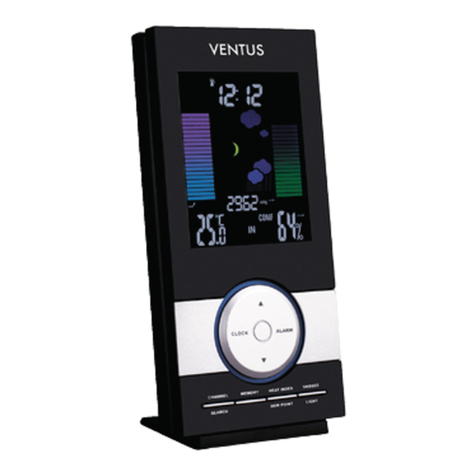
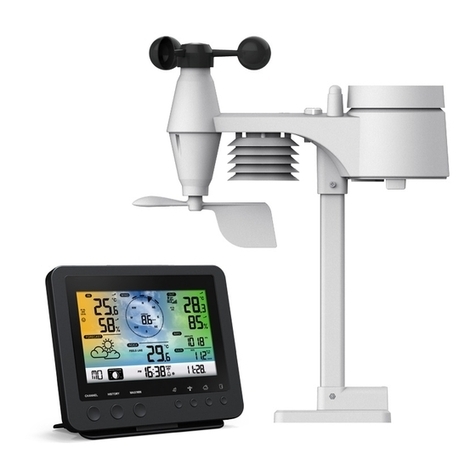
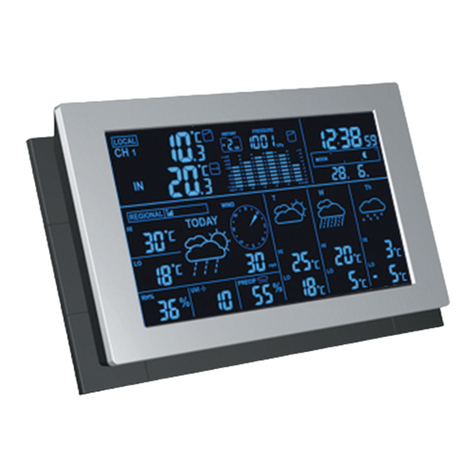
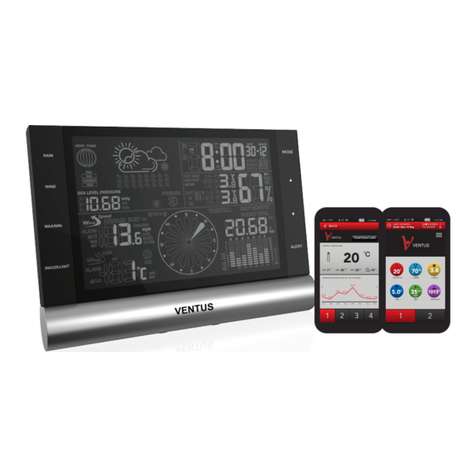
Ventus AOK-5005E User manual

AOK-5005E Weather Station Instruction Manual
Thank you for purchasing this device, please read the operating instructions carefully to familarize yourself
with the features and modes of operation before using the product.
Unpacking and checking
1. Remove the weather station from the packaging, remove all protective films and keep the packaging
materials out of the reach of children.
2. Dispose of the materials separately according to type.
3. Check that all the items that should be included in the delivery are present and whether the weather
station displays any damage.
Items included in the delivery
• Weather station x 1
• Support foot of base station x 1
• Outdoor sensor x 1
• Power adapter for base unit x 1
• Instruction manual x 1
Product functions
• Exact time thanks to receiving radio time signals, DCF function
• Time, date, day of the week in the language selected (7 different languages) and the number of week
• Time display in 12/24 hour format
• Adjustable time zone from -12H to + 12H
• Indoor temperature display in °C/°F
• Indoor and outdoor humidity display
• Outdoor temperature display in °C/°F with up to 3 wireless sensors at different measurement sites
(delivery includes 1 wireless sensor)
• Minimum/maximum display for temperature and humidity
• Humidity and temperature trend display
• Air pressure with 12-hour data history
• Air pressure with trend
• Weather forecast symbols in Sunny, Partly sunny, Cloudy, Rainy and Heavy rain. (It is possible to
manually change the symbols for the prediction)
• Moon phase display
• Alert function on the outside temperature of the highest and the lowest
• Comfort indicator
• 2 alarms can be set, with snooze function
• Low battery indicator
• Adjustable backlight (High, medium and low) when operated by power adaptor

Overview of the weather station
Base unit – view from above
Base unit –Back

Support foot of base unit
- How to plug in power adaptor?
Please put the adaptor cable through the hole [ 5 ] and plug it into power socket [ 3 ]. After this
step, please assemble the support foot to the base unit backside.
Operating elements and parts of the base unit
1 Operating buttons
Button
MODE
* Activate settings mode: time, date, alarm
* Save changes to settings
Button
CH
* Display weather data from various wireless sensors ( channel 1.2.3 and automatic)
* Disconnect/reconnect wireless sensor connection
Button
ALERT
* Activate/disactivate outdoor temperature alert function
* Alert setting for highest and lowest
Button
SNOOZE•LIGHT
* Illuminate backlight
* Activate snooze function

* Activate setting mode for altitude and weather symbol
Button
ʌ•MEM
* Set values (increase)
* Display/delete stored MAX and MIN values
Button
V•HOSTORY
* Set values (decrease)
* Display past 12 hours air pressure data
2 Loop for hanging
3 Power adaptor port
4 Battery compartment
5 Hole for power adaptor cable
Wireless sensor
1 Current channel
2 Outdoor temperature
3 Outdoor humidity
4 Red pilot light
5 Loop for hanging
6 Sliding switch 1 2 3: Set sensor number (transmission channel)
7 Battery compartment
If you wish to use only the wireless sensor included in the delivery, as a general rule, the transmission
channel does not need to be changed.

Initial setup
Follow the instructions in the order described and first put the batteries in the wireless sensor. This is the
only way for the weather station to function without any problems. Do not press any buttons while switching
the device on.
Wireless sensor
1. Use a thin screwdriver to remove the battery compartment cover on the back of the wireless sensor.
2. Insert 2 AAA / 1.5 V batteries facing in the direction indicated on the bottom of the battery compartment.
Make sure that the poles of the batteries are correct (+/-). As soon as the wireless sensor is receiving power,
the red pilot light will light up and thus display that data is being transmitted to the base unit.
3. Put the battery compartment cover back in place and screw it into place.
- Do not use batteries that have a voltage that is too low (only 1.2 V instead of 1.5 V). This affects the
accuracy of the measurements, among other things.
- If possible, use alkaline batteries instead of zinc-carbon batteries. Alkaline batteries last longer,
particularly outside in low temperatures.
Base unit
You can operate the wireless weather station using the power adapter or with batteries. If the wireless
weather station is connected to a power socket, it will be operated using the power mains, even if there are
batteries in the device. Remove depleted batteries from the battery compartment, as they can leak.
A) Power mains operation
ATTENTION
Use only the power adapter included in the delivery for power mains operation.
1. Insert the power adapter included in the delivery into the base unit port.
2. Plug the power adapter into a socket that corresponds to the voltage listed in the Technical Data.
3. Wait several minutes. The base unit needs this time to collect all the weather data and to receive radio
signals from the time signal transmitter.
B) Battery operation
1. Remove the battery compartment cover.
2. Insert 3 AAA / 1.5 V batteries facing in the direction indicated on the bottom of the battery compartment.
Make sure that the poles of the batteries are correct (+/-).
3. Put the battery compartment cover back in place and close it.
4. Wait several minutes. The base unit needs this time to collect all the weather data and to receive radio
signals from the time signal transmitter.

Setting air pressure at the location
When the base unit has power, all the symbols on the display are shown for a brief moment. The display
also briefly lights up and the unit emits a beep.
1. The altitude value will flash (and will receive RF signal at the same time for 3 miutes, flash).
- Entry is in units of 10.
- The number of displayed are based on meters above the sea level.
2. Set the appropriate value with
ʌ•MEM
and
V•HISTORY
buttons.
3. Press the
SNOOZE•LIGHT
button. The weather symbol will flash on the display.
4. Set the appropriate weather symbol with the
ʌ•MEM
and
V•HISTORY
buttons.
5. Press the
SNOOZE•LIGHT
button to end the process.
Information
:
The weather symbol can set Sunny, partly sunny, cloudy, rainy and heavy rain manually.
If you press and hold
ʌ•MEM
and
V•HISTORY
button, the values displayed will change more quickly.
The air pressure depends on altitude; in other words, the air pressure is lower in mountainous areas than in
flat ones. In order to make air-pressure information from different weather-report services comparable, it is
converted to sea level (“standard zero”).
The weather station measures your location’s approximate elevation above sea level and uses it to
determine, then display the air pressure at sea level. The display area for air pressure shows you the
detected elevation above sea level.
If you wish to correct this (possible between -190 and 2,000 meters), you will find a guide for doing so in the
following text.
• You can find out your location’s elevation above sea level from, for example, your city or community’s local
administration, or on the Internet.
• If you would like to receive air pressure information for your location that is NOT based on elevation above
sea level, set the elevation in meters to “0”.
1. Press and hold the
SNOOZE•LIGHT
button until the numbers in the display start to flash.
2. Follow other steps as mentioned above.
About the time signal
The radio clock built into the weather station receives its wireless signals from the DCF77 time signal
transmitter, the base station has power from the batteries after 3 minutes, it begins receiving and searches
for the signal from the DCF77 transmitter.
If the time signal is been received in sufficient strength, the date and time are shown on the display. The
base station switches on several times a day and synchronises the time with the wireless signal from the
transmitter DCF77.
If there is no reception, the device continues to run precisely and then automatically switches to receiving at
the next scheduled time again.

Starting radio reception
When the device switches to receiving mode; the receiving symbol will flash, and the number of radio
waves on display indicates the quality of reception: The more radio waves on display, the better the
reception.
As soon as the signal has been received with sufficient strength, the corresponding information is shown on
the display and the radio tower symbol is permanently displayed. This process can take a few minutes.
The weather station will now switch to receive automatically several times a day and compare the time
displayed with the time received from the time signal transmitter.
If the signal strength is
not sufficient
, the base unit stops the receiving process and the radio tower symbol
is not displayed any more. The receiving process is then carried out again at a later time.
In this case, the time will continue as normal.
• First, check if the base unit is in a suitable location
• You can restart the receiving process manually or
• You can wait for the base unit to automatically switch back to receiving mode at a later time. The reception
is usually better at night.
• If reception is not possible at your location, you can set the date and time manually; see the next chapter
Setting the time and date manually
1. Press and hold the
MODE
button until the display for the hour format begins to flash.
2. Set the 24-HR or 12-HR with the
ʌ•MEM
and
V•HISTORY
buttons. (in the 12-hour format, the morning
hours are shown with “AM” and afternoon hours are shown with “PM” on the display)
3. Press
MODE
to store the setting. The time zone will flash on the display.
4. Set the time zone (-12~12 seletable) with the
ʌ•MEM
and
V•HISTORY
buttons. (“00” is the default
setting for continental Europe)
5. Press
MODE
to store the setting. The date foramt will flash on the display.
6. Set the date format with the
ʌ•MEM
and
V•HISTORY
buttons (Day/Month or Month/Day).
5. Press
MODE
to store the setting.
6. Continue as described:
- Set a value with
ʌ•MEM
and
V•HISTORY
.
- Store a setting with
MODE
.
7. Set the following settings one after another:
- Year
- Month
- Day
- Hours
- Minutes
- Language (only refers to how the days of the week are displayed)
- Air pressure unit (hPa or inHg)
- Temperature unit (°C or F°)

8. Then press
MODE
to store the changed setting.
Starting radio reception manually
When the adjacent radio signal symbol is not displayed any more, the radio signals from the time signal
transmitter are no longer being received. However, the time display will continue to operate precisely.
In order to start receiving the time signal manually, press the
ʌ•MEM
and
V•HISTORY
buttons together
and the radio signal symbol is displayed once again. The weather station will then switch back to receiving
mode.
• If the station was unable to receive the signal successfully, the receiving symbol will stop being
displayed after a few minutes and the time on the display will continue as normal.
• If the station successfully received the signal, the wireless weather station switches to the time from the
time signal transmitter. If you already have input time and date settings manually these are automatically
adjusted.
Information
:
Press and hold the
ʌ•MEM
and
V•HISTORY
buttons together to exit signal reception.
Choosing the location
ATTENTION
- Protect the base unit and wireless sensor from dust, shocks, extreme temperatures and direct sunlight.
- Protect the base unit from moisture. Only place the base unit in a dry, enclosed space.
- The wireless sensor is protected against moisture but must be protected against water, e.g. rain.
General
The base unit and wireless sensor exchange information over a radio frequency. For this reason, the
location is important for the range of the wireless connection. Note:
• The maximum distance between the base station and wireless sensor is 50 meters. However, this range is
only possible with in open area.
• Shielding building materials such as reinforced concrete reduce or prevent the radio reception between
the base station and wireless sensor.
• Devices such as televisions, cordless phones, computers and fluorescent tubes can also interfere with the
wireless reception.
• Do not place the base unit and wireless sensors directly on the floor. This restricts the range.
• In low temperatures in winter the battery performance of the wireless sensors can be significantly reduced.
This reduces the transmitter range.
• Depending on your location, in rare cases the base unit can receive signals from another time signal
transmitter, or even alternate between the two time signal transmitters. This is not a device error. In this
case, change the location of the base unit.
For matters relating to the radio reception between the time signal transmitter and base unit, please observe
the following points:
• Place the base unit as close to a window as possible.

• Keep a distance from television units, computers and monitors. Base units should also not be located in
the direct vicinity of cordless phones.
• The reception is usually better at night. If the base unit has no reception during the day, it may well be that
the signal is received immediately and at full strength during the night.
• The weather, e.g. a big storm, can cause the signal reception to be disrupted.
• It is also possible for the time signal transmitter to be switched off for short periods of time, e.g. for
maintenance work.
Base unit
DANGER
When installing the device on a wall, there must be no electrical cables, gas or water pipes in the wall at the
installation site. Otherwise there is a risk of electric shock!
• You can put the base unit on the desk or hang it up. It’s better to put on the desk.
• Place or hang the base unit as close to a window as possible. The reception is generally best there.
Wireless sensor
• Place or hang the wireless sensor in a place where it is protected from direct weather (rain, sun, wind,
etc.). Suitable locations include e.g. under a porch or in a carport.
Display indicators

Base unit
Bottom part:
This part is used to display the date, time, and week number as well as the time and alarm
time.
1 Date 6 Minute
2 Month 7 Second
3 Day of week 8 RC signal symbol
4 Week 9 Daylight saving time (DST)
5 Hour 10 Alarm
Alarm function
The base unit allows you to set two different alarm times.
1. Use the
MODE
button to select the desired alarm time (A1 or A2).
2. Hold and press the
MODE
button for approx. 3 seconds once you have chosen the desired alarm time.
The hour indicator of the alarm time (A1 or A2) will flash.

3. Set the desired hour for the alarm with the
ʌ•MEM
and
V•HISTORY
buttons.
4. Press
MODE
to store the setting. The minute indicator will flash on the display.
5. Set the desired minute for the alarm with
ʌ•MEM
and
V•HISTORY
buttons.
6. Press
MODE
to store the setting. The alarm time is set.
Switching the alarm on and off
Use the
MODE
button to switch the alarm 1 or alarm 2.
Use the
ʌ•MEM
or
V•HISTORY
button to switch the alarm on and off.
On ALARM 1:
• press
ʌ•MEM
or
V•HISTORY
once: on the display, A1 is activated
• press twice: disappear, A1 is deactivated
On ALARM 2:
• press
ʌ•MEM
or
V•HISTORY
once: on the display, A2 is activated
• press twice: disappear, A2 is deactivated
Stopping the alarm
You will be woken by the alarm at the set time, and the sound will become more and more intense as the
alarm continues.
• Snooze - Press the
SNOOZE•LIGHT
button to stop the alarm for approx. 5 minutes.
• Switch off the alarm completely - Press any button on the base unit (apart from
SNOOZE•LIGHT
), to stop
the alarm. The alarm will go off again after 24 hours.
• Automatic stop function- If you do not press any buttons, the alarm will automatically switch off after 2
minutes. The alarm will go off again after 24 hours.
Snooze function
Press the
SNOOZE•LIGHT
button once when the alarm sounds.
The alarm signal is paused for approx. 5 minutes, and the alarm symbol will flash on the display. Afterwards,
the alarm will sound and wake you up again. You can repeat this process multiple times.
Weather information

1 Indoor temperature 9 Outdoor temperature trend
2 Indoor temperature trend 10 Stored maximum outdoor temperature and
humidity values
3 Stored maximum indoor temperature and
humidity values 11 Outdoor humidity trend
4 Indoor humidity trend 12 Outdoor humidity
5 Indoor humidity 13 Low battery indicator of outdoor sensor
6 Comfort indicator 14 Outdoor temperature alert indicator
7 Low battery indicator of base station 15 Automatic mode for displaying external
data on 1.2.3 channels
8 Outdoor temperature 16 RF wireless symbol
17 Current channel
The highest and lowest temperature and humidity values by repeatedly pressing the
ʌ•MEM
button.
• press once: the maximum values are shown
• press again: the minimum values are shown
• press again: returns to normal display
Press and hold the
ʌ•MEM
button to delete the highest and lowest temperature and humidity values
manually.
Temperature Alert for Outdoor
Press
ALERT
button to switch on alert function, symbol will show.
Press and hold
ALERT
button
for 3 seconds, outdoor temperature and symbol will flash. Press
ʌ•MEM
and
V
•
HISTORY
button to select the highest value.
Press
ALERT
button to confirm, outdoor temperature and symbol will flash at the same time.

Press
ʌ•MEM
and
V
•
HISTORY
to select the lowest value.
Press
ALERT
button to confirm and exit.
Information:
1. Alert setting range is from -50°C to 70°C.
2. When setting alert value, press
CH
to switch and set for other channels if needed.
3. If in current outdoor channel, the corresponding temperature and alert symbol will flash with “BI BI”
sound when it’s alerting. If not, only alert symbol will flash with “BI BI” sound.
5. Press any buttons to stop alert sounds, but the alert symbol and corresponding temperature will still
flash (in current outdoor channel)
6. The alert will be stopped automatically until the corresponding temperature value is below the setting
value. Or press
ALERT
button to exit and alert symbol will disappear.
Weather trend
For the temperature and humidity values measured by the base unit and the wireless sensor, the trend is
displayed in the form of an arrow:
Trend rising constant falling
Temperature
Humidity
Air pressure
1 Current air pressure value
2 Air pressure trend
3 Air pressure unit: hPa or inHg
4 Air pressure history data of past hour
Changes in the air pressure within the past 12 hours are displayed with an animated bar graph.
The classification goes from
0H
(current) past -
1
(1 hour ago) to -
12
(12 hours ago).
The current prevailing air pressure is also displayed in hPa (hectopascals) or inHg (inches of mercury)
alongside the bar graph.
In connection with the weather forecast (see the
Weather forecast
chapter), other weather interpretations
are possible. Two examples:

• Weather forecast shows rain, the air pressure drops quickly and significantly >> heavier rain is likely.
• Weather forecast shows rain, the air pressure in the last 12 hours has risen but then dropped a little in the
past three hours >> light rain is likely.
Weather forecast
After setting up initially, the weather forecast can not be used for about 12 hours, as the weather station
needs this time to collect and evaluate the weather data.
The weather forecast is a result of the collected data and the measured changes in air pressure.
Sunny Partly sunny Cloudy
Rainy Heavy rain
Temperature alarm
- If the wireless sensor measures a temperature between 1 °C and -3 °C, there is a
risk of frost and a freezing point symbol will flash.
When the symbol for the weather forecast begins to flash and the air pressure falls, this is a sign that the
weather is getting worse.
However, in order for this to display correctly, you need to have already set the air pressure for your location,
When the air pressure increases again, the symbols display continuously again. An arrow shows the
weather tendency. If it is pointing up or down, the air pressure has risen or gone down more than 2 hPa in
an hour.
rising air pressure = weather will improve
constant air pressure = weather will stay the same
falling air pressure = weather will get worse
Phases of the moon
The phases of the moon displayed are automatically updated with the date.

Comfort indicator (display for indoors)
It depends on the indoor temperature and humidity and indicates the comfort degree a person would feel
Comfort symbol
Temperature range 0°C ~ 50°C 20°C to 28°C 0°C ~ 50°C
Humidity range < 40% 40% ~ 70% >70%
Degree of environment Dry Comfortable Wet
Dry
:When the indoor humidity is below 40% and temperature is within 0°C to 50°C range, it indicates the
indoor environment is dry, the symbol will appear.
Comfortable
:When the indoor temperature is within 20°C to 28°C range and humidity is within 40% to 70%
range, it indicates the indoor environment is comfortable, the symbol will appear.
Wet
:When the indoor humidity is over 70% and the temperature is within 0°C to 50°C range, it indicates the
indoor environment is wet, the symbol will appear.
No indicator
:When the indoor temperature is out of 20°C to 28°C but humidity is within 40% to 70%, no
symbol will appear.
Languages of day of week
The language options are English (EN), German (GE), French (FR), Italian (IT), Spanish (SP), Dutch (DU)
and Danish (DA).

Switching the light on
A)
Battery operation
Press the
SNOOZE•LIGHT
button to light up the display for 10 seconds.
B) Power mains operation
When the base unit is powered through the power adapter and the power mains, the display is constantly
illuminated.
Press the
SNOOZE•LIGHT
button repeatedly to select the following settings for the display illumination:
Bright >> Muted >> Off.
Low battery indicator
For the base unit and the wireless sensor, there is a separate low battery indicator.
When the low battery symbol is shown on the display, you have to replace the batteries in the base unit or
the wireless sensor with new batteries.
Note:
• When you change the batteries all the settings are lost.
• Always exchange all batteries and only use those listed in the ‘Technical Data’.
• Even if the base unit is being powered by the power mains, you should still remove any empty batteries
present from the base unit.
• Make sure that the poles of the batteries are correct (+/-) when inserting.
• Clean the battery and device contacts if necessary before inserting.
• Dispose of the old batteries in an environmentally manner.
Resetting the weather station
If the base station appears to display incorrect values, you should reset the weather station to the factory
settings.
1. Take the batteries out of the weather station and put them back in again. If you are operating the device
using the power mains, remove the power adapter from the socket, then plug it back in. If additional
batteries have been inserted, these also need to be removed briefly and then reinserted.
When base unit has power again, all the symbols on the display are shown for a brief moment. The display
also briefly lights up and the unit emits a beep.
After approx. 20 seconds, the display starts to flash and the current data from the wireless sensors is
retrieved.
2. Observe the values shown on the display.
3. Only if you continue to see the wrong values: Take the batteries out of all the wireless sensors in use and
put them back in.

Troubleshooting
Problem Possible cause and remedy
Display screen not working.
Check the batteries in main unit are inserted or power adaptor is
plugged in correctly
Device cannot receive the
DCF77 signal for the time.
- Check the chosen location
- Start radio reception manually if necessary
- Set the time manually
The temperature from the
sensor seems to be too high.
- Check if the sensor is exposed to direct sunlight.
The display shows HH, LL,
HH.H or LL.L instead of
measured values for
temperature or humidity.
- The values are above or below the measuring range, see Technical
Data.
The base unit is not
receiving any signal from the
wireless sensor.
- Make sure that there are no electrical sources of disturbance near
the wireless sensor or the base unit.
- Check the batteries in the sensor.
- Start the search for the wireless sensor manually: Press and hold
the
CH
button on the base unit until the display for the weather
information flashes
- Move the base unit closer to the sensor or vice versa.
The display is illegible, the
function is not clear or the
values are clearly wrong.
- Reset the weather station to the factory settings
Cleaning
1. When operating using the power mains: Remove the power adapter plug from the base unit.
2. Wipe the base unit with a slightly damp cloth when required.
3. Dry off the device completely before connecting it with the power adapter again.
Technical Data
Base unit
Batteries: 3 x AAA / 1.5 V (Not included)
Temperature measuring range: 0°C to +50°C
Resolution: 0.1 °C
Temperature accuracy: 0°C ~ 40°C: +/-1°C, over 40°C: +/-2°C
Humidity measuring range: 20 % to 95 % relative humidity

Humidity measuring accuracy: +/- 5 % with a measuring range of 30% to 80%, +/- 8% for other measuring
range
Resolution: 1 %
Wireless sensor
Batteries: 2 x AAA / 1.5 V (Not included)
Temperature measuring range: - 50°C to 70°C
Temperature accuracy: 0°C ~ 40°C: +/-1°C, -50°C ~ 0°C and 40°C ~ 70°C: +/-2°C
Transmission frequency: 433 MHz
Range: max. 50 meters (in open area)
Power adapter
Power supply: 230-240V~, 50 Hz 50 mA
Output: 5.0V 150 mA
As our products are constantly evolving and improving, changes in the design and technology are possible.
Disclaimers
Manufacturer reserves the right to change specifications of the product.
Manufacturer and supplier are not responsible for malfunction where interference occurs.

Brugsanvisning Ventus W200
Tak for købet af denne Ventus vejrstation. Læs
venligst
betjeningsvejledningen omhyggeligt igennem. Dette for at
sikre dig kendskab til diverse funktionerne og anvendelses muligheder, før du bruger produktet.
Udpakning og kontrol
1. Fjern vejrstationen fra emballagen. Fjern alle beskyttelsesfilm og opbevar emballagematerialet utilgængeligt for
børn.
2. kassér materialerne separat efter type.
3. Kontrollér at alle dele, der skal inkluderes i leverancen, er til stede, og om vejrstationen viser nogen form for skade.
Dele, der indgår i leverancen
• Vejrstation x 1
• Støttefoden til vejrstationen x 1
• Udendørs sensor x 1
• Strømadapter til vejrstationen x 1
• Brugsanvisning x 1
Produktfunktioner
• Præcis tid takket være radio kontrolleret ur. (DCF-funktion)
• Klokkeslæt, dato, ugedag på det valgte sprog (7 forskellige sprog) og uge nummer.
• Time display i 12/24 time format
• Indstillings tidszone fra-12 timer til + 12 timer.
• Valg mulighed mellem °c/°f
• Visning af indendørs og udendørs luftfugtighed
• Udendørs temperaturvisning i °c/°f med op til 3 trådløse sensorer. (levering omfatter 1 trådløs sensor)
• Minimum/maksimum display for temperatur og luftfugtighed
• Visning af trends for luftfugtighed og temperatur
• Lufttryk med 12-timers historik
• Lufttryk med Trend
• Vejrudsigt symboler: sol, delvis skyet, overskyet, regn og kraftig regn. (symbolerne kan manuelt korrigeres)
• Visning af månefase
• Advarselsfunktion af udetemperaturen på den højeste og den laveste temperatur.
• Komfort indikator
• Der kan indstilles 2 alarmer med snooze-funktion
• Indikator for lavt batteriniveau
• Justerbar baggrundslys (høj, medium og lav)
ved
drift med strømadapter

Oversigt af vejrstationen
Basisenhed – visning ovenfra
Basisenhed – bagside
Table of contents
Languages:
Other Ventus Weather Station manuals

Ventus
Ventus W177 User manual

Ventus
Ventus W177 User manual

Ventus
Ventus W155 User manual

Ventus
Ventus W161 User manual

Ventus
Ventus W157 User manual

Ventus
Ventus W820 User manual

Ventus
Ventus W266 User manual

Ventus
Ventus C6070A User manual

Ventus
Ventus W928-ULTIMATE User manual

Ventus
Ventus w160 User manual
Popular Weather Station manuals by other brands

La Crosse Technology
La Crosse Technology K84315 instruction manual

Auriol
Auriol H13726 Operation and safety notes

Emos
Emos TE388NL manual

Coastal Environmental Systems
Coastal Environmental Systems WEATHERPAK-2000 user manual

General
General WS831DL user manual

La Crosse Technology
La Crosse Technology S84107 Faqs