VERITAS 9000A5 User manual

Veritas 9000A5
Operating Instructions

Veritas 9000A5
Dear Customer! 1
Congratulations on the purchase of your sewing machine.
You have bought a top quality product which has been
manufactured with great care.
These Operating Instructions contain all you need to know
about using your sewing machine.
We hope you enjoy your sewing machine and wish you
success.
GUARANTEE
There is a three year guarantee on this device starting from the purchase date.
The device was inspected carefully and thoroughly before delivery.
Please keep your receipt as proof of purchase.
In case of a guarantee complaint, please call your service centre.
This is the only way to ensure free shipment of your goods to us.
The guarantee scope only covers material or manufacturing defects, it does not
cover wear parts or damage to fragile parts e.g. switches. The product is only
intended for private and not commercial use.
In the event of misuse or improper handling, forced or any kind of intervention,
which has not been performed by our service office, the guarantee will lapse.
This guarantee does not limit your statutory rights.
Table of Contents
Page
Safety information 2
Information about these Operating Instructions 3
Unpacking 3
Overview of the device and operating elements 4
Overview of the accessories 6
Commissioning 7
– Connecting the machine to the mains power supply 7
– Foot control 8
– Messages and beeps 8
– Typical warning messages 8
– Needle stop top/bottom 9
– Auto-lock button 9
– Reverse key 9
– Mounting the presser foot, attaching the seam guide 10
– Changing the needle 10
– Winding the bobbin thread 11
– Inserting the bobbin 12
– Threading the upper thread 13
– Using the threader 14
– Thread tension 15
– Bringing up the bobbin thread 16
– Cutting the thread 16
– Two-level presser foot lift 17
– Raising or lowering the feed dogs 17
– Setting the contact pressure of the presser foot 18
Sewing 18
– Selecting the right needle, thread and fabric 18
– Presser foot table 19
– Selecting the stitch 20
– Overview of stitch types 21
– Setting the stitch length 22
– Setting the stitch width and needle position 22
– IMirroring 23
Memory
– Saving stitches 24
24
– Sewing with saved stitches
Deleting the memory
25
Useful sewing applications 26
– Sewing corners 26
– Reverse sewing 26
– Free arm 26
– Sewing on thick fabric 27
– Straight stitches, zigzag stitches and needle position 28
– Stretch stitch 29
– Overcasting stitch 30
– Universal presser foot 30
– Blindhem and lingerie stitches 31
– Button sewing 32
– Buttonhole stitching 33
– Eyelet stitching 36
– Darning 37
– Faggots 39
– Patchwork stitch 39
– Zipper insertion 40
– Narrow hemming 42
– Sewing on cords, individual strings and triple strings 43
– Buttonhole seams 44
– Quilting 45
– Ruffling 46
– Pleating / smoking 47
– Free-motion, darning, embroidery and monogramming 48
–Scallop trim 50
– Twin needle (extra accessory) 51
– Walking foot (extra accessory) 52
Maintenance 53
– Cleaning the hook 53
– Changing the bulb 54
Troubleshooting 55
Disposal 57
Technical data 57
Page
25
–
– The hook race and feed dogs 53
– Cleaning the LCD display 54
– Cleaning the surface of the sewing machine 54

Veritas 9000A5
Safety information
2
Please read this information carefully before connecting your device
to the mains power supply; it contains important safety and operating
information.
− Read the all the Operating Instructions
− Never submerge the device into water or other liquids (risk of electrical shock)
− Ensure that children cannot play with the device
− The moving parts, such as the needle, thread take-up lever etc. are a source
of danger:
Risk of injury to fingers! Therefore the sewing point should be continuously
observed whilst the machine is in operation. Amendments to the machine
such as e.g. changing the needle, should only be performed when the machine
is switched off.
− Only connect the device to a 220-240V AC source
− We recommend connecting the device via an FI-circuit breaker. If in doubt,
ask a qualified person
− Always disconnect the main plug:
– before changing the needle, bobbin or the presser foot
– before moving the device somewhere else
– before cleaning or maintenance
– switch off or unplug the appliance when leaving it unattended
− Never allow the power cable to hang over corners or edges or become
caught (risk of an electrical shock)
− To prevent any risks, a damaged power cable should only ever be replaced
by the customer service
− Do not use the device in the event of:
– a malfunction
– a damaged power cable
– if the device has fallen down or there is any other sign of damage
In these cases, arrange for the customer service to check the device
immediately
− When selecting the location where the device is to be used, the following
points should be taken into consideration:
– Place the device on a dry, sturdy and even surface
− Do not place the device on a hot surface or close to open flames.
Observe a minimum clearance of 50 cm
– Only use in dry rooms
– Do not allow the cable to hang down: Risk of tripping!
− Never push the device when in operation (risk of injury)
− The device is only designed for use in households
− Do not place or insert any objects into the machine or the openings
− The use of accessories not recommended by the manufacturer could
lead to damage to the device or equipment
− Children or persons who lack knowledge or experience in handling
the device or who have limited physical, sensory or mental abilities
may not use the device without supervision or without instruction
by a person responsible for their safety. Children should be supervised
at all times to ensure they do not play with the device.

Veritas 9000A5
Information about these Operating Instructions 3
These Operating Instructions cannot cover all possible applications.
For more information or in case of problems not covered or inadequately
covered in these Operating Instructions, please contact the service number
+442030244354
Please keep these Operating Instructions in a safe place and pass on
to any future users.
−Take the sewing machine out of the packaging
–After unpacking, please ensure that the following parts have been
supplied:
1. Sewing machine
2. Accessories (in the accessories box)
3. Foot pedal
4. Dust cover
– Check whether the mains supply voltage (220-240V) complies with
the device voltage as stated on the type plate.
− Dispose of all plastic bags as these are dangerous for children!
Tip:
Keep all the packaging for storing the device if you do not need to use
it all year round or for subsequent transportation (e.g. during moves,
service etc.).
Unpacking
1.
2.
3.
4.
Service-Address:
Crown Technics GmbH
Sontheimerstrasse 59
DE-74074 Heilbronn
Tel. 0049 (0) 7131 642 49 55

C
M
Y
CM
MY
CY
CMY
K

Veritas 9000A5
Overview of the device and operating elements
4
Front side:
1. Tension dial
2. Bobbin thread winder guide
3. Upper thread guide
4. Presser foot pressure
5. Face side
6. Needle up/down
7. Auto-lock button
8. Thread cutter
9. Reverse
10. Buttonhole lever
11. Automatic needle threader
12. Needle plate with window
13. Accessory box
14. Programming keys (M, 2x MEM and C)
15. Bobbin winder
16. LCD display
17. Function keys
18. Keyboard and stitch selection keys
19. Stitch selection cover
Rear side:
20. Handwheel
21. Main power switch
22. Connection for power cable
23. Connection for foot control
24. Opening for second spool pin
25. Horizontal spool pin
26. Carrying handle
27. Presser foot lift
28. Presser foot attachment lift
29. Feed dog
1. 14.
13.
12.
20.
21.
2.
3.
4.
5.
6.
7.
8.
9.
10.
11.
15.
16.
17.
18.
22.
23.
24.
25.
26.
27.
28.
19.
17.
29.

Veritas 9000A5
Overview of the device and operating elements
5
LCD screen
Function keys
1. Reverse sewing (see page 26)
2. Auto-stop (see page 9)
3. Auto-lock button (see page 9)
4. Needle stop above (see page 9)
5. Needle stop below (see page 9)
6. Mirroring (see page 23)
7. Buttonhole lever (see page 34)
8. Bobbin in winding position (see page 11)
9. Needle position (see page 28)
10. Stitch sample number (see page 21)
11. Stitch selection; switch using key 19 :
– for direct stitch selection (page 20)
– for stitches 01 - 60 (page 20)
– for alphabet and numbers (page. 20)
12. Recommended presser foot, e.g. «T» (see page 6, 19)
13. Stitch length (see page 28)
14. «Memory» mode (see page 24)
15. No. of memory entries (see page 24)
16. Stitch width (see page 28)
1.
17. Stitch length setting –/+
18. Keyboard for stitch selection
19. Key for stitch selection (see also 11.):
– for direct stitch selection (see page 20)
– for stitches 01 - 60 (see page 20)
– for alphabet and numbers (page 20)
20. Stitch width setting –/+ (see page 28)
21. Mirroring stitches (see page 23)
11.
2. 3. 4. 5. 6. 7. 8. 9.
14. 15.12. 13. 16.
10.
17.
18.
19.
20.
21.
23. 24.22. 25.
26.
22. Memory key (see page 24)
23. Select memory slot (backwards) (see page 24)
24. Select memory slot (forwards) (see page 24)
25. Delete key (see page 24)
27.
28.
26. Needle up / down (page 9)
27. Auto-lock button (page 9)
28. Backwards sewing (page 26)

Veritas 9000A5
Overview of the accessories 6
1. 2. 3.
5. 6. 7.
9. 10. 11.
13. 14.
4.
18.
15. 16. 17.
12.
8.
19. 20. 21.
Accessories (included in delivery scope):
1. Standard presser foot «T»
2. Zipper presser foot «I»
3. Buttonhole presser foot «D»
4. Overcasting presser foot «M»
5. Edging presser foot «E»
6. Blindhem presser foot «F»
7. Hemmer «K»
8. Satin stitch presser foot «A»
9. Quilting presser foot «P»
10. Darning/embroidery foot
11. Pleater
12. Button sewing foot
13. Cleaning brush, seam ripper
14. Spool cap (large)
15. Spool cap (small)
16. Seam guide
17. Bobbins (3 units)
18. Screwdriver (large and small)
19. Pack of needles
20. Felt washer
21. Second spool pin
Accessories (not included in price):
22. Twin needle (option, see page 18, 19)
23. Walking foot (option, see page 19, 52)
22. 23.
«T»«I»«D»«M»
«E»«F»«K»«A»
«P»

Veritas 9000A5
Commissioning
7
Connecting the machine to the mains power supply
– Place the sewing machine onto a sturdy table
– Insert the plug (2 inputs) of the power cable into the mains power socket on the sewing machine
– Connect the mains plug to the mains power supply
– Set the main power switch to «I» (=on)
– As soon as the sewing machine is switched on the sewing light will shine
– After use, switch off the machine via the main power switch («O» =off) and disconnect the mains plug

Veritas 9000A5
Commissioning 8
Foot control
Only connect the foot control when the device is switched off.
Avec la pédale de commande, la vitesse de couture peut être réglée de manière continue.
The foot control is used for stepless regulation of the sewing speed. The firmer this is pressed,
the quicker the machine runs.
Insert the plug into the mains supply socket (220-240V).
Switch the sewing machine on and then press the foot control slowly to start sewing.
Take your foot off the foot control to make the sewing machine stop again.
Note:
− Only the original foot control may be used.
Messages and acoustic tones
− For fault-free operation: 1 beep
− For malfunctions: three short beeps
− For malfunctions of the sewing machine and if the machine does not sew: 8 second long short beeping.
This means that the thread is twisted, caught and the handwheel axle cannot turn. Please see page 55
„Troubleshooting“ on how to rectify this problem. Once the problem has been solved, the sewing
machine will continue sewing.
Note:
− If the problem continues, contact the customer service
Caution:
− If the thread gets caught in the hook and the needle cannot move, release the foot pedal immediately.
If the foot control continues to be pressed, a protection function will stop the sewing machine.
When the main power switch is switched off («O» =off) and switched on again («I» =on), the machine
is operational again.
Typical warning messages:
1. Holder for bobbin in winding position
– As soon as the holder for the bobbin is pressed to the right into the «winding position», the -symbol
will appear in the LCD screen. In this position, it is only possible to wind up one bobbin thread spool
(see also page 11). The transport and input of a stitch is refused and accompanied by beeping
– Swing the holder back to the left into the sewing position (the -symbol disappears)
2. Pull the buttonhole lever down (page 34 and 37)
– The symbol appears in the display for the buttonhole stitches «17 - 27» and for the darning stitch «29».
This indicates that the buttonhole lever needs to be pulled down as otherwise the transport will not
function properly
– After use, push the buttonhole lever back up again

Veritas 9000A5
Commissioning / operating elements
9
Needle stop up/down
With the needle stop up/down function, the user can decide whether the needle should remain up or down
(still in the fabric) when the machines stops. Press the key so that arrow on the LCD screen points
upwards and the needle therefore remains at the top when the machine is stopped. If the arrow points
down ,the needle remains in the fabric when the machine is stopped.
The -key cannot be activated during sewing.
Auto-lock button
At the end of sewing, 3 locking stitches are always performed before the automatic stopping if the function
«Auto-Lock» is activated (press the -key).
When using the stitch patterns 01 – 05, 3 locking stitches are performed (the display will show during
this time).
In the case of the stitch patterns 06 – 16 and 30 – 60, appears in the display after the -key is
pressed. The machine then sews 3 locking stitches when the foot control is pressed.
When the -key is pressed again, the function is switched off again (the display goes off).
Reverse key
(only for stitch patterns 01 – 16 and 30 – 60)
In the case of the stitch patterns 01 – 16 and 30 – 60, keeping the reverse key pressed means that
sewing can be performed backwards. Once the key is released again, the sewing machine will sew
forwards again. On the LCD screen, arrow indicates that the machine is sewing backwards.
Needle stop up/down
Auto-lock button
Reverse

Veritas 9000A5
Commissioning 10
Mounting the presser foot holder
– Lift up the presser foot rod with the presser foot lift (a)
– Mount the presser foot holder (b) and affix with the screw
Using the presser foot
– Lower the presser foot holder (b) until the recess (c) lies directly over the pin (d)
– Press the attachment lever (e) upwards
– Lower the presser foot holder (b) and the presser foot (f) will automatically click into place
Removal of the presser foot
– Lift up the presser foot rod
– Press the locking lever (e) upwards until the foot is free
Attaching the seam guide
– Push the seam guide (g) as shown through the opening. Set depending on the required width
of the hem, the pleat etc.
Changing the needle
Change the needle regularly especially when it is worn and causes problems.
Insert the needle as shown in the following illustrations.
A. Unscrew the needle clamp screw and tighten again after inserting a new needle.
The flat side of the shaft should be at the back.
B. Push the needle up as far as it will go.
Only use fully-functional needles:
Problems can occur with:
– Bent needles
– Blunt needles
– Damage points
Note:
− Switch off the sewing machine (set the main power switch to «0»)
A
B
Mounting the presser foot holder
Using the presser foot
Removal of the presser foot
Attachment of the seam guide
Changing the needle

Veritas 9000A5
Commissioning
11
Winding the bobbin thread
– Place the thread and the spool cap onto the spool pin. For smaller spools of thread, place the spool
cap with thesmall side next to the spool or use the small spool cap.
– Snap the thread into the thread guide.
– Wind the thread clockwise around the bobbin winder tension discs
– Place the thread end through one of the inner holes in the bobbin as illustrated and place the empty
bobbin on the spindle.
– Push the bobbin to the right
– When the bobbin winder spindle is pushed to the right, “winding position”, the symbol is shown
on the LCD screen. It will disappear from the LCD screen when the bobbin winder spindle is pushed
to the left into the “sewing position”
– Hold the thread tail securely and press on the foot control to start the sewing machine.
– Press the foot control so that the sewing machine starts winding
– After the bobbin has wound a few turns, stop the machine and cut the thread near the hole of the
bobbin. Continue filling the bobbin until it is full. The motor stops automatically when the bobbin is full.
Stop the sewing machine and cut the thread.
– Push the bobbin winder spindle to the left and remove.
Please note:
− When the bobbin winder switch is pushed to the right, “bobbin winding position”, the machine
will not sew and the handwheel will not turn. To start sewing, push the bobbin winder switch to
the left “sewing position”.
Winding the bobbin thread

Veritas 9000A5
Commissioning 12
Inserting the bobbin
– Remove the bobbin cover
– Insert the bobbin in the bobbin case with the thread running in an anti-clockwise direction (arrow)
– Pull the thread through the slit (A)
– Pull the thread toward the left and along the inside of the spring until it slips into the notch (B) being
sure that the thread does not slip out of the slit (A).
– Pull out about 15 cm (6 inches) of thread and slide on the bobbin cover (C)
Caution:
− To avoid accidents when the machine is accidentally started, switch off the sewing machine (set main
power switch to «O») before inserting or removing the bobbin
A
B
C
A
B
Inserting the bobbin

Veritas 9000A5
Commissioning
13
Threading the upper thread
Note: It is important to thread correctly to prevent sewing problems.
1. Lift up the spool pin. Place the spool of thread on the spool pin so that the thread comes from the front
of the spool, then place the spool cap at the end of the spool pin.
2. Pull the thread from the spool through the upper thread guide.
3. Guide the thread around the thread guide pulling the thread through the pre-tension spring as illustrated.
4. Pull the thread down between the silver-coloured tension discs.
5. Then, down and around the check spring holder.
6. Once at the top, pull the thread from right to the left through the slotted
eye of the take-up lever and then down again.
7. Pass the thread behind the flat, horizontal thread guide.
8. Guide the thread behind the needle clamp guide then thread the end of the thread through the needle
from front to back, and pull out about 10 cm of thread toward the back
Threading the upper thread

Veritas 9000A5
Commissioning 14
Using the threader
Raise the needle to its highest position and lower the presser foot using the presser foot lift.
1. Lower the needle threader lever slowly and draw the thread through the thread guide as illustrated
and then to the right.
2. The needle threader automatically turns to the threading position and the tiny hook passes
through the needle eye.
3. Take the thread in front of the needle
4. Hold the thread loosely and release the lever slowly. The hook will turn and pull the thread
through the needle eye forming a loop. Pull the rest of the thread through the needle eye.
Note:
– To avoid accidents when the machine is accidentally started, switch off the sewing machine
(set main power switch to «O») before threading
Using the threader

Veritas 9000A5
Commissioning
15
Thread tension
– Basic thread tension setting: “4”
– To increase the tension, turn the dial to the next number up.
– To reduce the tension, turn the dial to the next number down.
Proper setting of tension is important for good sewing.
– There is no single tension setting appropriate for all the stitch functions and fabrics.
– 90% of all sewing will be between “3” and “5” (“4” is basic setting).
– For all decorative sewing you will always obtain a nicer stitch and less fabric puckering
when the upper thread is slightly drawn to the left side of the fabric
1. Normal thread tension for straight stitch sewing.
2. Thread tension is too loose for straight stitch sewing. Turn dial to higher number.
3. Thread tension is too tight for straight stitch sewing. Turn dial to lower number.
4. Normal thread tension for zigzag and decorative sewing.
Front side of fabric
Reverse side of fabric Upper thread
Bobbin thread
Taut Loose
Thread tension

Veritas 9000A5
Commissioning 16
Bringing up the bobbin thread
1. Lift the presser foot using the presser foot lift
Hold the upper thread with the left hand. Turn the handwheel toward you (anti-clockwise) lowering,
then raising the needle.
2. Gently pull on the upper thread to bring the bobbin thread up through the needle plate hole.
The bobbin thread will come up in a loop.
3. Pull both threads approx. 10 cm to the back under the presser foot.
Cutting the thread
Raise the presser foot. Remove the fabric, draw the threads to the left side of the face cover
and cut using the thread cutter. The threads are cut at the proper length to start the next seam.
Bringing up the bobbin thread
Cutting the thread

Veritas 9000A5
Commissioning
17
Two-level presser foot lift
1. The presser foot lift raises and lowers your presser foot.
2. When sewing several layers or thick fabrics, the presser foot can be raised by one level for easy
positioning of the fabric under the foot. This facilitates positioning of the fabric.
Raising or lowering the feed dogs
With the accessory box off the machine, the feed dog adjustment lever can be seen on the base
at the back of the sewing machine.
Sliding the lever to the « » (b) will lower the feed dog, for example during button sewing.
If you wish to continue sewing normally, slide the lever to the « » (a) in order to raise the
feed dog.
Note:
– To avoid accidents when the machine is accidentally started, switch off the sewing machine
(set main power switch to «O») before performing this task

Veritas 9000A5
Commissioning 18
Needle size Fabric
Thread
9-11 (70-80) Lightweight fabrics, thin cottons, voile, serge, silk,
muslin, interlocks, cotton knits, tricot, jerseys,
crepes, woven polyester, shirt & blouse fabrics.
Light-duty thread in cotton, nylon, polyester
or cotton wrapped polyester.
11-14 (80-90) Medium weight fabrics, cotton, satin, canvas, sailcloth,
double knits, lightweight wool.
Most threads sold are medium sized and suitable for these fabrics
and needle sizes. Use polyester threads on synthetic materials
and cotton on natural woven fabrics for best results.
Always use the same thread on top and bottom.
14 (90) Medium weight fabrics, cotton duck, wool, heavier knits,
terrycloth, denims.
16 (100) Heavyweight fabrics, canvas, wool, outdoor tent
and quilted fabrics, denims, upholstery material
(light to medium).
18 (110) Heavy wool, overcoat fabrics, upholstery fabrics,
some leathers and vinyls.
Heavy duty thread, carpet thread.
Table for harmonising the needle, thread and fabric
Important :
− Select the right needle for the thread and fabric thickness
Selecting the right needle, thread and fabric
Setting the contact pressure for the presser foot
The contact pressure for the presser foot can be set using the dial on the upper side. Normally the factory
setting does not need to be adjusted.
If resetting is necessary, this can be set using a coin. Turn in a clockwise direction to raise the pressure
(e.g. for thin, light fabrics) and anti-clockwise to lower the pressure (for very thick, heavy fabrics).
Information about twin needles
1. Twin needles can be used for standard and decorative stitches
2. When sewing with twin needles, set the stitch width setting to maximum "3.5"
3. Change needles frequently (after about every second article of clothing) and when the first erroneous
stitches or ripped thread occur.
Setting the contact pressure for the presser foot
Sewing
Table of contents
Other VERITAS Sewing Machine manuals

VERITAS
VERITAS Romy User manual
VERITAS
VERITAS Claire User manual
VERITAS
VERITAS Sarah Operator's manual

VERITAS
VERITAS Power Stitch 17 User manual

VERITAS
VERITAS MyJanis Operator's manual
VERITAS
VERITAS Elastica User manual
VERITAS
VERITAS AVA User manual

VERITAS
VERITAS Amelia User manual
VERITAS
VERITAS Sarah User manual

VERITAS
VERITAS Anna User manual
VERITAS
VERITAS Florence User manual

VERITAS
VERITAS Rachel User manual

VERITAS
VERITAS JSB21 User manual

VERITAS
VERITAS Camille User manual
VERITAS
VERITAS Simone User manual
VERITAS
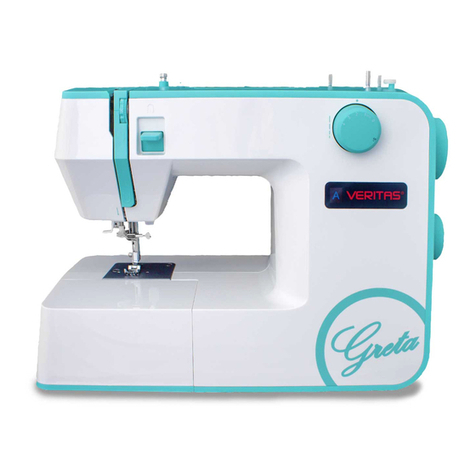
VERITAS Greta User manual
VERITAS
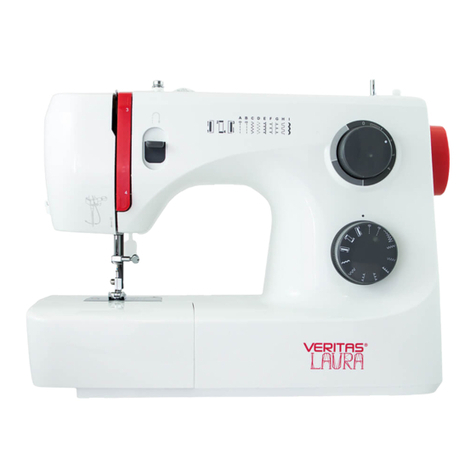
VERITAS Laura User manual

VERITAS
VERITAS Rachel User manual

VERITAS
VERITAS Bessie User manual
VERITAS
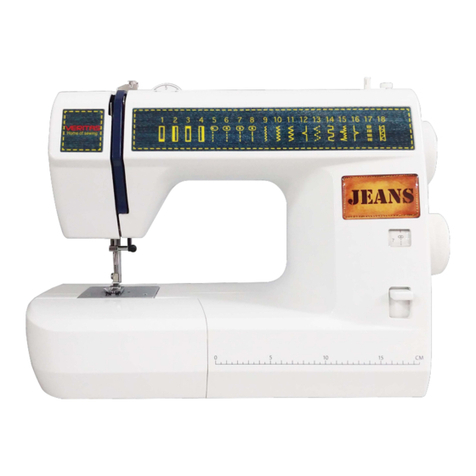
VERITAS JSA18 User manual
