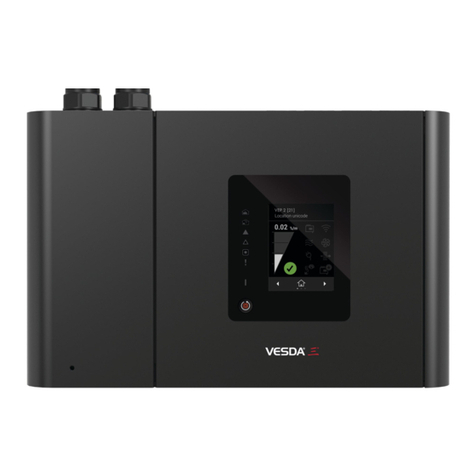
VESDA-E VEA Installation Instructions
Wiring: Power, Relays, GPI, VESDAnet, Expansion StaX, Relay StaX
Warning: Always disconnect detector power before plugging/unplugging electrical, relay
or network connections. Failure to do so may cause data corruption and/or
component failure.
Avertissement : Eteignez toujours détecteur avant de brancher/débrancher les relais électriques, ou de
connexions réseau. Au cas contraire vous pouver entraîner la défaillance corruption et/ou
élément de données.
SHSH
E
F
N
O
Q
P
NC C NO NC C NO NC C NO
2 [MINOR F] NC C NO
1 [ISOL]
5 [ACTION]
NO C NC 6 - FIRE 1
NO C NC 7 [FIRE 2]
NO C NC
J
I
H
G
K
L
M
4 [ALERT]
3 - URGENT F
A
C
B
R
S
D
Power
AEXP (Expansion)
BRV (Rotary Valve)
CPower In
DGround Reference
Terminal
VESDAnet
EVESDAnet B
FVESDAnet A
Relays
G1 - Disable (Isolate)
H2 - Minor Fault
I3 - Urgent Fault
J4 - Alert
K5 - Action
L6 - Fire 1
M7 - Fire 2
Communications
NEthernet
OUSB
GPI
PMonitored GPI
QUnmonitored GPI
Internal Components
RSmoke Sensor
Expansion
SData
Power and Relay Wiring
Power: Connect a 24 VDC power supply which is compliant with local re protection codes
and standards to the PWR IN socket (C).
Relays: The relays interface to the Fire Alarm Control Panel (FACP) to communicate
faults, alarms and disabled states. Relay contacts are rated 2 A @ 30 VDC, resistive.
Connect as required by the system design. Use electrical wire sizes from 0.2 mm² to
2.5 mm² (24 -12 AWG). Refer to the Addressable Loop Module example.
Warning: Ensure that all wiring complies with manufacturer’s instructions and local and
national re detection code requirements. Refer to Codes and Standards
Information for Air Sampling Smoke Detection section of the detector product
guide for further information on wiring compliance.
Avertissement : Verier que toute les cables ont passé au nombres d’instructions du fabricant et locaux et au
feu national de securited’incendie sois exiger. Adresser aux codes informations sur les normes
et reglementations de detection de fume par prelevement d’air par le notice descriptive du
produit pour plus de renseignements au conformite du cablage.
Caution: DO NOT LOOP WIRE UNDER TERMINALS WHEN WIRING DETECTORS.
BREAK WIRE RUNS TO PROVIDE SYSTEM SUPERVISION OF CONNECTIVITY.
Attention : NE PAS RALIER LES CABLES TERMINAUX PENDANT LES CABLAGES DES FILS. POUR
TOUTES LES CONNECTIONSA RELAIS, INTERROMPRE LES FILS POUR PERMETTRE LA
SUPERVISION DU CABLAGE.
Note: For information on wiring for other types of devices that may be required by
the system design, refer to the detector Product Guide and documentation
accompanying the device.
Unmonitored GPI
The Unmonitored GPI is a programmable input which can be congured to initiate a
number of different actions, including, by default, a Remote Reset function.
Monitored GPI
The monitored GPI senses contact closure and is congurable to initiate the same actions
as the unmonitored GPI. “Mains OK” is the default setting. A closed contact signals GPI
ON and open contact signals GPI OFF.
A 10K end of line resistor is used to allow the detector to monitor for open circuit faults in
the wiring from the detector to the contact.
Connection to Addressable Loop Module for Reporting Alarms and Faults
Normally Closed (NC)
Common (C)FIRE 1 (NO)Normally Open
Normally Closed (NC)
Common (C)ACTION (NO)Normally Open
Dete torc
Fire Input
EOL = Normal
Short = Fire
Open = Wiring Fault
3 Inputs Loop Module
Pre Alarm
EOL = Normal
Short = Fire
Open = Wiring Fault
Fault Input
EOL = Normal
Short = Detector Fault
Open = Wiring Fault
EOL*
EOL*
EOL*
Normally Closed (NC)
Common (C)FAULT (NO)Normally Open
Relay shown energized, which
is the no-fault condition
This wiring example is for wiring VESDA
detectors to a typical third party Input Loop
Module with three inputs.
This is an example drawing. Refer to the
appropriate product manual for the exact
wiring details of the third party equipment.
Connection to VESDAnet
A+
A-
B-
Shield
Module 1 Module 2 Module 3
B+
A+
A-
B-
Shield
B+
A+
A-
B-
Shield
B+
A+
A-
B-
Shield
Shield
B+
A+
A-
B-
Shield
Shield
B+
The diagram shows an example of the
wiring for a closed VESDAnet loop,
which is the recommended conguration.
Remove the factory default links from
the VESDAnet sockets (E and F) prior to
connecting the detector to the VESDAnet.
It is recommended that 120 Ohm twisted
pair cables (e.g. Belden 9841) be used for
including the devices in the network, with
a maximum length between devices of
1.2 km The polarity of the data wires must
be maintained throughout the network.
Standalone Detector
A-
A+
B-
B+
The diagram below shows the factory default wiring for VESDAnet
sockets (E and F) as required for a detector that is not connected to a
VESDAnet.
• Leave as is, or replace if it has been removed.
Communications
• USB: The USB port (O) is used for initial conguration and local maintenance or
servicing of the detector using a PC installed with Xtralis VSC software. Install Xtralis
VSC prior to connecting the detector to the computer to ensures that the required USB
drivers are present.
• Ethernet: The Ethernet port (N) is used for permanent network connection to the
detector, and provides a gateway to any other devices on the VESDAnet network. An
Ethernet lead can be routed through the cable entry ports and plugged into the Ethernet
port. Use a standard Ethernet lead when connecting the detector to a network switch,
router or directly to a PC or laptop. Ethernet connection must be congured using a
USB connection prior to use. Set the detector access password using Xtralis VSC.
• WiFi: The WiFi module allows connection of laptops installed with Xtralis VSC to the
detector, and provides a gateway to any other devices on the VESDAnet network. WiFi
must be enabled and congured using a USB connection prior to use. Set the detector
access password using Xtralis VSC.
Sampling Network
Complete the sampling network installation in accordance with the system design.
All tubes must have equal airow impedance. This is
achieved either by making them all equal in length,
or adhering to specications determined by the VEA
Microbore Tube Length Calculator (Document 29261)
for combinations of normal and reduced diameter
tube congurations. Where the tube length calculator
requires a tube to be comprised of a combination
of normal and reduced diameter microbore tube, a
reducer piece must be used between the two tubes
(P/N VSP-1000).
Tube inlets are numbered on the detector (see left).
Label each tube corresponding to its inlet. Unused
inlets on the detector should be blocked using
blanking plugs (P/N VSP-998).
it is recommended that excess tubing be coiled close to the sampling point end, and that
an additional 2 to 3 m (6 to 10 ft) of tubing be coiled to allow for future repositioning of the
sampling point.
Ensure that Microbore tubes are never glued anywhere in the tube network, including to
the inlets of the detector. Tubes can be joined using appropriate joiners.
Ensure that the exhaust is open and that tubes are clear.
Power Up
Connect 24 VDC power to the PWR IN terminal. Close front door.
On power up:
• The Power LED illuminates and the detector runs a series of self-diagnostic tests.
• If there is a fault, the Fault LED illuminates. To identify the fault, check the Active Event
List for the detector using Xtralis VSC or iVESDA.
• The pump starts up and air may be felt owing out of the exhaust port.
Conguration
For initial conguration, use a USB connection and the Xtralis VSC software.
• For networked detectors, set the IP address and subnet mask according to standard
building instructions.
• Normalize the airow. This takes approximately 30 minutes, after which the tube ow
rates (%) should be close to 100%.
• Reset the detector. It should now be running without faults.
• If a ow fault is present, the detector will re-scan for ow faults after a Reset is
performed. If required, cancel using Xtralis VSC.
Commissioning
• Carry out a smoke test, conrm that the transport time is as expected and test the
relays. Refer to the VESDA Commissioning Guide for further information.
12
1
2
3
4
5
76
8
9
10
11
13 14
15
16
17
18
19
20 22
21 23
24 26 27
28 29
30 31
32 33
34 35
36
37
38
39
40
25
www.acornfiresecurity.com
www.acornfiresecurity.com
