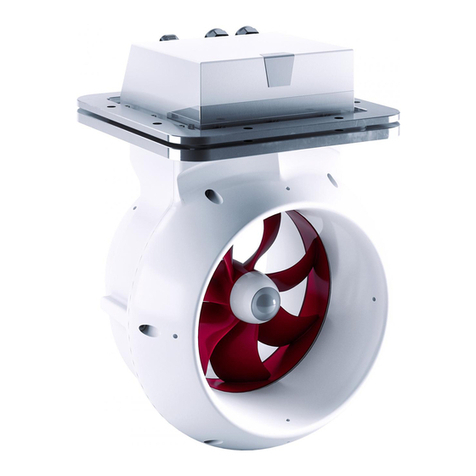
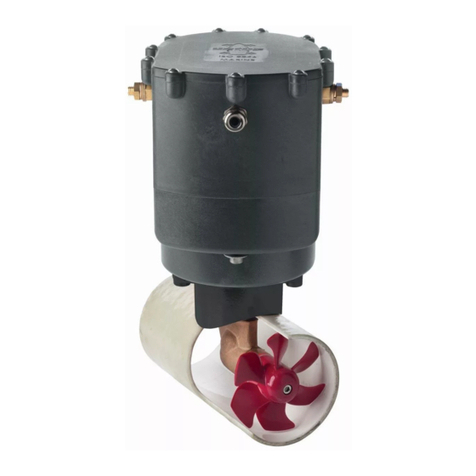
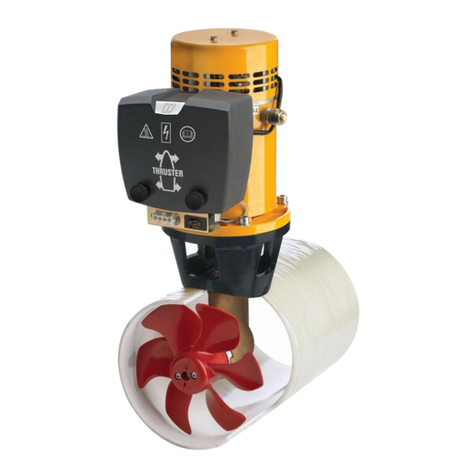
Vetus BOW3512C Specification sheet

NEDERLANDS 5
ENGLISH 11
DEUTSCH 17
FRANÇAIS 23
ESPAÑOL 29
ITALIANO 35
DANSK 41
SVENSKA 47
NORSK 53
SUOMEKSI 59
Copyright © 2011 Vetus n.v. Schiedam Holland
Bedieningshandleiding en
installatieinstructies
Operation manual and installation
instructions
Bedienungshandbuch und Einbauanleitung
Manuel d’utilisation et instructions
d’installation
Manual de manejo y instrucciones de
instalación
BOW3512C
35 kgf - ø 150 mm
Manuale per l’uso e istruzioni per
l’installazione
Betjeningsvejledning og installations-
instruktioner
Bruksanvisning och
monteringsinstruktioner
Bruksanvisning og
installasjonsinstrukser
Käyttö- ja asennusohje

2020523.08 vetus® Operation manual and installation instructions bow thruster BOW3512C
1 Inleiding . . . . . . . . . . . . . . . 5
2 Veiligheid . . . . . . . . . . . . . . 5
3 Gebruik . . . . . . . . . . . . . . . . 5
4 Inbouw . . . . . . . . . . . . . . . . 6
4.1 Voorbereiding . . . . . . . . . . . . 6
4.2 Montage staartstuk en tussen-
ens . . . . . . . . . . . . . . . . . . 6
4.3 Eindmontage . . . . . . . . . . . . 7
5 Elektrische installatie . . . . . . . 8
6 Onderhoud . . . . . . . . . . . . . 9
7 Storingen. . . . . . . . . . . . . . 10
8 Technische gegevens . . . . . . 10
9 Hoofdafmetingen. . . . . . . . 65
10 Elektrisch schema. . . . . . . . 66
10.1 Bediening met voetschakelaars 68
11 Accucapaciteit, accukabels . 69
Inhoud Content Inhalt
1 Introduction. . . . . . . . . . . . 11
2 Safety . . . . . . . . . . . . . . . . 11
3 Use . . . . . . . . . . . . . . . . . . 11
4 Installation. . . . . . . . . . . . . 12
4.1 Preparation. . . . . . . . . . . . . 12
4.2 Installation tailpiece and inter-
mediate ange . . . . . . . . . . 12
4.3 Final assembly . . . . . . . . . . . 13
5 Electrical installation . . . . . . 14
6 Maintenance . . . . . . . . . . . 15
7 Trouble shooting. . . . . . . . . 16
8 Technical data. . . . . . . . . . . 16
9 Principal dimensions. . . . . . 65
10 Wiring diagram . . . . . . . . . 66
10.1 Operated by foot switches . . . 68
11 Battery capacity, battery
cables . . . . . . . . . . . . . . . 69
1 Einleitung . . . . . . . . . . . . . 17
2 Sicherheitsbestimmungen . . 17
3 Gebrauch. . . . . . . . . . . . . . 17
4 Einbau. . . . . . . . . . . . . . . . 18
4.1 Vorbereitung. . . . . . . . . . . . 18
4.2 Befestigung des Unterwasser-
teils und des Zwischenansches 1 8
4.3 Endmontage . . . . . . . . . . . . 19
5 Elektrische Installation . . . . . 20
6 Wartung . . . . . . . . . . . . . . 21
7 Störungen . . . . . . . . . . . . . 22
8 Technische daten . . . . . . . . 22
9 Hauptabmessungen . . . . . . 65
10 Schaltschema . . . . . . . . . . 66
10.1 Bedienung mit Fußschaltung . 68
11 Akkukapazität, Akkukabel . . 69
1 Introduction. . . . . . . . . . . . 23
2 Sécurité . . . . . . . . . . . . . . 23
3 Emploi. . . . . . . . . . . . . . . . 23
4 Installation. . . . . . . . . . . . . 24
4.1 Préparatifs . . . . . . . . . . . . . 24
4.2 Montage de l’embase et de la
bride intermédiaire. . . . . . . . 24
4.3 Montage nal . . . . . . . . . . . 25
5 Installation électrique . . . . . 26
6 Entretien . . . . . . . . . . . . . . 27
7 Pannes . . . . . . . . . . . . . . . 28
8 Renseignements techniques . 28
9 Dimensions principales . . . . 65
10 Circuit electrique . . . . . . . . 66
10.1 Commande à interrupteurs à
pied . . . . . . . . . . . . . . . . . 68
11 Capacité de la batterie, câbles
de batterie . . . . . . . . . . . . 69
1 Introducción. . . . . . . . . . . . 29
2 Seguridad . . . . . . . . . . . . . 29
3 Uso . . . . . . . . . . . . . . . . . . 29
4 Incorporación . . . . . . . . . . . 30
4.1 Preparativos . . . . . . . . . . . . 30
4.2 Instalación de la parte poste-
rior y la brida intermedia . . . . 30
4.3 Montaje nal. . . . . . . . . . . . 31
5 Instalación eléctrica . . . . . . . 32
6 Mantenimiento . . . . . . . . . . 33
7 Fallos . . . . . . . . . . . . . . . . 34
8 Especicaciones técnicas . . . 34
9 Dimensiones principales . . . 65
10 Esquema eléctrico . . . . . . . 66
10.1 Manejo mediante conmutado-
res de pedal . . . . . . . . . . . . 68
11 Capacidad de las baterías,
cables de baterías. . . . . . . . 69
1 Introduzione . . . . . . . . . . . 35
2 Sicurezza . . . . . . . . . . . . . . 35
3 Funzionamento. . . . . . . . . . 35
4 Installazione. . . . . . . . . . . . 36
4.1 Operazioni preliminari. . . . . . 36
4.2 Montaggio del piedino e della
angia intermedia . . . . . . . . 36
4.3 Assemblaggio nale . . . . . . . 37
5 Collegamento elettrico. . . . . 38
6 Manutenzione . . . . . . . . . . 39
7 Guasti . . . . . . . . . . . . . . . . 40
8 Dati tecnici. . . . . . . . . . . . . 40
9 Dimensioni principali . . . . . 65
10 Schema elettrico . . . . . . . . 66
10.1 Comando a pedale . . . . . . . . 68
11 Capacità della batteria e cavi
della batteria. . . . . . . . . . . 69
Sommaire Índice Indice
020523.08 3
vetus® Operation manual and installation instructions bow thruster BOW3512C
1 Indledning . . . . . . . . . . . . . 41
2 Sikkerhed . . . . . . . . . . . . . 41
3 Brug . . . . . . . . . . . . . . . . . 41
4 Indbygning . . . . . . . . . . . . 42
4.1 Forberedelse . . . . . . . . . . . . 42
4.2 Montering af endestykke og
mellemange . . . . . . . . . . . 42
4.3 Slutmontering . . . . . . . . . . . 43
5 Elektrisk installation . . . . . . 44
6 Vedligeholdelse . . . . . . . . . 45
7 Driftsfejl . . . . . . . . . . . . . . 46
8 Tekniske specikationer . . . . 46
9 Mål . . . . . . . . . . . . . . . . . 65
10 Elektrisk skema . . . . . . . . . 66
10.1 Betjening med fodkontakter . . 68
11 Batteriets kapacitet, batteri-
kabler . . . . . . . . . . . . . . . 69
Indhold Innehåll Innhold
1 Inledning . . . . . . . . . . . . . . 47
2 Säkerhet . . . . . . . . . . . . . . 47
3 Användning . . . . . . . . . . . . 47
4 Montering . . . . . . . . . . . . . 48
4.1 Förberedelser . . . . . . . . . . . 48
4.2 Montering av växelhus och
mellanäns . . . . . . . . . . . . . 48
4.3 Slutmontering . . . . . . . . . . . 49
5 Elektrisk anslutning . . . . . . . 50
6 Underhåll. . . . . . . . . . . . . . 51
7 Felsökning . . . . . . . . . . . . . 52
8 Tekniska uppgifter. . . . . . . . 52
9 Huvudmått . . . . . . . . . . . . 65
10 Kopplingsschema. . . . . . . . 66
10.1 Manövrering med fotomkop-
plare . . . . . . . . . . . . . . . . . 68
11 Batterikapacitet, batterikablar 69
1 Innledning . . . . . . . . . . . . . 53
2 Sikkerhet . . . . . . . . . . . . . . 53
3 Bruk . . . . . . . . . . . . . . . . . 53
4 Innbygging . . . . . . . . . . . . 54
4.1 Forberedelser . . . . . . . . . . . 54
4.2 Montering av halestykke og
mellomens . . . . . . . . . . . . 54
4.3 Sluttmontasje . . . . . . . . . . . 55
5 Elektrisk installasjon . . . . . . 56
6 Vedlikehold . . . . . . . . . . . . 57
7 Feil . . . . . . . . . . . . . . . . . . 58
8 Tekniske data . . . . . . . . . . . 58
9 Viktigste mål . . . . . . . . . . . 65
10 Elektrisk skjema . . . . . . . . . 66
10.1 Betjening med fotbrytere. . . . 68
11 Batterikapasitet, batterikabler 69
1 Esipuhe . . . . . . . . . . . . . . . 59
2 Turvallisuus . . . . . . . . . . . . 59
3 Käyttö . . . . . . . . . . . . . . . . 59
4 Asennus. . . . . . . . . . . . . . . 60
4.1 Esivalmistelu . . . . . . . . . . . . 60
4.2 Kulmavaihteiston ja moottori-
laipan asennus. . . . . . . . . . . 60
4.3 Lopullinen asennus. . . . . . . . 61
5 Sähköasennukset . . . . . . . . 62
6 Huolto. . . . . . . . . . . . . . . . 63
7 Vian etsintä . . . . . . . . . . . . 64
8 Tekniset tiedot . . . . . . . . . . 64
9 Päämitat. . . . . . . . . . . . . . 65
10 Sähkökaavio . . . . . . . . . . . 66
10.1 Ohjaus jalkakytkimellä. . . . . . 68
11 Akkukapasiteetti, akkukaape-
lit . . . . . . . . . . . . . . . . . . 69
Sisältö
Boormal
Drill pattern
Bohrschablone
Gabarit
Plantilla de perforación
Sagoma di trapana natura
Skabelon
Borrjigg
Boresjablon
Poraussabluuna

4020523.08 vetus® Operation manual and installation instructions bow thruster BOW3512C

020523.08 11
vetus® Operation manual and installation instructions bow thruster BOW3512C
Introduction1
These installation instructions give guidelines for tting the Vetus
bow thruster ‘BOW3512C’.
The quality of installation will determine how reliably the bow thrust-
er performs. Almost all faults can be traced back to errors or impreci-
sion during installation. It is therefore imperative that the steps given
in the installation instructions are followed in full during the installa-
tion process and checked afterwards.
The thrust given by the bow thruster will vary from vessel to vessel
depending on the eect of the wind, the water displacement and the
shape of the underwater hull.
The nominal thrust quoted can only be achieved under the most•
favourable conditions:
During the installation process the• ‘Installation recommenda-
tions for bow thrusters’, must be followed, specically concern-
ing:
Suciently large diameter of the battery cables so that voltage-
drop is reduced to a minimum.
The manner in which the tunnel has been connected to the-
hull.
Use of bars in the tunnel openings.-
These bars should only be used where this is strictly necessary
(if sailing regularly in severely polluted water.)
The bars must have been tted correctly.-
Following the above recommendations will result in longer life and
better performance of your bow thruster.
Carry out the recommended maintenance regularly.•
Never allow the bow thruster to operate for a long period; the•
maximum length of usage is restricted because of heat release in
the electric motor. After use the motor must be allowed to cool
o.
No t e
The maximum continuous length of usage and the thrust as
specied in the technical details are based on the recommend-
ed battery capacities and battery cables.
If signicantly larger batteries in combination with very short
battery cables of signicantly larger diameter than recom-
mended are used then the thrust will increase. In such cases
the maximum length of usage must be reduced in order to
prevent damage to the motor.
Safety2
Wa r N i N g !
When using the bow thruster watch out for swimmers or light
boats which could be in the near vicinity of the bow thruster tun-
nel jet openings.
Pass on the safety instructions to others using the bow thruster.
General rules and laws with regard to safety and accident-prevention
also need to be applied.
Never touch the moving ends of the bow thruster whilst in opera-•
tion.
Never touch hot parts of the bow thruster and never place am-•
mable materials in the vicinity of the bow thruster.
Always stop the bow thruster before checking components or ad-•
justing the bow thruster.
Always detach the battery poles during maintenance work.•
Ensure maintenance work is safe by only using tools suitable for•
the purpose.
Always deactivate the main switch when the bow thruster is not in•
use for long periods.
Use3
Switch on the main switch.•
Consult the handbook supplied with the control panels for in-•
structions on using the bow thruster.
Never switch in one movement from starboard to portside or
reverse, but wait until the propeller stands still, before giving
it a command to operate the electric motor in the opposite di-
rection.
Ca r e !
If 2 control panels are installed never operate the bow thruster
from both panels simultaneously.
Switch o the main switch when leaving the ship.•
Make sure that the user of the vessel is supplied with the owner’s manual.
ENGLISH

12 020523.08 vetus® Operation manual and installation instructions bow thruster BOW3512C
Installation4
In order to install the tunnel, consult ‘Installation recommendations
for bow thrusters’, Vetus art. code 020571.01
For overall dimensions see drawing, page 65.
No t e
The areas in which the electric motor of the bow thruster and
the battery are positioned must be dry and well ventilated.
Preparation4.1
The bow thruster will be delivered fully as-
sembled. Perform the following steps:
Remove the propeller.•
Remove the motor from the intermediate•
ange.
Remove the intermediate ange from the•
tail piece.
The 2 bushes are only required for trans-
port and are now no longer needed.
Installation tailpiece and intermediate ange4.2
Place one packing between the tail piece and the tunnel. Apply a•
sealant (e.g. polyurethane or silicone) between the tail piece and
packing, and between the packing and the tunnel wall. Place the
tail piece in the hole in the tunnel.
Any extra packings used should be ones capable of justifying the
tail piece.
*) e.g. Sikaex®-292.
Grease the hole of the intermediate ange and position this•
ange. Fit the bolts.
Now check size‘A’(‘A’=‘B’+ 8 mm ). Use the adjustable screw ‘C’, if•
needed, to achieve the correct size ‘A’.
A = B + 8 mm
A = B + 5/16”

020523.08 13
vetus® Operation manual and installation instructions bow thruster BOW3512C
Final assembly4.3
Check again dimension ‘A’.•
Now t the intermediate ange permanently to the tail piece and•
grease the threads of the bolts with‘outboard gear grease’ before
inserting and tightening them.
No t e
Check for possible leaks immediately the ship returns to wa-
ter.
Grease the propeller shaft with ‘outboard gear grease’ and install•
the propeller.
The propeller should run a minimum of 1.5 mm (1/16”) free of the
thrust tube wall, all round.
Grease the input shaft with an installation compound, like ‘Mo-•
lykote® G-n plus’.
Grease the threads of the fastenings bolts with ‘outboard gear•
grease’ and install the electric motor to the intermediate ange.
For a rst check, turn the propeller by hand, it should turn easily,•
whilst being connected to the output spindle of the electric mo-
tor.
Outboard Gear
Grease
Outboard Gear
Grease
Outboard Gear
Grease
Molykote® G-n plus
A = B + 8 mm
A = B + 5/16”
ENGLISH

14 020523.08 vetus® Operation manual and installation instructions bow thruster BOW3512C
Electrical installation5
Consult the chapter ‘Electrical Management’ in ‘Installation recom-
mendations for bow thrusters’, Vetus art. code 020571.01
Connect the main power supply cables.•
Fit the control panel next to the steering position. There must be•
at least 50 mm space behind the panel.
Fit the control cable between the bow thruster and the control•
panel through the vessel and connect the jack connections to-
gether.
If it is necessary to cut the intermediate cable and reconnect it
take care to ensure the correct colours are connected together.
N.B: The colours of the wire cores in the intermediate cable may
dier from the wire core colours as used on the bow thruster mo-
tor and on the control panel!
If there are two steering positions, the second control panel can
be connected to the rst one.
Make sure that no other electrical parts come loose when con-
necting the electric cables.
Check all electrical connections after 14 days. Electrical parts
(such as bolts and nuts) may come loose as a result of uctua-
tions in temperature.
Check that the voltage, recorded on the motor type plate, is in agree-
ment with the vessel’s circuit voltage. Position the battery or batter-
ies as close as possible to the bow thruster; the main power supply
cables can then be short, which reduces the voltage drop as much
as possible.
See page 69 for the applicable battery capacity, the size of main pow-
er supply cables and fuse to use.
No t e
If 2 separate switches are used instead of a Vetus console, con-
sult the diagram on page 68.

020523.08 15
vetus® Operation manual and installation instructions bow thruster BOW3512C
If it is found during test running that the thrust direction does not
correspond with the direction switch on the control panel then the
blue (no. 1) and the white (no. 4) wires on the relay must be inter-
changed.
Wa r N i N g !
Do NOT test the bow thruster while the ship is out of water, un-
less you are certain that everyone is at a safe distance from the
thrust tube.
Never allow the bow thruster to run for longer than 5 seconds
with the ship out of water.
1
4
14
Maintenance6
Check the carbon brushes for wear - in normal use once per year -
with very intensive use of the bow thruster, e.g. with hire vessels,
once every two months.
Remove the Protective cover from the relay and then the Protec-•
tive cover to the brushes.
Clean the carbon brushes, the holders and the collector. (Blow•
away the dust coming o the brushes.)
Check the length of the carbon brushes and replace before the•
minimum length (L min) is reached. Also check the collector for
excessive wear.
For minimum length and art. code, see page 70.
The brushes can be taken out of the holders by releasing the re-•
taining spring.
The bow thruster tailpiece has long-term lubrication.
The following maintenance should be carried out during a slipway
service:
Check the cathodic Protection and if necessary renew the zinc•
anode.
For the art. code for the zinc anode, see page 70.
Provide the bolts with a screwlock (Loctite®).•
Clean the propeller shaft, grease with ‘outboard gear grease’ and•
ret the propeller on the shaft.
Check all electrical connections at least once annually.
The instructions of the manufacturer should be followed for the
maintenance of the batteries. Vetus batteries are maintenance free.
Outboard Gear
Grease
Loctite® 242
ENGLISH

16 020523.08 vetus® Operation manual and installation instructions bow thruster BOW3512C
Trouble shooting7
Electric motor does not operate
Check that the battery main switch is ‘ON’.-
Check whether the control panel fuse has burnt out.- [1]
Check if the main fuse has burnt out.- [2]
In all the above cases, the‘POWER’indicator LED is not lit.
The electric motor has overheated and its thermal Protection has-
broken the circuit of the control current.
The panel gives a warning signal three times ( . - . . - ) and the LED
will glow red.
As soon as the motor has cooled down enough, the LED will
resume glowing green and the bow thruster can be put back in
service.
Check if it is possible to turn the propeller. A piece of wood or similar
could have been caught between the propeller and the tunnel.
Electric motor turns slowly
The battery is at.-
Bad electrical connection(s) due to e.g. corrosion.-
The carbon brushes are not making proper contact.-
The battery capacity is reduced because of very low tempera--
tures.
Weed or shing line has become caught in the propeller.-
Control panel fuse is burnt out [1]
Short circuit in the operating circuit; check the wiring.-
Electric motor turns (too) fast but there is no thrust
The blades of the propeller have been damaged by a foreign ob--
ject having entered the propeller or tunnel.
The drive pin on the propeller shaft has been broken by a foreign-
object having entered the propeller or tunnel.
Replace the drive pin and check the propeller ange for any dam-
age.
[1] The control current fuse is in the bow thruster motor.
[2] See table on page 69
Technical data8
Type : BOW3512C
Electric motor
Type : reversible DC motor
Voltage : 12 V DC
Current : 220 A [3]
Rated output : 1.5 kW
No. of revolutions : 2600 rpm
Rating : S2 - 4 min. [3]
Protection : IP44
Motors conform to CE (80/336/EEC, EMC - EN60945)
Transmission
Gears : Bevel gear helical teeth
Gear ratio : 1 : 1
Lubrication : oilbath, approx. 0.04 litre (1.4 .oz.)
outboard gear oil SAE80W or EP 90
Housing : bronze
Propeller
Diameter : 146 mm (5 3/4”)
No. of blades : 6
Prole : asymmetrical
Material : polyacetal (Delrin ®)
Rated thrust : 350 N (35 kgf, 79 lbf)
Control circuit
Fuse : 5 A
Current solenoid switch : 2.8 A
Control circuit wires : 1.5 mm2(14 AWG)
Extension cable : 6, 10, 16, 18 or 20 m
(20’, 33', 52', 59', or 65')
Thrust-tunnel
Steel model
dimensions : O.D. 159 mm,
wall thickness 4,5 mm
treatment :
blasted, coated with: SikaCor Steel
Protect. Suitable for all kinds of
protection systems.
Plastic model
dimensions : I.D. 150 mm, wall thickness 5.3 mm
material : glass bre reinforced polyester
Aluminium model
dimensions : I.D. 150 mm, wall thickness 5 mm
material : aluminium, 6061 or 6062
(AlMg1SiCu)
Weight
Excl. thrust-tunnel : 12 kg (26 lbs)
Length of usage:
[3] 4 min. continuously or max. 4 min. per hour at 220 A (12 Volt)..

020523.08 65
vetus® Operation manual and installation instructions bow thruster BOW3512C
Hoofdafmetingen9
Principal dimensions
Hauptabmessungen
Dimensions principales
Dimensiones principales
Dimensioni principali
Mål
Huvudmått
Viktigste mål
Päämitat
138 (5 7/16 “ )
ø 112 (4 7/16 “ DIA.)
314 (12 3/8“)
79
(3 1/8“ )
149 (5 7/8“ )
MIN. 150
(5 7/8“)
ø 150
(5 7/8“ DIA.)
L
1 : 10

66 020523.08 vetus® Operation manual and installation instructions bow thruster BOW3512C
1 Hoofdzekering Main fuse Hauptsicherung Fusible principal Fusible principal 1 Fusibile principale Hovedsikring Huvudsäkring Hovedsikring Päävirtasulake
2 Hoofdschakelaar Main switch Hauptschalter Interrupteur principal Interruptor principal 2 Interruttore principale Hovedafbryder Huvudströmbrytare Hovedbryter Päävirtakytkin
3 Stuurstroomzekering Control current fuse Steuerstromsicherung Fusible courant de com-
mande
Fusible de circuito de
control 3Fusibile del circuito di
comando Styrestrømssikring Styrströmsäkring Styrestrømsikring Ohjausvirtasulake
4 Magneetschakelaar Solenoid switch Relais Contacteur solénoïde Interruptor de solenoide 4 Interruttore solenoidale Magnetafbryder Kontaktor Magnetbryter Rele
5 Elektromotor Electromotor Elektromotor Moteur électrique Electromotor 5 Motore elettrico Elektromotor Elmotor Elektromotor Sähkömoottori
6 Bedieningspaneel Control panel Bedienungspaneel Panneau de commande Tablero de mandos 6 Panelo di comando Betjeningspanel Manöverpanel Kontrollpanel Ohjauspaneli
7 Accu Battery Batterie Batterie Batería 7 Batteria Batteri Batteri Batteri Akku
8 Steker Plug Stecker Prise mâle Clavija macho 8 Spina maschio Stik Stickkontakt Støpsel Pikaliitin
9 Contrasteker Socket Kontrastecker Prise femelle Clavija hembra 9 Spina femmina Kontrastik Kontrastickkontakt Stikkontakt Pikaliitin
10 Verlengkabel Extension cable Zwischenkabel Câble de branchement Cable prolongador 10 Prolunga Forlængerledning Förlängningskabel Skjøtekabel Jatkokaapeli
11 Dynamo Alternator Lichtmaschine Générateur Generador 11 Dinamo Dynamo Generator Dynamo Generaattori
12 Thermische beveiliging Thermal Protection Thermosicherung Sécurité thermique Dispositivo térmico de
seguridad 12 Protezione termica Termisk beskyttelse Termiskt skydd Termisk sikring Lämpösuojain
Kleurcode bedrading: Wiring colour code: Farbkode für die Be-
drahtung:
Code de couleur des
câbles:
Código de color de los
cables: Codice colori cavi: Farvekode til kabler: Färgkod kablage: Fargekode ledninger: Kaapeleiden värikoodit:
1 Blauw Blue Blau Bleu Azul 1 Blu Blå Blå Blå Sininen
2 Rood (+) Red (+) Rot (+) Rouge (+) Rojo (+) 2 Rosso (+) Rød (+) Röd (+) Rød (+) Punainen (+)
3 Zwart (-) Black (-) Schwarz (-) Noir (-) Negro (-) 3 Nero (-) Sort (-) Svart (-) Svart (-) Musta (-)
4 Wit White Weiß Blanc Blanco 4 Bianco Hvid Vit Hvit Valkoinen
Elektrisch schema10 Schaltschema Esquema eléctrico Schema elettrico Kopplingsschema Sähkökaavio
Wiring diagram Circuit electrique Elektrisk skema Elektrisk skjema
7
12
(12 V)

020523.08 67
vetus® Operation manual and installation instructions bow thruster BOW3512C
4
3
2
1
4
3
2
1
1
2
3
4
1
2
3
4
1
2
3
4
12
1 Hoofdzekering Main fuse Hauptsicherung Fusible principal Fusible principal 1 Fusibile principale Hovedsikring Huvudsäkring Hovedsikring Päävirtasulake
2 Hoofdschakelaar Main switch Hauptschalter Interrupteur principal Interruptor principal 2 Interruttore principale Hovedafbryder Huvudströmbrytare Hovedbryter Päävirtakytkin
3 Stuurstroomzekering Control current fuse Steuerstromsicherung Fusible courant de com-
mande
Fusible de circuito de
control 3Fusibile del circuito di
comando Styrestrømssikring Styrströmsäkring Styrestrømsikring Ohjausvirtasulake
4 Magneetschakelaar Solenoid switch Relais Contacteur solénoïde Interruptor de solenoide 4 Interruttore solenoidale Magnetafbryder Kontaktor Magnetbryter Rele
5 Elektromotor Electromotor Elektromotor Moteur électrique Electromotor 5 Motore elettrico Elektromotor Elmotor Elektromotor Sähkömoottori
6 Bedieningspaneel Control panel Bedienungspaneel Panneau de commande Tablero de mandos 6 Panelo di comando Betjeningspanel Manöverpanel Kontrollpanel Ohjauspaneli
7 Accu Battery Batterie Batterie Batería 7 Batteria Batteri Batteri Batteri Akku
8 Steker Plug Stecker Prise mâle Clavija macho 8 Spina maschio Stik Stickkontakt Støpsel Pikaliitin
9 Contrasteker Socket Kontrastecker Prise femelle Clavija hembra 9 Spina femmina Kontrastik Kontrastickkontakt Stikkontakt Pikaliitin
10 Verlengkabel Extension cable Zwischenkabel Câble de branchement Cable prolongador 10 Prolunga Forlængerledning Förlängningskabel Skjøtekabel Jatkokaapeli
11 Dynamo Alternator Lichtmaschine Générateur Generador 11 Dinamo Dynamo Generator Dynamo Generaattori
12 Thermische beveiliging Thermal Protection Thermosicherung Sécurité thermique Dispositivo térmico de
seguridad 12 Protezione termica Termisk beskyttelse Termiskt skydd Termisk sikring Lämpösuojain
Kleurcode bedrading: Wiring colour code: Farbkode für die Be-
drahtung:
Code de couleur des
câbles:
Código de color de los
cables: Codice colori cavi: Farvekode til kabler: Färgkod kablage: Fargekode ledninger: Kaapeleiden värikoodit:
1 Blauw Blue Blau Bleu Azul 1 Blu Blå Blå Blå Sininen
2 Rood (+) Red (+) Rot (+) Rouge (+) Rojo (+) 2 Rosso (+) Rød (+) Röd (+) Rød (+) Punainen (+)
3 Zwart (-) Black (-) Schwarz (-) Noir (-) Negro (-) 3 Nero (-) Sort (-) Svart (-) Svart (-) Musta (-)
4 Wit White Weiß Blanc Blanco 4 Bianco Hvid Vit Hvit Valkoinen
Elektrisch schema10 Schaltschema Esquema eléctrico Schema elettrico Kopplingsschema Sähkökaavio
Wiring diagram Circuit electrique Elektrisk skema Elektrisk skjema

68 020523.08 vetus® Operation manual and installation instructions bow thruster BOW3512C
7
12
(12 V)
85
8630
87a 87 85
86 30
87a87
Bediening met voetschakelaars10.1
Operated by foot switches
Bedienung mit Fußschaltung
Commande à interrupteurs à pied
Manejo mediante conmutadores de pedal
Comando a pedale
Betjening med fodkontakter
Manövrering med fotomkopplare
Betjening med fotbrytere
Ohjaus jalkakytkimellä
Wa a r s C h u W i N g Wa r N i N g Wa r N u N g av e r t i s s e m e N t ad v e r t e N C i a av v e r t i m e N t o ad v a r s e l va r N i N g ad v a r s e l va r o i t u s
Beide boegschroefrelais (K1 en K2) mogen nooit gelijktijdig inge-
schakeld worden! Installeer daarom bij toepassing van voetschake-
laars 2 extra relais zoals in onderstaand schema is aangegeven.
The two bow thruster relays (K1 and K2) must never both be en-
gaged at the same time! For this reason, install two extra relays as
depicted in the schematic below when utilising foot switches.
Die beiden Bugschraubenrelais (K1 und K2) dürfen unter keinen
Umständen gleichzeitig eingeschaltet werden! Installieren Sie aus
diesem Grund, vorm Gebrauch von zwei Fußschaltern zwei zusätz-
liche Relais, wie in nachfolgender Skizze angegeben.
Les deux relais d‘hélice d‘étrave (K1 et K2) ne doivent jamais être
actionnés simultanément ! Si des interrupteurs à pied sont utilisés,
il faudra donc installer 2 relais supplémentaires comme indiqué sur
le schéma ci-dessous.
¡Los relés correspondientes a los tornillos de retención (K1 y K2) no
deben nunca conmutarse al mismo tiempo! Si utiliza conmutado-
res de pedal, instale 2 relés adicionales, tal y como se indica en el
siguiente esquema.
I due relè dell’elica di prua (K1 e K2) non devono mai essere azio-
nati contemporaneamente! Pertanto, quando utilizzate i comandi
a pedale installate 2 relè ausiliari, come indicato nello schema sot-
tostante.
De to bovpropelrelæer (K1 og K2) må aldrig tilkobles samtidig. Ved
anvendelse af fodkontakter skal der monteres 2 ekstra relæer som
vist i skemaet nedenfor.
Bogpropellerns båda reläer (K1 och K2) får aldrig kopplas på sam-
tidigt! Vid användning av fotomkopplare ska därför två extra reläer
installeras i enlighet med nedanstående kopplingsschema.
Begge baugpropellreléene (K1 og K2) skal aldri slås på samtidig!
Installer derfor ved hjelp av fotbrytere 2 ekstra reléer som angitt i
skjemaet nedenfor.
Molempia keulapotkureita (K1 ja K2) ei saa käynnistää koskaan
samanaikaisesti! Asenna siksi jalkakytkintä sovellettaessa kaksi yli-
määräistä relettä alla olevan kaavion mukaisesti.

020523.08 69
vetus® Operation manual and installation instructions bow thruster BOW3512C
Accucapaciteit, accukabels11
Battery capacity, battery cables
Akkukapazität, Akkukabel
Capacité de la batterie, câbles de bat-
terie
Capacidad de las baterías, cables de
baterías
Capacità della batteria e cavi della
batteria
Batteriets kapacitet, batterikabler
Batterikapacitet, batterikablar
Batterikapasitet, batterikabler
Akkukapasiteetti, akkukaapelit
Boegschroef
Toe te passen accu(’s) Totale lengte plus- en
minkabel
Draaddoor-
snede
Zekering
Minimaal Maximaal ‘traag’ Vetus art.
code
Bow thruster
Battery capacity required Total length of plus-
and minus cable
Cable cross-
section
Fuse
Minimum Maximum ‘slow blow’ Vetus art.
code
Bugschraube
Zu verwendende Akkus Gesamtlänge Plus-
und Minuskabel
Draht-
durchschnitt
Sicherung
Minimum Maximum ‘träge’ Artikelnum-
mer
Hélice
d'étrave
Batterie(s) à utiliser Longueur totale des
câbles plus et moins
Diamètre du
câble
Fusible
Minimum Maximum ‘lent’ code d'art.
Vetus
Hélice de proa
Batería(s) a aplicar Largo total cable
positivo y negativo
Diámetro de
hilo
Fusible
Mínimo Máximo ‘lento’ Código de art.
Vetus
Elica
Batteria(e) da usare Lunghezza totale
cavo positivo e ne-
gativo
Diametro
cavi
Fusibile
Minimo Massimo ‘a tempo’ Vetus codigo
art.
Bovpropel
Batterikapacitet Total længde af posi-
tiv og negativ batteri-
kabel tilsammen
Tråd-
diameter
Sikring
Min. Max. ‘træg’ Vetus artikeln
Bogpropeller
Lämpligt batteri Total längd kabel till
plus- och minuspol
Kabelns
dimension
Säkring
Min. Max. ‘trög’ Vetus artikelnr
Baugpropell
Nødvendig batterikapasitet Total lengde pluss- og
minuskabel
Ledningt-
verrsnitt
Sikring
Min. Maks ‘treg’ Vetus art.
kode
Keulapotkuri
Vaadittava akkukapasiteetti ‘Miinus’- ja ‘plus”-
kaapeleiden koko-
naispituudet
Kaapelikoko
Sulake
Minimi Maksimi hidas Vetus koodi
BOW3512C
35 kgf - 12 V
55 Ah - 12 V
BCI 90 - 500
CCA 500 - 12 V
108 Ah - 12 V
BCI 31 - 750
CCA 750 - 12 V
0 - 11 m 35 mm2
160 A ZE160
0 - 34 ft
34 - 43 ft AWG 2
AWG 1

70 020523.08 vetus® Operation manual and installation instructions bow thruster BOW3512C
5
4
2
1
3
6
8
10
11
7
12
9
BOW3512C Service onderdelen Service parts
pos. qty part benaming description
1 1 SET0021 Elektromotor 1,5 kW - 12 V compl. met relais Electromotor 1.5 kW - 12 V c/w solenoid switches
2 1 SET0009 Set relais 12 V Set of solenoid switches 12 V
3 1 SET0023 Set van 4 stuks koolborstels Set of 4 pcs of carbon brushes
4 1 BP3076 Relaiskap Relais cover
5 1 SET0006 Set van 2 stuks kartelmoeren Set of 2 pcs knurled nuts
6 1 SET0022 Koppeling Coupling
7 1 BP1034 Tussenflens Intermediate flange
8 1 SET0017 Staartstuk compl. Tailpiece compl.
9 1 SET0149 Zinkanode compl. met schroeven Zincanode c/w screws
10 1 SET0087 Schroef compl. met meeneempen en montageset Propeller c/w drive pin and mounting set
11 1 BP1129 Meeneempennen, 5 stuks Propeller pins, 5 pcs
12 2 BP1170 Pakking Gasket
25
13
9
L min.
14
[mm]
(4 x)
B11.214

020523.08 71
vetus® Operation manual and installation instructions bow thruster BOW3512C
EN 61000-6-3:2001 EN 61000-6-2:2001
89/336/EEC 93/68/EEC
Schiedam, 26 04 2011
Ing. P.H. le Pair
Vetus N.V.
Fokkerstraat 571
3125 BD Schiedam
The Netherlands
Declaration of Conformity
BOW3512C
Wij verklaren onder onze volledige verantwoordelijkheid dat dit pro-
duct voldoet aan, en in overeenstemming is met, de volgende nor-
men en richtlijnen:
We declare under our sole responsibility that this product is in con-
formity and accordance with the following standards and directives:
Wir übernehmen vollständige Verantwortung dafür, dass dieses Pro-
dukt den folgenden Normen und Richtlinien entspricht und deren
Anforderungen erfüllt:
Nous déclarons sous notre entière responsabilité que ce produit est
conforme aux normes et directives suivantes :
Declaramos bajo nuestra total responsabilidad que este producto es
conforme a las siguientes normas y directivas:
Dichiariamo sotto la nostra responsabilità che questo prodotto è
conforme e risponde alle seguenti norme e direttive:
Vi erklærer på vores fulde ansvar, at dette produkt opfylder og er i
overensstemmelse med følgende normer og direktiver:
Vi förklarar under vårt fullständiga ansvar att denna produkt uppfyl-
ler, och är i överensstämmelse med, följande normer och direktiv:
Vi erklærer under vårt fullstendige ansvar at dette produktet oppfyl-
ler og er i overensstemmelse medfølgende standarder og direktiver:
Vakuutamme täysin omalla vastuullamme, että tämä tuote täyttää
seuraavien normien ja direktiivien vaatimukset ja yhdenmukaisuu-
den:

vetus n.v.
FOKKERSTRAAT 571 - 3125 BD SCHIEDAM - HOLLAND - TEL.: +31 10 4377700
Printed in the Netherlands
020523.08 2011-04
Table of contents
Other Vetus Boating Equipment manuals

Vetus
Vetus HPW User manual

Vetus
Vetus BOW4512D Specification sheet

Vetus
Vetus FTANK25 User manual

Vetus
Vetus MP34 User manual

Vetus
Vetus BPPPA User manual

Vetus
Vetus BOW9512C Specification sheet

Vetus
Vetus HTANK User manual

Vetus
Vetus WSR160 User manual

Vetus
Vetus RimDrive RD125 User manual

Vetus
Vetus ZWB25A User manual

Vetus
Vetus FS3816 User manual

Vetus
Vetus BOW22024C Specification sheet

Vetus
Vetus TANKV55 Quick start guide

Vetus
Vetus DBPPJA User manual

Vetus
Vetus FSA3816 User manual

Vetus
Vetus BOW PRO Series User manual

Vetus
Vetus BOW16024C Specification sheet

Vetus
Vetus E-POD User manual

Vetus
Vetus Bullflex User manual

Vetus
Vetus ZWB60 User manual