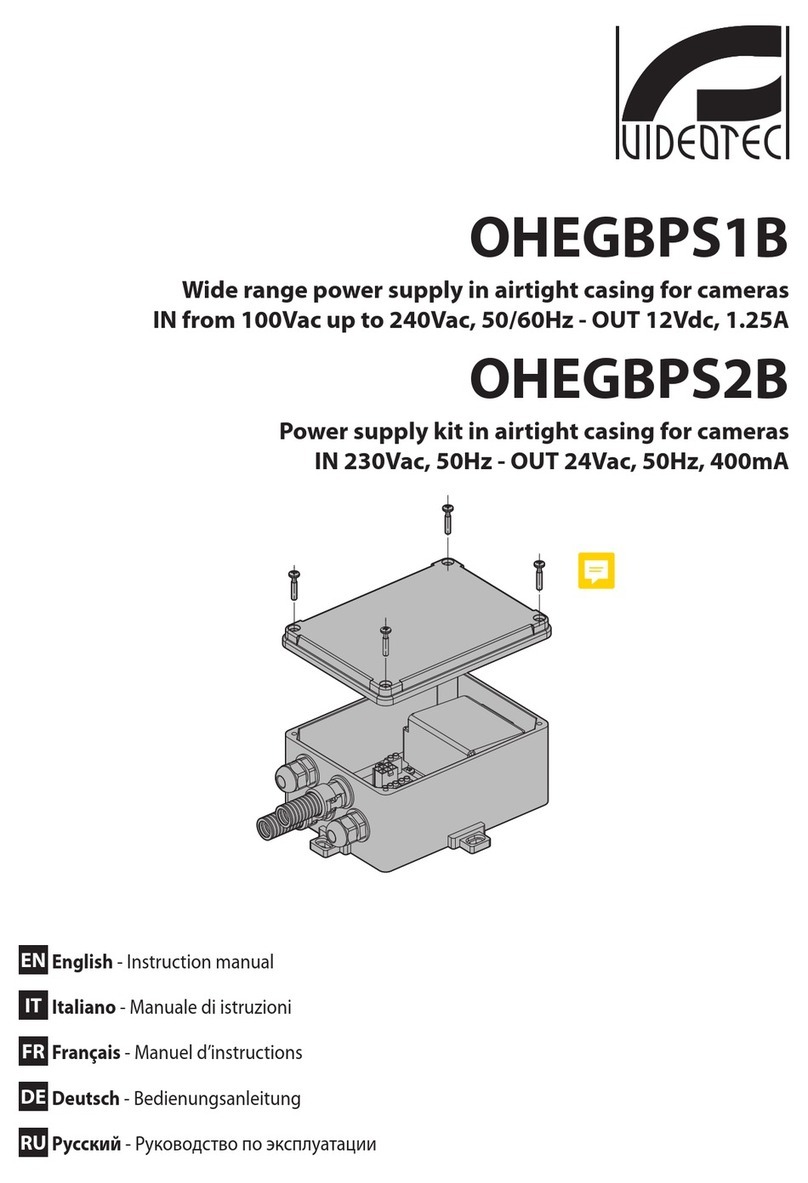
Videotec MAXIMUS MBA User manual

EN
English - Instruction manual
IT
Italiano - Manuale di istruzioni
FR
Français - Manuel d’instructions
DE
Deutsch - Bedienungsanleitung
RU
- Руководство по эксплуатации
PT
Português - Manual de instruções
KO
한국어 - 지침 설명서
ENGLISH
MAXIMUS MBA
Explosion-proof communication box in aluminium


EN
English - Instruction manual
ENGLISH
MAXIMUS MBA
Explosion-proof communication box in aluminium


Instruction manual - English - EN
3MNVCMBA_1817_EN
Contents
ENGLISH 1
1 About this manual ....................................................................................................................5
1.1 Typographical conventions ................................................................................................................................................ 5
2 Notes on copyright and information on trademarks.............................................................5
3 Safety rules................................................................................................................................5
4 Identication.............................................................................................................................7
4.1 Product description and type designation................................................................................................................... 7
4.2 Product marking..................................................................................................................................................................... 8
4.2.1 Explosion-proof box plate .................................................................................................................................................................... 8
4.2.2 Videotec label............................................................................................................................................................................................ 8
5 Product coding ......................................................................................................................... 8
6 Preparing the product for use .................................................................................................9
6.1 Safety precautions before use ........................................................................................................................................... 9
6.2 Unpacking................................................................................................................................................................................. 9
6.3 Contents .................................................................................................................................................................................... 9
6.4 Safely disposing of packaging material ......................................................................................................................... 9
7 Installation ................................................................................................................................9
7.1 Range of use............................................................................................................................................................................. 9
7.2 Communication box fastening.......................................................................................................................................... 9
7.3 Connection of the cables..................................................................................................................................................... 9
7.3.1 Product opening...................................................................................................................................................................................... 9
7.3.2 Cable entry...............................................................................................................................................................................................10
7.3.3 Connector board description............................................................................................................................................................10
7.3.4 Connection of the main power supply line..................................................................................................................................11
7.3.5 Products connection to the 24Vac power supply line..............................................................................................................12
7.3.6 Multi-polar connectors (relays, alarms, serial line).....................................................................................................................12
7.3.7 BNC connectors (analogue video)...................................................................................................................................................12
7.3.8 Connectors for the wash system......................................................................................................................................................12
7.3.9 Description of the switch board.......................................................................................................................................................13
7.3.10 Ethernet cables connection.............................................................................................................................................................13
7.3.11 Related products .................................................................................................................................................................................14
7.4 Ground connection .............................................................................................................................................................14
7.5 Product closure.....................................................................................................................................................................14
8 Instructions for safe operation..............................................................................................15
8.1 Safe operation .......................................................................................................................................................................15
8.1.1 Commissioning.......................................................................................................................................................................................15
8.1.2 Safety rules...............................................................................................................................................................................................15
9 Switching on ...........................................................................................................................15
10 Maintenance .........................................................................................................................15
10.1 Routine maintenance (to be performed on a periodic basis)............................................................................16
10.1.1 Inspecting the cables.........................................................................................................................................................................16
10.1.2 Fuses replacement..............................................................................................................................................................................16

EN - English - Instruction manual
4 MNVCMBA_1817_EN
11 Information on disposal and recycling...............................................................................16
12 Troubleshooting ...................................................................................................................16
13 Technical data .......................................................................................................................17
13.2 Mechanical ...........................................................................................................................................................................17
13.3 Electrical................................................................................................................................................................................17
13.4 Network.................................................................................................................................................................................17
13.5 Video.......................................................................................................................................................................................17
13.6 I/O interface .........................................................................................................................................................................17
13.7 Environment........................................................................................................................................................................17
13.8 Certications........................................................................................................................................................................17
14 Technical drawings ...............................................................................................................18

Instruction manual - English - EN
5MNVCMBA_1817_EN
1 About this manual
Read all the documentation supplied carefully before
installing and using this unit. Keep this manual
and use instructions of the box within reach for
subsequent consultation.
1.1 Typographical conventions
DANGER!
Explosion hazard.
Read carefully to avoid danger of explosion.
DANGER!
High level hazard.
Risk of electric shock. Disconnect the
power supply before proceeding with any
operation, unless indicated otherwise.
CAUTION!
Medium level hazard.
This operation is very important for the
system to function properly. Please read
the procedure described very carefully and
carry it out as instructed.
INFO
Description of system specications.
We recommend reading this part carefully
in order to understand the subsequent
stages.
2 Notes on copyright and
information on trademarks
The mentioned names of products or companies are
trademarks or registered trademarks.
3 Safety rules
Consult the use instructions of the
explosion-proof box.
CAUTION! Device installation and
maintaining must be performed by
specialist technical sta only.
CAUTION!The electrical system to which the
unit is connected must be equipped with a
15A max automatic bipolar circuit breaker.
The minimum distance between the circuit
breaker contacts must be 3mm (0.1in).
The circuit breaker must be provided
with protection against the fault current
towards the ground (dierential) and the
overcurrent (magnetothermal).
• The manufacturer declines all responsibility
for any damage caused by an improper use
of the appliances mentioned in this manual.
Furthermore, the manufacturer reserves the right
to modify its contents without any prior notice.
The documentation contained in this manual has
been collected and veried with great care. The
manufacturer, however, cannot take any liability
for its use. The same thing can be said for any
person or company involved in the creation and
production of this manual.
• Before starting any operation, make sure the
power supply is disconnected.
• Be careful not to use cables that seem worn or old.

EN - English - Instruction manual
6 MNVCMBA_1817_EN
• Installation category (also called Overvoltage
Category) species the level of mains voltage
surges that the equipment will be subjected to.
The category depends upon the location of the
equipment, and on any surge voltage protection
provided. Equipment in an industrial environment,
directly connected to major feeders/short branch
circuits, is subjected to Installation Category
III. If this is the case, a reduction to Installation
Category II is required. This can be achieved by
use of an insulating transformer with an earthed
screen between primary and secondary windings,
or by tting UL listed Surge Protective Devices
(SPDs) from live to neutral and from neutral to
earth. Listed SPDs shall be designed for repeated
limiting of transient voltage surges and the
following rated operation conditions: Type 2 (SPDs
permanently connected to the power network and
intended for installation on the load side of the
service equipment); Nominal Discharge Current
(In) 20kA min. For example: FERRAZ SHAWMUT,
STT2240SPG-CN, STT2BL240SPG-CN rated
120Vac/240Vac, (In=20kA). Maximum distance
between installation and reduction is 5m.
• Never, under any circumstances, make any
changes or connections that are not shown in
this handbook. Improper use of the appliance
can cause serious hazards, risking the safety of
personnel and of the installation.
• Use only original spare parts. Non-original spare
parts could cause re, electrical discharge or other
hazards. Any change that is not expressly approved
by the manufacturer will invalidate both the
guarantee and certication.
• Before proceeding with installation, check the
supplied material to make sure it corresponds
to the order specication by examining the
identication labels (4.2 Product marking, page 8).
• Read these instructions.
• Keep these instructions.
• Heed all warnings.
• Follow all instructions.
• Use adequate personal protective equipment
during installation.
• To comply with the main supply voltage dips and
short interruption requirements, use a suitable
Uninterruptable Power Supply (UPS) to power the
unit.
• A power disconnect device must be included
in the electrical installation, and it must be very
quickly recognizable and operated if needed.
• Connect the device to a power source
corresponding to the indications given on the
marking label. Before proceeding with installation
make sure that the power line is properly isolated.
• Equipment intended for installation in Restricted
Access Location performed by specialist technical
sta.

Instruction manual - English - EN
7MNVCMBA_1817_EN
4 Identication
4.1 Product description and type
designation
MAXIMUS MBA is much more than just a simple
explosion-proof junction box. In fact, it is a
communication box equipped with everything
needed to connect one or more IP or analogue
cameras.
MAXIMUS MBA has been designed to integrate and
work exclusively with the MAXIMUS range of Videotec
products.
MAXIMUS MBA provides a local, low-voltage power
supply. It also allows a Fast Ethernet connection,
thanks to an integrated Ethernet switch equipped
with 3 RJ45 ports and an SFP port for bre optic
connection. The type of SFP module can be chosen
according to the installation requirements. The
internal spaces are designed to make access to cables
easier, and to increase user-friendliness when it
comes to connection procedures. The internal board
also oers the bypass for analog video signals and for
all the inputs and outputs which are present in the
Videotec MAXIMUS products.
MAXIMUS MBA is the complete and competitive
solution for professional installation of the Videotec
MAXIMUS range of explosion-proof products.
MAXIMUS MBA has been designed to connect a PTZ
camera and its washing kit, or in alternative two xed
cameras and their washing kits. (Fig. 1, page7 and
Fig. 2, page7).
Main power supply
Videotec PTZ
Solenoid valve,
Videotec washing
system (WASEX)
Fig. 1
Main power supply
1° Solenoid valve,
Videotec washing
system (WASEX)
2° Solenoid valve,
Videotec washing
system (WASEX)
2° Videotec camera
1° Videotec
camera
Fig. 2

EN - English - Instruction manual
8 MNVCMBA_1817_EN
4.2 Product marking
4.2.1 Explosion-proof box plate
Consult the use instructions of the
explosion-proof box.
4.2.2 Videotec label
See the label attached to the product.
The label shows:
• Model identication code.
• Supply voltage (V).
• Frequency (Hz).
• Max current (A).
• Serial number.
5 Product coding
MBA CONFIGURATION OPTIONS
Input voltage Temperature class
MBA 1230Vac S 5 T5 -60°C/+80°C A
224Vac
6T6 -60°C/+60°C
3120Vac

Instruction manual - English - EN
9MNVCMBA_1817_EN
6 Preparing the product for
use
Consult the use instructions of the
explosion-proof box.
Any change that is not expressly approved
by the manufacturer will invalidate the
guarantee.
6.1 Safety precautions before use
Consult the use instructions of the
explosion-proof box.
Make connections and tests in the
laboratory before carrying out installation
on site. Use appropriate tools for the
purpose.
Before doing any technical work on the
device, disconnect the power supply.
6.2 Unpacking
When the product is delivered, make sure that the
package is intact and that there are no signs that it
has been dropped or scratched.
If there are obvious signs of damage, contact the
supplier immediately.
When returning a faulty product we recommend
using the original packaging for shipping.
Keep the packaging in case you need to send the
product for repairs.
6.3 Contents
Check the contents to make sure they correspond
with the list of materials as below:
• Explosion-proof communication box in aluminium
• Explosion-proof box manufacturer's manual
• Instruction manual
6.4 Safely disposing of packaging
material
The packaging material can all be recycled. The
installer technician will be responsible for separating
the material for disposal, and in any case for
compliance with the legislation in force where the
device is to be used.
7 Installation
Consult the use instructions of the
explosion-proof box.
CAUTION! Device installation and
maintaining must be performed by
specialist technical sta only.
Make sure that the installation complies
with local regulations and specications.
7.1 Range of use
Consult the use instructions of the
explosion-proof box.
Operating temperature: from -40°C (-40°F) up to
+70°C (158°F).
7.2 Communication box
fastening
Consult the use instructions of the
explosion-proof box.
7.3 Connection of the cables
7.3.1 Product opening
To open the explosion-proof box, consult
the relevant use instructions.
Once the cover is removed, you can access the
connectors board equipped with removable
connectors and a switchboard with three RJ45
connectors and a SFP slot.

EN - English - Instruction manual
10 MNVCMBA_1817_EN
7.3.2 Cable entry
Consult the use instructions of the
explosion-proof box.
The box is equipped with holes to host the cable
glands or conduit. Consult the technical drawings for
their type, quantity and arrangement (14 Technical
drawings, page18).
7.3.3 Connector board description
BOARD DESCRIPTION
Connector Function Terminals - Nominal
section of the cables
used
J1 Main power supply line from 0.2mm² (24AWG)
up to 2.5mm² (13AWG)
F1 Main power supply fuse –
J6 Power supply output
24Vac
from 0.2mm² (24AWG)
up to 2.5mm² (13AWG)
J7 Power supply output
24Vac
from 0.2mm² (24AWG)
up to 2.5mm² (13AWG)
J8 24Vac output and auxi-
liary contact input
from 0.2mm² (24AWG)
up to 2.5mm² (13AWG)
J9 24Vac output and auxi-
liary contact input
from 0.2mm² (24AWG)
up to 2.5mm² (13AWG)
F2 24Vac power supply
output fuse
–
J22 BNC (Video 1) IN –
J23 BNC (Video 1) OUT –
J26 BNC (Video 2) IN –
J27 BNC (Video 2) OUT –
J24 8-pole connector IN from 0.2mm² (24AWG)
up to 1.0mm² (17AWG)
J25 8-pole connector OUT from 0.2mm² (24AWG)
up to 1.0mm² (17AWG)
J10 10-pole connector IN from 0.2mm² (24AWG)
up to 1.0mm² (17AWG)
J11 10-pole connector OUT from 0.2mm² (24AWG)
up to 1.0mm² (17AWG)
Tab. 1
Stripping length of conductors: 5mm
(0.19in).
J1
F1
J22-
J23
J26-J27 J25
J24
J10
F2
J11
J6
J9
J7
J8
Fig. 3

Instruction manual - English - EN
11MNVCMBA_1817_EN
7.3.4 Connection of the main power
supply line
When commencing installation make sure
that the specications for the power supply
for the installation correspond with those
required by the device.
CAUTION! TNV-1 installation type. The
installation is type TNV-1, do not connect it
to SELV circuits.
Safety earth connections, use suitable
cable sections: from 16AWG up to 13AWG
(2.5mm²).
The safety grounding conductor must have
a cross-section equal to or greater than that
of the power supply cables.
Earth cable should be about 10mm longer
than the other two, so that it will not be
disconnected accidentally if pulled.
All the cables must comply with IEC 60332-
1-2 and IEC 60332-1-3.
Depending on the version, the device can be
provided with dierent power supply voltages. The
power supply voltage is indicated on the product
identication label. (4.2 Product marking, page8).
Connect the power supply cables to connector
J1, following the polarity indicated on the screen
printing. Connect the safety ground cable to
connector J1 following the instructions on the screen
printing (7.3.3 Connector board description, page10).
CONNECTION OF THE POWER SUPPLY LINE
Colour Terminals
Power supply 24Vac
Dened by the installer N (Neutral)
Dened by the installer L (Phase)
Yellow/Green
Power supply 230Vac
Blue N (Neutral)
Brown L (Phase)
Yellow/Green
Power supply 120Vac
Blue N (Neutral)
Brown L (Phase)
Yellow/Green
Tab. 2

EN - English - Instruction manual
12 MNVCMBA_1817_EN
7.3.5 Products connection to the 24Vac
power supply line
Earth cable should be about 10mm longer
than the other two, so that it will not be
disconnected accidentally if pulled.
Check the requirements of the related VIDEOTEC
products (Tab. 5, page14).
From the connectors’board, take out the removable
male connectors J6, J7 and connect the 24Vac power
supply cables of the devices following the polarity
indicated on the screen printing (7.3.3 Connector
board description, page10).
CONNECTION OF THE 24VAC OUTPUT POWER SUPPLY LINE
Colour Terminals
Power supply 24Vac
Dened by the installer ~
Yellow/Green
Tab. 3
7.3.6 Multi-polar connectors (relays,
alarms, serial line)
Consult the installation manuals of the devices to
connect for specications on relays, alarms and
serial line. Use the multi-polar connectors, on the
connectors’board, to transfer signals from the devices
to the main system considering the connector J24,
replica J25 and J10 replica J11 (7.3.3 Connector board
description, page10).
7.3.7 BNC connectors (analogue video)
Consult the installation manuals of the devices to
connect for specications on analogue video signals.
Use the BNC connectors, on the connectors’ board, to
transfer signals from the devices to the main system
considering the connector J22, replica J23 and J26
replica J27 (7.3.3 Connector board description, page
10).
7.3.8 Connectors for the wash system
Consult the installation manuals of the wash system
to connect for the relevant specications. Connect
the contacts of the command relay of PTZ or the
cameras and the power supply cables (24Vac) of the
wash system to the connectors J8 and J9 following
the screen printing on the board (7.3.3 Connector
board description, page10).
L
J8
N
RL
Solenoid valve,
Videotec washing
system (WASEX)
Videotec PTZ
Fig. 4

Instruction manual - English - EN
13MNVCMBA_1817_EN
7.3.9 Description of the switch board
DESCRIPTION OF THE SWITCH BOARD
Connector Function
J1 RJ45 Ethernet Connector
J3 RJ45 Ethernet Connector
J5 RJ45 Ethernet Connector
J2 SFP connector
Tab. 4
J1 J3 J5
J2
J1
J2
J3
J5
Fig. 5
Operation of the RJ45 connectors is signalled by the
relevant two LEDs:
• Yellow LED: LED on, indicates the connection is
enabled.
• Green LED: LED on, indicates the connection speed
is 100Mbps; LED o, indicates the connection
speed is 10Mbps.
Operation of the SFP connector is signalled by the
relevant three LEDs:
• Yellow LED: LED on, indicates the connector is
enabled.
• Red LED: LED on, indicates the bre optic signal
has pinged; LED o, indicates the bre optic signal
has not pinged.
• Green LED: LED on, indicates the connection speed
is 100Mbps.
7.3.10 Ethernet cables connection
The switch board can manage up to 3 RJ45 ports and
is equipped with a slot for SFP modules.
Connect the Ethernet cables to ports RJ45 J1, J3, J5.
Insert the SFP module (not supplied) in Slot J2 of the
switch board (7.3.9 Description of the switch board,
page13).
Consult the SFP module manual for the relevant
specications.
VIDEOTEC has tested various types of SFP
modules. For further information please
contact the VIDEOTEC service center.
Consult the installation manuals of the devices to
connect for specications on the Ethernet cable.

EN - English - Instruction manual
14 MNVCMBA_1817_EN
7.3.11 Related products
Check the requirements of the device to connect in
the relevant instructions manual.
RELATED PRODUCTS
Product Description
MAXIMUS MHX Ex-proof stainless steel housing
MAXIMUS MHXT Ex-proof stainless steel housing for thermal
cameras
MAXIMUS MMX Ex-proof FULL HD camera in a compact
design
MAXIMUS MPX Ex-proof positioning unit with built-in Day/
Night camera
MAXIMUS MPXT Ex-proof positioning unit with built-in Day/
Night and thermal cameras
MAXIMUS MPXHD Ex-proof positioning unit with built-in FULL
HD camera
MAXIMUS MPX
DELUX
Explosion-proof positioning unit with FULL
HD camera with Delux technology
MAXIMUS MVX Ex-proof Day/Night camera
MAXIMUS MVXT Ex-proof thermal camera
MAXIMUS MVXHD Ex-proof FULL HD camera
MAXIMUS MVX
DELUX
FULL HD explosion-proof camera with
Delux technology
WASEX Washer pump with ex-proof solenoid valve
Tab. 5
7.4 Ground connection
National standards must be complied with
for grounding.
To ground the box, consult the relevant use
instructions.
CAUTION! The equipment must be
connected to a ground conductor (safety
ground). This connection must only
be performed through the power line
connector (J1, 7.3.3 Connector board
description, page10).
7.5 Product closure
To close the explosion-proof box, consult
the relevant use instructions.

Instruction manual - English - EN
15MNVCMBA_1817_EN
8 Instructions for safe
operation
8.1 Safe operation
Before proceeding with the following
operations, make sure that the mains
voltage is correct.
Consult the use instructions of the
explosion-proof box.
8.1.1 Commissioning
Fully and carefully read the user manual and the
use instructions of the explosion-proof box before
proceeding with operation.
Test system operation for positive results before
closing the product and allowing the presence of a
dangerous atmosphere.
8.1.2 Safety rules
Before powering the system, install an overload
protection device in the electrical equipment for the
building.
Make sure that all precautions for personal safety
have been taken.
Installation of the electrical equipment must comply
with the local legislation in force.
9 Switching on
The unit is switched on by connecting the power
supply.
To switch o the unit disconnect the power.
10 Maintenance
The manufacturer declines all liability for
damage to any of the apparatus mentioned
in this handbook, when resulting from
tampering, use of non-original spare parts,
installation, maintenance and repairs
performed by non-authorised, non-skilled
personnel.
Whenever replacing the parts as indicated,
always use VIDEOTEC original spare parts
and meticulously follow the maintenance
instructions supplied with every spare parts
kit.
For all maintenance interventions, we
recommend you return the product to the
laboratory that will perform all required
operations.

EN - English - Instruction manual
16 MNVCMBA_1817_EN
10.1 Routine maintenance (to be
performed on a periodic basis)
Consult the use instructions of the
explosion-proof box.
Frequency will depend on the type of
environment in which the product is used.
10.1.1 Inspecting the cables
The cables should not show signs of damage or wear,
which could generate hazardous situations. In this
case extraordinary maintenance is necessary.
10.1.2 Fuses replacement
Maintenance must be performed with the
power supply disconnected and the circuit-
breaker open.
CAUTION! For continued protection against
risk of re, replace only with same type and
rating of fuse. Fuses must be replaced only
by service personnel.
If necessary, the connector board's fuses can be
replaced (Fig. 3, page10). The new fuses must comply
with the directions given in the table.
FUSES REPLACEMENT
Supply voltage Fuse (F1) Fuse (F2)
24Vac, 50/60Hz T 8A H 250V 5x20 T 8A H 250V 5x20
120Vac, 50/60Hz T 4A H 250V 5x20 T 8A H 250V 5x20
230Vac, 50/60Hz T 4A H 250V 5x20 T 8A H 250V 5x20
Tab. 6
11 Information on disposal
and recycling
The European Directive 2012/19/EU on Waste
Electrical and Electronic Equipment (WEEE) mandates
that these devices should not be disposed of in the
normal ow of municipal solid waste, but they should
be collected separately in order to optimize the
recovery stream and recycling of the materials that
they contain and to reduce the impact on human
health and the environment due to the presence of
potentially hazardous substances.
The symbol of the crossed out bin is marked
on all products to remember this.
The waste may be delivered to appropriate collection
centers, or may be delivered free of charge to the
distributor where you purchased the equipment at
the time of purchase of a new equivalent or without
obligation to a new purchase for equipment with size
smaller than 25cm (9.8in).
For more information on proper disposal of these
devices, you can contact the responsible public
service.
12 Troubleshooting
Contact the VIDEOTEC technical service
or an authorized support centre if the
problems listed below persist or you have
any other issues that are not described
here.
When contacting VIDEOTEC for assistance please
provide the serial number and the identication code
of the model.
PROBLEM The product does not go on.
CAUSE Wiring error, blown fuse.
SOLUTION Make sure the connections are
correct. Check the continuity of
the fuses and replace them with
the indicated models should they
fail.

Instruction manual - English - EN
17MNVCMBA_1817_EN
13 Technical data
13.2 Mechanical
Copper-free marine grade aluminum construction
RAL 9006 epoxy exterior painting
Fastening holes: 4 x Ø13mm (0.5in)
Cable gland holes: 4 x 3/4" NPT + 2 x 1/2" NPT
External dimensions (WxHxL): 305x228x340mm
(12x9x13.5in)
Unit weight: 16.3kg (36lb)
13.3 Electrical
MBA works with all MAXIMUS products in 24Vac.
Maximum power output: 120W
Supply voltage/Current consumption:
• 230Vac, 1A max, 50/60Hz
• 120Vac, 2A max, 50/60Hz
• 24Vac, 8A max, 50/60Hz
Possible system congurations:
• up to 1 PTZ + 1 wash system
• up to 2 Cameras + 2 wash systems
13.4 Network
4 Ethernet switch channels:
3 RJ45 ports
• Ethernet connection: 10BASE-T/100BASE-T
1 SFP port (SMALL FORM FACTOR PLUGGABLE)
• Ethernet connection:100BASE-FX
• Supply voltage: 3.3V
• Standard: compliant MSA
• Laser: Class 1, complies with EN60825-1
13.5 Video
2 bypass for analog video signals with BNC
connectors
13.6 I/O interface
2 bypass for I / O signals with multi-pin connectors
13.7 Environment
For installation indoors and outdoors
Installation temperature: from -60°C (-76°F) up to
+80°C (+176°F) (T5) or +60°C (140°F) (T6)
Operating temperature: from -40°C (-40°F) up to
+70°C (158°F)
Relative humidity: from 10% up to 95%
13.8 Certications
ATEX (EN 60079-0:2013/A11:2013, EN 60079-1:2007,
EN 60079-31:2009)
IECEX (IEC 60079-0 Ed.6, IEC 60079-1 Ed.6, IEC 60079-
31 Ed.2)
Electrical safety (CE): EN60950-1, IEC60950-1
Electromagnetic compatibility:
• CE: EN50130-4, EN55032 (Class B), EN61000-6-4
• FCC: Part 15 (Class B)
• ICES-003 (Class B)
IP protection degree (EN60529):
• IP66

14 Technical drawings
The measurements indicated are expressed in millimetres.
228
340
308
270
305
62.5
A A
A B B
A
107.5 70 70 57.5
75
120
80 70 92.5
13
A= 3/4”NPT
B= 1/2”NPT
HOLES
Fig. 6MAXIMUS MBA.
Headquarters Italy Videotec S.p.A.
Via Friuli, 6 - I-36015 Schio (VI) - Italy
Tel. +39 0445 697411 - Fax +39 0445 697414
Email: [email protected]
France Videotec France SARL
Immeuble Le Montreal, 19bis Avenue du Québec, ZA de Courtaboeuf
91140 Villebon sur Yvette - France
Tel. +33 1 60491816 - Fax +33 1 69284736
Email: info.fr@videotec.com
Asia Pacic Videotec (HK) Ltd
Flat 8, 19/F. On Dak Industrial Building, No. 2-6 Wah Sing Street
Kwai Chung, New Territories - Hong Kong
Tel. +852 2333 0601 - Fax +852 2311 0026
Email: info.hk@videotec.com
Americas Videotec Security, Inc.
Gateway Industrial Park, 35 Gateway Drive, Suite 100
Plattsburgh, NY 12901 - U.S.A.
Tel. +1 518 825 0020 - Fax +1 518 825 0022
Email: info.usa@videotec.com
www.videotec.com
Table of contents
Languages:
Other Videotec Security System manuals