manuals.online logo
Brands
  1. Home
  2. •
  3. Brands
  4. •
  5. Viessmann
  6. •
  7. Controllers
  8. •
  9. Viessmann VITOTRONIC 200 User manual

Viessmann VITOTRONIC 200 User manual

5728 014 v1.0 09/2010
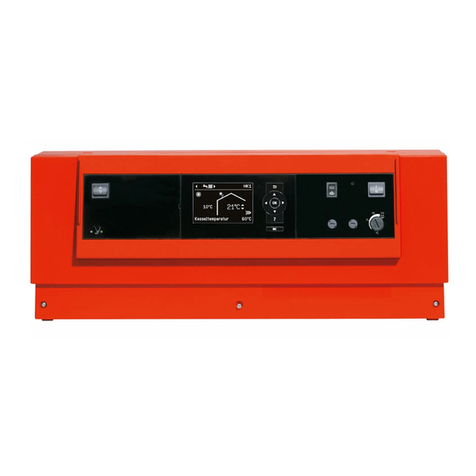
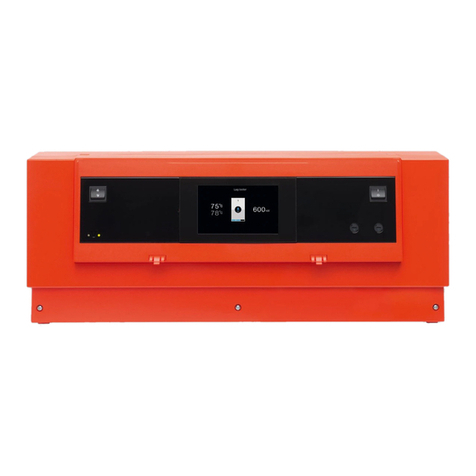
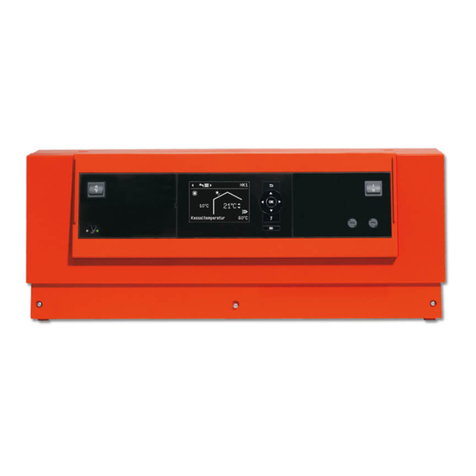
Vitodens 200, Programming unit with Vitotronic 200, H01 on-board control.
VITOTRONIC 200®
Quick Start Programming Guide
Product may not appear exactly as shown.
for use with the Operating, Installation and Service Instructions
B C DE
F
G
H
IJ
K
L
M
N
O
PQ
A
ATime program for central heating
BTime program for DHW heating
CHoliday program
DInformation
EStandby mode
FDHW only
GCentral Heating and DHW
HNormal room temperature adjust
IEnergy saving mode ON/OFF
JParty mode ON/OFF
KFactory default factory setting
LConfirmation button
M
Adjustment buttons
NDHW temperature
OEmissions test function (heating contractors only)
PReduced room temperature
QTime/Date
Vitodens 200, Vitotronic 200, H01 Control Lay-out
1
1
NOTE: The control will display the boiler temperature when not in the programming or fault mode.
1
2
These symbols are not displayed continuously, but appear according to system type and operating status.
Display Symbols
Risk of frost
Central heating with normal room temperature
Central heating with reduced room temperature
Frost protection heating circuit pump ON
Normal heating circuit pump ON
Reduced heating circuit pump ON
Mixing valve open
Mixing valve closed
Manual override operation
Automatic operation
DHW heating enabled
DHW pump ON, DHW heating enabled
DHW heating via solar heating system
Burner ON
Time adjustment display
Emissions test ON
Fault indicator
1Heating circuit number
Scanning hours run, scanning number of
burner starts and consumption
NOTE: To adjust the display contrast, press and hold and use the buttons for the desired setting.
1
10
1Press for approximately 2 seconds.
2Select the acknowledged fault code message
with the buttons.
3Correct each fault as per the troubleshooting
section of the Installation and Service Instructions.
4After each fault is removed, press the reset to
acknowledge.
Troubleshooting
1Press and simultaneously for approximately
2 seconds.
2Select the saved fault code message with the
buttons.
3All fault codes can be deleted by pressing .
Delete? Yes, will appear, press for yes or no.
4To finish the fault scan, press .
Calling up acknowledged fault messages Retrieving fault codes from the fault history
NOTE: For additional information on troubleshooting and operating status, refer to the Operating,
Installation and Service Instructions supplied with the system.
1
11 Additional Functions
Heating Time Program
Domestic Hot Water Time Program
DHW Recirculation Pump Time Program
Holiday Program
Heating Curve Slope (located in Coding 2)
Heating Curve Shift (located in Coding 2)
Standby Mode
Domestic Hot Water Only
Party Mode
Energy Saving Mode
!Participant Check (only on LON devices)
!Boiler Sequence (on Cascade Control)
!Cascade Control
!Starting/Stopping DHW Heating Only
!Starting/Shutting Down Heating System Only
!Starting/Stopping DHW and Heating System
!Remote Controls
NOTE: For information to access the additional
functions, refer to the Operating, Installation and
Service Instructions supplied with the system.
1
9Coding Level 1 and 2
Calling up coding level 1 (Basic programming)
1Press and simultaneously for approximately
2 seconds.
2Select the required coding address with the
buttons, the address will flash, confirm
with , the value will flash.
3To change the value, press the buttons,
once complete confirm with .
4Call up additional coding addresses with the
buttons.
5To exit coding level 1, press and
simultaneously for approximately 1 second.
Calling up coding level 2 (Detailed programming)
1Press and simultaneously for approximately
2 seconds and confirm with .
2Select the required coding address with the
buttons, the address will flash, confirm
with , the value will flash.
3To change the value, press the buttons,
once complete confirm with .
4Call up additional coding addresses with the
buttons.
5To exit coding level 2, press and
simultaneously for approximately 1 second.
1Press and simultaneously for approximately
2 seconds .
2Press factory default button and confirm ‘Base
setting? Yes’ with .
Resetting the codes to the factory setting NOTE: Coding level 2 contains all of coding level 1
programming information.
NOTE: For coding level 1 and coding level 2 listings,
refer to the Installation and Service
Instructions supplied with the system.
5728 014 v1.0
Technical information subject to change without notice.
1
6Changing the Temperature Display from oC to oF
To change the temperature display from
oC to oF call up coding level 2.
1Press and buttons simultaneously
and hold for 2 seconds and confirm with .
2The display will show 00: 0 (00: is flashing).
3Press the buttons to set 00: to 88:
4Press , (only the 0 will be flashing).
5Press the buttons to set 0 to 1.
6Press , (Accepted will be displayed).
7To exit coding level 2, press and
buttons simultaneously for 1 second.
NOTE: Displays are changed at remote locations.
1
7
2
3
4
5
6
1
7Setting Room, Reduced Room and DHW Temperatures
If the system is equipped with remote control units,
temperature settings for room, reduced room and
DHW must be set at each control location.
1For normal room temperature (default 68oF)
press the button, then rotate dial
to select the desired temperature.
2For reduced room temperature (default 37oF)
press the button, then press the
buttons to select the desired temperature.
3Press , to set the temperature.
4For DHW temperature (default 122oF) press
the button, then press the
buttons to select the desired temperature.
5Press , to set the temperature.
1
1
2
2
3
4
4
5
Fault Messages on Initial Start-up
1
3
1Press the information button .
2Read and record the fault code and number.
3Press . Quittieren? Ja (acknowledge?
yes) is displayed.
4To acknowledge the fault, press .
NOTE: Faults can be corrected after all the
programming and coding is completed.
1
2
3
4
On initial start-up the word Storung (fault) may
appear on the display. If no fault appears, go to
‘Setting the Time and Date’, otherwise follow
the steps below:
..
1
8Relay Test, Temperature Sensor Check and Operating Conditions Scan
Relay test
1Press and simultaneously for
approximately 2 seconds.
2Select the relay outputs with the
buttons.
3To exit the test mode, press .
Temp. sensor check and operating conditions scan
4Press the button.
5Select the heating circuit if requested and
press the button again.
6Scan required information with the
buttons.
7To exit, press .
NOTE: For additional information and value lists for relay tests, temperature sensor checks and operating
conditions, refer to the Operating, Installation and Service Instructions supplied with the system.
1
1
2
3
4
5
6
7
Setting the Time and Date
1
4
On initial start-up the word Uhrzeit (time) will
come up flashing. To set the time and date
follow the steps below:
1Press the buttons to set to the
current time (24:00 format).
2To confirm the time, press . The
date will come up flashing.
3Press the buttons to set to the
current date (DD/MM/YY format).
4To confirm the date, press .
24:00
4
3
2
1
NOTE: If the system is equipped with remote
control units (Vitocontrol 300), the time
and date may be set at each remote location. To change the time and date at any time and at any
location, press the button and follow the same procedure as shown above.
1
5Changing Language
The control language defaults to German,
to set the control language to English follow
the steps below:
1
2
3
4
1Press the information button .
2Heizkreis Wahlen (select heating circuit)
may be displayed, if requested select the
heating circuit and press again.
3Press buttons and scroll through the
menu until English is displayed on the
screen.
4Press the button to accept.
NOTE: If the system is equipped with remote
control units (Vitocontrol 300), the
language must be set at each remote location.
Following the same procedure as shown and change to the desired language.
..
5728 014 v1.0
5728 014 v1.0

Other manuals for VITOTRONIC 200

15

Other Viessmann Controllers manuals

Viessmann 5547 User manual

Viessmann

Viessmann 5547 User manual

Viessmann Commander 5300 User manual

Viessmann

Viessmann Commander 5300 User manual

Viessmann 4551 User manual

Viessmann

Viessmann 4551 User manual

Viessmann VITOTROL 100 UTDB User manual

Viessmann

Viessmann VITOTROL 100 UTDB User manual

Viessmann 5223 User manual

Viessmann

Viessmann 5223 User manual

Viessmann vitotronic 200-h Quick guide

Viessmann

Viessmann vitotronic 200-h Quick guide

Viessmann Fillstation medium User manual

Viessmann

Viessmann Fillstation medium User manual

Viessmann VITOTRONIC 100 Dimensions and installation guide

Viessmann

Viessmann VITOTRONIC 100 Dimensions and installation guide

Viessmann 5216 User manual

Viessmann

Viessmann 5216 User manual

Viessmann VITOTRONIC 300 User manual

Viessmann

Viessmann VITOTRONIC 300 User manual

Viessmann 5220 User manual

Viessmann

Viessmann 5220 User manual

Viessmann KW10 Dimensions and installation guide

Viessmann

Viessmann KW10 Dimensions and installation guide

Viessmann Vitotronic 11 CC1E Quick guide

Viessmann

Viessmann Vitotronic 11 CC1E Quick guide

Viessmann KW10 Guide

Viessmann

Viessmann KW10 Guide

Viessmann 4100 H0 User manual

Viessmann

Viessmann 4100 H0 User manual

Viessmann VITOTRONIC 300 Quick guide

Viessmann

Viessmann VITOTRONIC 300 Quick guide

Viessmann Commander 5300 User manual

Viessmann

Viessmann Commander 5300 User manual

Viessmann 5268 User manual

Viessmann

Viessmann 5268 User manual

Viessmann VITOCONNECT OPTO2 User manual

Viessmann

Viessmann VITOCONNECT OPTO2 User manual

Viessmann Vitotronic 300 Series User manual

Viessmann

Viessmann Vitotronic 300 Series User manual

Viessmann 5268 Servocontrol User manual

Viessmann

Viessmann 5268 Servocontrol User manual

Viessmann 5232 User manual

Viessmann

Viessmann 5232 User manual

Viessmann VITOTRONIC 300 User manual

Viessmann

Viessmann VITOTRONIC 300 User manual

Viessmann PLC VITOCAL 350-HT PRO Operating instructions

Viessmann

Viessmann PLC VITOCAL 350-HT PRO Operating instructions

Popular Controllers manuals by other brands

TMS LC-18-OD-4CH-48V user manual

TMS

TMS LC-18-OD-4CH-48V user manual

Mikster INDU-50 user manual

Mikster

Mikster INDU-50 user manual

IMS IM483H Plus quick reference

IMS

IMS IM483H Plus quick reference

HGLRC Forward 45A 4in1 MINI ESC manual

HGLRC

HGLRC Forward 45A 4in1 MINI ESC manual

Meech 233v3 manual

Meech

Meech 233v3 manual

Burkert 3005 quick start

Burkert

Burkert 3005 quick start

Lumascape ZDClink owner's manual

Lumascape

Lumascape ZDClink owner's manual

ACO MultiControl Mono manual

ACO

ACO MultiControl Mono manual

Festo SPC200 Series manual

Festo

Festo SPC200 Series manual

Sunforce 60031 manual 

Sunforce

Sunforce 60031 manual 

LOGICDATA COMPACT user guide

LOGICDATA

LOGICDATA COMPACT user guide

Vivo DESK-V120EB instruction manual

Vivo

Vivo DESK-V120EB instruction manual

B&G ZC1 user guide

B&G

B&G ZC1 user guide

iLiving Thermospeed ILG8SFST owner's manual

iLiving

iLiving Thermospeed ILG8SFST owner's manual

PXM PX746-L0 user manual

PXM

PXM PX746-L0 user manual

LEGRAND radiant WZ3RCB40 installation instructions

LEGRAND

LEGRAND radiant WZ3RCB40 installation instructions

Acard ARS-2057 user manual

Acard

Acard ARS-2057 user manual

Synapse DIM10-087-06-FW installation guide

Synapse

Synapse DIM10-087-06-FW installation guide

manuals.online logo
manuals.online logoBrands
  • About & Mission
  • Contact us
  • Privacy Policy
  • Terms and Conditions

Copyright 2025 Manuals.Online. All Rights Reserved.