manuals.online logo
Brands
  1. Home
  2. •
  3. Brands
  4. •
  5. Vimar
  6. •
  7. Intercom System
  8. •
  9. Vimar 930C User manual

Vimar 930C User manual

Istruzioni - Instruction sheet - Notice technique
Anleitungen - Instrucciones - Instruções
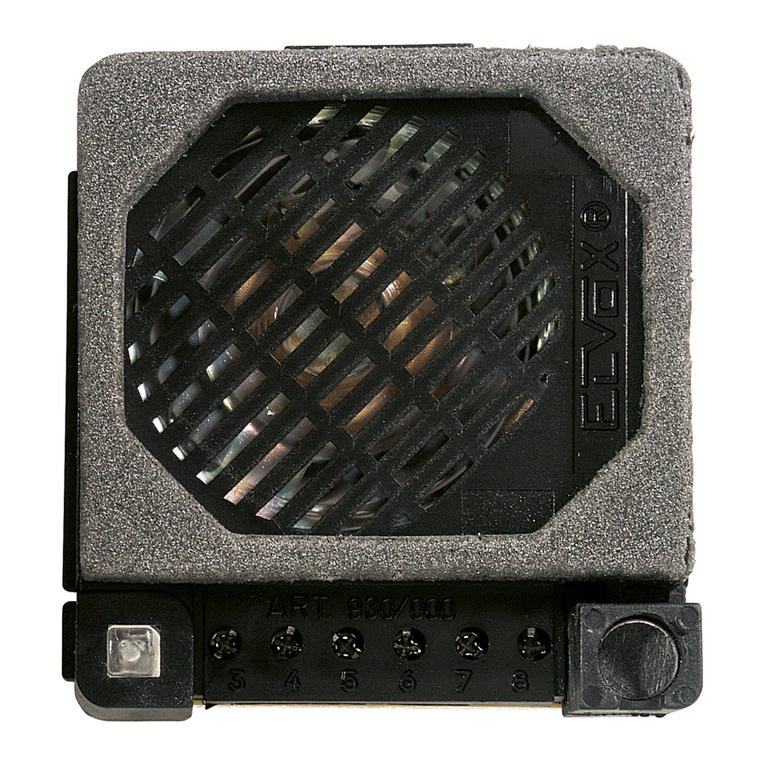
Art. 930C
Posto esterno - Speech unit - Poste externe
Außenstelle - Aparato externo - Posto externo
Viale Vicenza, 14
36063 Marostica VI - Italy
www.vimar.com
49401008A0 01 2003
Altoparlante
Loudspeaker
Haut-parleur
Lautsprecher
Altavoz
Altifalante
Microfono
Microphone
Kikrofon
Micrófono
Microfone
Morsettiera
Terminal block
Boîte de raccordement
Klemmenleiste
Regleta conexiones
Bornes
Volume esterno
External volume
Volume externe
Externlautstärke
Volumen externo
Volume externo
Volume interno
Internal volume
Volume interne
Internlautstärke
Volumen interno
Volume interno
All’interno sollevare il microtelefono ed incominciare a
parlare. Premere l’apposito pulsante per azionare la ser-
ratura elettrica.
Answer calls by lifting phone handset. Operate electric lock
by pushing appropriate button.
Pour répondre aux appels soulever le combiné du poste
d’appartement, la gâche électrique est commandée par le
bouton approprié.
Nach Abheben des Haustelefons ist die
Gesprächsverbindung hergestellt. Türöffner durch ent-
sprechende Taste betätigen.
En el interior, levantar el microteléfono y comenzar a
hablar. Apretar el pulsador apropiado para accionar la
cerradura eléctrica.
No interior levantar o telefone e começar a falar. Premir o
botão respectivo para accionar o trinco eléctrico.
Eseguire la chiamata dall’esterno premendo il pulsante
della targa e parlare a mani libere dopo aver ricevuto la
risposta.
Make calls by pushing door panel button and talk hands-
free after receiving reply.
Appeler en appuyant sur le bouton-poussoir de la plaque
de rue et parler mains libres après avoir reçu la réponse.
Herstellung des Rufes durch Betätigung des Klingeltasters.
LLamar desde el exterior apretando el pulsador de la
tarjeta y hablar a manos libres después de haber recibido
la respuesta.
Efectuar a chamada do exterior premindo o botão da boto-
neira e falar a mãos livres depois de receber a resposta.
USO - OPERATION - MODE D’EMPLOI - FUNKTION - UTILIZAÇÃO
C
2
1
3
4
D
B
120
PRI
*
G
E
CHCH S231CH
A
4
B
6
2
1
3
5
7
5
CH
4
B
6
2
1
3
5
7
CH
CHS231
7
8
4/5
3
1
2
6
7
8
4/5
3
1
2
6
Eseguire il collegamento seguendo attentamente lo schema. Con
distanze fino a 100m. usare cavo da 1 mm2.
Carry out wiring by following drawing carefully. Use 1 mm2cable up to
100m. distance.
Faire la connexion en suivant soigneusement le schéma. Employer du
câble de 1 mm2jusqu’à 100m. de distance.
Führen Sie die Verdrahtung gemäß der folgenden Zeichung sorgfältig aus.
Verwenden Sie Drahte mit 1mm
2
. Querschnitt bis max. 100m. Entfernung.
Ejecutar la instalación siguiendo atentamente el esquema. Con
distancias hasta 100m. usar cable de 1mm2.
Executar a ligação seguindo atentamente o esquema. Para distancias
até 100m. utilizar condutores de 1 mm2.
N. si579
SCHEMA COLLEGAMENTO PORTIERE ELETTRICO CON POSTO ESTERNO ART. 930C
WIRING DIAGRAM FOR ELECTRIC DOOR-OPENER SYSTEM WITH SPEECH UNIT ART. 930C
SCHÉMA DES CONNEXIONS PORTIER ÉLECTRIQUE AVEC POSTE EXTERNE ART. 930C
SCHALTPLAN FÜR TÜRSPRECHANLAGE MIT AUSSENSTELLE ART. 930C
ESQUEMA DE CONEXIONADO PORTERO ELÉCTRICO CON APARATO EXTERNO ART. 930C
ESQUEMA DE LIGAÇÃO DO PORTEIRO ELÉCTRICO COM POSTO EXTERNO ART. 930C
CITOFONO
PHONE - POSTE
HAUSTELEFON
TELÉFONO
TELEFONE
Art. 620R
Rete-Mains
Netz-Reséau
Red-Rede
CITOFONO
PHONE - POSTE
HAUSTELEFON
TELÉFONO
TELEFONE
Art. 620R
CITOFONO
PHONE - POSTE
HAUSTELEFON
TELÉFONO
TELEFONE
Art. 8870
CITOFONO
PHONE - POSTE
HAUSTELEFON
TELÉFONO
TELEFONE
Art. 8870
F
A- Audio entrance panel
B- Additionalpush-button for lock
C- 12v a.c. electric lock
D- Speech unitart. 930C
E- Entrance panel call push-button
F- Transformer Art. M832
G- Name-tag lighting led
A- Botoneira audio
B- Botão supplementar para trinco
C- Trinco électrico 12V c.c.
D- Posto externo Art. 930C
E- Botão chamada botoneira
F- Transformador Art. M832
G- LED iluminação cartão portanomes.
A- Targa audio
B- Pulsante supplementare per serratura
C- Serratura elettrica 12V c.c.
D- Posto esterno Art. 930C
E- Pulsante chiamata targa
F- Trasformatore Art. M832
G- LED illuminazione cartellino portanomi
A- Plaque de rue audio
B- Bouton-poussoir supplémentaire pour gâche
C- Gâche électrique 12V c.c.
D- Poste externe Art. 930C
E- Poussoir appel plaque de rue
F- Transformateur Art. M832
G- LED éclairage étiquette porte-nom
A- Placa audio
B- Pulsador suplementario para cerradura
C- Cerradura électrica 12V c.c.
D- Aparato externo Art. 930C
E- Pulsador llamada placa
F- Transformador Art. M832
G- LED iluminación tarjeta portanombres
A- Audio-Klingeltableau
B- Zusatztaste für Türschloss
C- 12V A.C. elektrisches Türschloss
D- Sprechstelle Art. 930C
E- Klingeltableauruftaste
F- Transformator Art. M832
G- Namenschildbelechtung-LED
*
*
Cavo di alimentazione separato dagli altri conduttori e da collegare
direttamente ai morsetti 3 e 4 del posto esterno Art. 930C.
Supply voltage cable separated from the remaining conductors and to
connect directly to terminals 3 and 4 of speech unit type 930C.
Cable d’alimentation séparé des autres conducteurs et à raccorder
directement aux bornes 3 et 4 du poste externe Art. 930C.
Versorgungsspannungskabel von den anderen Leitungen getrennt
und zum direkten Anschluss an Klemmen 3 und 4 der Sprechstelle
Art. 930C.
Cable de alimentación separado de los otros conductores y para
conectar directamente a los bornes 3 y 4 del aparato externo Art. 930C.
Cabo de alimentação separado dos outros conductores e para ligar
directamente aos terminais 3 e 4 do posto externo Art. 930C.
Per aprire il citofono
To open interphone
Pour ouvrir le poste
Öffnen des Haustelefone
Para abrir el teléfono
Para abrir o telefono
INSTALLAZIONE DEL CITOFONO - PHONE INSTALLATION - INSTALLATION DU POSTE
HAUSTELEFON INSTALLIERUNG - INSTALACION DO TELÉFONO - INSTALAÇÃO DO TELEFONE
8870
A
B
Per aprire il citofono
To open interphone
Pour ouvrir le poste
Öffnen des Haustelefone
Para abrir el teléfono
Para abrir o telefono
INSTALLAZIONE DEL CITOFONO - PHONE INSTALLATION - INSTALLATION DU POSTE
HAUSTELEFON INSTALLIERUNG - INSTALACION DO TELÉFONO- INSTALAÇÃO DO TELEFONE
PETRARCA
1 Fissare la vite superiore (A) nella scatola incasso (o
tassello) lasciando sporgere la testa della vite per 2-3
mm.
2 Agganciare il citofono alla vite superiore utilizzando
l’apposito foro posteriore accostandolo alla parete e
tirandolo verso il basso in direzione delle frecce.
3 Completare il fissaggio con la vite inferiore (B) nell’appo-
sito foro.
1 Partially fasten upper screw “A” to back box leaving it
out for 2 or 3 mm.
2 Hook interphone to upper screw “A” in rear hole and pull
it downwards. 1 - 2
3 Complete mounting with lower screw “B” in prepared
hole.
1 Fixer la vis supérieure (A) dans la boîte de raccorde-
ment (ou vis à goujon) en laissant saillir la tête de la vis
pour 2-3 mm.
2 Accrocher le poste à la vis supérieure en utilisant le trou
approprié, le rapprocher à la paroi et en le tirant vers le
bas en suivant la direction des flèches.
3 Completer le montage avec la vis inférieure (B) fixée
dans le trou approprié.
1 Die obere Schraube (A) am Unterputz-Gehäuse (oder
Dübel) befestigen. Die Schraube 2-3 mm vorstehen
lassen.
2 Das Haustelefon an der Schraube (A) durch das rück-
seitige Lock zuhacken und es nach unten laut dem
Zeichen ziehen.
3 Die untere Schraube (B) im bestimmten Loch befesti-
gen.
1 Fijar el tornillo superior (A) en la caja empotrada (o taco)
dejando la cabeza del tornillo unos 2-3 mm fuera.
2 Enganchar el teléfono al tornillo superior utilizando el
correspondiente orificio posterior; acercarlo a la pared y
tirar de él hacia abajo en la dirección ilustradas por las
flechas.
3 Completar la fijación con el tornillo inferior (B) en el
correspondiente orificio.
1 Fixar o parafuso superior (A) no local de encaixe dei-
xando a cabeça do parafuso saliente 2 a 3 mm.
2 Prender o telefone ao parafuso superior, utilizando o
furo posterior adequado, aproximando-o da parede e
puxando-o para baixo na direcção da seta.
3 Completar a fixação com o parafuso (B) no furo apro-
priado.
1 Aprire il citofono, separare il coperchio dal fondo
facendo forza nel lato inferiore del coperchio.
2 Fissare il citofono su scatola rettangolare verticale
incassata per mezzo delle 2 viti in dotazione, oppure
fissare le viti con i tasselli ad espansione ø5. Collegare
i fili ai morsetti.
Si consiglia di fissare la parte superiore del citofono ad
un’altezza di m. 1,5 circa dal pavimento.
1 Ouvrir le poste d’appartement, séparer le couvercle du
fond en faisant force du côté inférieur du couvercle.
2 Fixer le portier sur un boîtier rectangulaire vertical
encastré avec les 2 vis livrées en standard ou fixer
ces vis sur des chevilles à expansion ø5. Effectuer les
raccordements aux bornes. On conseille de murer le
côté supérieur à environ 1,5 m du niveau du sol.
1 Abrir el teléfono, separar la tapa del fondo apretando en
el lado inferior de la tapa.
2 Fijar el teléfono en la caja rectangular vertical empotrada
mediante los 2 tornillos en dotación, o fijar los tornillos
con los tacos de expansión ø5. Conectar los hilos a los
bornes. Se aconseja fijar la parte superior del teléfono a
aproximadamente 1,5 m del suelo.
1 Open the interphone, split the cover from the bottom
making pressure on the lower side of the cover.
2 Fix the interphone to the rectangular, vertical flush-
mounted back-box with the 2 screws supplied, or fix the
screws with the ø5 expansion plugs. Connect the wires
to the terminals. You are advised to fix the top of the
interphone at a height of about 1.5 m above the ground.
1 Das Haustelefon öffnen, den Deckel vom Boden
entfernen durch Drücken auf die Unterseite des Deckels.
2 Das Haustelefon mit den zwei mitgelieferten Schrauben
am rechteckigen senkrechten UP-Gehäuse oder
mit Spreizdübeln ø5 befestigen. Die Leiter an die
Klemmenleiste anschließen. Es wird empfohlen, die
obere Kante des Türsprechgeräts etwa 1,5 m über dem
Fußboden zu montieren.
1 Abrir o telefone, afastar a tampa do fundo fazendo força
no lado inferior da tampa.
2 Fixar a base do telefone na caixa rectangular vertical
anteriormente encastrada através de 2 parafusos
fornecidos ou aparafusar os mesmos nas buchas de
ø5. Efectuar as ligações nos bornes.
Aconselha-se a fixar a parte superior do telefone a uma
altura de 1,5 m do pavimento.
Serie-series-série
3300
Serie-series-série
1200
Serie-series-série
8100
Serie-series-série
Patavium
Questa operazione permette di aumentare notevolmente il
volume ed evitare l’effetto LARSEN (fischio).
Per spostare il microfono eseguire quanto segue:
- Aprire lo sportello con la freccia dell’Art. 930C (Fig. 1)
- Sfilare il microfono dalla sue sede.
- Alloggiare il microfono nell’apposita sede ricavata nella
parte bassa a destra nella targa. Vedi nella Fig. 2, esempi
per inserimento del microfono in una targa.
Fig. 2
Fig. 1
Dieser Vorgang ermöglicht die Läutstärke beachtlich zu
erhöhen und den LARSEN Effekt (Pfeifen) zu vermeiden.
Um das Mikrofon zu entfernen gehen Sie folgendermaßen
vor:
- Die Abdeckung mit dem Pfeil des Arts. 930C öffnen (Abb.
1).
- Das Mikrofon aus seiner Halterung nehmen
Das Mikrofon in den entsprechenden Sitz rechts auf der
Unterseite des Klingeltableaus einsetzen. Siehe Beispiel in
Abb. 2: Einstecken des Mikrofons in einem Klingeltableau.
Serie-series-série
8000
Allontanamento del microfono dall’altoparlante - Averting the microphone from the loudspeaker
Éloignement du microphone dès haut-parleur - Entfernung des Mikrofons vom Lautsprecher
Alejamiento del micrófono del altavoz - Afastamento do microfone do altifalante
This operation allows you to increase the volume consider-
ably and avoid the LARSEN effect (whistle).
To displace the microphone operate as it follows:
- Open the door with the arrow of Art. 930C (Fig. 1)
- Remove the microphone from its seat.
Fit the microphone in proper seat on the right lower side of
the panel. See Fig. 2, examples for insertion of microphone
in an entrance panel.
Cette opération permet d’augmenter notablement le volume
et d’éviter l’effet LARSEN (sifflement). Pour déplacer le
microphone effectuer les opérations suivantes :
- Ouvrir la porte avec la flèche de l’Art. 930C (Fig. 1).
- Défiler le microphone de son siège.
Loger le microphone dans le siège approprié dans la partie
inférieure à droite de la plaque de rue, voir Fig. 2: exemples
d’insertion du microphone dans une plaque de rue.
Esta operación permite aumentar considerablemente el
volumen y evitar el efecto LARSEN (silbido).
Par desplazar el micrófono efectuar las siguients opera-
ciones:
- Abrir la puerta con la flecha del Art. 930C (Fig. 1).
- Desfilar el micrófono de su asiento.
Montar el micrófono en el asiento apropiado a la derecha
en la parte inferior de la placa. Ver Fig. 2, ejemplos para la
inserción del micrófono en una placa.
Esta operação permite aumentar notávelmente o volume e
de evitar o efeito LARSEN (silbo).
Para afastar o microfone proceder do seguinte modo:
- Abrir a tampa do Art. 930C (Fig. 1), de acordo com a seta.
- Retirar o microfone da sua sede.
Montar o microfone na sede apropriada à direita na parte
inferior da botoneira. Ver Fig. 2, exemplos para a inserção
do microfone na botoneira.
O alimentador deverá ser colocado num local seco e ao
abrigo do pó e de fontes de calor. Para facilitar os contro-
los e as afinações, certifique-se de que o local é de fácil
acesso. Fixe o alimentador à parede com as buchas for-
necidas ou inserindo-o num quadro próprio com calha DIN
tipo omega. Antes de proceder à ligação certifique-se, com
um tester normal, de que os condutores não estão inter-
rompidos ou em curto-circuito. Para uma maior segurança
do utilizador, todos os aparelhos funcionam em baixa ten-
são e estão separados da rede por um transformador de
alto isolamento. Em todo o caso, convém colocar entre a
rede de alimentação e o aparelho um interruptor magneto-
térmico de capacidade adequada.
El alimentador tiene que ser colocado en un lugar seco y
lejos del polvo y fuentes de calor. Al fin de facilitar contro-
les y puestas a punto el lugar de la instalación debe ser
fácilmente accesible.
Fijar a la pared el alimentador por medio de tacos en dota-
ción o insertándolo en un cuadro apropiado con barra DIN
a omega. Ante de proceder al conexionado asegurarse,
por medio de un normal tester, que los conductores no
sean interrumpidos o en cortocircuito Para una mayor
seguridad del usuario, todas los aparatos funcionan a baja
tensión y son separados de la red por un transformador a
alta isolación. Es oportuno de todas maneras poner entre
la red de alimentación y el aparato un interruptor magne-
totérmico de portada adecuada.
Das Netzgerät ist an einem trockenen und staubfreien
Ort unter Vermeidung der Nähe von Wärmequellen
zu installieren. Zur Erleichterung von Kontrollen und
Einstellungen sollte der Aufstellungsort gut zugänglich
sein. Das Netzgerät mit den beigepackten Dübeln an
der Wand befestigen oder in einen Verteiler mit DIN-
Omegaschiene einsetzen. Vor dem Anschluß an das
Stromnetz mit einem Testgerät sicherstellen, daß die
Leiter nicht unterbrochen oder kurzgeschlossen sind. Zur
größeren Sicherheit des Anwenders werden alle Apparate
mit Niederspannung betrieben und durch einen stark
isolierenden Transformator vom Stromnetz getrennt. In
jedem Fall sollte jedoch zwischen dem Stromnetz und der
Anlage ein Fehlerstromschutzschalter von angemessener
Stromfestigkeit installiert werden.
The power supply must be installed in a dry place away
from direct heat or dust. Ensure easy access for inspec-
tion and maintenance. Secure the unit to the wall with the
anchor bolts provided or insert it into a rack with a omega
DIN bar. Before connecting the unit use a tester to make
sure that the cables are not broken or short-circuited. For
user safety, the equipment operates at a low voltage and
is separated from the mains by a high-insulation trans-
former. We recommend installation of an overload cutout
of appropriate capacity between the mains and the unit.
L’alimentatore andrà posto in un luogo asciutto e lontano
da polvere e fonti di calore. Al fine di facilitare controlli e
messe a punto curare che il luogo sia facilmente accessi-
bile. Fissare a parete l’alimentatore mediante i tasselli in
dotazione o inserendolo in apposito quadro con barra DIN
ad omega. Prima di procedere al collegamento accertarsi
mediante un normale tester che i conduttori non siano
interrotti o in corto circuito. Per una maggiore sicurezza
dell’utente, tutte le apparecchiature funzionano in bassa
tensione e sono separate dalla rete da un trasformatore
ad alto isolamento. È opportuno comunque interporre tra
la rete di alimentazione e l’apparecchio un interruttore
magnetotermico di portata adeguata.
INSTALLAZIONE DEGLI ALIMENTATORI - POWER SUPPLY INSTALLATION
INSTALLATION DES ALIMENTATIONS - INSTALLATION DER NETZGERÄTE
INSTALACIÓN DE LOS ALIMENTADORES - INSTALACIÓN DE LOS ALIMENTADORES
L’alimentation devra être placée dans un endroit sec, à
l’abri de la poussière et loin de toute source de chaleur.
Afin de faciliter les contrôles et les mises au point, choisir
un endroit facilement accessible. Fixer l’alimentation
sur le mur à l’aide des chevilles fournies de série ou en
l’insérant dans un tableau approprié avec barre DIN en
oméga. Avant d’effectuer le raccordement, s’assurer, à
l’aide d’un testeur normal, que les conducteurs ne sont
pas interrompus ou en court-circuit. Pour une plus grande
sécurité de l’utilisateur, tous les appareils fonctionnent en
basse tension et sont séparés du réseau par un trans-
formateur à haute isolation. Il convient dans tous les cas
d’interposer un disjoncteur magnétothermique d’une por-
tée appropriée entre le réseau d’alimentation et l’appareil.
Product is according to CE mark and directives:
- EC Directives 2004/108/CE and following norms.
- EC Directives 2006/95/CE (73/23/CEE).
Power supply units constitute SELV sources in compliance with the
requirements stipulated in Article 411.1.2.2 of CEI standard 64-8
(ed. 2003).
Production is subject to costant surveillance:
I prodotti sono conformi al marchio CE e alle direttive:
- Alla direttiva europea 2004/108/CE e successive.
- Alla direttiva europea 2006/95/CE (73/23 CEE).
Gli alimentatori costituiscono una sorgente SELV rispettando i
requisiti previsti dall’articolo 411.1.2.2 della norma CEI 64-8 (ed.
2003).
La produzione dell’alimentatore è sotto costante sorveglianza:
DVEDVE
Die Produkte sind konform zu den CE-Markenzeichen
und Richtlinien:
- zu den EG-Richtlinien 2004/108/CE und Folgenden
- zu den EG-Richtlinien 2006/95/CE (73/23/CEE).
Die Netzgeräte, die die vom Art. 411.1.2.2 der CEI 64-8 (Ausgabe
2003) Norm Vorgesehene Fähigkeiten respektieren, eine SELV
Quelle bestellen.
Production is subject to costant surveillance:
DVE
Les produits sont conformes à la marque CE et à les
directives :
- À la directive européenne 2004/108/CE et suivantes.
- À la directive européenne 2006/95/CE (73/23/CEE).
Les alimentations constituent une source SELV et respectent les
qualités requises par l’article 411.1.2.2 de la norme CEI 64-8 (ed.
2003).
La production est sous constante surveillance:
DVE
Los productos son conformes a la marca CE y a las
normas :
- A las normas europeas 2004/108/CE y siguientes
- A las normas europeas 2006/95/CE (73/23/CEE).
Los alimentadores constituyen una fuente SELV y respectan los
requisitos previstos por el artículo 411.1.2.2 de la norma CEI 64-8
(ed. 2003).
A fabrico do alimentador está sob a constante vigilância de:
DVE
Os produtos estão em conformidade com a marca CE
e as directivas:
- Directiva europeia 2004/108/CE e seguintes.
- Directiva europeia 2006/95/CE (73/23/CEE).
Os alimentadores constituem uma fonte SELV e cumprem os
requisitos previstos no artigo 411.1.2.2 da norma CEI 64-8 (ed.
2003).
A produção do alimentador está sob vigilância constante:
DVE
Il manuale istruzioni è scaricabile dal sito www.vimar.com
Regole di installazione
L’installazione deve essere effettuata da personale qualicato con l’osservanza delle
disposizioni regolanti l’installazione del materiale elettrico in vigore nel paese dove i prodotti
sono installati.
Conformità normativa
Direttiva EMC
Norme EN 61000-6-1 e EN 61000-6-3.
Regolamento REACh (UE) n. 1907/2006 – art.33. Il prodotto potrebbe contenere tracce di
piombo.
The instruction manual is downloadable from the site www.vimar.com
Installation rules
Installation should be carried out by qualied personnel in compliance with the current
regulations regarding the installation of electrical equipment in the country where the products
are installed.
Conformity
EMC directive
Standards EN 61000-6-1 and EN 61000-6-3.
REACH (EU) Regulation no. 1907/2006 – Art.33. The product may contain traces of lead.
Télécharger le manuel d’instructions sur le site www.vimar.com
Règles d’installation
L’installation doit etre conee a des personnel qualies et executee conformement aux
dispositions qui regissent l’installation du materiel electrique en vigueur dans le pays concerne.
Conformité aux normes
Directive EMC
Normes EN 61000-6-1 et EN 61000-6-3.
Règlement REACH (EU) n° 1907/2006 – art.33. Le produit pourrait contenir des traces de
plomb.
Die Bedienungsanleitung ist auf der Website www.vimar.com zum Download verfügbar
Installationsvorschriften
Die Installation muss durch Fachpersonal gema. den im Anwendungsland des Gerats
geltenden Vorschriften zur Installation elektrischen Materials erfolgen.
Normkonformität
EMC-Richtlinie
Normen DIN EN 61000-6-1 und EN 61000-6-3.
REACH-Verordnung (EG) Nr. 1907/2006 – Art.33. Das Erzeugnis kann Spuren von Blei
enthalten.
El manual de instrucciones se puede descargar en la página web www.vimar.com
Normas de instalación
La instalacion debe ser realizada por personal cualicado cumpliendo con las disposiciones en
vigor que regulan el montaje del material electrico en el pais donde se instalen los productos.
Conformidad normativa
Directiva EMC
Normas EN 61000-6-1 y EN 61000-6-3.
Reglamento REACH (UE) n. 1907/2006 – art.33. El producto puede contener trazas de
plomo.
É possível descarregar o manual de instruções no site www.vimar.com
Regras de instalação
A instalação deve ser efetuada por pessoal qualicado de acordo com as disposições que
regulam a instalação de material elétrico, vigentes no País em que os produtos são instalados.
Cumprimento de regulamentação
Directiva EMC
Normas EN 61000-6-1 e EN 61000-6-3.
Regulamento REACh (UE) n.º 1907/2006 – art.33. O produto poderá conter vestígios de
chumbo.
RAEE - Informazione agli utilizzatori
Il simbolo del cassonetto barrato riportato sull’apparecchiatura o sulla sua
confezione indica che il prodotto alla ne della propria vita utile deve essere
raccolto separatamente dagli altri riuti. L’utente dovrà, pertanto, conferire
l’apparecchiatura giunta a ne vita agli idonei centri comunali di raccolta
differenziata dei riuti elettrotecnici ed elettronici. In alternativa alla gestione
autonoma, è possibile consegnare gratuitamente l’apparecchiatura che si desidera smaltire
al distributore, al momento dell’acquisto di una nuova apparecchiatura di tipo equivalente.
Presso i distributori di prodotti elettronici con supercie di vendita di almeno 400 m2è inoltre
possibile consegnare gratuitamente, senza obbligo di acquisto, i prodotti elettronici da smaltire
con dimensioni inferiori a 25 cm. L’adeguata raccolta differenziata per l’avvio successivo
dell’apparecchiatura dismessa al riciclaggio, al trattamento e allo smaltimento ambientalmente
compatibile contribuisce ad evitare possibili effetti negativi sull’ambiente e sulla salute e
favorisce il reimpiego e/o riciclo dei materiali di cui è composta l’apparecchiatura.
WEEE - Information for users
If the crossed-out bin symbol appears on the equipment or packaging, this means
the product must not be included with other general waste at the end of its working
life. The user must take the worn product to a sorted waste center, or return it to
the retailer when purchasing a new one. Products for disposal can be consigned
free of charge (without any new purchase obligation) to retailers with a sales area
of at least 400m2, if they measure less than 25cm. An efcient sorted waste collection for the
environmentally friendly disposal of the used device, or its subsequent recycling, helps avoid
the potential negative effects on the environment and people’s health, and encourages the
re-use and/or recycling of the construction materials.
DEEE - Informations pour les utilisateurs
Le symbole du caisson barré, là où il est reporté sur l’appareil ou l’emballage,
indique que le produit en n de vie doit être collecté séparément des autres
déchets. Au terme de la durée de vie du produit, l’utilisateur devra se charger de
le remettre à un centre de collecte séparée ou bien au revendeur lors de l’achat
d’un nouveau produit. Il est possible de remettre gratuitement, sans obligation
d’achat, les produits à éliminer de dimensions inférieures à 25 cm aux revendeurs dont la
surface de vente est d’au moins 400 m2. La collecte séparée appropriée pour l’envoi successif
de l’appareil en n de vie au recyclage, au traitement et à l’élimination dans le respect de
l’environnement contribue à éviter les effets négatifs sur l’environnement et sur la santé et
favorise le réemploi et/ou le recyclage des matériaux dont l’appareil est composé.
Elektro- und Elektronik-Altgeräte - Informationen für die
Nutzer
Das Symbol der durchgestrichenen Mülltonne auf dem Gerät oder seiner
Verpackung weist darauf hin, dass das Produkt am Ende seiner Nutzungsdauer
getrennt von den anderen Abfällen zu entsorgen ist. Nach Ende der Nutzungsdauer
obliegt es dem Nutzer, das Produkt in einer geeigneten Sammelstelle für getrennte
Müllentsorgung zu deponieren oder es dem Händler bei Ankauf eines neuen Produkts
zu übergeben. Bei Händlern mit einer Verkaufsäche von mindestens 400 m2können
zu entsorgende Produkte mit Abmessungen unter 25 cm kostenlos und ohne Kaufzwang
abgegeben werden. Die angemessene Mülltrennung für das dem Recycling, der Behandlung
und der umweltverträglichen Entsorgung zugeführten Gerätes trägt dazu bei, mögliche
negative Auswirkungen auf die Umwelt und die Gesundheit zu vermeiden und begünstigt den
Wiedereinsatz und/oder das Recyceln der Materialien, aus denen das Gerat besteht.
RAEE - Información para los usuarios
El símbolo del contenedor tachado, cuando se indica en el aparato o en el envase,
indica que el producto, al nal de su vida útil, se debe recoger separado de
los demás residuos. Al nal del uso, el usuario deberá encargarse de llevar el
producto a un centro de recogida selectiva adecuado o devolvérselo al vendedor
con ocasión de la compra de un nuevo producto. En las tiendas con una supercie
de venta de al menos 400 m2, es posible entregar gratuitamente, sin obligación de compra,
los productos que se deben eliminar con unas dimensiones inferiores a 25 cm. La recogida
selectiva adecuada para proceder posteriormente al reciclaje, al tratamiento y a la eliminación
del aparato de manera compatible con el medio ambiente contribuye a evitar posibles efectos
negativos en el medio ambiente y en la salud y favorece la reutilización y/o el reciclaje de los
materiales de los que se compone el aparato.
REEE - Informação dos utilizadores
O símbolo do contentor de lixo barrado com uma cruz, axado no equipamento ou
na embalagem, indica que o produto, no m da sua vida útil, deve ser recolhido
separadamente dos outros resíduos. No nal da utilização, o utilizador deverá
encarregar-se de entregar o produto num centro de recolha seletiva adequado
ou de devolvê-lo ao revendedor no ato da aquisição de um novo produto.
Nas superfícies de venda com, pelo menos, 400 m2, é possível entregar gratuitamente,
sem obrigação de compra, os produtos a eliminar com dimensão inferior a 25 cm. A
adequada recolha diferenciada para dar início à reciclagem, ao tratamento e à eliminação
ambientalmente compatível, contribui para evitar possíveis efeitos negativos ao ambiente e
à saúde e favorece a reutilização e/ou reciclagem dos materiais que constituem o aparelho.
Other Vimar Intercom System manuals

Vimar ELVOX TAB 40507 User manual

Vimar

Vimar ELVOX TAB 40507 User manual

Vimar ELVOX 69RH/L Assembly instructions

Vimar

Vimar ELVOX 69RH/L Assembly instructions

Vimar 7549 User manual

Vimar

Vimar 7549 User manual

Vimar ELVOX 8878/A User manual

Vimar

Vimar ELVOX 8878/A User manual

Vimar ELVOX K40980 User manual

Vimar

Vimar ELVOX K40980 User manual

Vimar ELVOX 40980.M User manual

Vimar

Vimar ELVOX 40980.M User manual

Vimar Elvox 7200 Series User manual

Vimar

Vimar Elvox 7200 Series User manual

Vimar 887B User manual

Vimar

Vimar 887B User manual

Vimar ELVOX TAB Series User manual

Vimar

Vimar ELVOX TAB Series User manual

Vimar Elvox 6901 Assembly instructions

Vimar

Vimar Elvox 6901 Assembly instructions

Vimar ELVOX TVCC User manual

Vimar

Vimar ELVOX TVCC User manual

Vimar ELVOX Tab 5S UP Instruction sheet

Vimar

Vimar ELVOX Tab 5S UP Instruction sheet

Vimar Elvox 40515 User guide

Vimar

Vimar Elvox 40515 User guide

Vimar ELVOX Videocitofonia 1100 User manual

Vimar

Vimar ELVOX Videocitofonia 1100 User manual

Vimar ELVOX 930D User manual

Vimar

Vimar ELVOX 930D User manual

Vimar ELVOX 69RH Assembly instructions

Vimar

Vimar ELVOX 69RH Assembly instructions

Vimar Elvox 885B Assembly instructions

Vimar

Vimar Elvox 885B Assembly instructions

Vimar ELVOX 2550/301 Assembly instructions

Vimar

Vimar ELVOX 2550/301 Assembly instructions

Vimar Elvox 0554 User manual

Vimar

Vimar Elvox 0554 User manual

Vimar Elvox PATAVIUM Series Assembly instructions

Vimar

Vimar Elvox PATAVIUM Series Assembly instructions

Vimar 01420 User manual

Vimar

Vimar 01420 User manual

Vimar ELVOX 41018 User manual

Vimar

Vimar ELVOX 41018 User manual

Vimar ELVOX 0930/000.04 User manual

Vimar

Vimar ELVOX 0930/000.04 User manual

Vimar ELVOX PIXEL UP 40414.S User manual

Vimar

Vimar ELVOX PIXEL UP 40414.S User manual

Popular Intercom System manuals by other brands

Comelit 3460EA Technical manual

Comelit

Comelit 3460EA Technical manual

SVT -IP System B user manual

SVT

SVT -IP System B user manual

Auta NEOS DIGITAL 751925 manual

Auta

Auta NEOS DIGITAL 751925 manual

Akuvox E18 Installation

Akuvox

Akuvox E18 Installation

PACH & COMPANY AeGIS 4000 Installation and programming manual

PACH & COMPANY

PACH & COMPANY AeGIS 4000 Installation and programming manual

Bticino elkesan V16M user manual

Bticino

Bticino elkesan V16M user manual

Commax dpv-4be user manual

Commax

Commax dpv-4be user manual

Aiphone TAR-3 Installation & operation manual

Aiphone

Aiphone TAR-3 Installation & operation manual

Intrasonic Technology V304 installation manual

Intrasonic Technology

Intrasonic Technology V304 installation manual

Blyss 3663602632108 manual

Blyss

Blyss 3663602632108 manual

Well PIGEON Installation and operating manual

Well

Well PIGEON Installation and operating manual

RTS KP-98 operation instruction

RTS

RTS KP-98 operation instruction

Freund FE-IPDS-28A Admin guide

Freund

Freund FE-IPDS-28A Admin guide

PROEL DBE108E user manual

PROEL

PROEL DBE108E user manual

Bell System bellview Installation & operation manual

Bell System

Bell System bellview Installation & operation manual

Flightcom iNova user guide

Flightcom

Flightcom iNova user guide

Toa EXES 6000 CP-63 Installation handbook

Toa

Toa EXES 6000 CP-63 Installation handbook

Tellur TLL331511 installation guide

Tellur

Tellur TLL331511 installation guide

manuals.online logo
manuals.online logoBrands
  • About & Mission
  • Contact us
  • Privacy Policy
  • Terms and Conditions

Copyright 2025 Manuals.Online. All Rights Reserved.