VIRTUFIT Row 1000 User manual

Row 1000 Rowing Machine
User manual
EN
1
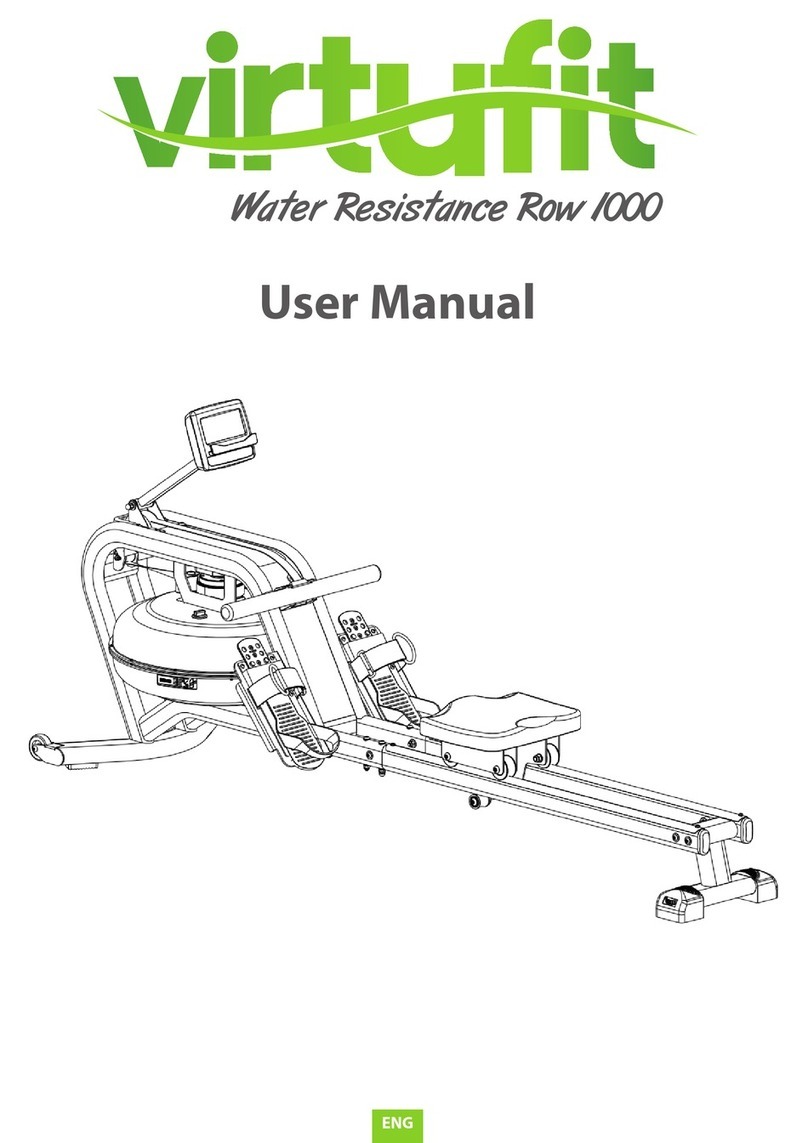
VirtuFit Water Resistance Row 1000
Water Resistance Row 1000
ENG
User Manual

VirtuFit Row 1000 Rowing Machine 2
EN
INHOUD
SAFETY INSTRUCTIONSSAFETY INSTRUCTIONS
CHECKLISTCHECKLIST
ASSEMBLY INSTRUCTIONSASSEMBLY INSTRUCTIONS
WATER TANKWATER TANK
ADJUSTMENT GUIDEADJUSTMENT GUIDE
MOVING AND STOREMOVING AND STORE
MAINTENANCEMAINTENANCE
TROUBLE SHOOTINGTROUBLE SHOOTING
CONTROL PANELCONTROL PANEL
EXPLODED DRAWINGEXPLODED DRAWING
PARTS LISTPARTS LIST
TRAINGING INSTRUCTIONSTRAINGING INSTRUCTIONS
3 - 4
5 - 6
7 - 9
10
11
12
13 - 14
15
16 - 20
21
22 - 23
24

VirtuFit Row 1000 Rowing Machine
3EN
– It is important to read this entire manual before assembling and using the device. Safe and
effective use can only be achieved if the device is assembled, maintained and used properly.
It is your responsibility to ensure that all users of the device are informed of all warnings and
precautions.
– Before starting any exercise program, you should consult your doctor to determine if you have
any medical or physical conditions that could put your health and safety at risk, or prevent you
from using the device properly. Your doctor’s advice is essential if you are taking medication
that affects your heart rate, blood pressure or cholesterol level.
– Be aware of your body’s signals. Incorrect or excessive exercise can damage your health. Stop
exercising if you experience any of the following symptoms: pain, tightness in your chest, irregular
heartbeat, extreme shortness of breath, lightheadedness, dizziness or feelings of nausea. If you do
experience any of these conditions you should consult your doctor before continuing with your
exercise program.
– Keep children and pets away from the device. The device is designed for adult use only.
– Use the device on a solid, flat level surface with a protective cover for your floor or carpet. To
ensure safety, the device should have at least 0.5 metres of free space all around it.
– Before using the device, check that the nuts and bolts are securely tightened.
– The safety of the device can only be maintained if it is regularly examined for damage and/or
wear and tear.
ATTENTION
WARNING
Before beginning any exercise program consult your physician. This is especially
important for people who are over 35 years old or who have pre-existing health
problems. Read all instructions before using any fitness equipment. Do not operate this
device without properly fitted guards, as the moving parts can present a risk of serious
injury if exposed.
SAFETY INSTRUCTIONS

VirtuFit Row 1000 Rowing Machine 4
EN
– Always use the device as indicated. If you find any defective components while assembling or
checking the device, or if you hear any unusual noises coming from the device during use,
stop immediately. Do not use the device until the problem has been rectified.
– Wear suitable clothing while using the device. Avoid wearing loose clothing that may get caught
in the device or that may restrict or prevent movement.
– The max user weight is 227 KGS. Braking ability is independent of speed.
– The device is not suitable for therapeutic use.
– Care must be taken when lifting or moving the device so as not to injure your back. Always use
proper lifting techniques and/or seek assistance if necessary.
– Please keep the space at least 1 to 2 meter at the end of base frame to escape any accidents!
– Place the device on a clean and flat surface. Do not place the device on a thick carpet.
– The device is for indoor use and not for outdoor use to prevent damage. Keep the storage location
dry, clean and flat. It is forbidden to use the device for purposes other than training.
– Only use the machine in an environment with an ambient temperature between 10 °C and 35 °C.
Only store the device at an ambient temperature between 5 °C and 45 °C.
Warranty claim is excluded if the cause of the defect is the result of:
– Maintenance assembly and repair work not carried out by an official dealer.
– In the event of improper use, neglect and / or poor maintenance.
– Failure to maintain the device in accordance with the manufacturer’s instructions (see the enclosed
manual).
SAFETY INSTRUCTIONS

VirtuFit Row 1000 Rowing Machine
5EN
CHECKLIST
TOOLKIT
When you open the carton, and you will find the below parts in the carton:
ENG 4
VirtuFit Water Resistance Row 1000
CHECKLIST
No. 1 No. 38 No. 51
No. 3 L/R No. 2
No. Description QTY
1 Main frame 1
2 Rear Stabilizer 1
3 L/R Slide rail 2
38 Seat 1
51 Computer 1
#DESCRIPION QTY
1Main Frame 1
2Rear Stabilizer 1
3 L/R Slide Rail 2
38 Saddle 1
51 Console 1

VirtuFit Row 1000 Rowing Machine 6
EN
CHECKLIST
TOOLKIT
ENG 5
VirtuFit Water Resistance Row 1000
CHECKLIST
TOOL KIT
#57 - M8*45 - 6 pcs
#61 - M8*75 - 4 pcs
#71 - M8 - 8 pcs #89 - S5 - 1 pc
#90 - S13-17 - 1 pc
#95 - M8 - 6 pcs
#94 - M8 - 6 pcs
#68 - OD20*ID8.5*1.5 - 12 pcs
#58 - M8*15 - 4 pcs

VirtuFit Row 1000 Rowing Machine
7EN
STEP 1
ENG 6
VirtuFit Water Resistance Row 1000
ASSEMBLY INSTRUCTIONS
Open the box and remove all parts from the packaging and place them on the oor.
Missing parts: If you think you are missing certain parts in your package, carefully check the styrofoa and
the treadmill. Some parts (bolts, screws, etc.) are already attached to / in the treadmill.
Error message: Make sure that all cables are carefully attached. The aluminum legs are very sensitive and
should remain straight. Do you get an error message after mounting your rowing machine? Then you
should bend these copper feet straight again, this may cause the error message to disappear.
Allen bolts: Make sure that the Allen key ts securely into the bolt before you apply force to the key. In
this way you prevent the head of the socket head from being turned.
STEP 1
- Turn over the Slide Rail (3), the Rear Stabilizer (2) and the seat (38) as above picture;
- Install the slide rail (3 L/R) into the seat;
- Attach the Rear Stabilizer (2) to the Slide Rail (3), tighten with 4 Washers (68) and 4 screws (57).
Missing parts: If you think you are missing certain parts in your package, carefully check the styrofoa and
the device. Some parts (bolts, screws, etc.) are already attached to/in the device.
Error message: Ensure that all cables are carefully attached. The aluminum legs are very sensitive and
must remain straight. Do you receive an error message after mounting your device? Then you have to
straighten these aluminum legs again, this may cause the error message to disappear.
Socket screws: The device contains socket screws, make sure that the allen key is firmly in the
bolt before you apply force to the key. In this way you prevent the head of the socket head screw from
being rotated.
• Turn over the Slide Rail (3), the Rear Stabilizer (2) and the seat (38) as above picture.
• Install the slide rail (3 L/R) into the seat.
• Attach the Rear Stabilizer (2) to the Slide Rail (3), tighten with 4 Washers (68) and 4 screws (57).
ASSEMBLY INSTRUCTIONS

VirtuFit Row 1000 Rowing Machine 8
EN
STEP 2
ENG 7
VirtuFit Water Resistance Row 1000
STEP 2
ASSEMBLY INSTRUCTIONS
- Attach the Slide Rail (3) to the Main Frame (1), tighten with 8 Arc Washers (71), 4 screws (61), 4 screws
(61), 4 spring washers (95) and 4 cap nut (94) 4 washers (68), 4 screws (57), 2 spring washers (95) and
2 cap nut (94).
ASSEMBLY INSTRUCTIONS
• Attach the Slide Rail (3) to the Main Frame (1), tighten with 8 Arc Washers (71), 4 screws (61), 4 screws
(61), 4 spring washers (95) and 4 cap nut (94) 4 washers (68), 4 screws (57), 2 spring washers (95) and
2 cap nut (94).

VirtuFit Row 1000 Rowing Machine
9EN
STEP 3
ENG 8
VirtuFit Water Resistance Row 1000
STEP 3
ASSEMBLY INSTRUCTIONS
- Connect the connection wire (85) to the sensor wire (84).
- Attach the Support for computer (51) to Main Frame, tighten with 4 Washers (68) and 4 screws (58).
- If the seat makes noise, the wheels under the seat should be slightly greased with the supplied
supplied silicone oil.
• Connect the connection wire (85) to the sensor wire (84).
• Attach the Support for computer (51) to Main Frame, tighten with 4 Washers (68) and 4 screws (58).
• If the seat makes noise, the wheels under the seat should be slightly greased with the supplied
supplied silicone oil.
ASSEMBLY INSTRUCTIONS

VirtuFit Row 1000 Rowing Machine 10
EN
FILL AND EMPTY THE TANK
WATER LEVEL
WATER TANK
• Remove the Fill Plug (49) from the Upper Tank Cover.
• To ll tank with water, refer to Fig. A. Insert the Funnel (92) into the tank, then use a cup or the
Pumping siphon (91) and a bucket to ll the tank. Use the water level gauge on the side of the tank
to measure desired water level in the tank.
• To empty the tank, refer to Fig. B. Place a bucket next to the rower, and use the Pumping siphon (91)
to pump out the water from the tank into the bucket.
• Insert the Fill Plug (49) into the Upper Tank Cover. Wipe excess water o of the frame.
NOTE!
•Fill the tank only with tap water. Add 1 water-purication tablet (1 packet is included.). Never use
pool chlorine or chlorine bleach. This will damage the tank and void the warranty.
•Add a water purication tablet every 6 months or as needed. If water remains cloudy, replace the
water in the tank.
•Water from the tank is not suitable for consumption. Dispose the water after pumping it out from
the tank.
• See Fig. A. The water level gauge is on the side of the tank.
The maximum ll is the top bar. Never ll it over this limit.
Filling the tank over this limit will void the warranty.
• The resistance depends on the water level in the tank. Water
level 1 is the lowest resistance. Level 6 is a higher resistance.
ENG 9
VirtuFit Water Resistance Row 1000
HOW TO FILL AND EMPTY THE TANK
1. Remove the Fill Plug (49) from the Upper Tank Cover;
2. To ll tank with water, refer to Fig. A. Insert the Funnel (92) into the tank, then use a cup or the Pumping
siphon (91) and a bucket to ll the tank. Use the water level gauge on the side of the tank to measure
desired water level in the tank.
3. To empty the tank, refer to Fig. B. Place a bucket next to the rower, and use the Pumping siphon (91) to
pump out the water from the tank into the bucket.
4. Insert the Fill Plug (49) into the Upper Tank Cover. Wipe excess water o of the frame.
NOTE:
– Fill the tank only with tap water. Add 1 water-purication tablet (1 packet is included.). Never use pool
chlorine or chlorine bleach. This will damage the tank and void the warranty.
– Add a water purication tablet every 6 months or as needed. If water remains cloudy, replace the water
in the tank.
– Water from the tank is not suitable for consumption. Dispose the water after pumping it out from the
tank.
– See Fig. A. The water level gauge is on the side of the tank. The maximum ll is the top bar. Never ll it
over this limit. Filling the tank over this limit will void the warranty.
– The resistance depends on the water level in the tank. Water level 1 is the lowest resistance. Level 6 is
a higher resistance.
WATER LEVEL

VirtuFit Row 1000 Rowing Machine
11 EN
ADJUSTMENT GUIDE
ENG 10
VirtuFit Water Resistance Row 1000
ADJUSTMENT GUIDE
PEDAL ADJUSTMENT
MOVING THE MACHINE
The pedal strap is adjustable and can be personalized to
t the user’s foot size.
To adjust the pedal strap, remove the Velcro end of the
strap from the mesh side by pulling it upward then to the
left.
Once removed, you may increase the opening of the
pedal strap by pulling the mesh end up and to the right.
To tighten, pull the Velcro end of the pedal strap upward
then to the right and down to secure it to the mesh side
of the strap.
To move the machine, lift up the rear stabilizer until the transportation wheels on the front stand touch the
ground. With the wheels on ground, you can transport the rower to the desired location with ease.
Caution: the seat moves.
ENG 11
VirtuFit Water Resistance Row 1000
ADJUSTMENT GUIDE
ADJUSTING THE BALANCE
Adjust the Rear Stabilizer of the machine if the machine is unbalanced during use.
Caution! Moving parts, such as the seat, could crush and cut your body. Please do not touch the slide
rail when using the machine.
PEDAL ADJUSTMENT
ADJUSTING THE BALANCE
The pedal strap is adjustable and can be
personalized to t the user’s foot size.
To adjust the pedal strap, remove the Velcro end of
the strap from the mesh side by pulling it upward
then to the left.
Once removed, you may increase the opening of
the pedal strap by pulling the mesh end up and
to the right.
To tighten, pull the Velcro end of the pedal strap
upward then to the right and down to secure it to
the mesh side of the strap.
Adjust the Rear Stabilizer of the machine if the
machine is unbalanced during use.
LET OP! Moving parts, such as the seat, could
crush and cut your body. Please do not touch the
slide rail when using the machine.

VirtuFit Row 1000 Rowing Machine 12
EN
NOTE! Store your machine in a dry area away from children and high trac areas as shown in the
illustration. Be sure it is secure and cannot fall onto small animals or children.
MOVING
STORE
To move the machine, lift up the rear stabilizer
until the transportation wheels on the front
stand touch the ground. With the wheels on
ground, you can transport the rower to the
desired location with ease.
NOTE! The seat moves.
When not in use, you can save space by
storing the rower vertically. If not using the
rower for more than a month, empty the
tank before storing.
NOTE!
•When you stand the rower up, the
Seat will slide down.
•Move with caution when you raise
the rower up, as your head may touch
the Rear Stabilizer.
MOVING AND STORE

VirtuFit Row 1000 Rowing Machine
13 EN
• Sit on the seat and pull the handle to make sure the water system is enough resistance, and the
mobility of the chair is smooth and stable.
• Maintenance is required every so often to ensure the quality of the operation of the water tank
guarantee. The water must be changed regularly, this can be done by removing the old water and
adding new water or putting a water purication tablet in the tank that is included with your rowing
machine. Do this every 6 months. When the water remains cloudy after adding the tablet, then the
water should be replaced. Do not use bleach or other cleaning products. Using these products will
void the warranty and may damage the product.
WATER TANK
SEMI-ANNUAL MAINTENANCE
DAILY MAINTENANCE
• Clean and remove sweat after each use Do not use aggressive cleaning agents and ensure that
the device remains free of moisture.
• Check that the rail and the wheels under the seat are free from dust and dirt.
• Inspect all bolts and nuts in connection with moving parts of the device, tighten as required.
• Check the mobility of moving parts and components of the use equipment, silicone spray if
necessary.
Safeandeectiveusecanonlybeachievedifthedevicewillbeassembledandmaintained
well. It is your responsibility to ensure that the equipment is regularly maintained. Parts
that are already used and / or damaged must be replaced before continuing using. The
rower machine may only be used indoors and stored away, prolonged exposure to
weathering and changes in temperature / humidity can have a serious impact on the
electrical components and moving parts of the rowing machine.
MAINTENANCE

VirtuFit Row 1000 Rowing Machine 14
EN
AA BATTERIES
The screen uses 2 AA batteries, which you can replace at the back of the screen. Do not mix old and new
batteries or batteries from dierent brands.
The batteries must be installed correctly. If the screen is unreadable or if there is another problem with the
console, we recommend the following step: Remove the batteries and wait 15 seconds, then replace two
new AA batteries. All values are reset by removing or replacing batteries.
1. Remove the batteries when they are exhausted or if you do not use the product for an extended
period of time in order to avoid hazards through leaking batteries.
2. Do not recharge batteries nor dissemble or throw then into re. Danger of explosion!
3. Pay attention to the polarity (+) and (-). Always replace all the batteries; do not mix old and new batteries,
or dierent battery types.
4. Use preferably alkaline batteries, as they have a longer operation time then usual zinc-coalbatteries.
5. A change of batteries is necessary when the display becomes weaker or completely faded.
1. If you see an incorrect display on the screen, it is recommended to replace the batteries to replace.
2. Use 2 new AA batteries as power supply and place them in the console.
NOTE! All values are reset by replacing batteries.
BATTERY
MAINTENANCE
ADVICE FOR HANDLING BATTERIES
CHANGING THE BATTERIES

VirtuFit Row 1000 Rowing Machine
15 EN
TROUBLE SHOOTING
Display does not work
If the display no longer works, you can replace the batteries. These are at the back of the display.
Display shows no values
If the display does not show any values, you can try to check the sensor cables and the cables in the back
of the display. If this still does not work, you can move the sensor slightly.
Rowing machine beeps
Check that all bolts and nuts are tightened securely. Spray silicone spray if necessary. Also check the wheels
under the seat.
PROBLEM SOLUTIONS

VirtuFit Row 1000 Rowing Machine 16
EN
CONSOLE
CONTROL PANEL
BUTTON FUNCTION
RECOVERY Press this button to test the pulse recovery for 60 seconds, the computer must
have the pulse signal.
RESET
1. Press to go back to the preset value while setting the parameters, then press it
again to reset the program selection.
2. Press to return to standby mode during stop.
3. Hold it for 2 seconds and the computer will reset.
START/
STOP To start or stop the selected training program.
ENTER
1. Press to conrm the selected program.
2. Press to conrm the parameter setting and move to the next parameter.
3. Press to switch to another function display during exercise.
“^^” 1. Increase the parameter setting.
2. Select the program (QUICK, STANDARD, TARGET etc.).
“v” 1. Decrease the parameter setting.
2. Select the program (QUICK, STANDARD, TARGET etc.).

VirtuFit Row 1000 Rowing Machine
17 EN
BUTTON EXPLANATION
TIME Counts rowing time from the beginning of the workout to the end.
TIME/500M
Counts rowing time from the beginning of the workout to the end.
The average time per 500 meters is automatically displayed and continuously
updated.
DISTANCE The distance traveled during the exercise is displayed.
STROKES Displays the current rowing strokes.
TOTAL
STROKES Counts rowing strokes from start to nish.
CALORIES Counts the total calories from the beginning to the end of rowing.
PULSE
(PUL) Displays the heart rate during exercise.
DRAG
FORCE Displays the current drag speed.
WATT Displays the current wattage.
A+ Displays the average function value of time, calories, watts and pulse.
STANDARD INCREASE /
DECREASE
SETTING
RANGE
DISPLAY
RANGE
TIME 0:00 ±1 0:00 ~ 99:00 0:00 ~ 99:59
DISTANCE 0 ±100 0 ~ 99900 0 ~ 99999
STROKES 0 ±10 0 ~ 99990 0 ~ 99999
CALORIES 0 ±10 0 ~ 9990 0 ~ 9999
NOTE! TIME and DISTANCE cannot be set simultaneously, but can be set separately. You train for a
certain time or a certain distance.
FUNCTIONS
CONTROL PANEL

VirtuFit Row 1000 Rowing Machine 18
EN
SWITCH ON
FUNCTION EXPLANATION
CONTROL PANEL
The full LCD screen is displayed for 2 seconds when the batteries are installed. The exercise intensity of the
selection mode from L1 to L6 must be entered by pressing “^” or “v” to select (the default is L6) then press
enter to confirm and enter standy mode.
QUICK START
Press “^” / “v” to choose Quick Start and then press “START / STOP” to start training.
• Press “ENTER” to set the function value on the large display during training.
• The program profile with 16 columns, each column is equal to 100 meters.
STANDARD
Press “^” /“v”to select STANDARD then press ENTER to confirm and enter 5 selections of the training mode
from: 2000m, 5000m, 10000m, 30:00, 500m / 1: 00. Then press “START / STOP” to start training. The preset
function value will count down, other function value will count up. Press RESET to enter standby mode
when the preset function value drops to 0.
TARGET SINGLE
Press “^” / “v” to choose TARGET SINGLE then press ENTER to select and enter four single setting of; Single
Time, Single Distance, Single Calories and Single THR in.
•Single Time: Can only preset the time, after the setting is completed, press“START / STOP”.
•Single Distance: Can only preset the distance, after the setting is completed, press then press START
/ STOP.
•Single Calories: Can only preset calories, then press START / STOP.
•Single: Can only set target heart rate from 90 to 200 BPM, after setting completed, press then press
START / STOP. A beep sounds when the current heart rate is above T.H.R.

VirtuFit Row 1000 Rowing Machine
19 EN
CONTROL PANEL
TARGET INTERVAL
Press “^” / “v” to select TARGET INTERVAL, then press ENTER to and to enter the 3 interval settings. This
consists of interval Time, Interval \ Distance and Interval Variable.
•Intervals Time: Press “^” / “v” to set the training time and press ENTER to conrm and set the REST
TIME. Press START / STOP to start training after setting is complete.
•Intervals Distance: Press “^” / “v” to set the training distance and press ENTER to and set the REST
TIME. Press START / STOP to start training after the setting is complete.
•Intervals Variable: Press “^” / “v” to set the exercise time, then press ENTER to conrm and set the
training distance. Press ENTER to conrm and set the REST TIME and press START / STOP to start
training after the setting is completed.
CUSTOM
Press “^” / “v” to select CUSTOM and press “ENTER” to conrm and move to four Custom mode from V: 30 /:
30R, V1: 00/1: 00R… 7, V2000m / 3: 00R… 4, V1: 40 /: 20R.
• V: 30 /: 30R, train for 30 seconds, rest for 30 seconds.
• V1: 00/1: 00R… 7, train for 1 minute, rest for 1 minute, repeat 7 times.
• V2000m / 3: 00R… 4, train 2000 meters, rest 3 minutes, repeat 4 times
• V1: 40 /: 20R, 1 minute workout in 40 seconds, rest 20 seconds, repeat 9 times.
RACE
• Press “^” / “v” to select RACE and press“ENTER” to conrm, then press L1 ~ L15.
• Press “ENTER” to conrm and enter the DISTANCE setting, DISTANCE ashes and press UP or DOWN
to adjust. Press “ENTER” to stop and then press START to exercise. The dot matrix shows U and PC
image for racing.
• When the PC or user has reached the end of the workout, the computer stops.
View race details
• In the TIME window, press ENTER to toggle between TIME and TIME / 500M A + display.
• In the SPM window, press ENTER to switch between the SPM and SPM A + view.
• The DISPLAY window shows the total training distance.
• In the TOTAL STROKES window, press ENTER to switch between STROKES and
• TOTAL STROKES.
• In the CALORIE window, press ENTER to switch between CALORIES and WATT A +.
• The PULSE window displays PULSE A +
• The dot matrix displays PC WIN or USER WIN.
NOTE! In the RACE program only the DISTANCE can be set, TIME / 500M is xed. TIME / 500M for L1-L15
is as shown on the next page.

VirtuFit Row 1000 Rowing Machine 20
EN
CONTROL PANEL
L1 L2 L3 L4 L5 L6 L7 L8 L9 L10 L11 L12 L13 L14 L15
8:00 7:30 7:00 6:30 6:00 5:30 5:00 4:30 4:00 3:30 3:00 2:30 2:00 1:30 1:00
RECOVERY
ALARM
SLEEP MODE
This meter works with a 5.3 kHz heart rate monitor (not included). After a while, continue to wear the chest
strap monitor and press the “RECOVERY” button. All function displays stop, “TIME” starts to count down
from 06:00 to 00:00. Your condition is measured.
• The screen will display your heart rate status with F1, F2 .... to F6.
• F1 is excellent. F6 is bad. The user can continue to exercise to recover from the heart rate (press the
“RECOVERY button”again to return to the main screen).
The alarm only works when the computer is in sleep mode. No alarm will sound during training. Press and
hold “RESET” to enter the clock screen to set “ALARM”.
The computer will enter sleep mode after approximately 4 minutes of inactivity.
Table of contents
Other VIRTUFIT Home Gym manuals

VIRTUFIT
VIRTUFIT Row 1.0 User manual

VIRTUFIT
VIRTUFIT Row 600i User manual

VIRTUFIT
VIRTUFIT Ultimate Pro 2 User manual

VIRTUFIT
VIRTUFIT Row 450 User manual

VIRTUFIT
VIRTUFIT Ultimate Pro 2i User manual

VIRTUFIT
VIRTUFIT Row 1.0 User manual

VIRTUFIT
VIRTUFIT Power Tower Deluxe User manual

VIRTUFIT
VIRTUFIT Row Limited Edition User manual

VIRTUFIT
VIRTUFIT Water Resistance Row 800 User manual

VIRTUFIT
VIRTUFIT Water Resistance Row 1000 User manual