manuals.online logo
Brands
  1. Home
  2. •
  3. Brands
  4. •
  5. Vitek
  6. •
  7. Humidifier
  8. •
  9. Vitek VT-1760 User manual

Vitek VT-1760 User manual

ИНСТРУКЦИЯ ПО ЭКСПЛУАТАЦИИ
MANUAL INSTRUCTION
МОДЕЛЬ VT 1760
ULTRASONIC HUMIDIFIER
УЛЬТРОЗВУКОВОЙ УВЛАЖНИТЕЛЬ
Vt-1760.qxd 19.09.03 11:29 Page 2
ПРИМЕЧАНИЕ
В случае несоблюдения правил очистки частей прибора от минеральных
загрязнений, вызванных использованием недистиллированной воды
эффективность работы прибора может снизиться В этом случае гарантийное
обслуживание не осуществляется
Прибор не включится, если резервуар не установлен на базу правильно.
СПЕЦИФИКАЦИЯ
Питание 230 V ~ 50 Hz
Потребляемая мощность 34 W
СРОК СЛУЖБЫ УВЛАЖНИТЕЛЯ НЕ МЕНЕЕ 3Х ЛЕТ
112
РУССКИЙENGLISH
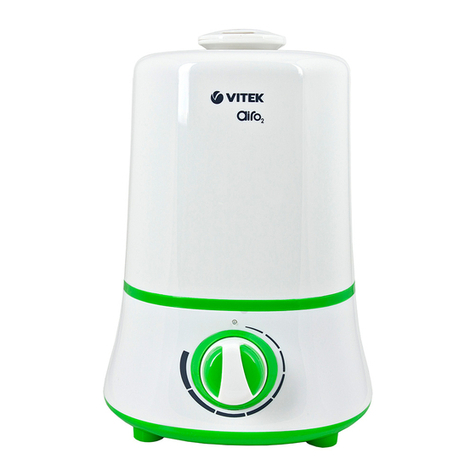
ULTRASONIC HUMIDIFIER
1 Water tank
2 Power switch
3 Power indicator
4 Nebulizer
5 Air outlet
6 Base
7 Mist nozzle
8 Water valve
9 Water sensor
10 Process chamber
Vt-1760.qxd 19.09.03 11:29 Page 4
Дайте раствору впитаться После этого промойте камеру под струей воды и
протрите насухо Не касайтесь распылителя пальцами, т к отпечатки пальцев
могут ухудшить качество производимого тумана Будьте осторожны при уходе за
сенсором
Ежемесячный уход
В случае, если Вы не собираетесь пользоваться прибором некоторое время,
убедитесь, что все его части сухие, включая рабочую камерную Не храните
прибор с водой в рабочей камере
НЕИСПРАВНОСТИ И ИХ УСТРАНЕНИЕ:
РУССКИЙ
10
IMPORTANT SAFETY INSTRUCTIONS
READ ALL INSTRUCTIONS BEFORE USING HUMIDIFIER, ESPECIALLY THESE BASIC
SAFETY PRECAUTIONS:
1 Before using the humidifier, extend the cord and inspect for any signs of damage Do
not use product if cord has been damaged
2 Always place humidifier on a firm, flat; level surface Keep cord away from heated
surfaces and out of the way, where it cannot be stepped on or tripped over
3 Do not place the humidifier directly on wood furniture or other surfaces that could be
damaged by water Protect by placing the humidifier on a nonmetallic waterproof
surface
4 Do not place in direct sunlight, hightemperature areas, or near computers or sensi
tive electronic equipment
5 Do not operate outdoors, this appliance is intended for indoor use
6 Do not operate without water Turn off unit when water bottle is empty
7 Do not use with a water bottle over 0 4 gallons (1 5 liters) or 12 inches in height
8 Do not use glass bottles Do not use carbonated water
9 Do not add any Do not cover, or insert objects into, any openings on the unit
10 Do not immerse the base in water or other liquid Do not overfill
11 This product has a polarized plug (one blade is wider than the other) as a safety fea
ture This plug will fit into a polarized outlet only one way If the plug does not fit fully
into the outlet, reverse the plug If it still does not fit, contact a qualified electrician
Do not attempt to defeat this safety feature
12 CAUTION: To avoid the risk of fire, shock or personal injury, do not use an extension
cord
13 Humidifier should always be unplugged and emptied when not in operation or while
being cleaned Shut off and unplug humidifier before moving Do not move or tilt
humidifier while it is operating Plug and unplug unit with dry hands
14 The humidifier should not be left unattended in a closed room since air could become
saturated and leave condensation on walls or furniture Leave room door partly open
Do not aim Mist Nozzle directly at children, walls or furniture
15 CAUTION: Do not touch the nebulizer while the unit is plugged in as burns could
result
USING YOUR PERSONAL HUMIDIFIER
First Time Use
Read all instructions before using this appliance
Unpack and remove all packing material from the Base Completely unravel power cord
and place unit on a flat, stable surface Follow the directions below to fill and operate the
Humidifier
W ter Bottle
The Purely Personal Humidifier is designed to be used with commonly available bottled
3
ENGLISH
Переключатель
установлен в положение
"вкл", но индикатор
питания не горит
Туман не появляется из
сопла или появляется в
малом количестве
Вокруг прибора и на
окнах образуется
конденсат
Появление белой пыли
 прибор не подсоединен
к сети; нет напряжения в
сети
 резервуар для воды
пуст; прибор установлен
на наклонной плоскости
известковые отложения
на распылителе и
сенсоре
 не включенвентилятор;
вода слишком холодная
вентилятор работает, но
туман не проходит через
сопло не работает
распылитель на
распылителе появилась
пена (после
неправильной чистки)
На приборе установлен
слишком интенсивный
для данного помещения
режим выработки тумана
Используется слишком
жесткая вода
 подсоедините прибор к
сети; проверьте
напряжение в сети и
исправность розетки
 заполните резервуар
водой установите
прибор на ровной
поверхности очистите
распылитель и сенсор в
соответствии с
указаниями инструкции
 убедитесь, что вода в
рабочей камере касается
сенсора используйте
воду комнатной
температуры рабочая
камера переполнена
водой вылейте излишек
воды из рабочей
камеры см гарантиюсм
рекомендации по чистке
и уходу
Переключите прибор на
менее интенсивный
режим работы или
отключите его
Используйте
дистиллированную воду
Vt-1760.qxd 19.09.03 11:29 Page 6
Инструкция по эксплуатации:
1 Не используйте увлажнитель, если в резервуаре нет воды
2 После заполнения резервуара убедитесь, что переключатель вкл/выкл
находится в положении "выкл"
3 Переведите переключатель вкл/выкл в положение "вкл" После этого загорится
индикатор питания
4 Туман появится через некоторое время Подождите несколько минут, пока
рабочая камера не заполнится водой
5 Не направляйте сопло прибора на мебель или стены Если на мебели или
стенах появляется конденсат, или если относительная влажность в комнате
превышает 50%, переведите регулятор на одно деление влево, откройте дверь
в комнату, где работает увлажнитель или полностью отключите прибор
6 Если туман не появляется из сопла, отключите прибор и проверьте, покрывает
ли вода сенсор в рабочей камере После этого убедитесь, что резервуар для
воды плотно установлен на место
7 Всегда отключайте прибор перед снятием резервуара для воды или перед
заполнением его водой После того, как резервуар для воды опустеет,
производство тумана прекратится, но вентилятор продолжит работать Перед
заполнением резервуара для воды убедитесь, что рабочая камера пуста
УХОД И ЧИСТКА
Предупреждение: Всегда отсоединяйте прибор от сети перед чисткой
Ежедневный уход:
1 Снимите резервуар для воды и вылейте воду из рабочей камеры Протрите
части прибора мягкой влажной тканью
2 Не погружайте основание прибора в воду Осторожно протрите мягкой сухой
тканью рабочую камеру Следите, чтобы вода не попадала в выпускное
воздушное отверстие Не пытайтесь удалить или усовершенствовать сенсор
наличия воды в рабочей камере
3 Не обрабатывайте чистящими средствами емкости для воды, т к это может
ухудшить качество тумана Не используйте для чистки абразивные средства и
щетки
4 Не оставляйте воду в рабочей камере увлажнителя, так как известковый осадок
может ухудшить работу прибора
Еженедельный уход
1 Раз в неделю тщательно промывайте все части прибора раствором
отбеливателя (половина чайной ложки отбеливателя на 1,5л воды) После
этого тщательно сполосните части прибора водой
2 Если вокруг распылителя и сенсора появились следы известкового осадка,
протрите эти области тканью, смоченной в не разведенном белом уксусе Для
удаления сильных известковых отложений наполните рабочую камеру
раствором уксуса (50% белого уксуса и 50% воды) Не погружайте базу в воду!
9
water Any standard bottled water that has either US, Australian or English threads may be
used The amount of time that the humidifier will run will depend on the capacity of the
water bottle For safety reasons, the size of the water bottle should be less than 0 4 gal
lons (1 5 liters) and 12 inches in height Do not use glass bottles Do not use carbonated
water
Ad pters
The Detachable Bottle Gap is sized to accept Australian threaded water bottles without an
adapter Two adapters are provided to fit U S and English bottle styles The adapter with
the yellow 0ring fits US threaded bottled water The adapter with the red 0ring fits
English threaded bottled water For storage, an adapter compartment is located on the
underside of the base
Connecting the W ter Bottle
Always UNPLUG the humidifier before filling
1 Remove the Detachable Bottle Cap from the top cover Determine whether an English
Threaded Adapter or a US Threaded Adapter should be used with the Detachable Bottle
Gap Secure the adapter if needed into the Detachable Bottle Gap by turning clockwise
2 Secure the Detachable Bottle Cap to the neck or the full Water Bottle by turning clock
wise Ideally, water should be at room temperature Use of very cold water may temporar
ily reduce the mist output Never fill the humidifier with hot or warm water as this could
cause damage and void your warranty
3 Remove the Top Cover from the Base and inspect the Reservoir and Nebulizer for
cleanliness Refer to Care and Gleaning section below
4 Replacethe Top Cover onto the Base Turn the Water Bottle/Detachable Bottle Cap
Assembly over and check to be sure that no water is leaking Place the Water Bottle/
Detachable Bottle Cap Assembly info the opening in the Top Cover from which the
Detachable Bottle Cap was removed
OPERATING INSTRUCTIONS
1 Do not operate the humidifier without water in the Water Bottle
2 After filling the humidifier, be sure the Switch is in the OFF position A voltage selector
switch is provided on some models Select the appropriate Volt AG using the switch on the
back of the humidifier and then plug the power cord into wall outlet The 115 Volt AC set
ting can be used for 110120 Volt AC and 230 setting for 220240 Volt AC
3 Turn the Switch to the On position The Power Indicator will illuminate Some models
have one output setting and some models have two output settings
4 Mist will not appear immediately; allow a few minutes for the water to fill the reservoir
5 Direct Mist Nozzle away from walls and furniture If condensation forms on walls or win
dows, or if indoor relative humidity exceeds 50% turn the Switch to the low setting, open
door to room where humidifier is operating, or turn unit off
6 lf mist is not produced, unplug cord and check the Water Sensors in the Reservoir to
ensure they are covered by the water The water level in the Reservoir must be high
enough to partially immerse the Water Sensors in order for the humidifier to work In addi
ENGLISH
4
РУССКИЙ
Vt-1760.qxd 19.09.03 11:29 Page 8
ПОЧИТАЙТЕ И СОХРАНИТЕ ДАННУЮ ИНСТРУКЦИЮ
Быстрое увлажнение сухого воздуха в помещении
 Ультразвуковая бесшумная технология получения тумана
 Допускается заполнение резервуара любой очищенной водой
ПРАВИЛА БЕЗОПАСНОГО ИСПОЛЬЗОВАНИЯ
1 Перед использованием прибора внимательно осмотрите сетевой шнур и
убедитесь, что он не поврежден Не используйте прибор при поврежденном
сетевом шнуре
2 Располагайте прибор на твердой, устойчивой поверхности Не располагайте
шнур вблизи горячих поверхностей
3 Не направляйте сопло увлажнителя на деревянную мебель и на предметы,
которые могут быть повреждены влагой Не направляйте сопло увлажнителя на
детей Рекомендуется устанавливать прибор на влагоустойчивой
неметаллической поверхности
4 Не располагайте увлажнитель в местах, подверженных воздействию прямых
солнечных лучей, высоких температур, вблизи компьютеров или
чувствительной электронной техники
5 Прибор рассчитан на применение только внутри помещений
6 Не включайте прибор без воды Отключите прибор после опустения
резервуара для воды
7 Не используйте газированную воду
8 Не добавляйте какиелибо медицинские препараты в сопло прибора, в
резервуар с водой Не накрывайте вентиляционные отверстия и не допускайте
попадания в них посторонних предметов
9 Не погружайте основание в воду и не наполняйте резервуар выше
рекомендованных норм
10 Внимание! Во избежания пожара и электрошока не используйте удлинители
11 Всегда отключайте прибор от сети и выливайте воду из резервуара во время
чистки или если Вы не пользуетесь увлажнителем Отключите прибор от сети
перед тем, как перемещать его в другое место Не двигайте и не наклоняйте
прибор во время работы Прикасайтесь к штепсельной вилке только сухими
руками
12 Не оставляйте прибор без присмотра в закрытом помещении, т к на мебели и
стенах может появиться конденсат Поэтому дверь в помещение, где работает
увлажнитель, рекомендуется держать приоткрытой
13 Во избежания пожара не касайтесь распылителя во время работы прибора
ИСПОЛЬЗОВАНИЕ УВЛАЖНИТЕЛЯ
Использование в первый раз
Перед использованием прочитайте инструкцию
Распакуйте прибор Полностью размотайте сетевой шнур и установите прибор на
плоской ровной поверхности Следуйте приведенным ниже указаниям по
заполнению прибора водой и его эксплуатации
РУССКИЙ
8
tion, make sure the Top Cover is securely in place
7 Turn the humidifier off before removing the Water Bottle to refill or replace it When the
Water Bottle is empty the mist will stop although the fan will continue to operate Do not
replace the Water Bottle/Detachable Bottle Cap Assembly onto the top cover if the
Reservoir is full This could lead to overfilling of the reservoir Empty the Reservoir of water
prior to replacing the Water Bottle/Detachable Bottle Cap Assembly onto the top cover
CARE AND CLEANING
D ily M inten nce:
1 Lift the Water Bottle/Detachable Bottle Cap from the Top Cover Remove the Detachable
Bottle Cap and any adapters from the Water Bottle Remove the Top Cover and empty all
water from the Reservoir Wipe the Top Cover, Detachable Bottle Cap and Adapters clean
with a soft, damp clothe
2 Do not immerse the Base in water Gently wipe the reservoir with a soft clean, wet clothe
Keep water away from the Air Outlet in the Base Do not attempt to remove or in any other
way modify the Water Sensor Use care when wiping around the Water Sensor For storage,
wipe dry with a soft, clean cloth
3 Do not use detergent to clean any watercontaining parts of the humidifier Detergents
and the film they leave behind can affect the output of the humidifier Do not use abrasive
cleansers or brushes
4 Do not leave water in the Reservoir when unit is not in use as it may result in the build up
of mineral deposits and bacteria that can inhibit the output efficiency of the humidifier
Weekly M inten nce:
1 Thoroughly clean humidifier every week using a solution of bleach and water (1/2tea
spoonof bleach in 1/2 gallon of water) Wipe the Reservoir, Top Cover, Detachable Bottle
Cap and Adapters with a soft cloth dampened in the solution Rinse area thoroughly before
proceeding
2 lf mineral deposits are evident around the Nebulizer and Water Sensors, clean their sur
faces with a soft, clean cloth and a small amount of undiluted white vinegar If necessary
for removal of mineral deposits, mix a solution of 53% white vinegar and 50% water and
fill the base with enough solution to cover the Nebulizer Do not immerse the Base in water
Allow it to soak for an hour Then use a cotton swab to gently loosen build up on the
Nebulizer Rinse out the Reservoir and wipe clean Do not touch Nebulizer with bare fingers
as any fingerprints or other residue can affect mist output Be careful not to damage the
Water Sensors
3 All surfaces should be thoroughly cleaned with water prior to reuse
End of Se son M inten nce
1 Follow above weekly cleaning procedure at the end of the humidification season, or
when the humidifier will not be used for several days, bang sure to dry all parts including
the Reservoir Do not store with water inside
ENGLISH
5
Vt-1760.qxd 19.09.03 11:29 Page 10
7
TROUBLESHOOTING GUIDE
Problem Possible C use Solution
Power Switch is Unit not plugged in Plug unit in
set to "On" and No power at outlet Check circuits, fuses, test
Power Indicator is off outlet
Little or no mist Water Bottle Empty Use room temperature water
is produced Blower operating but mist Reservoir overfilled Empty
not exiling through outlet Reservoir and reset
nozzle Water Bottle
Nebulizer not functioning See Warranty
Soap residue on Nebulizer Follow Care and
(cleaned incorrectly) Cleaning instructions
Condensation forms Mist Intensity is set too high Decrease mist output to low or
around humidifier for room size or preexisting off using the Switch
or windows humidity level
White Dust Hard water used Use distilled water
Accumulation
SPECIFICATION
Power requirement 230 V ~ 50 Hz
Power consumption 34 W
SERVICE LIFE OF THE HUMIDIFIERNOT LESS THAN 3 YEARS
ENGLISH
6
УЛЬТРОЗВУКОВОЙ
УВЛАЖНИТЕЛЬ
РУССКИЙ
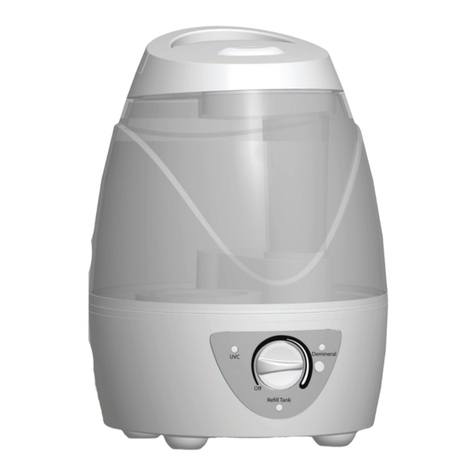
1 Резервуар
2 Переключатель вкл /выкл
3 Индикатор питания
4 Распылитель
5 Воздуховыпускное
отверстие
6 Основание
7 Сопло
8 Водяной клапан
9 Сенсор наличия воды
в рабочей камере
10 Рабочая камера
Vt-1760.qxd 19.09.03 11:29 Page 12

Other manuals for VT-1760

2

Other Vitek Humidifier manuals

Vitek VT-2350 User manual

Vitek

Vitek VT-2350 User manual

Vitek VT-2350 User manual

Vitek

Vitek VT-2350 User manual

Vitek VT-1762 User manual

Vitek

Vitek VT-1762 User manual

Vitek VT-1760 User manual

Vitek

Vitek VT-1760 User manual

Vitek VT-1760 User manual

Vitek

Vitek VT-1760 User manual

Vitek VT-2352 User manual

Vitek

Vitek VT-2352 User manual

Vitek VT-1770 W User manual

Vitek

Vitek VT-1770 W User manual

Vitek VT-2359 User manual

Vitek

Vitek VT-2359 User manual

Vitek VT-2349 User manual

Vitek

Vitek VT-2349 User manual

Vitek VT-2340 User manual

Vitek

Vitek VT-2340 User manual

Vitek VT-1762 User manual

Vitek

Vitek VT-1762 User manual

Vitek VT-2342 User manual

Vitek

Vitek VT-2342 User manual

Vitek VT-1764 BK User manual

Vitek

Vitek VT-1764 BK User manual

Vitek VT-2353 User manual

Vitek

Vitek VT-2353 User manual

Vitek VT-2341 User manual

Vitek

Vitek VT-2341 User manual

Vitek VT-2337 User manual

Vitek

Vitek VT-2337 User manual

Vitek VT-1766 User manual

Vitek

Vitek VT-1766 User manual

Vitek VT-2339 User manual

Vitek

Vitek VT-2339 User manual

Vitek VT-2346 User manual

Vitek

Vitek VT-2346 User manual

Vitek VT-2338 User manual

Vitek

Vitek VT-2338 User manual

Vitek VT-2350 User manual

Vitek

Vitek VT-2350 User manual

Vitek VT-1767 BK User manual

Vitek

Vitek VT-1767 BK User manual

Vitek VT-1761 BK User manual

Vitek

Vitek VT-1761 BK User manual

Vitek VT-2348 User manual

Vitek

Vitek VT-2348 User manual

Popular Humidifier manuals by other brands

TEFAL HUMIDIFICATEUR COMPACT manual

TEFAL

TEFAL HUMIDIFICATEUR COMPACT manual

Carel humiSteam UE Series user manual

Carel

Carel humiSteam UE Series user manual

Healthy Climate Solutions HCWB3-17 Installation instructions and template

Healthy Climate Solutions

Healthy Climate Solutions HCWB3-17 Installation instructions and template

pureguardian H1300 Use & care instructions

pureguardian

pureguardian H1300 Use & care instructions

Le Veil iCigar Pro DCH-67 instructions

Le Veil

Le Veil iCigar Pro DCH-67 instructions

Topcom 500 user guide

Topcom

Topcom 500 user guide

Marta MT-2685 user manual

Marta

Marta MT-2685 user manual

Essick 7D6 100 Care and use manual

Essick

Essick 7D6 100 Care and use manual

Crane EE-5949 instruction manual

Crane

Crane EE-5949 instruction manual

MoistAir MA0300 instructions

MoistAir

MoistAir MA0300 instructions

SATA STEAMaster+ SERIES Installation, operation & maintenance manual

SATA

SATA STEAMaster+ SERIES Installation, operation & maintenance manual

Safety 1st Smart Humidifier manual

Safety 1st

Safety 1st Smart Humidifier manual

Vigilant Sentry 10 operating instructions

Vigilant

Vigilant Sentry 10 operating instructions

Crane EE-5200B,EE-520B instruction manual

Crane

Crane EE-5200B,EE-520B instruction manual

pureguardian H1010 Use & care instructions

pureguardian

pureguardian H1010 Use & care instructions

Stadler Form Oskar operating instructions

Stadler Form

Stadler Form Oskar operating instructions

Stadler Form Jerry EMS-200 operating instructions

Stadler Form

Stadler Form Jerry EMS-200 operating instructions

HygroMatik HeaterLine Series instructions

HygroMatik

HygroMatik HeaterLine Series instructions

manuals.online logo
manuals.online logoBrands
  • About & Mission
  • Contact us
  • Privacy Policy
  • Terms and Conditions

Copyright 2025 Manuals.Online. All Rights Reserved.