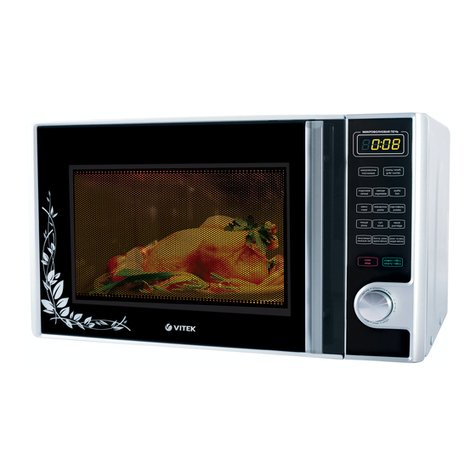
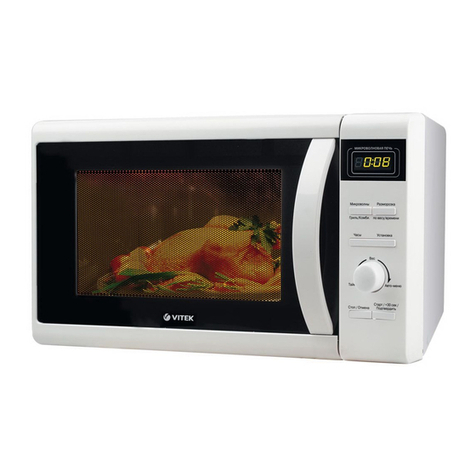
Vitek VT-1699 SR User manual

1
Микроволновая печь
VT-1699 SR
Microwave oven
3
14
27
39
51
62
73
85
97
VT-1699 belorus.indd 1 13.09.2012 11:51:51

11 12
13
14
15
16
«СВЧ/Гриль/
Комби»
«Разморозка
по весу/
времени»
«Стоп/Отмена»«Часы/
Предустановки»
«Старт/+30 сек/Подтвердить»
VT-1699 belorus.indd 2 13.09.2012 11:51:52

3
E N G L I S H
MICROWAVE OVEN
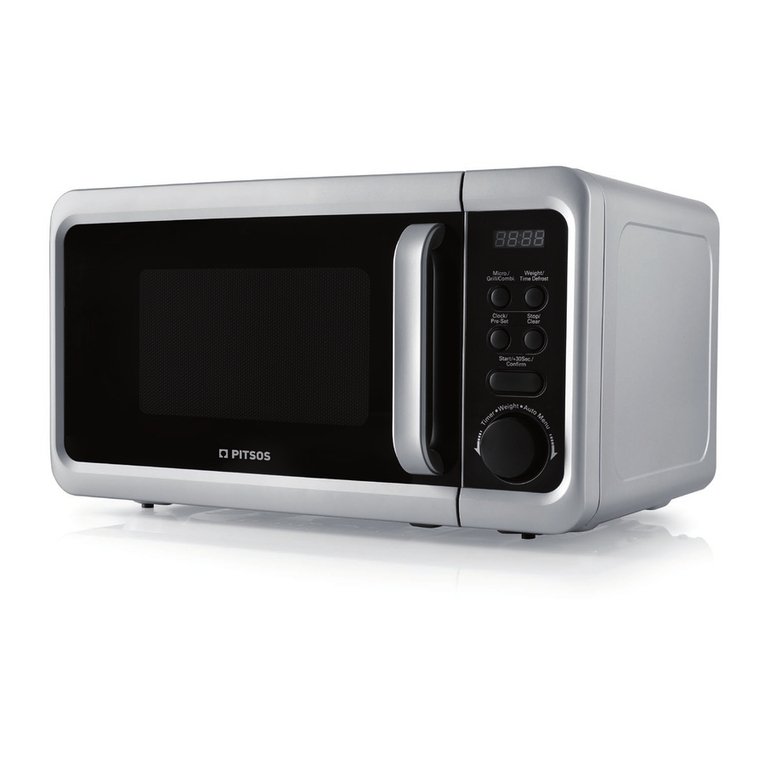
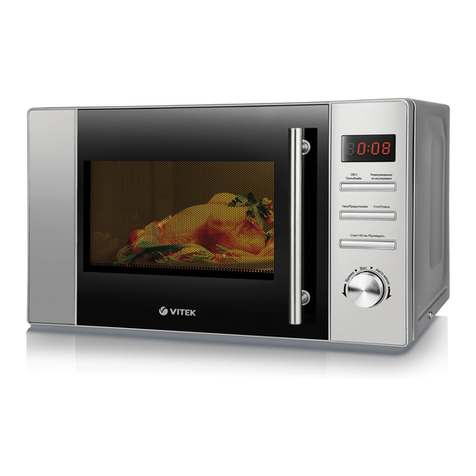
Description
1. Door latches
2. Viewing window
3. Glass plate
4. Glass plate support
5. Roller ring
6. Microwaves output
7. Control panel
8. Door blocking system
9. Grill rack (used only for Grill mode)
Control panel:
10. Display
11. “Microwaves/Grill/Combi” button («СВЧ/Гриль/Комби»
12. “Defrost by weight/time” button («Разморозка по весу/времени»)
13. “Clock/Presets” button («Часы/Предустановки)
14. “Stop/Cancel” button («Стоп/Отмена»)
15. “Start/+30 sec/Confirm” button («Старт/+30 сек/Подтвердить»)
16. “Time/Weight/Auto-menu” knob («Время/Вес/Авто-меню»)
Attention!
For additional protection it is reasonable to install a residual current device (RCD) with nominal op-
eration current not exceeding 30 mA into the kitchen mains, contact a specialist for installing.
SAFETY MEASURES
READ THESE INSTRUCTIONS CAREFULLY AND KEEP THESE INSTRUCTIONS FOR FUTURE
REFERENCE.
Always follow the safety precautions when using electric appliances.
• Do not operate the unit when the door is open, it is dangerous since it can cause negative micro-
wave radiation.
• Do not make any changes in electric circuits of protective oven door blocking system.
• Do not place any objects between the unit body & door, remove dirt and remaining detergent from
the inner side of the door.
• Do not use the oven when it is damaged, it is especially important that the door closes properly.
Make sure that the unit has no damages of:
– the door (for instance, when the door is bent),
– hinges and latches (when they are broken or loose).
• Adjustments and repair of the microwave oven should be performed by specialists of authorized
service centers only.
Attention! In order to avoid burns, electric shock, fire, microwave radiation exposure and personal
injury:
• Before using the unit, please read all the instructions carefully.
• Before switching on the unit, make sure that the voltage of your mains corresponds to the volt-
age specified on the unit.
• Use the unit only for the intended purposes, specified in this manual.
• The unit is intended for cooking food and heating of ready meals.
• Do not switch the unit on without food inside.
• In order to avoid fire in the oven cavity:
VT-1699 belorus.indd 3 13.09.2012 11:51:52

4
ENGLISH
– When heating food in a plastic or paper packaging, watch the heating process to avoid package
burning;
– Before putting paper or plastic bags into the oven, remove wire twist-ties from them.
– If there is burning inside the oven cavity, switch the unit off and unplug it immediately, without
opening the door in order not to let fire spread.
– Do not use the oven cavity for storage of products; do not leave paper or products inside it.
• Cookware should be preliminarily tested for usage in microwave ovens.
• Be careful taking cookware out of the oven as strong boiling of liquids may happen after you have
finished heating them in the microwave oven.
• Do not fry products in the oven.
• Shell eggs and whole hard-boiled eggs should not be heated in microwave ovens since they may
explode due to increase of inner pressure.
Attention! To avoid the explosion do not heat the liquids and other products in closed con-
tainers!
• Before cooking, pierce pithy products such as potatoes, vegetable marrows and apples.
• Before feeding children in order to avoid burns, shake feeding bottles and check the temperature
of the content.
• Cookware can heat up strongly from the cooked products, thus it is necessary to use potholders.
• Do not leave the operating unit unattended.
• For children safety do not leave polyethylene bags, used as a packaging, unattended.
Attention! Do not allow children to play with polyethylene bags or packaging film. Danger
of suffocation!
• Close supervision is necessary when children or disabled persons are near the unit.
• This unit is not intended for usage by children or disabled persons unless they are given by a
person who is responsible for their safety all the necessary instructions on safety measures and
information about danger, that can be caused by improper usage of the unit.
• Do not block ventilation openings in unit body.
• Do not immerse the power cord or the plug into water or other liquids.
• Make sure that the power cord and the plug do not touch hot surfaces.
• Make sure that the power cord does not hang over the edges of the table.
• When unplugging the unit, pull the plug but not the cord.
• Do not touch the plug with wet hands as it may lead to electric shock.
• Never use the unit if the power cord or the plug are damaged, the unit works improperly or after
it was dropped.
Attention! If the power cord is damaged, it should be replaced by the manufacturer, service
or other qualified personnel in order to avoid danger!
• For repair of the unit or changing of the power cord apply to the authorized service center.
Attention! All maintenance and repair works concerning the removal of the lids protecting
from the microwave radiation should be performed by specialists only.
• The unit is intended for household usage only.
RULES FOR COOKING PRODUCTS IN MICROWAVE OVENS
• When cooking, do not put the products directly on the glass plate, local overheating of the glass
plate can lead to appearance of cracks in it.
• Use only microwave-safe cookware; put it on the glass plate.
• For even heating of products, put thicker slices near the edges of the cookware.
• Follow cooking time. Set the shortest possible cooking time, and it can be increased if necessary.
Do not exceed cooking time, it can lead to burning of the products.
• Cook foods under a glass or plastic microwave-safe cover. Covers prevent juice or fat from spat-
tering and help to cook evenly.
VT-1699 belorus.indd 4 13.09.2012 11:51:52
5
E N G L I S H
• To speed up the cooking process turn over easy-cooking products (such as chicken and ham-
burgers) once. Large pieces of meat must be turned over at least twice during coking.
• Mix foods during cooking both from top to bottom and from the center of dish to outside.
RECOMMENDATIONS ON CHOOSING COOKWARE
• Ideal material for microwave-safe cookware should be “transparent” for microwaves, as it allows
microwave energy to pass through and heat the food.
• Microwaves could not go through metal; that is why never use metal cookware in the microwave
ovens.
• Do not use cookware with metal coating.
• Do not place recycled paper products in microwave oven, as they may contain small metal frag-
ments which may cause sparks and/or fires.
• Round or oval cookware is more preferable for using in microwave ovens, than rectangular cook-
ware.
Testing cookware before using it in a microwave oven
• Put the tested cookware (for instance, a plate) into the unit; place a glass with cold water on it.
• Switch on the microwave oven at the maximal power and set cooking time not more than 1-2
minutes.
• Carefully touch the cookware being tested. If it is hot, and the water in the glass is cold, do not
use this cookware for cooking in the microwave oven.
• Do not exceed testing time. Maximal testing time is 1-2 minutes.
Cookware Usage in the microwave oven
Heat-resistant glass Yes
Non-heat resistant glass No
Heat-resistant ceramics Yes
Microwave-safe plastic cookware Yes
Kitchen paper Yes
Metal tray No
Metal grill No
Aluminum foil or foil containers No
INSTRUCTIONS ON MICROWAVE OVEN GROUNDING
The microwave oven should be securely grounded. In case of any short circuit grounding reduces risk
of getting electric shock, because current will pass via a ground wire. A power cord with a grounding
wire and the plug with a grounding contact are used in the unit.
The plug should be connected to the outlet with a grounding contact.
For additional protection you can install a residual current device with nominal current of operation,
not exceeding 30 mA, into the mains of the microwave oven; when installing contact a specialist;
WARNING: usage of the plug with a grounding contact connected with the outlet without grounding
can lead to the risk of electric shock.
Consult a qualified electrician, if grounding instructions are not completely clear for you or if you are
not sure that the unit is securely grounded.
To prevent tangling of the power cable the microwave oven is equipped with a short power cable.
If it is necessary to use an extension cord, use only a 3-wired extension cord with a grounding contact
on the plug and the socket.
VT-1699 belorus.indd 5 13.09.2012 11:51:52
6
ENGLISH
– Wire section marking of the MWO cord and of the extension cord should match.
– There should be a grounding wire in the extension cord.
– The extension cord should not hang over the edges of the table, where children can pull it.
Extension cord placing should exclude the possibility of stepping on it.
SETTING
• Before switching on the unit, make sure that the mains voltage corresponds to the voltage speci-
fied on the unit body.
• Make sure that all packing materials are removed from the oven cavity.
• Do not remove the light gray plate (6) covering the wave guide, it protects the magnetron.
ATTENTION! Make sure that the unit does not have damages such as: bent or broken door, broken
or loose hinges and latches, dimples on the oven body or on the door. If there is any damage, usage
of the unit is prohibited.
• Set the unit on the flat stable surface that will bear its weight and max. weight of the products, that
will be cooked in it. Place the unit out of the reach of children.
• Do not place the unit in places with high moisture and temperature, and near inflammable objects.
• Proper ventilation is needed for normal operation of the unit.
• Install the oven keeping at least 7-8 cm of free space behind and on the sides of the oven and 30
cm above it. Do not block ventilation openings on the microwave oven body. Do not remove sup-
porting legs from the bottom of the oven.
• Do not use the unit without the glass plate and the roller ring.
• Make sure that the power cable does not have any damages and does not pass under the unit or
over any hot or sharp edges of furniture.
MICROWAVE OVEN ASSEMBLY
If the microwave oven was stored or transported at negative temperatures, before switching it on for
the first time, keep it at room temperature for 2-3 hours.
– Remove the package and the accessories from the cavity.
– Check the oven for deformations. Pay special attention to the door state. If there is any problem
do not set and do not switch the oven on.
Protective covering
Body: if there is a protective film on the oven body, remove it carefully.
Do not remove the light gray plate (6) covering the wave guide, it protects the magnetron.
Setting the glass plate
1. Set the glass plate support (4) in the opening located on the bottom of the working cavity.
2. Set the roller ring (5) on the bottom of the working cavity.
3. Carefully set the glass plate (3) on the roller ring (5), by matching ledges and grooves of the glass
plate support (4).
• Never set the glass plate with its bottom side up.
• Do not prevent rotation of the glass plate while operating the oven.
• During cooking always use the glass plate and the roller ring.
• Cookware should always be set only on the glass plate.
• The glass plate (3) can rotate clockwise/counterclockwise. It is normal.
• If cracks or chops appear on the glass plate, stop using the unit immediately and replace the
glass plate.
OPERATION
Before switching on the unit, make sure that the voltage of your mains corresponds to the voltage
specified on the unit.
VT-1699 belorus.indd 6 13.09.2012 11:51:52

7
E N G L I S H
Setting time
When the microwave oven is connected to the mains, you’ll hear a sound signal, and «0:00» will ap-
pear on the display (10). You can set the time in the range 0:00 - 23:59.
1. Press the “Clock/Presets” button (13), on the display (10) flashing «0:» will appear.
2. Turn the knob (16) to set «hours».
3. Press the “Clock/Presets” button (13), on the display (10) flashing «:00» will appear.
4. Turn the knob (16) to set «minutes».
5. Press the “Clock/Presets” button (13) to finish time setting. On the display (10) the preset time
will appear and symbol (:) will be flashing.
Note:
– If the clock is not set, the current time will not be shown on the display (10).
– If you haven’t set the current time or pressed the “Clock/Presets” button (13), the display (10)
will show the original indications.
– If you incorrectly input the current time, press the “Stop/Cancel” button (14) to reset the values
and repeat points 1-5.
Cooking in the microwave oven
Select the necessary power level of the microwave oven and set the cooking time.
1. Open the door, put the products into the cavity and close the door.
2. Press the “Microwaves/Grill/Combi” button (11), you will hear a sound signal, “Р-100” will be
flashing on the display.
To select the required power level press the “Microwaves/Grill/Combi” button (11) or turn the knob
(16). Power modes will be displayed.
Number of pressings Display indications Power of the oven
1 Р100 100%
2 Р80 80%
3 Р50 50%
4 Р30 30%
5Р10 10%
3. Press the “Start/+30 sec/Confirm” button (15) to confirm the selected power level; you will
hear a sound signal.
4. Set the cooking time turning the knob (16). Time will appear on the display (10).
You can set cooking time in the range 0:05-95:00 with the step, stated in the table.
Time interval Time setting step
0-1 min 5 sec.
1-5 min 10 sec.
5-10 min 30 sec.
10-30 min 1 min
30-95 min 5 min
5. Press the “Start/+30 sec/Confirm” button (15) to start cooking, countdown of the remaining
time will start on the display (10). After the cooking process is over, the unit will be switched off,
and you will hear 5 sound signals.
VT-1699 belorus.indd 7 13.09.2012 11:51:52
8
ENGLISH
Cooking in the “Grill” mode
1. Open the door, put the products into the cavity and close the door.
2. Press the “Microwaves/Grill/Combi” button (11), “Р-100” will be flashing on the display. Select
the grill mode “G” pressing the “Microwaves/Grill/Combi” button (11) or rotating the knob (16).
3. Press the “Start/+30 sec/Confirm” button (15) to confirm the selected mode.
4. Set the cooking time turning the knob (16). Time will appear on the display (10).
5. Press the “Start/+30 sec/Confirm” button (15) to start cooking, countdown of the remaining
time will start on the display (10). After the cooking process is over, the unit will be switched off,
and you will hear 5 sound signals.
Note: To get the best effect of grill, you should turn over the products during cooking.
After half of the preset time is over you will hear 2 sound signals, that remind you that it is necessary
to turn over the products.
Open the door, turn over the products, close the door and press the “Start/+30 sec/Confirm” but-
ton (15) to continue cooking.
Combination cooking mode
1. Open the door, put the products into the cavity and close the door.
2. Press the “Microwaves/Grill/Combi” button (11), “Р-100” will be flashing on the display (10).
3. Consequently pressing the button (11), or turning the knob (16), select one of the two combination
cooking modes. On the display (10) the selected mode: “С-1” or “С-2” will appear.
4. Press the “Start/+30 sec/Confirm” button (15) to confirm the selected mode.
5. Set the cooking time turning the knob (16). Time will appear on the display (10).
6. Press the “Start/+30 sec/Confirm” button (15) to start cooking, countdown of the remaining
time will start on the display (10). After the cooking process is over, the unit will be switched off,
and you will hear 5 sound signals.
Combination cooking options
Mode Oven power Grill power
C-1 55% 45%
C-2 36% 64%
Quick cooking mode
1. Press the “Start/+30 sec/Confirm” button (15) to start cooking at full power during 30 sec,
each next pressing will add 30 seconds; maximal time, that you can set, is 95 minutes.
2. Rotating the knob (16) counterclockwise (to the left) for quick setting of the cooking time and then
press the “Start/+30 sec/Confirm” button (15) to start cooking at full power.
Note:
- In the microwave mode, the grill mode, the defrost time mode and the combination mode you
can add cooking time pressing the “Start/+30 sec/Confirm” button (15), each next pressing
will add 30 seconds.
- At multi-stage cooking, in the auto cooking mode and at defrost, by weight you cannot add time.
After the cooking process is over, the unit will be switched off, and you will hear 5 sound signals.
Products defrosting by weight
1. Open the door, put the products into the cavity and close the door.
2. Press the “Defrost by weight/time” button (12) once, “dЕF-1” will appear on the display –
defrost by weight.
3. Set the products weight turning the knob (16). You can enter products weight in the range from
100 to 2000 g.
VT-1699 belorus.indd 8 13.09.2012 11:51:52
9
E N G L I S H
4. Press the “Start/+30 sec/Confirm” button (15) to start defrost products by weight.
5. Remaining defrost time, that is set automatically depending on the selected weight, will appear on
the display (10), after the defrost process is over the oven will be switched off, and you will hear
5 sound signals.
Products defrosting by time
1. Open the door, put the products into the cavity and close the door.
2. Press the “Defrost by weight/time” button (12) twice, “dЕF-2” will appear on the display –
defrost by time.
3. Set the products defrost time turning the knob (16). You can enter time from 00:05 to 95:00 min-
utes.
4. Press the “Start/+30 sec/Confirm” button (15) to start defrost products by time.
5. Remaining defrost time will appear on the display (10) during defrost, after the defrost process is
over the unit will be switched off, and you will hear 5 sound signals.
Multi-stage cooking
This microwave oven allows cooking of products in two stages. After finish of the first stage you will
hear a sound signal and then the second stage will start.
Note: defrost mode can be set only in the first cooking stage. Auto cooking modes cannot be set as
one of the cooking stages.
Example: You need to defrost products for 5 minutes and then cook them in the microwave mode at
power 80% for 7 minutes.
1. Open the door, put the products into the cavity and close the door.
2. Press the “Defrost by weight/time” button (12) twice, “dЕF-2” will appear on the display –
quick defrost by time.
3. Rotating the knob (16) set the defrost time 5:00 minutes.
4. Press the “Microwaves/Grill/Combi” button (11), “Р-100” will appear on the display (10). To
select power 80 % press the “Microwaves/Grill/Combi” button (11) or rotate the knob (16).
5. “P-80” will appear on the display.
6. Press the “Start/+30 sec/Confirm” button (15) to confirm the selected mode.
7. Set cooking time 7 minutes rotating the knob (16). “07:00” will appear on the display.
8. Press the “Start/+30 sec/Confirm” button (15) to start cooking, countdown of the remaining
time will start on the display (10). After the first cooking stage is over (“dЕF-2” - quick defrost by
time), you will hear one sound signal. After the cooking process is over, the unit will be switched
off, and you will hear 5 sound signals.
Setting start cooking time
1. Open the door, put the products into the cavity and close the door.
2. Check whether the time is set properly, and then select the cooking program as you wish.
Note: you can set maximum two cooking stages.
If you lay over cooking time, defrost mode can be set as a cooking program.
Example: - You need to cook products in the microwave oven at 80% for 7 minutes. Do the following:
3. Press the “Microwaves/Grill/Combi” button (11), “Р-100” will appear on the display (10). To
select power 80 % press the “Microwaves/Grill/Combi” button (11) or rotate the knob (16).
“P-80” will appear on the display (10).
4. Press the “Start/+30 sec/Confirm” button (15) to confirm the selected mode.
5. Set cooking time of 7 minutes rotating the knob (15). “07:00” will appear on the display (10).
6. Press the “Clock/Presets” button (13), on the display (10) flashing “:00” will appear.
7. Set “hours” rotating the knob (16).
8. Press the “Clock/Presets” button (13), on the display (10) flashing “:00” will appear.
VT-1699 belorus.indd 9 13.09.2012 11:51:52
10
ENGLISH
9. Set “minutes” rotating the knob (16).
10. Press the “Start/+30 sec/Confirm” button (15) to finish setting time.
11. When the current time matches the time which was set two sound signals will be heard and the
oven will be switched on in the cooking mode. The remaining cooking time will be shown on the
display (10). After the cooking process is over, the oven will be switched off, and you will hear 5
sound signals.
The preset starting cooking time can be checked by pressing the “Clock/Presets” button (13).
Auto cooking menu
You can select one of the following auto modes, by setting the corresponding mode, rotating the knob
(16) clockwise:
Menu Product weight Display indications Oven power
A-1
«Heating»
200 g 200 100%
400 g 400
600 g 600
A-2
«Vegetables»
200 g 200 100%
300 g 300
400 g 400
A-3
«Fish»
250 g 250 80%
350 g 350
450g 450
A-4
«Meat»
250 g 250 100%
350 g 350
450g 450
A-5
«Pasta»
50 g (and 450 ml of
cold water)
50 80%
100 g (and 800 ml of
cold water)
100
A-6
«Potatoes»
200 g 200 100%
400 g 400
600 g 600
A-7
«Pizza»
200 g 200 100%
400 g 400
A-8
«Soups»
200 g 200 80%
400 g 400
Example: to cook vegetables weighing 350 g:
1. Open the door, put the products into the working cavity and close the door.
2. Rotating the knob (16) clockwise select the vegetables cooking mode, “А-2” will be shown on the
display (10). Press the “Start/+30 sec/Confirm” button (15) to confirm your choice.
3. Rotate the knob (16) to select the desired products weight (300 g), that will appear on the display
(10).
4. Press the “Start/+30 sec/Confirm” button (13) to start auto cooking of products. Cooking time
will be set automatically; the remaining cooking time will appear on the display (10). After the
cooking process is over, the oven will be switched off, and you will hear 5 sound signals.
VT-1699 belorus.indd 10 13.09.2012 11:51:52
11
E N G L I S H
Child safety lock
– Lock: press and hold the “Stop/Cancel” button (14) for 3 seconds, you will hear a sound signal
and will appear on the display (10).
– Cancel lock: in the lock mode press and hold the “Stop/Cancel” button (14) for three seconds,
you will hear a sound signal and will disappear from the display (10).
Viewing the preset modes
– In the microwaves mode, the combination mode or the “Grill” mode press the “Microwaves/
Grill/Combi” button (11), the preset power value will be displayed for 2-3 seconds.
– In the one-stage mode, press the “Clock/Presets” button (13), the current time will be displayed
for 2-3 seconds.
CLEANING AND MAINTENANCE
• Before cleaning switch the unit off and unplug it.
• Protect that moisture does not get on the control panel. Wipe the panel with a soft, slightly damp
cloth.
• Keep the working cavity clean. When food splatters or spilled liquids stick to the oven walls,
remove them carefully using a damp cloth.
• If the working cavity is dirty, use a soft detergent.
• Do not use abrasives, wire brushes to clean the unit inside and outside.
• Provide that no water or detergent gets into the air and steam openings on the oven top.
• Do not use detergent based on ammonia.
• Use a damp cloth to clean external surfaces.
• Keep the door clean. Provide that no crumbs accumulate between the door and the panel as it
prevents the door from closing.
• Regularly clean the ventilation openings on the oven body from dust and dirt, as air for cooling the
unit passes through them.
• Regularly clean the glass plate and its support; wipe the bottom of the working cavity.
• Wash the glass plate and the roller ring with a neutral soapy solution.
• Do not immerse the heated glass plate into cold water: due to sudden temperature drop the glass
plate can splinter.
• To remove unpleasant odors in the working cavity put a bowl with water and lemon juice in the oven
and boil it for several minutes. Wipe the walls of the working cavity with a soft cloth thoroughly.
• Keep the microwave oven away from children in a dry cool place.
TROUBLES AND TROUBLESHOOTING
The unit makes interferences in the
reception of TV and radio signals
Interferences in the reception of TV and radio signals can
appear during unit operation. The same interferences
appear during operation of small electrical appliances such
as a mixer, a vacuum cleaner and a hair dryer. It is normal.
Steam accumulation on the door,
hot air output from the ventilation
openings.
During cooking, steam can evaporate from the products.
Great amount of steam evaporates via the ventilation
openings but some of it can accumulate on the inner side of
the door. It is normal.
Microwave oven is switched on
without food inside.
Switching on of the microwave oven for several minutes
without food does not cause its damage. Always make sure
that there are food products in the unit before switching it on
VT-1699 belorus.indd 11 13.09.2012 11:51:52
12
ENGLISH
Troubleshooting
Problem Possible Cause Solution
The unit can not
be switched on.
The power cord plug is not properly
inserted in the socket.
Pull the plug out of the socket. After 10
seconds insert the plug into the socket
again.
Problem with the socket Try to
connect another unit to the same socket
for checking
There is no
heating
The door is closed not firmly Close the door firmly
During operation
the glass plate
produces
sounds
The roller ring or the lower part of
the working cavity is dirty
Remove the glass plate and the roller
ring. Wash the roller ring and the bottom
of the working cavity.
Technical specifications
Operation conditions
Air temperature +10°С - +35°С
Relative humidity 35-80%
Atmospheric pressure 86-106 kPa (650 – 800 mm Hg)
Main technical specifications
Power supply: 230 ± 10 % V ~ 50 Hz
Rated output power 700 W
Rated microwave input power 1050 W
Rated grill input power 1000 W
Microwaves efficiency (%): 55%
Operation frequency 2450 ± 49 MHz
Cavity capacity 20 L
Glass plate, dia. 255 mm
Dimensions, not more than 440 x 355 x 260 mm
Net weight, not more than 11,5 kg.
Precious metal content:
gold 0 g
silver 1,06794 g
Delivery set
Microwave oven 1 pc.
Glass plate 1 pc.
Roller ring 1 pc.
Grill rack 1 pc.
Instruction manual 1 pc.
VT-1699 belorus.indd 12 13.09.2012 11:51:52
13
E N G L I S H
Warranty certificate 1 pc.
Recipe book for microwave ovens 1 pc.
Package 1 pc.
The manufacturer preserves the right to change design and specifications of the unit without a pre-
liminary notification.
Service life of the unit is 5 years
This domestic appliance corresponds to the regulations of the customs union on the required
safety standards and electromagnetic compatibility.
Guarantee
Details regarding guarantee conditions can be obtained from the dealer from whom the appliance
was purchased. The bill of sale or receipt must be produced when making any claim under the terms
of this guarantee.
This product conforms to the EMC-Requirements as laid down by the Council Directive 89/336/EEC
and to the Low Voltage Regulation (73/23 EEC)
VT-1699 belorus.indd 13 13.09.2012 11:51:52

14
DEUTSCH
14
MIKROWELLENOFEN
Beschreibung
1. Verschlüsse der Mikrowellenofentür
2. Sichtfenster
3. Glasplatte
4. Halterung der Glasplatte
5. Rollring
6. Austritt der Mikrowellenstrahlung
7. Steuerungsplatte
8. Blockierungssystem der Mikrowellenofentür
9. Grillrost (nur für den Grillbetrieb)
Steuerungsplatte:
10. Bildschirm
11. Taste «Mikrowellenofen/Grill/Kombi» («СВЧ/Гриль/Комби»)
12. Taste «Auftauen nach Gewicht/Zeit» («Разморозка по весу/времени»)
13. Taste «Uhr/Voreinstellung» («Часы/Предустановки»)
14. Taste «Stop/Abbrechen» («Стоп/Отмена»)
15. Taste «Start/+30 Sek./Bestätigen» («Старт/+30 сек/Подтвердить»
16. Schalter der Einstellung «Zeit/Gewicht/Auto-Menü» («Время/Вес/Авто-меню»)
Achtung!
Als zusätzlicher Schutz ist es zweckmäßig, den FI-Schalter mit Nennstrom maximal bis 30 мА im
Stromversorgungskreis der Küche einzubauen; wenden Sie sich dafür an einen Spezialisten.
WICHTIGE SICHERHEITSMAßNAHMEN
LESEN SIE AUFMERKSAM UND BEWAHREN SIE DIESE FÜR WEITERE REFERENZ AUF
Beim Gebrauch der elektrischen Geräte sind die Sicherheitsmaßnahmen immer zu beachten.
• Es ist nicht gestattet, den Mikrowellenofen mit der geöffneten Tür zu nutzen, weil die
Mikrowellenstrahlung gesundheitsschädlich wirkt.
• Es ist nicht gestattet, Änderungen im Stromkreis der Schutzverriegelungen der Mikrowellenofentür
vorzunehmen.
• Es ist nicht gestattet, irgendwelche Gegenstände zwischen dem Gehäuse des Mikrowellenofens
und seiner Tür zu setzen, entfernen Sie Verschmutzungen und Reste der Reinigungsmittel sorg-
fältig von der inneren Seite der Tür.
• Benutzen Sie nie einen beschädigten Mikrowellenofen, insbesondere ist es wichtig, die Tür des
Mikrowellenofens ordnungsgemäß zu schließen, damit es keine Beschädigungen entstehen sol-
len:
– an der Tür (gebogen oder zum Gehäuse nicht genügend anliegt),
– Scharniere und Verriegelungen (gelockert oder gebrochen).
• Die Einstellung oder die Reparatur des Mikrowellenofens sollen nur vom Fachpersonal eines
autorisierten Kundenservicedienstes durchgeführt werden.
Achtung! Um das Risiko der Verbrennungen, Stromschläge, Brandfälle, Einwirkung der
Mikrowellenstrahlung und des Gesundheitsschadens zu vermeiden:
• Lesen Sie die Bedienungsanleitung vor der Nutzung des Geräts aufmerksam durch.
• Vergewissern Sie sich vor dem Einschalten des Geräts, dass die Netzspannung mit der Spannung
Ihres Geräts übereinstimmt, die am Gehäuse des Geräts angegeben ist.
• Nutzen Sie den Mikrowellenofen nur bestimmungsgemäß, wie es in dieser Anleitung angeführt
ist.
VT-1699 belorus.indd 14 13.09.2012 11:51:53
15
D E U T S C H
• Der Mikrowellenofen ist für die Zubereitung von Nahrungsmitteln und Aufwärmung von fertigen
Gerichten bestimmt.
• Es ist nicht gestattet, den Mikrowellenofen ohne Nahrungsmittel einzuschalten.
• Um das Brandsrisiko des Garraums des Mikrowellenofens zu vermeiden:
– Passen Sie beim Aufwärmen in Plastik- oder Papierverpackung auf den Aufwärmungsprozess
auf, um die Entzündung der Verpackung zu vermeiden.
– Entfernen Sie Verdrahten vor der Anbringung der Papier- oder Plastikpakete im Mikrowellenofen.
– Bei der Entflammung im Innern des Mikrowellenofens schalten Sie ihn sofort aus, dann schal-
ten Sie ihn vom Stromnetz ab, und lassen Sie die Mikrowellenofentür geschlossen, um die
Feuerverbreitung zu vermeiden.
– Es ist nicht gestattet, den Garraum des Mikrowellenofens zur Aufbewahrung von irgendwelchen
Gegenständen zu nutzen, lassen Sie im Mikrowellenofen kein Papier oder keine Nahrungsmittel
liegen.
• Prüfen Sie vorher das Geschirr, ob es für die Nutzung im Mikrowellenofen geeignet ist.
• Seien Sie vorsichtig, wenn Sie das Geschirr aus dem Mikrowellenofen herausnehmen, weil die
Kochung von Flüssigkeiten auch nach ihrer Aufwärmung im Mikrowellenofen erfolgen kann.
• Es ist nicht gestattet, Nahrungsmittel im Mikrowellenofen zu braten.
• Es ist nicht gestattet, Eier mit Eierschale im Mikrowellenofen zuzubereiten und aufzuwärmen, weil
diese auch nach der Aufwärmung explodieren können.
Achtung! Es ist nicht gestattet, Flüssigkeiten und andere Nahrungsmittel in geschlossenen
Behältern zur Vermeidung der Explosion im Mikrowellenofen aufzuwärmen!
• Stechen Sie dickschalige Nahrungsmittel, wie (z.B., Kartoffeln, Auberginen oder Äpfel) vor der
Zubereitung durch.
• Vor dem Füttern der Kinder mit der im Mikrowellenofen aufgewärmten Flasche, schütteln sie den
Inhalt der Flasche gut durch und prüfen Sie die Temperatur der Flüssigkeit, um Verbrennungen
zu vermeiden.
• Das Geschirr kann durch die Wärmeaufnahme von den zubereitenden Nahrungsmitteln sehr stark
erhitzt werden, nutzen Sie spezielle Topfhandschuhe und Topflappen.
• Lassen Sie das eingeschaltete Gerät nie unbeaufsichtigt.
• Aus Kindersicherheitsgründen lassen Sie Plastiktüten, die als Verpackung verwendet werden,
nie ohne Aufsicht.
Achtung! Lassen Sie Kinder mit Plastiktüten oder Folien nicht spielen. Erstickungsgefahr!
• Besondere Vorsichtsmaßnahmen sind in den Fällen angesagt, wenn sich Kinder oder behinderte
Personen während der Nutzung des Geräts in der Nähe aufhalten.
• Dieses Gerät darf von Kindern und behinderten Personen nicht genutzt werden, außer wenn
die Person, die für ihre Sicherheit verantwortlich ist, ihnen entsprechende und verständliche
Anweisungen über sichere Nutzung des Geräts und die Gefahren bei seiner falschen Nutzung
gibt.
• Sperren Sie nie Lüftungsöffnungen am Gehäuse des Mikrowellenofens ab.
• Tauchen Sie nie das Netzkabel und den Netzstecker des Geräts ins Wasser oder andere
Flüssigkeiten.
• Vermeiden Sie die Berührung des Netzkabels und des Netzsteckers mit heißen Oberflächen.
• Lassen Sie das Netzkabel vom Tisch frei nicht hängen.
• Es ist nicht gestattet, das Gerät beim Abschalten vom Stromnetz am Netzkabel zu ziehen, halten
Sie ihn am Stecker.
• Es ist nicht gestattet, den Stecker des Netzkabels mit nassen Händen zu halten, weil es zum
Stromschlag führen kann.
• Es ist nicht gestattet, das Gerät zu nutzen, wenn das Netzkabel oder der Netzstecker beschä-
digt ist, sowie beim Herunterfallen, nicht ordnungsgemäßen Betrieb oder beliebigen Störungen.
VT-1699 belorus.indd 15 13.09.2012 11:51:53

16
DEUTSCH
Achtung! Das Ersetzen des Netzkabels bei seiner Beschädigung soll vom Hersteller,
Kundenservicedienst oder vom ähnlich qualifizierten Personal zur Vermeidung der Gefahr
durchgeführt werden!
• Wenden Sie sich an einen autorisierten (bevollmächtigten) Kundenservicedienst, um das Gerät
zu reparieren oder das Netzkabel auszutauschen.
Achtung! Alle Wartungs- und Reparaturarbeiten die mit der Abnahme der
Mikrowellenschutzdeckel verbunden sind, sollen nur von Spezialisten durchgeführt werden.
• Das Gerät ist nur für den Gebrauch im Haushalt geeignet.
ZUBEREITUNG VON NAHRUNGSMITTELN IN MIKROWELLENÖFEN
• Es ist nicht gestattet, die Nahrungsmittel bei der Zubereitung direkt auf die Glasplatte zu legen,
die lokale Überhitzung kann zur Entstehung von Rissen an der Glasplatte führen.
• Nutzen Sie während der Zubereitung nur das Geschirr, das für die Nutzung im Mikrowellenofen
geeignet ist, indem Sie es auf die Glasplatte aufstellen.
• Um eine gleichmäßige Zubereitung von Nahrungsmitteln zu erzielen, legen Sie dickere Stücke an
den Rand des Geschirrs.
• Passen Sie auf die Zubereitungsdauer auf. Stellen Sie die kürzeste Zubereitungsdauer ein und
falls notwendig ist, erhöhen Sie die Zubereitungszeit. Es ist nicht gestattet, die Zubereitungsdauer
von Nahrungsmitteln zu überschreiten, es kann zu ihrer Entzündung führen.
• Bereiten Sie das Essen unter dem Glasdeckel zu, das für die Nutzung im Mikrowellenofen geeig-
net ist. Der Deckel verhindert das Abspritzen des Saftes oder Fettes und gewährleistet eine
gleichmäßige Zubereitung von Nahrungsmitteln.
• Um die Zubereitung zu beschleunigen, drehen Sie einmal schnell zubereitende Nahrungsmittel
(z.B. Hähnchen oder Hamburgers). Grosse Fleischstücke müssen während der Zubereitung min-
destens zweimal umgedreht werden.
• Rühren Sie Nahrungsmittel während der Zubereitung um, indem Sie diese von oben nach unten
und von Zentrum zum Rand des Geschirrs mischen.
ANWEISUNGEN ZUR GESCHIRRAUSWAHL
• Das ideale Material des Geschirrs, das für die Nutzung im Mikrowellenofen geeignet ist, soll
„durchsichtig» für Mikrowellenstrahlung sein, indem ihre Energie durch das Geschirr strömt und
Nahrungsmittel aufwärmt.
• Mikrowellen können durch Metall nicht durchdringen, deswegen darf das Metallgeschirr nicht
verwendet werden.
• Es ist nicht gestattet, das Geschirr mit der Metallumrandung verwendet werden.
• Es ist nicht gestattet, Gegenstände in den Mikrowellenofen hineinzulegen, die aus dem
gebrauchten Papier (Recyclingpapier) hergestellt sind, da sie Metalleinprägungen enthalten kön-
nen, die die Entflammung der Verpackung hervorrufen können.
• Im Vergleich zum rechteckigen ist rundes und ovales Geschirr für die Verwendung im
Mikrowellenofen vorteilhafter.
Prüfung des Geschirrs vor der Nutzung im Mikrowellenofen
• Stellen Sie das zu prüfende Geschirr (z.B. einen Teller) in den Garraum des Mikrowellenofens,
stellen Sie darauf ein Glas mit kaltem Wasser auf.
• Schalten Sie den Mikrowellenofen auf die maximale Betriebsstufe ein und stellen Sie die
Betriebszeit auf maximal 1-2 Minuten ein.
• Berühren Sie vorsichtig das zu prüfende Geschirr. Falls es aufgewärmt ist, und das Wasser im
Glas kalt geblieben ist, darf solches Geschirr im Mikrowellenofen nicht genutzt werden.
• Die Prüfdauer soll 1-2 Minuten nicht überschreiten.
VT-1699 belorus.indd 16 13.09.2012 11:51:53

17
D E U T S C H
Geschirr Möglichkeit der Nutzung im Mikrowellenofen
Hitzbeständiges Glas Ja
Nicht hitzbeständiges Glas Nein
Hitzbeständige Keramik Ja
Plastikgeschirr für Mikrowellen J
Nahrungsmittelpapier J
Metallschale Nein
Metallrost Nein
Alu-Folie und Behälter aus Folie Nein
ANWEISUNG ZUR ERDUNG DES MIKROWELLENOFENS
Der Mikrowellenofen soll sicher geerdet werden. Im Falle eines Kurzschlusses, senkt die
Erdung das Stromschlagrisiko, weil die Stromableitung über die Erdung erfolgt. Es wird ein
Erdungsnetzkabel und ein Netzstecker mit Erdungskontakt im Mikrowellenofen verwendet.
Der Netzstecker wird an die Steckdose angeschlossen, die über einen Erdungskontakt auch
verfügen muss.
Als zusätzlicher Schutz ist es zweckmäßig, den FI-Schalter mit Nennstrom bis 30 mA im
Stromversorgungskreis des Mikrowellenofens aufzustellen; wenden Sie sich dafür an einen
Spezialisten;
WARNUNG: Die Nutzung des Netzsteckers mit der Kontakterdung, der in die Steckdose ohne
Erdung angeschlossen ist, kann zum Stromschlag führen.
Lassen Sie sich bei einem qualifizierten Elektriker beraten, wenn Sie einige Erdungsanweisungen
nicht verstehen oder wenn Sie zweifeln, dass der Mikrowellenofen eine sichere Erdung hat.
Um die Verwicklung des Netzkabels zu vermeiden, verfügt der Mikrowellenofen über ein kurzes
Netkabel.
Bei der Notwendigkeit verwenden Sie nur ein Dreileiter-Verlängerungskabel mit Erdung an der
Steckdose und dem Netzstecker.
Drahtquerschnitt-Markierung am Netzkabel des Mikrowellenofens und am Verlängerungskabel
müssen übereinstimmen.
– Das Verlängerungskabel soll immer mit der Erdung sein.
– Das Verlängerungskabel darf vom Tischrand nicht frei hängen, wo Kinder daran ziehen können.
Das Netzkabel soll so verlegt werden, dass die Menschen es nicht auftreten.
AUFSTELLUNG
• Vergewissern Sie sich vor dem Einschalten des Geräts, dass die Netzspannung mit der Spannung
Ihres Geräts übereinstimmt, die am Gehäuse des Geräts angegeben ist.
• Vergewissern Sie sich, dass alle Verpackungsmaterialien aus dem Mikrowellenofen entfernt sind.
• Es ist nicht gestattet, die weiß-graue Folienplatte des Austritts der Mikrowellenstrahlung (6) zu
entfernen, sie dient zum Schutz des Magnetrons.
ACHTUNG! Vergewissern Sie sich, dass das Gerät folgende Beschädigungen nicht aufweist:
die Tür des Garraums soll nicht gebrochen oder gebogen sein, Gelenke der Halterung
oder Verschlüsse sollen nicht beschädigt oder gelockert sein, die Innenwände und die
Mikrowellenofentür sollen keine Verbeulungen haben. Es ist nicht gestattet, den Mikrowelleofen bei
Beschädigungen beliebiger Art zu nutzen.
• Stellen Sie den Mikrowelleofen auf eine harte flache Oberfläche auf, die sein Gewicht und
das maximale Gewicht der zubereiteten Nahrungsmittel aushalten kann. Stellen Sie den
Mikrowellenofen in einem für Kleinkinder unzugänglichen Ort auf.
VT-1699 belorus.indd 17 13.09.2012 11:51:53

18
DEUTSCH
• Es ist nicht gestattet, das Gerät in den Orten mit erhöhter Feuchtigkeit und hoher Temperatur, und
auch neben leichtentflammbaren Gegenständen aufzustellen.
• Es soll eine gute Durchlüftung für den ordnungsgemäßen Betrieb des Mikrowellenofens gewähr-
leistet werden.
• Sichern Sie eine freie Aufstellung des Mikrowellenofens: 30 cm über dem Mikrowellenofen, 7-8
cm hinten und an den Seiten. Schließen Sie oder sperren Sie nie Öffnungen am Gehäuse des
Mikrowellenofens ab. Es ist nicht gestattet, Füße des Mikrowellenofens abzunehmen.
• Es ist nicht gestattet, das Gerät ohne Glasplatte und Rollring zu nutzen.
• Vergewissern Sie sich, dass das Netzkabel keine Beschädigungen aufweist und sich unter dem
Ofen oder anderen heißen oder scharfen Gegenständen nicht befindet.
ZUSAMMENBAU DES MIKROWELLEOFENS
Falls das Gerät unter niedrigen Temperaturen transportiert oder aufbewahrt wird, lassen Sie es vor
der Nutzung bei der Raumlufttemperatur für nicht weniger als 2-3 Stunden stehen.
Entfernen Sie das Verpackungsmaterial und Zubehör aus dem Garraum des Mikrowellenofens.
– Prüfen Sie den Mikrowellenofen auf Mängel von allen Seiten. Seien Sie besonders aufmerksam
bei der Prüfung der Mikrowellenofentür. Es nicht gestattet, den Mikrowellenofen aufzustellen und
einzuschalten, wenn er beschädigt ist.
Schutzabdeckung
Gehäuse: Beim Vorhandensein der Schutzfolie, entfernen Sie diese vom Gehäuse des Geräts.
Es ist nicht gestattet, die weiß-graue Folienplatte von der inneren Seite des Garraums zu
entfernen, wo sich der Austritt der Mikrowellenstrahlung (6) befindet, der zum Schutz des
Magnetrons dient.
Aufstellung der Glasplatte
1. Stellen Sie die Halterung der Glasplatte (4) in die Öffnung im Boden des Garraums auf.
2. Stellen Sie den Rollring (5) in den Boden des Garraums auf.
3. Stellen Sie die Glasplatte (3) auf den Rollring (5) sorgfältig auf, so dass die Vorsprünge darauf mit
den Aussparrungen der Halterung (4) zusammenfallen.
• Es ist nicht gestattet, die Glasplatte mit der unteren Seite nach oben aufzustellen.
• Es ist nicht gestattet, die Drehung der Glasplatte während des Betriebs des Mikrowellenofens zu
verhindern.
• Nutzen Sie immer die Glasplatte und den Rollring während der Zubereitung von Nahrungsmitteln.
• Das Geschirr für die Zubereitung von Nahrungsmitteln soll nur auf die Glasplatte aufgestellt wer-
den.
• Die Glasplatte (3) kann sich im/gegen den Uhrzeigersinn drehen. Es ist normal.
• Bei der Entstehung von Rissen oder Splitterungen an der Glasplatte, soll der Betrieb des
Mikrowellenofens sofort unterbrochen und die Glasplatte umgetauscht werden.
INBETRIEBNAHME
Vergewissern Sie sich vor dem Einschalten des Geräts, dass die Netzspannung mit der Spannung
Ihres Geräts übereinstimmt, die am Gehäuse des Geräts angegeben ist.
Zeiteinstellung
Beim Anschließen des Mikrowellenofens an die Netzspannung ertönt ein Tonsignal und auf dem
Bildschirm (10) erscheint «0:00». Sie können die Zeit im folgenden Bereich einstellen: 0:00 - 23:59.
1. Drücken Sie die Taste (13) «Uhr/Voreinstellung», auf dem Bildschirm (10) erscheinen blinkende
Ziffern «0:».
VT-1699 belorus.indd 18 13.09.2012 11:51:53

19
D E U T S C H
2. Stellen Sie Stunden, indem Sie den Schalter (16)drehen.
3. Drücken Sie die Taste (13) „Uhr/Voreinstellung“, auf dem Bildschirm erscheinen blinkenden
Ziffern „:00“.
4. Stellen Sie Stunden, indem Sie den Schalter (16)drehen.
5. Drücken Sie die Taste (13) «Uhr/Voreinstellung», um die Einstellungen zu beenden. Auf dem
Bildschirm (10) leuchtet die gewählte Betriebszeit und das Trennzeichen (:) blinkt auf.
Anmerkung
- Wenn die Zeit nicht eingestellt wurde, wird die aktuelle Zeit auf dem Bildschirm (10) nicht
dargestellt.
- Wenn die Zeit nicht eingestellt wurde, bzw. die Taste (13) «Uhr/Voreinstellung» nicht gedrückt
wurde, werden die Einstellungen auf dem Bildschirm (10) zurückgesetzt.
- Bei der nicht ordnungsgemäßen Eingabe der laufenden Zeit drücken Sie die Taste (14) „Stop/
Abbruch“, um die Einstellungen zurückzusetzen und wiederholen Sie die Zeiteinstellung (Punkte
1-5).
Zubereitung im Mikrowellenofen
Wählen Sie die Leistungsstufe der Mikrowelle aus und stellen Sie die Betriebsdauer ein.
1. Öffnen Sie die Mikrowellenofentür, legen Sie die Nahrungsmittel in den Garraum, schließen Sie
die Tür zu.
2. Drücken Sie die Taste (11) «Mikrowellenofen/Grill/Kombi», es ertönt ein Tonsignal, auf dem
Bildschirm (10) wird „P-100“ blinken.
Um die gewünschte Leistungsstufe zu wählen, drücken Sie die Taste (11) „Mikrowellenofen/Grill/
Kombi“ oder drehen Sie den Schalter (16). Auf dem Bildschirm werden Leistungsstufen angezeigt.
Anzahl der
Tastenbetätigungen
Angaben auf dem Bildschirm Mikrowellenleistung
1P 100 100%
2P 80 80%
3P 50 50%
4P 30 30%
5P 10 10%
3. Drücken Sie die Taste (15) „Start/+30 Sek./Bestätigen“, um die Auswahl der Leistungsstufe zu
bestätigen, es ertönt ein Tonsignal.
4. Stellen Sie die Zubereitungszeit mit dem Schalter (16) ein. Auf dem Bildschirm (10) leuchtet die
gewählte Zeitangabe auf.
Sie können die die Zeit im folgenden Bereich einstellen: 00:05 - 95:00 mit dem Schritt, der in der
Tabelle angegeben ist.
Zeitinterval Zeiteinstellungsschritt
0-1 Min 5 Sek.
1-5 Min 10 Sek.
5-10 Min 30 Sek.
10-30 Min 1 Min
30-95 Min 5 Min
5. Drücken Sie die Taste (15) „Start/+30 Sek./Bestätigen“, um die Zubereitung zu starten,
auf dem Bildschirm (10) beginnt das Abzählen der gebliebenen Zeit. Nach dem Ablauf der
Zubereitungszeit schaltet sich der Mikrowellenofen aus, und ertönen fünf Tonsignale.
VT-1699 belorus.indd 19 13.09.2012 11:51:53

20
DEUTSCH
Zubereitung im Grillbetrieb
1. Öffnen Sie die Mikrowellenofentür, legen Sie die Nahrungsmittel in den Garraum, schließen Sie
die Tür zu.
2. Drücken Sie die Taste (11) „Mikrowellenofen/Grill/Kombi“, auf dem Bildschirm wird „P-100“
blinken. Drücken Sie die Taste (11) „Mikrowellen/Grill/Kombi“ oder drehen Sie den Schalter
(16), wählen Sie den Grillbetrieb «G».
3. Drücken Sie die Taste (15) „Start/+30 Sek./Bestätigen“, um die Auswahl der gewählten
Betriebsstufe zu bestätigen.
4. Stellen Sie die Zubereitungszeit mit dem Schalter (16) ein. Auf dem Bildschirm (10) wird die
eingestellte Zeit angezeigt.
5. Drücken Sie die Taste (15) „Start/+30 Sek./Bestätigen“, um die Zubereitung zu starten,
auf dem Bildschirm (10) beginnt das Abzählen der gebliebenen Zeit. Nach dem Ablauf der
Zubereitungszeit schaltet sich der Mikrowellenofen aus, und ertönen fünf Tonsignale.
Anmerkung: Um besseres Grillergebnis zu erzielen, soll man Nahrungsmittel während der
Zubereitung einigemal wenden.
Nach dem Ablauf der halben Zeit ertönen zwei Tonsignale, die Sie erinnern, Nahrungsmittel zu
wenden.
Öffnen Sie die Tür, wenden Sie Nahrungsmittel, schließen Sie die Tür wieder zu und drücken Sie die
Taste(15) „Start/+30 Sek./Bestätigen“, um die Zubereitung fortzusetzen.
Kombinierter Betrieb
1. Öffnen Sie die Mikrowellenofentür, legen Sie Nahrungsmittel in den Garraum, schließen Sie die
Tür zu.
2. Drücken Sie die Taste (11) „Mikrowellenofen/Grill/Kombi“, auf dem Bildschirm (10) wird
„P-100“ aufleuchten.
3. Drücken Sie konsequent die Taste (11) bzw. drehen Sie den Schalter (16), wählen Sie einen von
zwei Betriebsstufen der kombinierten Zubereitung. Auf dem Bildschirm (10) wird die gewählte
Betriebsstufe angezeigt: „C-1“ oder „C-2“.
4. Drücken Sie die Taste (15) „Start/+30 Sek./Bestätigen“, um die Auswahl der Betriebsstufe zu
bestätigen.
5. Stellen Sie die Zubereitungszeit mit dem Schalter (16) ein. Auf dem Bildschirm (10) wird die ein-
gestellte Zeit angezeigt.
6. Drücken Sie die Taste (15) „Start/+30 Sek./Bestätigen“, um die Zubereitung zu starten, auf
dem Bildschirm beginnt das Abzählen der gebliebenen Zeit. Nach dem Ablauf der Zubereitungszeit
schaltet sich der Mikrowellenofen aus, und es sollen fünf Tonsignale ertönen.
Varianten des kombinierten Betriebs
Betrieb Mikrowellenleistung Grillleistung
C-1 55% 45%
C-2 36% 64%
Betrieb der schnellen Zubereitung
1. Drücken Sie die Taste (15) „Start/+30 Sek./Bestätigen“, um die Zubereitung mit der maximalen
Leistung innerhalb von 30 Sekunden zu beginnen. Jede erneute Betätigung der Taste gibt 30
Sekunden hinzu, die maximale Zeit beträgt 95 Minuten.
2. Drehen Sie den Schalter (16) gegen den Uhrzeigersinn (nach links), um die Zubereitungszeit schnell
einzustellen, danach drücken Sie die Taste (15) „Start/+30 Sek./Bestätigen“, um die Zubereitung
mit der maximalen Leistung zu beginnen.
VT-1699 belorus.indd 20 13.09.2012 11:51:53
Table of contents
Languages:
Other Vitek Microwave Oven manuals

Vitek
Vitek VT-1658 User manual

Vitek
Vitek VT-1650 W User manual

Vitek
Vitek VT-1693 User manual

Vitek
Vitek Crystal VT-1653 User manual

Vitek
Vitek VT-1661 W User manual

Vitek
Vitek Lacerta VT-1687 User manual

Vitek
Vitek VT-2451 BK User manual

Vitek
Vitek VT-1662 User manual

Vitek
Vitek VT 1661 User manual

Vitek
Vitek VT-1657 User manual

Vitek
Vitek Sagitta VT-1691 User manual

Vitek
Vitek VT-1659 User manual

Vitek
Vitek Mercury User manual

Vitek
Vitek VT-1683 User manual

Vitek
Vitek VT-2453 W User manual

Vitek
Vitek VT-1655 User manual

Vitek
Vitek VT-1689 SR User manual

Vitek
Vitek VT-1690 User manual

Vitek
Vitek VT-1654 W User manual

Vitek
Vitek VT-1681 User manual