manuals.online logo
Brands
  1. Home
  2. •
  3. Brands
  4. •
  5. VITRA
  6. •
  7. Indoor Furnishing
  8. •
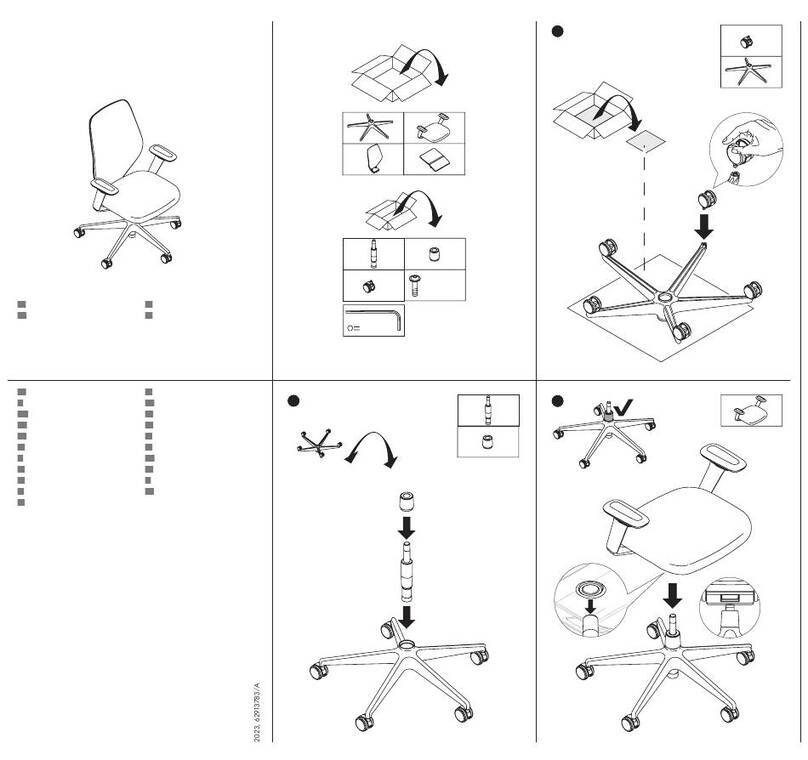
  9. VITRA ID Series User manual

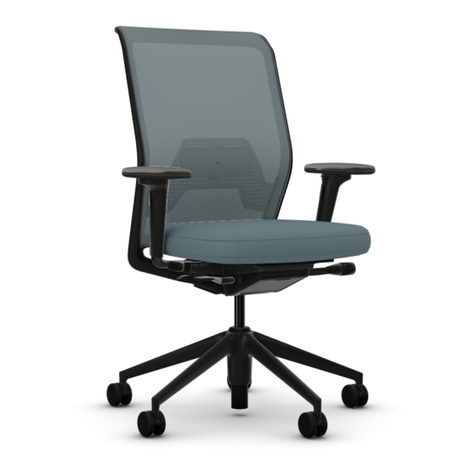
VITRA ID Series User manual

This manual suits for next models

5

Other VITRA Indoor Furnishing manuals

VITRA ACS User manual

VITRA

VITRA ACS User manual

VITRA Silent Wall User manual

VITRA

VITRA Silent Wall User manual

VITRA Tyde 2 User manual

VITRA

VITRA Tyde 2 User manual

VITRA Alcove Work User manual

VITRA

VITRA Alcove Work User manual

VITRA Ad Hoc User manual

VITRA

VITRA Ad Hoc User manual

VITRA Xero Frame P User manual

VITRA

VITRA Xero Frame P User manual

VITRA Workbays Port User manual

VITRA

VITRA Workbays Port User manual

VITRA Rayonnage Mural User manual

VITRA

VITRA Rayonnage Mural User manual

VITRA Tip Ton User manual

VITRA

VITRA Tip Ton User manual

VITRA Ad Hoc User manual

VITRA

VITRA Ad Hoc User manual

VITRA MedaMorph User manual

VITRA

VITRA MedaMorph User manual

VITRA Soft Work Table 71 User manual

VITRA

VITRA Soft Work Table 71 User manual

VITRA ACSU-Registraturbox User manual

VITRA

VITRA ACSU-Registraturbox User manual

VITRA OnTable Electrification User manual

VITRA

VITRA OnTable Electrification User manual

VITRA Playns Single Desk User manual

VITRA

VITRA Playns Single Desk User manual

VITRA Eames DAR User manual

VITRA

VITRA Eames DAR User manual

VITRA Workbays 90 User manual

VITRA

VITRA Workbays 90 User manual

VITRA Tyde 2 User manual

VITRA

VITRA Tyde 2 User manual

VITRA Workbays Meet User manual

VITRA

VITRA Workbays Meet User manual

VITRA Electrification User manual

VITRA

VITRA Electrification User manual

VITRA HACK User manual

VITRA

VITRA HACK User manual

VITRA Dancing Wall User manual

VITRA

VITRA Dancing Wall User manual

VITRA Physix User manual

VITRA

VITRA Physix User manual

VITRA Tyde 2 User manual

VITRA

VITRA Tyde 2 User manual

Popular Indoor Furnishing manuals by other brands

Regency LWMS3015 Assembly instructions

Regency

Regency LWMS3015 Assembly instructions

Furniture of America CM7751C Assembly instructions

Furniture of America

Furniture of America CM7751C Assembly instructions

Safavieh Furniture Estella CNS5731 manual

Safavieh Furniture

Safavieh Furniture Estella CNS5731 manual

PLACES OF STYLE Ovalfuss Assembly instruction

PLACES OF STYLE

PLACES OF STYLE Ovalfuss Assembly instruction

Trasman 1138 Bo1 Assembly manual

Trasman

Trasman 1138 Bo1 Assembly manual

Costway JV10856 manual

Costway

Costway JV10856 manual

moss DESIGN Caisson Credenza Assembly instructions

moss DESIGN

moss DESIGN Caisson Credenza Assembly instructions

Aquaglide FULL DECK 15.0 owner's manual

Aquaglide

Aquaglide FULL DECK 15.0 owner's manual

AREBOS AR-HE-SW30 user manual

AREBOS

AREBOS AR-HE-SW30 user manual

Till-Hilft Fulda 87005.330 Assembly instructions

Till-Hilft

Till-Hilft Fulda 87005.330 Assembly instructions

Twoey Outside 2010 quick start guide

Twoey Outside

Twoey Outside 2010 quick start guide

Hettich Easys 200 operating instructions

Hettich

Hettich Easys 200 operating instructions

The bedboss RELAX 404 Series owner's manual

The bedboss

The bedboss RELAX 404 Series owner's manual

Oeseder Möbelindustrie Bern 991 720 Assembly instructions

Oeseder Möbelindustrie

Oeseder Möbelindustrie Bern 991 720 Assembly instructions

Costway HW68469 user manual

Costway

Costway HW68469 user manual

Next ALIX A27743 Assembly instructions

Next

Next ALIX A27743 Assembly instructions

BROSA Hans Assembly guide

BROSA

BROSA Hans Assembly guide

Prodigg MINIKA PBA015T-FUR installation manual

Prodigg

Prodigg MINIKA PBA015T-FUR installation manual

manuals.online logo
manuals.online logoBrands
  • About & Mission
  • Contact us
  • Privacy Policy
  • Terms and Conditions

Copyright 2025 Manuals.Online. All Rights Reserved.

ID Chair Concept
Instructions for use
Gebrauchsanleitung
Mode d’emploi
Gebruiksaanwijzing
Instrucciones de uso
Instruzioni per l’uso
ID Mesh
ID Soft
ID Trim
ID Trim L
ID Chair
Conference version
(fixed seat height,
no forward tilt, no seat
depth adjustment)
Thank you for selecting a quality product made by Vitra.
The Vitra brand guarantees that you own an original
Antonio Citterio product.
Vitra is certified in accordance with ISO 9001 and has
been certified in accordance with ISO 14001 since 1997.
We are dedicated to creating long-
lasting products which feature components that can
easily be replaced and (if possible) are made from
recyclable materials.
ID Chair is an innovative office swivel chair that is
produced in accordance with EN 1335 and ANSI/
BIFMA X5.1. It carries the ”tested for ergonomics”
seal and fulfils the requirements that the EU directive
stipulates for VDU workstations.
ID Chair with 4-star base complies with DIN EN 1728,
EN 13761 and ANSI/BIFMA X5.1.
Sie haben sich für ein Vitra Qualitätsprodukt entschie-
den. Die Marke Vitra garantiert Ihnen, dass Sie ein
Originalprodukt von Antonio Citterio besitzen.
Vitra ist nach ISO 9001 und seit 1997 nach ISO 14001
zertifiziert. Wir legen Wert auf eine lange Lebensdauer
unserer Produkte, auf den einfachen Austausch von Ver-
schleissteilen und, soweit möglich, auf die Verwendung
von recycelbaren Materialien.
ID Chair ist ein innovativer Bürodrehstuhl nach EN 1335
und ANSI/BIFMA X5.1. Er trägt das Siegel „Ergonomie
geprüft”und erfüllt die Anforderungen der EU-Richtlinie
für Bildschirmarbeitsplätze.
ID Chair mit Viersternuntergestell entspricht der
DIN EN 1728, der EN 13761 und ANSI/BIFMA X5.1.
ID Chair Concept
www.vitra.com/ID
530-585 21”-23”
400-450 15
3
/
4
”-17
3
/
4
”
520-76 0 20
1
/
2
”-30”
380 15”
485 19”
920-1100 36
1
/
4
”-43
1
/
4
”
150-250 6”-9
3
/
4
”
700-940 27
1
/
2
”-37”
495-550 19
1
/
2
”-21
3
/
4
”
400-520 15
3
/
4
”-20
1
/
2
”
530-585 21”-23”
400-450 15
3
/
4
”-17
3
/
4
”
520-76 0 20
1
/
2
”-30”
380 15”
485 19”
920-1100 36
1
/
4
”-43
1
/
4
”
150-250 6”-9
3
/
4
”
700-940 27
1
/
2
”-37”
495-550 19
1
/
2
”-21
3
/
4
”
400-520 15
3
/
4
”-20
1
/
2
”
580 22
3
/
4
”
275-320 10
3
/
4
”-12
1
/
2
”
400-450 15
3
/
4
”-17
3
/
4
”
580-840 22
3
/
4
”-33 ”
380 15”
485 19”
1200-1325 47
1
/
4
”-52
1
/
4
”
150-250 6”-9
3
/
4
”
700-940 27
1
/
2
”-37”
555 21
3
/
4
”
400-520 15
3
/
4
”-20
1
/
2
”
580 22
3
/
4
”
275-320 10
3
/
4
”-12
1
/
2
”
400-450 15
3
/
4
”-17
3
/
4
”
580-840 22
3
/
4
”-33 ”
380 15”
485 19”
1200-1325 47
1
/
4
”-52
1
/
4
”
150-250 6”-9
3
/
4
”
700-940 27
1
/
2
”-37”
555 21
3
/
4
”
400-520 15
3
/
4
”-20
1
/
2
”
400-450 15
3
/
4
”-17
3
/
4
”
660-795 26”-31
1
/
4
”
600 23
1
/
2
”
380 15”
485 19”
990-1100 39”-43
1
/
4
”
150-250 6”-9
3
/
4
”
700-940 27
1
/
2
”-37”
580 22
3
/
4
”
400-520 15
3
/
4
”-20
1
/
2
”
400-450 15
3
/
4
”-17
3
/
4
”
660-795 26”-31
1
/
4
”
600 23
1
/
2
”
380 15”
485 19”
990-1100 39”-43
1
/
4
”
150-250 6”-9
3
/
4
”
700-940 27
1
/
2
”-37”
580 22
3
/
4
”
400-520 15
3
/
4
”-20
1
/
2
”
400-450 15
3
/
4
”-17
3
/
4
”
540-900 21
1
/
4
”-35
1
/
2
”
820-870 32
1
/
4
”-34
1
/
4
”
380 15”
485 19”
1215-1385 47
3
/
4
”-54
1
/
2
”
180-230 7”-9 ”
590 23
1
/
4
”
770-820 30
1
/
4
”-32
1
/
4
”
400-520 15
3
/
4
”-20
1
/
2
”
400-450 15
3
/
4
”-17
3
/
4
”
540-900 21
1
/
4
”-35
1
/
2
”
820-870 32
1
/
4
”-34
1
/
4
”
380 15”
485 19”
1215-1385 47
3
/
4
”-54
1
/
2
”
180-230 7”-9 ”
590 23
1
/
4
”
770-820 30
1
/
4
”-32
1
/
4
”
400-520 15
3
/
4
”-20
1
/
2
”
400-450 15
3
/
4
”-17
3
/
4
”
660-795 26”-31
1
/
4
”
600 23
1
/
2
”
345 13
1
/
2
”
485 19”
1040 41”
180-230 7”-9”
590 23
1
/
4
”
580 22
3
/
4
”
450 17
3
/
4
”
400-450 15
3
/
4
”-17
3
/
4
”
660-795 26”-31
1
/
4
”
600 23
1
/
2
”
345 13
1
/
2
”
485 19”
1040 41”
180-230 7”-9”
590 23
1
/
4
”
580 22
3
/
4
”
450 17
3
/
4
”
Vous avez opté pour un produit de qualité Vitra.
La marque Vitra vous offre la garantie de posséder
un produit original signé Antonio Citterio.
Vitra est certifié selon les normes ISO 9001 et, depuis
1997, ISO 14001. Nous accordons de l’importance à la
longévité de nos produits, à la simplicité du remplace-
ment des pièces d’usure et, dans la mesure du possible,
à l’usage de matériaux recyclables.
ID Chair est une chaise de bureau pivotante innovante
répondant aux normes de sécurité EN 1335 et ANSI/
BIFMA X5.1. Elle porte le sigle « ergonomie testée » et ré-
pond aux exigences prescrites par les lignes de conduite
de l’UE sur les postes de travail équipés d’écrans.
ID Chair avec piètement à 4 branches répond aux
exigences des normes DIN EN 1728, EN 13761 et
ANSI/BIFMA X5.1.
Acaba de adquirir un producto de calidad Vitra.
La marca Vitra le garantiza que ha adquirido un
producto original de Antonio Citterio.
Vitra cuenta con el certificado ISO 9001 y desde 1997
con el ISO 14001. Consideramos crucial la durabilidad de
nuestros productos, la sustitución sencilla de las piezas
de desgaste y, en la medida de lo posible, la utilización
de materiales reciclables.
ID Chair es una innovadora silla giratoria de oficina que
cumple con las normas EN 1335 y ANSI/BIFMA X5.1.
Además, posee el sello «Ergonomía probada» y cumple
con los requisitos de la Directiva de la UE en materia de
puestos de trabajo con ordenador.
ID Chair con pie de cuatro radios cumple las normas
DIN EN 1728, EN 13761 y ANSI/BIFMA X5.1.
U hebt voor een kwaliteitsproduct van Vitra gekozen.
Het merk Vitra biedt u de garantie dat u een origineel
product van Antonio Citterio bezit.
Vitra is ISO 9001-gecertificeerd en sinds 1997 ook
ISO 14001-gecertificeerd. Wij vinden het belangrijk dat
onze producten een lange levensduur hebben, dat aan
slijtage onderhevige onderdelen gemakkelijk vervang-
baar zijn en dat zoveel mogelijk recycleerbare materia-
len worden gebruikt.
ID Chair is een innovatieve bureaustoel die voldoet aan
de normen EN 1335 en ANSI/BIFMA X5.1. De stoel draagt
het stempel ‘Ergonomie geprüft’ (ergonomisch getest) en
voldoet aan de eisen van de EU-richtlijn voor beeld-
schermwerkplekken.
ID Chair met vierster voet voldoet aan DIN EN 1728,
EN 13761 en ANSI/BIFMA X5.1.
Avete scelto un prodotto Vitra di prima qualità.
Il marchio Vitra vi garantisce di possedere un prodotto
originale di Antonio Citterio.
Vitra è certificata secondo le norme ISO 9001 e, dal
1997, ISO 14001. Teniamo molto alla longevità dei nostri
prodotti, alla facile sostituzione degli elementi soggetti
ad usura e, per quanto possibile, all'utilizzo di materiali
riciclabili.
ID Chair è un'innovativa sedia girevole per ufficio, con-
forme a EN 1335 e ANSI/BIFMA X5.1. Essa reca il sigillo
«Ergonomia testata» e soddisfa i requisiti della direttiva
UE per le postazioni di lavoro al videoterminale.
ID Chair con bassamento con 4 razze è conforme alle
norme DIN EN 1728, EN 13761 e ANSI/BIFMA X5.1.
730 283
/4”
730 283
/4”
730 283
/4”
730 283
/4”
730 283
/4”
700 271/2”
700 271/2”
700 271/2”
700 271/2”
Réglage en hauteur de l’assise
Tirez le manche situé à l’avant à droite sous l’assise vers le
haut et réglez la hauteur du siège en pesant plus ou moins
dessus. Lorsque la hauteur de l’assise est correctement réglée,
la partie supérieure de la jambe et la partie de la jambe du
genou au pied doivent former un angle à 90°, et les pieds
doivent être posés à plat sur le sol. La hauteur de l’assise
adéquate détermine une position de travail saine per-
mettant de délester la partie supérieure des jambes.
Regulación de la altura del asiento
Empuje la palanca delantera, situada a la derecha del asiento,
hacia arriba y ajuste el asiento a la altura deseada liberando
o sosteniendo peso sobre el asiento. La altura ideal es aquella
donde las piernas se encuentran dobladas en un ángulo de
90° y los pies se apoyan completamente sobre el suelo. La al-
tura correcta del asiento es una condición imprescindible
para poder trabajar en una posición saludable en la que
no se ejerza una presión sobre la parte superior de las
piernas.
Regeling van de zithoogte
Trek de hendel vooraan rechts onder de zitting naar boven en
breng de zitting op de gewenste hoogte door ze in meerdere
of mindere mate te belasten. De zithoogte is juist als uw bo-
ven- en onderbenen een hoek van 90° vormen en uw voeten
plat op de vloer staan. De juiste zithoogte is een vereiste
voor een gezonde zithouding en ontlast de bovenbenen.
Regolazione dell'altezza del sedile
Tirare verso l’alto la leva anteriore destra posizionata sotto al
sedile e portare quest’ultimo, tramite carico e scarico del pro-
prio peso, all’altezza desiderata. Se il sedile si trova ad altezza
corretta, coscia e gamba formano un angolo di 90° e i piedi
poggiano completamente a terra. L’altezza corretta del
sedile è un presupposto essenziale per una sana postura
ed alleggerisce il peso che grava sulle cosce.
Adjusting the seat height
Pull the lever located beneath the front right of the seat up-
wards and bring the seat to the desired height by applying
or relieving pressure. In an ideal sitting position, the upper
and lower legs form a 90° angle and the feet should be flat on
the floor. The proper seat height is essential for a healthy
sitting position, and it relieves pressure on the thighs.
Regulierung der Sitzhöhe
Ziehen Sie den Hebel vorne rechts unter der Sitzfläche nach
oben und bringen Sie den Sitz durch Be- und Entlasten in die
gewünschte Höhe. Bei richtig eingestellter Sitzhöhe bilden Ober-
und Unterschenkel einen Winkel von 90° und Ihre Füsse stehen
flach auf dem Boden. Die richtige Sitzhöhe ist Voraussetzung
für eine gesunde Sitzposition und entlastet die Oberschenkel.
Basic Settings
Grundeinstellungen
Réglages de base
Ajustes Principales
Basisinstellingen
Regolazioni di base
Regulierung der Stützkraft der Rückenlehne und der
(optionalen) Vorwärtsneigung
Diese Einstellung sollte in aufrechter Sitzposition und mit unbe-
lasteter Rückenlehne vorgenommen werden.
Ziehen Sie das Handrad links unter der Sitzfläche heraus und
drehen Sie es, bis die gewünschte Stützkraft der Rückenlehne
erreicht ist: nach vorne stärker, nach hinten schwächer, maxi-
mal 2 volle Umdrehungen. Damit passen Sie automatisch auch
die Gegenkraft der synchronen Vorwärtsneigung (Option für
alle ID Chairs) an. Nach erfolgter Einstellung drücken Sie das
Handrad wieder unter die Sitzfläche zurück. Durch die Stüt-
zung in jeder Sitzposition – sogar in der Vorwärtsneigung
– bleibt die Wirbelsäule immer in einer gesunden Haltung.
Régularisation de l’intensité de l’appui du dossier et de
l’inclinaison (optimale) vers l’avant
Ce réglage doit être effectué en position droite sans exercer
de poids sur le dossier.
Tirez le manche situé à gauche sous l’assise et tournez le
jusqu’à atteindre l’intensité d’appui souhaitée : vers l’avant
l’appui est renforcé, vers l’arrière l’appui est diminué, maxi-
mum 2 tours complets. Ce faisant vous adaptez simultanément
la contre-force de l’inclinaison vers l’avant synchrone (option
existant pour toutes les ID Chairs). Une fois le réglage réalisé,
remettez le manche en place sous l’assise en exerçant une
pression. L’appui en toute position - même en position
inclinée vers l’avant - permet de conserver une position
saine de la colonne vertébrale.
730 283
/4”
730 283
/4”
730 283
/4”
730 283
/4”
730 283
/4”
700 271/2”
700 271/2”
700 271/
2”
700 271/2”
Adjusting the resistance of the backrest and the (optional)
forward tilt
This adjustment should be carried out while in an upright posi-
tion and without putting any pressure on the backrest.
Pull out the handle that is located beneath the front left of the
seat and turn it until you reach the desired backrest resistance.
Turning the handle forwards will increase resistance and turn-
ing it backwards will decrease resistance. The handle can be
turned a maximum of two full rotations. This will automatically
adjust the counterforce of the synchronous forward tilt (an op-
tion that is available for all ID Chairs). After having adjusted
the chair, push the handle back beneath the seat. Thanks to
the support offered in every sitting position – even with
negative tilt – the spinal column always maintains a
healthy posture.
Regeling van de steunkracht van de rugleuning en
(optionele) voorwaartse neiging
Deze instelling moet worden aangepast vanuit een rechte
zithouding en met een onbelaste rugleuning.
Trek het handwiel links onder de zitting uit en draai het totdat
de gewenste tegendruk van de rugleuning bereikt is: naar
voren voor meer tegendruk, naar achteren voor minder te-
gendruk, maximaal 2 keer volledig omdraaien. Op die manier
past u ook automatisch de tegendruk van de synchrone voor-
waartse neiging aan (optie voor alle ID Chairs). Duw na het
instellen het handwiel terug onder de zitting. De ondersteu-
ning in elke zithouding – zelfs bij de voorwaartse neiging
– zorgt ervoor dat de wervelkolom altijd in een gezonde
houding blijft.
Regolazione dell’intensità di sostegno dello schienale
e dell’inclinazione in avanti (opzionale)
Questa regolazione dovrebbe essere eseguita in posizione di
seduta eretta e con schienale non gravato dal peso corporeo.
Tirare verso l’esterno la manovella posizionata a sinistra sotto
al sedile e ruotarla finché non venga raggiunta l’intensità di
sostegno dello schienale desiderata: ruotando in avanti essa
risulterà più elevata, indietro più debole. Sono effettuabili al
massimo 2 rotazioni complete. In questo modo viene automati-
camente adeguato anche il grado di resistenza dell’inclinazio-
ne sincrona in avanti (opzionale per tutte le ID Chair). Una
volta eseguita la regolazione, premere di nuovo la manovella
sotto al sedile, riportandola alla posizione iniziale. Grazie al
sostegno offerto in qualsiasi posizione di seduta – perfino
nell’inclinazione in avanti – la colonna vertebrale man-
tiene sempre una postura corretta.
730 283
/4”
730 283
/4”
730 283
/4”
730 283
/4”
730 283
/4”
700 271/2”
700 271/2”
700 271/
2”
700 271/2”
Regulación de la fuerza de apoyo del respaldo y de la
inclinación hacia adelante (opcional)
Este ajuste debería realizarse al sentarse con la espalda er-
guida y sin apoyarse sobre el respaldo de la silla.
Extraiga la ruedecilla situada debajo del asiento, a la izquier-
da, y gírela hasta alcanzar la fuerza de apoyo del respaldo
deseada: el apoyo se hace más fuerte girando hacia adelante
y más suave haciéndolo hacia atrás; la ruedecilla se puede
girar hasta un máximo de 2 vueltas completas. De esta forma,
también puede ajustar la fuerza antagónica de la inclinación
sincronizada hacia adelante (opcional para todas las sillas
ID Chair). Una vez que ha realizado el ajuste, empuje la
ruedecilla debajo del asiento a su posición original. Gracias
al apoyo en cada posición, incluso al inclinarse hacia
adelante, la columna vertebral se mantiene siempre en
una postura saludable.
730 283
/4”
730 283
/4”
730 283
/4”
730 283
/4”
730 283
/4”
700 271/2”
700 271/2”
700 271/
2”
700 271/2”
Réglage en hauteur des accoudoirs 2-D et 3-D
Pressez sur le bouton situé à l’arrière de l’accoudoir afin de
régler l’accoudoir à la hauteur souhaitée. La partie supérieure
du bras et l’avant-bras forment un angle droit lorsque la hau-
teur des accoudoirs est correctement réglée. Le délestage de
la musculature de la nuque et des épaules permet d’éviter
les crispations.
Regulación de la altura de los reposabrazos 2D y 3D
Para modificar la altura del reposabrazos, pulse el botón situa-
do en la parte posterior del reposabrazos para desplazarlo
así hasta la altura deseada. Cuando el ajuste se realiza co-
rrectamente, el brazo y el antebrazo forman un ángulo recto.
El alivio que experimenta la musculatura del cuello y de
los hombros evita las tensiones musculares.
Hoogte-instelling van de 2D- en 3D-armleuningen
Druk op de knop aan de onderkant van de armleuning en
schuif de armleuning tot de gewenste hoogte. De juiste instel-
ling bereikt u als uw boven- en onderarm een rechte hoek
vormen. Zo worden de nek- en schouderspieren ontlast,
wat verkramping voorkomt.
Regolazione in altezza dei braccioli 2D e 3D
Premere il tasto che si trova sul retro del bracciolo per spin-
gerlo fino all’altezza desiderata. Con la giusta regolazione,
braccio e avambraccio devono formare un angolo retto.
Sgravando la muscolatura di nuca e spalle, si prevengo-
no fastidiose contratture.
Adjusting the height of the 2-D and 3-D armrests
Press the button that is located on the back of the armrest in
order to adjust it to the desired height. In an ideal sitting
position, the upper and lower arms should form a right angle.
Because the neck and shoulder muscles are relieved of
pressure, tenseness in those areas is prevented.
Höheneinstellung der 2D und 3D Armlehnen
Drücken Sie den Knopf an der Rückseite der Armlehne, um die
Armlehne in die gewünschte Höhe zu schieben. Ober- und
Unterarm bilden bei richtiger Einstellung einen rechten Winkel.
Durch die Entlastung der Nacken- und Schultermuskula-
tur wird Verspannungen vorgebeugt.
730 283
/4”
730 283
/4”
730 283
/4”
730 283
/4”
730 283
/4”
700 271/2”
700 271/2”
700 271/
2”
700 271/2”
Durch die Entlastung der Nacken- und Schultermuskula-
tur wird Verspannungen vorgebeugt.
Réglage en hauteur des accoudoirs circulaires
Pressez sur le bouton situé à l’avant de l’accoudoir en glissant
simultanément l’accoudoir jusqu’à la hauteur souhaitée. En
libérant le bouton et en réajustant légèrement l’accoudoir
celui-ci s’enclenche automatiquement. La partie supérieure du
bras et l’avant-bras forment un angle droit lorsque la hauteur
des accoudoirs est correctement réglée. Le délestage de la
musculature de la nuque et des épaules permet d’éviter
les crispations.
Regulación de la altura de los reposabrazos circulares
Pulse el botón situado en la parte anterior del reposabrazos y
desplace simultáneamente el reposabrazos hasta alcanzar la
altura deseada. Una vez que deja de pulsar el botón y reajus-
ta ligeramente el reposabrazos, éste encastra automáticamen-
te. Cuando el ajuste se realiza correctamente, el brazo y el
antebrazo forman un ángulo recto. El alivio que experimen-
ta la musculatura del cuello y de los hombros evita las
tensiones musculares.
Hoogte-instelling van de ringarmleuningen
Druk op de knop vooraan op de armleuning en schuif de
armleuning gelijktijdig tot de gewenste hoogte. Als u de knop
loslaat, zal de armleuning nog even bijstellen en vervolgens
automatisch vergrendelen. De juiste instelling bereikt u als uw
boven- en onderarm een rechte hoek vormen. Zo worden de
nek- en schouderspieren ontlast, wat verkramping voor-
komt.
Regolazione in altezza dei braccioli ad anello
Premere il tasto che si trova sulla parte anteriore del bracciolo
e spingere contemporaneamente il bracciolo fino all’altezza
desiderata. Rilasciando il tasto e riaggiustando leggermente il
bracciolo, questo scatta automaticamente in posizione. Con la
giusta regolazione, braccio e avambraccio devono formare un
angolo retto. Sgravando la muscolatura di nuca e spalle,
si prevengono fastidiose contratture.
Adjusting the height of the ring armrests
Press the button on the front of the armrest while you simulta-
neously adjust it to the desired height. When you release the
knob and carefully readjust the armrest, it will automatically
click into place. In an ideal sitting position, the upper and low-
er arms should form a right angle. Because the neck and
shoulder muscles are relieved of pressure, tenseness in
those areas is prevented.
Höheneinstellung der Ringarmlehnen
Drücken Sie den Knopf an der Vorderseite der Armlehne und
schieben Sie dabei gleichzeitig die Armlehne in die gewünsch-
te Höhe. Wenn Sie den Knopf loslassen und die Armlehne
leicht nachjustieren, rastet sie automatisch ein. Ober- und
Unterarm bilden bei richtiger Einstellung einen rechten Winkel.
You have now completed the three main adjustments
that can be carried out on your chair. You should now
be sitting properly on your ID Chair.
If required, you can make further adjustments – also
while in a seated position – in order to make precision
adjustments that suit your body weight and sitting
posture.
Nun haben Sie die drei hauptsächlichen Einstellungen
vorgenommen und sitzen grundsätzlich richtig in Ihrem
ID Chair.
Bei Bedarf können Sie – ebenfalls bequem im Sitzen –
noch weitere Einstellungen vornehmen, um den Stuhl fein
auf Ihren Körper zu justieren.
A présent, vous avez effectué les trois réglages princi-
paux et vous êtes correctement installé dans votre
ID Chair.
Si besoin est, vous pouvez réaliser des réglages
supplémentaires - en restant confortablement assis –
afin d’ajuster parfaitement le siège à votre corps.
Ya ha realizado los tres ajustes principales y ahora podrá
sentarse correcta y cómodamente en su ID Chair.
De ser necesario, puede efectuar otros ajustes para
adaptar la silla a su constitución física, incluso permane-
ciendo sentado.
U hebt nu de drie belangrijkste instellingen uitgevoerd en
zit nu principieel in de juiste zithouding in uw ID Chair.
Desgewenst kunt u – eveneens terwijl u comfortabel zit –
nog verdere instellingen aanpassen om de stoel precies
op uw lichaam af te stemmen.
Ora che le tre regolazioni principali sono state effettuate,
potete sedervi correttamente sulla vostra ID Chair.
In caso di necessità – sempre comodamente seduti –
è possibile eseguire ulteriori regolazioni per adattare
perfettamente la sedia al proprio corpo.
Réglage de la profondeur d’assise (en option)
Appuyez sur le manche situé à l’arrière à droite sous l’assise
et faites glisser la surface d’assise vers l’avant ou l’arrière. Il
importe de rester en contact avec le dossier en toute position
et de conserver un espace d’environ la largeur de deux doigts
entre la lisière avant et la partie supérieure des jambes.
Les personnes de grande taille bénéficient de suffisam-
ment d’espace pour leurs jambes.
Regulación de la profundidad del asiento (opcional)
Tire de la palanca trasera situada debajo del asiento a la
derecha y desplace el asiento hacia adelante o hacia atrás.
Es importante que al estar sentado mantenga el contacto con
el respaldo en todo momento y que la distancia entre el borde
delantero del asiento y la pierna sea de aprox. 2 dedos.
Los usuarios corpulentos disponen de suficiente superfi-
cie de apoyo para las piernas.
Instelling van de zitdiepte (optioneel)
Druk op de achterste hendel rechts onder de zitting en schuif
de zitting naar voren of naar achteren. Het is belangrijk dat u
nog steeds in elke zithouding contact houdt met de rugleuning
en dat er tussen de voorkant van de zitting en de onderbenen
een afstand van ongeveer twee vingers is. Op die manier
hebben grote gebruikers voldoende ruimte voor de
bovenbenen.
Regolazione della profondità del sedile (opzionale)
Premere la leva posteriore destra posizionata sotto al sedile
e spingere lo stesso in avanti o indietro. L’importante è che, in
qualsiasi posizione di seduta assumiate successivamente, il
vostro corpo rimanga a contatto dello schienale e vi sia una
distanza di circa due dita fra il bordo anteriore del sedile e la
gamba. Anche gli adulti di altezza superiore alla media
dispongono di un sostegno sufficiente per la coscia.
730 283
/4”
730 283
/4”
730 283
/4”
730 283
/4”
730 283
/4”
700 271/2”
700 271/2”
700 271/2”
700 271/2”
Adjusting the seat depth (optional)
Press the back lever that is located beneath the right side of
the seat and slide the seat forwards or backwards. It is impor-
tant that whatever your sitting position is you are touching
the backrest and that you can place two fingers between the
front edge of the seat and your lower legs. Bigger users
have enough upper leg space.
Verstellung der Sitztiefe (optional)
Drücken Sie den hinteren Hebel rechts unter dem Sitz und
schieben Sie die Sitzfläche vor oder zurück. Wichtig ist, dass
Sie weiterhin in jeder Sitzposition Kontakt zur Rückenlehne
haben und dass zwischen Sitzvorderkante und Unterschenkel
ein circa zwei Finger breiter Abstand besteht. Gross gewach-
sene Nutzer bekommen genügend Oberschenkelauflage.
Other settings
Weitere Einstellungen
Réglages supplementaires
Otros ajustes
Verdere instellingen
Ulteriori regolazioni