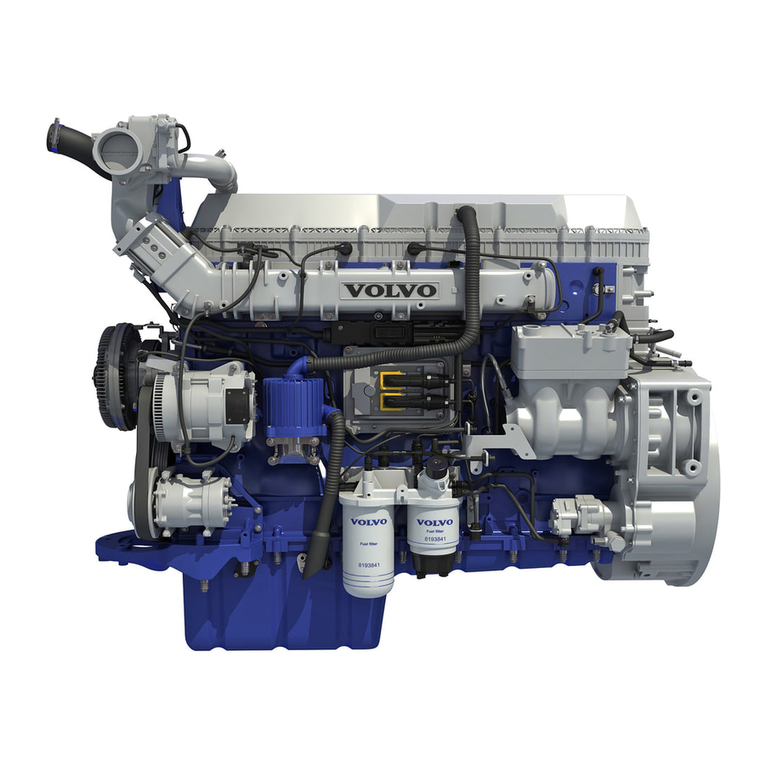
Volvo B6324S Operating and installation instructions

1
Table of content
DISCLAIMER...........................................................................................................................................................2
SYSTEM OVERVIEW.............................................................................................................................................3
COMMUNICATION ON THE INTERNAL NETWORK..................................................................................4
INPUT SIGNALS ...................................................................................................................................................5
OUTPUT SIGNALS ..............................................................................................................................................6
DIAGNOSE FUNCTIONS – OVERVIEW ........................................................................................................7
CATALYTIC CONVERTER DIAGNOSTIC .......................................................................................................8
MISFIRE DIAGNOSTIC.....................................................................................................................................10
LEAKAGE DIAGNOSTIC .................................................................................................................................12
FUEL SYSTEM DIAGNOSIS ............................................................................................................................16
HEATED OXYGEN SENSORS DIAGNOSTIC ............................................................................................18
APPENDIX: CORRESPONDING MODE$06 DATA / DIAGNOSTIC FUNCTIONS
Functional Description
MY07
Vehicle: S80, XC90
Engine: B6324S

2
Disclaimer
All information, illustrations and specifications contained herein are based on the latest pro-
duction information available at the time of this publication. Volvo reserves the right to make
changes in specifications and design at any time.
June 1 - 2008
Volvo Customer Service

3
The following modules communicate with the Engine
Control Module (ECM) via the network:
- Electronic Throttle System (ETS) including Elec-
tronic Throttle Module (ETM) and Accelerator Pedal
Module (APM)
- Transmission Control Module (TCM)
- Anti-lock Braking System (ABS)
- Central Electronic Module (CEM)
- Diagnostic Connector for connection to VADIS
(Volvo Aftersales Diagnostic and Information System)
- Driver Information Module (DIM), combined instru-
ment panel
- Climate Control Module (CCM)
- Steering Wheel Module (SWM)
- Central Electronic Module (CEM) is the central com-
puter in the network, which handles the exchange bet-
ween the network’s high speed and low speed sections.
The high-speed section covers the following modules:
Engine Control Module (ECM), Electronic Throttle
Module (ETM), Transmission Control Module (TCM),
Anti-lock Braking System (ABS) and the Central Elec-
tronic Module (CEM).
- The Engine Management System contains a large
number of sensors that send information by analog
signals directly to the Engine Control Module (ECM).
System overview - Design and function
Communication on the internal network
CAN communication
ECM (Engine Control Module) sends out and receives
the following signals via the network:
Brake Control Monitoring (BCM)
Provides information so that the Engine Control Mo-
dule (ECM) can determine whether any
misring is due to road condition or to a fault in the
engine management system. Also provides a
vehicle speed signal.
Climate Control Module (CCM)
Informs the Engine Control Module (ECM) about
A/C selection and requests A/C activation.
Central Electronic Module (CEM)
Is the “main computer” in the network and coordina-
tes required information between other
modules. It also controls diagnostic function by con-
necting the Diagnostic Connector to the
network for programming and reading off diagnostic
trouble codes (DTCs) and parameters. The
CEM also includes the Immobilizer.
Steering Wheel Module (SWM)
Provides information to the Engine Control Module
(ECM) that the cruise control is selected and
that the driver requests changing the cruise control
speed.
Transmission Control Module (TCM)
The Transmission Control Module (TCM) is only im-
plemented in automatic transmission cars.
The following signals are being sent on the network
from the Engine Control Module (ECM) and picked
up by the Transmission Control Module (TCM):
- Engine load
- Throttle opening
- Response to torque limiting
- Accelerator and brake pedal position
- Cruise control status.

4
The following signals are sent out on the network
from the Transmission Control Module (TCM) and
taken up by the Engine Control Module (ECM):
- Request for torque limiting step I and II
- Request to light Malfunction Indicator Lamp (MIL)
- Signal for constant idle speed compensation (P/N
position)
- Engaged gear.
Diagnostic Connector
The serial communication via the Diagnostic Con-
nector is used when reading off the Volvo onboard
diagnostic (OBD) system.
Contact General allocation
1 Discretionary
2Not Connected
3 MS_CAN (Manufacturer spec)
4 Chassis ground
5 Signal ground
6CAN_H line of ISO 15765-4
7 Not Connected
8 Discretionary
Contact General allocation
9 Discretionary
10 Not Connected
11 MS_CAN (Manufacturer spec)
12 Discretionary
13 Discretionary
14 CAN_L line of ISO 15765-4
15 Not Connected
16 Permanent positive voltage

5
Input signals
Component Purpose
A/C Linear High Pressure Sen-
sors
Provides information using a linear signal about any pressure changes on the high-
pressure side of the A/C system. Not used by emission related functions.
Accelerator Pedal
Senses the accelerator pedal position. The signal is used by the ECM. The pedal is
designed with two independent signals, one with analogue and one with digital output
(Pulse Width Modulated – PWM).
Alternator, LIN (bus)
Exchange of information between the Engine Control Module (ECM) and the other
units occurs as well with the use of LIN (Local Interconnect Network) serial communi-
cation. Not used by emission related functions.
Ambient temperature sensor Provides information about ambient air temperature. The signal is used by the ECM.
Brake light switch Informs Engine Control Module (ECM) that the car is braking. Not used by emission
related functions.
Camshaft sensor, inlet/outlet Provides the ECM information about the engine working cycle.
Coolant Level Switch Not EuCD Indicates low level in coolant water, the switch is open when the level is low.
CAN (bus)
Reading out fault codes. Exchange of information between the ECM and the following
units: CEM, BCM, TCM, Steering Angle Sensor (SAS), Differential Electronic Module
(DEM) and Diagnostic Connector.
Engine Coolant Temp Sensor To detect coolant temperature, which makes it necessary for the ECM to correct fuel
injection.
Flywheel/Crank Sensor Provides the ECM information about the crankshaft position and engine speed
Fuel Pressure/Temp. Sensor To measure the fuel pressure and fuel temperature.
Heated Oxygen Sensors Front,
UHEGO (One sensor for each
bank)
UHEGO linear oxygen sensor detects oxygen concentration in the exhaus
gas. (Universal HEGO)
Heated Oxygen Sensors, HEGO
(One sensor for each bank) Detection of lambda = 1, where the catalyst function is optimal.
Ignition Switch Ignition starts the ECM)
Knock sensors (One sensor for
each bank) To detect harmful knocking combustions in the engine.
MAF Sensor Provides information about the quantity of air mass passing through into the engine,
mainly under normal driving conditions.
MAP Sensor Provides information, about the engine load at rapid load changes, to the engine con-
trol unit.
Oil Quality Sensor
Provides information to the engine control unit, which will determine when to inform
the driver about needed oil top-ups or required service. Not used by emission related
functions.
Starter Switch Starter switch activates the output for starter motor by the ECM
Wake Up Switch Wake Up starts the ECM

6
Output signals
Component Purpose
A/C Compressor Control Valve Controlling the A/C compressor displacement. Not used by emission related functions.
A/C Relay Connecting and disconnecting A/C compressor. Not used by emission related func-
tions.
Alternator, LIN (bus) Exchange of information between the ECM and the other units occurs as well with the
use of LIN serial communication. Not used by emission related functions.
Battery (Kl.30) Provides the ECM with RAM backup voltage.
CAN Exchange of information between the ECM and other Control Units.
CPS - Cam Profile Shifting Is used to control the CPS valves for variable inlet valve lift.
Diagnose Module – Tank Lea-
kage (DMTL) Detects leakages above 0.5 mm in tank using overpressure.
ECM Power Main ECM power supply
Electronic Throttle Module To control the engine torque at all driving conditions by regulating the throttle plates, and
hence air flow to the engine, with an electrical motor.
Electronic Fan Control Module
(EFCM) The EFCM allows continuously variable control of the fan motor’srotation rate.
EVAP Canister Purge Valve To control the purge flow from canister to engine.
Ignition Coils/Power Stages
(1-6)
The ignition coils store energy from the battery and transform to a high voltage ignition
pulse to the spark plugs out of a control signal from the ECM.
Instrument panel Displays the MIL.
Starter Motor Relay Relay to switch on and off starter motor.
System relay Controlled by the ECM. To switch on and off EMS components.
VVT Control Valves, intake (One
for each bank) Is used to control the Intake VVT valve for VVT Timing.
Pump Electronic Module (PEM)
The PEM is a component within a demand controlled fuel supply system (DECOS).
It’s a power stage that is used to control the flow rate and pressure of the fuel pump
continuously.
Spark plugs (1-6) Transfer the high-tension ignition voltage generated within the coil into the cumbustion
chamber. No output signal directly from the ECM.
TCM (Automatic transmission
only)
Receiving signals (through CAN) from ECM. Hard wired Park/Neutral signal from TCM
to ECM.
VIS - Variable Intake System Is used to control the variable intake systems two electricaly controled tuning valves.

7
The Engine Management System fuel/ignition system
control module has an on-board diagnostic system
for self- diagnosis, continuously monitoring input and
output signals and several other functions.
If the engine control module (ECM) detects a fault,
some parameters will switch to predetermined, default
values, to allow as normal as possible operation. At
this time a pending diagnostic trouble code (DTC)
will be stored together with a number of relevant
parameters, to help the fault tracing operation. If the
same fault occurs during the next driving cycle then
the DTC will be set as permanent and if the fault is
emission relevant the malfunction indicator (MIL) will
be activated.
If a fault disappears after the DTC has been stored,
information about the fault is stored in the ECM.
Every time the fault reoccurs a counter counts it. After
three consecutive driving cycles without the fault it is
allowed to turn off the MIL. For every warm-up cycle
that is driven without the fault reoccurring a second
counter counts down. It begins with 40 and counts
down to 0. When the second counter has counted
down to 0 the diagnostic trouble code can be erased
from the ECM memory.If the fault reoccurs the se-
cond counter is reset to 40.
The OnBoard Diagnostic (OBD) system also makes it
possible to read out the values and status of a number
of parameters through the diagnostic link connector
(DLC) using standardized protocol and a standardized
scan tool, or the manufacturers diagnostic tool.
DIAGNOSE FUNCTIONS – OVERVIEW

8
Catalytic converter diagnostic
General Description
UHEGO CCC
Tailpipe
HEGO UFC
HEGO = Universal Heated Exhaust Gas Oxygen Sensor = ”Binary sensor”
UHEGO = Universal Heated Exhaust Gas Oxygen Sensor = ”Linear sensor”
CCC = Close Coupled Catalyst
UFC = Under Floor Catalyst
Exhaust system with a total of four sensors – two-sensor method stereo.

9
The three-way catalytic converter (TWC) stores oxygen
found in the exhaust gases and uses it to make toxic
gases less dangerous. The catalytic converter is a TWC
converter in which hydrocarbons (HC) and carbon
monoxide (CO) are oxidized and oxides of nitrogen
(NOx) are reduced.
As the TWC ages its ability to store oxygen drops.
This reduces the conversion capacity of the TWC. To
avoid dangerous emissions the ECM checks TWC ef-
ciency. This check is carried out as follows.
The two-sensor method stereo makes use of one
upstream and one downstream oxygen sensor for each
cylinder bank, each bank has one sensor before the
catalytic converter (UHEGO) and one after (HEGO).
Rich and lean lambda pulses are sent through the
TWC. For a TWC with good gas converter and large
oxygen storage capacity, it will take a long time for the
rich/lean pulse to reach the rear oxygen sensor. The
rear oxygen sensor will then have long rich and lean
pulses and a long time between switches. When the
TWC detoriate and oxygen storage capacity drops will
the rear oxygen sensor switching frequency increase.
The rear oxygen sensor voltage will be used to calcula-
te a test value of the TWC performance and a malfun-
ctioning TWC will be detected by OBD II
system.
Enable condition Minimum Maximum
Ambient pressure 74 kPa
Vehicle speed 0 km/h 655 km/h
Catalyst temperature 550°C 1000°C
Typical catalytic converter diagnostic enable conditions
Malfunction criteria Threshold value
Accumulated signal uctuation on
secondary O2 sensor during A/F
modulation (shift from lean to rich
/rich to lean)
Bank 1 > 22.5
Bank 2 > 22.5
Typical catalytic converter malfunction thresholds
DTCs
P0420 - Catalyst System Efciency Below
Threshold (Bank 1)
P0430 - Catalyst System Efciency Below
Threshold (Bank 2)
21
22
Monitor Strategy description High air ow monitoring
Catalytic Converter Monitor Operation Corresponding MonitorID

10
Misfire diagnostic
If the fuel/air mixture does not burn correctly, then
the generated torque will be less than intended and the
engine rpm will drop suddenly, (decelerate) the engine
is said to be misring. The control module can detect
misring by measuring the time between successive
segments on the ywheel /carrier plate.
If there is a misre then there will be a stepchange
in the size of these successive time measurements, if
there is a misre the lost torque will be noticed as a
slowing down of the ywheel rotation. The prerequi-
site for reliable misre detection is accurate segment
period measurement. However, the period between
two top dead centers (TDC), at constant speed, is also
subject to variations due to manufacturing tolerances
and off center installation. These inaccuracies are sys-
tematic, so they can be “learned” during fuel cut off
periods and used for compensation. By this way, the
systematic error introduced by the tolerances of the
target ywheel is largely eliminated. The segment time
can vary due to the following reasons:
- Misring
- Flywheel mechanical tolerances
- Driveline oscillations
- Normal variations caused by uneven
combustion
- Poor roads.
Since mechanical tolerances and driveline oscillation
interfere with the signal, it is difcult to ascertain
whether or not this interference is due to misring. To
eliminate mechanical faults in the ywheel the ywheel
signal is adapted. Two crankshaft revolutions are divi-
ded into six periods, (on a 6 – cylinder engine), if the
engine has no external load all six periods should be
equal. This is to even out the signal, so that a mecha-
nical fault in the ywheel is not registeredas misring.
After adaptation there is someinterference in the signal
due to oscillations in the drive train and normal engine
irregularities.The ywheel signal is adapted when:
- Engine speed is between two targets
- The fuel shut-off system is operating and has been
active for 100 revolutions.
A DTC is stored when misring leads to increased
emissions and a DTC is stored when misring could
cause damage to the TWC. The engine control module
registers and stores the engine speed, load and warm-
up status in which the misring occurred. See part
”Diagnostic functions, Overview”.
If misre exceeds catalyst damage threshold, the sys-
tem will cut the fuel on those cylinders that experience
misre if one of the two following conditions are
fullled:
1. Misre on single cylinder
2. One or two cylinders misring all the time.

11
DTCs
P0300
P0301
P0302
P0303
P0304
P0305
P0306
Multiple Cylinder Misre Detected
Cylinder 1 Misre Detected
Cylinder 2 Misre Detected
Cylinder 3 Misre Detected
Cylinder 4 Misre Detected
Cylinder 5 Misre Detected
Cylinder 6 Misre Detected
A1
A2
A3
A4
A5
A6
A7
Monitor Strategy description Emission related
Catalyst damage
Enable condition Minimum Maximum
Load 0.29 g/rev
Depending on altitude and coo-
lant temperature
0.65 g/rev
Depending on altitude and coolant
temperature
Engine speed 500 rpm 6600 rpm
Coolant temperature -20°C
Typical Misre diagnostic enable conditions
Malfunction criteria Threshold value
FTP Emission threshold
> 1.5 % (4th exceedance
or exceedance in rst 1000
revolutions)
Catalyst damage threshold 8 - 25 %
Typical Misre malfunction thresholds
Misre Diagnostic Operation Corresponding MonitorID

12
Leakage diagnostic
Vapor that evaporates from the fuel in the fuel tank is
routed to and stored in the EVAP canister from where
it is introduced into the combustion process via the
Canister Purge (CP) valve.
A leak diagnostic has been introduced in certain mar-
kets to ensure that there are no leaks in the fuel tank
system. The diagnostic is designed to detect leakage
corresponding to a 0,20 inch or larger hole. The fuel
tank system consists of fuel tank, fuel ller pipe,
EVAP canister, CP valve and all pipes between these
components. To be able to diagnose the fuel tank
system, it is also equipped with a diagnostic module
(DMTL = Diagnostic Module Tank Leakage) inclu-
ding the electrical driven air pump.
Fresh air
To canister
Reference
Orifice
Leakage diagnostic (LD) is performed in after run mode, when key off.
The diagnostic is divided into different phases as
follow:
Reference leak measurement, performed every LD
Rough leak test, performed every DCY
Small leak test performed every second DCY when
enabling conditions are met.
The diagnostic is performed by measuring the LD
Pump Module Motor current and then compares it to
a specied reference current. If a fault is detected in
any of the phases the diagnostic is interrupted and the
DTC for the component identied is stored. Diagno-
sis is carried out in the following stages: At the rst
engine stop after refueling, the module
DMTL will start if conditions are met (conditions for
soak time and fuel level are over ridden). When the
fuel level sensors are working correctly and the fuel
level is higher than 85 % or smaller than 15 % all lea-
kage tests are aborted. Also, the test is aborted if the
initial rate of change is higher than a calibrated level
due to a combination of high fuel level and high eva-
poration. In case of healing attempt the test is aborted
when the fuel level is too high, which is calibrated
lower than 85 %. While the fuel level sensors are not
working correctly the test only will be aborted if the
initial rate of change is higher than a calibrated level.

13
1. Reference leak measurement phase
For the reference current measurement, the motor-
pump is switched on. In this mode fresh air is pum-
ped through a 0.02-inch reference orice, situated
internally in the module, and the pump motor current
is measured. At some unusual operating conditions
the pump current may not stabilize. In this case the
leak check is aborted and a new leak check will be
performed in the next after run. To prevent a perma-
nent disablement of the leak check due to a DM-TL
module problem, the number of subsequent irregular
current measurements is counted and a module error
is set as soon as the counter exceeds a calibrated value.
2. Rough leak test phase
In this monitoring mode the changeover valve is
switched over (the purge control valve remains closed).
The motor current drops to a zero load level. Fresh
air is now pumped through the canister into the tank.
This creates a small overpressure at a tight evaporative
system, which leads to a current increase.
The rough leak check (≥ 0.04-inch) is performed by
monitoring the pump motor current gradient. Relative
pump motor current is created by using minimum
pump motor current and reference pump motor cur-
rent. Area ratio is created by dividing integrated relati-
ve current with ideal area, which is the linear integrated
area from minimum pump current to current sample
of the current. If the relative current has increased
above an upper limit but not exceeded a calibrated
area, within a calibrated time, the rough leak check has
passed without a fault. If the calibrated area ratio is
reached before the relative pump current limit, within
the calibrated time, a rough leak fault code is set.
The integrated relative pump current area Aint is
dened by;
Aint = A1 + A2
and the ideal area Aideal ,
Aideal = A2 .
See gure below.

14
3. Small leak test phase
If the conditions for a small leak check (³0.02- inch)
are set the pump motor remains on in monitoring
mode until an elliptic combination of the relation
pump current and area ratio are fullled, or a maxi-
mum time limit has been reached. The judgment is
based on a test value which is a combination of the
actual area ratio and gradient of area ratio with respect
to relative pump current. If the estimated leak size is
close to the fault limit (0.020” leaks) the monitor may
decide to extend the run time of the pump to encrease
the build up pressure. This will make the judgement of
a small leak safer.
If the test value is very near to set 0.02 inch leakage
the reference leak measurement phase is performed
again in order to compensate test value and make
a nal judgment. If the motor current decreases or
increases too much during one of the tests, the test is
aborted and a new leak test will be performed in the
next after run.
Monitoring conditions
To carry out the leak diagnostic it is necessary that:
- Engine-on time is at least 20 minutes and last engine-
off time is more than 5 hours.
- ECM (=Engine Control Module) is in after run
mode
- Engine speed is 0 rpm
- Vehicle speed is 0 km/h
- Altitude is less than (or equal to) 2500 meters
- Engine coolant temperature is above (or equal to) +4°C
- Ambient temperature is between +4°C and +35°C
- Fuel level between 15% to 85% when no fuel level fault
- Fuel level is not used if fault on fuel level
- Rate of change of the initial relative pump current is
low enough
- Concentration of fuel vapor in the EVAP canister is
not excessive
- Battery voltage between 11.0 V and 14.5 V
- Purge valve is closed.
With the following errors the leakage detection moni-
toring can not be performed. These errors will there-
fore disable the leakage detection monitoring and the
MIL (and the corresponding fault code) will be set.
The disable conditions are:
- Error on power stages DM-TL pump
- Error on power stage purge valve
- Error on purge valve
- Error on change-over valve

15
Leakage detection pump, me-
chanical error
Monitor Strategy description
DTCs P043E
P043F
P2407
Continuous, high
Continuous, low
Noisy during reference
Enable condition Minimum Maximum
Ambient temperature 3°C 36°C
Battery voltage 11.0 V 15.0 V
Fuel level 0% 80%
Atmospheric pressure 69 kPa
Typical Leakage diagnostic enable conditions
Malfunction criteria Threshold value
Reference current above limit > 36 mA
for specied time > 10 s
Reference measurement could not be performed within
specied TIME even though running conditions were
satised
> 200 s
Typical Leakage malfunction thresholds
Leakage diagnostic operation

16
Fuel system diagnosis
The fuel system diagnosis monitor the long term fuel
trim adaptions, to check if any of the adaption points
has reached it’s limits (rich or lean), and no more
adaption is possible. This will not immediately lead
to higher emissions, because the short-term fuel trim
can take care of additional faults. The long term fuel
trim is calculated from the front linear oxygen sensor,
and there are 6 times 6 (depending on load and engine
speed) different adaptation points. Each point is mo-
nitored in order to check if it is higher/lower than the
threshold value.
Below are some faults that illustrate cases, which could
cause higher emissions:
- Fault leading to lean A/F mixture.
- Air leakage after MAF sensor.
If there is an air leakage after the Maf sensor, this
will lead to unmeasured air is added to the combus-
tion. Short term and long term fuel trim will adjust
fuel amount to homogenous A/F mixture, and if the
leakage is large enough, the diagnosis will detect a lean
fault. Greatest inuence of this fault is at low load.
Fault leading to low fuel pressure.
If for example there is a fault which decreases the
fuel pressure from required pressure, this could also
affect the short term and long term fuel trim, and if
this difference is a large deviation from the required
fuel pressure, then the diagnosis will detect a lean fault.
Greatest inuence of this fault is at high load.
- Fault leading to rich A/F mixture.
- Maf sensor which is rich.
If the Maf sensor measure more air than is actually
passing the sensor, then this will result in a rich com-
bustion, and the consequence if the fault is great
enough, the diagnosis will detect a rich fault.
Other fault leading to rich A/F mixture
If the fuel pressure regulator is broken, injectors are
broken or there is another fault that will result in a rich
A/F mixture, then the diagnosis will detect rich.

17
Enable condition Minimum Maximum
After start delay 20 s
Air ow 1.99 g/s
Engine coolant temp 60°C 110°C
Typical Fuel System diagnosis enable conditions
Malfunction criteria Threshold value
Adaptive fuelling value above limit > 1.24
for specied time > 5 s
Adaptive fuelling value below limit < 0.78
for specied time > 5 s
Typical Fuel System diagnosis malfunction thresholds
Fuel system adaptation error Monitor Strategy description
P0171
P0172
P0174
P0175
Lean fault, bank 1
Rich fault, bank 1
Lean fault, bank 2
Rich fault, bank 2
81
81
82
82
DTCs
Fuel system diagnostic operation Corresponding MonitorID
To be able to activate closed-loop lambda control after
engine start the following must be true:
- Oxygen Sensor readiness detected (sensor
heating must be completed).
- No errors present for the Oxygen Sensor.
- The engine start sequence must be
completed (engine rpm risen close to idle).
- It is required that the engine is running.
- No catalyst damaging misre detected.
- Not too big deviation of target lambda.
- Engine load not too low.
- No F/C (Fuel cut) recovery enrichment
effect.
Closed loop fuel trim

18
Heated oxygen sensors diagnostic
An S80 car with EMS system that meets ULEV2/EU-
RO4 legal demands is tted with two heated oxygen
sensors per bank. The upper sensor is tted before the
CCC and the second sensor after the CCC and before
the UFC (under oor catalyst). The upper sensor is
linear type and the second is a binary type.
The upper sensors have the following monitoring:
- Slow activation (P-code P0134 and P0154). When
the Oxygen sensor heater circuit start to heat up the
element, a delay counter is activated. After a specied
time of heating is a judgment done by evaluating sen-
sor element impedance. Continues monitoring.
- Slow response (P-code P0133 and P0153). A dither is
added to target lambda. The diagnose will then check
if the lambda value can follow this square wave. When
the sensor is slow enough to give high emission it will
be detected as malfunctioning. Performed once per
driving cycle.
- Heater circuit (P-code P0031, P0032 and P0051,
P0052). The sensor heater is continuously monito-
red. Fault will be detected if circuit is: Open, short to
ground or short to battery.
- Sensor circuit (P-code P0131, P0132 and P0151 and
P0152). The sensor circuit is continuously monitored.
Fault will be detected if sensor circuit is: Open, short
to ground or short to battery.
- The second sensors have the following monitoring:
- Sensor circuit (P-code P0137, P0138 and P0157,
P0158). The sensor working range is checked to detect
if sensor have an amplitude/range problem to work in
its normal voltage range. Sensor must be able to work
in catalyst monitoring area to be judged as normal and
be close to 0V after fuel cut. Function also monitor if
sensor is stuck in range.
- Heater circuit (P-code P0037, P0038 and P0057,
P0058). The sensor heater is continuously monito-
red. Fault will be detected if circuit is: Open, short to
ground or short to battery.
- Sensor out of range (P-code P1137, P1138 and
P1157, P1158). If sensor doesn’t work in its normal
range, fault will be detected. Continuous monitoring.
Enable condition Minimum Maximum
UHEGO heater On operation Duty Low Level 7.7 ms
UHEGO heater On operation Duty High 120ms
After start delay 30s
Typical Heated Oxygen Sensor diagnostic enable conditions
Malfunction criteria Threshold value
O2 Sensor Heater fault ag. 5.12s
Element impedance too high > 80 Ω during 10 s
Typical Heated Oxygen Sensor malfunction thresholds

19
Upper O2 Heater Control Circuit Monitor Strategy description Corresponding MonitorID
P0031
P0032
P0051
P0052
Heater low fault, bank 1
Heater high fault, bank 1
Heater low fault, bank 2
Heater high fault, bank 2
41
41
45
45
Upper O2 Sensor Circuit
P0131
P0132
P0151
P0152
Element low fault, bank 1
Element high fault, bank 1
Element low fault, bank 2
Element high fault, bank 2
01
01
05
05
Upper O2 Circuit Slow Response
P0133
P0153
UHEGO Slow response, bank 1
UHEGO Slow response, bank 2
01
05
Upper O2 Circuit Slow Activation
P0134
P0154
UHEGO Slow activation, bank 1
UHEGO Slow activation, bank 2
01
05
O2 Heater ControlCircuit
P0037
P0038
P0057
P0058
Heater low fault, bank 1
Heater high fault, bank 1
Heater low fault, bank 2
Heater high fault, bank 2
42
42
46
46
O2 Sensor Circuit
P0137
P0138
P0157
P0158
Element low fault, bank 1
Element high fault, bank 1
Element low fault, bank 2
Element high fault, bank 2
02
02
06
06
O2 Sensor Out Of Range
P1137
P1138
P1157
P1158
Out of range high, bank 1
Out of range low, bank 1
Out of range high, bank 2
Out of range low, bank 2
DTCs
Heated Oxygen Sensor operation

I
Request on-board monitoring test results for specific monitored
systems
The purpose of this service is to allow access to the results for on-board
diagnostic monitoring tests of specic components / systems that are conti-
nuously monitored (e.g. misre monitoring) and non-continuously monitored
(e.g. catalyst system).
The request message for test values includes an On-Board Diag ostic Mo-
nitor ID, see Annex D (ISO/DIS 15031-5.3) that indicates the information
requested. Unit and Scaling information is included in Annex E (ISO/DIS
15031-5.3).
The vehicle manufacturer is responsible for assigning ”Manufacturer Dened
Test IDs” for different tests of a monitored system. The latest test values
(results) are to be retained, even over multiple ignitions OFF cycles, until re-
placed by more recent test values (results). Test values (results) are requested
y On-Board Diagnostic Monitor ID. Test values (results) are always repor-
ted with the Minimum and Maximum Test Limits. The Unit and Scaling ID
included in the response message denes the scaling and unit to be used by
the external test equipment to display the test values (results), Minimum Test
Limit, and Maximum Test Limit information.
If an On-Board Diagnostic Monitor has not been completed at least once
since Clear/reset emission-related diagnostic information or battery discon-
nect, then the parameters Test Value (Results), Minimum Test Limit, and
Maximum Test Limit shall be set to zero $00) values.
Not all On-Board Diagnostic Monitor IDs are applicable or supported by
all systems. On-Board Diagnostic Monitor ID $00 is a bit-encoded value that
indicates for each ECU which On-Board Diagnostic Monitor IDs are sup-
ported. On-Board Diagnostic Monitor ID $00 indicates support for On-Board
Diagnostic Monitor IDs from $01 to $20. On-Board Diagnostic Monitor ID
$20 indicates support for On-Board Diagnostic Monitor IDs $21 through $40,
etc. This is the same concept for PIDs/TIDs/InfoTypes support in services
$01, $02, $06, $08, and $09. On-Board Diagnostic Monitor ID $00 is required
for those ECUs that respond to a corresponding service $06 request message
as specied in Annex A ISO/DIS 15031-5.3). On-Board Diagnostic Monitor
ID $00 is optional for those ECUs that do not respond to additional service
$06 request messages.
MY07
Vehicle: S80, XC90
Engine: B6324S
Mode $06 Data
Table of contents
Other Volvo Engine manuals

Volvo
Volvo 3TNV76 Operating and installation instructions

Volvo
Volvo D11F Guide

Volvo
Volvo B 17 User manual

Volvo
Volvo MB10A Instruction manual

Volvo
Volvo B 17 User manual

Volvo
Volvo D13J User manual

Volvo
Volvo TAMD74C User manual

Volvo
Volvo TD420VE User manual

Volvo
Volvo D1-13 B Instruction manual

Volvo
Volvo D20 User manual