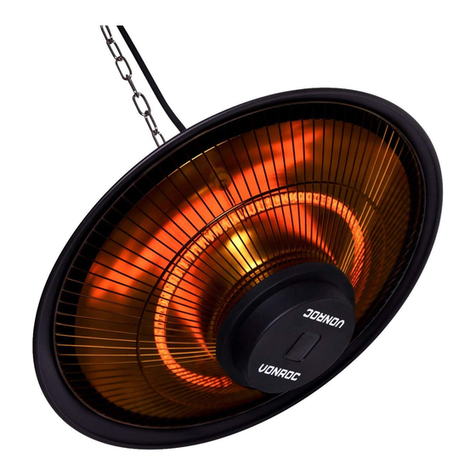
VONROC PH508AC User manual

PATIO HEATER VOLSINI
PH508AC
EN
Original Instructions 06
PT
Tradução do manual original 11
HU
Eredeti használati utasítás fordítása 17
CS
Překlad püvodního návodu k používání 23

WWW.VONROC.COM2
A
B C
63 2 1
13 14 15 16 18 17
10
12
4
5
8
7
9
11

WWW.VONROC.COM 3
G
D
E F
13
14
14
13
15
15
13
13

WWW.VONROC.COM4
H
JK
L
I
16
17
18

WWW.VONROC.COM 5
M
N

6
EN
WWW.VONROC.COM
1. SAFETY INSTRUCTIONS
Read the enclosed safety warnings, the additional
safety warnings and the instructions. Failure to
follow the safety warnings and the instructions may
result in electric shock, fire and/or serious injury.
Save the safety warnings and the instructions for
future reference.
The following symbols are used in the user manual
or on the product:
Read the user manual.
Denotes risk of personal injury, loss of life
or damage to the heater in case of
nonobservance of the instructions in this
manual.
Risk of electric shock.
Caution: hot surface!
Do not cover the device.
Earthing symbol. This appliance is classified
as protection class I and must be connected
to an earthed mains socket.
The product is in accordance with the
applicable safety standards in the European
directives.
GENERAL SAFETY WARNINGS
THESE INSTRUCTIONS SHOULD BE READ CAREFULLY
AND RETAINED FOR FUTURE REFERENCE.
The manufacturer cannot be held liable for any dam-
ages caused by failure to observe these instructions.
IMPORTANT SAFETY INSTRUCTIONS
READ CAREFULLY-The infrared heater is designed
for safe operation. Nevertheless, installation,
maintenance and operation of the heater can be
dangerous. Observing the following procedures
will reduce the risk of fire, electric shock, injury to
persons and keep installation time to a minimums.
Save these instructions for future used.
• Read all instruction before using this heater.
• Remove the unit from its packaging and check to
make sure it is in good condition before using.
• Do not let children play with parts of package
(such as plastic bags).
• Check the household voltage to ensure it match-
es the heater’s rated specification.
• Check the power cord and plug carefully before
used, to make sure that they are not damaged.
•
Before unplugging the power cord, be sure to turn
off the power, when energizing the unit, be sure
your hands are dry to prevent from electric shock.
• Only use the terrace radiator outdoors or in a
large open space. Keep all flammable objects
such as tarpaulins, parasols, branches, furniture,
curtains, paper etc. out of the way of the device
(at least 1 meter also if they are if they are
non-stationary objects!). The distance to the
walls must be at least 1 meter. The head must
be located at least 180 cm above the ground. If
you place the device under a roof, there must be
a space of at least 50 cm between the cap of the
terrace radiator and the (non-flammable) ceiling.
With a flammable roof (wood, plastic, tarpaulin
etc.) this distance must be at least 1 meter.
Always ensure good ventilation!
• Do not locate the device just above or below a
wall socket (not in the immediate vicinity).
• The terrace heater is only intended for household
use. You should not therefore use it on construc-
tion sites, in glasshouses, barns or stalls etc.,
even if they are largely open. There is usually too
much flammable material there.
• Do not use this terrace heater as sauna heating
or as a permanent space or room heater.
• Do not use this terrace heater in a kennel or any
other location where animals are present.
• Do not use near or in the immediate vicinity of a
bath or swimming pool or any source of liquid.
Despite the fact that the device is splash proof,
you need to be careful with water. Ensure that it
cannot fall into the water and do not expose it to
powerful jets of water. Do not touch it with wet
hands and do not place the device in the area im-
mediately around a bath, washroom, swimming
pool or other water supply, as this is dangerous.
• To protect against electric shock, do not immerse
cord or plug in water or any other liquid.
• Do not insert or allow foreign objects to enter any
ventilation or exhaust opening, as this may cause
an electric shock, fire or damage to the heater.
• Ensure there is sufficient light. The switches
on the device must be properly visible from a
distance of 1 meter.

EN
7WWW.VONROC.COM
• Always unplug the heater when not in use. Never
leave the device unsupervised when in use, but
switch it off and unplug. Do not use the device
with a programmer, timer or any other device
that switches the device on automatically.
• Do not use the heater with an external voltage
regulator such as dimmer, speed controller etc.
This produces an electrical hazard.
• Make sure that the cord does not hang over
(sharp) edges, does not make strong curves,
does not touch hot surfaces. Do not wrap the
cord around the device.
• Do not allow cord to overhang the counter top
where it can be easily pulled by children.
• Do not put fingers or foreign objects into the grill
while in operation.
• Do not leave the appliance unattended when in
use.
• This heater is not intended for use in bathrooms,
laundry and similar indoor locations, never locate
the heater where it may fall into a bathtub or
other water container.
• No liability can be accepted for any damage
caused by non-compliance with these instruc-
tions or any other improper use or mishandling.
• This appliance can be used by children aged from
8 years and above and persons with reduced
physical, sensory or mental capabilities or lack of
experience and knowledge if they have been giv-
en supervision or instruction concerning use of
the appliance in a safe way and understand the
hazards involved. Children shall not play with the
appliance. Cleaning and user maintenance shall
not be made by children without supervision.
• If the device for any reason produces cracks
or breaks, or if you establish any imperfection
or interruption to the aluminium casing or any
other part, immediately stop the operation of the
device and take the plug from the socket.
• If the power cord is damaged in any way, it must
be replaced by the manufacturer or its service
agent or a similarly qualified person in order to
avoid a hazard.
• To prevent overheating of this appliance, keep the
air inlets and outlets clean and free of anything
that may cause blockage. Check all inlets and
outlets from time to time to ensure it is clear of
any dirt or dust accumulation. DO NOT COVER.
The warning label not to cover the device must
also be placed in a clearly visible location after in-
stallation: it should not therefore be on the back.
• Parts of the heater may exceed 200°C, contact
with the heating tube, reflector, or metal parts
near the heating tube, may cause severe BURNS.
To avoid burns, do not let bare skin touch the hot
surface.
• NEVER place hands under the heating elements.
ALWAYS allow heating element to cool at least
10 minutes before touching the heating tube or
adjacent parts.
• Do not store any burnable liquids or materials
like paint, petrol, gas tanks etc. in the immediate
surroundings of the device. Don’t use the device
in flammable ambience, such as nearby combus-
tible gas tanks, gas tubes or spray cans. Danger
of explosion and fire!
• This product contains recyclable materials. Do
not dispose this product as unsorted community
waste. Please contact your local authorities for
the nearest collection point.
Electrical safety
Always check that the voltage of the power
supply corresponds to the voltage on the
rating plate.
• If the supply cord of this power tool is dam-
aged, it must be replaced by a specially pre-
pared supply cord available through the service
organization.
• Only use extension cables that are suitable for
the power rating of the machine with a minimum
thickness of 1.5 mm². If you use an extension
cable reel, always fully unroll the cable.
2. MACHINE INFORMATION
Intended use
This product is designed as a patio heater for
domestic environments. The heater is intended for
private gardens or other outdoor areas at home.
The heater may not be used to heat an indoor
space, usage as a non-household outdoor space
heater or for the drying of textiles or other mate-
rials. This heater is not equipped with a device to
control the room temperature so do not use this
heater in spaces when they are occupied by per-
sons not capable of leaving the room on their own,
unless constant supervision is provided. The device
is to be used only for its prescribed purpose. Any
other use is deemed to be a case of misuse.

8
EN
WWW.VONROC.COM
TECHNICAL SPECIFICATIONS
Model No. PH508AC
Voltage 220–240 V ~
Frequency 50-60 Hz
Power 3000W
Power settings 1: 1500W
2: 3000W
Heating element type Golden amber low glare lamp
Heating time 1 second
Wave length 0.78-1.4 microns
Radiant efficiency 90%
Heating distance 4-5m
Heating area 12-18m²
Colour temperature 1500K
Overheat protection Yes
Electronic soft start Yes
Ingress protection class IP54
Protection class Class I
Weight 4.2 kg
DESCRIPTION
The numbers in the text refer to the diagrams on
page 2-5.
1. Heater
2. Protective grill
3. Receiver for remote control with display
4. Power cable
5. On/off switch
6. Mode button
7. Remote control
8. Remote control on/off button
9. Down button
10.Up button
11.Timer button
12.Heat level button
13.Mounting bracket
14.Sleeve anchor
15.Screw with washers
16.Wing nut
17.Bolt
18.Washer
3. ASSEMBLY
This heater should be installed by a
competent person, i.e. a qualified electrician.
Always disconnected the heater from the
electrical supply and allow it to cool before
installation.
Installing the heater (Fig. A-N)
Always mount the device with the supplied
accessories.
Before starting the installation, take the following
into consideration:
• Place the device on a firm, level surface.
• The device must be mounted so that there is
50 cm of free space between the heater and
any ceiling, tent canvas etc. There must also
be at least 1.80 m between the ground and the
underside of the device. Refer to Fig. J and K.
The device may never be hung at an angle!
• Ensure that the power supply cable is well
mounted and that it does not come into contact
with reflector of the heater or that does not trail
into heated area.
• Do not install the heater on an inflammable
surface.
• If the heater is to be used outside, a weather-
proof outlet is highly recommended.
• Before drilling ensure that there are no wires or
water pipes in the area where the heater is to
be installed.
To install the heater on a wall or ceiling, follow
these steps:
1. The device is supplied with the mounting acces-
sories as shown in figure C.
2. Drill a total of 4 holes using the dimensions in
figure D. The hole diameter should be the same
diameter as the anchor diameter: 8mm. Drill at
least 10 to 15 mm deeper than the expected
embedment. Ensure the holes are level and at
exactly the same height.
3. Clean out the holes of any debris.
4. Set the nut flush with the top of the sleeve
anchor (14), shown as step 1 in figure E.
5. Insert the sleeve anchor (14) into the hole in
the base material, shown as step 2 in figure E.
Using a hammer, insert the sleeve anchor as far
until the washer and nut are tight against the
base material.

EN
9WWW.VONROC.COM
6. Now put the mounting bracket (13) on the
sleeve anchors (14), and mount it using the
washer and nut. Turn the nut until finger tight.
Both as shown on figure F.
7. Use a size 10 wrench to set the anchor by turn-
ing the nut three to four full turns.
8. Mount the remaining 2 mounting brackets (13)
onto the outer holes of the heater (1), as shown
on figure G.
9. Take the heater with the assembled brackets
to the mounting brackets mounted on the wall
or ceiling. Now pair both brackets with the bolt
(17), washer (18) and wing nut (16), as shown
on figure H.
10.Figure I shows a correctly assembled mounting
bracket assembly.
11.Take into account the minimum distances as
shown on figure J and K.
12.The heater can be adjusted until the maximum
angle, as shown on figure K and L.
13.Plug the patio heater into a grounded power
outlet. Check beforehand if the voltage rating
matches the device.
14.Take into account to mount the power cable in
correct matter, as shown on figure M and N.
Use tyraps to fixate the cable to the mounting
brackets if necessary.
Note: the heater can also be mounted on a tripod
or metal stand. Follow the instructions supplied
with the tripod or stand, to mount the heater
properly.
Assembling the remote control (Fig. B)
• Flip the remote control (7) to the backside and
remove the battery cover.
• Insert 2 AAA/ Alkaline type batteries into the
remote control (7) in accordance with the
instructions and polarity of the batteries.
• Change the batteries in the same way depicted
above.
4. OPERATION
Switching on/off (Fig. A, B)
The heater can be turned on and off using the
remote control (7) or the mode button (6). Before
use, the power switch (5) on the heater must first
be turned on.
Using the remote control
If you do not have the remote control in your pos-
session, please contact Vonroc customer service.
• First turn the switch (5) on the heater to the On
position.
• Press the button (8) on the remote control (7) to
turn the heater on.
• To turn the heater off, again press the button (8)
on the remote control (7).
• Press the switch (5) on the heater to the Off
position to power off.
Note: Make sure to point the remote control (7) in
the direction of the remote control receiver (3). All
VONROC heaters and their remote controls use the
same frequency, so it is possible to control several
heaters with just one remote.
Adjusting the power level (Fig. A, B)
The heater power can be adjusted in two levels:
• Level 1 - 1500W (50% power) ‘L1’ on display (3)
•
Level 2 - 3000W (100% power) ‘L2’ on display (3)
The desired level can be selected using the remote
control. Press the heat level button (12) and after-
wards use the up button (10) to increase the level
and down (9) button to decrease the level.
The level can also be selected by using the mode
button (6), see chapter ‘switching on/off’.
Using the timer function (Fig. A, B)
The heater is equipped with a timer function, ena-
bling the heater to remain on for a selected amount
of time. The selectable range is between 0 and 24
hours and will be shown on the display (3).
For example, when selecting 3 hours on the timer,
the heater will remain on for 3 hours and then will
automatically turn off.
To use the timer, press the heat level button (12)
and afterwards set the timer using the up button
(10) and down (9) button.
5. MAINTENANCE
Always make sure that the machine is not
connected to the mains electricity when you
carry out any maintenance of the mechanism.
CAUTION: Risk of Electric Shock. DO NOT
open or try to repair the heater yourself.

10
EN
WWW.VONROC.COM
Clean the machine casings regularly with a soft
cloth, preferably after each use. Make sure that the
ventilation openings are free of dust and dirt. Re-
move very persistent dirt using a soft cloth mois-
tened with soapsuds. Do not use any solvents such
as gasoline, alcohol, ammonia, etc. Chemicals such
as these will damage the synthetic components.
• DO NOT use alcohol, gasoline, abrasive pow-
ders, furniture polish or rough brushes to clean
the heater. This may cause damage or deterio-
ration to the surface of the heater.
• DO NOT immerse the heater in water.
• Wait until the heater is completely dry before
use.
ATTENTION:
1. Always disconnect the heater from the electric-
ity supply and allow it to cool before attempting
to clean it.
2. If the heater has collected dust or dirt inside
the unit or around the heating element, have to
unit cleaned by a qualified service agent. Do not
operate the heater in this condition.
3. The only maintenance required is cleaning of
the external surfaces of the heater.
4. Do not touch the heating element with bare
fingers, as residue from your hand could affect
the life of the lamp. If it is accidentally touched,
remove the finger marks with a soft cloth mois-
tened with mentholated spirit or alcohol.
5. Do not attempt to repair or adjust any electrical
or mechanical functions on this heater.
6. The heater contains no user serviceable parts.
Should the product suffer damage or break-
down, it must be returned to the manufacturer
or its service agent.
7. Damaged supply cords to be replaced by the
manufacturer, service agent or similarly quali-
fied person in order to avoid hazard.
Storage
Store the heater in a cool, dry location when not in
use to prevent dust and dirt build up. Use packag-
ing carton to store.
Trouble Shooting
If the heater will not operate, please check the
following before seeking repair or service:
• Check if the power cord is plugged into an
electrical outlet, if not plug in.
• Check if electricity to the main fuse is working.
• Make certain the power switches are turned on
If not, choose a setting.
ENVIRONMENT
Faulty and/or discarded electrical or
electronic apparatus have to be collected at
the appropriate recycling locations.
Only for EC countries
Do not dispose of power tools into domestic waste.
According to the European Guideline 2012/19/EU
for Waste Electrical and Electronic Equipment
and its implementation into national right, power
tools that are no longer usable must be collected
separately and disposed of in an environmentally
friendly way.
WARRANTY
VONROC products are developed to the highest
quality standards and are guaranteed free of
defects in both materials and workmanship for the
period lawfully stipulated starting from the date of
original purchase. Should the product develop any
failure during this period due to defective material
and/or workmanship then contact your VONROC
directly.
The following circumstances are excluded from this
guarantee:
• Repairs and or alterations have been made
or attempted to the machine by unauthorized
service centers;
• Normal wear and tear;
• The tool has been abused, misused or im-prop-
erly maintained;
• Non-original spare parts have been used.
This constitutes the sole warranty made by compa-
ny either expressed or implied. There are no other
warranties expressed or implied which extend
beyond the face hereof, herein, including the im-
plied warranties of merchantability and fitness for
a particular purpose. In no event shall VONROC be
liable for any incidental or consequential damages.
The dealers remedies shall be limited to repair or
replacement of nonconforming units or parts.

PT
11WWW.VONROC.COM
The product and the user manual are subject to
change. Specifications can be changed without
further notice.
1. INSTRUÇÕES DE SEGURANÇA
Leia os avisos de segurança fornecidos, os avisos
de segurança adicionais e as instruções. O não
cumprimento dos avisos de segurança e das instru-
ções pode resultar em choque eléctrico, incêndio
e/ou ferimentos graves. Guarde os avisos de segu-
rança e as instruções para referência futura.
Os seguintes símbolos são utilizados no manual do
utilizador ou no equipamento:
Leia o manual do utilizador.
Indica o risco de ferimentos, morte ou
danos no aquecedor se as instruções
indicadas neste manual não forem
seguidas.
Risco de choque eléctrico.
Cuidado: superfície quente!
Não tape o dispositivo.
Símbolo de ligação à terra. Este equipa-
mento está classificado como classe de
protecção I e deve ser ligado a uma tomada
eléctrica com ligação à terra.
O equipamento está em conformidade com
as normas de segurança aplicáveis nas
directivas europeias.
AVISOS GERAIS DE SEGURANÇA
ESTAS INSTRUÇÕES DEVEM SER LIDAS COM
ATENÇÃO E GUARDADAS PARA REFERÊNCIA
FUTURA.
O fabricante não pode ser responsabilizado por
quaisquer danos causados pela não observância
destas instruções.
INSTRUÇÕES IMPORTANTES DE SEGURANÇA
LEIA COM ATENÇÃO: o aquecedor por infraverme-
lhos é concebido para um funcionamento seguro.
Não obstante, a instalação, a manutenção e
funcionamento do aquecedor podem ser perigo-
sas. Ocumprimento dos seguintes procedimentos
reduz o risco de incêndio, choque eléctrico, feri-
mentos em pessoas e mantém um período mínimo
de instalação. Guarde estas instruções para uma
utilização futura.

12
PT
WWW.VONROC.COM
• Leia todas as instruções antes de utilizar este
aquecedor.
• Retire a unidade da embalagem e certifique-se de
que está em boas condições antes de utilizá-la.
• Não permita que as crianças brinquem com as
peças da embalagem (por exemplo, os sacos de
plástico).
• Verifique se a tensão na sua residência corres-
ponde à especificação nominal do aquecedor.
• Verifique o cabo de alimentação e a ficha com
atenção antes de utilizá-los, para certificar-se de
que não estão danificados.
•
Antes de desligar o cabo de alimentação, certi-
fique-se de que desliga a alimentação. Quando
ligar a unidade à corrente, as suas mãos devem
estar secas para evitar um choque eléctrico.
• Utilize o aquecedor de terraço em exteriores ou
numa grande área aberta. Mantenha todos os
objectos inflamáveis, como lonas, guarda-sóis,
ramos, mobília, cortinas, papel, etc., afastados
do dispositivo (a uma distância de pelo menos
1 metro se forem objectos móveis!). A distância
até à parede deve ser, pelo menos, de 1 metro.
Aparte superior deve estar situada a pelo menos
180 cm acima do chão. Se colocar o dispositi-
vo debaixo de uma cobertura, deve haver uma
distância de pelo menos 50 cm entre a tampa do
aquecedor de terraço e o tecto (não inflamável).
Se o colocar debaixo de um tecto inflamável (de
madeira, plástico, lona, etc.), esta distância deve
ser, pelo menos, de 1 metro. Assegure sempre
uma ventilação adequada!
• Não coloque o dispositivo imediatamente acima
ou abaixo de uma tomada de parede (não colo-
que demasiado perto de uma tomada).
• O aquecedor de terraço é concebido apenas
para uso doméstico. Por conseguinte, não
deve utilizá-lo em estaleiros, estufas, celeiros,
estábulos, etc., mesmo que sejam amplamente
abertos. Normalmente contêm muitos materiais
inflamáveis.
• Não utilize este aquecedor de terraço para aque-
cimento de saunas ou como área permanente ou
aquecedor de ambiente.
• Não utilize este aquecedor de terraço num canil
ou em qualquer local onde estejam animais.
• Não utilize perto ou junto de banheiras, piscinas
ou qualquer outra fonte de líquidos. Apesar do
dispositivo ser à prova de salpicos, deve ter
cuidado com a água. Não deve deixá-lo cair
dentro de água e não o exponha a jactos de
água potentes. Não toque no dispositivo com as
mãos molhadas e não o coloque num local junto
a banheiras, casas de banho, piscinas ou outras
fontes de água, porque é perigoso.
• Para proteger o dispositivo de choque eléctrico,
não coloque o cabo ou a ficha dentro de água ou
de qualquer outro líquido.
• Não insira nem permita a entrada de objectos
estranhos dentro das aberturas de ventilação ou
escape, porque pode causar choque eléctrico,
incêndio ou danos no aquecedor.
• Certifique-se de que tem luz suficiente. Os inter-
ruptores no dispositivo devem estar claramente
visíveis a 1 metro de distância.
• Desligue sempre o aquecedor quando não esti-
ver a utilizá-lo. Nunca deixe o dispositivo sem vi-
gilância quando estiver a utilizá-lo; desligue-o e
retire a ficha da tomada. Não utilize o dispositivo
com um programador, temporizador ou qualquer
dispositivo que ligue o dispositivo automatica-
mente.
• Não utilize o aquecedor com um regulador de
tensão externo, como um regulador de intensi-
dade, regulador de velocidade, etc. Isto causa
um choque eléctrico.
• Certifique-se de que o cabo não fica pendurado
sobre arestas (afiadas), não fica muito encurvado
e não entra em contacto com superfícies quentes.
Não enrole o cabo à volta do dispositivo.
• Não deixe que o cabo fique pendurado no bal-
cão, porque pode ser puxado facilmente pelas
crianças.
• Não coloque os dedos ou objectos estranhos na
grelha quando o dispositivo estiver a ser utilizado.
• Quando estiver a utilizar o equipamento, não o
deixe sem vigilância.
• Este aquecedor não é concebido para utilização
em casas de banho, lavandarias e em áreas
interiores semelhantes, nunca coloque o aque-
cedor num local onde possa cair dentro de uma
banheira ou outro depósito de água.
• Não será assumida qualquer responsabilidade
por danos causados pelo não cumprimento
destas instruções ou qualquer outra utilização
inadequada ou incorrecta.
• Este equipamento pode ser utilizado por crianças
a partir dos 8 anos e por pessoas com capacida-
des físicas, sensoriais ou mentais reduzidas ou
com falta de experiência e conhecimentos que
tenham recebido instruções ou supervisão sobre
a utilização segura do equipamento e com-

PT
13WWW.VONROC.COM
preendam os riscos envolvidos. As crianças não
devem brincar com o equipamento. Alimpeza e
a manutenção por parte do utilizador não devem
ser efectuadas por crianças sem supervisão.
• Se, por algum motivo, o dispositivo ficar rachado
ou partido ou fizer algum risco ou arranhão na
caixa de alumínio ou em qualquer outra peça,
deixe de utilizar o dispositivo de imediato e retire
a ficha da tomada.
• Se o cabo de alimentação estiver danificado de
qualquer maneira, deve ser substituído pelo fa-
bricante, pelo respectivo técnico de assistência
ou técnico devidamente qualificado para evitar
uma situação de perigo.
• Para impedir o sobreaquecimento do equipa-
mento, mantenha as entradas e saídas de ar
limpas e sem quaisquer objectos que possam
obstruí-las. Verifique periodicamente todas as
entradas e saídas para evitar a acumulação de
sujidade ou pó. NÃO TAPE. A etiqueta de aviso
para não tapar o dispositivo deve ser sempre co-
locada num local bem visível após a instalação:
por conseguinte, não pode ser colocada na parte
de trás.
• As peças do aquecedor podem atingir uma
temperatura superior a 200 °C. O contacto com
o tubo de aquecimento, reflector ou peças
metálicas perto do tubo de aquecimento podem
causar QUEIMADURAS graves. Para evitar esta
situação, não permita o contacto da pele com as
superfícies quentes.
• NUNCA coloque as mãos debaixo dos elementos
de aquecimento. Aguarde SEMPRE até o elemen-
to de aquecimento arrefecer durante pelo menos
10 minutos antes de tocar no tubo de aqueci-
mento ou em peças adjacentes.
• Não guarde líquidos ou materiais inflamáveis,
como tinta, gasolina, botijas de gás, etc., perto
do dispositivo. Não utilize o dispositivo num am-
biente inflamável, por exemplo, perto de botijas
de gás, tubos de gás ou latas de spray inflamá-
veis. Perigo de explosão e incêndio!
• Este equipamento contém materiais recicláveis.
Não elimine este equipamento como resíduos
urbanos não triados. Contacte as autoridades
locais para saber qual é o ponto de recolha mais
próximo.
Segurança eléctrica
Verifique sempre se a tensão da fonte de
alimentação corresponde à tensão na placa
sinalética.
• Se o cabo de alimentação desta ferramenta
eléctrica estiver danificado, deve ser substituí-
do por um cabo de alimentação especialmente
preparado, disponível através do serviço de
assistência.
• Utilize apenas extensões que sejam adequadas
para a potência nominal da máquina com uma
espessura mínima de 1,5 mm². Se utilizar um
enrolador de extensão, desenrole sempre o
cabo por completo.
2. INFORMAÇÕES SOBRE A MÁQUINA
Utilização pretendida
Este equipamento é concebido como aquecedor de
exterior para ambientes domésticos. O aquecedor
é concebido para jardins privados ou outras áreas
exteriores em casa. O aquecedor não pode ser
utilizado para aquecer espaços interiores, como
aquecedor de áreas exteriores não domésticas ou
para secar têxteis ou outros materiais. Este aque-
cedor não está equipado com um dispositivo para
controlar a temperatura ambiente, por isso não
utilize este aquecedor em salas onde haja crianças
que não tenham capacidade para sair sozinhas,
excepto se forem vigiadas constantemente. O dis-
positivo deve ser utilizado apenas para a finalidade
para a qual foi concebida. Qualquer outra utilização
é considerada um caso de utilização indevida.
ESPECIFICAÇÕES TÉCNICAS
Modelo n.º PH508AC
Tensão 220 – 240 V ~
Frequência 50 - 60 Hz
Potência 3000 W
Definições de potência 1: 1500 W
2: 3000 W
Tipo de elemento de
aquecimento
Lâmpada duradoura âmbar
com brilho reduzido
Tempo de aquecimento 1 segundos
Comprimento de onda 0,78 a 1,4 mícrones
Rendimento energético 90 %
Distância de aquecimento 4 - 5 m
Área de aquecimento 12 - 18 m²
Temperatura da cor 1500 K

14
PT
WWW.VONROC.COM
Protecção contra aque-
cimento
Sim
Arranque electrónico
suave
Sim
Protecção contra entrada
de corpos estranhos
IP54
Classe de protecção Classe I
Peso 4,2 kg
DESCRIÇÃO
Os números indicados no texto dizem respeito aos
diagramas nas páginas 2 e 5.
1. Aquecedor
2. Grelha de protecção
3. Receptor do telecomando com visor
4. Cabo de alimentação
5. Botão para ligar/desligar
6. Botão de modo
7. Telecomando
8. Botão para ligar/desligar do telecomando
9. Botão para baixo
10.Botão para cima
11.Botão do temporizador
12.Botão do nível de aquecimento
13.Suporte de montagem
14.Bucha de expansão
15.Parafuso com anilhas
16.Parafuso de orelhas
17.Parafuso
18.Anilha
3. MONTAGEM
Este aquecedor deve ser instalado por um
pessoa competente, ou seja, por um
electricista qualificado.
Desligue sempre o aquecedor da rede
eléctrica e aguarde até arrefecer antes de
efectuar a instalação.
Instalar o aquecedor (Fig. A-N)
Monte sempre o dispositivo com os
acessórios fornecidos.
Antes de iniciar a instalação, tenha os seguintes
aspectos em consideração:
• Coloque o dispositivo numa superfície robusta e
nivelada.
• O dispositivo deve ser montado de modo a que
fique um espaço de 50 cm livre entre o aque-
cedor e o tecto, barraca, toldo, etc. Deve haver
também um espaço de pelo menos 1,80m
entre o chão e a parte inferior do dispositivo.
Verifique as Fig. J e K. O dispositivo nunca deve
ser pendurado em ângulo!
• Assegure que o cabo de alimentação está bem
montado e que não entra em contacto com o
reflector do aquecedor ou que não fique na
área de aquecimento.
• Não instale o aquecedor em superfícies infla-
máveis.
• Se utilizar o aquecedor no exterior, é recomen-
dável utilizar uma tomada impermeabilizada.
• Antes de perfurar, certifique-se de que não há
fios ou tubos de água na área onde pretende
instalar o aquecedor.
Para instalar o aquecedor numa parede ou tecto,
siga estes passos:
1. O dispositivo é fornecido com os acessórios de
montagem, como indicado na Figura C.
2. Faça 4 furos de acordo com as dimensões indi-
cadas na Figura D. O diâmetro do furo deve ser
igual ao diâmetro da fixação: 8 mm. Faça um
furo com, pelo menos, 10 a 15 mm mais pro-
fundos do que o encaixe previsto. Certifique-se
de que os furos estão nivelados e exactamente
à mesma altura.
3. Limpe os furos para retirar os resíduos.
4. Coloque a porca rente à parte superior da ânco-
ra de manga (14), como indicado no passo 1 na
Figura E.
5. Insira a bucha de expansão (14) no furo no ma-
terial de base, indicado no passo 2 na Figura E.
Com um martelo, insira a bucha de expansão o
máximo possível até a anilha e a porca ficarem
apertadas no material de base.
6. Em seguida, coloque o suporte de montagem
(13) nas buchas de expansão (14) e monte-a
com a anilha e a porca. Rode a porca com a
mão até ficar apertada. Ambos estão indicados
na Figura F.
7. Utilize uma chave de tamanho 10 para regular
a âncora, rodando a porca três ou quatro voltas
completas.
8. Insira os 2 suportes de montagem restantes
(13) nos furos exteriores do aquecedor (1),
como indicado na Figura G.
9. Insira o aquecedor com os suportes montados
na parede ou no tecto. Em seguida, encaixe os

PT
15WWW.VONROC.COM
suportes com o parafuso (17), a anilha (18) e
o parafuso de orelhas (16), como indicado na
Figura H.
10.A Figura I mostra um conjunto de suporte de
montagem montado correctamente.
11.Tenha em consideração as distâncias mínimas
indicadas nas Figuras J e K.
12.O aquecedor pode ser ajustado até ao ângulo
máximo, como indicado nas Figuras K e L.
13.Ligue o aquecedor de exterior numa tomada
eléctrica com ligação à terra. Verifique
primeiro se a tensão nominal corresponde à do
dispositivo.
14.O cabo de alimentação deve ser montado cor-
rectamente, como indicado na Figuras M e N.
Se for necessário, utilize abraçadeiras para fixar
o cabo nos suportes de montagem.
Nota: o aquecedor pode ser montado também num
tripé ou num suporte metálico. Siga as instruções
fornecidas com o tripé ou o suporte para montar o
aquecedor correctamente.
Montagem do telecomando (Fig. B)
• Rode o telecomando (7) para a parte de trás e
retire a tampa das pilhas.
• Coloque 2 pilhas do tipo AAA/alcalinas no
telecomando (7) de acordo com as instruções e
a polaridade das pilhas.
• Substitua as pilhas de acordo com o procedi-
mento indicado acima.
4. FUNCIONAMENTO
Ligar/desligar (Fig. A, B)
O aquecedor pode ser ligado e desligado com o
telecomando (7) ou o botão de modo (6). Antes de
utilizar o aquecedor, é necessário ligar o interrup-
tor de alimentação (5).
Utilizar o telecomando
Se perdeu o telecomando, contacte o serviço de
apoio ao cliente da Vonroc.
• Primeiro, coloque o interruptor (5) na posição
“Ligar” do aquecedor.
• Carregue no botão (8) no telecomando (7) para
ligar o aquecedor.
• Para desligar o aquecedor, carregue no botão
(8) no telecomando (7).
• Coloque o interruptor (5) na posição “Desligar”
do aquecedor para desligá-lo.
Nota: Aponte o telecomando (7) na direcção do re-
ceptor do telecomando (3). Todos os aquecedores
da VONROC e os respectivos telecomandos utilizam
a mesma frequência, por isso é possível controlar
vários aquecedores com um único telecomando.
Regular o nível de potência (Fig. A, B)
A potência do aquecedor pode ser regulada para
dois níveis:
• Nível 1 - 1500 W (50% de potência) “L1” no
visor (3)
•
Nível 2 - 3000 W (100% de potência) “L2” no
visor (3)
O nível pretendido pode ser seleccionado com o
telecomando. Carregue no botão do nível de aque-
cimento (12) e, em seguida, utilize o botão para
cima (10) para aumentar o nível e o botão para
baixo (9) para reduzir o nível.
O nível pode ser seleccionado também utilizando
o botão de modo (6), consulte o capítulo “Ligar/
desligar”.
Utilizar a função de temporização (Fig. A, B)
O aquecedor está equipado com uma função de
temporização, o que permite mantê-lo ligado du-
rante um determinado intervalo. A gama seleccio-
nável varia entre 0 e 24 horas e é apresentada no
visor (3).
Por exemplo, se seleccionar 3 horas no tempori-
zador, o aquecedor permanece ligado durante 3
horas e depois desliga-se automaticamente.
Para utilizar o temporizador, carregue no botão do
nível de aquecimento (12) e, em seguida, regule o
temporizador com o botão para cima (10) e para
baixo (9).
5. MANUTENÇÃO
Certifique-se sempre de que a máquina não
está ligada à rede eléctrica quando efectuar
tarefas de manutenção no mecanismo.
CUIDADO: Risco de choque eléctrico. NÃO
abra nem tente reparar o aquecedor.
Limpe a caixa da máquina com frequência com um
pano macio, de preferência após cada utilização.
Certifique-se de que as aberturas de ventilação
não têm pó ou sujidade. Retire a sujidade muito
persistente com um pano macio humedecido com

16
PT
WWW.VONROC.COM
água de sabão. Não utilize solventes, como gaso-
lina, álcool, amoníaco, etc. Este tipo de produtos
químicos danificam os componentes sintéticos.
• NÃO utilize álcool, gasolina, pós abrasivos,
produtos para lustrar móveis ou escovas duras
para limpar o aquecedor. Isto pode causar
danos ou deterioração da superfície do aquece-
dor.
• NÃO mergulhe o aquecedor dentro de água.
• Aguarde até o aquecedor secar por completo
antes de utilizá-lo.
ATENÇÃO:
1. Desligue sempre o aquecedor da rede eléctrica
e aguarde até arrefecer antes de efectuar a
limpeza.
2. Se o aquecedor acumular pó ou sujidade no
interior da unidade ou à volta do elemento de
aquecimento, peça a um técnico de assistência
qualificado para limpá-lo. Não utilize o aquece-
dor em ambientes com pó.
3. A única manutenção necessária é limpar as
superfícies externas do aquecedor.
4. Não toque no elemento de aquecimento com
os dedos descobertos, porque os resíduos nas
suas mãos podem afectar a vida útil da lâmpa-
da. Se tocar acidentalmente na lâmpada, retire
as marcas dos dedos com um pano macio,
humedecido com álcool mentolado.
5. Não tente reparar ou regular as funções eléctri-
cas ou mecânicas deste aquecedor.
6. O aquecedor não contém peças que possam ser
reparadas pelo utilizador. Se o produto sofrer
danos ou uma avaria, deve ser devolvido ao
fabricante ou ao técnico de assistência.
7. Se o cabo de alimentação estiver danificado,
deve ser substituído pelo fabricante, técnico de
assistência ou por uma pessoa qualificada para
evitar uma situação de risco.
Armazenamento
Quando não estiver a utilizar o aquecedor, guarde-o
num local seco e fresco para impedir a acumulação
de pó e sujidade. Utilize a embalagem de cartão
para guardá-lo.
Resolução de problemas
Se o aquecedor não funcionar, verifique o seguinte
antes de reparar ou fazer a manutenção:
• Verifique se o cabo de alimentação está ligado
a uma tomada eléctrica, caso não esteja ligado.
• Verifique se o fusível principal tem corrente.
• Certifique-se de que os interruptores de cor-
rente está ligados. Caso contrário, escolha uma
definição.
AMBIENTE
Os equipamentos eléctricos ou electrónicos
defeituosos e/ou eliminados devem ser
recolhidos em locais de reciclagem
adequados.
Apenas para os países da CE
Não elimine as ferramentas eléctricas em conjunto
com os resíduos domésticos. De acordo com a
directiva europeia 2012/19/UE sobre resíduos de
equipamentos eléctricos e electrónicos e a res-
pectiva implementação na legislação nacional, as
ferramentas eléctricas que já não sejam utilizadas
devem ser recolhidas em separado e eliminadas de
maneira ecológica.
GARANTIA
Os produtos da VONROC são desenvolvidos de
acordo com os padrões de qualidade mais eleva-
dos e não têm quaisquer defeitos em termos de
materiais e mão-de-obra em relação ao período
estipulado por lei, cujo início é a partir da data de
compra original. Se o produto apresentar qual-
quer falha durante este período devido a qualquer
defeito no material e/ou de mão-de-obra, contacte
a VONROC directamente.
As seguintes circunstâncias estão excluídas desta
garantia:
• Se forem efectuadas ou tentadas quaisquer
reparações e/ou alterações na máquina por
centros de assistência não autorizados;
• Desgaste normal;
• Se a ferramenta foi utilizada de maneira abusi-
va, indevida ou a manutenção for efectuada de
maneira incorrecta;
• Se forem utilizadas peças sobresselentes não
originais.
Isto constitui a única garantia feita pela empresa,
de maneira expressa ou implícita. Não existem
quaisquer outras garantias expressas ou implí-
citas que se prolonguem, incluindo as garantias
implícitas de comercialização e adequação para
fins específicos. A VONROC não será, em nenhuma

HU
17WWW.VONROC.COM
circunstância, responsável por danos incidentais
ou indirectos. Os fornecedores devem estar limita-
dos a reparar ou substituir as unidades ou peças
que não estejam em conformidade.
O equipamento e o manual do utilizador estão
sujeitos a alterações sem aviso prévio. As
especificações podem ser alteradas sem aviso
prévio.
1. BIZTONSÁGI UTASÍTÁSOK
Olvassa el a mellékelt biztonsági figyelmeztetése-
ket, a kiegészítő biztonsági figyelmeztetéseket és
az utasításokat. A figyelmeztetések és utasítások
be nem tartása áramütéshez, tűz keletkezéséhez
vagy akár súlyos személyi sérüléshez vezethet.
Őrizze meg a biztonsági figyelmeztetéseket és az
utasításokat, hogy azokat később is használhassa
referenciaként.
A használati útmutatóban és a terméken a követke-
ző jelölésekkel találkozhat:
Olvassa el a használati útmutatót.
A jelen útmutató utasításainak be nem
tartása esetén balesetveszély, életveszély
vagy a fűtőberendezés károsodásának
veszélyét jelöli.
Áramütés veszélye.
Vigyázat: forró felület!
Ne takarja le a készüléket.
Földelés szimbólum. Ez a készülék I-es
védelmi osztályú készüléknek minősül, és
földelt elektromos aljzathoz kell csatlakoz-
tatni.
A termék megfelel az európai irányelvek rá
vonatkozó biztonsági követelményeinek.
ÁLTALÁNOS BIZTONSÁGI FIGYELMEZTETÉSEK
A JELEN UTASÍTÁSOKAT ALAPOSAN EL KELL
OLVASNI, ÉS MEG KELL ŐRIZNI ŐKET, MERT
KÉSŐBB MÉG SZÜKSÉG LEHET RÁJUK.
A gyártó nem vonható felelősségre a jelen utasítá-
sok be nem tartásából eredő semmilyen kárért.
FONTOS BIZTONSÁGI UTASÍTÁSOK
OLVASSA EL ALAPOSAN – Az infravörös fűtőberen-
dezést úgy tervezték, hogy biztonságosan hasz-
nálható legyen. Mindazonáltal a fűtőberendezés
telepítése, karbantartása és használata veszélyes
lehet. A következő eljárások betartásával csökkent-
heti a tűz, az áramütés és a személyi sérülések
kockázatát, valamint minimálisra csökkentheti a
telepítési időt. Őrizze meg ezeket az utasításokat,
mert később még szüksége lehet rájuk.

18
HU
WWW.VONROC.COM
• A fűtőberendezés használata előtt olvassa el az
összes utasítást.
• Távolítsa el az egységet a csomagolásából, és
használat előtt győződjön meg róla, hogy az
egység jó állapotban van.
• Ne hagyja, hogy a gyerekek játsszanak a csoma-
golóanyagokkal (például a nejlonzacskókkal).
• Győződjön meg róla, hogy a háztartási tápfe-
szültség megegyezik a fűtőberendezés névleges
feszültségével.
• Használat előtt győződjön meg róla, hogy a táp-
kábel és a tápdugó nem sérült.
•
A tápkábel kihúzása előtt kapcsolja ki az egysé-
get, bekapcsoláskor pedig az áramütés elkerülése
érdekében ügyeljen rá, hogy a kezei szárazok
legyenek.
• A teraszfűtőt csak kültéren, tág és nyitott helyen
használja. Mindennemű éghető tárgyat (például
ponyvákat, napernyőket, ágakat, bútorokat,
függönyöket, papírokat stb.) távol kell tartani
a készüléktől (legalább 1 méterre még akkor
is, ha azok mozgó tárgyak!). Legalább 1 méter
távolságot kell tartani a falaktól. A fejnek lega-
lább 180cm magasban kell lennie a talajtól. Ha
a készüléket tető alá helyezi, akkor a teraszfűtő
burája és a (nem éghető) mennyezet között
legalább 50 cm-nyi helynek kell lennie. Ha a tető
éghető anyagból készült (fa, műanyag, ponyva
stb.), akkor ennek a távolságnak legalább 1
méternek kell lennie. Mindig gondoskodjon a
megfelelő szellőzésről!
• A készüléket nem szabad közvetlenül fali aljzat
fölé vagy alá vagy annak közvetlen közelébe
helyezni.
• A teraszfűtőt csak háztartási célra szabad hasz-
nálni. Ezért a terméket tilos építkezési helyeken,
üvegházakban, fészerekben, istállókban stb.
használni, még akkor is, ha azok tágak és nyitot-
tak. Általában túl sok gyúlékony anyag található
ott.
• A jelen teraszfűtőt nem szabad szaunafűtésre
vagy más terek vagy szobák állandó fűtésére
használni.
• A jelen teraszfűtőt nem szabad kennelben vagy
olyan más helyen használni, ahol állatok tartóz-
kodnak.
• Ne használja fürdőkád, úszómedence és semmi-
lyen más vízforrás közelében vagy közvetlen kö-
zelében. Bár a készülék cseppálló, legyen óvatos
a vízzel kapcsolatban. Gondoskodjon róla, hogy
ne eshessen vízbe, és hogy ne érje erős vízsugár.
Ne nyúljon vizes kézzel a készülékhez, és ne
tegye a készüléket fürdőkádak, mosókonyhák,
úszómedencék vagy más vízforrások közvetlen
közelébe, mert ez veszélyes.
• Az áramütés elleni védelem érdekében sem a
kábelt, sem a dugót nem szabad vízbe vagy más
folyadékba meríteni.
• Ne helyezzen be (és ne hagyja, hogy bejusson)
semmilyen idegen tárgyat a szellőző- vagy kive-
zető nyílásokba, mert ez áramütést, tüzet vagy a
fűtőberendezés károsodását okozhatja.
• Gondoskodjon a megfelelő megvilágításról.
Akészüléken található kapcsolóknak 1 méteres
távolságból megfelelően láthatónak kell lenniük.
• Mindig húzza ki az elektromos aljzatból a fűtő-
berendezést, amikor azt nem használja. Amikor
a készüléket nem használja, soha ne hagyja
azt felügyelet nélkül – kapcsolja ki, és húzza
ki az elektromos aljzatból. A készüléket nem
szabad programozóval, időzítővel vagy más olyan
készülékkel használni, amely automatikusan
bekapcsolja a készüléket.
• A fűtőberendezést nem szabad külső feszült-
ségszabályozóval használni, ideértve például a
fényerősség-szabályozót, a sebességszabályozót
stb., máskülönben elektromos veszély áll fenn.
• Gondoskodjon róla, hogy a kábel ne lógjon rá
(éles) szélekre, ne görbüljön meg erősen, és ne
érjen forró felületekhez. A kábelt nem szabad a
készülék köré tekerni.
• Ne hagyja, hogy a kábel az asztallapról lelógjon,
máskülönben a gyerekek könnyen meghúzhatják
a kábelt.
• Működés közben ne tegye be se az ujjait, se
idegen tárgyakat a rácsba.
• Használat közben ne hagyja felügyelet nélkül a
készüléket.
• A jelen fűtőberendezést nem szabad fürdőszo-
bában, mosókonyhában vagy ehhez hasonló más
beltéri helyeken használni, valamint soha nem
szabad olyan helyre tenni, ahol beleeshet egy
fürdőkádba vagy más víztárolóba.
• Mindennemű felelősség kizárt bármely olyan
kárért, amely a jelen utasítások be nem tartá-
sából vagy másféle helytelen használatból vagy
szakszerűtlen kezelésből ered.
• A készüléket 8 éves vagy annál idősebb gyerme-
kek, valamint csökkent fizikai, érzékszervi vagy
mentális képességekkel rendelkező személyek,
vagy megfelelő tapasztalattal és tudással nem
rendelkező személyek csak felügyeletet mellett

HU
19WWW.VONROC.COM
használhatják, ill. ha megfelelő utasításokat
kaptak a készülék biztonságos használatához
és megértették a kapcsolódó veszélyeket. Aké-
szülék nem gyermekek kezébe való játékszer.
Atisztítását és karbantartását gyermek felügye-
let nélkül nem végezheti.
• Ha a készüléken bármilyen okból repedés vagy
törés jelentkezik, vagy ha bármilyen anyaghibát
vagy hézagot észlel az alumínium házon vagy
bármely más alkatrészen, azonnal kapcsolja ki a
készüléket és húzza ki a dugót az aljzatból.
• Ha a tápkábel megsérült, a veszélyhelyzetek el-
kerülése érdekében ki kell cseréltetni a gyártóval
vagy megbízott szervizével, vagy más, hasonlóan
képzett szakemberrel.
• A készülék túlmelegedésének megelőzése érde-
kében a levegőbemeneteknek és -kimeneteknek
mindig tisztának kell lenniük, és nem szabad
olyan anyagnak vagy tárgynak lennie rajtuk,
amely eltömődést okozhat. Időnként ellenőrizze
az összes bemenetet és kimenetet, hogy ne
halmozódjon fel rajtuk a szennyeződés vagy a
por. NE TAKARJA LE. A telepítés után a készülék
letakarását tiltó figyelmeztető címkét jól látható
helyre kell tenni (vagyis nem szabad a készülék
hátuljára tenni).
• A fűtőberendezés egyes alkatrészei 200 °C fölé
is hevülhetnek. A fűtőcső, a reflektor, valamint
a fűtőcső közelében található fém részek meg-
érintése súlyos ÉGÉSI SÉRÜLÉSEKET okozhat. Az
égési sérülések elkerülése érdekében ne hagyja,
hogy a csupasz bőr a forró felülettel érintkezzen.
• SOHA ne tegye a kezét a fűtőelemek alá. MINDEN
ESETBEN hagyja legalább 10 percet hűlni a
fűtőelemet, mielőtt hozzáér a fűtőcsőhöz vagy a
fűtőcső közelében található alkatrészekhez.
• A készülék közvetlen közelében nem szabad
éghető folyadékokat vagy anyagokat tárolni,
ideértve például a festéket, kőolajat, gázt stb.
tartalmazó tartályokat. A készüléket nem szabad
gyúlékony környezetben használni, például
éghető gáztartályok, gázcsövek vagy szórófejes
flakonok (spray-k) közelében. Robbanás- és
tűzveszély!
• Ez a termék újrahasznosítható anyagokat tar-
talmaz. Ezt a terméket csak szelektíven szabad
kiselejtezni, nem szabad a háztartási hulladékok
közé tenni. Kérjük, érdeklődjön a helyi hatósá-
goknál a legközelebbi gyűjtőpont felől.
Elektromos biztonság
Mindig ellenőrizze, hogy a tápellátás
megfelel-e az adattáblán feltüntetett
feszültségnek.
• Ha az elektromos szerszám tápkábele sérült,
azt a szolgáltatási szervezeten keresztül
kapható, speciálisan kialakított tápkábelre kell
cserélni.
• Csak olyan hosszabbító kábelt használjon amely
megfelel a berendezés névleges teljesítményé-
nek és legalább 1,5 mm² vastag. Ha kábeldobot
használ a hosszabbító kábelhez, mindig teljesen
tekerje le a kábelt.
2. AZ ESZKÖZ ADATAI
Rendeltetésszerű használat
Ezt a terméket otthoni környezetben történő
használatra tervezték, mint teraszfűtőt. A fűtőbe-
rendezést kertekhez vagy a lakóházak más kültéri
területeihez tervezték. A fűtőberendezést nem sza-
bad beltéri helyiségek fűtésére használni, valamint
nem szabad nem lakossági (például ipari) kültéri
területek fűtésére vagy textíliák vagy más anyagok
szárítására használni. A jelen fűtőberendezésben
nem található a szobahőmérséklet szabályozására
szolgáló eszköz, ezért nem szabad olyan helyisé-
gekben használni, ahol olyan személyek tartóz-
kodnak, akik nem képesek önerőből elhagyni a
helyiséget, kivéve, amikor folyamatosan felügyelik
őket. Akészüléket csak az előírt rendeltetési célra
szabad felhasználni. A használat minden más for-
mája nem rendeltetésszerű használatnak minősül.
MŰSZAKI ADATOK
Modellazonosító PH508AC
Feszültség 220–240 V ~
Frekvencia 50–60 Hz
Teljesítmény 3000 W
Teljesítménybeállítások 1: 1500 W
2: 3000 W
Fűtőelem típusa Arany borostyán színű,
alacsony fényerejű lámpa
Felmelegedési idő 1 másodperc
Hullámtartomány 0,78–1,4 mikron
Sugárzási hatékonyság 90%

20
HU
WWW.VONROC.COM
Fűtési távolság 4–5 m
Fűtési terület 12–18m²
Színhőmérséklet 1500 K
Túlmelegedés elleni
védelem
Igen
Elektronikus lágy indítás Igen
Behatolásvédelmi osztály IP54
Védelmi osztály I. osztály
Súly 4,2 kg
LEÍRÁS
A szövegbeli számok a 2–5. oldal képeire utalnak.
1. Fűtőberendezés
2. Védőrács
3. A távvezérlő kijelzővel ellátott vevője
4. Hálózati kábel
5. Főkapcsoló
6. Üzemmód gomb
7. Távvezérlő
8. A távvezérlő főkapcsolója
9. Lefelé mutató nyílgomb
10.Felfelé mutató nyílgomb
11.Időzítő gomb
12.Hőfokszabályozó gomb
13.Rögzítőkonzol
14.Feszítődübel
15.Csavar alátétekkel
16.Szárnyas anya
17.Csavar
18.Alátét
3. ÖSSZESZERELÉS
A jelen fűtőberendezést szakképzett
személynek (értsd: képzett villanyszerelő-
nek) kell telepítenie.
Telepítés előtt minden esetben válassza le a
fűtőberendezést az áramellátásról és hagyja
kihűlni.
A fűtőberendezés telepítése (A–N ábra)
A készüléket kizárólag a mellékelt
tartozékokkal rögzítse.
Telepítés előtt tartsa szem előtt a következőket:
• Helyezze a készüléket szilárd, vízszintes felületre.
• A készüléket úgy kell rögzíteni, hogy a fűtő-
berendezés és a mennyezet, sátorvászon stb.
között 50 cm szabad tér maradjon. A talaj és a
készülék alja között is legalább 1,80 m távol-
ságnak kell lennie. Lásd a J és K ábrát. Akészü-
léket soha nem szabad ferdén felakasztani!
• Ügyeljen arra, hogy a tápkábel megfelelően le-
gyen felszerelve, és ne érintkezzen a fűtőberen-
dezés reflektorával, illetve ne kerüljön a fűtött
területre.
• A fűtőberendezést nem szabad gyúlékony felü-
letre telepíteni.
• Ha a fűtőberendezést kívül szeretnék használni,
akkor erősen ajánlott időjárásálló aljzatot hasz-
nálni.
• A fúrás előtt győződjön meg arról, hogy sem
elektromos, sem vízvezetékek nem találhatók
azon a helyen, ahova a fűtőberendezést telepí-
teni szeretné.
A fűtőberendezés falon vagy mennyezeten történő
telepítéséhez kövesse az alábbi lépéseket:
1. A készüléket a C ábrán látható szerelési tartozé-
kokkal együtt kapja kézhez.
2. Fúrjon összesen 4 furatot a D ábrán látható
méretekkel. A furat átmérőjének meg kell
egyeznie a dübel átmérőjével: 8 mm. A várható
beágyazásnál legalább 10–15 mm-rel mélyebb-
re fúrjon. A furatok vízszintesek legyenek és
pontosan azonos magasságban legyenek.
3. Tisztítsa meg a furatokat az esetleges törmeléktől.
4. Tekerje be a csavaranyát annyira, hogy az „be-
lekapjon” a feszítődübel (14) tetejébe az E ábra
1.lépésében látható módon.
5. Helyezze be a feszítődübelt (14) az alapanyag-
ban található furatba az E ábra 2. lépésében
látható módon. Kalapács segítségével üsse be
a feszítődübelt addig, amíg az alátét és az anya
szorosan az alapanyagra nem fekszik.
6. Ekkor helyezze a rögzítőkonzolt (13) a feszítő-
dübelekre (14), majd rögzítse az alátét és az
anya segítségével. Húzza meg kézzel az anyát
(mindkettőt az F ábrán látható módon).
7. A dübel rögzítéséhez forgassa el az anyát
három-négy teljes fordulattal egy 10-es méretű
csavarkulcs segítségével.
8. Szerelje fel a maradék 2 rögzítőkonzolt (13) a
fűtőberendezés (1) külső furataira a G ábrán
látható módon.
Other manuals for PH508AC
1
Table of contents
Languages:
Other VONROC Patio Heater manuals

VONROC
VONROC VULCANO User manual

VONROC
VONROC PH508AC User manual

VONROC
VONROC FILICUDI User manual

VONROC
VONROC PH506AC User manual

VONROC
VONROC ALICUDI PH515AC User manual

VONROC
VONROC AMIATA PH510AC User manual

VONROC
VONROC PH513AC User manual

VONROC
VONROC PH512AC User manual

VONROC
VONROC PH502AC User manual

VONROC
VONROC PH511AC User manual