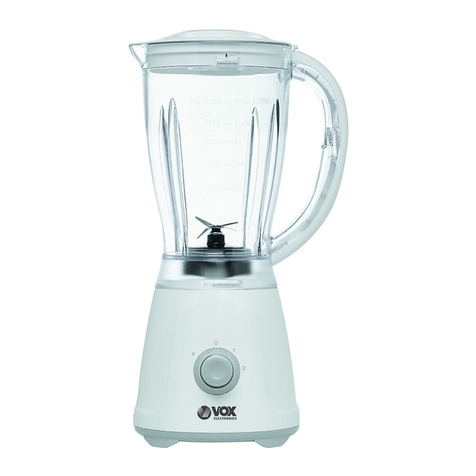
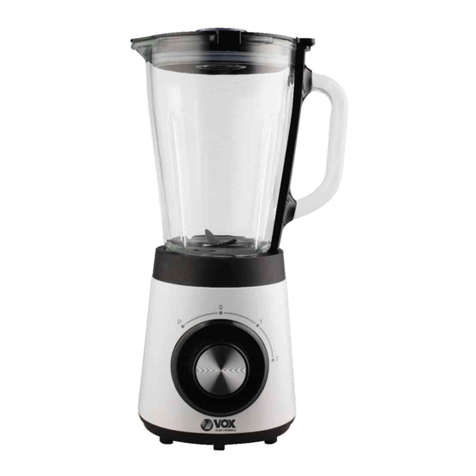
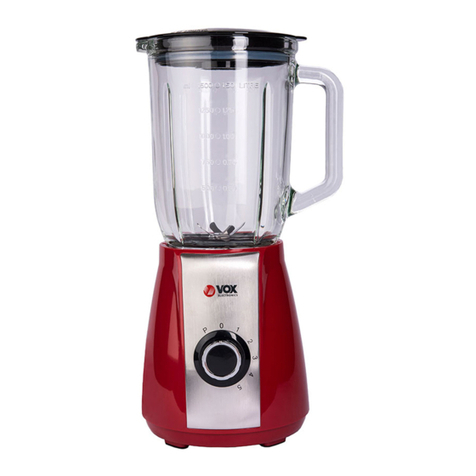
VOX electronics TM-6006 User manual

GBR
SRB
ESP
PRT
GRC
SVN
BIH
MNE
MKD
ALB
HRV
OPERATING INSTRUCTIONS STAND BLENDER
UPUTSTVO ZA UPOTREBU BLENDER
MANUAL DE USUARIO LICUADORA
MANUAL DO USUÁRIO LIQUIDIFICADOR
ЕГХЕIРIΔIO ХРНΣТН
ΜΠΛΕΝΤΕΡ
NAVODILA ZA UPORABO BLENDER
UPUTE ZA UPORABU BLENDER
UPUTSTVO ZA UPOTREBU BLENDER
УПА
TСТВАЗА РАКУВАЊЕ БЛЕНДЕР
MANUALI I PERDORUESIT BLENDER
ТМ-6006
ALB

LET’S LIVE TOGETHER
INSTRUCTION MANUAL
STAND BLENDER
Model: TM-6006
GBR

PLEASE RETAIN THESE INSTRUCTIONS FOR FUTURE REFERENCE

IMPORTANT SAFEGUARDS
When using this electrical appliance, basic safety precautions should always be
followed, including the following:
1. Read all instructions.
2. Before using check that the voltage indicated on the product corresponds with the
voltage of your electrical outlet.
3. Do not let cord hang on hot surface or over edge of table or counter.
4. Do not operate any appliance with a damaged cord or plug or after the appliance
malfunction or has been damaged in any manner. Return the appliance to the
nearest authorized service facility for examination, repair or adjustment.
5. If the supply cord is damaged,it must be replaced by the manufacturer or its service
agent or a similarly qualified person in order to avoid a hazard.
6. Close supervision is necessary when any appliance is used by or near children.
7. Avoid contacting the moving parts.
8. Keep hands and utensils out of container while blending to reduce the risk of severe
injury to persons or damage to the blender. Ascraper may be used but must be used
only when the blender is not running.
9. The use of attachments not recommended or sold by manufacturer may cause on
fire, electric shock or injury.
10. Unplug from outlet when not in use, before putting on or taking off parts, and before
cleaning. To disconnect, turn any control to “off”, then remove plug from wall outlet
by grasping the plug, not the cord.
11. To reduce the risk of injury, never place blade assembly on motor unit without the
jar properly attached.
12. This appliance is not intended for use by persons (including children) with reduced
physical, sensory or mental capabilities, or lack of experience and knowledge,
unless they have been given supervision or instruction concerning use of the
appliances by a person responsible for their safety.
13. Children should be supervised to ensure that they do not play with the appliance.
14. Do not leave the machine on unattended.
15. When removing the blender from the motor unit, wait until the blades have
completely stopped.
16. Always operate blender with cover in place.
17. Always use the appliance on a secure, dry level surface.
18. Never place this appliance on or near a hot gas or an electric burner or where it
could touch a heated appliance.
19. Do not use outdoors.
20. Do not use appliance for other than its intended use.
WARNING: Potential injury from misuse. Care shall be taken when handling the sharp
cutting blades, emptying the bowl and during cleaning.

3
Fig.1
Fig.2
HOUSEHOLD USE ONLY
KNOW YOUR BLEANDER
SPEED KNOB
CAUTION: Ensure that the blender is switched off before removing it from the stand.
Switch off the appliance and disconnect from supply before changing accessories or
approaching parts that move in use.

Fig.5
HOW TO USE
Before initial use
1. Before first use, unpack the appliance and place all parts on a horizontal surface.
2. The jar assembly (including the measure cup, lid, seal ring 1, jar, seal ring 2 , blade assembly and
jar base) has already been assembled into the motor unit. Disassemble to wash all detachable parts
except the motor unit. Refer to the latter chapter CARE AND CLEANING.
3. Once all pieces have been cleaned and dry thoroughly, reassemble.
1) Invert the jar onto a level surface, holding the jar handle, put the the seal ring 2 and blade
assembly onto the jar base bottom and secure the blade assembly by turning it anti-clockwise until
tight(See Fig.3)
2) Reposition the jar assembly with its opening upwards. Wrap the seal ring 1 around the lid bottom
and put the lid onto the jar assembly. Place the measure cup exactly into the lid by fitting the small
projection on the both sides of the cup into the slots of the lid and turning the cup clockwise until tight.
(See Fig.4)
3) Finally, place the assembled jar onto the motor unit by aligning the strip on the assembled jar
bottom. (See Fig.5)
CAUSION: Jar and jar base is now secure. Do not try to twist the jar and jar base onto motor unit
1. Peeled or cored the fruit or vegetables and then cut it into small dices.
2. Place the food to be blended into the jar(See Fig.6). Usually, certain amount of purified water
has to be added to facilitate the smooth running of appliance. The proportion of the food and
water is 2:3.The amount of mixture should not exceed the max level as indicated on the jar.
How to use
Fig.3
1
Fig.3
Fig.4

.RECIPE
FOOD TYPE SPEC WEIGHT SPEED
Carrot (apple,
pear etc. ) Cut into 15mm*15mm*15mmm
Carrot: 600g
Water: 900g
High speed
Note: never use boiling liquids or run the appliance empty.
3. Put the lid on the jar. Be sure the measuring cup is in place.
4. Plug the power cord into a standard wall outlet.
5. Turn the speed knob to the appropriate speed setting for your task.
6. For quick or delicate blending tasks, turn the speed knob to P position and hold for a few seconds
and then release, the knob will reset to O position automatically. Operate several times until the
consistence you want is obtained
7. If you want to add ingredients while the blender is working, remove the measuring cup and place
through the lid opening. (See Fig.7)
8. When crushing ice or hard food, keep one hand firmly on the lid.
9. When the consistence you desire is obtained, turn the knob to O position.
Note: 1) For each use, the consecutive operation time should not exceed 3minutes. at least
10 minutes rest time must be maintained between two continuous cycles, let the unit cool to
room temperature before performing next operation cycle.
2) If you want to stop the machine during operation, turn the knob to O position anytime.
Important operating tips
·For best circulation of food that are to be blended with some liquid, pour the liquid into the jar first,
then add solids.
·Some of the tasks that cannot be performed efficiently with a blender are: beating egg whites,
whipping cream, mashing potatoes, grinding meat, mixing dough, extracting juice from fruit and
vegetable
·The following items should never be placed in the unit as they may cause damage: bones, large
pieces of solid, frozen food, or tough foods such as turnips.
·To crush ice, add up to 6 ice cubes. If more ice is needed, remove the cup and add cubes one by
one through the lid opening.
Fig.6
Fig.7
Before blending, add
food to be blended
into the jar.
During blending, add the
ingredient through the lid
opening.

CARE AND CLEANING
This product contains no user serviceable parts. Refer service to qualified service personnel.
1. Before cleaning, unplug the blender.
2. Always wash immediately after use for easier cleaning. Don’t let food dry on the jar assembly as
this will make cleaning difficult.
3. Pour a little warm soapy water into the jar and turn the knob to P position for a few seconds. And
then empty the jar.
4. Dismantle all detachable parts. Lift the jar assembly off the motor unit, To detach the blade
assembly by turning it clockwise from the jar base bottom , and remove the seal ring 2 and blade
assembly (see fig.8). In addition, detach the jar cover seal ring 1 from the jar cover.
5. Rinse the measure cup, lid, seal ring 1, jar, seal ring 2 and blade assembly by hands or in a
dishwasher and then dry. They are dishwasher safe components, but the temperature setting
shall not exceed 70℃.
6. Brush the blade clean using warm soapy water, then rinse thoroughly under the tap. Don’t touch
the sharp blades, handle carefully. Don’t immerse the blade assembly in water. Leave to dry
upside down away from children.
7. Wipe the motor unit with a damp cloth and dry thoroughly. Remove the stubborn spots by rubbing
with non-abrasive cleaner. If liquids spill into the motor unit; first unplug the unit, then wipe with a
damp cloth and dry thoroughly.
CAUSION
1) Do not immerse the motor unit in liquid to prevent the risk of electric shock.
2) Do not use rough scouring pads or cleansers on parts or finish.
3) Do not place any parts of this unit into dishwasher for cleaning. This unit is not available
for dishwasher.
12 Month Warranty
Thank you for your purchase from VOX.
Fig.8

UPUTSTVO ZA UPOTREBU
LENDER
Model: TM-6006
SRB

MOLIMO SAČUVAJTE OVO UPUTSTVO ZA BUDUĆU UPOTREBU

VAŽNA BEZBEDNOSNA UPUTSTVA
Pre upotrebe ovog električnog uređaja trebalo bi uvek ispuniti osnovne preduslove
uključujući sledeće:
1. Pročitajte sva uputstva.
2.Pre upotrebe proverite da li napon na vašem uređaju odgovara naponu u zidnoj
utičnici.
3. Ne dozvolite da kabl za napajanje tokom upotrebe ne visi sa ivice stola, radne
površine ili blizu bilo kakvog grejnog tela.
4. Ne koristite uređaj sa oštećenim kablom za napajanje ili utikačem ili ukoliko je
uređaj prestao da radi ili se oštetio na bilo koji način. Vratite uređaj u najbliži ovlašćeni
servis na pregled, popravku ilizamenu
5. Ako se kabl za napajanje ošteti, može ga zameniti samo ovlašćeno lice u servisu
ilineko drugo kvalifikovano lice, kako biste izbegli moguću povredu.
6. Neophodan je nadzor ukoliko se uređaj koristi od strane dece ili u njihovoj blizini.
7. Izbegavajte kontakt sa delovima koji se pomeraju
8. Držite ruke ili kuhinjska pomagala van blendera dok je u funkciji kako biste smanjili
rizik od ozbiljnih povreda ili nanošenja štete blenderu. Strugačza hranu možete
koristiti samo ukoliko uređaj nije u funkciji.
9. Upotreba dodataka koji nisu preporučeni ili kupljeni od strane proizvođača može
dovesti do požara, strujnog udara ili povrede korisnika.
10. Isključute uređaj iz utičnice kada nije u upotrebi, pre sastavljanja ili rastavljanja
delova, kao i pre čišćenja. Da biste isključili uređaj pritisnite bilo koje dugme na ‘off+,
zatim isključite uređaj iz zidne utičnice, povlačenjem utikača, nikako samog kabla.
11. Da biste smanjili rizik od povrede, uvek pravilno postavite posudu.
12.Ovaj uređajnije predviđen za upotrebu od straneosoba (uključujući decu) sa
smanjenim psihičkim, senzornim ili mentalnim sposobnostima, ili nedostatkom
iskustva ili znanja, osim kada su pod nadzorom ili su im data uputstva za bezbednu
upotrebu od strane osobe odgovorne za njihovu bezbednost.
13. Deca treba da budu pod nadzorom da biste se uverili da se ne igraju s uređajem.
14. Nemojte ostavljati uređaj da radi bez nadzora.
15. Kada sklanjate bledner sa motorne jedinice, sačekajte da se sečiva zaustave u
potpunosti.
16. Uvek koristite blender sa postavljenim poklopcem.
17.Uvek koristite blender na sigurnoj, suvoj i ravnoj podlozi.
18.Nikada ne stavljajte uređaj na ili u blizini vrućeg plina ili električnog gorionika ili
tamo gde može doći u dodir s vrućim uređajima.
19.Nemojte koristiti na otvorenom.
20.Koristite uređaj samo za predviđenu namenu.

e
UPOZORENJE: Moguće povrede u slučaju nepravilnog korišćenja. Budite pažljivi
kada rukujete s oštrim sečivima, prilikom pražnjenja posude i tokom čišćenja.
OPREZ: Proverite da li ste isključili uređaj pre nego što sklonite posudu sa postolja.
Isključite uređaj sa napajanja pre menjanja dodataka i kada prilazite delovima koji
se pokreću dok rade.
SAMO ZA KUĆNU UPOTREBU
UPOZNAJTE VAŠBLENDER
Slika 1
Regulator brzine
Slika 2
Čaša sa merama
Poklopac
Posuda
Set sa sečivima
Zaptivni prsten
Postolje za sečivo
Motorna jedinica
Regulator brzine

Slika 5
UPOTREBA BLENDERA
Pre prve upotrebe
1. Pre prve upotrebe, raspakujte uređaj i postavite sve delove na horizontalnu površinu.
2. Posuda sa dodacima (Slika 1, uključujući čašu sa merama, poklopac, zaptivni prsten, posudu,
kućište sa sečivima) je većpostavljena na kućište motora. Rasklopite sve delove da biste ih oprali osim
kućišta s motorom. Molimo konsultujte deo ČIŠĆENJE I ODRŽAVANJE.
3. Nakon što ste sve delove očistili i temeljno osušili, ponovo ih sastavite.
1) Okrenite posudu i postavite je na ravnu površinu, držeći ručku posude, postavite zaptivni prsten 2 i
dodatak sa sečivima na dno posude i osigurajte postolje sa sečivima okrećući u smeru suprotnom
kazaljci na satu dok se dobro ne zatvori.(Vidi sliku 3)
2) Ponovo stavite posudu sa dodacima okrenutu nagore. Obmotajte zaptivni prsten 1 oko dna
poklopca, zatim stavite poklopac na posudu. Postavite čašu za merenje u otvor na sredini poklopca i
okrenite posudu u smeru kazaljke na satu dok dobrone zatvorite.(Vidi sliku 4)
3) Na kraju, postavite posudu sa dodacima na kućište motora, ravnajući indikatore na dnu posude I
dobro zategnite. (Vidi sliku 5)
OPREZ: Posudaibaza su sad sigurne.Ne pokušavajte dauvrćete dno posude na motornu
jedinicu.
Kako da koristite blender
1. Oljuštite voće ili povrće i izvadite koštice, zatim ga isecite na male kocke.
2. Stavite hranu u posudu blendera (Vidi Sliku 6). Obično je potrebno dodati određenu količinu čiste vode da
bi se olakšao rad blendera. Odnos hrane i vode je 2:3. Količina smese za obradu ne sme preći maksimalni
nivo označen na posudi.
1
Slika 3 Slika 4

.RECEPT
Vrsta hrane Uputstvo Težina Brzina
Šargarepa (jabuka,
kruška itd ) Isecite na 15mm*15mm*15mmm Šargarepa: 600g
Voda: 900g Velika brzina
Napomena: nikadane koristite ključalutečnost niti puštajte uređaj urad ukoliko je posuda
prazna.
3. Stavite poklopac na posudu. Proverite da li je čaša s merama postavljena u otvor poklopca.
4. Uključite utikaču standardnu zidnu utičnicu.
5. Okrenite dugme za regulisanje brzine na željeni nivo.
6. Za brza ili gruba mlevenja, okrenite regulator brzine na pozicijuP i držite nekoliko sekundi, a
zatim pustite. Regulator brzine će se automatski vratiti u poziciju O. zatim pustite. Ukoliko je to
nephodno ponovite ovaj proces više puta dok ne dobijete željeni rezultat.
7. Ukoliko želite da dodate neke sastojke dok blender radi, skinite čašu sa merama sa vrha
poklopca i kroz otvor dodajte sastojke. (Vidi Sliku 7)
8. Kada lomite led ili tvrdu hranu, čvrsto držite poklopac.
9. Kada je hrana obrađena u skladu sa Vašim potrebama, stavite regulator u položaj O.
Napomena: 1)Kod svake upotrebe,kontiniurani rad ne sme preći3 minuta. Najmanje 10
minuta uređaju treba dase ohladiizmeđudva uzastopna ciklusa rada, sačekajte dase uređaj
ohladido nivoasobne temperature pre nego što nastavite sradom.
2)Ukoliko želite dazaustavite rad mašine tokomkorišćenja, stavite regulatorupoziciju O u
bilo komtrenutku.
Važni saveti
Za najbolju rotaciju hrane koju treba izmešati sa tečnostima, sipajte u posudu prvo tečnost, a čvršću
hranu dodajte naknadno.
Neki od zadataka koji se ne mogu najefikasnije izvesti u blenderu su: mućenje belanaca, šlaga,
krompir pirea, mlevenje mesa, mešanje testa, ceđenje soka iz voća i povrća.
Sledeće namirnice nikada ne bi trebalo stavljati u blender jer mogu da prouzrokuju štetu na uređaju:
kosti, veći komadi čvrste, zaleđene hrane, ili žilavije hrane poput repe.
Da biste lomili led, dodajte do 6 kocki leda. Ukoliko treba dodati jošleda, skinite čašu i dodajte kocke
jednu po jednu kroz otvor na poklopcu.
Slika 6 Slika 7
Pre blendiranja,
dodajte hranu u
posudu. Tokomblendiranja, dodajte
sastojke krozotvor na
poklopcu.

ČIŠĆENJE I ODRŽAVANJE
Ovaj uređaj ne sadrži delove koji se mogu menjati od strane korisnika. Obratite se stručnom
osoblju za popravku.
1. Pre čišćenja, isključite blender sa napajanja.
2. Uvek operite odmah nakon upotrebe zbog lakšeg čišćenja. Ne dozvolite hrani da se osuši u
posudi jer će to otežati čišćenje.
3. Sipajte malo tople sapunjave vode u posudu i okrenite regulator brzine u poziciju P na nekoliko
sekundi, a zatim ispraznite posudu.
4. Rastavite sve rasklopive delove. Podignite posudu sa motorne jedinice. Uklonite jedinicu sa
sečivom iz posude tako što ćete je odvrnuti sa dna posude u pravcu kazaljke na satu i uklonite
zaptivni prsten 2 i sečivo (vidi sliku 8). Nakon toga, odvrnite i zaptivni prsten 1 sa dna poklopca.
5. Operite čašu sa merama, poklopac, posudu, zaptivni prsten, postolje sa sečivima za mlevenje,
postolje sa sečivima za seckanje ručno ili u sudomašini. To su delovi bezbedni za pranje u
sudomašini, ali temperatura pranja ne sme prelaziti70℃.
6. Očistite sečivo koristeći toplu, sapunjavu vodu i temeljno isperite pod tekućom vodom. Ne
dodirujte oštro sečivo i rukujte njime pažljivo. Ne potapajte sečivo u vodu. Okrenite ga nakon
pranja naopačke i ostavite ga dase osuši, držeći ga podalje od dece.
7. Obrišite motornu jedinicu vlažnom krpom i osušite temeljno. Uklonite tvrdokorne flekenekom
neabrazivnom tečnošću. Ako se desi da se prospe tečnost na motornu jedinicu, prvo iskopčajte
uređaj iz struje, a zatim prebrišite temeljno suvom krpom i ostavite da se osuši.
PAŽNJA
1- Ne potapajte motornu jedinicu utečnost kako biste sprečilirizik od strujnogudara.
2- Ne koristite grube četke za čišćenje ijaka sredstva za čišćenje.
3- Ne stavljajte postolje sa motoromusudomašinu radičišćenja. Ovaj deo nije prikladan za
pranje usudomašini.
12 Meseci garancije
Hvala Vam što kupujete VOX uređaje.
Slika 8

VIVIMOS JUNTOS
MANUAL DE USO
LICUADORA
Model:TM-6006
ESP

1
POR FAVOR, CONSERVE ESTAS INSTRUCCIONES PARA FUTURAS REFERENCIAS

2
SALVAGUARDIAS IMPORTANTES
Antes de usar el artefacto eléctrico, siempre se deben seguir las precauciones básicas, incluidas las siguientes:
1. Lea este folleto a fondo antes de usar el aparato y conserve lo para futuras referencias.
2. Antes de usar el aparato, compruebe que el voltaje indicado en el producto corresponde con el voltaje de su toma de
corriente.
3. No permita que el cable cuelgue en la superficie caliente o sobre el borde de la mesa o mostrador.
4. No opere ningún aparato con un cable o enchufe dañado o después de un mal funcionamiento o de que el
electrodoméstico ha sido dañado de cualquier manera. Lleve el aparato al centro de servicio autorizado más cercano
para su examen, reparación o ajuste.
5. Si el cable de alimentación está dañado, debe ser reemplazado por el fabricante o su agente de servicio o una
persona calificada similarmente para evitar un peligro.
6. Es necesaria una supervisión estricta cuando cualquier dispositivo es utilizado por niños o cerca de ellos.
7. Evite a contactar las partes móviles.
8. Mantenga las manos y los utensilios fuera del recipiente mientras se licua para reducir el riesgo de lesiones graves a
personas o daños a la licuadora. Se puede usar un raspador, pero se debe usar solo cuando la licuadora no esté en
funcionamiento.
9. El uso de accesorios no recomendados o vendidos por el fabricante puede causar incendios, descargas eléctricas o
lesiones.
10. Siempre desconecte el aparato del suministro si lo deja desatendido y antes de montarlo, desmontarlo o limpiarlo.
Para desconectarlo, apague cualquier control presionando “off” y luego desenchúfelo de la toma de corriente sujetando
el enchufe, no el cable.
11. Para reducir el riesgo de lesiones, nunca coloque el conjunto de la cuchilla en la unidad del motor sin la jarra
correctamente colocada.
12. Este aparato no debe ser utilizado por personas (incluidos niños) con capacidades físicas, sensoriales o mentales
reducidas, o por falta de experiencia y conocimiento, a menos que una persona responsable de su seguridad les haya
dado supervisión o instrucciones sobre el uso de los dispositivos.
13. Los niños deben ser supervisados para asegurarse de que no jueguen con el aparato.
14. No deje la máquina desatendida.
15. Cuando retire la licuadora de la unidad del motor, espere hasta que las cuchillas se hayan detenido por completo.
16. Siempre opere la licuadora con la tapa en su lugar.
17. Siempre use el aparato en una superficie nivelada, segura y seca.
18. Nunca coloque este artefacto sobre o cerca de un calentador de gas o un quemador eléctrico o donde pueda tocar un
artefacto caliente.
19. No lo use en aire libre.
20. No use el aparato para otro uso que no sea el previsto.
ADVERTENCIA: Son posibles lesiones por uso indebido. Se debe tener cuidado al manipular las cuchillas de corte
afiladas, vaciar el recipiente y durante la limpieza.
PRECAUCIÓN: Asegúrese de que la licuadora esté apagada antes de sacarla del soporte.
Apague el aparato y desconéctelo del suministro antes de cambiar accesorios o acercarse a piezas que se mueven en
uso.
SÓLO PARA USO DOMÉSTICO

3
Fig.1
Fig.2
CONOZCA SU LICUADORA
PERILLA DE VELOCIDAD
COMO USAR
Antes del primer uso
1. Antes del primer uso, desembale el aparato y coloque todas las piezas en una superficie horizontal.
2. El conjunto de la jarra (incluyendo la jarra de medida, la tapa, el anillo de sellado 1, la jarra, el anillo de sellado 2, el
conjunto de la cuchilla y la base de la jarra) ya se ha ensamblado en la unidad del motor. Desarme para lavar todas las
partes desmontables excepto la unidad del motor. Consulte el último capítulo CUIDADO Y LIMPIEZA.
3. Una vez que todas las piezas se hayan limpiado y secado completamente, vuelva a armarlas.
1) Invierta la jarra sobre una superficie nivelada, sosteniendo la manija del jarro, coloque el anillo de sello 2 y el conjunto
MEDIDA DE LA TAZA
CUBIERTA
JARRA
CUCHILLA
ANILLO DE SELLADO
BASE DE LA CUCHILLA
UNIDAD DEL MOTOR
PERILLA DE VELOCIDAD

4
Fig.5
de la cuchilla en la base de la jarra y asegure el conjunto de la cuchilla girándolo en sentido contrario de reloj hasta que
quede apretado (Ver la Fig.3).
2) Vuelva a colocar el conjunto de la jarra con su abertura hacia arriba. Envuelva el anillo de sellado 1 alrededor del
fondo de la tapa y coloque la tapa en el conjunto de la jarra. Coloque la jarra de medida exactamente en la tapa
colocando la pequeña proyección en ambos lados de la jarra en las ranuras de la tapa y girando la taza en el sentido de
las agujas del reloj hasta que quede apretada. (Ver la Fig.4).
3) Finalmente, coloque la jarra ensamblada en la unidad del motor alineando la tira en la parte inferior de la jarra
ensamblada. (Ver la Fig.5)
CAUSIÓN: La base de la jarra ahora está segura. No intente girar la jarra y la base del vaso en la unidad del
motor.
Cómo utilizar
1. Pelar o cortar el corazón de la fruta o verdura y luego cortarla en pequeños dados.
2. Coloque la comida que se va a mezclar en la jarra (vea la Fig. 6). Por lo general, se debe agregar cierta cantidad de
agua purificada para facilitar el buen funcionamiento del electrodoméstico. La proporción de comida y agua es de 2: 3. La
cantidad de mezcla no debe exceder el nivel máximo como se indica en la jarra.
Fig.3
1
Fig.3
Fig.4
Table of contents
Languages:
Other VOX electronics Blender manuals

VOX electronics
VOX electronics MS-6010 User manual

VOX electronics
VOX electronics MS-5020 User manual

VOX electronics
VOX electronics MS-2106 User manual

VOX electronics
VOX electronics MS-2006 User manual

VOX electronics
VOX electronics TM-6003 User manual

VOX electronics
VOX electronics TM-9321 User manual

VOX electronics
VOX electronics MS-984 User manual

VOX electronics
VOX electronics MS 981 User manual

VOX electronics
VOX electronics MS-6008 User manual

VOX electronics
VOX electronics TM-1056 User manual