Würth master NTS 125 User manual

NTS 125
Bedienungsanleitung
Operating Instructions
Istruzioni d’uso
Notice d’utilisation
Instrucciones para el manejo
Instruções de utilização
Gebruiksaanwijzing
Betjeningsvejledning
Bruksanvisning
Käyttöohje
Bruksanvisning
Οδηγίες χειρισµού
Kullanım kılavuzu
0701 412 - Titel Seite 1 Freitag, 9. September 2005 8:26 08

............................... 6 . . 9
............................... 10 . . 13
............................... 14 . . 17
............................... 18 . . 21
............................... 22 . . 25
............................... 26 . . 29
............................... 30 . . 33
............................... 34 . . 37
............................... 38 . . 41
............................... 42 . . 45
............................... 46 . . 49
............................... 50 . . 53
............................... 54 . . 57
D
GB
I
F
E
P
NL
DK
N
FIN
S
GR
TR

11
12
1
8
3,4,5
*13
7

3,4
5
1
15
2
7
6
9
A
B

C
10
14

6
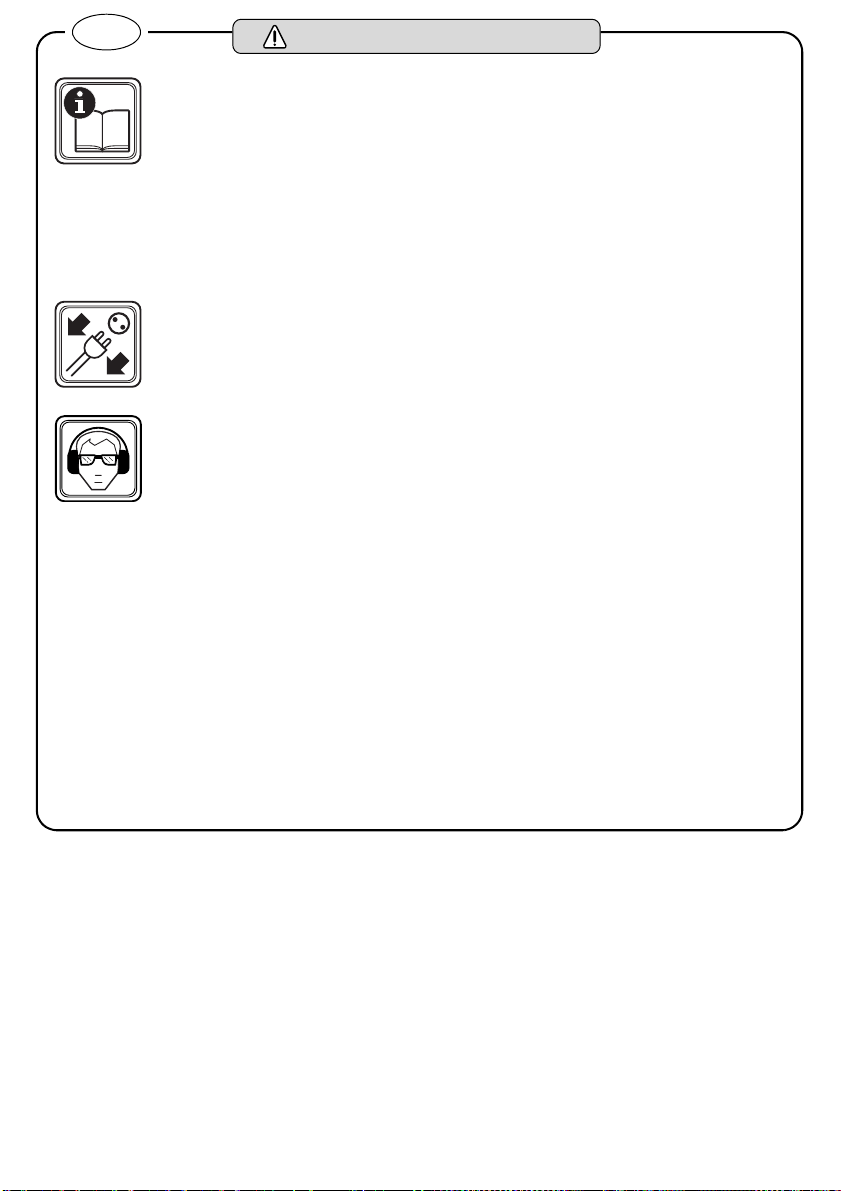
Gefahrloses Arbeiten mit dem Ge-
rät ist nur möglich, wenn Sie die
Bedienungsanleitung und die Si-
cherheitshinweise vollständig lesen
und die darin enthaltenen Anwei-
sungen strikt befolgen. Zusätzlich
müssen die allgemeinen Sicher-
heitshinweise im beigelegten Heft
befolgt werden. Lassen Sie sich vor
dem ersten Gebrauch praktisch
einweisen.
Wird bei der Arbeit das Netzkabel
beschädigt oder durchtrennt, Kabel
nicht berühren, sondern sofort den
Netzstecker ziehen. Gerät niemals
mit beschädigtem Kabel benutzen.
Bei dieser elektrischen Säge wird
der zulässige Schalldruckpegel von
79 dB (A) überschritten. Die Unfall-
verhütungs-Vorschrift 'Lärm' (VGB
121) verlangt von den Anwendern,
dass persönliche Schallschutzmittel
getragen werden.
Schutzbrille und Gehörschutz tra-
gen.
Die Hinweise für Montage und Betrieb der Ma-
schine sind vorher genau durchzulesen.
Die Maschine darf nur zum Sägen von Kalk-
sandstein, Betonprodukten und Natursteinen
verwendet werden.
Es dürfen nur die vom Hersteller empfohlenen
Trennscheiben verwendet werden.
Die Maschine muss horizontal auf einem stabi-
len und flachen Untergrund stehen.
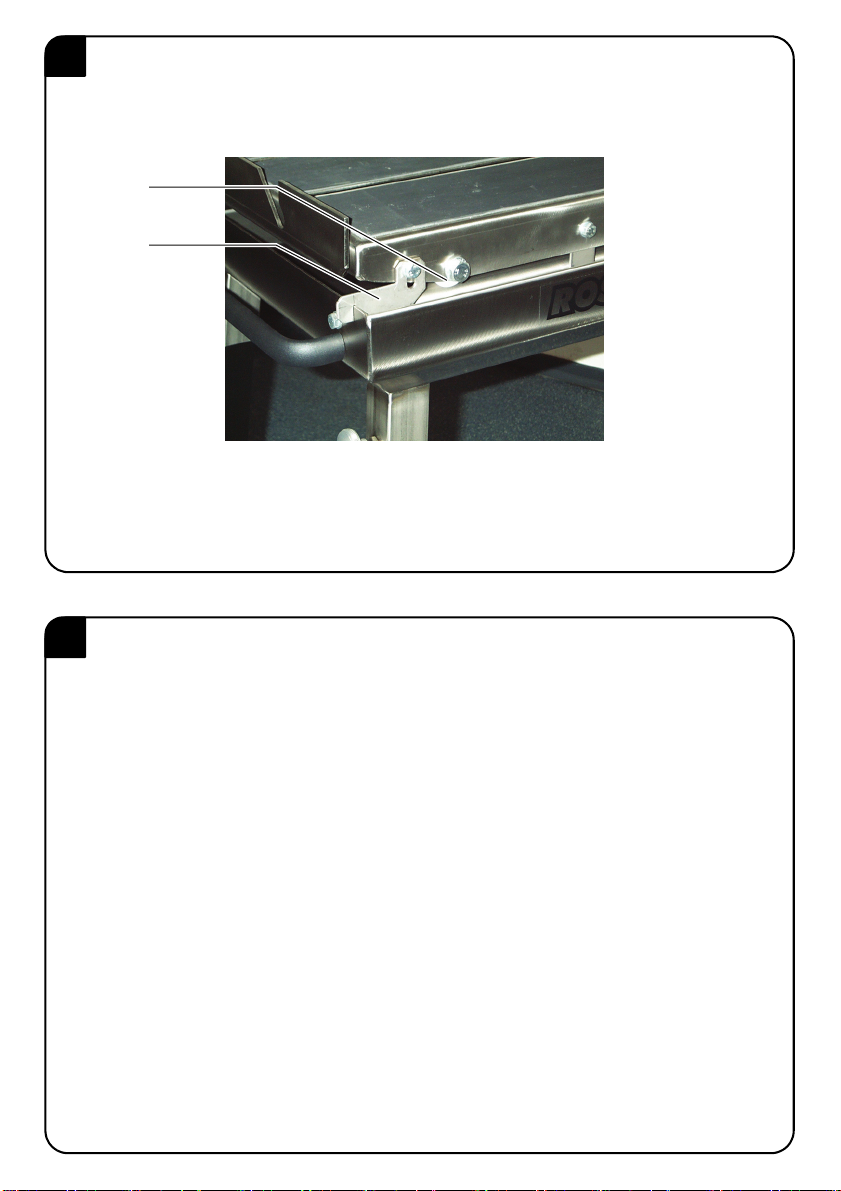
Die Trennscheibe muss richtig montiert sein. Auf
die richtige Drehrichtung und Zentrierung ach-
ten. Der maximale Scheibendurchmesser be-
trägt 400 mm.
Die Zustand der Trennscheibe muss kontrolliert
werden. Beschädigte Trennscheiben müssen so-
fort ersetzt werden.
Der Schutzhaube muss richtig befestigt sein. (nie
ohne Schutzhaube arbeiten!)
Das Kühlwasser von Schlamm freihalten und auf
ausreichender Füllstand achten.
Während des Sägens das Verkanten des Werk-
stückes vermeiden.
Bei langen Haaren Haarschutz tragen. Nur mit
enganliegender Kleidung arbeiten.
Das Gerät darf nur in einem Stromnetz mit vor-
schriftsmäßiger Schutzerdung betrieben werden.
Es ist sicherzustellen, dass die elektrischen Kabel
einwandfrei angeschlossen sind.
Vor Arbeitsbeginn muss die ordnungsgemäße
Funktion des PRCD-Schutzschalters* überprüft
werden.
Den PRCD-Schutzschalter* nicht zum Ein-/Aus-
schalten des Gerätes verwenden.
Den Stecker nur bei ausgeschaltetem Gerät ein-
stecken und nach Gebrauch wieder ziehen.
Gerät und Zubehör für Kinder unzugänglich
aufbewahren.
Das Gerät darf nicht von Personen unter 16
Jahren bedient werden.
Nur Original-Würth-Zubehör verwenden!
* Dieses Zubehör gehört nicht zum Lieferumfang.
Zu Ihrer Sicherheit
D
)Weitere Sicherheitshinweise siehe Beilage

7
Gerätekennwerte
Nasstrennsystem NTS 125
Artikelnummer 0701 412
Aufnahmeleistung 2200 W
Leerlaufdrehzahl 2800 min–1
Trennscheibendurchmesser Ø350 mm / Ø400 mm
Bohrung Ø25,4 mm
Max. Schnitthöhe Ø350 mm: 100 mm
Ø400 mm: 125 mm
Max. Schnittlänge 500 mm
Tischabmessungen (LxB) 475 x 400 mm
Abmessungen (LxBxH) 1060 x 600 x 620 mm
Gewicht ca. 62 kg
Schutzklasse / I
Geräteelemente
1Motor
2Ein-/Ausschalter
3Motorflansch
4Sägeflansch
5Flanschmutter
6Kondensator
7Pumpe
8Rändelschraube
9Einstelbarer Griff
10 Führungsrollen
11 Laufrollen
12 Griff
13 PRCD-Schützschalter*
14 Sägetisch-Transportsicherung
15 Thermoschutz
Abgebildetes oder beschriebenes Zubehör gehört teil-
weise nicht zum Lieferumfang.
Bestimmungsgemäßer
Gebrauch
Das Gerät ist in Verbindung mit Diamant-Nass-
trennscheiben und einer geeigneten Wassermenge
bestimmt zum Sägen von Kalksandstein, Betonpro-
dukten und Natursteinen.
Für Schäden bei nicht bestimmungsgemäßen Ge-
brauch haftet der Benutzer.
Vor der Inbetriebnahme
Netzspannung beachten: Die Spannung der
Stromquelle muss mit den Angaben auf dem Typ-
schild des Gerätes übereinstimmen.
Elektrische Betriebsmittel auf Baustellen
müssen von besonderen Speisepunkten
aus versorgt werden. Als Speisepunkte
gelten Baustromverteiler, daneben
aber auch Transformatoren mit
getrennten Wicklungen (Trenntrans-
formatoren).
Wandsteckdosen in Hausinstallationen
oder ähnlichen ortsfesten Anlagen sind
keine Speisepunkte.
Für elektrische Sägen im Nassbetrieb gelten erhöhte
Sicherheitsforderungen. Dies hat zu Folge, dass eine
der folgenden Schutzmaßnahmen gegen zu hohe
Berührungsspannung anzuwenden ist:
* Baustromverteiler mit Fehlerstromschutzschaltung,
die bei einem Nennfehlerstrom bis max. 30 mA
wirksam sind
--------------------- oder ---------------------
* Schutztrennung, wobei an einem Trenntransforma-
tor stets nur ein Verbraucher angeschlossen werden
darf
--------------------- oder ---------------------
* Zwischenkabel mit PRCD-Schutzschalter 30mA.
* Dieses Zubehör gehört nicht zum Lieferumfang.

8
Inbetriebnahme
Maschine aufstellen
- Maschine aus dem Karton nehmen und auf
Beschädigungen kontrollieren.
- Füße aus der Wasserwanne herausnehmen, in
die unteren Rohre der Wasserwanne einstecken
und mit Rändelschrauben festziehen.
- Die Maschine möglichst waagerecht und stabil
aufstellen. Dies wird durch das Verschieben der
Füße in den Rohren des Wasserwanne erreicht.
- Sägetisch-Transportsicherung 14 entfernen.
Funktionstest PRCD-Schutzschalter* 13
Um ein unbeabsichtigtes Einschalten
des Gerätes zu vermeiden, muss zur
Durchführung des Funktionstests des
PRCD-Schutzschalters 13 der Ein-/
Ausschalter 2 ausgeschalten sein.
Vor Arbeitsbeginn die ordnungsgemäße Funktion
des PRCD-Schutzschalters überprüfen:
-«ON»-Taste am PRCD-Schutzschalter drücken.
Leuchten der roten Kontroll-Lampe zeigt Betriebs-
bereitschaft des Schutzschalters an.
-«TEST»-Taste drücken.
Kontroll Lampe muss erlöschen.
Kühlsystem
Die elektrische Wasserpumpe darf nie
trocken laufen. Die Pumpe wird sofort
beschädigt.
- Den Stopfen in den Ablauf drücken.
- Die Wasserwanne mit Wasser füllen bis die
Pumpe 7komplett mit Wasser bedeckt ist.
Sägekopf
- Nach Lösen der Hebel 9kann der Sägekopf und
damit die Schnitttiefe nach Bedarf verstellt wer-
den.
- Für einen Trennschnitt den Sägekopf absenken
bis Trennscheibe 10 mm unter der Tischober-
kante steht.
- Bei harten Materialien ist es empfehlenswert, den
Schnitt in mehreren Arbeitsgängen auszuführen.
- Trennscheibenhöhe für den ersten Schnitt einstel-
len und danach die Schnitttiefe in Schritten erhö-
hen.
- Die Anzahl der Schnitte ist abhängig vom Typ der
Trennscheibe und dem Material.
Ein-/Ausschalten
Einschalten: Ein-/Ausschalter 2drücken
(Stellung „1“).
Ausschalten: Ein-/Ausschalter 2drücken
(Stellung „0“).
Schutz vor Überlastung
Eine thermische Überlastsicherung 15 verhindert
den Wiederanlauf des Motors außerhalb des zuläs-
sigen Betriebstemperaturbereiches. Der Schalter ist
ebenfalls gesichert gegen Stromausfall. Nach dem
Stromausfall wird die Maschine nicht wieder anlau-
fen, sondern muss von Hand erneut wieder einge-
schaltet werden.
Montage der Trennscheibe
Beim Wechseln der Trennscheibe oder
anderen Wartungsarbeiten immer den
Netzstecker ziehen.
- Rändelschrauben lösen und Schutzhaube abne-
hemen.
- Flanschmutter 5lösen und Sägeflansch 4abneh-
men (Achtung: Linksgewinde).
-Motorflansch3und Sägeflansch 4reinigen.
- Trennscheibe zentrisch auf den Zentrierring des
Motorflansches 3aufsetzen. ACHTUNG: Dreh-
richtung beachten.
-Sägeflansch4aufsetzen und Flanschmutter 5
anziehen.
- Schutzhaube schließen.

9
Wartung und Pflege
Vor allen Arbeiten am Gerät Netzstecker
ziehen.
- Das Kühlwasser muss regelmäßig erneuert wer-
den.
- Wir empfehlen regelmäßig die Wasserwanne,
Pumpe, Rohre und Düsen zu reinigen. Hängen
Sie z.B. die Pumpe nach dem Arbeiten in einen
Behälter mit sauberem Wasser und lassen Sie
dann die Maschine ± 1 min. laufen.
- Wenn die Maschine für längere Zeit nicht
gebraucht wird, darf die Pumpe nicht im
Schlammwasser bleiben, sondern muss gereinigt
werden und außerhalb der Wasserwanne verblei-
ben.
- Die Sägeflansche sind regelmäßig auf Verschleiß
zu prüfen.
Umweltschutz
Rohstoffrückgewinnung statt
Müllentsorgung
Gerät, Zubehör und Verpackung
sollten einer umweltgerechten
Wiederverwertung zugeführt wer-
den.
Zum sortenreinen Recycling sind Kunststoffteile ge-
kennzeichnet.
In Deutschland können nicht mehr gebrauchsfähige
Geräte zum Recycling an Würth zurückgegeben
werden.
Gewährleistung
Für dieses Würth-Gerät bieten wir eine Gewährleis-
tung den gesetzlichen / länderspezifischen Bestim-
mungen ab Kaufdatum (Nachweis durch Rechnung
oder Lieferschein). Entstandene Schäden werden
durch Ersatzlieferung oder Reparatur beseitigt.
Schäden, die auf natürliche Abnutzung, Überlastung
oder unsachgemäße Behandlung zurückzuführen
sind, werden von der Garantie ausgeschlossen.
Beanstandungen können nur anerkannt werden,
wenn Sie das Gerät unzerlegt einer Würth-Nieder-
lassung, Ihrem Würth-Außendienstmitarbeiter oder
einer Würth-autorisierten Kundendienststelle für
Elektrowerkzeuge übergeben.
Geräuschinformation
Der A-bewertete Geräuschpegel des Gerätes be-
trägt typischerweise: Schalldruckpegel 89 dB (A)
NEN-ISO 11204/prEN 31204;
Schallleistungspegel 98 dB (A) NEN-ISO 3744.
Gehörschutz tragen!
Die Hand-Arm-Vibration ist typischerweise niedriger
als 2,5 m/s². (EN 5349)
Konformitätserklärung
Wir erklären in alleiniger Verantwortung, dass dieses
Produkt mit den folgenden Normen oder normativen
Dokumenten übereinstimmt:
EN 55014-1/04.93 DIN EN 292
EN 61000-3-2/04.95 DIN EN 60204-1
EN 50082-2/03.95 EN 5349
NEN-ISO 11204/prEN 31204
NEN-ISO 3744 (Gehörschutz tragen!)
gemäß den Bestimmungen der Richtlinien
89/392/EWG, 91/386/EWG, 73/23/EWG und
89/336 EWG.
05
Adolf Würth GmbH & Co. KG
P. Z ü r n R . B a u e r
Form oder Ausführung unsere Maschinen kann sich, ohne vorherige Mitteilung, ändern.

10
Working safely with this machine is
possible only when the operating
and safety information are read
completely and the instructions
contained therein are strictly fol-
lowed. In addition, the general
safety instructions in the enclosed
booklet must be followed. Before
using for the first time, ask for a
practical demonstration.
If the mains cable is damaged or
cut through while working, do not
touch the cable but immediately
pull the mains plug. Never use the
machine with a damaged cable.
During sawing with this sawing
machine the max. sound pressure
level is exceeded. Wearing hearing
protection is therefore mandatory.
Wear safety goggles and hearing
protection.
The instructions for setting up and operating the
machine should be read first.
The sawing machine is only to be used for saw-
ing sandstones, concrete products and natural
stone.
Only saw blades advised by the manufacturer
should be used.
The machine should be positioned on a stable,
flat and horizontal base.
The saw blade must be correctly mounted.
(direction of rotation, centred correctly and
max. Ø400 mm)
The condition of the saw blade should be
checked regularly. Damaged blades must be
replaced immediately.
The saw blade cover must be fastened tight.
(Never work without the cover!)
Cooling water should be refreshed regularly
and kept above the minimum level.
Make sure the piece of work can not tilt or shift
during sawing.
Wear protective hair covering to contain long
hair. Do not wear loose clothing when working
The machine may only be operated using a
power supply with protection earthing accord-
ing to the regulations.
Make sure the power cable is connected secure
to the machine and the plug.
Before commencing work, the PRCD protective
switch* must be checked for proper functioning.
Do not use the PRCD protective switch* for
turning the machine on and off.
Unplug the machine from the power source
after use.
Keep the machine and accessories out of the
reach of children.
The machine may not be operated by persons
under the age of 16 years.
Use only original Würth parts and accessories!
* Not included as standard delivery.
For Your Safety
GB
)For further notes on safety refer to the enclosed sheet

11
Tool Specifications
Wet Tile Saw NTS 125
Article number 0701 412
Input power 2200 W
No-load speed 2800 RPM
Blade diameter Ø350 mm / Ø400 mm
Hole Ø25,4 mm
Max. sawing height Ø350 mm: 100 mm
Ø400 mm: 125 mm
Max. sawing length 500 mm
Saw table dim. (LxB) 475 x 400 mm
Dimensions (LxBxH) 1060 x 600 x 620 mm
Weight approx. 62 kg
Safety class / I
Operating Controls
1Motor
2On/Off switch
3Motor flange
4Saw flange
5Flange nut
6Capacitor
7Pump
8Knob f/ legs
9Clamping lever
10 Guiding roll
11 Roll
12 Grip
13 PRCD protective switch*
14 Saw table lock
15 Thermal protection
Not all of the accessories illustrated or described are
included as standard delivery.
Intended Use
The sawing machine is only to be used for sawing
sandstones, concrete products and natural stone in
combination with wet-diamond blades and a suffi-
cient supply of water.
For damage caused by usage other then intended,
the user is responsible.
Before Use
Always use the correct supply voltage: The
power supply voltage must match the information
quoted on the tool identification plate.
On construction sites electrical
appliances should be connected to
specially designed power supplies.
Suitable are grounded main power
supplies equipped with an earthleak
switch of max. 30mA or separating
transformers.
Non-grounded common household or
similar power outlets are not suited as
a power source.
For water cooled sawing machines stricter safety
standards are applicable. Therefore, for extra safety
the machine must be connected according to one of
the following methods:
* Main power supply equipped with earthleak switch
30 mA.
--------------------- or ---------------------
* Separating transformer, only 1 machine may be
connected at any given time.
--------------------- or ---------------------
* With an intermediate cable equipped with a PRCD
safety switch of max. 30mA.
* Not included as standard delivery.

12
Initial Operation
Setting up
- Unpack the sawing machine and inspect for any
damaged parts.
- Install the legs in the sockets at the underside of
the water container and fasten with the knobs.
- Level the sawing machine by adjusting the legs in
the sockets and make sure its stable.
- Unlock the saw table lock 14.
Functional test for the PRCD protective
switch* 13
The machine must be switched off
when carrying out the functional test of
the PRCD protective switch 13.
Before commencing work, check that the
PRCD protective switch is functioning properly:
- Press the «ON» button on the PRCD protective
switch.
- When the red control lamp illuminates, the pro-
tective switch is ready for operation.
- Press the «TEST» button.
- The control lamp must go off.
Cooling system
Operating the water pump without a
sufficient supply of water may result in
pump damage.
- Place the plug in the drain of the water container.
- Fill up the container with water until the water
pump 7is completely submerged.
Saw head
- By loosening the clamping lever 9the saw head
can be positioned at the desired cutting depth.
- For one-step cutting, lower the saw head until the
saw is approx. 10 mm. below the saw table.
- When cutting hard materials it is recommended
to do it in multiple steps.
- Adjust the saw head for the first cut and gradually
increase the cutting depth.
- The number of steps is dependent on the type of
saw and the material.
Switching On/Off
Switching on: Press the On/Off switch 2
(position „1“).
Switching off: Press the On/Off switch 2
(position „0“).
Overload Protection
The motor is equipped with a thermal safety switch
15 for protection against an overload. When the
motor gets overheated the switch falls back into its
initial position and can only be switched on again
after the motor is cooled down. The switch is also
protecting against power failure. When the power
returns, the motor will not start on its own but must
be switched on by hand.
Mounting the saw blade
Make sure you disconnect the machine
from the power supply before fitting or
switching the saw blade or when
performing any maintenance on the
machine.
-Removesawcover.
- Block the sawing spindle with the 5 mm. Allen
- wrench.
- Unscrew the 19 mm. flange nut 5with the
wrench and remove the saw flange 4.
(Attention: Left-handed screw thread)
- Clean the saw flanges 3and 4.
- Fit the saw blade on the centre ring of the motor
- flange. (Check the direction of rotation and
make sure the blade is well centred)
-Mountsawflange4and tighten with the flange
nut 5Place saw cover and tighten with the 2
knobs.

13
Maintenance and Cleaning
Before any work on the machine itself, pull
the mains plug.
- The cooling water should be replaced and/or
replenished regularly.
- It is recommended to clean the water container,
pump, hoses and spray nozzle on a regular
basis. For example, place the pomp in a bucket
of clean water after the sawing job and run the
machine for a minute or so. This also guarantees
a longer lifetime of the pump.
- When the machine is not used for a longer
period of time, the pump should not remain in
the muddy cooling water. It is better to clean the
pump as described above and leave it outside
the water container.
- Regularly check the saw flanges for wearing out
and replace if necessary.
Environmental Protection
Recycle raw materials instead
of disposing as waste.
The machine, accessories and
packaging should be sorted for
environmental-friendly recycling.
The plastic components are labelled for categorized
recycling.
Guarantee
For this Würth machine, we provide a guarantee in
accordance with statutory / country-specific regula-
tions from the date of purchase (proof of purchase
by invoice or delivery note). Damage that has
occurred will be corrected by replacement or repair.
Damage caused by normal wear, overloading or
improper handling is excluded from the guarantee.
Claims can only be accepted if the device is sent
undisassembled to a Würth branch office, your
Würth sales representative or a customer service
agent for Würth power tools.
Noise Information
Typically the A-weigthed noise levels of the product
are: sound pressure level: 89 dB (A) NEN-ISO
11204/prEN 31204; sound power level: 98 dB(A)
NEN-ISO 3744.
Wear ear protection!
The typical hand-arm vibration is below 2,5 m/s².
(EN 5349)
Declaration of Conformity
We declare under our sole responsibility that this
product is in conformity with the following standards
or standardization documents:
EN 55014-1/04.93 DIN EN 292
EN 61000-3-2/04.95 DIN EN 60204-1
EN 50082-2/03.95 EN 5349
NEN-ISO 11204/prEN 31204
NEN-ISO 3744 (Ear protection required!)
according to the provisions of the regulations
89/392/EEC, 91/386/EEC, 73/23/EEC and
89/336 EEC.
05
Adolf Würth GmbH & Co. KG
P. Z ü r n R . B a u e r
Design or construction of our machinery may change without prior notice.

14
È possibile lavorare con la mac-
china senza incorrere in pericoli
soltanto dopo aver letto completa-
mente le istruzioni per l’uso e
l’opuscolo avvertenze per la sicu-
rezza e seguendo rigorosamente
le istruzioni in essi contenute. Inol-
tre vanno rispettate anche le gene-
rali istruzioni di sicurezza riportate
nell’opuscolo allegato. Fatevi istru-
ire praticamente prima di passare
all’operazione pratica.
Se durante un’operazione di lavoro
viene danneggiato oppure troncato
il cavo dell’alimentazione di rete,
non toccare il cavo ma estrarre
immediatamente la spina dalla
presa. Mai utilizzare la macchina
con un cavo danneggiato.
Questa macchina troncatrice
supera il livello ammesso di rumo-
rosità. Le relative norme antinfortu-
nistiche prevedono per l'operatore
l'obbligo di misure di protezione
contro i rumori.
Portare occhiali e cuffie di prote-
zione.
❏Prima di utilizzarla, leggere attentamente le
indicazioni relative al montaggio ed al funzio-
namento della macchina.
❏La macchina può essere utilizzata solo per
tagliare arenaria calcare, prodotti in cemento
armato e roccia naturale.
❏Possono essere utilizzate soltanto le mole abra-
sive da taglio diritto consigliate dalla casa
costruttrice.
❏La macchina deve essere installata in posizione
orizzontale su una base stabile e piana.
❏La mola per troncare deve essere montata cor-
rettamente (direzione di rotazione e centratura,
max. Ø delle mole per troncare 400 mm).
❏Controllare sempre lo stato della mola per tron-
care. Mole per troncare danneggiate devono
essere sostituite immediatamente.
❏La cuffia di protezione deve essere fissata cor-
rettamente. (Non lavorare mai senza la cuffia
di protezione!)
❏Tenere l'acqua di raffreddamento sempre
pulita dal fango ed assicurarsi sempre un suffi-
ciente livello di riempimento.
❏Evitare che il pezzo in lavorazione possa pren-
dere delle angolature improprie durante l'ope-
razione di taglio.
❏In caso di capelli lunghi è necessario portare
un'adatta protezione per i capelli. Lavorare sol-
tanto con abiti adatti ed aderenti al corpo.
❏La macchina può essere utilizzata soltanto con
una rete di alimentazione dotata di collega-
mento a terra conforme alle norme vigenti.
❏Accertarsi che il cavo elettrico sia stato colle-
gato correttamente.
❏Prima di iniziare i lavori, è indispensabile assi-
curarsi del corretto funzionamento dell'interrut-
tore automatico PRCD*.
❏Non utilizzare l'interruttore automatico PRCD*
per accendere/spegnere la macchina.
❏Inserire la spina solo quando la macchina è
spenta ed estrarla di nuovo dopo l'utilizzo della
stessa.
❏Conservare la macchina e gli accessori in
maniera tale che non siano accessibili per
bambini.
❏La macchina non può essere utilizzata da per-
sone che abbiano meno di 16 anni.
❏Impiegare solo accessori originali di Würth.
* non compreso nel volume di fornitura
Per la Vostra sicurezza
I
☞Per altre istruzioni di sicurezza si veda il foglio allegato
0701 412 - I Seite 14 Freitag, 9. September 2005 8:43 08

15
Dati tecnici
Elementi della macchina
1 Motore
2 Interruttore di avvio/arresto
3 Flangia motore
4 Flangia della mola
5 Madrevite flangiata
6 Condensatore
7 Pompa
8 Vite a testa zigrinata
9 Maniglia regolabile
10 Rullo di guida
11 Rotelle
12 Impugnatura
13 Interruttore automatico PRCD*
14 Blocco del tavolo per troncare multiuso
15 Protezione termica
Gli accessori illustrati o descritti nelle istruzioni per l’uso non
sono sempre compresi nella fornitura!
Uso conforme alle norme
In combinazione con mole diamantate per troncare
ad umido ed un'adatta quantità di acqua la mac-
china è prevista per tagliare arenaria calcare, pro-
dotti in cemento armato e roccia naturale.
Per danni provocati da uso non conforme alle
norme, risponde esclusivamente l’Utente.
Prima della messa in esercizio
Osservare la tensione di rete: La tensione della rete
deve corrispondere a quella riportata sulla targhetta
della macchina.
Apparecchiature elettriche su cantieri
devono essere alimentate da particolari
punti di alimentazione. Per punti di alimen-
tazione si intendono distributori per corrente
di cantiere ed anche trasformatori con
avvolgimenti separati (trasformatori di
separazione).
Prese di corrente da muro installate in nor-
mali case o in simili impianti stazionari non
sono da intendersi come punti di alimenta-
zione.
Per le macchine troncatrici sono validi i più alti
requisiti richiesti per l'esercizio ad umido. Ciò
implica che si deve applicare la seguente misura di
protezione contro una tensione di contatto troppo
alta:
Distributore per corrente di cantiere con interruttore
di sicurezza per correnti di guasto* che si disinseri-
sce in caso di una corrente di guasto nominale pari
a 30 mA .
--------------------- oppure ---------------------
separazione di protezione considerando che ad un
trasformatore di separazione* può essere collegato
sempre una sola utenza.
--------------------- oppure ---------------------
cavo intermedio con interruttore automatico PRCD*
30 mA.
* Questo accessorio non fa parte del volume di fornitura.
Messa in esercizio
Messa in opera della macchina
– Estrarre la macchina dal cartone e controllare se
vi dovessero essere dei difetti.
– Estrarre i piedi dalla vasca per l'acqua, inserirli
nei tubi inferiori della vasca per l'acqua ed avvi-
tare forte con le vite a testa zigrinata.
– Mettere la macchina il più possibile in posizione
orizzontale e stabile. Ciò è possibile regolando i
piedi nei tubi della vasca per l'acqua.
– Rimuovere il blocco del tavolo per troncare multi-
uso 14.
Sistema di troncatura
ad umido NTS 125
Codice di ordinazione 0701 412
Potenza assorbita nominale 2200 W
Numero di giri a vuoto 2800 g/min
Diametro delle mole per
troncare
Ø 350 mm/
Ø 400 mm
Foro Ø 25,4 mm
Max. altezza di taglio Ø 350 mm: 100 mm
Ø 400 mm: 125 mm
Max. lunghezza di taglio 500 mm
Dimensioni del tavolo (L x P) 475 x 400 mm
Dimensioni (L xP x A) 1060 x 600 x
620 mm
Peso, ca. 62 kg
Classe protezione /I
0701 412 - I Seite 15 Freitag, 9. September 2005 8:43 08

16
Prova di funzionamento dell'interruttore di
sicurezza per correnti di guasto 13*
Al fine di evitare un'accensione accidentale
della macchina, per eseguire la prova di fun-
zionamento dell'interruttore automatico
PRCD 13, l'interruttore avvio/arresto 2 deve
essere spento.
Prima di iniziare i lavori è indispensabile assicurarsi
del corretto funzionamento dell'interruttore di sicu-
rezza per correnti di guasto PRCD,
– Premere il tasto «ON» all'interruttore automatico
PRCD. Quando la lampada rossa di controllo è
accesa significa che l'interruttore automatico è
pronto per l'esercizio.
– Premere il tasto «TEST». La lampada di controllo
deve spegnersi.
Sistema di refrigerazione
La pompa elettrica dell'acqua non deve mai
restare completamente senza acqua. La
pompa ne rimarrebbe subito danneggiata.
– Premere il tappo nel deflusso.
– Riempire la vasca per l'acqua con acqua fino a
quando la pompa 7 sarà completamente coperta
di acqua.
Testa della sega
– Sbloccando la levetta 9è possibile spostare la
testa della sega troncatrice e determinare la pro-
fondità di taglio a seconda delle esigenze.
– Per eseguire un taglio di troncatura, abbassare la
testa della troncatrice fino a quando la mola per
troncare arriverà a trovarsi 10 mm sotto il bordo
superiore del tavolo.
– In caso di materiale duro è consigliabile eseguire
la troncatura in diverse fasi operative.
– Regolare l'altezza della mola per troncare per il
primo taglio ed aumentare poi man mano la pro-
fondità di taglio per le successive operazioni.
– La quantità dei tagli dipende dal tipo della mola
da taglio e del materiale.
Accendere/spegnere
Accendere: Premere l'interruttore di avvio/arre-
sto 2 (posizione "1").
Spegnere: Premere l'interruttore di avvio/arre-
sto 2 (posizione "0").
Protezione contro i sovraccarichi
Un dispositivo termico di protezione contro i sovrac-
carichi impedisce il riavviamento del motore al di
fuori del campo ammesso della temperatura di eser-
cizio. L'interruttore è anche assicurato contro la
mancanza di corrente. In seguito ad una mancanza
di corrente la macchina non si avvia di nuovo auto-
maticamente ma deve essere di nuovo accesa
manualmente.
Montaggio della mola per troncare
In caso di sostituzione della mola per tron-
care oppure altri lavori di manutenzione,
estrarre sempre la spina dalla rete di ali-
mentazione.
– Allentare le viti a testa zigrinata e rimuovere la
cuffia di protezione.
– Allentare la madrevite flangiata 5 e togliere la
flangia della mola 4 (Attenzione: filettatura in
senso antiorario).
– Pulire la flangia motore 3 e la flangia della
mola 4.
– Applicare la mola per troncare al centro
dell'anello di centraggio della flangia motore 3.
(ATTENZIONE: osservare il senso di rotazione)
– Applicare la flangia della mola 4 ed avvitare la
madrevite flangiata 5.
– Chiudere la cuffia di protezione.
0701 412 - I Seite 16 Freitag, 9. September 2005 8:43 08

17
Manutenzione e pulizia
❏Prima di qualunque intervento alla macchina,
estrarre la spina dalla presa di rete.
– L'acqua di raffreddamento deve essere rinnovata
ad intervalli regolari.
– Consigliamo di pulire ad intervalli regolari la
vasca per l'acqua, la pompa, i tubi e gli ugelli.
Dopo il lavoro, appendere p.es. la pompa in un
contenitore con acqua pulita e far funzionare la
macchina ± 1 minuto.
– In caso che la macchina non dovesse essere usata
per maggiori periodi di tempo, la pompa non
deve restare nell'acqua salmastra ma deve essere
pulita e conservata al di fuori della vasca per
l'acqua.
– Controllare ad intervalli regolari se le flange
dovessero essere usurate.
Avvertenze per la protezione
dell’ambiente
Recupero di materie prime, piutto-
sto che smaltimento di rifiuti
Macchina, accessori ed imballaggio
dovrebbero essere inviati ad una riu-
tilizzazione ecologica.
I componenti in plastica sono contrassegnati per il
riciclaggio selezionato.
Garanzia
Per questa macchina Würth forniamo una garanzia
in conformità con le direttive di legge vigenti nel
rispettivo Paese ed a partire dalla data di acquisto
(verifica da fattura o bolla di consegna). I difetti
subentrati vengono eliminati attraverso una forni-
tura di ricambio oppure provvedendo alle dovute
riparazioni.
Si esclude la prestazione di garanzia in caso di
danni dovuti a normale usura, a sovraccarico,
oppure a trattamento ed impiego non appropriato.
Si accettano reclamazioni soltanto in caso che la
macchina venga rimandato indietro non smontato
ad una delle sedi Würth oppure al Vostro Responsa-
bile Servizio Clienti Würth oppure ad un Centro Ser-
vizio Clienti per Elettroutensili Würth autorizzato.
Informazione sulla rumorosità
La misurazione A del livello di pressione acustica
dell’utensile è di solito di: Livello di rumorosità
89 dB (A) NEN-ISO 11204/prEN 31204
Potenza della rumorosità 98 dB (A) NEN-ISO
3744.
Utilizzare le cuffie di protezione!
Le vibrazioni sull’elemento mano-braccio di solito
sono inferiori a 2,5 m/s2. (EN 5349)
Dichiarazione di
conformità
Assumendone la piena responsabilità, dichiariamo
che il prodotto è conforme alle seguenti normative
ed ai relativi documenti:
EN 55014-1/04.93, DIN EN 292,
EN 61000-3-2/04.95, DIN EN 60204-1,
EN 50082-2/03.95, EN 5349
NEN-ISO 11204/prEN 31204,
NEN-ISO 3744 (Utilizzare le cuffie di protezione!)
in base alle prescrizioni delle direttive
89/392/CEE, 91/386/CEE, 73/23/CEE e
89/336 CEE.
05
Adolf Würth GmbH & Co. KG
P. Zürn R. Bauer
Ci riserviamo ogni diritto di apportare modifiche alla forma od all'esecuzione delle nostre macchine senza preavviso.
0701 412 - I Seite 17 Freitag, 9. September 2005 8:43 08

18
Pour travailler sans risque avec cet
appareil, lire intégralement au
préalable les instructions d’utilisa-
tion et les remarques concernant la
sécurité. Respecter scrupuleuse-
ment les indications et les consi-
gnes qui y sont données. En plus, il
convient de respecter les consignes
d’ordre général touchant à la sécu-
rité qui sont définies dans le cahier
ci-joint. Avant la première mise en
service, laisser quelqu’un connais-
sant bien cet appareil vous indiquer
la façon de s’en servir.
Si le câble d’alimentation électrique
est endommagé ou se rompt pen-
dant le travail, ne pas y toucher.
Retirer immédiatement la fiche du
câble d’alimentation de la prise de
courant. Ne jamais utiliser un
appareil dont le cordon d’alimenta-
tion est endommagé.
Pendant le sciage le niveau sonore
que produit cette machine dépasse
les normes officielles.
Porter des lunettes de sécurité et
une protection acoustique.
Lire attentivement les prescriptions de montage
et d’utilisation de la machine.
La machine a été conçue uniquement pour le
sciage de pierre calcaire, béton et pierre bleue.
Pour garantir un bon fonctionnement, il est
nécessaire de monter des disques diamantés
préconisés par le fabricant.
Placer la machine sur une surface stable, régu-
lière et horizontale.
Monter le disque diamanté correctement- prê-
ter attention à la flèche qui donne la direction
de rotation et contrôler si l’alésage est d’un
diamètre correct. (max. Ø400 mm)
Contrôler la condition du disque (endommage-
ments éventuels, usure). Remplacer immédiate-
ment les disques diamantés endommagés ou
usés.
S’assurer que le carter est monté correctement
et que les volants ont été fixés.
Contrôler l’adduction d’eau de refroidissement.
Il est interdit de déplacer ou manipuler le maté-
riau pendant le sciage. De graves accidents
peuvent se produire.
Porter un bonnet de protection pour maintenir
les cheveux longs. Ne travailler qu’avec des
vêtements près du corps.
L‘appareil ne doit être branché que sur un
réseau muni d‘une prise de terre conforme à la
législation en vigueur.
Contrôler si la machine est branchée correcte-
ment sur le réseau.
Avant de commencer le travail, il faut contrôler
le bon fonctionnement du disjoncteur de pro-
tection PRCD*.
Ne pas utiliser le disjoncteur de protection
PRCD* pour mettre en marche ou pour arrêter
l‘appareil.
Brancher l‘appareil sur le courant électrique
seulement en position d‘arrêt et retirer la fiche
de la prise de courant une fois le travail ter-
miné.
Garder l‘appareil et les accessoires dans un
endroit inaccessible aux enfants.
L‘appareil ne doit pas être utilisé par des per-
sonnes de moins de 16 ans.
N’utiliser que des accessoires Würth d’origine.
* Cet accessoire ne fait pas partie de la fourniture
Pour votre sécurité
F
)D'autres consignes de sécurité figurent sur la feuille ci-jointe

19
Caractéristiques techniques
Scie de table NTS 125
Numéro d’article 0701 412
Puissance absorbée 2200 W
Vitesse à vide 2800 min–1
Diamètre disque Ø350 mm / Ø400 mm
Alésage Ø25,4 mm
Epaisseur de sciage Ø350 mm: 100 mm
Ø400 mm: 125 mm
Longueur de sciage 500 mm
Dimensions table 475 x 400 mm
Dimensions (Lo x La x H) 1060 x 600 x 620 mm
Poids env. 62 kg
Classe de protection / I
Eléments de la machine
1Moteur
2Commutateur Marche/Arrêt
3Flasque moteur
4Flasque de serrage
5Ecrou de serrage
6Condensateur
7Pompe
8Volant
9Manivelle ajustable
10 Galet en forme V
11 Galet plat
12 Poignée
13 Disjoncteur de protection PRCD*
14 Fixation de table
15 Protection thermique
Les accessoires reproduits et décrits dans la notice
d’utilisation ne sont pas forcément compris dans les
fournitures.
Utilisation conformément à sa
destination
L’appareil est destiné au sciage de pierre calcaire,
béton et pierre bleue au moyen de disques diaman-
tés et à l’aide d’une quantité suffisante d’eau de
refroidissement.
L’utilisateur assume toute responsabilité pour les
dommages dus à une utilisation non conforme à la
conception de la machine.
Avant la mise en service
Tenir compte de la tension du secteur: La ten-
sion de la source de courant doit correspondre aux
indications figurant sur la plaque signalétique de la
machine.
Sur les chantiers les machines
électriques sont à brancher aux sources
de puissance spéciales.
Les prises de courant domestiques ou
endroits de branchement analogues ne
peuvent pas servir pour alimenter la
machine.
Pour les débiteuses travaillant avec arrosage, des
mesures plus strictes sont à respecter et par consé-
quent une des méthodes suivantes est à appliquer
pour le branchement:
* Source principale pourvue d’une prise de terre
avec disjoncteur à courant différentiel résiduel de
30mA maximum
--------------------ou---------------------
* Transformateur de séparation; cependant une
seule machine peut être branchée
--------------------ou---------------------
* Par moyen d’un câble intermédiaire pourvu d’un
dispositif de protection PRCD de 30 mA maximum
* Cet accessoire ne fait pas partie de la fourniture stan-
dard et peut être commandé en option.

20
Mise en service
Préparation de la machine
- Déballer la machine et vérifier qu’elle ne pré-
sente pas d’endommagements.
- Monter les pieds dans leur support et serrer avec
les volants.
- Poser la machine sur une surface stable et niveler
par ajustement des pieds dans leur support.
- Desserrer la fixation de table 14.
Test de fonctionnement du disjoncteur de
protection PRCD 13*
Pour effectuer un test de
fonctionnement du disjoncteur de
protection PRCD 13, l’interrupteur
Marche/Arrêt 8 doit être en position
«Arrêt» afin d’éviter une mise en
fonctionnement par mégarde de l’appareil.
Avant de commencer le travail, contrôler le bon
fonctionnement du disjoncteur de protection PRCD.
- Appuyer sur la touche «ON» se trouvant sur le
disjoncteur de protection PRCD.
- Lorsqu‘elle est allumée, la lampe de contrôle
rouge indique que le disjoncteur de protection
PRCD est en service.
- Appuyer sur la touche «TEST».
- La lampe de contrôle doit s‘éteindre.
Circuit de refroidissement
La pompe ne doit pas tourner sans être
immergée. Par manque d’eau elle
risque d’être endommagée.
- Poser le bouchon dans le trou d’évacuation
d’eau.
- Remplir le bassin, la pompe 7doit être immer-
gée complètement.
Unité de sciage
- L’unité de sciage peut être ajustée en hauteur
après avoir desserré la manivelle ajustable 9.
- Pour effectuer un sciage en une passe, déplacer
l’unité de sciage de sorte que le disque diamanté
dépasse d’environ 10mm dans la rainure de
table.
- Fixer l’unité de sciage en position à l’aide du
volant.
- Pour le sciage de matériaux épais et durs, il est
conseillé de faire un sciage en plusieurs passes.
- Cette méthode consiste à fixer le disque dia-
manté à une certaine profondeur et faire traver-
ser l’unité de sciage par un mouvement aller et
retour dans le matériau. Puis vous ajustez la pro-
fondeur de sciage.
- Après un nombre de passes, ce qui dépend du
disque diamanté choisi et du matériau, le sciage
peut être achevé.
Mise en Marche/Arrêt
Mise en
fonctionnement: appuyer sur l’interrupteur
Marche/Arrêt 2(position „1“).
Arrêt: appuyer sur l’interrupteur
Marche/Arrêt 2(position „0“).
Protection moteur
Le moteur est pourvu d’une protection thermique
incorporée. S’il surchauffe, le moteur se déclenche
et peut seulement être réarmé après refroidissement.
En plus en cas de coupure de courant, le commuta-
teur se déclenche automatiquement; pour réarmer il
faut appuyer sur le bouton.
Montage du disque diamanté
Débrancher toujours la machine.
- Démonter le carter en dévissant 2 volants.
- Bloquer la broche-moteur avec la clé Allen de 5
mm.
- Dévisser l’écrou hexagonal 5et enlever le flas-
que de serrage 4. (Attention: écrou avec un pas
à gauche).
- Nettoyer la surface de serrage des flasques 3et
4.
- Monter le disque sur l’anneau de centrage du
flasque-moteur.
- Observer le sens de rotation représenté par une
flèche.
- Remettre le flasque de serrage 4et serrer l’écrou
hexagonal 5.
- Remettre le carter et serrer les volants.
Table of contents
Languages:
Other Würth Saw manuals

Würth
Würth SBS 12-A Quick guide

Würth
Würth KGS 250-60 Quick guide

Würth
Würth MHKS 28-A Quick guide

Würth
Würth AFS 18 COMPACT Quick guide

Würth
Würth Master HKS 86-2 Quick guide

Würth
Würth SBS 18-A Quick guide

Würth
Würth Master PS 350 User manual

Würth
Würth MKS 2400 Quick guide

Würth
Würth Master HKS 28-A User manual

Würth
Würth PBS 105 Quick guide
Popular Saw manuals by other brands

Ozito
Ozito CSW-7000U Additonal operating & safety instructions

MULTIQUIP
MULTIQUIP Stow Cutter 3 CC813H20 Operation and parts manual

Makita
Makita LH1040 instruction manual

Powermatic
Powermatic 66 Instruction manual & parts list

DeWalt
DeWalt DW304 instruction manual

Craftsman
Craftsman 113.235110 owner's manual