9
ESPAÑOL
¡Gracias por adquirir la Wahoo
KICKR CORE!
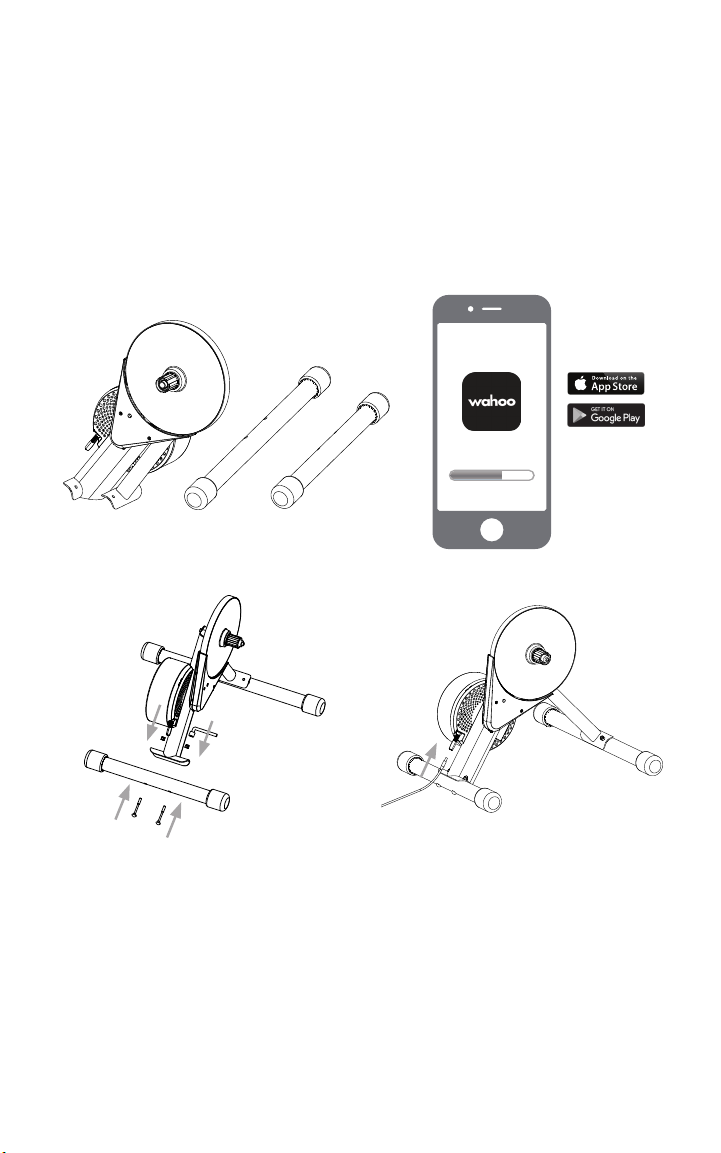
REGISTRA TU PRODUCTO USANDO LA APLICACIÓN WAHOO PARA RECIBIR LAS
ÚLTIMAS NOTICIAS, ACCEDER A NUESTRO SERVICIO DE SOPORTE Y ACTUALIZAR
EL FIRMWARE.
CONOZCA MÁS:
Sobre videos tutoriales, aplicaciones compatibles, preguntas frecuentes,
o para enviar una solicitud de asistencia, sírvase visitar:
www.wahoofitness.com/support
PARA CUALQUIER DUDA O ACLARACIÓN,
SÍRVASE CONTACTARNOS AL:
Wahoo Fitness
90 W. Wieuca Rd NE
Suite 110
Atlanta, GA 30342 United States
TELÉFONO:
Estados Unidos: 1-877-978-1112
Alemania: +49-30-568-373827
Reino Unido: +44-800-808-5773
Horario de atención: de lunes a
viernes de 10 am a 7 pm, hora del
Este de Norteamérica
• Consulte con su médico antes
de comenzar o de modificar
cualquier programa de
ejercicios.
• No ponga manos ni objetos
cerca de las partes móviles de la
KICKR CORE.
• La KICKR CORE puede
volverse caliente al tacto
cuando se utiliza por períodos
prolongados.
• No intente bajarse de la bicicleta
mientras el volante esté en
movimiento.
• Mantenga a los niños y a las
mascotas lejos de la KICKR CORE
mientras esté en uso.
• Utilice la unidad KICKR CORE
únicamente sobre una superficie
plana y estable.
• Tenga precaución mientras
se ponga de pie sobre la
KICKR CORE.
• No moje la KICKR CORE.
• Utilice solo la fuente de
energía proporcionada
con la KICKR CORE.
• Revise que la bicicleta haya sido
asegurada adecuadamente a la
KICKR CORE antes de cada uso.
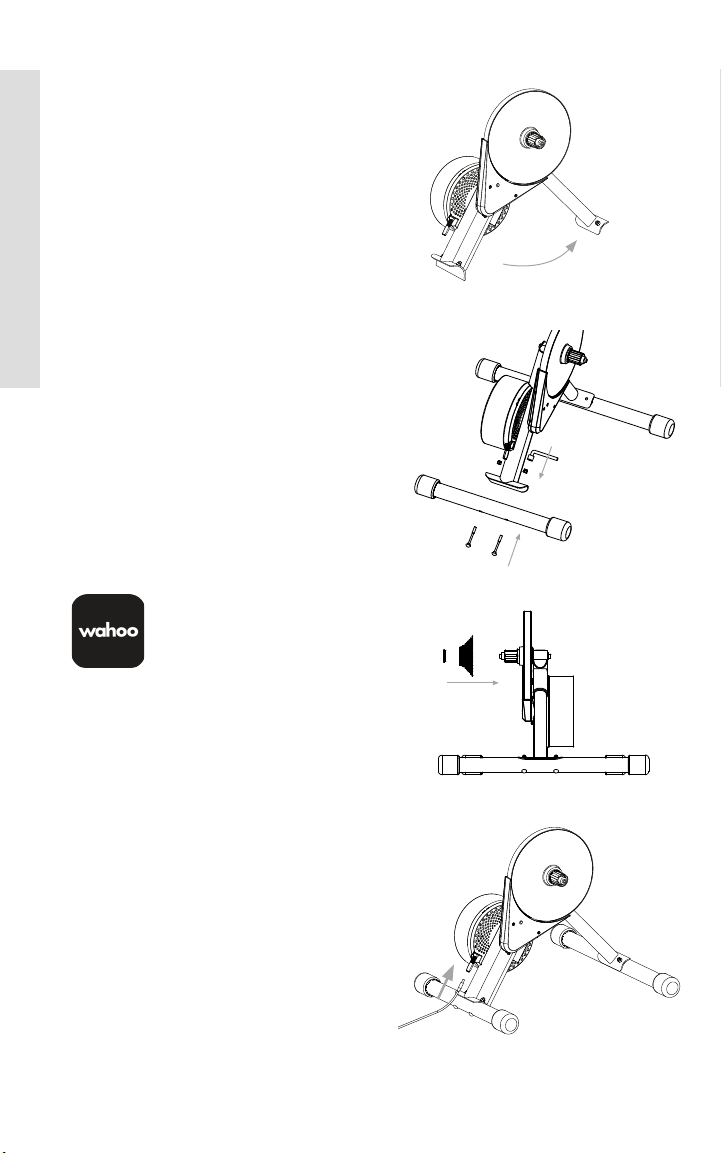
• Utilice la unidad KICKR CORE
únicamente cuando la unidad
esté totalmente ensamblada y
en la posición correcta.
• Utilice únicamente accesorios
y adaptadores Wahoo cuando
utilice la unidad KICKR CORE.
PRECAUCIÓN