Grommet Base Installation
8
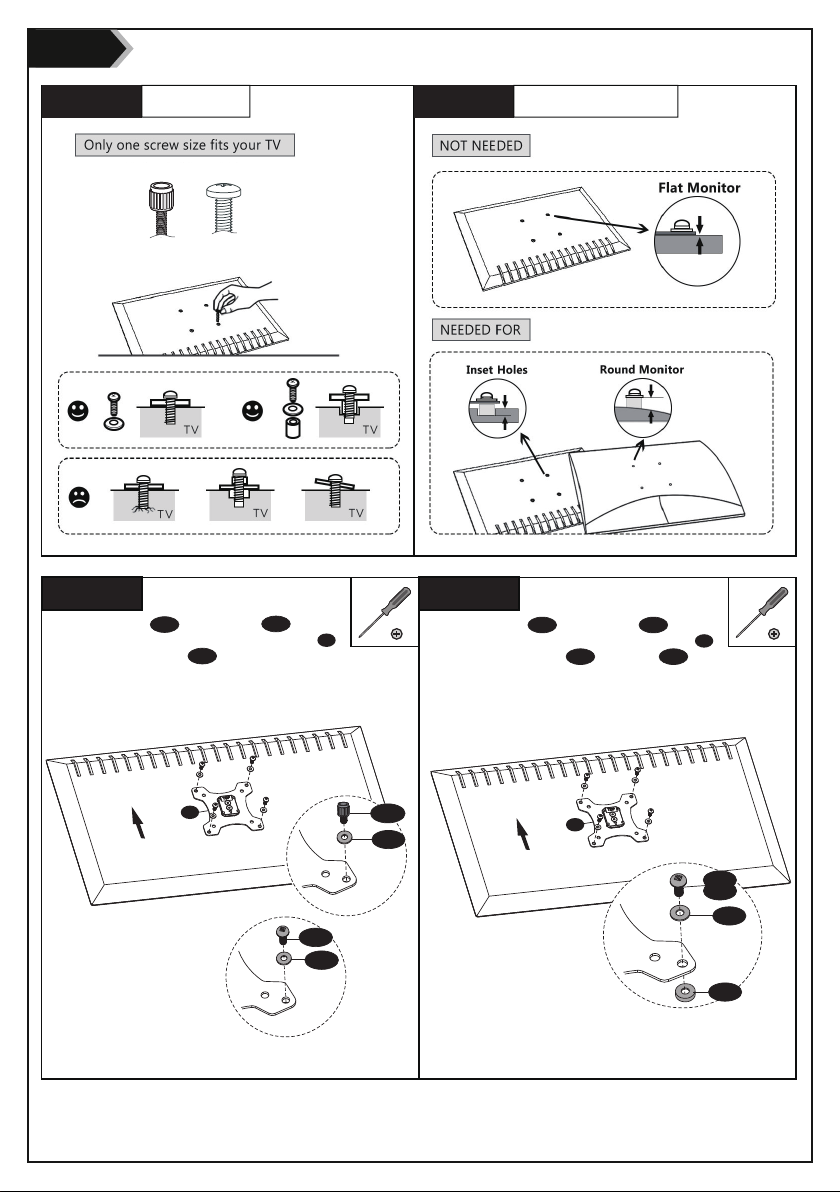
Step 4
Step 4.3a Step 4.3b
Select M4x12 Bolt M-A or M5x12 Bolt M-C
according to your TV/Monitor,connect VESA Plate E
together with D5 Washer M-E into the mounting
holes on the back of TV/Monitor, tighten with
screwdriver.(Screwdriver needed but not included)
Select M4x16 Bolt M-B or M5x16 Bolt M-D
according to your TV/Monitor,connect VESA Plate E
together with D5 Washer M-E and Spacer M-F into
the mounting holes on the back of TV/Monitor,
tighten with screwdriver.(Screwdriver needed but not
included)
Step 4.1
Select TV Screws
Step 4.2
Select Spacers ( if needed )
E
E
M-E
M-E
M-C
M-A
E
M-E
M-F
M-B
M-D
E
Hand thread screws
into the threaded
inserts on the back of
your TV to determine
which screw diameter
(M4 or M5) to use.
M4 M5