o
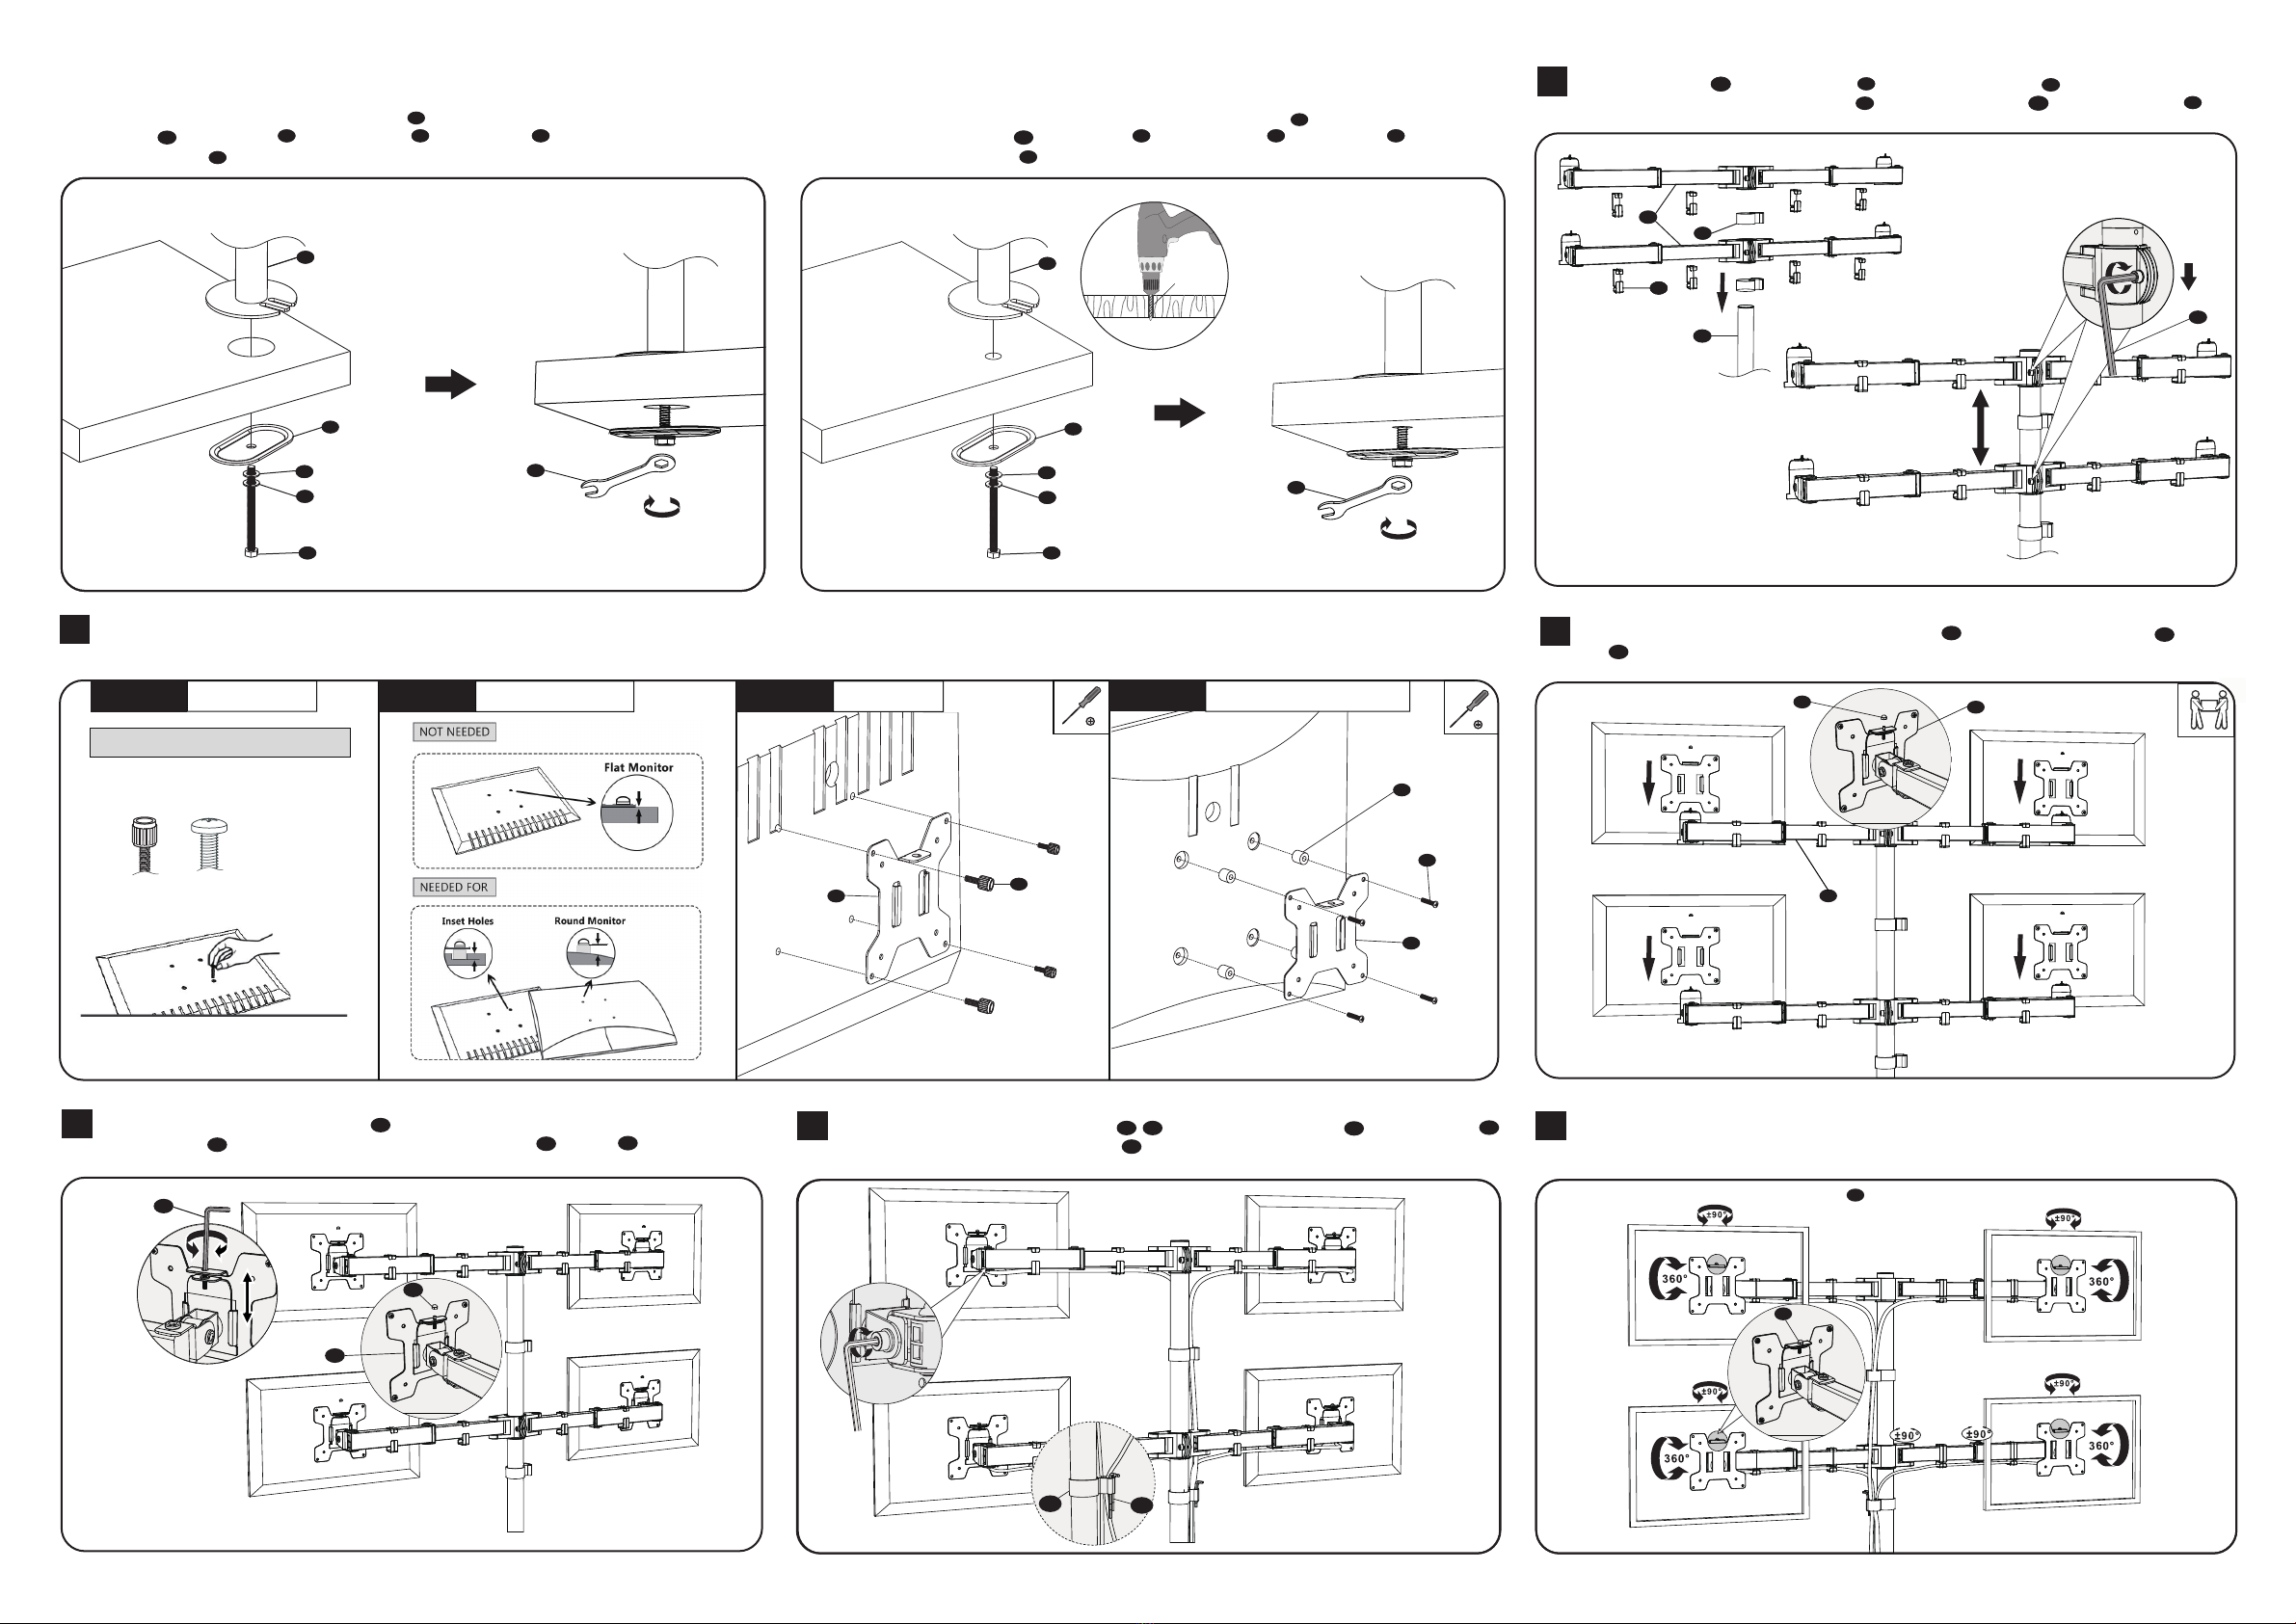
3Put the Wire Clips n1 and Swivel Arms d through the Upper Pole a , adjust the preferred
height and tighten using Allen Key 6mm o . Attach the Wire Clips to the Swivel Arms d .
8Manually swivel, tilt, and rotate the monitor for the best viewing angle.
7Guide the cable through the Wire Clips ( n1, n2 ) and store the Allen Keys o in the Wire Clip n1 .
Adjust the tilt angle using Allen Key 5mm n .
n1 n1
o
o
n2
d
d
n2
n1 a2
o
a2
n1n2
n1
d
j
j
k
l
i
p
a1 j
a1
j
k
lp
i
2a. Existing Grommet Hole Installation
If the existing grommet hole comes with a plastic protector, remove it to ensure a flat surface before
installing the desk mount. Position the Lower Pole a on the mounting surface and secure using the
Support Plate j , M10 Washer k , Spring Washer l , and M10 Bolt i . Fasten the Bolt using
the provided Wrench p .
2b. Self-drilled Grommet Hole Installation
Mark the position of the hole on your mounting surface. Drill a 3/8"(10mm) diameter hole at the
marked position through the mounting surface. Position the Lower Pole a on the mounting surface and
secure using the Support Plate j , M10 Washer k , Spring Washer l , and M10 Bolt i . Fasten the
Bolt using the provided Wrench p .
p
jkli
a1 a1
jkl
p
i
ø 10mm
(ø ")3/8
Select bolts and spacers (if needed) according to your TV/Monitor. Attach the VESA Plate to the Monitor and tighten with a screwdriver. (Screwdriver not included)
Step 4.1
Select Monitor Screws
Step 4.3a
Flat Back Monitor
Step 4.3b
Curved or Recessed Back Monitor
e
e
r
s
q
M4x12 M4x30
4
Only one screw size fits your Monitor
Step 4.2
Select Spacers ( if needed )
Hand thread screws into the
threaded inserts on the back
of your Monitor to determine
which screw (M4x12 or M4x30)
to use.
6If one monitor is lower, remove the Nut h and turn the bolt counter-clockwise using
Allen key 3mm o to raise the monitor. Tighten the VESA Plate e with Nut h for stability
after the adjustment.
e
d
h
e
e
o
o
h
h
5Put the assembled TV/Monitor onto the Swivel Arms d and tighten the VESA Plate e with
Nut h for stability.
h
e
d
h
Ignore this step if monitors are level.
h
o
n1
Please make sure the security nut is installed before you rotate the monitor.
Notice:
h
h
For safety, please do not extend the arms too far forward or backward. This may
cause instability and tip over.


