Wartmann WM-2007 EL User manual

WWW.WARTMANN.COOKING
USER MANUAL / GEBRUIKERSHANDLEIDING
VACUUM DEVICE | VACUÜMAPPARAAT
model WM-2007 EL

2
User manuals
User manual English 1-31
Gebruikshandleiding Nederlands 32-63

1
CONTENTS
WELCOME 2
IMPORTANT 4
Only suitable for domestic purposes 4
Check electrical connections 4
Prevent the vacuum device from coming
into contact with water 4
Contains heating elements 4
Use original accessories 5
FOOD SAFETY 6
Vacuum-packaging 6
Deep-freezing 7
Verify 7
PREPARATIONS 7
LIST OF THE VACUUM DEVICE 8
Outside 8
Inside 9
Control panel 10
USING THE VACUUM DEVICE 13
Switching on the vacuum device 13
Making a vacuum bag from a vacuum roll (sealing) 13
Vacuumising and sealing by use of a vacuum bag 14
Vacuumising and sealing using vacuum pulse-function 15
Tips for packaging 16
Vacuumising by use of vacuum boxes 16
Tips for using vacuum boxes 18
Vacuumising by use of a wine stopper 18
Marinating foods 20
Sealing multiple bags 21
AFTER USE 22
Cleaning 22
Storing 22
Maintenance 22
RECYCLING THE VACUUM DEVICE 22
APPENDIX: STORING ADVICE FOR FOODS 24
APPENDIX: TROUBLESHOOTING 26
Error codes 28
APPENDIX: OTHER VACUUM-PACKAGING
APPLICATIONS 29
APPENDIX: PROCEDURE FOR REPLACING THE
SEAL RIBBON 30
ENGLISH

2
WELCOME
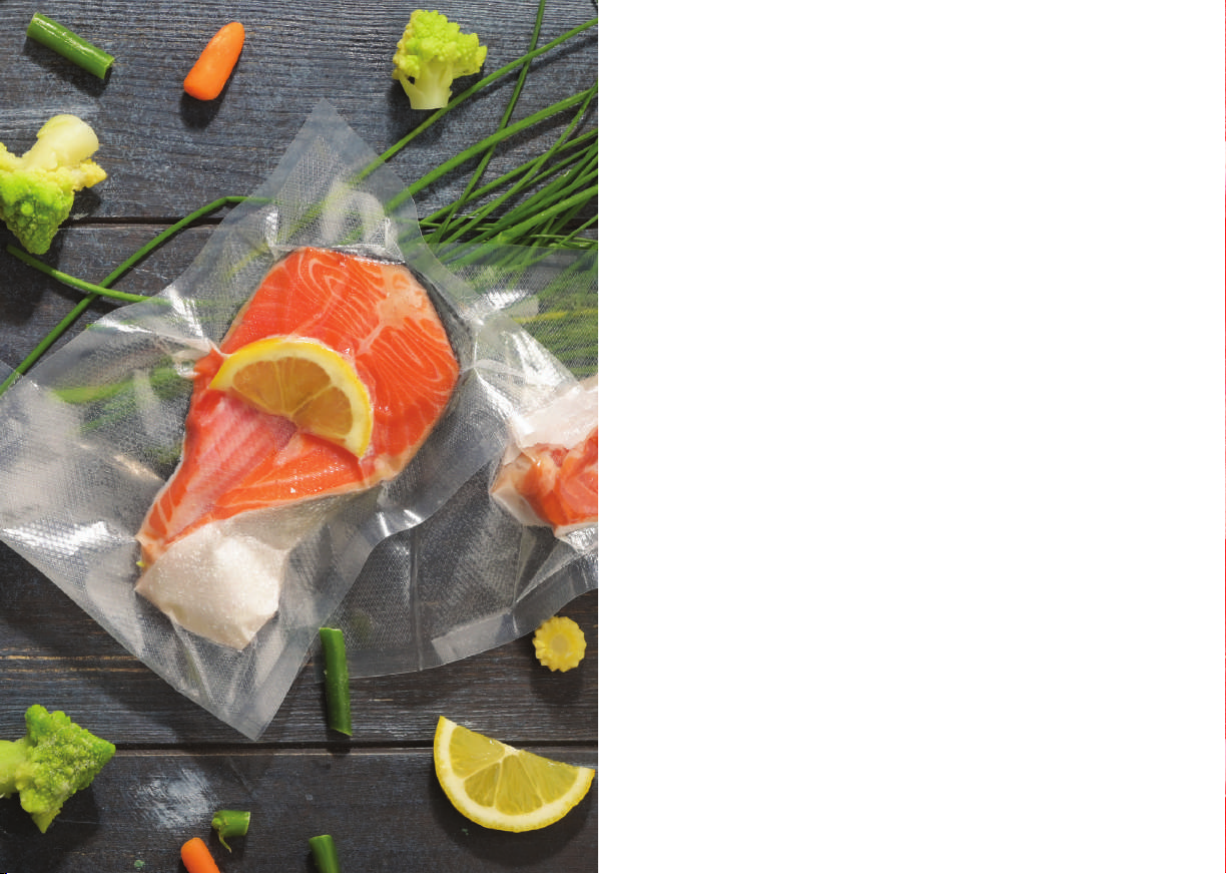
Congratulations on your purchase!
Wartmann hopes that you will enjoy your new
vacuum device. Using the Wartmann® vacuum
device, you can keep your food fresh for a lon-
ger period of time in the fridge or freezer. As the
Wartmann® vacuum device efficaciously removes
the air, the storage times may be up to five times
longer.
Using vacuum bags and special storage boxes, you
can store your food longer, wasting less food and
ultimately saving costs.
The Wartmann® vacuum device is perfectly suitable
for storing or preserving various household items.
And while doing sous vide cooking, the Wartmann®
vacuum device is an excellent choice.

3
A good choice
Thanks to ingenious design, the Wartmann® vacuum
device is compact, light-weight and easy to operate.
The broad vacuum chamber with transparent lid en-
sures that vacuum bags can be positioned easily and
are always well sealable.
During manufacturing of the Wartmann® vacuum
device, only tested, high-quality components are
used.
Following the instruction manuals and maintenance
instructions you will enjoy your Wartmann® vacuum
device for many years.
ENGLISH

4
IMPORTANT
This instruction manual contains information for the
use and maintenance of your vacuum device. Read
this instruction manual carefully before using the
vacuum device and keep it for possible later
consultation.
Only suitable for domestic purposes
This device is exclusively intended for common
household use. In case of (semi)-professional or
incorrect use, usage not in accordance with the
instructions in the manual, or self-performed repairs,
the warranty expires and Wartmann® will decline
any responsibility for any damage caused by this.
Check electrical connections
Check if the voltage indicated on the vacuum device
conforms with the local mains voltage before
connecting the vacuum device. Connect the vacu-
um device exclusively to a grounded socket. In case
the plug, power cord or the vacuum device itself is
damaged, repairs must be carried out first or the re-
levant part should be replaced by a qualified service
centre.
Prevent the vacuum device from coming
into contact with water
The vacuum device contains electrical parts and
heating elements. Never rinse the vacuum device
under the tap and do not immerse the vacuum
device in water. Make sure that no water ever enters
the vacuum device to prevent electrical shock and/
or damage to the vacuum device.
Contains heating elements
Do not touch the heating elements, they could be hot.
Do not position the vacuum device near flammable
materials (such as curtains) or cleaning agents (such
as methylated spirit).

5
Use original accessories
This manual applies to the optional use of
Wartmann® accessories. For accessories from other
suppliers, other instructions may apply.
ENGLISH

6
FOOD SAFETY
Vacuum-packaging
When vacuum-packaging food in vacuum-storage
boxes, most of the surrounding air is extracted whilst
the inflow of fresh air is being prevented. This way
the storage life of food is lengthened.
Vacuum-packaging helps to prevent freezer burn,
which is the dehydration of the surface layer of the
food. This is characterised by white or brown-red
discolouration of the food.
Vacuum-packaging contributes to the preservation of
the taste and the overall quality of the food. It slows
the growth of aerobic micro-organisms that could
cause:
• Mould. As mould won’t grow in environments with
little oxygen, the vacuum-packaging will strongly
reduce the risk of moulding.
• Fermentation. Fermentation can be noticed
by the odour or taste of the food. Fermentation
requires water and sugar and will develop at room
temperature. Fermentation can also develop when
air is lacking. In order to slow the yeast growth items
should be cooled, only at deep-freezing temperatu-
re, this growth will come to a halt.
• Bacteria. Bacterial growth can often be recognised
by a nasty smell, discolouration and a soft or
slimy layer. Under specific circumstances, clostridium
botulinum, which causes botulism, can grow without
air. This is rare, but also extremely dangerous. You
can neither smell nor taste it.
The vacuum-packaging is no replacement for cooling
or deep-freezing. Perishable foods that require
cooling or freezing, must still be kept in the
refrigerator or freezer.

7
Deep-freezing
In order to safely preserve foods, it must be kept at
low temperatures. The growth of micro-organisms is
strongly reduced at temperatures of 4°C and below.
At a temperature of -17°C, growth will nearly come
to a full stop. This does however not kill the micro-
organisms.
If you wish to store your vacuum packed food
long-term, then always place it in the freezer.
Verify
Always check if food is spoiled, before consuming
it. You must realise that vacuum-packaging cannot
undo spoilage. Vacuum-packaging only ensures that
the quality of food is retained longer. How much
longer you can preserve the food, depends on
different factors, such as the quality of the food at
the time of packaging. We advise to only package
fresh food and mention the date of packaging on the
package.
PREPARATIONS
Before you can start vacuum-packaging vegetables,
they need blanching. This will inhibit the
enzymatic activity which causes loss of flavour and
colour fading. Cook the vegetables or place them
in the microwave until they are done, but still a bit
crispy. Subsequently you immerse the vegetables in
cold water, stopping the cooking process. Next, dry
the vegetables with, for instance, a clean towel.
Cruciferous vegetables, such as broccoli, sprouts,
cabbage, cauliflower, kale and turnips produce
carbon dioxide during preservation. Therefore, you
can only store these vegetables in the freezer.
ENGLISH

8
LIST OF THE VACUUM DEVICE
Outside
Handle
Control panel
Power cord
connection
Vacuum hose
connection
Lid

9
ENGLISH
Sealing edge
Gasket
Vacuum chamber
Sealing strip
Inside

10
Control panel
A. Start button [Start]
Using the start button you can directly start your
preferred programme. By pressing [Start] you start
the “vacuumising & sealing” or the “vacuum-marina-
ting”. Which programme is started, depends on the
setting of the vacuum device.
B. Seal button [Seal]
The seal button is perfectly suitable for sealing
items in a bag for which no vacuum is desired or
necessary. By pressing [Seal] you start the sealing.
If you press [Seal] during a running vacuum-
programme, the vacuumising will stop and sealing
will start immediately.
C. Vacuum pulse-button [Pulse]
Using the vacuum pulse-button, the vacuum can
be metered accurately. When pressing [Pulse] the
vacuum is being developed as long as you keep
pressing the button. This is to prevent, for instance,
products from being compressed.
K1 G H C E D F
I J K2 A B

11
ENGLISH
D. Impulse sealing-button [Impulse Seal]
The impulse sealing-button helps to quickly seal
multiple bags one after another. Open the lid and
press [Impulse Seal] to select the programme for
sealing multiple bags. You only need to position the
bag to be sealed and close the lid. As soon as the
sealing is completed, you open the lid, remove the
bag and directly place the next bag to be sealed.
Subsequently close the lid. You can repeat the-
se steps until all the bags to be sealed have been
processed.
E. Accessories-button [Accessory]
With the accessories-button you can use vacuum
boxes, wine stoppers and other accessories suitable
for vacuumising. After you have correctly fixed the
accessory, using the hose, you press [Accessory].
The vacuum device will stop automatically as soon
as the desired vacuum has been reached.
F. Cancel-button [Cancel]
Using the cancel-button you can stop any running
programme. Press [Cancel] to stop the running
programme.
G. Function-button [Function]
The function button enables you to set a prefer-
red programme on “vacuumising & sealing” or
“vacuum-marinating”. Press [Function] to switch
between both programmes; the indicator light shows
the chosen programme; “Seal time” for vacuumising
and sealing, “Marinate time” for vacuum-marina-
ting. By pressing either the [+] or [-] button, you can
set the sealing time and marinating time as you see
fit. The set time will be shown on the display.
H. Vacuum degree-button [Vacuum Degree]
Using the vacuum degree-button you can set the de-
sired vacuum. Keep pressing [Vacuum Degree] until
the desired setting has been selected. You can choose

12
from High, Medium, Low or Adjustable. When you
have chosen Adjustable, then, using the [+] and [-]
buttons, you can set the vacuum as you desire. The
set value is shown in inHg in the display.
I. Display
1. You can read the (set) vacuum, the sealing time
and marinating time from the display.
J. Adjust Button [+] and [-]
Using the [+] and [-] buttons, you can set the desired
vacuum, sealing time and marinating time.
K. Indicator lights
K1. This indicator light shows the selected preferred
programme.
K2. This indicator light shows the set vacuum.
PLEASE NOTE: The vacuum device stores the set
value until the vacuum device is switched off.

13
Unpacking the vacuum device and
preparations for first use
Take the vacuum device out of the box and remove
all packaging materials. Do not remove the yellow
warning label on the lid. Place the vacuum device on
a horizontal surface in a location where the vacuum
device cannot tip over, even when passing.
Switching on the vacuum device
Insert the plug of the vacuum device into a grounded
socket. Wait for the indicator lights to light up. The
vacuum device is now ready for use.
Making a vacuum bag from a vacuum roll
(sealing)
If you work with vacuum bags only, you can skip this
step. Choose a vacuum roll of suitable width. Open
the vacuum device lid and place the open end of the
vacuum roll over the sealing strip. Make sure that
the open part of the vacuum roll reaches beyond the
sealing strip and ends up in the vacuum chamber.
Close the lid and press it lightly for a short time, whi-
le briefly pressing the [Seal] button to start sealing.
As soon as the sealing is completed, the lid will be
released while a beep will sound.
Open the lid, take the sealed part of the vacuum roll
from the vacuum device and check the sealing.
A proper sealing will be transparent over the entire
length. If the sealing is mottled, white or milky or
even crumpled, then it is not suitable. In this case,
cut off the sealing and create a new sealing in accor-
dance with the abovementioned steps.
If the sealing is correct, then cut the desired length
off the vacuum roll, leaving a vacuum bag with one
USING THE WARTMANN®
VACUUM DEVICE
ENGLISH

14
open side. The open side of the vacuum bag is requi-
red to have a free space of at least 4.5 centimetres.
Vacuumising and sealing by use of
a vacuum bag
Choose a vacuum bag that is suitable for the product
to be vacuumised. At least 4.5 centimetres must be
available in order to make a proper vacuum.
Open the lid of the vacuum device and place the
open end of the vacuum bag over the gasket and in
the vacuum chamber. Please make sure that the open
part of the vacuum bag is in the vacuum chamber.
Set the vacuum device on programme “vacuumising
& sealing”. To do so, press button [Function] until the
indicator light [Seal time] lights up. If you wish, you
can still adjust the sealing time by means of buttons
[+] and [-]. Using the button [Vacuum Degree] you
can select the desired under-pressure.
Close the lid and press it lightly for a short time,
while briefly pressing the [Start] button to start the
vacuumising and sealing. You can notice air flowing
out of the vacuum bag. As soon as the desired va-
cuum has been reached, the vacuum device will au-
tomatically start sealing. Once the sealing is com-
pleted, the lid will be released and a beep can be
heard.
Open the lid, take the sealed vacuum bag out of the
vacuum device and check the sealing.
A proper sealing will be transparent over the entire
length. If the sealing is mottled, white or milky or
even crumpled, then it is not suitable. In this case,
cut off the sealing and create a new sealing in accor-
dance with the abovementioned steps. If necessary,
use a new vacuum bag.
Store the vacuum bag, containing the product, in an
appropriate way. All perishable foods must be coo-

15
ENGLISH
led or kept in the freezer to reduce the risk of spoi-
lage. If you want to interrupt the vacuumising, then
briefly press the [Cancel] button.
Vacuumising and sealing using the vacuum
pulse-function
Delicate products in the vacuum bag can be dama-
ged as a result of too high an under-pressure. Using
the vacuum pulse-function you can manually control
the vacuumising time and -pressure, ensuring that
your delicate products are not automatically dama-
ged. The vacuum pulse-function can also be used
for the vacuumising of liquids, to prevent these from
being sucked up.
Place the delicate products in the vacuum bag. Open
the vacuum device lid and place the open end of the
vacuum bag over the gasket in the vacuum chamber.
Make sure that the open part of the vacuum bag is in
the vacuum chamber.
Close the lid and press it lightly for a short time,
while you keep pressing the [Pulse] button until the
preferred vacuum is reached. The shape of the va-
cuum bag will indicate whether the desired vacuum
has been reached. Only when taking your finger off
the [Pulse] button, the vacuumising will stop. Simply
press the [Pulse] button again to continue the vacu-
umising. During this step the letter P will continuously
show on the display.
As soon as the desired vacuum has been reached,
press [Seal]. The sealing will start and in the display
you can now see the remaining sealing time going
down to 0 seconds. Subsequently, the lid will be re-
leased and you can hear a beep.
If you want to interrupt the vacuumising, then briefly
press the [Cancel] button.

16
Tips for packaging
Pack the food as freshly as possible. By means of
vacuum-packaging, the freshness of the food can be
retained up to five times longer, compared with food
that is stored under regular circumstances.
Delicate and moist food, as well as food of which the
shape should be retained, must first be frozen. Food
such as meat, berries and bread can be frozen up to
24 hours before freezer burn starts. As soon as the
food is solid, you can deep-freeze it.
If you choose to package meat without freezing it
first, then place a folded paper towel between the
meat and the top of the bag. This will absorb moistu-
re. You can also choose for special vacuum bags
with integrated absorption strip.
Firstly, freeze liquid food, such as soups, stews and
casseroles in, for instance, an oven dish. As soon
as they are frozen, they are ready for vacuum-pack-
aging, marking and storage in the freezer.
Cover sharp points and edges of products such as
bones, pasta and rice first, using a paper towel. This
reduces the risk of the vacuum bag being punctured.
Vacuum bags are suitable for the microwave and
are hot water resistant. You can re-use vacuum bags,
unless they have been used to store fish or fat food.
We recommend that you do not re-use vacuum bags
that have been cooked or been in the microwave.
Vegetables should be blanched first before
vacuum-packaging is done. Mushrooms and garlic
cannot be vacuum-packed.
Vacuumising by use of vacuum boxes
The vacuum device can also be connected to vacuum
boxes. The vacuum is controlled by the button on (the
lid of) the vacuum box. By setting the button to clo-
se, you shut off the air supply, securing the vacuum.
Setting the button to open, air will flow into the

17
ENGLISH
vacuum box, after which you can take off the box
lid.
Check first if the gasket in the lid is dust-free and con-
tains no food residues. Also check if the vacuum box
is dry. Place the product to be stored in the vacuum
box. Leave a little room on top of the food, so that air
can easily flow out. Place the lid on the vacuum box
and set the button of the vacuum box to “vacuum”.
Connect the one side of the vacuum hose to the
nipple of the vacuum box, and the other side to the
nipple of the vacuum device. The nipple is on the
right hand side of the vacuum device.
Briefly press the [Accessory] button and subsequently
also press the vacuum box lid lightly for 3-5 seconds.
The vacuum device will stop automatically as soon
as the vacuum has been reached. After this, turn the
button on the vacuum box lid to “lock”.
Subsequently disconnect the vacuum hose from the
lid nipple.
If you want to interrupt the vacuumising, then briefly
press the [Cancel] button. In order to undo the vacu-
um entirely, you should turn the vacuum box lid to
open, and briefly lift the lid from the vacuum box.
Keep the vacuum box in your fridge. To open the
vacuum box, you turn the button on the vacuum box
lid to “open”.

18
Tips for using vacuum boxes
Use only storage boxes that are suitable for
vacuumising. Ordinary storage boxes may implode
when creating a vacuum in these boxes.
Warm foods must cool off before they are
vacuum-packed. Cool any liquids in the fridge befo-
re you vacuum-pack them.
Vacuum boxes can be kept in the freezer. The re-
commended lowest temperature at which a vacuum
box can be stored is -18C. At temperatures lower
than that, the vacuum boxes will suffer too high an
under-pressure. At temperatures exceeding 100C,
there is a chance that the vacuum boxes will deform
or melt.
From the moment you start vacuumising, lightly press
the vacuum box lid for three to five seconds.
Do not place the vacuum box lid in the dishwasher
or microwave, but clean it manually. The vacuum
box (without a lid) is suitable for the dishwasher and
microwave. The recommended maximum temperatu-
re for the vacuum box is 100C.
Rinse the supplied vacuum hose with warm water,
if any fluids accidently got into the hose. Make sure
that the vacuum hose is not connected to the nipple.
Make sure that no food particles can get into the
vacuum device. Food containing powder or crystal
should be covered by use of a paper towel before
vacuumising.
Vacuumising by use of a wine stopper
Using the vacuum device and special wine stoppers,
bottles can be vacuumised, for instance to store an
opened wine bottle, non-carbonated soft drinks, ve-
getable oil or fresh juice.
Insert the bottom of the wine stopper into the neck of
the bottle. Keep at least 2.5 cm between the bottom
Table of contents
Languages:
Other Wartmann Kitchen Appliance manuals

Wartmann
Wartmann WM-1912 DH User manual

Wartmann
Wartmann WM-2110 DH User manual

Wartmann
Wartmann WM-1902 DH User manual

Wartmann
Wartmann WM-2006 DH Installation and operation manual

Wartmann
Wartmann WM-1902 DH User manual

Wartmann
Wartmann WM-1509 VAC User manual

Wartmann
Wartmann WM-1507 SV User manual

Wartmann
Wartmann WM-1508 SV User manual

Wartmann
Wartmann WM-2002 OP User manual