manuals.online logo
Brands
  1. Home
  2. •
  3. Brands
  4. •
  5. Webasto
  6. •
  7. Marine Equipment
  8. •
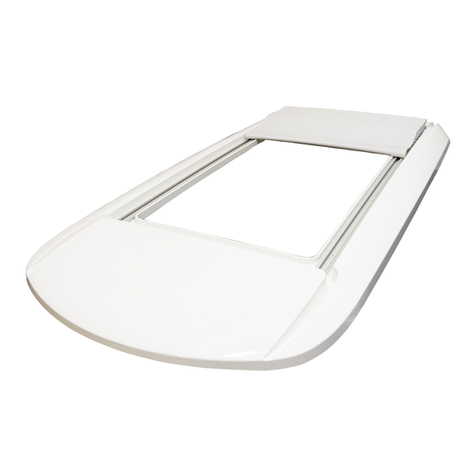
  9. Webasto 80 Series User manual

Webasto 80 Series User manual

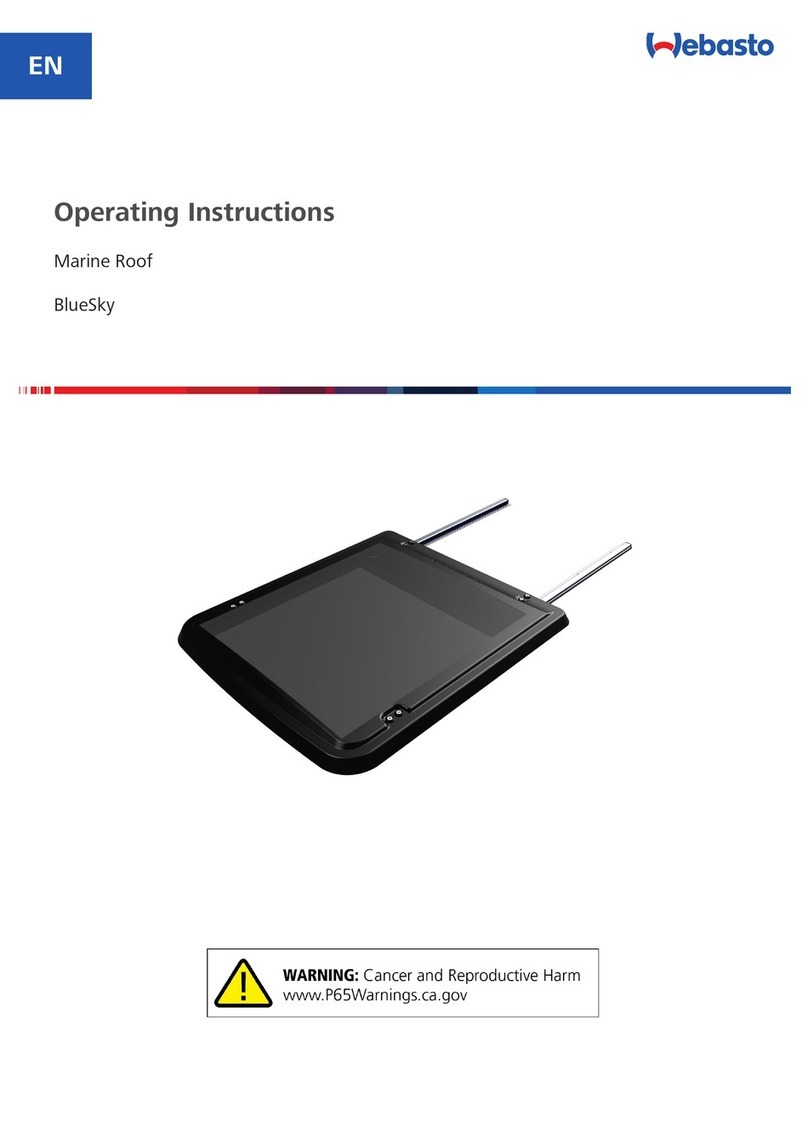
Marine Roof
Marinedach
Toit ouvrant Marine
Marine schuifdak
Tetti per la Nautica
Installation Instructions
Einbauanweisung
Notice de montage
Montagehandleiding
Istruzioni di montaggio
80-100 Series
80-100er Serie
Série 80-100
80-100 Series
80-100 Series
80-100 Series
TABLE OF CONTENTS / INHALTSVERZEICHIS / INDEX / INHOUDSOPGAVE / INDICE
English ....................................................................................................................................5
1. INTRODUCTION ..................................................................................................7
2. OPERATION ........................................................................................................7
3. PRE-INSTALLATION ...........................................................................................8
4. SEAL COMPRESSION .......................................................................................13
5. INSTALLATION ................................................................................................14
6. ELECTRICAL CONNECTIONS ............................................................................17
7. RESETTING ......................................................................................................18
8. ELECTRICAL DIAGRAM ....................................................................................19
9. SAFETY ...........................................................................................................20
10. SUPPORT ..........................................................................................................21
11. TECHNICAL DATA .............................................................................................21
12. CHECKLIST........................................................................................................23
Deutsch .................................................................................................................................25
1. EINLEITUNG ......................................................................................................27
2. BETRIEB ............................................................................................................27
3. INSTALLATIONSVORBEREITUNGEN .................................................................28
4. DICHTUNGSKOMPRESSION .............................................................................33
5. EINBAU.............................................................................................................34
6. ELEKTRIK .........................................................................................................37
7. RÜCKSETZUNG ...............................................................................................38
8. ELEKTRISCHER SCHALTPLAN.............................................................................39
9. SICHERHEIT .....................................................................................................40
10. HOTLINE ...........................................................................................................41
11. TECHNISCHE DATEN .........................................................................................41
12. CHECKLISTE ......................................................................................................43
Français .................................................................................................................................45
1. INTRODUCTION ................................................................................................47
2. FONCTIONNEMENT ..........................................................................................47
3. PRÉ-INSTALLATION .........................................................................................48
4. COMPRESSION DU JOINT ................................................................................53
5. MONTAGE ......................................................................................................54
6. PARTIE ÉLECTRIQUE .........................................................................................57
7. RÉINITIALISATION .............................................................................................58
8. SCHÉMA ÉLECTRIQUE .....................................................................................59
9. SÉCURITÉ ........................................................................................................60
10. ASSISTANCE TECHNIQUE ..................................................................................61
11. CARACTÉRISTIQUES TECHNIQUES.....................................................................61
12. LISTE DE CONTRÔLE .........................................................................................63
Nederlands ............................................................................................................................65
1. INLEIDING.........................................................................................................67
2. BEDIENING .......................................................................................................67
3. VOOR MONTAGE ............................................................................................68
4. AANDRUKKEN DICHTING ................................................................................73
5. INSTALLATIE .....................................................................................................74
6. ELEKTRISCHE VERBINDINGEN ..........................................................................77
7. RESETTEN .......................................................................................................78
8. ELEKTRISCH SCHEMA........................................................................................79
9. VEILIGHEID .....................................................................................................80
10. HOTLINE ...........................................................................................................81
11. TECHNISCHE GEGEVENS ...................................................................................81
12. CHECKLIJST.......................................................................................................83
80-100 Series
Italiano.................................................................................................................................. 85
1. INTRODUZIONE................................................................................................ 87
2. FUNZIONAMENTO ........................................................................................... 87
3. PRE-INSTALLAZIONE ....................................................................................... 88
4. COMPRESSIONE DELLA TENUTA ..................................................................... 93
5. INSTALLAZIONE ............................................................................................. 94
6. COLLEGAMENTI ELETTRICI ............................................................................ 97
7. RESETTAGGIO ................................................................................................ 98
8. SCHEMA ELETTRICO ....................................................................................... 99
9. SICUREZZA ................................................................................................... 100
10. ASSISTENZA ................................................................................................... 101
11. DATI TECNICI ................................................................................................. 101
12. LISTA DI CONTROLLO..................................................................................... 103
80-100 Series
5
NOTE
For installation and repair of Webasto roofs you will need a special training by Webasto, technical
documentation, special tools and special equipment.
Do NOT install or repair Webasto roofs, if you have not successfully finished the training by Webasto for
acquiring the necessary technical skills. Do NOT install or repair Webasto roofs, if you do not have the
necessary technical documentation, tools or equipment.
ALWAYS follow the 80-100 Series80-100 SeriesWebasto installation and service instructions and mind all
warning indications.
Webasto does not assume any liabilities for defects or damages caused by for installation untrained
personnel.
SYMBOLS
On each page you can find a symbol of the kind of tasks explained on that page.
Mechanical tasks
Electrical connections
Special parts of the text are marked with these symbols:
Indication of danger of injuries or accidents
Indication of danger of damaging the product
Indication of another source of information
Indication of technically special features
80-100 Series
6
SCOPE OF DELIVERY
• Top frame (incl. 2 motors, mechanisms, wiring, rocker switch)
• Hinge bodies, left and right (incl. sliding mechanism)
•Rearrails,2pcs
• Rear rail covers, 2 pcs
• Rear rail end caps, 2 pcs
• Emergency key (hex key), 2 pcs
• Installation instructions
• Operating instructions
• Panel assembly (according to your order)
OTHER MATERIALS REQUIRED
• Hardware to fixate top frame and rear rails: screws stainless steel A4, class 70
- M5 pan, dome or round head for top frame (alternative: self tapping screws)
- M6 pan, dome or round head for rear rails (alternative: self tapping screws)
• Hardware to fixate panel to hinge bodies and lever assemblies: screws stainless steel A4, class 70
• High quality, acid-free, UV resistant, silicon mastic sealant
• Loctite®243 or similar thread sealant
•GreaseIsoflex
®Topas L32
•Fuse40A
• Electrical wiring, connectors, etc.
NECESSARY TOOLS
• Drilling machine
• Drills ø 4.2 and 5 mm
• Taps M5 and M6
•Hexkeys
•Masticgun
•Screwdrivers
• Tools for electrical connections
Personnel
Perform roof installation with at least 2 persons. This makes the installation easier and reduces the risk of damage.
Protection
Improper use of tools can lead to injuries or damage to the ship or roof!
Thoroughly read tool instructions prior to using.
Before using any specialized tools, make sure to know all rules and regulations in your country.
Cover interior and exterior of the ship with protection materials (covers, cloths, etc.) to reduce the risk of damage.
Also wear protective clothing like ear protection, safety shoes, safety goggles and protective gloves.
80-100 Series
7
1. INTRODUCTION
The Webasto 80 Series is an electrically operated sliding roof for comfort purposes. The sliding roof has been designed for use
on motor and sailing yachts and can be used in the toughest conditions.
It is suitable for fitting in area III (or area II, depending on your order) and usage for ship type with design-
category A (ocean-worthy).
All parts are made from high corrosion resistant materials.
Note: Several components are customer specific and may be different from corresponding components shown
in this document.
2. OPERATION
See operating instructions.
80-100 Series
8
3. PRE-INSTALLATION
Marine Roof has to be installed on surface with shape
specified below.
Deck must be sufficiently strong at installation point.
If not, reinforcement must be made.
Note:
Illustration is an example!
Deck shape:
- Lengthwise: uncurved, straight.
-Cross direction: according to your order.
-Place top frame in deck.
-Center top frame in aperture.
-Fixate top frame to deck near “A”
• Aluminium or steel deck:
Drill hole ø 4.2 mm and cut thread M5.
Important:
Do not damage seal when drilling holes,
placing and tightening fixing screws.
•Other deck materials, e.g. GRP (Glass Rein-
forced Plastic):
Make your own choice.
-Check if boat center and rear beam of top frame
are perpendicular.
-Fixate top frame to deck near “B”,
same as before (near “A”).
-Check if sides of top frame are parallel and
perpendicular to rear beam.
- Fixate top frame to deck near “C” and “D”,
same as before (near “B” and “A”).
-Check if sides of top frame are parallel and
perpendicular to rear beam.
R2 R1
R3
W2 L2L1
A
A
B
C
D
80-100 Series
9
- Drill remaining holes ø 4.2 mm and cut thread M5.
- Remove top frame.
Important:
Do not damage seal when drilling holes.
- Apply bead of sealant along contour of roof
aperture.
Also around fixing holes.
- Place top frame again.
- Aluminium or steel deck:
Place and tighten fixing screws.
Important:
Do not damage seal when placing and tightening
fixing screws.
- Make electrical connections.
See chapter 6.
For GRP panels:
- Attach the 2 forks (these are customer specific) to
panel.
- With mechanism in “tilt” position, 10 ~ 20 cm
open:
Place panel assembly on top of top frame and
attach forks to LH and RH lever assemblies with 2
hexagon socket head screws M6 and 2 bushings.
Just hand-tight.
Note:
Levers must be centered between forks.
xx
80-100 Series
10
For other panels (glass, sandwich, ...):
- Attach the 2 forks (these are customer specific) to
panel.
- With mechanism in “tilt” position, 10 ~ 20 cm
open:
Place panel assembly on top of top frame and
attach forks to LH and RH lever assemblies with 2
hexagon socket head screws M6 and 2 bushings.
Just hand-tight.
Note:
Levers must be centered between forks.
- Attach 2 hinge bodies (these are customer specific)
incl. sliding mechanisms to panel.
- Slide rear rails through sliding mechanisms.
Close sliding roof completely.
Position rear rails.
With closed sliding roof:
- Ensure that rear rails are parallel and perpendicular
to rear beam of top frame.
- Measure distance between rear rails near sliding
bracket.
xx
60 mm
front
80-100 Series
11
- Drill fixing holes H1 (front holes in rear rails only)
ø 5 mm and cut thread M6 in deck (LH and RH).
Place fixing screws in holes H1, just hand-tight.
Use pan, dome or round head screws.
Alternative fixation with self tapping screws:
- drill holes with correct diameter
- place screws in holes H1
- Open sliding roof completely.
If necessary, close roof a bit, until last hole in each
rail can be accessed.
- Check if distance between rear rails is same as
measured before.
- Check if sliding roof is well aligned with deck:
X = X
Y = Y
sliding roof in center of deck
H1
H1
front
310 mm
Y
X
Y
X
80-100 Series
12
- Drill rear fixing holes H2 ø 5 mm and cut thread M6
in deck.
Place fixing screw in each hole, just hand-tight.
Alternative fixation with self tapping screws:
- drill holes with correct diameter
- place screws in holes H2
H2
H2
rear
80-100 Series
13
4. SEAL COMPRESSION
- Close sliding roof completely.
- Measure distance between top frame and panel
assembly.
Ideally, this is 12 mm.
12 mm
80-100 Series
14
5. INSTALLATION
- Drill remaining fixing holes ø 5 mm and cut thread
M6 in deck.
Alternative fixation with self tapping screws:
drill holes with correct diameter
- Remove rear rails.
- Apply bead of sealant around all fixing holes.
-Place rear rails and all fixing screws.
Tighten fixing screws.
-Apply thin layer of grease (Isoflex®Topas L32) to
inside of rear rails to ensure smooth sliding.
grease
grease
80-100 Series
15
For GRP panels:
- Place panel assembly again.
Push sliding mechanism into back side rear rails.
-With mechanism in “tilt” position, 10 ~ 20 cm
open:
Attach forks on panel assembly to LH and RH lever
assemblies with 2 hexagon socket head screws M6
and 2 bushings.
Tightening torque 4 Nm.
Lock threads with Loctite®243 or similar.
Note:
Levers must be centered between forks.
For other panels (glass, sandwich, ...):
- Place panel assembly again.
Push sliding mechanism into back side rear rails.
-With mechanism in “tilt” position, 10 ~ 20 cm
open:
Attach forks on panel assembly to LH and RH lever
assemblies with 2 hexagon socket head screws M6
and 2 bushings.
Tightening torque 4 Nm.
Lock threads with Loctite®243 or similar.
Note:
Levers must be centered between forks.
- Place rear rail end caps in back side of rear rails and
tighten set screws.
Tightening torque 1 Nm.
xx
xx
rear
80-100 Series
16
- Press rear rail covers into rear rails and cut excessive
length.
Check if there is grease on inside of rear rails (A) and
tracks (B).
If not, apply a thin layer of grease (Isoflex®Topas L32)
to inside of rear rails (A) and tracks (B) to ensure
smooth sliding.
Trim interior of boat.
Ensure that the 2 motors and connectors can be
reached if necessary.
E. g.:
- Manual operation of roof in case power supply is
shut off.
-Replacement of motors and control units.
IMPORTANT:
Ensure that the hex keys / emergency keys to open
the sliding roof manually are always ready to hand for
crew / passengers.
Finish the installation and check the function of the
marine sliding roof.
A
A
B
B
grease
grease
(A)
grease (B)
80-100 Series
17
6. ELECTRICAL CONNECTIONS
Determine switch position and install it.
Connect battery 12 V DC.
Red: + 12 V DC, continuous,
fused with 40 A.
Orange: + 12 V DC, continuous,
fused with 40 A.
Yellow: – (minus)
br = brown
ge = yellow
or = orange
rt = red
sw = black
Attach connectors wiring harness to motors.
See electrical diagram (chapter 9.)
Note:
There should be an amperage of at least 40 A
available.
Note:
In case there’s a 24 V DC power supply, use a 24 V -
12 V DC convertor that can handle at least 40 A.
Note:
All wiring must be able to handle 40 A.
If desired, switch can be illuminated.
In that case, make 2 additional connections (see
illustration):
- Orange: + 12 V DC
-Green: –
(minus)
Other wires:
-Red: Motors close
- Black: Motors – (minus)
- Brown: Motors open
br = brown
gn = green
or = orange
rt = red
sw = black
rt
or
ge
rt
sw
br
40A
sw
gn
or
rt
br
customer
Webasto
80-100 Series
18
7. CLOSING ROOF MANUALLY
Different switch:
In case another switch is used to operate the roof, it
must be switched minus from the motors.
Connect the wires as follows:
- Black and red => close roof
- Black and brown => open roof
If the drive shafts of the motors cannot be turned
with the emergency keys use the following instruc-
tion to close the roof.
- Disconnect wiring harnesses from motors.
- Remove 3 hex bolts at each motor.
- Remove motors.
80-100 Series
19
- Close roof manually by pushing the glass panel
towards the close position at the front.
.IWARNING
Entrapment by closing the roof
Injuries or suffocation.
The glass panel will sink by itself using its own weight
in the top frame.
- When closing the roof, ensure to keep all body
parts and/or obstructions away from the marine
roof opening.
8. RESET PROCEDURE
Note:
There should be an amperage of at least 40 A
available.
- Press and hold close button.
The roof closes as far as possible.
- Release close button.
- Press and hold close button.
After approx. 10 seconds roof slides with small steps
until it is completely closed.
Motor produces a loud click sound.
- Release close button.
The system has been reset.
80-100 Series
20
9. ELECTRICAL DIAGRAM
1 = motors with control units 80 Series
2 = connectors
3 = fuse 40 A
4 = battery 12 V DC
5 = switch 80 Series
Red wire: + 12 V DC, continuous, with fuse 40 A
Orange wire: + 12 V DC, continuous, with fuse 40 A
Yellow wire: – (minus)
Cut and lengthen wires if necessary.
All wiring must be able to handle 40 A.
Webasto
rt
or
rt
br
sw
ge
1 2
3
4
5
40 Amp
customer
br = brown
ge = yellow
or = orange
rt = red
sw = black
80-100 Series
21
10. SAFETY
Sliding roof must not be used as escape hatch.
Ensure that another hatch is accessible for
emergencies.
Do not to stick out any limbs when closing the roof!
Not designed as walking surface!

This manual suits for next models

1

Other Webasto Marine Equipment manuals

Webasto 40 Series User manual

Webasto

Webasto 40 Series User manual

Webasto FS 2500 User manual

Webasto

Webasto FS 2500 User manual

Webasto 60 Series User manual

Webasto

Webasto 60 Series User manual

Webasto FS 3500 User manual

Webasto

Webasto FS 3500 User manual

Webasto FS 2500 User manual

Webasto

Webasto FS 2500 User manual

Webasto Marine Roofs 60 Series User manual

Webasto

Webasto Marine Roofs 60 Series User manual

Webasto FS 2500 User manual

Webasto

Webasto FS 2500 User manual

Webasto Electrical room thermostat User manual

Webasto

Webasto Electrical room thermostat User manual

Webasto 20 Series User manual

Webasto

Webasto 20 Series User manual

Webasto BlueCool S Series User manual

Webasto

Webasto BlueCool S Series User manual

Webasto Ti22 ProX User manual

Webasto

Webasto Ti22 ProX User manual

Webasto AirTop 2000 S User manual

Webasto

Webasto AirTop 2000 S User manual

Webasto BlueSky User manual

Webasto

Webasto BlueSky User manual

Popular Marine Equipment manuals by other brands

Lars Thrane LT-3100 User & installation manual

Lars Thrane

Lars Thrane LT-3100 User & installation manual

Ampac AS1670.4 installation guide

Ampac

Ampac AS1670.4 installation guide

Furumo NAVpilot-711C Operator's manual

Furumo

Furumo NAVpilot-711C Operator's manual

Cetrek Propilot 725 user guide

Cetrek

Cetrek Propilot 725 user guide

Furuno DSC-6 Operator's manual

Furuno

Furuno DSC-6 Operator's manual

Furuno FI-501 Specification sheet

Furuno

Furuno FI-501 Specification sheet

Mercury VesselView 4 user guide

Mercury

Mercury VesselView 4 user guide

Simrad ES80 Reference manual

Simrad

Simrad ES80 Reference manual

Quark-Elec QK-A031 Setup guide

Quark-Elec

Quark-Elec QK-A031 Setup guide

Teledyne STREAMPRO Guide

Teledyne

Teledyne STREAMPRO Guide

Furuno felcom15 installation manual

Furuno

Furuno felcom15 installation manual

Harken 1635 instructions

Harken

Harken 1635 instructions

GME RCU9200 series instruction manual

GME

GME RCU9200 series instruction manual

Furuno TZT-3KP-F3D installation guide

Furuno

Furuno TZT-3KP-F3D installation guide

TradeQuip PORTA POWER KIT owner's manual

TradeQuip

TradeQuip PORTA POWER KIT owner's manual

Raymarine A series installation instructions

Raymarine

Raymarine A series installation instructions

Vingtor ETB-5 Technical manual

Vingtor

Vingtor ETB-5 Technical manual

Teletek electronics SensoIRIS WSST IS Installation instruction

Teletek electronics

Teletek electronics SensoIRIS WSST IS Installation instruction

manuals.online logo
manuals.online logoBrands
  • About & Mission
  • Contact us
  • Privacy Policy
  • Terms and Conditions

Copyright 2025 Manuals.Online. All Rights Reserved.