manuals.online logo
Brands
  1. Home
  2. •
  3. Brands
  4. •
  5. Wenglor
  6. •
  7. Accessories
  8. •
  9. Wenglor HD Series User manual

Wenglor HD Series User manual

nicht erkannt
aktiv
nicht erkannt
aktiv
erkannt
aktiv
Objekt Objekt Objekt
aus aus
nicht erkannt
aktiv
nicht erkannt
aktiv
erkannt
aktiv
Objekt Objekt Objekt
Objekt
Verschmutzungsausgang
Gelbe LED
Rote LED
Objekt
Verschmutzungsausgang
Gelbe LED
Rote LED
an
an
an
aus
aus
aus
aus aus
aus aus
aus
aus
aus
nicht erkannt
aktiv
nicht erkannt
aktiv
nicht erkannt
aktiv
Objekt Objekt Objekt
aus aus
aus
Objekt
Verschmutzungsausgang
Gelbe LED
Rote LED
101
104 04
105
Passende Befestigungstechnik-Nr.
Passende Anschlusstechnik-Nr.
2
DF
Ewenglor®
Dwenglor®
wenglor®
HD
Steckerversion/Plug/Connecteur
 = Sendediode/Transmitter diode/ iode émettrice
 = Empfangsdiode/Receiver diode/ iode réceptrice
HW
Steckerversion/Plug/Connecteur
Schaltabstand
er Mindestabstand ist die Tastweite × 0,9 (bei 25°C
Raumtemperatur). Alle Schaltabstandsangaben beziehen
sich auf weißes KO AK - Papier matt, 200g/m2, mit einer
Fläche von 40 × 40 cm und 90° senkrecht auftreffendem
Licht.
Montagehinweise
Beim Betrieb der Sensoren sind die entsprechenden
elektrischen sowie mechanischen Vorschriften, Normen
und Sicherheitsregeln zu beachten. er Sensor muss
gegen mechanische Einwirkung geschützt werden.
Einstellanweisung
ie Rotlicht-Reflextaster von wenglor® werden so montiert
und ausgerichtet, dass das vom Reflextaster ausgesandte
sichtbare Rotlicht auf das abzutastende Objekt fällt.
Mit einem Schraubendreher wird der Schaltpunkt am
Potentiometer exakt eingestellt.
Objekterkennung direkt vor dem Hinter- oder Untergrund
1.Sensor so justieren und fest montieren, dass der
Abtastpunkt auf das abzutastende Objekt fällt.
.Objekt entfernen und Potentiometer langsam
zurückdrehen, bis das Gerät abschaltet. Nun ist der
Hinter- oder Untergrund ausgeblendet.
3.Objekt wieder unter dem Leuchtfleck plazieren und
kontrollieren, ob der Sensor wieder einschaltet.
Erkennung von Objekten ohne störenden Hintergrund
1.Sensor so justieren und fest montieren, dass der
Leuchtfleck auf das abzutastende Objekt fällt.
.Potentiometer Sr zurückdrehen bis der Sensor
abschaltet, dann wieder aufdrehen bis zum Einschalten
und je nach Bedarf etwas weiter aufdrehen zur Erhöhung
der Schaltsicherheit.
Anschlussbilder
Connection iagrams
Schémas de raccordement
BEDIENANLEITUNG
OPERATING INSTRUCTIONS
MODE D'EMPLOI
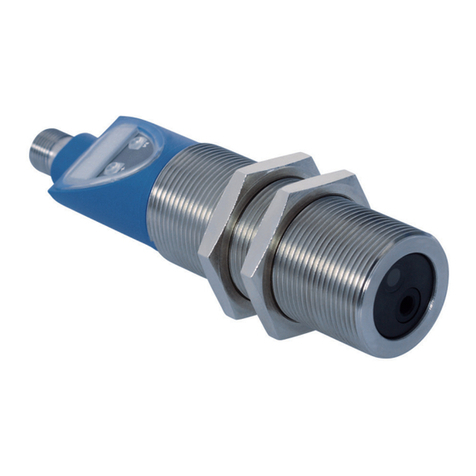
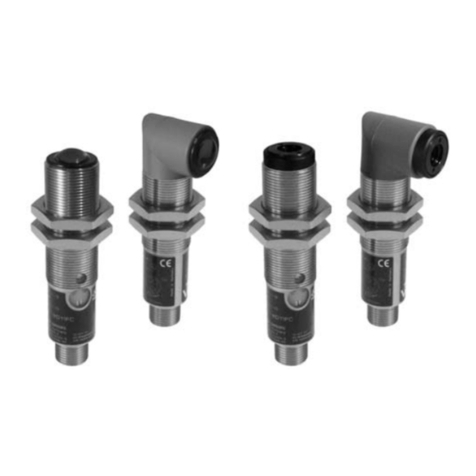
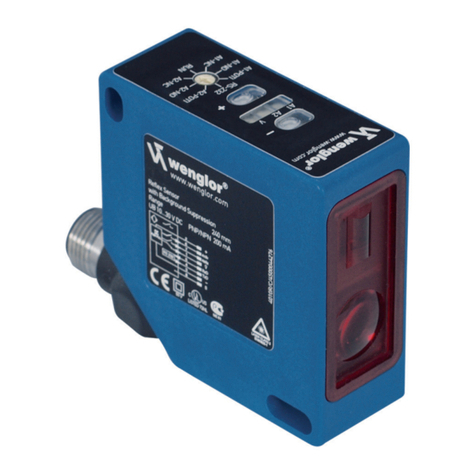
Reflextaster mit Hintergrundausblendung, Bauform M18
Reflex sensor with Backround Suppression, M18 housing
Capteur réflex avec élimination d'arrière-plan, boîtier M18
HD/HW
SAP NR. 80217
iese Sensoren sind nicht für Sicherheitsanwendungen geeignet/These sensors are not suited for safety applications/Ces détecteurs ne peuvent pas être utilisés pour des applications soumises aux normes de sécurité.
Achtung!
ie Empfindlichkeit des Sensors kann am eingebauten
Potentiometer Sr verändert werden. er rehbereich beträgt
270° und wird auf "Min" und "Max" Stellung jeweils durch einen
Anschlag begrenzt. Beim rehen des Potentiometers gegen
den Anschlag muss darauf geachtet werden, dass das
rehmoment unterhalb der Zerstörungsgrenze von 40 Nmm
bleibt. er Trimmer wird sonst irreversibel beschädigt. as
gleiche gilt für den Umschalter.
Allg. technische Daten
Optisch
Tastweite 120 mm
Einstellbereich 35120 mm
Schalt-Hysterese <5 %
Lichtart Rotlicht
Lebensdauer (Tu= +25°C) 100000 h
max. zul. Fremdlicht 10000 Lux
Lichtfleckdurchmesser siehe Tabelle 1
Elektrisch
Versorgungsspannung 1030 V C
Stromaufnahme (Ub = 24 V) < 30 mA
Schaltfrequenz 600 Hz
Ansprechzeit 833 µs
Temperaturdrift < 5%
Temperaturbereich -2560°C
Spannungsabfall Schaltausgang < 2,5 V
Schaltstrom PNP Schaltausgang 200 mA
Schaltstrom Verschmutzungsausgang 50 mA
kurzschlussfest ja
verpolungssicher ja
überlastsicher ja
Mechanisch
Gehäusematerial Edelstahl
Vollverguss ja
Schutzart IP 67
Anschlussart M12×1
Schutzisolierung,
Bemessungsspannung 50 V
beginnende Verschmutzung
keine Verschmutzung
fortgeschrittene Verschmutzung
Ablaufdiagramme Verschmutzungsausgang /-meldung
Stecker Metall
Verschmutzungsausgang
Anschlussbild Nr.
Antivalent
Bestell - Nr.
Kabel
= Öffner/Schließer
umschaltbar
HD11PA 3
HD11PC HD11PCV 3 HD11PC 3
10104 105 104
x
x
x
x
xx
x
x
x
Reflextaster
+ Versorgungsspannung "+"
A Schaltausgang/Schließer
Schaltausgang/Öffner
- Versorgungsspannung "0V"
+ Power Supply "+"
U Test Input
Switching Output/ NC
- Power Supply "0V"
+ Tension d'alimentation "+"
U Entrée test
Sortie de commutation / Ouverture
- Tension d'alimentation "0V"
Tastweite
60 mm
1 0 mm
Ø ,5 mm
Ø 5 mm
Lichtfleck
Lichtfleckdurchmesser
in Abhängigkeit von der Tastweite
Tab.1
wenglor®
Änderungen vorbehalten
Modifications réservées
Right of modifications reserved
03.1 . 009
wenglor sensoric gmbh
wenglor Straße 3
88069 Tettnang
( +49 (0)7542 5399-0
info@wenglor.com
Weitere wenglor Kontakte finden Sie unter:
For further wenglor contacts go to:
Autres contacts wenglor sous:
www.wenglor.com
Bestimmungsgemäße Verwendung
ieses wenglor Produkt ist gemäß dem folgenden
Funktionsprinzip zu verwenden:
Reflextaster mit Hintergrundausblendung
Sender und Empfänger sind in einem Gehäuse
untergebracht.
iese Sensoren werten das vom Objekt reflektierte Licht aus.
Erreicht das Objekt die eingestellte Tastweite, schaltet der
Ausgang.
Sie arbeiten nach dem Prinzip der Winkelmessung.
eswegen haben Farbe, Form und Oberflächenbeschaffenheit
des Objektes nahezu keinen Einfluss auf die Tastweite. Selbst
dunkle Objekte können auch vor einem hellen Hintergrund
sicher erkannt werden.
Sicherheitshinweise
 iese Anleitung ist Teil des Produkts und während der
gesamten Lebensdauer des Produkts aufzubewahren.
 Bedienungsanleitung vor Gebrauch des Produkts
sorgfältig durchlesen.
 as Produkt ist nicht für Sicherheitsanwendungen geeignet.
 ie Montage, Inbetriebnahme und Wartung des
vorliegenden Produkts sollte nur ausschließlich durch
fachkundiges Personal ausgeführt werden.
 Eingriffe und Veränderungen am Produkt sind nicht
zulässig.
 Produkt bei Inbetriebnahme vor Verunreinigung schützen.
Bedienfeld
01 = Schaltzustandsanzeige
02 = Verschmutzungsmeldung
05 = Schaltabstandseinsteller
Befestigungstechnik-Nr.
Ergänzende Produkte (siehe Katalog)
HW11PA 3 HW11PCV 3
101 105
x
x
x
xx
150/160 150 150150/160 150/160 150/160
EG - Konformitätserklärung
ie Bauart aller Näherungsschalter ist entwickelt, konstruiert und gefertigt in
Übereinstimmung mit der Richtlinie 2004/108/EG.
Folgende internationale Normen, Richtlinien und Spezifikationen sind angewendet:
EN 60947-5- : 004 + A1: 005 + A : 006 Niederspannungsschaltgeräte
Teil 5-2: Steuergeräte und Schaltelemente  Näherungsschalter
Declaration of Conformity
All proximity switches are developed, constructed and manufactured according to the
directive 2004/108/EG.
The following international standards, directives and specifications apply:
 EN 60947-5- : 004 + A1: 005 + A : 006 Low-voltage switchgear and controlgear
Part 5-2: Control circuit devices and switching elements - Proximity switches
Déclaration de conformité
Nous certifions nos capteurs conformes aux exigences de la directive européenne
2004/108/EG.
es normes et directives internationales, et prescriptions appliquées sont :
 EN 60947-5- : 004 + A1: 005 + A : 006 Appareillage à basse tension
Partie 5-2: Appareils et éléments commutation pour circuits de commande -
étecteurs de proximité
Umweltgerechte Entsorgung
ie wenglor sensoric gmbh nimmt unbrauchbare oder
irreparable Produkte nicht zurück. Bei der Entsorgung der
Produkte gelten die jeweils gültigen länderspezifischen
Vorschriften zur Abfallentsorgung.
0 01
05
D 6
150 160
Ewenglor®
Fwenglor®
The red light sensor is mounted and set up so that the
visible red light emitted by the reflex sensor falls on the
object to be monitored.
Turn the setting screw, until the LE lights up yellow.
Object recognition on a background or underl ing
surface
1.Adjust the instrument and securely fix it, so that the beam
spot falls on the object to be detected.
.Remove the object and turn back the adjustment screw
until the apparatus switches off. The background and
underlying surface are now suppressed.
3.Replace the object under the illuminated spot and check
that the sensor switches on again.
Object recognition without disturbing background
1.Adjust the instrument and securely fix it, so that the beam
spot falls on the object to be detected.
.Turn back the adjustment screw until the apparatus
switches off and then turn it foreward to until it switches
on. If necessary turn it foreward a bit further to increase
the reliablility of the switching.
Mounting instructions
uring operation of the sensors, the corresponding electrical and
mechanical regulations, as well as safety regulations must be
observed. The sensor must be protected from mechanical impact.
Switching range
The minimum range is equal to the range × 0,9 (at an ambient
temperature of 25°C). All sensing range data refer to white KO AK
paper, matt, 200g/m2, with a surface area of
40 × 40 cm and with light striking vertically at 90°.
Attention!
Special attention must be paid to the arrow at the screwdriver slot in
the potentiometer Sr. This arrow serves to indicate at which
scanning distance the sensor has been set. o not turn
potentiometer Sr beyond the limit stops (max. torque: 40 Nmm).
The potentiometer will otherwise be irreparably damaged. The
same applies for the changeover switch.
Distance de détection
La distance de détection est la distance de travail multipliée par
0,9 (à température ambiente de +25°C). Les distances de
détection se réfèrent au papier KO AK blanc-mat de 200g/m2,
d'une surface de 40 × 40 cm et d'un rayon lumineux
perpendiculaire par rapport à la surface du papier.
Instructions de montage
Lors de la mise en service des détecteurs respecter les
prescriptions de sécurité, normes et instructions électriques et
mécaniques appropriées. Protéger le détecteur contre toute
influence mécanique pouvant le dérégler ou endommager.
Le capteur optique de proximité à lumière rouge est monté
et fixé de manière que le faisceau de lumière vise l'objet à
détecter. Tourner le potentiomètre jusqu' à la LE est allumé
jaune.
Détection d'un objet placé directement devant l'arrière-
plan et/ou le fond gênant
1.Régler et monter le détecteur de manière à ce que le
faisceau lumineux tombe sur l'objet à détecter.
.Enlever l'objet et tourner le potentiomètre Sr lentement à
gauche jusqu' à ce que le détecteur soit coupé.
L'arrière-plan et/ou le fond pertubateur sont ainsi
éliminés.
3.Replacer l'objet sous le spot lumineux et vérifier la remise
en marche du détecteur.
Détection d'un objet sans arrière-plan gênant
1.Régler et monter le détecteur de manière à ce que le
faisceau lumineux tombe sur l'objet à détecter.
.Tourner le potentiomètre Sr à gauche jusqu'à ce que le
détecteur soit coupé, puis tourner le vis de réglage à
droite jusqu'à la remise en marche du détecteur. Si
besoin est, continuer à tourner le potentiomètre Sr afin
d'augmenter la certidude de commutation.
Attention !
La sensibilité du détecteur se règle avec le potentiomètre intégré.
La plage de réglage est comprise entre 0° et 270°. Les butées des
positions "Mini" et "Maxi" évitent un dépassement de la plage de
réglage. Lorsque le potentiomètre est réglé en butée, veillez à ne
pas dépasser le couple de rotation maxi de 40 Nmm afin d'éviter
une destruction irréversible du potentiomètre. La même chose est
valable pour la distance.
non détecté
activée
non détecté
activée
non détecté
activée
non détecté
activée
non détecté
activée
non détecté
activée
non détecté
activée
détecté
activée
détecté
non activée après 00 ms
objet
objet
objet
objet
objet
objet
objet
objet
objet
Objet
Sortie d'encrassement
LED jaune
LED rouge
Objet
Sortie d'encrassement
LED jaune
LED rouge
Objet
Sortie d'encrassement
LED jaune
LED rouge
éteint
éteint
éteint
éteint
éteint
éteint éteint
éteint éteint
éteint
éteint
éteint éteint
éteint
éteint
allumée
allumée
allumée
Diagramme Sortie et signalisation dencrassement
Mode réflex pas d'encrassement
encrassement commenceant
encrassement avancé
detected
not active after 00 ms
Object Object Object
OFF OFF
not detected
active
not detected
active
not detected
active
not detected
active
not detected
active
not detected
active
not detected
active
detected
active
Object Object Object
Object
Contamination Output
Yellow LED
Red LED
Object
Contamination Output
Yellow LED
Red LED
Object
Contamination Output
Yellow LED
Red LED
ON
ON
OFF
OFF
OFF
OFF
OFF
ON
OFF
OFF
OFF
OFF
OFF
Object Object Object
OFF OFF
OFF
beginning contamination
no contamination
Diagram Contamination Output / Contamination Warning
Reflex Mode
advanced contamination
Licht spot size
in relation to the distance
Distance
60 mm
1 0 mm
Ø ,5 mm
Ø 5 mm
Light spot
table 1
Technical Data
Optical Data
Range 120 mm
Adjustable Range 35120 mm
Switching Hysteresis <5 %
Light Source Red Light
Service Life (Tu= +25°C) 100000 h
Max. Ambient Light 10000 Lux
Light Spot iameter see table 1
Electrical Data
Supply Voltage 1030 V C
Current Consumption (Ub = 24 V) < 30 mA
Switching Frequency 600 Hz
Response Time 833 µs
Temperature rift < 5%
Temperature Range -2560°C
Switching Output Voltage rop < 2,5 V
PNP Switching Output/
Switching Current 200 mA
Contamination Output/
Switching Current 50 mA
Short Circuit Protection yes
Reverse Polarity Protection yes
Overload Protection yes
Mechanical Data
Housing Stainless Steel
Full Encapsulation yes
egree of Protection IP 67
Connection M12×1
Protective Insulation, Rated Voltage 50 V
Diamètre du spot lumineux
rélative avec la distance de détection
Distance Spot lumineux
60 mm
1 0 mm
Ø ,5 mm
Ø 5 mm
tableau 1
Données techniques générales
Caractéristiques optiques
istance de travail 120 mm
Plage ajustable 35120 mm
Hystérèsis de commutation <5 %
Type de lumière Lumière rouge
urée de vie (Tu= +25°C) 100000 h
Ambiance lumineuse max. 10000 Lux
iamètre du spot lumineux voir tableau 1
Caractéristiques électroniques
Tension d'alimentation 1030 V C
Consommation (Ub = 24 V) < 30 mA
Fréquence de commutation 600 Hz
Temps de réponse 833 µs
érive en température < 5%
Température d'utilisation -2560°C
Chute de tension sortie de commutation < 2,5 V
Courant commuté PNP sortie
de commutation 200 mA
Courant commuté sortie d'encrassement 50 mA
Protection contre les court-circuit oui
Protection contre les inversions de polarité oui
Protection contre les surcharges oui
Caractéristiques mécaniques
Matière du boîtier Inox
Noyé oui
egré de protection IP 67
Mode de raccordement M12×1
Isolation, tension de référence 50 V
Proper Use
This wenglor product has to be used according to the
following functional principle:
Reflex Sensors with Background Suppression
The transmitter and the receiver are integrated into a single
housing.
The sensor evaluates light reflected from the object. If the
object passes within the selected range.
The sensors function in accordance with the principal of
angular measurement. For this reason, the object's color,
shape and surface characteristics have practically no influence
on detection range. Even dark objects can be reliably
recognized against bright backgrounds.
Safety Precautions
 This operating instruction is part of the product and must
be kept during its entire service life.
 Read this operating instruction carefully before using the
product.
 This product is not suitable for safety applications.
 Installation, start-up and maintenance of this product
should only be carried out by trained personal.
 Tampering with or modifying the product is not permissible.
 Protect the product against contamination during start-up.
Utilisation
Ce produit wenglor doit être utilisé selon le mode de
fonctionnement suivant:
Détecteur optique avec élimination d'arrière-plan
Emetteur et récepteur sont placés dans un seul et même boîtier.
Ces détecteurs exploitent la lumière réfléchie par l'objet. Si l'objet
atteint la distance de travail réglée, la sortie commute.
Ces détecteurs travaillent selon le principe de la trigonométrie.
Grâce à cela la couleur, la forme ou l'état de surface de l'objet
n'ont pratiquement aucune influence sur la distance de travail.
Ainsi les objets foncés peuvent être aussi bien détectés que les
objets clairs.
Conseils de sécurité
 Ces instructions de Service sont une partie intégrante du
produit et doivent être conserves durant toute la durée de vie
du produit.
 Lire les Instructions de Service avant la mise en marche.
 Le produit nest adéquat pour des applications de sécurité.
 Installation, raccordement et réglage ne doivent être effectués
que par du personnel qualifié.
 Toute intervention ou modification sur le produit ne sont pas
autorisées.
 Lors de la mise en service, protéger lappareil des saletés.
Connection iagram
Order Nr.
= NO / NC
switchable
Antivalent
Metal Plug
Cable
Contanimation Output
HD11PA 3
HD11PC HD11PCV 3 HD11PC 3
10104 105 104
x
x
x
x
xx
x
x
x
Suiting Mounting Technology No.
HW11PA 3 HW11PCV 3
101 105
x
x
x
xx
150/160 150 150150/160 150/160 150/160
Connecteur en métal
Schéma de raccordement
Référence
Câble
= NO / NF
commutable
Sortie dencrassement
Antivalent
HD11PA 3
HD11PC HD11PCV 3 HD11PC 3
10104 105 104
x
x
x
x
xx
x
x
x
Suiting Mounting Technology No.
HW11PA 3 HW11PCV 3
101 105
x
x
x
xx
150/160 150 150150/160 150/160 150/160
Proper Disposal
wenglor sensoric gmbh does not accept the return of unusable
or irreparable products. Respectively valid national waste
disposal regulations apply to product disposal.
Mise au rebut écologique
La société wenglor sensoric gmbh ne reprend ni les produits
inutilisables ni les produits irréparables. Les prescriptions
nationales en vigueur en matière de mise au rebut des déchets
sont applicables.
Panneau
01 = Signalisation de l'état de commutation
02 = Signalisation de l'encrassement
05 = Réglage de la distance
0 01
05
D 6
Control Panel
01 = Switching Status Indicator
02 = Contamination Warning
05 = Switching istance Adjuster
0 01
05
D 6
Suiting Mounting Technology No.
Suiting Connection Technology No.
2
Complimentary Products (see catalog)
wenglor offers Connection Technology providing field wiring means.
150 160
No. de Technique de
montage appropriée
Référence connectique
appropriée 2
Produits complémentaires (voir catalogue)
150 160

This manual suits for next models

7

Other Wenglor Accessories manuals

Wenglor OPT2203 User manual

Wenglor

Wenglor OPT2203 User manual

Wenglor OPT2022 User manual

Wenglor

Wenglor OPT2022 User manual

Wenglor P1PY0 Series User manual

Wenglor

Wenglor P1PY0 Series User manual

Wenglor P2KK004 User manual

Wenglor

Wenglor P2KK004 User manual

Wenglor UF Series User manual

Wenglor

Wenglor UF Series User manual

Wenglor FX Q0 Series User manual

Wenglor

Wenglor FX Q0 Series User manual

Wenglor P1EL Series User manual

Wenglor

Wenglor P1EL Series User manual

Wenglor ODX402P0088 User manual

Wenglor

Wenglor ODX402P0088 User manual

Wenglor P1NE Series User manual

Wenglor

Wenglor P1NE Series User manual

Wenglor P1NK Series User manual

Wenglor

Wenglor P1NK Series User manual

Wenglor Y1TA Series User manual

Wenglor

Wenglor Y1TA Series User manual

Wenglor weCat3D MLSL User manual

Wenglor

Wenglor weCat3D MLSL User manual

Wenglor P1KE Series User manual

Wenglor

Wenglor P1KE Series User manual

Wenglor UMF402U035 User manual

Wenglor

Wenglor UMF402U035 User manual

Wenglor P1HJ1 Series User manual

Wenglor

Wenglor P1HJ1 Series User manual

Wenglor P1MH Series User manual

Wenglor

Wenglor P1MH Series User manual

Wenglor OCP801P0150P User manual

Wenglor

Wenglor OCP801P0150P User manual

Wenglor OEII403C0103 User manual

Wenglor

Wenglor OEII403C0103 User manual

Wenglor OPT154 Series User manual

Wenglor

Wenglor OPT154 Series User manual

Wenglor P1PA00 Series User manual

Wenglor

Wenglor P1PA00 Series User manual

Wenglor P1PK104 User manual

Wenglor

Wenglor P1PK104 User manual

Wenglor OPT2172-74 User manual

Wenglor

Wenglor OPT2172-74 User manual

Wenglor OCP P0150C Series User manual

Wenglor

Wenglor OCP P0150C Series User manual

Wenglor L1FL Series User manual

Wenglor

Wenglor L1FL Series User manual

Popular Accessories manuals by other brands

Hessaire MC92 Use & care guide

Hessaire

Hessaire MC92 Use & care guide

Alcatel-Lucent 9927 Guidelines

Alcatel-Lucent

Alcatel-Lucent 9927 Guidelines

ENS NVB-150 user manual

ENS

ENS NVB-150 user manual

Kingfisher BF50EN instruction manual

Kingfisher

Kingfisher BF50EN instruction manual

Anton Paar ADU 5 Product information

Anton Paar

Anton Paar ADU 5 Product information

EINHELL EGS12 operating instructions

EINHELL

EINHELL EGS12 operating instructions

Mirabella International 43061068 quick start guide

Mirabella International

Mirabella International 43061068 quick start guide

ESP CSD212 Installation instructions manual

ESP

ESP CSD212 Installation instructions manual

Trimilin Trimilin-Fun user manual

Trimilin

Trimilin Trimilin-Fun user manual

ECOWITT WH55 manual

ECOWITT

ECOWITT WH55 manual

Aura ZEN manual

Aura

Aura ZEN manual

Heathkit Heathkit HP-1144 Guide manual

Heathkit

Heathkit Heathkit HP-1144 Guide manual

Telex RADIOCOM BTR-1 Owner & user manual

Telex

Telex RADIOCOM BTR-1 Owner & user manual

Ezviz T1 quick start guide

Ezviz

Ezviz T1 quick start guide

Orno SOUL DC Operating and instalation instructions

Orno

Orno SOUL DC Operating and instalation instructions

Pil Sensoren P41-350-I-CM12 manual

Pil Sensoren

Pil Sensoren P41-350-I-CM12 manual

KROHNE OPTIFLUX 2000 quick start

KROHNE

KROHNE OPTIFLUX 2000 quick start

Lifegoods LG930 user manual

Lifegoods

Lifegoods LG930 user manual

manuals.online logo
manuals.online logoBrands
  • About & Mission
  • Contact us
  • Privacy Policy
  • Terms and Conditions

Copyright 2025 Manuals.Online. All Rights Reserved.