manuals.online logo
Brands
  1. Home
  2. •
  3. Brands
  4. •
  5. Westin
  6. •
  7. Automobile Accessories
  8. •
  9. Westin 25-0530 User manual

Westin 25-0530 User manual

QTY CONTENTS - CONTENIDO - CONTENU TOOLS - HERRAMIENTA
- OUTILS
APPLICATION: 1980-96 F-SERIES SUPERCAB
1980-96 F-SERIES REGULAR CAB
1980-96 FULL SIZE BRONCO
ITEM
APLICACIÓN: SUPERCAB SERIE F, MOD. 1980-1996
CABINA REGULAR SERIE F, MOD. 1980-1996
BRONCO FULL SIZE, MOD. 1980-1996
APPLICATION: F-SERIES SUPERCAB 1980-96
F-SERIES CABINE REGULIERE 1980-96
AUTOMOTIVE PRODUCTS, INC.
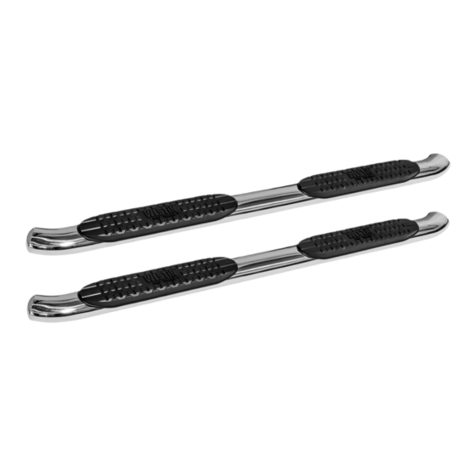
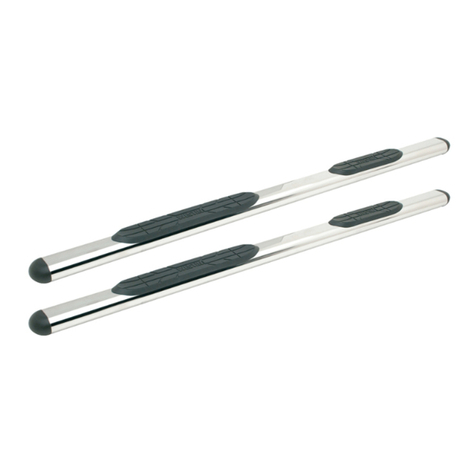
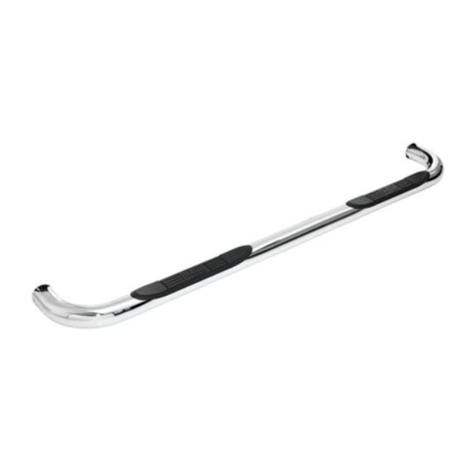
STEP BAR ASSEMBLIES
25-0530
25-0535
25-0620
25-0625
ENSAMBLES DE ESTRIBOS
MONTAGES DE MARCHE-PIEDS
INSTRUCTIONS-INSTRUCCIONES-CONSIGNES
75-0127 REVISION H 2/27/08
WO:
REGULAR CAB
CABINA REGULAR
CABINE REGULIERE
SUPER CAB
CABINA SUPER
CABINE SUPER
1,2 2 STEP BAR, PASSENGER (1) AND DRIVER (2)
3,4 2 FRONT BRACKET, PASSENGER (3) AND DRIVER (4)
5 2 REAR BRACKET
6 2 REAR SWING BRACKET
7 2 REAR HANGER BRACKET
8 2 SPACER TUBE
9 4 1/2-13 X 1.75” HEX HEAD BOLT
10 2 1/2-13 X 1.50” HEX HEAD BOLT
11 6 1/2” FLAT WASHER
12 6 1/2” LOCK WASHER
13 2 1/2-13 HEX NUT
14 2 7/16-14 X 1.00” HEX HEAD BOLT
15 2 7/16-20 X 1.00” HEX HEAD BOLT
16 2 7/16-14 X 1.75” COUPLING NUT
17 2 7/16-20 X 1.75” COUPLING NUT
18 4 7/16” LOCK WASHER
19 2 3/8-16 X 1.00” SQUARE HEAD, CUP POINT, SET SCREW
20 2 3/8-16 X 1.00” THREAD CUTTING SCREW
21 2 3/8” LOCK WASHER
22 2 PLASTIC WASHER
1,2 2
3,4 2
5 2 TRASERAS
6 2 SOPORTES TRASEROS ARTICULADOS
7 2 SOPORTES DE SUSPENSIÓN TRASEROS
82
94
10 2
11 6
12 6
13 2
14 2
15 2
16 2 TUERCAS DE ACOPLAMIENTO DE 7/16-14 X 1,75”
17 2 TUERCAS DE ACOPLAMIENTO DE 7/16-20 X 1,75”
18
ESTRIBOS, ACOMPAÑANTE (1) Y CONDUCTOR (2)
SOPORTES DELANTERAS, ACOMPAÑANTE (3) Y CONDUCTOR (4)
SOPORTES
TUBO SEPARADOR
PERNOS CON CABEZA HEXAGONAL DE 1/2-13 X 1,75”
PERNOS CON CABEZA HEXAGONAL DE 1/2-13 X 1,50"
ARANDELAS PLANAS DE 1/2"
ARANDELAS DE PRESIÓN DE 1/2"
TUERCAS HEXAGONALES DE 1/2-13
PERNOS CON CABEZA HEXAGONAL DE 7/16-14 X
PERNOS CON CABEZA HEXAGONAL DE 7/16-20 X
ARANDELAS DE PRESIÓN DE 3/8”
22 2 ARANDELAS DE PLÁSTICO
1,00”
1,00”
4 ARANDELAS DE PRESIÓN DE 7/16”
19 2 TORNILLO A PRESIÓN DE PUNTA ACOPADA CON CABEZA CUADRADA DE 3/8 - 16 X 1,00”
20 2 TORNILLOS FRESADOS ROSCADOS DE 3/8 -16 x 1,00”
21 2
1,2 2
3,4 2 SUPPORTS AVANT
5 2 SUPPORTS ARRIERE
6 2 SUPPORT ARTICULE ARRIERE
7 2 SUPPORT DE SUSPENSION ARRIERE
82
94
10 2
11 6
12 6
13 2
14 2 1,00 PO
15 2 1,00 PO
16 2 ECROU D'ACCOUPLEMENT 7/16-14 X 1,75 PO
17 2 ECROU D'ACCOUPLEMENT 7/16-20 X 1,75 PO
18 4 RONDELLE A FREIN DE 7/16 PO
19 2 VIS DE PRESSION A CUVETTE A TETE CARREE 3/8 16 X 1,00 PO
20 2
MARCHE-PIEDS, PASSAGER (1) ET CONDUCTEUR (2)
, PASSAGER (3) ET CONDUCTEUR (4)
TUBE D'ESPACEMENT
BOULONS A TETE HEXAGONALE 1/2-13 X 1,75 PO
BOULONS A TETE HEXAGONALE 1/2-13 X 1,50 PO
RONDELLES PLATES 1/2 PO
RONDELLES A FREIN 1/2 PO
ÉCROUS HEXAGONAUX 1/2-13
BOULONS A TETE HEXAGONALE 7/16-14 X
BOULONS A TETE HEXAGONALE 7/16-20 X
VIS TRANCHANTE 3/8 16 X 1,00 PO
21 2 RONDELLES A FREIN 3/8 PO
22 2 RONDELLE DE PLASTIQUE
3/4” SOCKET
3/4” WRENCH
5/8” SOCKET
5/8” WRENCH
16MM SOCKET
16MM WRENCH
ADJUSTABLE WRENCH
RATCHET
TORQUE WRENCH
DADO DE 3/4”
LLAVE DE TUERCAS DE 3/4"
DADO DE 5/8"
LLAVE DE TUERCAS DE 5/8”
DADO DE 16MM
LLAVE DE TUERCAS DE 16MM
LLAVE AJUSTABLE
MANERAL
LLAVE DE TORQUE
DOUILLE 3/4 PO
CLE 3/4 PO
DOUILLE 5/8 PO
CLE 5/8 PO
DOUILLE 16MM
CLE16MM
CLE AJUSTABLE
CLIQUET
CLE DE COUPLE
3
4
5
7
6
7
8
EXTENDED CAB
CABINA EXTENDIDA
CABINE RALLONGEE
REGULAR CAB
CABINA REGULAR
CABINE REGULIERE
STEP 1. Remove the contents from box and check for damage. Verify all parts are present. Read instructions
completely before beginning.
STEP 2. Screw 7/16-14 X 1.75” coupling nut onto front body mount and torque to 40 FT. LBS. Attach front bracket
to body mount as shown. NOTE: Do not tighten at this time. Attach short end of step bar to front
bracket.
STEP 3. Attach rear bracket onto bottom flange of vehicle frame and attach rear swing bracket to rear bracket.
Do not tighten. Attach rear leg of tube to rear swing bracket as shown. Adjust tube and brackets until
rear leg of tube is level with front end of step bar. Tighten rear swing bracket to rear bracket and secure
rear bracket to frame with 3/8-16 x 1.00” set screw.
STEP 4. Screw 7/16-20 x 1.75” coupling nut onto bolt above the hole in step bar tube. Torque to 40 FT. LBS.
Attach rear hanger bracket to coupling nut as shown in the position to line up with the hole in tube. Sight
level tube and attach hanger bracket to tube using one of the two holes in the hanger bracket and
placing a rubber washer between the hanger bracket and step bar tube. Torque 3/8-16 x 1.00” thread
cutting bolt to 20 FT.LBS.
FINISH PROTECTION
Westin products have a high quality finish that must be cared for like any other exposed finish on the vehicle. Protect the finish with a non-abrasive automotive wax,
(e.g. Pure Carnauba) on a regular basis. The use of any soap, polish or wax that contains an abrasive is detrimental, as the compounds scratch the finish and
open it to corrosion.
PROTECCIÓN DEL ACABADO
Los productos Westin tienen un acabado de alta calidad que requiere del mismo cuidado que cualquier otro acabado expuesto del vehículo. Proteja el
acabado con una cera no abrasiva para automóviles (por ejemplo, Pure Carnauba) regularmente. El uso de cualquier jabón, pulidor o cera que contenga un
abrasivo es nocivo, dado que los componentes rayan el acabado y lo exponen a la corrosión.
PASO 1. Retire el contenido de la caja y verifique que ninguna pieza se haya dañado. Verifique que no falte
ninguna
pieza. Lea las instrucciones completamente antes de comenzar.
PASO 2. Atornille la tuerca de acoplamiento de 7/16-14 X 1,75” a la base de montaje delantera de la carrocería
y aplique un torque de 40 libras-pies. Instale el soporte delantero en la base de montaje de la
carrocería como se muestra. NOTA: No apriete con la mano ahora. Coloque el extremo corto
del estribo en el soporte delantero.
PASO 3. Coloque el soporte trasero en la brida inferior del chasis del vehículo e instale los soportes traseros
articulados
en el soporte trasero. No apriete con la mano. Coloque el apoyo trasero del tubo en los soportes
traseros
articulados como se muestra. Ajuste el tubo y los soportes hasta que el apoyo trasero del tubo esté
nivelado
con la parte delantera del extremo del estribo. Ajuste con la mano el soporte trasero articulado al
soporte
trasero, y asegure el soporte trasero al chasis con el tornillo a presión de 3/8-16 x 1,00”. Aplique un
torque de 60 libras-pulgadas.
PASO 4. Atornille la tuerca de acoplamiento de 7/16-14 X 1,75” al perno por arriba del agujero del tubo del
estribo.
Aplique un torque de 40 libras-pies. Instale el soporte de suspensión trasero en la tuerca de
acoplamiento en la
ETAPE 1. Enlevez le contenu de la boîte et vérifiez pour tout dommage. Vérifiez que toutes les pièces y sont. Lisez
complètement les instructions avant de commencer.
ETAPE 2. Vissez l'écrou d'accouplement 7/16-14 X 1,75 po dans la fixation de carosserie avant et couplez à 40
pieds-livres. Fixez le support avant aux points de fixation de la carosserie tel qu'illustré. NOTA : Ne pas
serrer à ce moment-là. Fixez le bout court du marche-pieds au support avant.
ETAPE 3. Fixez le support arrière à la bride inférieure de la carosserie et fixez le support articulé arrière au support
arrière. Ne pas serrer. Fixez la patte arrière du tube au support articulé arrière tel qu'illustré. Manipulez le
PROTECTION DE LA FINISSION
Les produits Westin ont une finission de haute qualité qui requiert des soins, comme toute autre finission du véhicule exposée aux éléments. Protégez la finission à
l’aide d’une cire non-abrasive (par exemple, Pure Carnauba) de façon régulière. L’usage de tout savon, pâte à polir ou cire contenant un abrasif est nuisible,
puisque les composantes strient la finission et la laissent vulnérable à la corrosion.
Thank You for choosing Westin products
For additional installation assistance please call
Customer service (800) 793-7846 or (507) 375-3559
Westin Automotive Products, Inc.
5200 N. Irwindale Ave. Suite 220
Irwindale, Ca. 91706
INSTALLATION VIEW OF DRIVER SIDE SHOWN, PASSENGER SIDE OPPOSITE
VISTA DE LA INSTALACIÓN DEL LADO DEL CONDUCTOR OPUESTO AL LADO DEL ACOMPAÑANTE
ILLUSTRE: COTE CONDUCTEUR, EN FACE: COTE PASSAGER
tube et les supports jusqu'à ce que la patte arrière du tube soit à niveau avec le marche-pieds. Serrez
le support articulé arrière au support arrière et fixez le support arrière à la carosserie à l'aide de la vis de
pression 3/8-16 x 1,00 po. Couplez à 60 pouces-livres.
ETAPE 4. Vissez l'écrou d'accouplement 7/16-20 x 1,75 po sur le boulon au-dessus du trou dans le tube du
marche-pieds. Couplez à 40 pieds-livres. Fixez le support de suspension arrière à l'écrou
d'accouplement tel qu'illustré pour qu'il s'aligne au trou du tube. Mettez le tube au niveau et fixez le
support de suspension au tube à l'aide d'un des deux trous dans le support de suspension. Placez une
rondelle de caoutchouc entre le support de suspension et le tube du marche-pieds. Couplez los
boulons tranchant 3/8-16 x 1,00 po à 20 pieds-livres.
EATPE 5. Assurez-vous que le marchepied et les supports sont correctement alignés et ensuite serrez les
attaches. Les valeurs de couple recommandées sont les attaches 1/2 po. à 64 pieds-livres et les
attaches 7/16 po. à 42 pieds-livres.
912 11
7/16-20 BOLT LOCATED NEAR
REAR OF CAB UNDER
ROCKER PANEL.
PERNO DE 7/16-20 UBICADO
CERCA DE LA PARTE
TRASERA DE LA ZONA
DEL PANEL BAJO.
LA PUERTA DE LA CABINA
BOULON 7/16-20 SITUE PRES
DE L'ARRIERE DE LA
CABINE SOUS LE
BAS DE CAISSE.
EXTENDED CAB
CABINA EXTENDIDA
CABINE RALLONGEE
BODY MOUNT
BASE DE MONTAJE
FIXATION DE CAROSSERIE
FRAME
CARROCERÍA
CADRE
9
18
4
2
8
16
10
56
7
19
11
21
15
12
20
18 22
7
17
13
12
14
11
REGULAR CAB
CABINA REGULAR
CABINE REGULIERE
This manual suits for next models

3

Other Westin Automobile Accessories manuals

Westin 58-41175 User manual

Westin

Westin 58-41175 User manual

Westin HLR User manual

Westin

Westin HLR User manual

Westin E Series User manual

Westin

Westin E Series User manual

Westin 21-23290 User manual

Westin

Westin 21-23290 User manual

Westin 57-2330 User manual

Westin

Westin 57-2330 User manual

Westin 25-0760 User manual

Westin

Westin 25-0760 User manual

Westin 27-1255 User manual

Westin

Westin 27-1255 User manual

Westin 25-2550 User manual

Westin

Westin 25-2550 User manual

Westin 25-2630 User manual

Westin

Westin 25-2630 User manual

Westin PRO TRAXX 6 User manual

Westin

Westin PRO TRAXX 6 User manual

Westin 27-1845 User manual

Westin

Westin 27-1845 User manual

Westin 58-54165 User manual

Westin

Westin 58-54165 User manual

Westin 25-1310 User manual

Westin

Westin 25-1310 User manual

Westin 21-1680 User manual

Westin

Westin 21-1680 User manual

Westin 57-6025 User manual

Westin

Westin 57-6025 User manual

Westin 22-1885 User manual

Westin

Westin 22-1885 User manual

Westin 46-23995 User manual

Westin

Westin 46-23995 User manual

Westin 32-2360 User manual

Westin

Westin 32-2360 User manual

Westin 22-1635 User manual

Westin

Westin 22-1635 User manual

Westin 33-0880 User manual

Westin

Westin 33-0880 User manual

Westin 21-2320 User manual

Westin

Westin 21-2320 User manual

Westin 22-1065 User manual

Westin

Westin 22-1065 User manual

Westin 32-0055 User manual

Westin

Westin 32-0055 User manual

Westin 46-22235 User manual

Westin

Westin 46-22235 User manual

Popular Automobile Accessories manuals by other brands

Thule Kit 1366 Fitting instructions

Thule

Thule Kit 1366 Fitting instructions

Atera SIGNO 044 261 quick start guide

Atera

Atera SIGNO 044 261 quick start guide

BRP Sea-Doo MOVE Operator's guide

BRP

BRP Sea-Doo MOVE Operator's guide

ECB BIG TUBE BH44SY Fitting instructions

ECB

ECB BIG TUBE BH44SY Fitting instructions

Phonocar 05932 instruction manual

Phonocar

Phonocar 05932 instruction manual

Avantree BTCK-19V user manual

Avantree

Avantree BTCK-19V user manual

Dakota Digital VLC-51C installation instructions

Dakota Digital

Dakota Digital VLC-51C installation instructions

Akyga AK-ND-40 user manual

Akyga

Akyga AK-ND-40 user manual

IAG IAG-ENG-5010BK instructions

IAG

IAG IAG-ENG-5010BK instructions

WALMEC 40037 Mounting instructions

WALMEC

WALMEC 40037 Mounting instructions

Thermo King B Series Operator's manual

Thermo King

Thermo King B Series Operator's manual

DVB DMJL-01 installation manual

DVB

DVB DMJL-01 installation manual

Extang Solid Fold 2.0 Installation sheet

Extang

Extang Solid Fold 2.0 Installation sheet

Saris SENTINEL Assembly instructions

Saris

Saris SENTINEL Assembly instructions

Canyon C-05 quick guide

Canyon

Canyon C-05 quick guide

MSA ALSCA QUICK-FIT INSTALLATION GUIDE

MSA

MSA ALSCA QUICK-FIT INSTALLATION GUIDE

Demello Offroad Swing out Gate installation instructions

Demello Offroad

Demello Offroad Swing out Gate installation instructions

Nautilus P3 instruction manual

Nautilus

Nautilus P3 instruction manual

manuals.online logo
manuals.online logoBrands
  • About & Mission
  • Contact us
  • Privacy Policy
  • Terms and Conditions

Copyright 2025 Manuals.Online. All Rights Reserved.