Wheatstone Corporation E-6 User manual

E-6 Digital Control Surface
TECHNICAL MANUAL
600 Industrial Drive, New Bern, North Carolina, USA 28562

WHEATSTONE CORPORATION
600 Industrial Drive
New Bern, North Carolina 28562
tel 252-638-7000 / fax 252-637-1285
E-6 Digital Control Surface Technical Manual - 1st EditionE-6 Digital Control Surface Technical Manual - 1st Edition
E-6 Digital Control Surface Technical Manual - 1st Edition
©2007 Wheatstone Corporation
E-6/April 2007

page Contents – 1
E-6 / Apr 2007
CONTENTS
E-6 Technical Manual
Table of Contents
Chapter 1 – General Information
Introduction ...................................................................................1-2
Control Surface Placement ..........................................................1-3
Power Supply ................................................................................1-4
Failsafe Dual Redundant Supply.............................................................................. 1-5
Energizing ................................................................................................................. 1-5
I/O Connections.............................................................................1-6
Getting Started ..............................................................................1-8
Surface Software Version.............................................................1-8
Chapter 2 - Input Panel (IPE-6)
Controls and Functions................................................................2-2
Input Sources............................................................................................................ 2-2
SET Button................................................................................................................ 2-2
Programmable Buttons ............................................................................................. 2-2
Channel Mode Indicator ........................................................................................... 2-3
Surround Phase System....................................................................................... 2-4
Phase........................................................................................................................ 2-5
Program Assign ........................................................................................................ 2-5
MXM Assign LED’s ................................................................................................... 2-5
LED Readout ............................................................................................................ 2-5
CUE Switch............................................................................................................... 2-5
TB BUS- Switch ........................................................................................................ 2-5
Fader......................................................................................................................... 2-6
Channel ON Switch .................................................................................................. 2-6
Channel OFF Switch................................................................................................. 2-6
Channel Status Buttons Display............................................................................... 2-6
E-6 / Nov 2009

page Contents – 2
E-6 / Apr 2007
CONTENTS
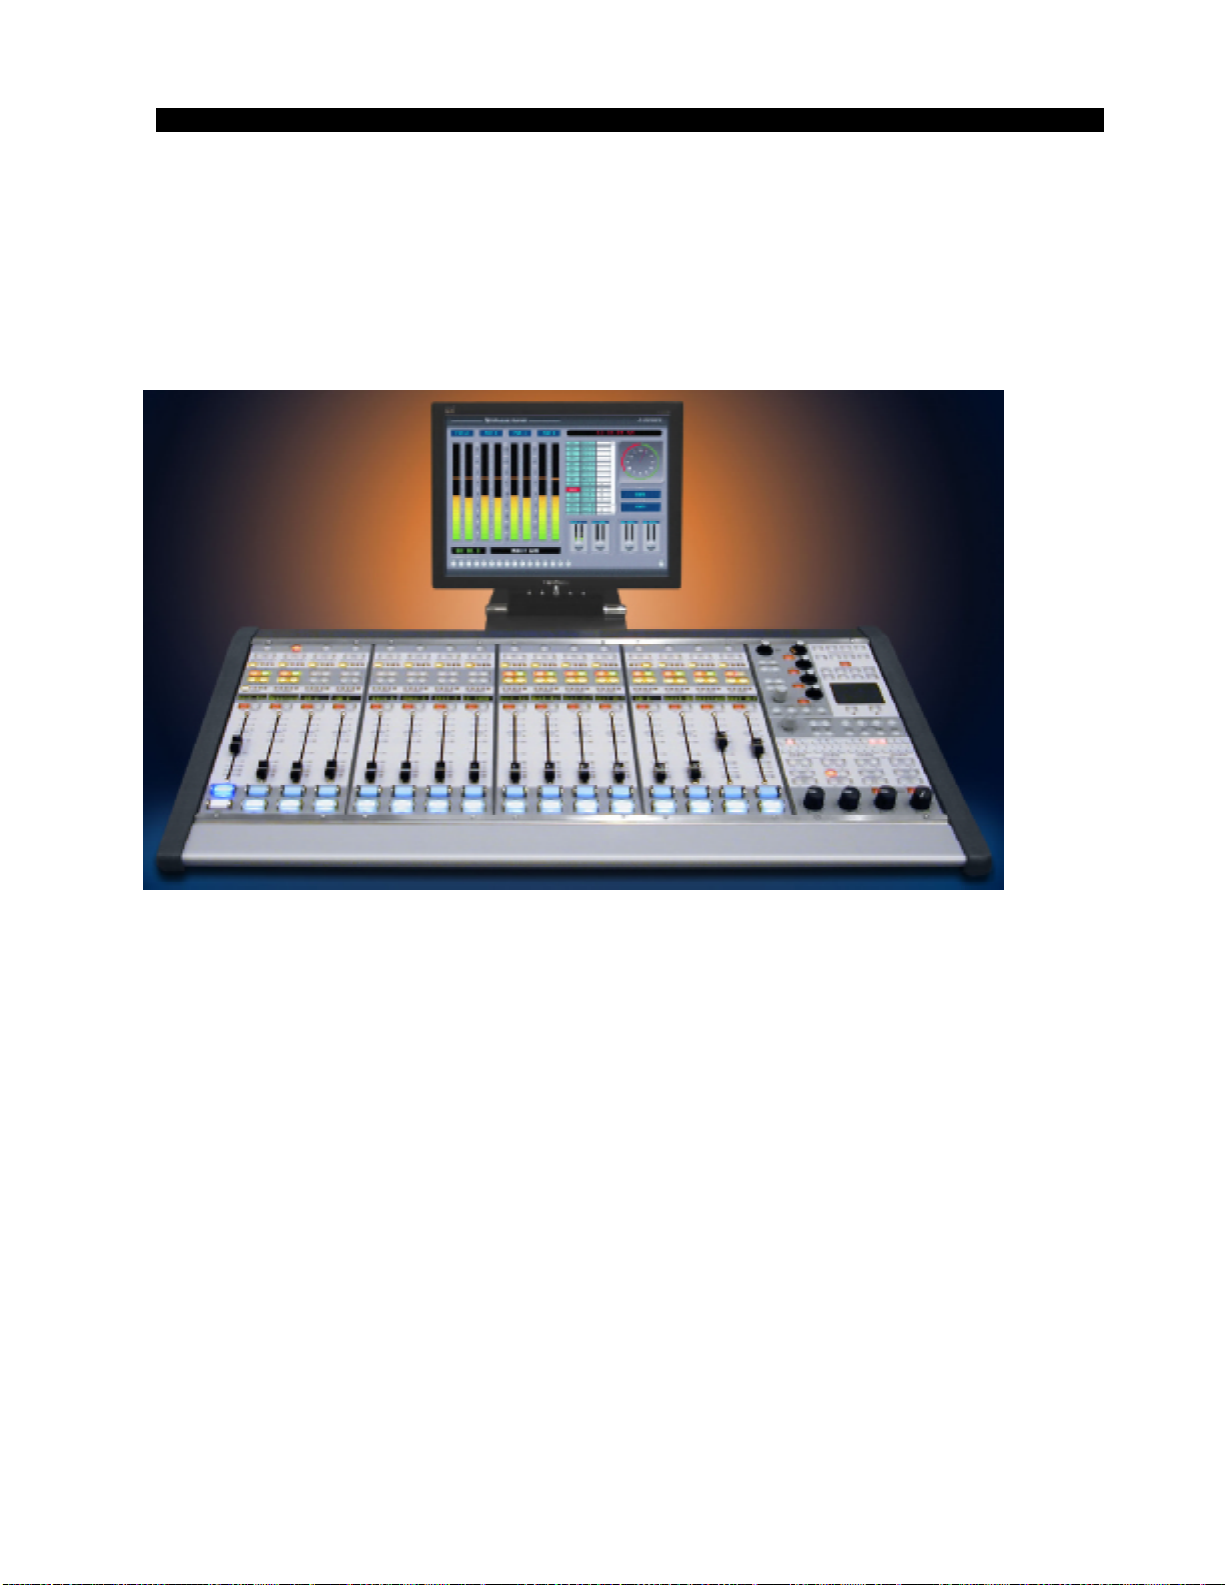
Chapter 3 - Master Panel (MNE-6)
Controls and Functions................................................................3-3
PAN Control.............................................................................................................. 3-3
Input Source Knob .................................................................................................... 3-3
AUX Buses................................................................................................................ 3-5
TB ........................................................................................................................... 3-6
MXM Assign.............................................................................................................. 3-6
MXM Talkback .......................................................................................................... 3-9
CUE Knob ................................................................................................................. 3-9
Headphone Mode ..................................................................................................... 3-9
Split Cue ................................................................................................................. 3-9
EQ ........................................................................................................................... 3-9
Monitors ................................................................................................................... 3-10
Control Room Section ........................................................................................... 3-10
Program Output Select ....................................................................................... 3-10
External Source Select ....................................................................................... 3-10
Mix-Minus ........................................................................................................... 3-11
AUX Sends ......................................................................................................... 3-11
Control Room Level Control ............................................................................... 3-11
Studio Section........................................................................................................ 3-12
Program Output Select ....................................................................................... 3-12
External Source Select ....................................................................................... 3-12
Mix-Minus ........................................................................................................... 3-12
AUX Sends ......................................................................................................... 3-12
TB Button ............................................................................................................ 3-12
Studio Level Control ........................................................................................... 3-12
Headphone Section ............................................................................................... 3-13
Program Output Select ....................................................................................... 3-13
External Source Select ....................................................................................... 3-13
Mix-Minus ........................................................................................................... 3-13
AUX Sends ......................................................................................................... 3-13
Headphone Level Control................................................................................... 3-13
E6 Monitor Configuration....................................................................................... 3-14
Enter Button............................................................................................................. 3-14
Help Button .............................................................................................................. 3-14
Events ...................................................................................................................... 3-15
Viewing Event Choices.......................................................................................... 3-15
Loading an Event................................................................................................... 3-15
Saving an Event..................................................................................................... 3-15
Deleting an Event .................................................................................................. 3-15
Control Modes ......................................................................................................... 3-16
View/ProcessorButton ............................................................................................ 3-17
Switched Meters ...................................................................................................... 3-18
Route ....................................................................................................................... 3-19
Timer Section........................................................................................................... 3-20
Time of Day Clock ................................................................................................... 3-20
Programmable Buttons ............................................................................................ 3-21
VDIP Settings .......................................................................................................... 3-23
Machine Logic.......................................................................................................... 3-25

page Contents – 3
E-6 / Apr 2007
CONTENTS
Dynamics Processing Controls............................................................................. 3-26
Using the Embedded E-6 GUI ............................................................................ 3-26
EQ Settings......................................................................................................... 3-27
Filter ................................................................................................................. 3-27
Low and High Shelving.................................................................................... 3-27
Compressor Settings .......................................................................................... 3-28
Expander Settings .............................................................................................. 3-29
Side Bar .............................................................................................................. 3-31
Save Buttons ................................................................................................... 3-31
Presets............................................................................................................. 3-31
Source and Destination Displays .................................................................... 3-32
Optional Glass E Interface.................................................................................... 3-33
Chapter 4 - Host CPU (HC-3)
Overview ..................................................................................... 4-2
HC-3 BIOS Settings/Format....................................................... 4-2
Ethernet IP Addressing ............................................................. 4-2
Ethernet Interface Wiring .......................................................... 4-2
Mixer Link Wiring ....................................................................... 4-3
Internal Programming Options ................................................. 4-3
Switch Settings .......................................................................... 4-3
SW1 Position 1 - Sample Rate ............................................................................... 4-3
SW1 Position 4 - CAT5 Enable .............................................................................. 4-3
SW2 - CPU Reset................................................................................................... 4-3
Hook-Ups
“ETH” RJ-45 - Main Ethernet Connector ................................................................ 4-4
“CAT5” RJ-45 - Mixer Link Connector .................................................................... 4-4
“HEADPHONE” - Headphone Connector............................................................... 4-4
Typical Ethernet Cable .............................................................. 4-5
Typical Crossover Cable ........................................................... 4-5
HC-3 Pinouts Drawing ............................................................... 4-6
Chapter 5 - Schematic and Load Sheet Drawings
IPE-6 4 Inputs Panel Switch Card
Schematic ............................................................................................................... 5-2
Load Sheet.............................................................................................................. 5-4
ONSE-6 4 Inputs Panel On/Off Switch Card
Schematic ............................................................................................................... 5-5
Load Sheet.............................................................................................................. 5-6
MNE-6 Master Panel Switch Card
Schematic ............................................................................................................... 5-7
Load Sheet............................................................................................................ 5-11
!
All devices in the
system must be
set to the same
sample rate!
E-6 / Jan 2008

page Contents – 4
E-6 / Apr 2007
CONTENTS
HC-3 Host Controller Card
Schematic ............................................................................................................. 5-12
Load Sheet............................................................................................................ 5-16
PSU-1 Power Supply
Schematic ............................................................................................................. 5-17
Load Sheet............................................................................................................ 5-18
Appendices
Appendix 1
Control Surface Clock ...............................................................A-3
Setting the Time......................................................................................................A-3
Update Options.......................................................................................................A-3
Synchronize ............................................................................................................A-3
Battery Backup .......................................................................................................A-4
Appendix 2
Options Text File ........................................................................A-6
Introduction .............................................................................................................A-6
Modifying The Options Text File.............................................................................A-6
A Simple Example From The File...........................................................................A-7
A Second Example .................................................................................................A-8
An Example File - Complete...................................................................................A-9
Appendix 3
Replacement Parts List ...........................................................A-13

GENERAL INFORMATION
page 1 – 1
E-6 / Apr 2007
General Information
Chapter Contents
Introduction ................................................................................ 1-2
Control Surface Placement ....................................................... 1-3
Power Supply ............................................................................. 1-4
Failsafe Dual Redundant Supply............................................................................ 1-5
Energizing ............................................................................................................... 1-5
I/O Connections.......................................................................... 1-6
Getting Started ........................................................................... 1-8
Surface Software Version.......................................................... 1-8
E-6 / Nov 2009

G E N E R A L I NFORMATION
page 1 – 2
E-6 / Apr 2007
General Information
Introduction
Designed to integrate flawlessly with the E-series Satellite digital audio network
router, the E-6 control surfaces allow you to easily create large- or small- platform-
based systems that are exceptionally user-friendly and flexible. The E-6 control
surface has major market features: event recall, both bus-minus and mix-minus, and
four aux mixes—all with dedicated talkback systems. The E-6 also has four monitor
outputs and standard EQ, dynamics, panning and mic processing on all channels
(simultaneously). It supports multiple arrays of programmable input channel and
master panel switches for customized functions like phone, intercom, salvos or
machine commands. The E-6 drives a user-supplied VGA monitor display, via the
Embedded E-6 Graphic User Interface (GUI), providing hi-res REALTIME graphic
displays, production tools, and set up screens (security protected by multilevel pass
codes). An RJ-45 Audio Transport “MIXER” connector on the rear of the control
surface serves as the link between the surface and the network system.

G E N E R A L I NFORMATION
page 1 – 3
E-6 / Apr 2007
Control Surface Placement
The E-6 digital audio control surface is designed for simple drop-in installation
in a countertop. Cutout dimensions (in inches) are shown in the drawings below for
5 available frame sizes.
Do not connect the E-6 control surface to its power supply (and do not connect
the power supply to the AC power line) until instructed to do so.
33.31
17.83
13.67
1.67
0.955
3.21 2.55
E-6 16 INPUT FRAME
39.57
17.83
E-6 20 INPUT FRAME
45.83
17.83
E-6 24 INPUT FRAME
27.05
17.83
E-6 12 INPUT FRAME
20.79
17.83
E-6 8 INPUT FRAME
18.79 for 8 Fader Input
25.05 for 12 Fader Input
31.31 for 16 Fader Input
37.57 for 20 Fader Input
43.83 for 24 Fader Input
8 INPUT FRAME - 14.17" x 19.19"
CUTOUT DIMENSIONS
12 INPUT FRAME - 14.17" x 25.45"
16 INPUT FRAME - 14.17" x 31.71"
20 INPUT FRAME - 14.17" x 37.97"
24 INPUT FRAME - 14.17" x 44.23"

G E N E R A L I NFORMATION
page 1 – 4
E-6 / Apr 2007
Power Supply
The E-6 control surface is powered by a Wheatstone Model PSU-1
rackmount power supply. This unit occupies two 19” wide rack spaces
(total height 3-1/2”). Convection cooled, it requires ample ventilation
space above and below it.
Note the power supply (supplies)
should be mounted in an equipment
rack within fifteen feet of the control
surface (but no closer than 3 feet).
Avoid locating any high gain equip-
ment (such as phono preamps, tape
recorders, etc.) too near the rackmount
supplies, to avoid magnetic interfer-
ence into that equipment.
Once the supply is rackmounted,
it should be connected to the control
surface using the factory supplied
cable. The cable has two different
types of connectors on it: a 5-pin fe-
male connector that connects to the
control surface’s power supply con-
nector, and an 8-pin male connector
that plugs into the power supply. The
control surface’s two power supply
connectors are located at the rear of the
control surface, in the middle of the
meterbridge bottom pan. If you are
using one supply, connect it to one of
8
7
6
5
PIN
1
2
3
4
PIN
8-pin Connector
Male
5-pin Connector
Female
Power Supply EndConsole End
4
3
2
1
5
RED, YEL
BLU, BLK
N/C
N/C
N/C
N/C
N/C
N/C
PS Cable Pinout
RED
YEL
BLU
BLK
N/C
+V in
-V in
Power Supply
End
Control Surface
End
Front view of the PSU-1
rackmount power supply
Rear view of the PSU-1
rackmount power supply
If failsafe redundant sup-
plies have been ordered,
you will be installing two
PSU-1 units.

G E N E R A L I NFORMATION
page 1 – 5
E-6 / Apr 2007
the control surface connectors (it doesn’t matter which one). If you are
using the failsafe option (two PSU-1 supplies), connect one end of a
power supply cable to either control surface power connector and
connect the other end of the cable to one of the two power supply
connectors. Then use the other cable to connect the second power
supply connector to the remaining control surface power supply
connector.
Note each power supply is fitted with a 3-wire grounded AC cord
that should be plugged into a "clean" AC power source, that is, an AC
source that feeds only the control room audio gear. This source should
be a separate feed from those powering lighting, air-conditioning, or
any other non-audio machinery. The third pin ground wire of the AC
source should be tied to the central system ground point.
Failsafe Dual Redundant Supply
Wheatstone failsafe power supply systems use two PSU-1 power
supplies for each piece of powered equipment. Though either is
capable of running a full load on its own, in failsafe operation both units
run in tandem: if one fails, the other takes over, assuring uninterrupted
operation.
In order for failsafe systems to perform as designed, always have
BOTH rackmount supplies powered up and connected to their associ-
ated equipment.
Energizing
Assuming the E-6 control surface mainframe is properly placed,
and its PSU-1 power supply (or supplies) correctly rackmounted and
connected to the control surface, you may now energize the rackmount
power supply by plugging it into the AC mains. The “GOOD” LEDs
on the power supply front panel should light up to indicate the presence
of their respective voltages. The control surface's LED meters will
illuminate and individual module switches will assume factory default
settings.
Note: To de-energize the control surface, unplug the rackmount
power supply’s AC cord from the AC mains. Never de-energize the
control surface by disconnecting the cable that connects the control
surface and power supply together.
Once you have verified proper power-up, unplug the rackmount power
supply to de-energize the control surface. You maynow proceed to wire
up audio and control connections.
The power feed recom-
mended in the text is of-
ten installed and referred
to in studios as an “iso-
lated AC ground” outlet.
It is usually orange in
color.

G E N E R A L I NFORMATION
page 1 – 6
E-6 / Apr 2007
I/O Connections
All user wiring to and from the E-6 control surface is made via
connectors located on the control surface’s rear panel. Two 5-pin male
connectors at the center of the control surface’s rear are for power
supply connections. A external line level headphone signal plugs into
the female DB-9 connector, located next to power supply connectors.
This signal is routed to internal amplifiers that feed the headphone jack,
located on the front right-hand side of the surface’s pan. There are two
RJ-45 connectors for Ethernet and CAT-5 connection. There are also
a DB-15, a DB-9, and a keyboard connector to plug in computer
monitor, mouse, and keyboard standard cables. The sketch below
shows connector locations. For all wiring pinout connections refer to
Chapter 4.
POWER A POWER BKEYBRDMONITOR
DB-15
MOUSEENET
RJ-45
MIXER
RJ-45 DB-9 DB-9
HEADPHONE
E-6 / Nov 2009

GENERAL INFORMATION
page 1 – 7
E-6 / Apr 2007E-6 / Nov 2009
This page is intentionally left blankThis page is intentionally left blank

G E N E R A L I NFORMATION
page 1 – 8
E-6 / Apr 2007
Getting Started
The E-6 control surface comes with a E-6 Embedded Graphical User Interface
(GUI) program, intended to be straightforward in use, controlling and displaying
graphics, production tools, and set up screens. Plug in the flat panel monitor display
(user supplied) to the DB-15 “MONITOR” connector on the control surface’s rear
panel, power up the surface, and the GUI will appear on the monitor display.
The surface Master Panel has a mouse pad to control the mouse pointer on the
VGA screen for system software navigation.
Surface Software Version
In the event that you need to consult the
factory about the E-6 control surface, you may
need to have the surface software version num-
ber available. Click the Wheatstone logo on the
top of the start-up screen to display the “IN-
FORMATION” form, which shows technical
information about the surface’s software ver-
sion and connection status to its companion
rack MT link, Ethernet link, and automation
interface.

INPUT PANEL
page 2 – 1
E-6 / Apr 2007
Input Panel (IPE-6)
Chapter Contents
Controls and Functions............................................................. 2-2
Input Sources.......................................................................................................... 2-2
SET Button.............................................................................................................. 2-2
Programmable Buttons ........................................................................................... 2-2
Channel Mode Indicator ......................................................................................... 2-3
Surround Phase System..................................................................................... 2-4
Phase...................................................................................................................... 2-5
Program Assign ...................................................................................................... 2-5
MXM Assign LED’s ................................................................................................. 2-5
LED Readout .......................................................................................................... 2-5
CUE Switch............................................................................................................. 2-5
TB BUS- Switch ...................................................................................................... 2-5
Fader....................................................................................................................... 2-6
Channel ON Switch ................................................................................................ 2-6
Channel OFF Switch............................................................................................... 2-6
Channel Status Buttons Display............................................................................. 2-6

INPUT PANEL
page 2 – 2
E-6 / Apr 2007
Input Panel (IPE-6)
Controls and Functions
Each input panel of the E-6 digital
audio control surface has four identical
strips representing four input channels.
Input Sources
Each input panel controls four stereo
sources. By pressing a channel’s SET
button and turning the INPUT SOURCE
knobatthecenteroftheMNE-6panel,the
available inputs are displayed in the 8-
character SOURCE display. When the
desired input source is scrolled into the
SOURCE window, press the red ENTER
button on the MNE-6 panel to take that
source to that channel. If you fail to press
ENTER,thedisplaywillreverttoitsorigi-
nal setting after a timeout of approxi-
mately 4 seconds, and the original source
remains in effect.
SET Button
Thisallowstheoperatortoaccessvari-
ous controls and functions, such as EQ/
Dynamics,Panning,MXMAssign,AUX
Bus Assign, and Source Selection, and
apply them to the selected channel. To
use, press the SET button and then make
your appropriate section settings in other
areas of the control surface. Once a SET
button has been pressed, the button lights
up, and all setting changes will apply to
thatinput channeluntil a different input
SETbuttonispressed,oruntilatimeoutof
about 20 seconds has occurred.

INPUT PANEL
page 2 – 3
E-6 / Apr 2007
ProgrammableButtons
Thereare twoprogrammablebuttons associatedwith each inputchannel
to perform special functions, such as taking a preset, altering channel mode,
or controlling left or right phase. To program a button, press and hold the
button until the PROGRAMMABLE BUTTON screen pops up. Select the
desired function by clicking on the text to highlight it, and then clicking the
Set button on the screen. If your choice was “Take A Preset” then the
PROCESSOR PRESETS screen pops up when you click the Set button to
allow you to choose the desired preset.

INPUT PANEL
page 2 – 4
E-6 / Apr 2007
Channel Mode Controls and Indicators
MODE selection is set in the Embedded E-6 GUI using the mouse
pad,locatedinthecenterofthemasterpanel,
to control the mouse pointer on the VGA
screenforsystemsoftwarenavigation.Press-
ingtheMODEbuttononthelower-rightside
of the VGA screen will bring up an “E6
Modes”screen.Therearefiveavailablechan-
nel modes: Stereo, Mono, Left only, Right
only,andSurround(5.1).ToselectaMODE,
press the SET button of the desired input
channel. The SET button will illuminate,
and the CHANNEL MODE indicators will
display the current mode setting for that
channel. Click on the desired mode and its
virtual switch will light. The channel’s
CHANNEL MODE indicators will change to reflect the new mode.
MODES - a row of five interlocked switches (only one selected at
a time). Affects which channels of the source signal are passed to the
rest of the input signal path.
STEREO – selects stereo mode; the source left input feeds LT, the
source right input feeds RT. Used for stereo music, normal mixing
applications.If a monosourceis selected, itwillfeedboth LT andRT.
A 5.1 source will be down-mixed to stereo.
MONO - selects mono mode. If a stereo source is selected it is
summed to mono and reduced by 6dB. A 5.1 source will be down-
mixed to mono.
LEFT(leftonly)– passes onlythe leftchannelofastereosource to
both LT and RT.
RIGHT (right only) – passes only the right channel of a stereo
source to both LT and RT.
SURR (5.1) – sets the input fader to be a surround channel. Only
inputfaderchannelsconfiguredinhardwareas5.1channelsmaybeput
in this mode. Use this mode when selecting 5.1 surround sources.
MODE can be reconfigured by pressing any allowable button. In
most cases pressing a disallowed button has no effect. All configura-
tion changes can be saved to channel, source, event, headphone, or
preset.
E-6 / Jan 2008

INPUT PANEL
page 2 – 5
E-6 / Apr 2007
Surround Pan System
Note: Normally 5.1 source signals are routed to input faders that have
been configured as surround inputs. Routing a 5.1 signal to a stereo input
fader will get just the L-R front signals.
PROGRAMMING A CHANNEL FOR SURROUND SOUND: Se-
lectthechannelyouwishtoprogrambypressingitsSETbutton,andassign
it to the 5.1 destination by pressing SURR button.
The “E6 SURROUND/PAN” screen will indicate the current settings
oftheencoder LEFT/RIGHT, FRONT/REAR,CENTER, andLFEslider
levelcontrols.Thescreenwillalsodisplayamulti-colorgraphicrepresen-
tationofthis system. Thesystem cangenerate5.1signalsfrom MONO or
STEREO sources, and can modify the 5.1 signal of existing 5.1 input
sources.Double-clickinganyoftheencoderswillreturnthatparameterto
its default setting (for example, LT/RT returns to center).
L/R - slider moves the signal left to right.
FRONT/REAR - slider moves the signal front to back.
CENTER/SURROUND - slider controls the ratio of CENTER imag-
ing. Full left removes signal from CENTER and is applied to the LEFT/
RIGHT and FRONT/REAR panner, full right pans signal to CENTER
only.
LFE - slider controls level of signal sent to subwoofer channel.
WIDTH - slider controls an effect that changes the apparent distance
between the speakers - applies to stereo signals only.

INPUT PANEL
page 2 – 6
E-6 / Apr 2007
Phase
Apairofswitches,oneforleftandoneforright,
locatedonthebottomofthe“E6MODES”screen,
are provided to allow for the reversal of absolute
phase of the signal path.
ProgramAssign
Outputswitchesassigntheselectedsourcesignaltoanycombinationof
thesurface’sfourstereoProgramoutputs—A,B,C,andD.Thebuttonwill
belit whenthesource is assignedto its respectivebus. To removea source
fromthebus, pressthebuttonagain;thelightwillgoofftoindicatethatthe
source is no longer assigned to that bus.
MXM Assign LED’s
Each channel can be assigned to any combination of the four MIX-
MINUS buses. The MXM ASSIGN 1-4 LED group
gives the operator a quick indication of what mix-
minus buses the source is assigned to, and also
indicates if the source is assigned to the “Quick
Record” output.
Channels are assigned to these MXMs in the
following manner: press the channel SET button on
the input fader section and then press the desired
MIX-MINUSASSIGNbutton,locatedontheMNE-
6 panel. Note that you are normally assigning the channel, and not the
source,to the MXMbus.But see thesectionon MIXMINUSoptionslater
in the manual (MXM ASSIGN, page 3-6)
LED Readout
An 8-character display shows the name of the audio source selected to
the fader.
CUE Switch
TheCUEswitch assigns theselected sourcetotheCUEbus, letting the
control surface operator monitor the channel’s pre-fader signal.
TB BUS- Switch
TheTBBUS-switchroutestheTBBUSaudio,typicallytheoperator’s
microphone, to the BUS MINUS output for that channel, allowing the
operator to talkback to the talent hearing that BUS MINUS signal.
Other manuals for E-6
1
Table of contents
Other Wheatstone Corporation Recording Equipment manuals

Wheatstone Corporation
Wheatstone Corporation Talent Station TS-22 User manual

Wheatstone Corporation
Wheatstone Corporation D-5.1 User manual

Wheatstone Corporation
Wheatstone Corporation D-9 User manual

Wheatstone Corporation
Wheatstone Corporation DMX-8 User manual

Wheatstone Corporation
Wheatstone Corporation A-5000 User manual

Wheatstone Corporation
Wheatstone Corporation A-2000 User manual

Wheatstone Corporation
Wheatstone Corporation TV-1000 User manual

Wheatstone Corporation
Wheatstone Corporation EMX User manual

Wheatstone Corporation
Wheatstone Corporation A-32 User manual

Wheatstone Corporation
Wheatstone Corporation Dimension Three User manual