®®
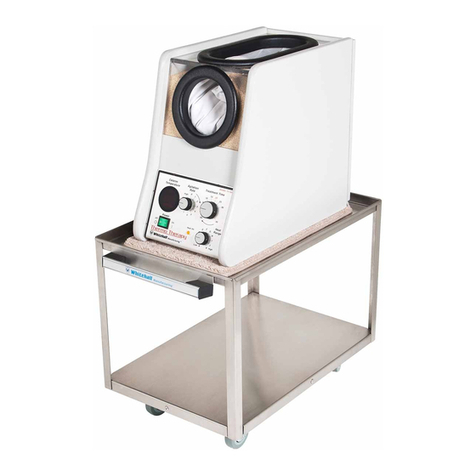
Instructions for Operation and Care of Thermo-Therapy Dry Heat Therapy
WHITEHALL MANUFACTURING • P.O. BOX 3527 • City of Industry, CA 91744-0527 U.S.A
Phone (800) 782-7706 • (626) 968-6681 • Fax (626) 855-4862 • Web: www.whitehallmfg.com
6
MAINTENANCE OF THE UNIT
On all models, remove the Outer Cover and remove and
clean the primary Filter. If necessary, remove the four
Screws to access the secondary Filters . Replacements
are readily available.
Pay particular attention to the Air Inlet on the TT-101 and
TT-101L since it is on the units’ bottom and close to
whatever surface it is placed upon. Also, make sure this
surface is rigid as the Blower will pull up any flexible
material and cause the Blower to labor.
®
The Celstim , after prolonged use, may become too fine
for effective therapy and can be replaced by removing the
Top Sleeve and “digging” it out or by removing the Rear Top
Panel. If the Panel is removed, be prepared to contain any
spillage. Also, make sure the panel is tightly reinstalled
®
to prevent any Celstim from escaping. A “Hex” Wrench
has been provided for removing and replacing the Screws
from the Top Panel.
®
Celstim , with fines removed, for replacement or addition
is readily available in a 10 lb. (4.5 kg) box containing
two (2) 5 lb. (2.25 kg) plastic “jugs” for easy adding.
®
Too much Celstim in the treatment chamber can cause
®
a “rolling” action - remove the excess Celstim through a
Top Port.
®
Too little Celstim results in a perceived loss of agitation.
Normal capacity is as follows:
TT-101 – 10 lbs. (4.5 kg)
TT-101L – 12 lbs. (5.4 kg)
INSTRUCTIONS FOR USE AND
OPERATING CONTROLS
Please refer to the photos on page 3 for TT-101 and
page 4 for TT-101L.
®
Thermo-Therapy units will only operate with the Power
Switch ON and the Treatment Timer activated.
®
Thermo-Therapy units are temperature safety
switched at approximately 130º F (54.4º C).
To best prolong the motor life, the unit must be turned off
between treatments. DO NOT LEAVE THE UNIT “ON”
CONTINUOUSLY FOR THREE HOURS OR MORE.
Once the
®
Rotate the Celstim agitation or Speed Control(s)
clockwise increase air speed and flow. Rotate the
Controls counterclockwise to decrease the air speed
and flow.
Heat is also increased by rotating the Heat Control Knob
clockwise- from “A” lowest heat to “K” highest heat.
Treatment time is indicated as minutes with 20 minutes
highlighted as being the usual treatment cycle.
All
®
Celstim is at operating temperature and the
Blowers are turned off, heat loss is approximately 2º F-
3ºF (0.55º C- 1.65º C) per hour.
Make sure the body part being treated is washed with an
antimicrobial soap and is as dry as possible as moisture
®
in the Celstim will cause caking.
Tightly close the Sleeves at the Treatment Ports so
®
minimal Celstim escapes from the unit.
The most important maintenance function on all
®
Therapy products is to make sure to keep all incoming
Air Filters clean and unclogged. If this is not done,
airflow will be restricted resulting in less agitation, over-
heated motors, and premature Motor failure. We have
enclosed a spare Filter so one Filter can always be
cleaned and on standby. To remove the Filter Cover, use
a straight Screwdriver.
The Housing can be cleaned with a mild household
cleaner with out damage as its surface is similar to that
found on kitchen cabinets.
The Treatment Port Sleeves can be washed and
replaced to remove the Sleeves, carefully pull the
bottom of the Rims toward the center away from the side
and at the same time pull or push them up and out of the
Housing. Pull the sleeves from the Velcro found
underneath the Rim. Reverse the procedure to replace
the Sleeves.
Thermo-
CHANGING THE FUSES
®
Turn the Thermo-Therapy unit off via the Controls on the
Front Panel and then unplug the unit. Next, position the
®
unit to allow access to the rear of the Thermo-Therapy
device. Locate the Fuse Holders at rear of the unit near
the Power Cord.
Depress the Fuse Holder Caps and rotate counterclockwise
approximately 90° or until the Cap becomes loose. Remove
the Fuse Holder Cap, exposing the Glass Fuse. Remove
the blown Fuse. Once the old Fuse has been removed,
replace it with a new Fuse of the same kind and amperage.
This must be a Slow-Blow Fuse purchased from Whitehall.
Re-install the Fuse Holder Cap by depressing and rotating
clockwise approximately 90° and ensure that the Fuse
Holder Caps are secured. Plug the unit back in to a Power
Outlet. Turn the unit on via front Control Panel. Allow the
unit to warm up to the operating temperature and use as
required.
