manuals.online logo
Brands
  1. Home
  2. •
  3. Brands
  4. •
  5. Wiesenfield
  6. •
  7. Farm Equipment
  8. •
  9. Wiesenfield WIE-BK-50 User manual

Wiesenfield WIE-BK-50 User manual

WIE-BK-50 | WIE-BK-51
WIE-BK-52 | WIE-BK-54
expondo.de
BEDIENUNGSANLEITUNG
USER MANUAL
INSTRUKCJA OBSŁUGI
NÁVOD K POUŽITÍ
MANUEL D´UTILISATION
ISTRUZIONI PER L‘USO
MANUAL DE INSTRUCCIONES
FRAME LANGSTROTH BEEHIVE
BEEHIVE
expondo.com
3
5
7
9
11
13
15
DEUTSCH
ENGLISH
POLSKI
ČESKY
FRANÇAIS
ITALIANO
ESPAÑOL
INHALT | CONTENT | TREŚĆ | OBSAH | CONTENU | CONTENUTO | CONTENIDO
2
TECHNISCHE DATEN
3
Gebrauchsanweisung beachten.
ACHTUNG!, WARNUNG! oder HINWEIS!, um auf
bestimmte Umstände aufmerksam zu machen
(allgemeines Warnzeichen).
Augenschutz benutzen.
Handschutz benutzen.
Sicherheitsschuhe benutzen.
Kopf- und Gesichtsschutz benutzen.
Schutzkleidung benutzen.
Die Begrie „Gerät“ oder „Produkt“ in den Warnungen
und Beschreibung des Handbuchs beziehen sich auf
BIENENBEUTE.
a) Bewahren Sie die Gebrauchsanleitung für
den weiteren Gebrauch auf. Sollte das Gerät
an Dritte weitergegeben werden, muss die
Gebrauchsanleitung mit ausgehändigt werden.
b) Verpackungselemente und kleine Montageteile
außerhalb der Reichweite von Kindern aufbewahren.
c) Halten Sie das Gerät von Kindern und Tieren fern.
d) Bei Zweifeln, ob das Produkt ordnungsgemäß
funktioniert, oder wenn Schäden festgestellt werden,
wenden Sie sich bitte an den Kundendienst des
Herstellers.
e) Das Gerät darf nicht von Kindern oder Personen
mit eingeschränkten physischen, sensorischen und
geistigen Fähigkeiten oder ohne entsprechende
Erfahrung und entsprechendes Wissen bedient
werden. Dies ist nur unter Aufsicht einer für die
Sicherheit zuständigen Person und nach einer
Einweisung in die Bedienung der Maschine gestattet.
f) Das Gerät darf nur von körperlich geeigneten
Personen bedient werden, die zu ihrem Benutzen
fähig und entsprechend geschult sind und die
diese Bedienungsanleitung gelesen und verstanden
haben und im Rahmen der Sicherheit und des
Gesundheitsschutzes am Arbeitsplatz geschult
wurden.
g) Benutzen Sie eine persönliche Schutzausrüstung,
die den in Punkt 1 der Symbolerläuterungen
vorgegebenen Maßgaben entspricht. Die
Verwendung einer geeigneten und zertizierten
Schutzausrüstung verringert das Verletzungsrisiko.
h) Das Gerät ist kein Spielzeug. Kinder sollten in der
Nähe des Geräts unter Aufsicht stehen, um Unfälle
zu vermeiden.
i) Um die Funktionsfähigkeit des Gerätes zu
gewährleisten, dürfen die werksmäßig montierten
Abdeckungen oder Schrauben nicht entfernt werden.
j) Es ist verboten, das Produkt mit den Bienen zu
verschieben, umzustellen oder zu drehen.
k) Es ist untersagt, in den Aufbau des Geräts
einzugreifen, um seine Parameter oder Konstruktion
zu ändern.
l) Geräte von Feuer – und Wärmequellen fernhalten.
m) Wenn sich Bienen im Produkt benden, nicht unnötig
die Hände hineinlegen!
n) Kinder und Umstehende sollten sich nicht in der
Nähe des Bienenkastens aufhalten.
o) Es wird empfohlen, bei der Arbeit am Bienenstock
die Hygieneregeln zu beachten.
p) Vor dem Aufstellen eines Bienenstandes sollten
die Voraussetzungen für die Unterbringung von
Bienenstöcken geprüft werden.
q) Bewahren Sie einen Erste-Hilfe-Kasten in der Nähe
des Bienenstocks auf.
3. NUTZUNGSBEDINGUNGEN
Die Bienenstöcke sind für Personen bestimmt, die eine
Imkerei einrichten möchten. Sie werden zur Bienenzucht
und zum Sammeln von Honig verwendet.
Für alle Schäden bei nicht sachgemäßer Verwendung
haftet allein der Betreiber.
1. ALLGEMEINE BESCHREIBUNG
Diese Anleitung ist als Hilfe für eine sichere und
zuverlässige Nutzung gedacht. Das Produkt wurde strikt
nach den technischen Vorgaben und unter Verwendung
modernster Technologien und Komponenten sowie unter
Wahrung der höchsten Qualitätsstandards entworfen und
angefertigt.
VOR INBETRIEBNAHME MUSS DIE ANLEITUNG
GENAU DURCHGELESEN UND VERSTANDEN
WERDEN.
Für einen langen und zuverlässigen Betrieb des Geräts muss
auf die richtige Handhabung und Wartung entsprechend
den in dieser Anleitung angeführten Vorgaben geachtet
werden. Die in dieser Anleitung angegebenen technischen
Daten und die Spezikation sind aktuell. Der Hersteller
behält sich das Recht vor, im Rahmen der Verbesserung der
Qualität Änderungen vorzunehmen.
ERLÄUTERUNG DER SYMBOLE
HINWEIS! In der vorliegenden Anleitung sind
Beispielbilder vorhanden, die von dem tatsächlichen
Aussehen das Produkt abweichen können.
Die originale Anweisung ist die deutschsprachige Fassung.
Sonstige Sprachfassungen sind Übersetzungen aus der
deutschen Sprache.
2. NUTZUNGSSICHERHEIT
ACHTUNG! Lesen Sie alle Sicherheitshinweise und
alle Anweisungen durch.
BEDIENUNGSANLEITUNG DE
PRODUKTNAME RAHMEN-
BIENENBEUTE BIENENBEUTE RAHMEN-
BIENENBEUTE BIENENBEUTE
PRODUCT NAME FRAME LANGSTROTH
BEEHIVE BEEHIVE FRAME LANGSTROTH
BEEHIVE BEE HIVE
NAZWA PRODUKTU UL LANGSTROTH
10-RAMKOWY UL DADANT UL
10-RAMKOWY UL PSZCZELI
NÁZEV VÝROBKU RÁMOVÝ VČELÍ ÚL VČELÍ ÚL
DADANT RÁMOVÝ VČELÍ ÚL VČELÍ ÚL
NOM DU PRODUIT
CADRE
LANGSTROTH
POUR RUCHE
RUCHE DADANT
CADRE
LANGSTROTH
POUR RUCHE
RUCHE
NOME DEL PRODOTTO TELAIO MOBILE
PER ARNIA ARNIA TELAIO MOBILE
PER ARNIA ARNIA
NOMBRE DEL PRODUCTO COLMENA
DE MARCO
COLMENA
DADANT
COLMENA
DE MARCO COLMENA
MODELL
WIE-BK-50 WIE-BK-51 WIE-BK-52 WIE-BK-54
PRODUCT MODEL
MODEL PRODUKTU
MODEL VÝROBKU
MODÈLE
MODELLO
MODELO
HERSTELLER
EXPONDO POLSKA SP. Z O.O. SP. K.
MANUFACTURER
PRODUCENT
VÝROBCE
FABRICANT
PRODUTTORE
FABRICANTE
ANSCHRIFT DES HERSTELLERS
UL. NOWY KISIELIN-INNOWACYJNA 7, 66-002 ZIELONA GÓRA | POLAND, EU
MANUFACTURER ADDRESS
ADRES PRODUCENTA
ADRESA VÝROBCE
ADRESSE DU FABRICANT
INDIRIZZO DEL PRODUTTORE
DIRECCIÓN DEL FABRICANTE
Parameter Werte
Produktname RAHMEN-
BIENENBEUTE BIENENBEUTE
Modell WIE-BK-50 WIE-BK-51
Abmessungen
[Breite
x Tiefe
x Höhe; mm]
550x460
x510
540x470
x610
Gewicht [kg] 12 12,5
Produktname RAHMEN-
BIENENBEUTE BIENENBEUTE
Modell WIE-BK-52 WIE-BK-54
Abmessungen
[Breite
x Tiefe
x Höhe; mm]
510x410
x650 600x540x730
Gewicht [kg] 13 12,3
09.12.2021
DE
4
GERÄTEBESCHREIBUNG
WIE-BK-50/ WIE-BK-51/ WIE-BK-52
TECHNICAL DATA
5
Read instructions before use.
WARNING! or CAUTION! or REMEMBER!
Applicable to the given situation (general
warning sign).
Wear protective goggles.
Wear protective gloves.
Wear electrical hazard work boots.
Wear head and face protection.
Wear protective clothing.
The terms „device“ or „product“ are used in the warnings
and instructions to refer to a BEEHIVE.
a) Please keep this manual available for future
reference. If this device is passed on to a third party,
the manual must be passed on with it.
b) Keep packaging elements and small assembly parts
in a place not available to children.
c) Keep the device away from children and animals.
d) The device is not designed to be handled by persons
(including children) with limited mental and sensory
functions or persons lacking relevant experience
and/or knowledge unless they are supervised by
a person responsible for their safety or they have
received instruction on how to operate the device.
e) The device can be handled only by physically t
persons who are capable of handling it, properly
trained, familiar with this manual and trained within
the scope of occupational health and safety.
f) Use personal protective equipment as required
for working with the device, specied in section 1
(Legend). The use of correct and approved personal
protective equipment reduces the risk of injury.
g) The device is not a toy. Children must be supervised
to ensure that they do not play with the device.
h) To ensure the operational integrity of the device, do
not remove factory-tted guards and do not loosen
any screws.
i) DO NOT move, relocate or rotate the device with the
bees inside.
j) It is forbidden to interfere with the structure of
the device in order to change its parameters or
construction.
k) Keep the device away from sources of re and heat.
l) If you are unsure about whether the product is
operating correctly or if you nd damage, please
contact the manufacturer’s service centre.
m) If there are bees in the device, do not put your hands
in if there is no need to!
n) Children and bystanders should not stay in the
vicinity of the apiary.
o) It is recommended to observe the principles of
hygiene when working at the hive.
p) Before setting up an apiary, check the requirements
for positioning the hives.
q) Keep a rst aid kit near the hive.
3. USE GUIDELINES
The hives are intended for bee breeders planning to set up
an apiary. They are used for breeding bees and collecting
honey.
The user is liable for any damage resulting from
unintended use of the device.
To increase the product life of the device and to ensure
trouble-free operation, use it in accordance with this user
manual and regularly perform maintenance tasks. The
technical data and specications in this user manual are
up to date.
LEGEND
1. GENERAL DESCRIPTION
The user manual is designed to assist in the safe and
trouble-free use of the device. The product is designed
and manufactured in accordance with strict technical
guidelines, using state-of-the-art technologies and
components. Additionally, it is produced in compliance
with the most stringent quality standards.
DO NOT USE THE DEVICE UNLESS YOU HAVE
THOROUGHLY READ AND UNDERSTOOD THIS
USER MANUAL.
PLEASE NOTE! Drawings in this manual are for
illustration purposes only and in some details may
dier from the actual product.
The original operation manual is written in German. Other
language versions are translations from the German.
2. USAGE SAFETY
ATTENTION! Read all safety warnings and all
instructions.
USER MANUAL EN
1. Bienenstock-Bodenplatte
2, 3, 4, 5. Wand (Zuchtkammer/Korpus)
6. Abdeckung
7. Dach
8. Auslassbrücke
WIE-BK-54
DESINFEKTION DES BIENENSTOCKS
Wenn der Bienenstock von einer abgestoßenen oder
umgesiedelten Familie übrig ist, kratzen Sie ihn vorsichtig
heraus, fegen Sie den Schmutz weg und entsorgen Sie ihn.
Die beste und gebräuchlichste Methode, einen Bienenstock
zu desinzieren, besteht darin, ihn gründlich mit einem
Gasbrenner zu verbrennen. Wenn das Bienenvolk schwere
Krankheiten (Nasemose, Faulbrut) erlitten hat, sollten die
Rahmen unbedingt verbrannt oder (zusammen mit Wachs)
begraben werden. Es gibt auch eine Methode, das Innere
der Bienenstöcke mit einer 3%igen Natronlauge zu reinigen.
Spülen Sie den Bienenstock jedoch nach der Behandlung
mit Wasser unter Zugabe von Essig oder Essigsäure
(neutralisieren Sie die Wirkung von Soda - es verhindert
die Kristallisation im Bienenstock). Auf dem Markt sind
auch Chemikalien zur Desinfektion von Bienenstöcken
erhältlich - überprüfen Sie deren Verwendung, bevor Sie
sie verwenden.
7
6
5
4
3
2
1
4
5
2
3
8
5
4
3
2
1
6
7
8
9
1. Bienenstock-Bodenplatte
2. Zuchtkammer
3. Platz für die Bienenkönigin
4. Übersichtsfenster
5. Dach
6. Frontabdeckung
7. Rahmen mit Honigplastern
8. Gri
9. Türe
AUFBAU DES GERÄTES (betrit alle Modelle)
Die Installation sollte am Boden und am Brutplatz (dem
untersten Teil des Bienenstocks) beginnen. Verbinden Sie die
Boden- und Seitenwände (1, 2, 3) wie in der o.a. Zeichnung
dargestellt. Das Verbinden von Elementen besteht darin, die
Nuten an den Kanten der Elemente zusammenzubringen
(ineinander stecken) und sie dann zu verdrehen. Zwischen
den Wänden sollte ein rechter Winkel eingehalten werden.
Ein weiteres zu montierendes Element ist der Innendeckel mit
Sichtfenster. Abschließend montieren Sie das Dach mit den
angebrachten Paneelen genauso wie beim Zusammenbau
des Zuchthauses/Korpuses.
Parameter
description Parameter value
Product name FRAME LANG-
STROTH BEEHIVE BEEHIVE
Model WIE-BK-50 WIEBK-51
Dimensions
[Width
x Depth
x Height; mm]
550x460
x510
540x470
x610
Weight [kg] 12 12,5
Product name FRAME LANG-
STROTH BEEHIVE BEE HIVE
Model WIE-BK-52 WIE-BK-54
Dimensions
[Width
x Depth
x Height; mm]
510x410
x650 600x540x730
Weight [kg] 13 12,3
09.12.2021
DANE TECHNICZNE
Dla zapewnienia długiej i niezawodnej pracy urządzenia
należy dbać o jego prawidłową obsługę oraz konserwację
zgodnie ze wskazówkami zawartymi w tej instrukcji. Dane
techniczne i specykacje zawarte w tej instrukcji obsługi są
aktualne. Producent zastrzega sobie prawo dokonywania
zmian związanych z podwyższeniem jakości.
OBJAŚNIENIE SYMBOLI
1. OGÓLNY OPIS
Instrukcja przeznaczona jest do pomocy w bezpiecznym
i niezawodnym użytkowaniu. Produkt jest zaprojektowany
i wykonany ściśle według wskazań technicznych przy
użyciu najnowszych technologii i komponentów oraz przy
zachowaniu najwyższych standardów jakości.
PRZED PRZYSTĄPIENIEM DO PRACY NALEŻY
DOKŁADNIE PRZECZYTAĆ I ZROZUMIEĆ
NINIEJSZĄ INSTRUKCJĘ.
UWAGA! Ilustracje w niniejszej instrukcji obsługi
mają charakter poglądowy i w niektórych szczegółach
mogą różnić się od rzeczywistego wyglądu produktu.
Instrukcją oryginalną jest niemiecka wersja instrukcji.
Pozostałe wersje językowe są tłumaczeniami z języka
niemieckiego.
UWAGA! Przeczytać wszystkie ostrzeżenia dotyczące
bezpieczeństwa oraz wszystkie instrukcje.
2. BEZPIECZEŃSTWO UŻYTKOWANIA
INSTRUKCJA OBSŁUGI PL
Przed użyciem należy zapoznać się z instrukcją.
UWAGA! lub OSTRZEŻENIE! lub PAMIĘTAJ!
opisująca daną sytuację (ogólny znak
ostrzegawczy).
Założyć okulary ochronne.
Stosować rękawice ochronne.
Stosować obuwie specjalne.
Stosować ochronę głowy i twarzy.
Stosować kombinezon ochronny.
Termin „urządzenie” lub „produkt” w ostrzeżeniach
i w opisie instrukcji odnosi się do ULA.
a) W razie wątpliwości czy produkt działa poprawnie
lub stwierdzenia uszkodzenia należy skontaktować
się z serwisem producenta.
b) Zachować instrukcję użytkowania w celu jej
późniejszego użycia. W razie, gdyby urządzenie miało
zostać przekazane osobom trzecim, to wraz z nim
należy przekazać również instrukcję użytkowania.
c) Elementy opakowania oraz drobne elementy
montażowe należy przechowywać w miejscu
niedostępnym dla dzieci.
d) Urządzenie trzymać z dala od dzieci i zwierząt.
e) Urządzenie nie jest przeznaczone do tego, by
było użytkowane przez osoby (w tym dzieci)
o ograniczonych funkcjach psychicznych,
sensorycznych i umysłowych lub nieposiadające
odpowiedniego doświadczenia i/lub wiedzy, chyba
że są one nadzorowane przez osobę odpowiedzialną
za ich bezpieczeństwo lub otrzymały od niej
wskazówki dotyczące tego, jak należy obsługiwać
urządzenie.
f) Urządzenie mogą obsługiwać osoby sprawne
zycznie, zdolne do jego obsługi i odpowiednio
wyszkolone, które zapoznały się z niniejszą instrukcją
oraz zostały przeszkolone w zakresie bezpieczeństwa
i higieny pracy.
g) Należy używać środków ochrony osobistej
wymaganych przy pracy urządzeniem
wyszczególnionych w punkcie 1 objaśnienia symboli.
Stosowanie odpowiednich, atestowanych środków
ochrony osobistej zmniejsza ryzyko doznania urazu.
h) Urządzenie nie jest zabawką. Dzieci powinny być
pilnowane, aby nie bawiły się urządzeniem.
i) Nie wkładać bez potrzeby rąk do produktu, jeśli
znajdują się w nim pszczoły!
j) Dzieci i osoby postronne nie powinny przebywać
w pobliżu pasieki.
k) Aby zapewnić zaprojektowaną integralność
operacyjną urządzenia, nie należy usuwać
zainstalowanych fabrycznie osłon lub odkręcać śrub.
l) Zabrania się przesuwania, przestawiania i obracania
produktu, w którym znajdują się pszczoły.
m) Zabrania się ingerowania w konstrukcję urządzenia
celem zmiany jego parametrów lub budowy.
n) Trzymać urządzenia z dala od źródeł ognia i ciepła.
o) Zaleca się przestrzegać zasady higieny podczas prac
przy ulu.
p) Przed założeniem pasieki należy sprawdzić
wymagania dotyczące miejsc stacjonowania uli.
q) Należy przechowywać apteczkę pierwszej pomocy
w pobliżu ula.
EN
6
Opis parametru Wartość parametru
Nazwa produktu UL LANGSTROTH
10-RAMKOWY UL DADANT
Model WIE-BK-50 WIE-BK-51
Wymiary
[Szerokość x
Głębokość x
Wysokość; mm]
550x460
x510
540x470
x610
Ciężar [kg] 12 12,5
Nazwa produktu UL 10-RAMKOWY UL PSZCZELI
Model WIE-BK-52 WIE-BK-54
Wymiary
[Szerokość x
Głębokość x
Wysokość; mm]
510x410
x650 600x540x730
Ciężar [kg] 13 12,3
1. bottom board
2, 3, 4, 5. walls (of the bee cocoon hatchery/box)
6. vented inner cover
7. roof
8. exit bridge
WIE-BK-54
ASSEMBLING THE APPLIANCE (applies to all models)
Installation should start from the bottom board and the
bee cocoon hatchery (the lowest part of the hive). As shown
in the drawing above, connect the bottom board and side
walls (1, 2, 3). Joining elements consists in matching the
grooves on the edges of the elements (insert one into the
other) and then gently twist them. The angle between the
walls should be 900. The vented inner cover to be tted is
the vented inner cover with the viewing window. Finally,
install the roof with the attached panels, proceeding in the
same way as when assembling the bee cocoon hatchery/
box.
HIVE DISINFECTION
If the hive is left over from a fallen or relocated family,
carefully scrape the hive inside, sweep away and discard
the debris. The best and most often used method of
disinfecting a hive is to burn it o thoroughly with a gas
burner. If the bee colony has suered severe diseases
(nosemosis, foulbrood), then the frames should doubtless
be burned or buried (along with wax). There is also
a method of cleaning the inside of the hive with a 3%
caustic soda solution. However, after the treatment, rinse
the hive with water with the addition of vinegar or acetic
acid (to neutralize the eect of soda - it will prevent its
crystallization in the hive). There are also chemicals
available on the market for disinfecting beehives - check
their use before applying them.
7
6
5
4
3
2
1
4
5
2
3
8
5
4
3
2
1
6
7
8
9
1. bottom board
2. bee cocoon hatchery
3. queen cell
4. overview window
5. roof
6. front cover
7. frames with honey
8. handle
9. door
DEVICE DESCRIPTION
WIE-BK-50/ WIE-BK-51/ WIE-BK-52
7
09.12.2021
PL
8
3. ZASADY UŻYTKOWANIA
Ule przeznaczone są dla osób planujących założyć pasiekę.
Służą do hodowli pszczół oraz zbioru miodu.
Odpowiedzialność za wszelkie szkody powstałe
w wyniku użytkowania niezgodnego z przeznaczeniem
ponosi użytkownik.
OPIS URZĄDZENIA
WIE-BK-50/ WIE-BK-51/ WIE-BK-52
TECHNICKÉ ÚDAJE
9
Před použitím výrobku se seznamte s návodem.
UPOZORNĚNÍ! nebo VAROVÁNÍ! nebo
PAMATUJTE! popisující danou situaci (všeobecná
výstražná značka).
Používejte ochranné brýle.
Používejte ochranné rukavice.
Používejte speciální obuv.
Používejte ochranu hlavy a obličeje.
Používejte ochranný oděv.
Pojem „zařízení“ nebo „výrobek“ v bezpečnostních
pokynech a návodu se vztahuje na ÚL.
a) Návod k obsluze uschovejte za účelem jeho
pozdějšího použití. V případě předánání zařízení
třetím osobám musí být spolu se zařízením předán
rovněž návod k obsluze.
b) Obalový materiál a drobné montážní prvky
uchovávejte na místě nedostupném pro děti.
c) Zařízení mějte v dostatečné vzdálenosti od dětí
a zvířat.
d) Zařízení není určen k tomu, aby jej používaly osoby
(včetně dětí) s omezenými psychickými, smyslovými
nebo duševními schopnostmi nebo osoby bez
příslušných zkušeností a/nebo znalostí, ledaže
jsou pod dohledem osoby zodpovědné za jejich
bezpečnost nebo od ní obdržely pokyny, jak zařízení
obsluhovat.
e) S výrobkem mohou pracovat pouze fyzicky zdravé
osoby, které jsou schopné ho obsluhovat. Musejí být
náležitě proškolené z hlediska bezpečnosti a ochrany
zdraví při práci a seznámené s tímto návodem.
f) Používejte osobní ochranné pomůcky vyžadované
pro práci se zařízením, specikované v bodě 1
vysvětlením symbolů.
g) Používání vhodných, atestovaných osobních
ochranných prostředků snižuje nebezpečí úrazu.
h) Zařízení není hračka. Dohlížejte na děti, aby si
nehrály se zařízením.
i) Pro zachování navržené mechanické integrity
zařízení neodstraňujte předem namontované kryty
nebo neuvolňujte šrouby.
j) Nezasahujte do zařízení s cílem změnit jeho
parametry nebo konstrukci.
k) Udržujte zařízení mimo zdroje ohně a tepla.
l) Nevkládejte bezdůvodně ruce do výrobku, pokud se
v něm nacházejí včely!
m) Děti a přihlížející by se neměli zdržovat v blízkosti
včelína.
n) Je zakázáno přesouvat, přenášet nebo otáčet
výrobek obsahující včely.
o) Během prací při úlu se doporučuje dodržovat
hygienická pravidla.
p) Před založením včelína je třeba zkontrolovat
požadavky na rozmístění úlů.
q) Uchovávejte lékárničku poblíž úlu.
3. ZÁSADY POUŽÍVÁNÍ
Úly jsou určeny pro lidi, kteří plánují založit včelín. Používají
se k chovu včel a sběru medu.
Odpovědnost za veškeré škody vzniklé v důsledku
použití zařízení v rozporu s určením nese uživatel.
Pro zajištění dlouhého a spolehlivého fungování zařízení
pravidelně provádějte revize a údržbu v souladu s pokyny
uvedenými v tomto návodu. Technické údaje a specikace
uvedené v návodu jsou aktuální. Výrobce si vyhrazuje právo
provádět změny za účelem zvýšení kvality.
VYSVĚTLENÍ SYMBOLŮ
1. VŠEOBECNÝ POPIS
Návod slouží jako nápověda pro bezpečné a spolehlivé
používání výrobku. Výrobek je navržen a vyroben přesně
podle technických údajů za použití nejnovějších technologií
a komponentů a za dodržení nejvyšších jakostních norem.
PŘED ZAHÁJENÍM PRÁCE SI DŮKLADNĚ PŘEČTĚTE
TENTO NÁVOD A UJISTĚTE SE, ŽE JSTE POCHOPILI
VŠECHNY POKYNY.
POZOR! Obrázky v tomto návodu jsou ilustrační.
V některých detailech se od skutečného vzhledu
zařízení mohou lišit.
Originálním návodem je německá verze návodu. Ostatní
jazykové verze jsou překladem z německého jazyka.
2. BEZPEČNOST POUŽÍVÁNÍ
POZNÁMKA! Přečtěte si tento návod včetně všech
bezpečnostních pokynů.
NÁVOD K OBSLUZE CZ
1. dennica
2, 3, 4, 5. ścianki (lęgarni/korpusu)
6. powałka
7. daszek
8. mostek wylotowy
WIE-BK-54
MONTAŻ URZĄDZENIA (dotyczy wszystkich modeli)
Montaż należy zacząć od dennicy i lęgarni (najniższa
część ula). Tak jak pokazano na rysunku powyżej, należy
połączyć ze sobą dennicę i ściany boczne (1, 2, 3). Łączenie
elementów polega na dopasowaniu rowków na krawędziach
elementów (należy wsadzić jeden w drugi), a następnie
skręceniu ich. Pomiędzy ścianami należy zachować kąt
prosty. Kolejnym montowanym elementem jest powałka
wraz z oknem poglądowym. Na końcu należy zamontować
dach z załączonym paneli postępując analogicznie jak
w przypadku montowania lęgarni/korpusu.
DEZYNFEKCJA ULA
Jeśli ul pozostał po spadłej lub przeniesionej rodzinie, należy
go starannie wyskrobać wewnątrz, a zanieczyszczenia zmieść
i wyrzucić. Najlepszym i najbardziej rozpowszechnionym
sposobem na dezynfekcję ula jest jego dokładne opalenie
palnikiem gazowym. Jeśli rodzina pszczela przeszła ciężkie
choroby (nosemoza, zgnilec), to ramki należy absolutnie
spalić lub zakopać (razem z woszczyną). Istnieje też metoda
czyszczenia wnętrza uli 3-procentowym roztworem sody
kaustycznej. Jednak po zabiegu należy wypłukać ul wodą
z dodatkiem octu lub kwasu octowego (zneutralizować
działanie sody – zapobiegnie jej krystalizacji w ulu). Na
rynku dostępne są także środki chemiczne do dezynfekcji
uli – przed ich użyciem należy zapoznać się z ich
zastosowaniem.
7
6
5
4
3
2
1
4
5
2
3
8
5
4
3
2
1
6
7
8
9
1. dennica
2. lęgarnia
3. miejsce królowej
4. okno poglądowe
5. daszek
6. przednia osłonka
7. ramki z miodem
8. uchwyt
9. drzwiczki
Popis
parametru Hodnota parametru
Název výrobku RÁMOVÝ VČELÍ
ÚL
VČELÍ ÚL
DADANT
Model WIE-BK-50 WIE-BK-51
Rozměry [Šířka x
Hloubka
x Výška; mm]
550x460
x510
540x470
x610
Hmotnost [kg] 12 12,5
Název výrobku RÁMOVÝ VČELÍ
ÚL VČELÍ ÚL
Model WIE-BK-52 WIE-BK-54
Rozměry [Šířka x
Hloubka
x Výška; mm]
510x410
x650 600x540x730
Hmotnost [kg] 13 12,3
09.12.2021
CZ
10
DÉTAILS TECHNIQUES
11
Respectez les consignes du manuel.
ATTENTION! , AVERTISSEMENT ! et REMARQUE
attirent l‘attention sur des circonstances
spéciques (symboles d‘avertissement généraux).
Portez une protection oculaire.
Portez des protections pour les mains.
Portez des chaussures de sécurité.
Portez un équipement de protection de la tête
et du visage.
Portez des vêtements de protection.
Les notions d‘« appareil », de « machine » et de « produit
» gurant dans les descriptions et les consignes du manuel
se rapportent à/au RUCHE.
a) Conservez le manuel d’utilisation an de pouvoir
le consulter ultérieurement. En cas de cession de
l’appareil à un tiers, l’appareil doit impérativement
être accompagné du manuel d’utilisation.
b) Tenez les éléments d’emballage et les pièces de
xation de petit format hors de portée des enfants.
c) Tenez l’appareil hors de portée des enfants et des
animaux.
d) Cet appareil n‘est pas conçu pour être utilisé
par les personnes dont les facultés physiques,
sensorielles ou mentales sont limitées (enfants y
compris), ni par des personnes sans expérience
ou connaissances adéquates, à moins qu‘elles se
trouvent sous la supervision et la protection d‘une
personne responsable ou qu‘une telle personne leur
ait transmis des consignes appropriées en lien avec
l‘utilisation de l’appareil.
e) Seules des personnes aptes physiquement à se servir
de l‘appareil, qui ont suivi une formation appropriée
et ont lu ce manuel d‘utilisation peuvent utiliser le
produit. En outre, ces personnes doivent connaître
les exigences liées à la santé et à la sécurité au travail.
f) Utilisez l‘équipement de protection individuel
approprié pour l‘utilisation de l‘appareil,
conformément aux indications faites dans le
tableau des symboles, au point 1. L‘utilisation de
l‘équipement de protection individuel adéquat
certié réduit le risque de blessures.
g) Cet appareil n‘est pas un jouet. Les enfants doivent
demeurer sous la supervision d’un adulte an qu’ils
ne jouent pas avec l’appareil.
h) Pour garantir l‘intégrité opérationnelle de l‘appareil,
les couvercles et les vis posés à l‘usine ne doivent pas
être retirés.
i) Il est défendu de modier l’appareil pour en changer
les paramètres ou la construction.
j) Gardez le produit à l’écart des sources de feu et de
chaleur.
k) En cas de doute quant au bon fonctionnement de
l‘appareil ou si vous constatez des dommages sur
celui-ci, veuillez communiquer avec le service client
du fabricant.
l) Ne mettez pas vos mains dans le produit si des
abeilles sont à l‘intérieur !
m) Tenir les enfants et les personnes non autorisées à
l‘écart du rucher.
n) Il est interdit de déplacer, réarranger ou faire pivoter
le produit avec les abeilles à l‘intérieur.
o) Il est recommandé de respecter les règles d‘hygiène
lors des travaux sur la ruche.
p) Vériez les exigences relatives à l‘emplacement des
ruches avant d‘installer un rucher.
q) Gardez une trousse de premiers soins près de la
ruche.
An de garantir le fonctionnement able et durable de
l‘appareil, il est nécessaire d‘utiliser et d‘entretenir ce
dernier conformément aux consignes gurant dans le
présent manuel. Les caractéristiques et les spécications
contenues dans ce document sont à jour. Le fabricant se
réserve le droit de procéder à des modications à des ns
d’amélioration du produit.
SYMBOLES
1. DESCRIPTION GÉNÉRALE
L'objectif du présent manuel est de favoriser une utilisation
sécuritaire et able de l'appareil. Le produit a été conçu
et fabriqué en respectant étroitement les directives
techniques applicables et en utilisant les technologies et
composants les plus modernes. Il est conforme aux normes
de qualité les plus élevées.
LISEZ ATTENTIVEMENT LE PRÉSENT MANUEL ET
ASSUREZ-VOUS DE BIEN LE COMPRENDRE AVANT
LA PREMIÈRE UTILISATION.
REMARQUE! Les illustrations contenues dans le
présent manuel sont fournies à titre explicatif. Votre
appareil peut ne pas être identique.
La version originale de ce manuel a été rédigée en
allemand. Toutes les autres versions sont des traductions
de l‘allemand.
2. CONSIGNES DE SÉCURITÉ
ATTENTION! Veuillez lire attentivement toutes les
consignes de sécurité et toutes les instructions.
MANUEL D‘UTILISATION FR
1. dno
2, 3, 4, 5. stěna (líhně/nástavky)
6. víko
7. stříška
8. odletový můstek
WIE-BK-54
MONTÁŽ ZAŘÍZENÍ (platí pro všechny modely)
Montáž začněte od dna a líhně (nejnižší část úlu). Jak je
znázorněno na obrázku výše, spojte dno a boční stěny
(1, 2, 3). Spojování dílů spočívá v přizpůsobení drážek na
okrajích dílů (vložení jedné do druhé) a jejich následném
sešroubování. Mezi stěnami je třeba udržovat pravý úhel.
Dalším montovaným dílem je víko s náhledovým oknem.
Nakonec namontujte střechu s připojeným panelem stejně
jako v případě líhně/nástavky.
DEZINFEKCE ÚLU
Pokud úl zůstal po vymřelém nebo přeneseném včelstvu,
je třeba jej uvnitř důkladně seškrábnout a nečistoty zamést
a vyhodit. Nejlepším a nejběžnějším způsobem dezinfekce
úlu je jeho důkladné opálení plynovým hořákem. Pokud
včelstvo utrpělo těžké nemoci (nosemóza, mor), je třeba
rámy úplně spálit nebo zakopat (spolu s voskem). Existuje
také metoda čištění vnitřku úlů 3% roztokem hydroxidu
sodného. Po ošetření však úl opláchněte vodou s
přídavkem octa nebo kyseliny octové (neutralizujte účinek
sody - zabráníte její krystalizaci v úlu). Na trhu jsou také
dostupné chemikálie pro dezinfekci úlů - před jejich užitím
se seznamte s jejich použitím.
7
6
5
4
3
2
1
4
5
2
3
8
5
4
3
2
1
6
7
8
9
1. dno
2. líhně
3. místo královny
4. náhledové okno
5. stříška
6. přední kryt
7. rámy s medem
8. rukojeť
9. dvířka
Description
des paramètres Valeur des paramètres
Nom
du produit
CADRE
LANGSTRO-
THPOUR RUCHE
RUCHE DADANT
Modèle WIE-BK-50 WIE-BK-51
Dimensions
[Largeur
x Profondeur
x Hauteur; mm]
550x460
x510
540x470
x610
Poids [kg] 12 12,5
Nom
du produit
CADRE
LANGSTRO-
THPOUR RUCHE
RUCHE
Modèle WIE-BK-52 WIE-BK-54
Dimensions
[Largeur
x Profondeur
x Hauteur; mm]
510x410
x650 600x540x730
Poids [kg] 13 12,3
POPIS ZAŘÍZENÍ
WIE-BK-50/ WIE-BK-51/ WIE-BK-52
09.12.2021
FR
12
3. CONDITIONS D’UTILISATION
Les ruches sont conçues pour les personnes qui envisagent
d‘installer un rucher. Ils sont utilisés pour l‘élevage des
abeilles et la récolte du miel.
L’utilisateur porte l’entière responsabilité pour
l’ensemble des dommages attribuables à un usage
inapproprié.
DESCRIPTION DE L‘APPAREIL
WIE-BK-50/ WIE-BK-51/ WIE-BK-52
DATI TECNICI
13
Leggere attentamente le istruzioni.
ATTENZIONE o AVVERTENZA! o NOTA!
per richiamare l‘attenzione su determinate
circostanze (indicazioni generali di avvertenza).
Indossare una protezione per gli occhi.
Utilizzare dei guanti protettivi.
Indossare delle scarpe antinfortunistiche.
Utilizzare una protezione per la testa e il viso.
Utilizzare indumenti protettivi.
Il termine „apparecchio“ o „prodotto“ nelle avvertenze e
descrizioni contenute nel manuale si riferisce alla/al ARNIA.
a) Conservare le istruzioni d‘uso per uso futuro. Nel
caso in cui il dispositivo venisse adato a terzi,
consegnare anche queste istruzioni.
b) Tenere gli elementi di imballaggio e le piccole parti
di assemblaggio fuori dalla portata dei bambini.
c) Tenere il dispositivo fuori dalla portata dei bambini e
degli animali.
d) Questo dispositivo non è adatto per essere utilizzato
da persone, bambini compresi, con ridotte capacità
siche, sensoriali o mentali, così come da privi di
adeguata esperienza e/o conoscenze. Si fa eccezione
per coloro i quali siano sorvegliati da un responsabile
qualicato che si prenda carico della loro sicurezza e
abbia ricevuto istruzioni dettagliate al riguardo.
e) Il dispositivo può essere usato solo da persone
con capacità siche adeguate che sono state
adeguatamente istruite e che hanno letto queste
istruzioni, le hanno capite e hanno appreso le norme
di sicurezza e di protezione sul posto di lavoro.
f) Utilizzare dispositivi di protezione individuale
adeguati quando si utilizza il dispositivo,
conformemente alle speciche indicate nella
spiegazione dei simboli al punto 1. L‘uso di dispositivi
di protezione individuale adeguati e certicati riduce
il rischio di lesioni.
g) Questo dispositivo non è un giocattolo. I bambini
devono essere sorvegliati anché non giochino con
il prodotto.
h) Per garantire l‘integrità di funzionamento
dell‘apparecchio, i coperchi o le viti installati in
fabbrica non devono essere rimossi.
i) È vietato spostare, riposizionare o ruotare il prodotto
con le api.
j) È vietato intervenire sulla costruzione del dispositivo
per modicare i suoi parametri o la sua costruzione.
k) Tenere dispositivi lontano da fonti di fuoco e calore.
l) In presenza di dubbi sul corretto funzionamento
del dispositivo o se ci sono dei danni, rivolgersi al
servizio clienti del produttore.
m) Non mettere senza bisogno le mani nel prodotto se
ci sono delle api all‘interno!
n) Tenere i bambini e gli astanti lontani dall‘apiario.
o) Si raccomanda di seguire le regole di igiene quando
si lavora vicino all’arnia.
p) Prima di allestire un apiario, controlla i requisiti per il
luogo in cui stazionare le arnie.
q) Tenere un kit di pronto soccorso vicino all‘arnia.
3. CONDIZIONI D‘USO
Le arnie sono progettate per le persone che hanno
intenzione di creare un apiario. Sono utilizzati per
l‘allevamento delle api e la raccolta del miele.
L‘operatore è responsabile di tutti i danni derivanti da
un uso improprio.
Per un funzionamento duraturo e adabile del dispositivo
assicurarsi di maneggiarlo e curarne la manutenzione
secondo le disposizioni presentate in questo manuale.
I dati e le speciche tecniche indicati in questo manuale
sono attuali. Il fornitore si riserva il diritto di apportare
delle migliorie nel contesto del miglioramento dei propri
prodotti.
SPIEGAZIONE DEI SIMBOLI
1. DESCRIZIONE GENERALE
Queste istruzioni sono intese come ausilio per un uso sicuro
e adabile. Il prodotto è stato rigorosamente progettato
e realizzato secondo le direttive tecniche e l'utilizzo delle
tecnologie e componenti più moderne e seguendo gli
standard di qualità più elevati.
PRIMA DELLA MESSA IN FUNZIONE È NECESSARIO
AVER LETTO E COMPRESO LE ISTRUZIONI D'USO.
AVVERTENZA! Le immagini in questo manuale sono
puramente dimostrative per cui i singoli dettagli
possono dierire dall'aspetto reale dell'apparecchio.
Il manuale originale è stato scritto in tedesco. Le versioni in
altre lingue sono traduzioni dalla lingua tedesca.
2. SICUREZZA NELL'IMPIEGO
ATTENZIONE! Leggere le istruzioni d‘uso e di
sicurezza.
ISTRUZIONI PER L’USO IT
1. plateau
2, 3, 4, 5. mur (couveuse/corps)
6. abri
7. auvent
8. pont de sortie
WIE-BK-54
MONTAGE DE L’APPAREIL (s‘applique à tous les modèles)
Commencez l‘assemblage à partir du plateau inférieur
et de la couveuse (la partie la plus basse de la ruche).
Comme indiqué sur l‘image ci-dessus, connectez les parois
inférieures et latérales ensemble (1, 2, 3). L‘assemblage
des éléments consiste à faire correspondre les rainures
sur les bords des éléments (mettre l‘un dans l‘autre) puis à
les visser. Gardez un angle droit entre les murs. L‘élément
suivant à monter est l’abri avec la fenêtre d‘observation. À
la n, le toit avec les panneaux attachés doit être monté
en suivant la même procédure que pour le montage de la
couveuse/corps.
DÉSINFECTION DE LA RUCHE
Si la ruche provient d‘une colonie tombée ou déplacée,
il faut en racler soigneusement l‘intérieur, balayer les
débris et les jeter. La meilleure façon, et la plus courante,
de désinfecter la ruche est de la brûler complètement
avec un brûleur à gaz. Si la colonie d‘abeilles a subi des
maladies graves (nosémose, pourriture), les cadres doivent
absolument être brûlés ou enterrés (avec la cire). Il existe
également une méthode consistant à nettoyer l‘intérieur
des ruches avec une solution de soude caustique à 3 %.
Cependant, après le traitement, la ruche doit être rincée
avec de l‘eau et du vinaigre ou de l‘acide acétique (pour
neutraliser l‘eet de la soude – pour éviter qu‘elle ne se
cristallise dans la ruche). Des produits chimiques pour
désinfecter les ruches sont également disponibles sur le
marché. Avant de les utiliser, il convient de se renseigner
sur leur utilisation.
7
6
5
4
3
2
1
4
5
2
3
8
5
4
3
2
1
6
7
8
9
1. plateau
2. couveuse
3. place de la reine
4. fenêtre d‘observation
5. auvent
6. couverture avant
7. cadres avec du miel
8. poignée
9. petite porte
Parametri
- Descrizione Parametri - Valore
Nome
del prodotto
TELAIO MOBILE
PER ARNIA ARNIA
Modello WIE-
BK-50 WIE-BK-51
Dimensioni
[Larghezza
x Profondità
x Altezza; mm]
550x460
x510
540x470
x610
Peso [kg] 12 12,5
Nome
del prodotto
TELAIO MOBILE
PER ARNIA ARNIA
Modello WIE-BK-52 WIE-BK-54
Dimensioni
[Larghezza
x Profondità
x Altezza; mm]
510x410
x650 600x540x730
Peso [kg] 13 12,3
09.12.2021
IT
14
DESCRIZIONE DEL DISPOSITIVO
WIE-BK-50/ WIE-BK-51/ WIE-BK-52
DATOS TÉCNICOS
15
Respetar las instrucciones de uso.
¡ATENCIÓN!, ¡ADVERTENCIA! o ¡NOTA! para
llamar la atención sobre ciertas circunstancias
(señal general de advertencia).
Utilizar protección para los ojos.
Utilizar guantes de protección.
Utilizar zapatos de seguridad.
Utilizar protección para la cabeza y protección
facial.
Utilizar ropa de protección.
Conceptos como „aparato“ o „producto“ en las advertencias
y descripciones de este manual se reeren a COLMENA.
a) Conserve el manual de instrucciones para futuras
consultas. Este manual debe ser entregado a toda
persona que vaya a hacer uso del dispositivo.
b) Los elementos de embalaje y pequeñas piezas de
montaje deben mantenerse alejados del alcance de
los niños.
c) Mantenga el equipo alejado de niños y animales.
d) Este aparato no debe ser utilizado por personas
(entre ellas niños) con capacidades físicas, sensoriales
o mentales reducidas, o con falta de la experiencia
y/o los conocimientos necesarios, a menos que
sean supervisadas por una persona responsable de
su seguridad o que hayan recibido de esta persona
responsable las indicaciones pertinentes en relación
al manejo del aparato.
e) El producto solamente puede utilizarse por personas
con la forma física adecuada para el trabajo, con
el equipo de protección personal apropiado, que
hayan leído atentamente y comprendido este
manual de instrucciones y que cumplan con la
normativa en materia de seguridad y salud para el
trabajo correspondiente.
f) Utilice el equipo de protección personal necesario
para el empleo de este dispositivo, de acuerdo con
las especicaciones del punto 1 de las explicaciones
de los símbolos. El uso de un equipo de protección
personal apropiado y certicado reduce el riesgo de
lesiones.
g) Este aparato no es un juguete. Debe controlar que
los niños no jueguen con él.
h) A n de asegurar la integridad operativa del
dispositivo, no se deben retirar las cubiertas o los
tornillos instalados de fábrica.
i) Está prohibido mover, cambiar de sitio y girar el
producto si hay abejas dentro.
j) Se prohíbe realizar cambios en la construcción del
dispositivo para modicar sus parámetros o diseño.
k) Mantenga el dispositivo alejado de fuentes de fuego
o calor.
l) En caso de duda sobre si el producto funciona
correctamente o si detectara daños, póngase en
contacto con el servicio de atención al cliente del
fabricante.
m) ¡No introduzca las manos en el producto sin
necesidad si hay abejas dentro!
n) Los niños y las personas ajenas no deben acercarse
a la colmena.
o) Recomendamos seguir las normas de higiene al
trabajar con el panal.
p) Antes de formar la colmena, compruebe los
requisitos sobre los lugares de estacionamiento de
los panales.
q) Guarde un botiquín de primeros auxilios cerca del
panal.
Para garantizar un funcionamiento duradero y able del
aparato, el manejo y mantenimiento deben llevarse a cabo
de acuerdo con las instrucciones de este manual. Los
datos técnicos y las especicaciones de este manual están
actualizados. El fabricante se reserva el derecho de realizar
modicaciones para mejorar la calidad.
EXPLICACIÓN DE LOS SÍMBOLOS
1. DESCRIPCIÓN GENERAL
Este manual ha sido elaborado para favorecer un empleo
seguro y able. El producto ha sido estrictamente diseñado
y fabricado conforme a las especicaciones técnicas y para
ello se han utilizado las últimas tecnologías y componentes,
manteniendo los más altos estándares de calidad.
ANTES DE LA PUESTA EN FUNCIONAMIENTO,
LEA LAS INSTRUCCIONES MINUCIOSAMENTE
Y ASEGÚRESE DE COMPRENDERLAS.
¡ADVERTENCIA! En este manual se incluyen fotos
ilustrativas que podrían no coincidir exactamente con
la apariencia real del dispositivo.
El texto en alemán corresponde a la versión original. Los
textos en otras lenguas son traducciones del original en
alemán.
2. SEGURIDAD
¡ATENCIÓN! Lea todas las instrucciones e
indicaciones de seguridad.
MANUAL DE INSTRUCCIONES ES
1. fondo
2, 3, 4, 5. parete (della camera di allevamento/del corpo)
6. tettuccio
7. tetto
8. ponte di uscita
WIE-BK-54
MONTAGGIO DEL DISPOSITIVO
(RIGUARDA TUTTI I MODELLI)
Iniziare il montaggio dal fondo e dalla camera di
allevamento (la parte più bassa dell‘arnia). Come mostrato
nell‘immagine qui sopra, unite le pareti inferiore e laterale
(1, 2, 3). L‘unione degli elementi consiste nel far combaciare
le scanalature sui bordi degli elementi (mettere uno
nell‘altro) e poi avvitarli insieme. Mantenere un angolo
retto tra le pareti. Il prossimo elemento da montare è il
tettuccio con la nestra di visualizzazione. Alla ne il tetto
con i pannelli attaccati deve essere montato seguendo
la stessa procedura come nel caso del montaggio della
camera di allevamento/corpo.
DISINFEZIONE DELL‘ARNIA
Se l‘arnia è rimasta da una colonia morta o trasferita,
dovrebbe essere accuratamente raschiato all‘interno
e i detriti spazzati e gettati via. Il modo migliore e più
comune per disinfettare l‘alveare è quello di bruciarlo
completamente con un bruciatore a gas. Se la colonia di api
ha subito gravi malattie (nosema, marciume), allora i telai
devono essere assolutamente bruciati o sepolti (insieme
alla cera). Esiste anche un metodo per pulire l‘interno delle
arnie con una soluzione al 3% di soda caustica. Tuttavia,
dopo il trattamento, l‘alveare deve essere sciacquato con
acqua e aceto o acido acetico (per neutralizzare l‘eetto
della soda - per evitare che si cristallizzi nell‘alveare). Sul
mercato esistono anche prodotti chimici per disinfettare gli
alveari - prima di usarli è importante sapere a cosa servono
7
6
5
4
3
2
1
4
5
2
3
8
5
4
3
2
1
6
7
8
9
1. fondo
2. della camera di allevamento
3. posto della regina
4. nestra di visualizzazione
5. tetto
6. copertura anteriore
7. telaini con miele
8. maniglia
9. la porta
Parámetro
- Descripción Parámetro - Valor
Nombre
del producto
COLMENA DE
MARCO
COLMENA
DADANT
Modelo WIE-
BK-50 WIE-BK-51
Dimensiones
[Ancho
x Profundidad
x Altura; mm]
550x460
x510
540x470
x610
Peso [kg] 12 12,5
Nombre
del producto
COLMENA DE
MARCO COLMENA
Modelo WIE-BK-52 WIE-BK-54
Dimensiones
[Ancho
x Profundidad
x Altura; mm]
510x410
x650 600x540x730
Peso [kg] 13 12,3
09.12.2021
NOTES/NOTIZEN
17
ES
16
3. INSTRUCCIONES DE USO
Los panales están destinados para las personas que
planeen formar una colmena. Sirven para criar abejas y
recoger miel.
El usuario es responsable de los daños derivados de un
uso inadecuado del aparato.
DESCRIPCIÓN DEL APARATO
WIE-BK-50/ WIE-BK-51/ WIE-BK-52
1. tabla inferior
2, 3, 4, 5. pared (criadero/cuerpo)
6. cubierta interior ventilada
7. tapa superior
8. puente de salida
WIE-BK-54
MONTAJE DE LA MÁQUINA (en todos los modelos)
Empiece la instalación por la tabla inferior y el criadero
(la parte más baja del panal). Como se muestra en la
ilustración anterior; una la tabla inferior a las paredes
laterales (1, 2, 3). Para enganchar los elementos, ajuste
las hendiduras a los bordes de los elementos (introduzca
uno dentro de otro), y después apriételos. Mantenga un
ángulo recto entre las paredes. A continuación, instale la
cubierta interior ventilada con la ventana de inspección. Al
nal, instale la tapa superior con el panel adjunto de forma
análoga al montaje del criadero/cuerpo.
DESINFECCIÓN DEL PANAL
Si el panal ha quedado vacío después de que una
colonia muriera o abandonara el lugar, limpie su interior
minuciosamente, barra la suciedad y tírela. El método de
desinfección del panal más común y efectivo consiste en
quemarlo con un quemador de gas. Si la colonia de abejas
ha sufrido una enfermedad grave (nosemosis, loque), es
absolutamente necesario quemar o enterrar los marcos
(junto con la cera). También existe el método de limpiar el
interior de los panales con solución de soda cáustica al 3
%. Sin embargo, después de la limpieza se debe aclarar el
panal con agua y vinagre o ácido acético (para neutralizar
la actividad de la soda e impedir que se cristalice en el
panal). También hay productos químicos para desinfectar
panales, pero antes de utilizarlos lea detenidamente sus
instrucciones de uso.
7
6
5
4
3
2
1
4
5
2
3
8
5
4
3
2
1
6
7
8
9
1. tabla inferior
2. criadero
3. sitio de la reina
4. ventana de inspección
5. tapa superior
6. cubierta delantera
7. marcos con miel
8. mango
9. puertecilla
09.12.2021
NOTES/NOTIZEN
19
NOTES/NOTIZEN
18
09.12.2021
expondo.com
UNSER HAUPTZIEL IST DIE ZUFRIEDENHEIT UNSERER KUNDEN!
BEI FRAGEN KONTAKTIEREN SIE UNS BITTE UNTER:
OUR CUSTOMERS‘ SATISFACTION IS OUR MAIN GOAL!
PLEASE CONTACT US WITH QUESTIONS AT:
NASZYM GŁÓWNYM CELEM JEST SATYSFAKCJA KLIENTÓW
W PRZYPADKU PYTAŃ PROSIMY O KONTAKT Z PRZEDSTAWICIELEM
W DANYM KRAJU:
NAŠÍM HLAVNÍM CÍLEM JE SPOKOJENOST NAŠICH ZÁKAZNÍKŮ! V PŘÍPADĚ
OTÁZEK NÁS PROSÍM KONTAKTUJTE NA:
NOTRE BUT PREMIER EST VOTRE SATISFACTION!
POUR TOUTE QUESTION, CONTACTEZ NOUS SUR:
NUESTRO OBJETIVO PRINCIPAL ES LA SATISFACCIÓN DE NUESTROS CLIENTES!
SI TIENE PREGUNTAS, POR FAVOR PÓNGANSE EN CONTACTO CON NOSTROS EN:
I NOSTRO PRINCIPALE OBIETTIVO È LA SODDISFAZIONE DEI NOSTRI CLIENTI!
PER EVENTUALI DOMANDE PER FAVORE, CI CONTATTINO SOTTO:
CONTACT
expondo Polska sp. z o.o. sp. k.
ul. Nowy Kisielin-Innowacyjna 7
66-002 Zielona Góra | Poland, EU
e-mail: [email protected]

This manual suits for next models

1
Other Wiesenfield Farm Equipment manuals

Wiesenfield WIE-CM-02 User manual

Wiesenfield

Wiesenfield WIE-CM-02 User manual

Wiesenfield WIE-CCD-600 User manual

Wiesenfield

Wiesenfield WIE-CCD-600 User manual

Wiesenfield WI-CF-200 User manual

Wiesenfield

Wiesenfield WI-CF-200 User manual

Wiesenfield WIHE-03201 User manual

Wiesenfield

Wiesenfield WIHE-03201 User manual

Wiesenfield WI-CF-150 User manual

Wiesenfield

Wiesenfield WI-CF-150 User manual

Wiesenfield WIE-CLI-200 User manual

Wiesenfield

Wiesenfield WIE-CLI-200 User manual

Wiesenfield WI-CF-100 User manual

Wiesenfield

Wiesenfield WI-CF-100 User manual

Wiesenfield WIBS-002 User manual

Wiesenfield

Wiesenfield WIBS-002 User manual

Wiesenfield WIE-AT-300 User manual

Wiesenfield

Wiesenfield WIE-AT-300 User manual

Wiesenfield WIE-CLI-100 User manual

Wiesenfield

Wiesenfield WIE-CLI-100 User manual

Wiesenfield WIE-PM-2000 User manual

Wiesenfield

Wiesenfield WIE-PM-2000 User manual

Wiesenfield WIE-FE-100 User manual

Wiesenfield

Wiesenfield WIE-FE-100 User manual

Wiesenfield WIE-CCD-100 User manual

Wiesenfield

Wiesenfield WIE-CCD-100 User manual

Wiesenfield WIBS-001 User manual

Wiesenfield

Wiesenfield WIBS-001 User manual

Wiesenfield WI-CF-200 User manual

Wiesenfield

Wiesenfield WI-CF-200 User manual

Wiesenfield WIE-PM-2500 User manual

Wiesenfield

Wiesenfield WIE-PM-2500 User manual

Wiesenfield WIE-BK-49 User manual

Wiesenfield

Wiesenfield WIE-BK-49 User manual

Wiesenfield WIE-CNB-240 User manual

Wiesenfield

Wiesenfield WIE-CNB-240 User manual

Wiesenfield WIE-PM-1500 User manual

Wiesenfield

Wiesenfield WIE-PM-1500 User manual

Wiesenfield WIHE-04201 User manual

Wiesenfield

Wiesenfield WIHE-04201 User manual

Wiesenfield WIE-PPS-50 User manual

Wiesenfield

Wiesenfield WIE-PPS-50 User manual

Wiesenfield WI-CF-100 User manual

Wiesenfield

Wiesenfield WI-CF-100 User manual

Wiesenfield WIE-CS-70 User manual

Wiesenfield

Wiesenfield WIE-CS-70 User manual

Wiesenfield WIE-CCD-600 User manual

Wiesenfield

Wiesenfield WIE-CCD-600 User manual

Popular Farm Equipment manuals by other brands

Koyker FLEXSTOR 1055 owner's manual

Koyker

Koyker FLEXSTOR 1055 owner's manual

HighLine Bale Pro CFR650 Operator's manual

HighLine

HighLine Bale Pro CFR650 Operator's manual

AGCO 1800 Series Troubleshooting

AGCO

AGCO 1800 Series Troubleshooting

RHINO RHINO 2409 Assembly manual

RHINO

RHINO RHINO 2409 Assembly manual

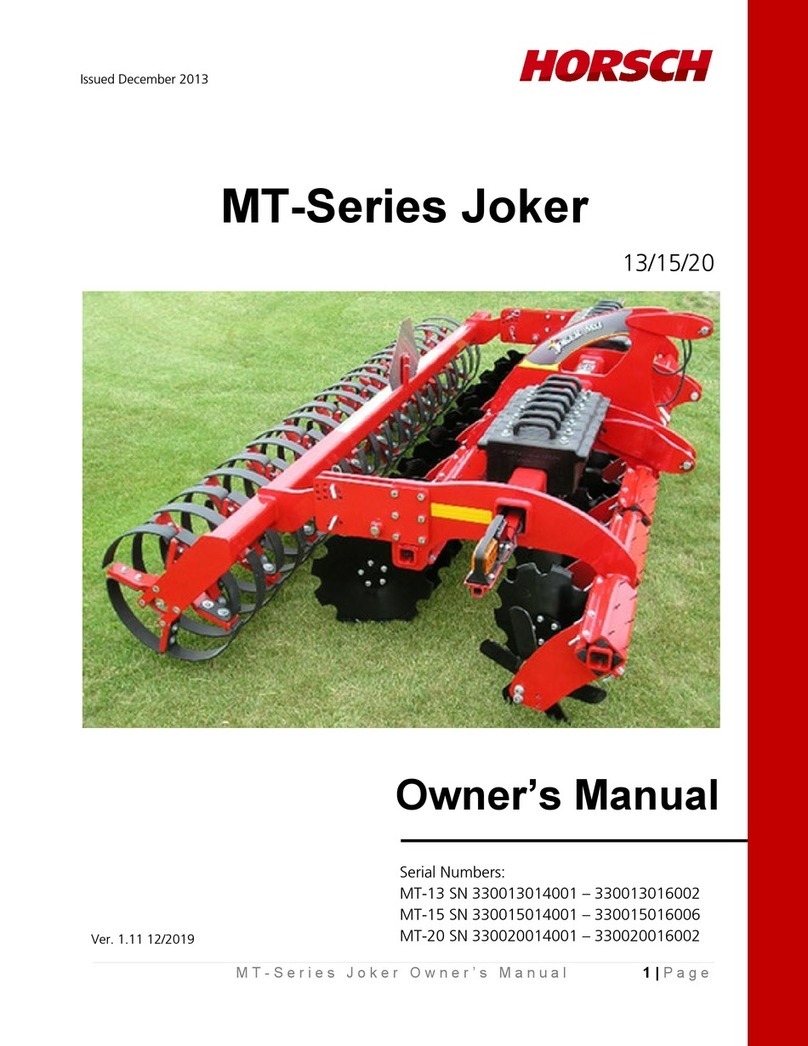
horsch Joker MT-Series owner's manual

horsch

horsch Joker MT-Series owner's manual

Norwest Pivot track filler owner's manual

Norwest

Norwest Pivot track filler owner's manual

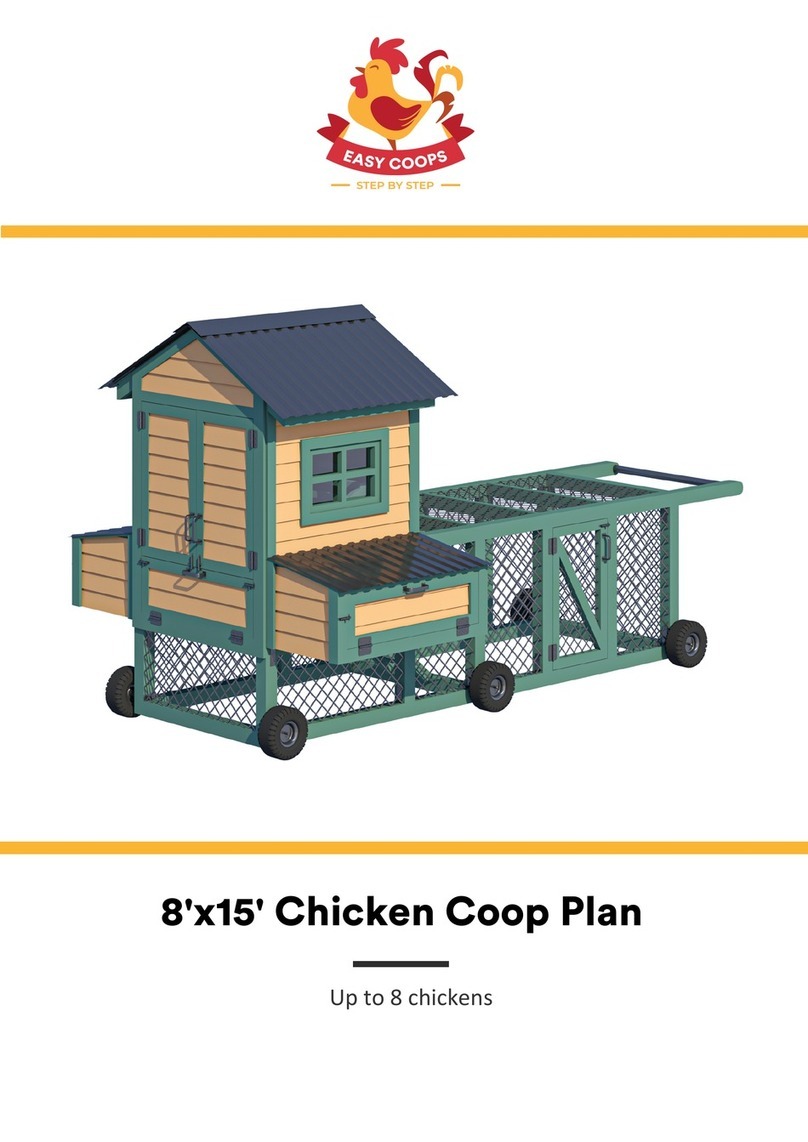
EASY COOPS Chicken Coop Plan 8x15 Assembly instructions

EASY COOPS

EASY COOPS Chicken Coop Plan 8x15 Assembly instructions

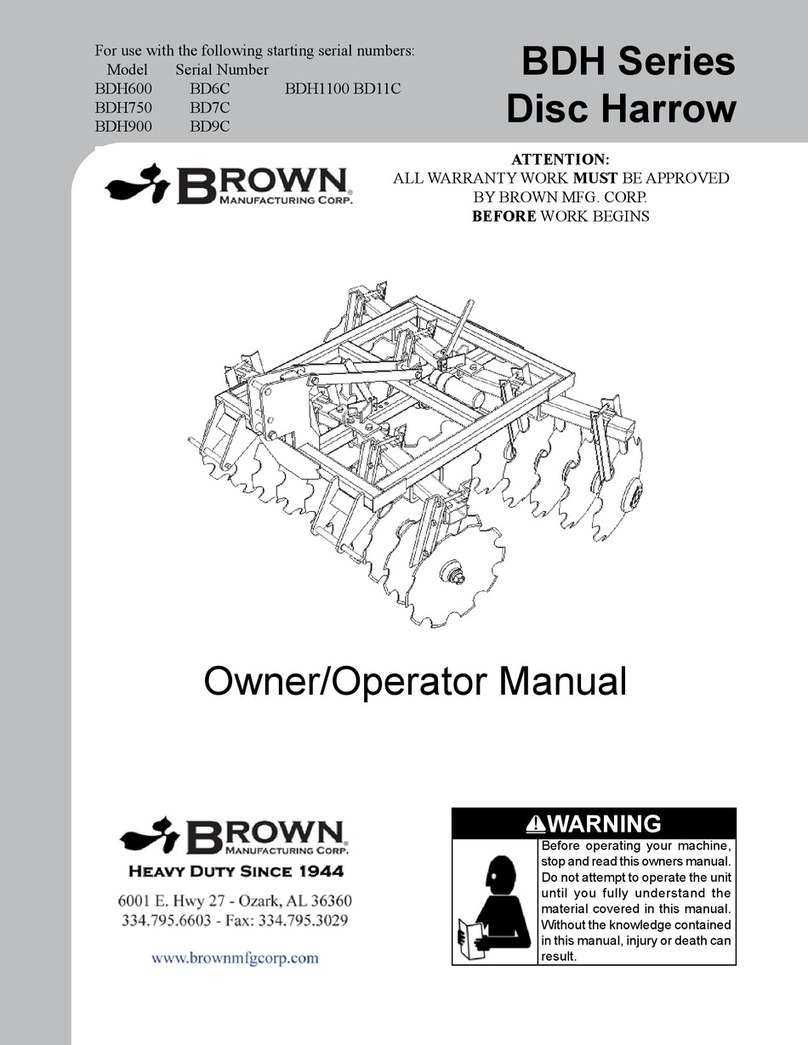
BROWN BDH Series Owner's/operator's manual

BROWN

BROWN BDH Series Owner's/operator's manual

GSi Sweep II Series owner's manual

GSi

GSi Sweep II Series owner's manual

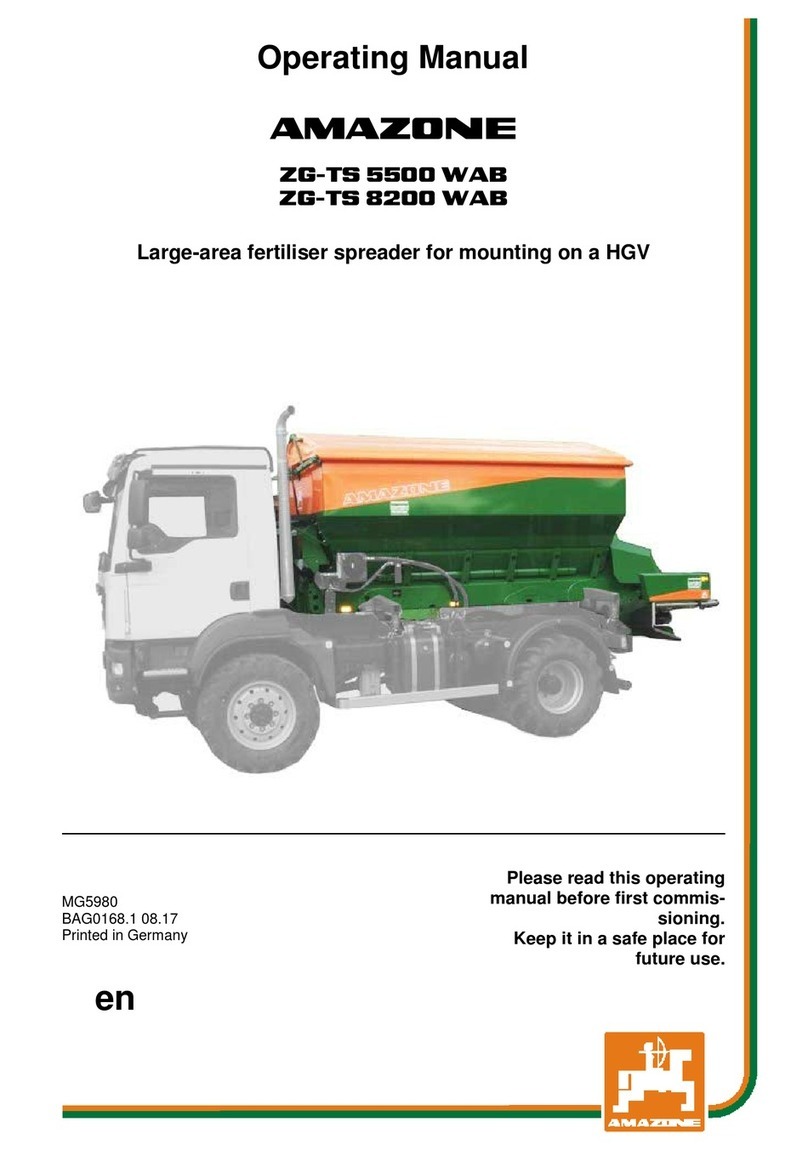
Amazone ZG-TS 5500 WAB operating manual

Amazone

Amazone ZG-TS 5500 WAB operating manual

PRONAR ZKP801 Operator's manual

PRONAR

PRONAR ZKP801 Operator's manual

Cub Cadet 190-004 Operator's manual

Cub Cadet

Cub Cadet 190-004 Operator's manual

GEA AutoSelect 3000 Original instructions

GEA

GEA AutoSelect 3000 Original instructions

Kverneland CLG-II-CLC TINES operating manual

Kverneland

Kverneland CLG-II-CLC TINES operating manual

Poettinger ALPINTOP 300 U Operator's manual

Poettinger

Poettinger ALPINTOP 300 U Operator's manual

CAMPAGNOLA STARBERRY MD2 Use and maintenance manual

CAMPAGNOLA

CAMPAGNOLA STARBERRY MD2 Use and maintenance manual

AGCO FENDT 9300R Operator's manual

AGCO

AGCO FENDT 9300R Operator's manual

Kerbl CowCleaner operating instructions

Kerbl

Kerbl CowCleaner operating instructions

manuals.online logo
manuals.online logoBrands
  • About & Mission
  • Contact us
  • Privacy Policy
  • Terms and Conditions

Copyright 2025 Manuals.Online. All Rights Reserved.