manuals.online logo
Brands
  1. Home
  2. •
  3. Brands
  4. •
  5. WilTec
  6. •
  7. Accessories
  8. •
  9. WilTec 52016 User manual

WilTec 52016 User manual

Operation Manual
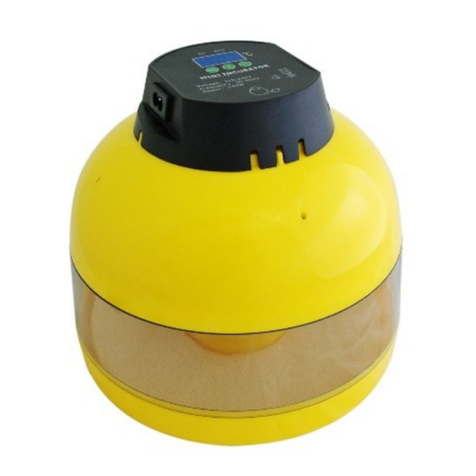
Incubator for 12 Eggs
52016
Illustration similar, may vary depending on model
Please read and follow the operating instructions and safety information prior to initial operation.
Technical changes reserved!
Illustrations, functional steps and technical data may deviate insignificantly due to continuous further
developments.
© by WilTec Wildanger Technik GmbH Item 52016 Page 2
http://www.WilTec.de
http://www.aoyue.eu 10 2021-1
http://www.teichtip.de
The information contained in this document may alter at any time without prior notice. No part of this
document may be copied or otherwise duplicated without prior written consent. All rights reserved.
WilTec Wildanger Technik GmbH cannot be held liable for any possible mistakes in this operating man-
ual, nor in the diagrams and illustrations shown.
Although WilTec Wildanger Technik GmbH has made every possible effort to ensure that this operating
manual is complete, accurate and up-to-date, errors cannot be ruled out entirely.
If you have found an error or wish to suggest an improvement, we look forward to hearing from you.
Send us an e-mail to:
[email protected]
or use our contact form:
https://www.wiltec.de/contacts/
The most recent version of this manual in several languages can be found in our online shop:
https://www.wiltec.de/docsearch
Our postal address is:
WilTec Wildanger Technik GmbH
Königsbenden 12
52249 Eschweiler Germany
Do you wish to collect your goods? Our address for collection is:
WilTec Wildanger Technik GmbH
Königsbenden 28
52249 Eschweiler Germany
In order to shorten the waiting time and to allow for an easy on-site processing, we kindly ask you to
contact us briefly beforehand or to place your order via the webshop.
E-mail: service@wiltec.info
Phone: +49 2403 55592-0
Fax: +49 2403 55592-15
To return your goods for exchange, repair or other purposes, please use the following address. Atten-
tion! To allow for a trouble-free complaint or return, it is important to contact our customer service team
before returning your goods.
Retourenabteilung
WilTec Wildanger Technik GmbH
Königsbenden 28
52249 Eschweiler Germany
E-mail: [email protected]o
Phone: +49 2403 55592-0
Fax: (+49 2403 55592-15)
© by WilTec Wildanger Technik GmbH Item 52016 Page 3
http://www.WilTec.de
http://www.aoyue.eu 10 2021-1
http://www.teichtip.de
Introduction
Thank you for choosing to purchase this quality product. To minimise the risk of injury, we ask you to
always take some basic safety precautions when using this product. Please read this operating manual
carefully and make sure that you understand it.
Keep these operation instructions in a safe place.
Unpacking and commissioning
Functional test
It is recommended to perform a functional test before the first incubation. During this test, do not put any
eggs into the incubator. We recommend performing a long-term test.
1. Make sure that the rotary shaft is properly fixed to the egg rack.
2. Plug in the power cord.
3. The incubator emits an alarm tone after plugging in, for the temperature inside the device is too
low.
4. Stop the alarm by pressing any button.
5. Fill the water reservoir to gradually increase the air humidity. It is recommended to use warm
water.
6. The turning interval is pre-set to 2 h. Observe the turning process before first use. During 10 s,
the eggs are carefully rolled by 45° from the left to the right, after that in a random direction. To
perform the test, you should remove the lid.
1. Scope of delivery: 1×incubator, 1×polystyrene
cover, 1×power cable, 1×user’s manual, 1×egg
rack, 6×spacer, 1×rotary shaft
2. Power connection
3. Installation of the rotary shaft
4. Make sure that the rotary shaft is properly fixed
to the egg rack.
© by WilTec Wildanger Technik GmbH Item 52016 Page 4
http://www.WilTec.de
http://www.aoyue.eu 10 2021-1
http://www.teichtip.de
5. Check the functionality of the fan, temperature
display, functional buttons, and heater. Use the
polystyrene cover in case the ambient tempera-
ture is below 20 ℃.
6. Fill in water, pre-heat the incubator. After 20–
30 min check values. You can now start incuba-
tion.
7. The eggs need a distance of 2–3 mm to the spacers.
Check of air humidity during incubation
The following example refers to a hen’s egg. Schedule the incubation process by defining three different
phases that require different humidity values.
Figure 1
Phase 1: Day 1 to 7 –Only the central part of the
water reservoir must be filled (Fig. 1).
© by WilTec Wildanger Technik GmbH Item 52016 Page 5
http://www.WilTec.de
http://www.aoyue.eu 10 2021-1
http://www.teichtip.de
Figure 2
Phase 2: Day 8 to 14 –Fill the three central parts
of the water reservoir (Fig. 2).
Figure 3
Phase 3: Day 15 to 21 –Fill all parts of the water
reservoir (Fig. 3).
Attention: Different clutches require different air humidity values. The data mentioned above corre-
spond to hen’s eggs. When incubating eggs of other specied, adapt the air humidity to the individual
clutch.
Adjustments
№
Name
№
Name
1
LED lamp
5
Adjustments
2
Switch to 1
6
Up (+)
3
Temperature display
7
Down (–)
4
Status LED of heater
8
Status LED of adjustments
© by WilTec Wildanger Technik GmbH Item 52016 Page 6
http://www.WilTec.de
http://www.aoyue.eu 10 2021-1
http://www.teichtip.de
Basic functions
1. Press “SET”(5) and “+”(6) while the incubator is not supplied with energy to restore the factory
settings (turning interval: every 2 h during 10 s).
2. Press the LED switch (2) during 3 s to test the egg turning function. By pressing the up and
down buttons (6, 7), the turning interval can be adjusted.
Temperature adjustment
The factory temperature setting is 38 ℃(100 °F). The temperature can be adapted to different types of
clutches and ambient temperature. Should the incubator not have reached 38 ℃(100 °F) even after
several hours of operation, check the following:
1. Has the temperature been set to 38 ℃(100 °F)?
2. Does the fan work properly?
3. Is the lid closed?
4. Is the ambient temperature above 18 ℃(64.4 °F)?
To check and modify the temperature settings, proceed as follows:
1. Press the “SET”button (5) once.
2. Press “+”(6) or “–” (7) to adjust the desired temperature.
3. Press “SET”(5) to complete the adjustment.
Adjustments of temperature alarm value (AL and AH)
The alarm value is set to 1 ℃(33.8 °F) in the factory.
Adjustment of alarm when temperature is too low (AL)
1. Press the “SET”button (5) during 3 s.
2. Press the “SET”button (5) repeatedly until “AL”is displayed.
3. Press “+”(6) or “–” (7) to define the desired temperature alarm value.
Adjustment of alarm when temperature is too high (AH)
1. Press the “SET”button (5) during 3 s.
2. Press the “SET”button (5) repeatedly until “AH”is displayed.
3. Press “+”(6) or “–” (7) to define the desired temperature alarm value.
Adjustment of upper and lower temperature limit (HS and LS)
With the upper limit set to for example 38.2 ℃(100.8 °F) and the lower limit to 37.4 ℃(99.3 °F), the
temperature of the incubator can only be adjusted to a value comprised between these two limits.
Calibrating the temperature sensor
The thermometer is set to 0 ℃(32 °F) in the factory. In case the temperature display has deviating
values, you can adjust the temperature sensor. Use a standardised external thermometer to determine
the correct temperature values. The deviation between the temperature display and the external ther-
mometer is the value to be set.
1. Press the “SET”button (5) during 3 s.
2. Press the “SET”button (5) repeatedly until “CAU”is displayed.
3. Press “+”(6) or “–” (7) to define the desired value.
© by WilTec Wildanger Technik GmbH Item 52016 Page 7
http://www.WilTec.de
http://www.aoyue.eu 10 2021-1
http://www.teichtip.de
Display
Name
Factory setting
AL
Adjustment of alarm when temperature is too low
1 ℃(33.8 °F)
AH
Adjustment of alarm when temperature is too high
CAU
Calibrating the temperature sensor
0 ℃(32 °F)
HS
Adjustment of the upper temperature limit
39.5 ℃(103.1 °F)
LS
Adjustment of the lower temperature limit
30 ℃(86 °F)
Hygiene of eggs and incubator
•To obtain good incubation results, hygiene is utterly important. With bad hygiene, the chicks
might already perish during the first 10 days.
•You should only use clean eggs for incubation. Dirty eggs are potential vectors for pathogens
that develop and proliferate thanks to optimal warmth and air humidity conditions. Should you
nonetheless wish to incubate dirty eggs, ensure to wash them clean before in warm water (44–
49 ℃) with disinfectant (most household disinfectants are suitable) and to immediately dry off
each egg after cleaning with an individual dry cloth.
•Do not leave the eggs in the water for more than 4 min to not impair fertility. Do not wash them
clean in cold water; this might invite the intrusion of bacteria through the eggshell.
Troubleshooting chart (problems with the chicks)
#
Problem
Possible cause
Solutions
1
Too much
egg white or
too many un-
fertilised
eggs
(a) Wrong ratio of male and female ani-
mals
(a) Check mating conditions according to
breeder’s recommendations.
(b) Male animal malnourished
(b) Feed roosters separately, so that
chickens do not take most of the food.
(c) Interruption of male animals during
mating
(c) Do not use too many male animals;
keep breeding roosters together; build a
non-permanent solid separation wall be-
tween individual breeding coop or sepa-
rate them within bigger breeding coops.
(d) Damaged combs and gills on roosters
(d) Ensure that their coop is comfortable
and there is enough suitable drinking wa-
ter.
(e) Rooster too old
(e) A young rooster is required.
(f) Sterile rooster
(f) An unsterilised rooster is required.
(g) Egg has been stored for too long or
under the wrong circumstances before-
hand
(g) Do not keep eggs for more than ten to
twelve days; store them at cool tempera-
ture (8–15 ℃) with relative humidity of 75–
80 %. Turn eggs at least once a day
around their longitudinal axis
2
Blood dots
pointing to an
early death of
the embryo
(a) Temperature of incubator too high or
too low
(a) Check thermometers, thermostat, and
electricity, follow manufacturer’s instruc-
tions.
(b) See 1 (g)
(b) See 1 (g)
3
(a) See 2 (a).
(a) See 2 (a).
© by WilTec Wildanger Technik GmbH Item 52016 Page 8
http://www.WilTec.de
http://www.aoyue.eu 10 2021-1
http://www.teichtip.de
Broken egg-
shells
(b) Eggs not turned properly
(b) Turn eggs frequently, at least 4–
5 times a day; always turn them into oppo-
site direction.
(c) Deficient feeding if high death rate on
days 10 and 14
(c) Check feeding.
(d) Ventilation of the incubator faulty
(d) Increase air flow by normal means.
(e) Infectious diseases
(e) Only use eggs from healthy stocks;
check hygiene measures.
4
Eggs which
will not hatch
(a) Insufficient humidity inside incubator
(a) Increase evaporation surface with wa-
ter or sprays.
(b) Too high a humidity at too early a
stage
(b) Check humidity temperature measure-
ments.
(c) Problems with the food
(c) Check feeding.
5
(a) Too early
a hatching
(a) Too high a temperature inside incuba-
tor
(a) (b) (c) Make sure property of tempera-
ture regulation or adjust it properly.
(b) Too late a
hatching
(b) Too low a temperature inside incuba-
tor
(c) Sticky
chicks
(c) Temperature inside incubator proba-
bly too high
6
Deformed
chicks
(a) Too high a temperature inside incuba-
tor
(a) See 2 (a).
(b) Too low a temperature inside incuba-
tor
(a) See 2 (a).
(c) Eggs turned improperly
(c) See 3 (b); ensure to insert eggs with
wider part first.
7
Chicks with
straddled
legs
Breeding inlay too slippery/smooth
Use wire inlay or cover slippery/smooth
ground with e.g., sackcloth.
8
Weak chicks
(a) Incubator or hatchery overheated
(a) See 5.
(b) Use of small eggs
(b) Only use eggs of average size.
Small chicks
(c) Too low a humidity inside incubator
(c) See 4.
Heavily
breathing
chicks
(d) Too high a humidity inside incubator
(d) See 4.
(e) Possible infectious disease
(e) Bring chicks to a veterinary surgeon for
diagnosis.
(f) Lower temperature during incubation
time.
(f) See 2 (a).
Weak chicks
(g) Ventilation of incubators too low
(g) See 3 (d).
(h) Omphalitis (navel infection)
(h) Clean and disinfect incubator as well
as entire equipment.
9
Irregular
hatching
Eggs too different in size and age
Set eggs at least once a week, never keep
them for longer than ten to twelve days be-
fore breeding them, only breed average
sized eggs.
Thoroughly read the instructions
to obtain best hatching
results.
© by WilTec Wildanger Technik GmbH Item 52016 Page 9
http://www.WilTec.de
http://www.aoyue.eu 10 2021-1
http://www.teichtip.de
General information on breeding
Ambient conditions
Voltage (V)
230
Frequency (㎐)
50
Relative air humidity (%)
Between 55 and 75
Ambient temperature (℃)
Between 17 and 25
The right location
For a good result, place the incubator into a heated room. There should not be any major fluctuations
of room temperature inside it. Ideally, the room temperature should be comprised between 17 ℃and
25 ℃.
Additionally, there should be a good ventilation in this area. Especially with presence of several incuba-
tors, you should make sure sufficient ventilation. A natural air supply ensures that the developing em-
bryos always have fresh oxygen.
Make sure that the incubator is placed on a flat, even surface and not in direct sunlight. Place it on a
solid surface which is approx. 80 cm above the floor.
It is recommended to place the incubator far away from heating sources, drafts, and windows to avoid
harmful temperatures fluctuations. Additionally, the incubator should be kept with the included polysty-
rene packaging, which provides protection.
1. How do the poultry eggs have to be stored before placing them into the incubator?
Hatching eggs should not be kept longer than ten to twelve days. After that, the hatching success rate
is very low. Store the eggs at a cool temperature (8–15 ℃) and at a relative air humidity of 75 %. If the
hatching eggs have been sent you via post, they should rest for at least 24 h before being placed in the
incubator.
Important: The eggs should be stored lying and need to be rotated halfway around their longitudinal
axis at least once a day.
2. When is the incubator ready?
The incubator should run for at least 24 hours before placing any eggs into it. If possible, let the
incubator run for a week without eggs. Thus, you will easily see if all parameters can be adjusted and
work as required. Additionally, you will learn how the incubator functions and adjustments work during
this time. There is nothing more harmful to the eggs than wrong adjustments of the incubator. If every-
thing works accordingly in the testing period, the incubator has to be cleaned thoroughly with a suitable
disinfectant.
The intended humid and warm climate in the incubator is a good breeding ground for bacteria and fungi.
Not disinfecting the incubator invites the growth of these, posing a threat to the entire brood. Thus:
Before the first breeding and after every new breeding, thoroughly disinfect the incubator.
You need to make sure that the disinfectant is suitable for the material of the incubator. Otherwise, the
material can be attacked and the hatching process endangered.
Important note on parameters: Be sure to properly understand the term “internal temperature”(“inter-
nal”). Do not confuse the term “internal temperature (inside the egg)” with “internal temperature (inside
© by WilTec Wildanger Technik GmbH Item 52016 Page 10
http://www.WilTec.de
http://www.aoyue.eu 10 2021-1
http://www.teichtip.de
incubator).” The internal temperature within the incubator constantly changes up and down. The internal
temperature of the egg thus is the average temperature of the temperature fluctuations inside the incu-
bator.
3. Which temperature should my incubator have?
The required temperature depends on the individual type of animal. For every type of animal has its own
requirements and even amongst poultry there are differences regarding the temperature required during
the breeding process. The required temperature depends as well on the type of incubator.
An example based on a chicken egg:
With so-called surface incubators (breeding on an even surface), the breeding temperature is measured
on the height of the upper edge of the egg and should be between 38.0 ℃and 38.3 ℃. If a so-called
motorised incubator (breeding process on several levels one above the other) is used, the measured
temperature should be at around 37.5 ℃at any point of the egg. Your incubator is a surface incuba-
tor.
An overview of various poultry types and the breeding temperatures required:
Type of poultry
Breeding temperature (℃)
Chicken
37.4–37.6
Duck
37.4–37.6
Pigeon
38.5
Goose
37.6
Quail
37.6–37.8
Note: A short temperature drop while checking the eggs usually is not a problem for the embryos. Con-
trariwise, temperatures exceeding the recommended one are harmful and even deadly and should be
avoided at all costs.
4. Does my thermometer show exact values?
Thermometers are not exact. Keeping the temperature constant might be difficult, even with good ther-
mometers. If running a big incubator over a longer period of time, you can optimise the temperature,
regardless of what the thermometer states.
After the first breeding process, you may modify the temperature (set it to a higher or lower value). If the
hatching takes places in an early stage, the temperature should be lowered. If the hatching is delayed,
it needs to be increased.
How to check the thermometer: Keep notes during the time of the brood, as these are a reliant aid.
You will soon have the required routine to select the right adjustments and settings for a successful
hatch. Alternatively, an additional thermometer can be placed in the incubator to be able to see the
various temperature differences and readjusting the temperatures of the incubator accordingly.
5. How high must the air humidity be?
The air humidity required varies again depending on the brooded type of animal and needs to be
changed during the breeding process. Inform yourself beforehand on the requirements to be met in the
incubator. To give you an example:
© by WilTec Wildanger Technik GmbH Item 52016 Page 11
http://www.WilTec.de
http://www.aoyue.eu 10 2021-1
http://www.teichtip.de
Chicken eggs:
Day 1–18: 50–55 % air humidity
From day 19: 70–75 % air humidity
The air humidity is increased towards the end of the breeding to soften the hard egg membrane. Without
increased humidity, the chicks can neither break through the membrane nor through the egg shell. Yet,
the humidity should not be increased too much, as the chicks might drown.
Note: The humidity is checked with a so-called hygrometer. It is near enough impossible to keep hu-
midity as exact as temperature, especially in small incubators. Just try to keep it as exact as possible.
The temperature is the significant criteria. Even a small deviation (even a couple of degrees) can ruin
the breeding process or lead to a bad result.
Important: The air humidity changes with the season. If the breeding is carried out in January and
February, it is very difficult to keep the humidity at the desired level, as the external humidity is rather
low (depending on the location).
In June and July, the external humidity usually is higher, resulting in the humidity in the
incubator being higher than desired. To avoid these problems, change the water surface in the incubator:
To increase the humidity and thus to enlarge the water surface, place an additional container with wa-
ter/a few small moist sponges in the incubator. Alternatively, the eggs can be sprayed with fine water
mist. To reduce the humidity, decrease the water surface by using smaller containers.
6. How long is the incubation time?
Type of poultry
Incubation time (days) [normal deviation: 1–2]
Chicken
20–21
Duck
28
Pigeon
18
Goose
30
Quail
16–18
7. When start to turn and how frequently? When do the eggs not have to be turned any longer?
With a manual or semi-automatic surface incubator, you may not start turning the eggs before day four.
Contrariwise, turning may be carried out from the first day on with fully automatic incubators (large in-
cubators with several levels).
Your incubator is a semi-automatic surface incubator with turning mechanism. Therefore, wait for
the first three days to pass before starting turning. For the embryos are very sensitive in the first days,
therefore shakes should be avoided.
Additionally, the incubator should be kept closed within the first three days of breeding, if
possible, which allows for a better climate to build up.
Important: In the last two to three days of the breeding process, the eggs must not be turned any
longer. For the chicks are finding a hatching position, which must not be changed any more.
© by WilTec Wildanger Technik GmbH Item 52016 Page 12
http://www.WilTec.de
http://www.aoyue.eu 10 2021-1
http://www.teichtip.de
8. What is to regard within the last days of the breeding process?
In the last two to three days before hatching, the poultry eggs must not only not be turned anymore, but
also does the entire incubator need to stay closed. For the humid-warm atmosphere needs to be pre-
served during the last days of breeding to soften the egg membrane and enable the hatching process.
Therefore, remove the turning insert at that moment. To do so, carefully open the incubator to take out
the eggs with greatest care from the turning insert. Then place them on the bottom of the incubator. Try
to keep opening of the device as short as possible, then spray the eggs with warm (not boiling!) water
from a spray bottle. Thus, in most cases, the damp-warm climate inside the device will be preserved.
Note: Most chicks are not able to cope with a complete collapse of the climate.
9. What happens after hatching?
Congratulations, your chicks have hatched! Have a little patience, as the freshly hatched chicks should
stay in the incubator for approx. 24 hours longer to be able to recover and dry off.
Important: Remove the water container. Otherwise, the humidity is too high for the chicks, and there is
the danger of the chicks drowning. However, you must develop a sure instinct for possible Johnnys-
come-lately still need humidity to hatch.
If these latecomers, pecking the egg from the inside, have difficulties getting through the eggshell, you
can provide a starting aid by carefully opening the eggshell a little bit. Certainly, a sure instinct is needed
as well in this condition for you must not help them too early. Oftentimes, a wrong humidity can be the
reason for that, as the egg membrane can dry and get stuck to the chick before it is able to get out.
Thus, the chick cannot turn any longer and hatch.
Note: There has to be a sufficient fresh air flow, too, as the young animals can otherwise suffocate in
the
closed container. If an integrated air hole is available, it will ensure for fresh air.
Incubation notes
The first step to good incubation results is choosing the best fertilised eggs. How to do this?
1. Fertilised eggs have to be fresh, there may only be 4–7 days between laying the eggs and starting
the incubation. Optimal storing temperatures of fertilised eggs are comprised between 8 and 15 ℃. The
fertilised egg is covered with a powdery substance that must not be washed off or stored in the refriger-
ator.
2. The eggshell surface must be free from deformations, cracks, or spots.
3. There is no need to disinfect the fertilised eggs, as improper disinfection might reduce the hatching
ratio. Just make sure that the egg surface is clean and spotless.
4. When placing the egg into the incubator, make sure that the pointed end points down.
5. Proper operation and thorough observation are necessary during incubation. Among other things, this
requirement comprises regular adding of water every 1 or 2 days to the device (dependent on water
level and air humidity value inside the device).
6. The fertilised eggs cannot be tested by the grower within the first 4 days of incubation, as a temper-
ature drop in the incubator and on the egg surface is harmful to the early development of the egg.
© by WilTec Wildanger Technik GmbH Item 52016 Page 13
http://www.WilTec.de
http://www.aoyue.eu 10 2021-1
http://www.teichtip.de
7. First check-up of the egg (after 5–6 days): mainly to check fertilisation of the eggs. Sort out the unfer-
tilised, yellow, and dead eggs.
Second check-up of the egg (after 11–12 days): mainly to check development of the embryo. A well-
developed embryo has already grown and formed inside blood vessels. The air chamber should be large
and clearly distinguishable.
Third check-up of the egg (after 16–17 days): Light the egg from the side. A well-developed embryo has
still grown, filling nearly the entire egg, so that most of the light is absorbed. In case the embryo is dead,
the inside blood vessels are indistinct, parts near the air chamber have adopted a yellowish colour, and
the line between the egg and air chamber is not clearly visible.
3rd day
6th day
8th day
10th day
15th day
19th day
8. During incubation, increase the air humidity and lower the temperature. This prevents the water in the
eggs from quickly evaporating. The air humidity corresponding to the defined values, dehydration pre-
vented from forming, and lowering the temperature are of capital importance to avoid too high a tem-
perature and too high an air humidity, especially when the hatching takes some time. The temperature
should not be above 37.5 ℃within 19–21 days.
© by WilTec Wildanger Technik GmbH Item 52016 Page 14
http://www.WilTec.de
http://www.aoyue.eu 10 2021-1
http://www.teichtip.de
Regulations for waste disposal
The Waste Electrical and Electronic Equipment Directive (WEEE Directive, 2012/19/EU) of the EU was
implemented in the German law related to electrical and electronic equipment and appliances.
All WilTec electric devices that fall under the WEEE directive are labelled with the symbol of a crossed-
out wheeled rubbish bin. This symbol indicates that this electric device must not be disposed of with the
domestic waste.
WilTec Technik GmbH is registered with the German registration authority EAR (Stiftung Elektro-
Altgeräte Register) under the WEEE-registration number DE45283704.
Disposal of used electrical and electronic devices (in-
tended for use in the countries of the European Union
and other European countries with a separate waste
collection system for these devices).
The symbol on the packaging or the product itself indi-
cates that this product must not be treated as normal
domestic waste but must be disposed of at a recycling
collection station for electrical and electronic waste.
By disposing of this product correctly, you contribute to
the protection of the environment and the health of your
fellow people. Inappropriate disposal threatens the en-
vironment and health.
Material recycling helps to reduce the consumption of raw materials.
Additional information about the recycling of this product can be provided by your local commune, the
municipal waste disposal facilities, or the store where you purchased the product.
Address:
WilTec Wildanger Technik GmbH
Königsbenden 12 / 28
52249 Eschweiler Germany
Important Note:
Reproduction and any commercial use (of parts) of this operating manual, requires a written permission
of WilTec Wildanger Technik GmbH.

Other WilTec Accessories manuals

WilTec 61341 User manual

WilTec

WilTec 61341 User manual

WilTec 51185 User manual

WilTec

WilTec 51185 User manual

WilTec XPOtool 62822 User manual

WilTec

WilTec XPOtool 62822 User manual

WilTec 62304 User manual

WilTec

WilTec 62304 User manual

WilTec 50035 User manual

WilTec

WilTec 50035 User manual

WilTec 52170 User manual

WilTec

WilTec 52170 User manual

WilTec 50033 User manual

WilTec

WilTec 50033 User manual

WilTec PAXTON User manual

WilTec

WilTec PAXTON User manual

WilTec 50039 User manual

WilTec

WilTec 50039 User manual

WilTec 52168 User manual

WilTec

WilTec 52168 User manual

WilTec 52168 User manual

WilTec

WilTec 52168 User manual

WilTec 50035 User manual

WilTec

WilTec 50035 User manual

WilTec 51185 User manual

WilTec

WilTec 51185 User manual

WilTec 51073 User manual

WilTec

WilTec 51073 User manual

WilTec 50035 User manual

WilTec

WilTec 50035 User manual

WilTec 50036 User manual

WilTec

WilTec 50036 User manual

Popular Accessories manuals by other brands

SENSINOVA PC308 quick start guide

SENSINOVA

SENSINOVA PC308 quick start guide

PST HD05 user manual

PST

PST HD05 user manual

Interacoustics EyeSeeCam Instructions for use

Interacoustics

Interacoustics EyeSeeCam Instructions for use

LNS Turbo HB instruction manual

LNS

LNS Turbo HB instruction manual

Hubbell Gear Drive Electric Cable Reels SM-28 Installation and maintenance instructions

Hubbell

Hubbell Gear Drive Electric Cable Reels SM-28 Installation and maintenance instructions

Emos P5710-2R manual

Emos

Emos P5710-2R manual

IstaGoal ELLIPTICAL ALUMINIUM GOAL FITTING INSTRUCTION

IstaGoal

IstaGoal ELLIPTICAL ALUMINIUM GOAL FITTING INSTRUCTION

ANFIELD ULS owner's manual

ANFIELD

ANFIELD ULS owner's manual

Emos P5763R manual

Emos

Emos P5763R manual

B+B SmartWorx Wzzard WSD2C31010 user manual

B+B SmartWorx

B+B SmartWorx Wzzard WSD2C31010 user manual

SICK WTV4-3 V-optic operating instructions

SICK

SICK WTV4-3 V-optic operating instructions

KROHNE OPTIFLUX 2000 quick start guide

KROHNE

KROHNE OPTIFLUX 2000 quick start guide

PCB Piezotronics 070A15 Installation and operating manual

PCB Piezotronics

PCB Piezotronics 070A15 Installation and operating manual

YOKOGAWA ISC40G(S) user guide

YOKOGAWA

YOKOGAWA ISC40G(S) user guide

Atonometrics Mars user guide

Atonometrics

Atonometrics Mars user guide

Vega VEGAPULS 66 operating instructions

Vega

Vega VEGAPULS 66 operating instructions

netvox Z809B user manual

netvox

netvox Z809B user manual

Vaisala WINDCAP WS425 user guide

Vaisala

Vaisala WINDCAP WS425 user guide

manuals.online logo
manuals.online logoBrands
  • About & Mission
  • Contact us
  • Privacy Policy
  • Terms and Conditions

Copyright 2025 Manuals.Online. All Rights Reserved.