manuals.online logo
Brands
  1. Home
  2. •
  3. Brands
  4. •
  5. Windsor
  6. •
  7. Door Lock
  8. •
  9. Windsor 9201D User manual

Windsor 9201D User manual

0800 607 028
sales@windsorhardware.co.nz
FITTING INSTRUCTIONS
HALO DUMMY LEVER
© WINDSOR ARCHITECTURAL HARDWARE
6. Press the rose cover onto
the handle and align the
dimples on the sides of the
rose. Tighten the
grubscrews on the side of
the lever onto the spindle.
Note: The grubscrews may
need a re-tighten after a
bedding-in period.
We recommend medium
strength thread-lock to be
used, Windsor Code: 1276
Windsor 1152 8mm dummy fix mounts are designed to be recessed and screwed onto the door face, with the handle slipping over the top.
The handle base plate is then screwed to, or bolted through the door.
Note: It is important to ensure solid fixing is available for handle and dummy mount screws (especially for hollow core doors).
Note: If the 1152 dummy fix mount is not fitted, there is no
warranty on Halo dummy levers.
3. Fit the dummy spindle by
drilling and fitting the three
wood screws provided.
Ensure the grooved side of
the spindle is aligned with
the grubscrew on the
handle.
Version 2
windsorhardware.co.nz
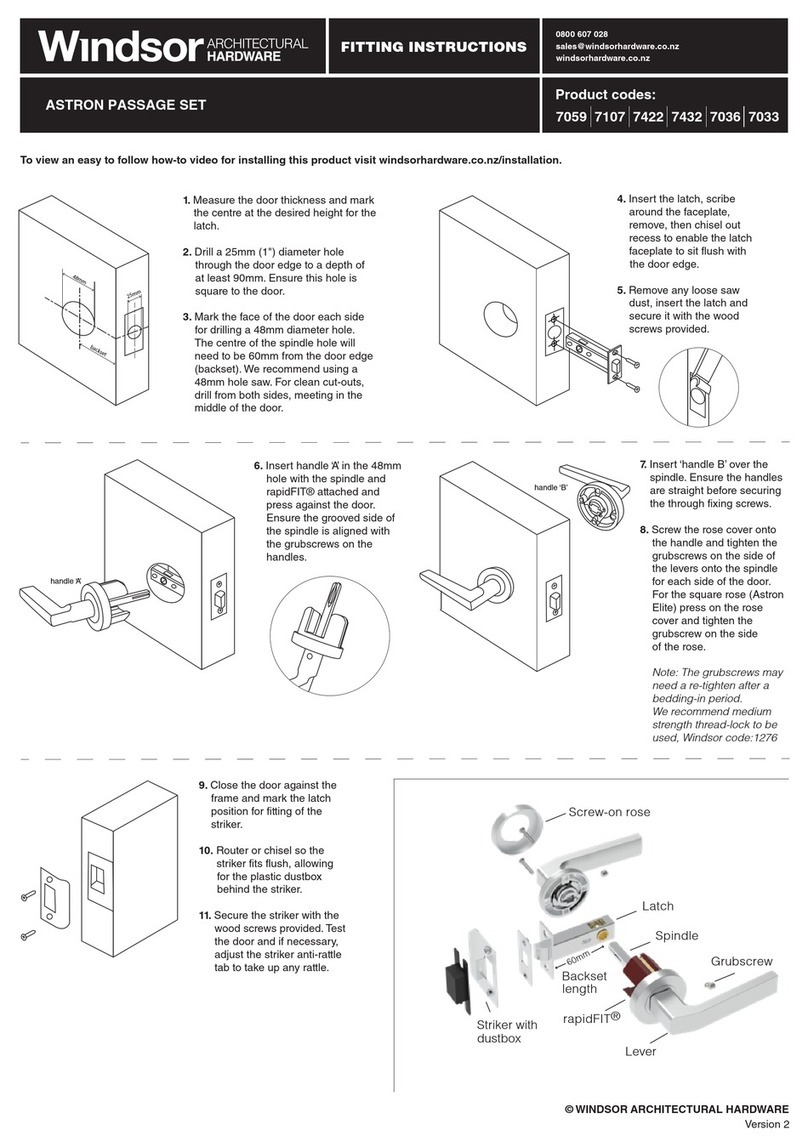
Product codes:
9201D 9211D 9221D
Dummy
mount
Press-on
rose
Lever
Grubscrew
32mm
backset
1. Establish the height and
position for the handle on the
door.
2. Drill a 32mm diameter recess
on the face of the door to a
depth of 4mm. Match the
backset measurement of the
passage doors throughout
your home. Mark and drill
four pilot holes vertically and
horizontally, at 42mm crs.
4. Slide the handle onto the
spindle ensuring that it sits
straight on the door face.
5. Install the handle by
screwing the base plate
to the door with the wood
screws provided.
Note: In some cases where
through door bolts are
provided, the door can be
drilled both sides to accept
the through screws.
42mm
0800 607 028
sales@windsorhardware.co.nz
FITTING INSTRUCTIONS
HALO - ROSE COVER REMOVAL
© WINDSOR ARCHITECTURAL HARDWARE
Version 2
windsorhardware.co.nz
Product codes:
9201D 9211D 9221D
1. To remove the rose cover
off the handle, use a flat
head screwdriver, ideally
the same width as the
groove on the side of the
rose.
3. To protect the door from
getting damaged, use a
small wooden block or
something similar and use
the screwdriver as a lever.
5. Carefully slide the loose
rose cover off the handle.
6. The screws can now be
accessed and unscrewed.
4. Lever the rose cover off the
handle. The rose cover will
pop off.
2. Insert the screwdriver into
the groove on the side of
the rose.

This manual suits for next models

2

Other Windsor Door Lock manuals

Windsor 7059 User manual

Windsor

Windsor 7059 User manual

Windsor 1335 User manual

Windsor

Windsor 1335 User manual

Windsor 5327 User manual

Windsor

Windsor 5327 User manual

Windsor 1501 User manual

Windsor

Windsor 1501 User manual

Popular Door Lock manuals by other brands

FingerprintDoorLocks BioBolt X2 installation manual

FingerprintDoorLocks

FingerprintDoorLocks BioBolt X2 installation manual

Stanley EL manual

Stanley

Stanley EL manual

Kaadas K9-5W user manual

Kaadas

Kaadas K9-5W user manual

Andersen Windows & Doors FSB 1035 instructions

Andersen Windows & Doors

Andersen Windows & Doors FSB 1035 instructions

Schlage S-5600 user manual

Schlage

Schlage S-5600 user manual

eTIGER ES-DL02 manual

eTIGER

eTIGER ES-DL02 manual

Ingersoll-Rand SCHLAGE Stella installation instructions

Ingersoll-Rand

Ingersoll-Rand SCHLAGE Stella installation instructions

QS X3100 user manual

QS

QS X3100 user manual

Rockwell Automation Allen-Bradley 194U-FB installation instructions

Rockwell Automation

Rockwell Automation Allen-Bradley 194U-FB installation instructions

Schlage BR260 installation instructions

Schlage

Schlage BR260 installation instructions

GEZE GC 151 quick start guide

GEZE

GEZE GC 151 quick start guide

HEOSolution HEOSafe 1958 manual

HEOSolution

HEOSolution HEOSafe 1958 manual

Weiser 49688/01 instructions

Weiser

Weiser 49688/01 instructions

Kaba Mas 3715 User operating instructions

Kaba Mas

Kaba Mas 3715 User operating instructions

Assa Abloy Corbin Russwin Access 600 CL33600 TCRNE1... installation instructions

Assa Abloy

Assa Abloy Corbin Russwin Access 600 CL33600 TCRNE1... installation instructions

DynaLock 1661 instructions

DynaLock

DynaLock 1661 instructions

Assa Abloy ES8100 Installation guide and user's manual

Assa Abloy

Assa Abloy ES8100 Installation guide and user's manual

Allegion Olivari PT Series installation instructions

Allegion

Allegion Olivari PT Series installation instructions

manuals.online logo
manuals.online logoBrands
  • About & Mission
  • Contact us
  • Privacy Policy
  • Terms and Conditions

Copyright 2025 Manuals.Online. All Rights Reserved.