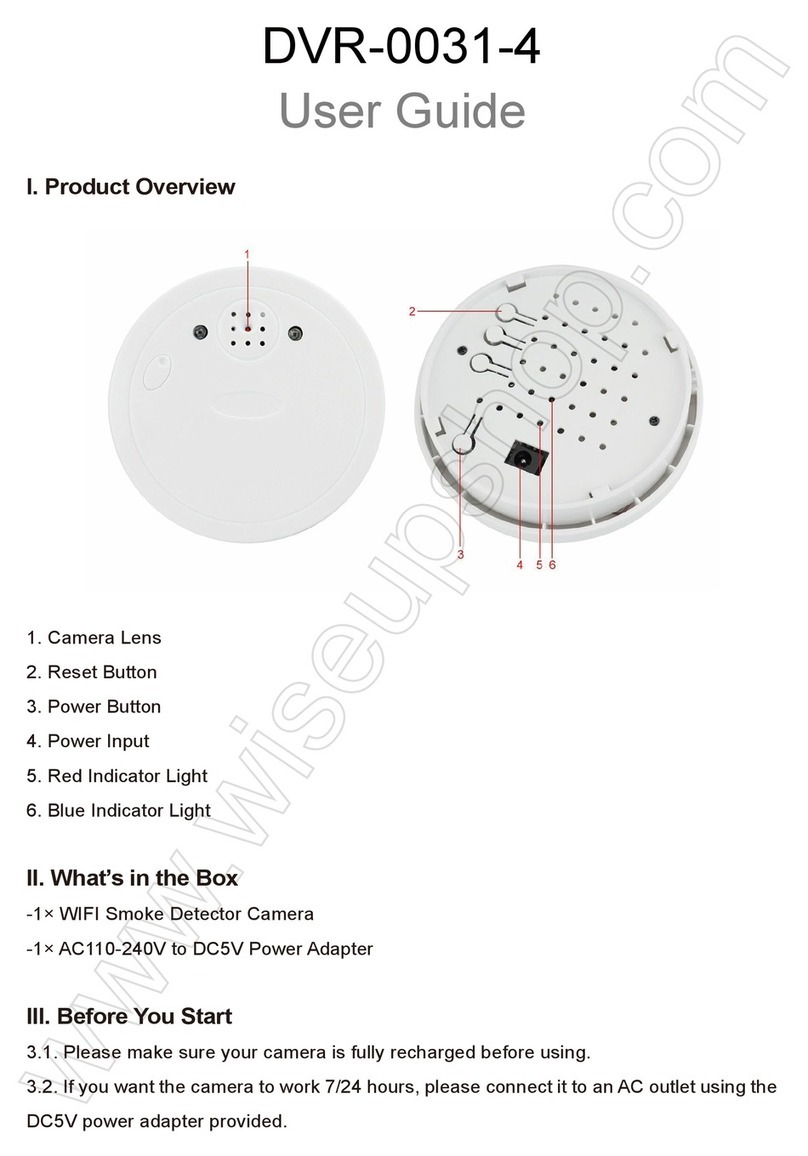
Wiseup CK6000 User manual

CK6000
User Guide
I. Product Overview
1. Camera Lens
2. Blue Indicator Light
3. Yellow Indicator Light
4. Red Indicator Light
5. Mini USB Port
II. What’s In the Box
-1×Car Key Camera
-1×USB/AV Cable
-1×DC5V Charging Adapter
III. Operation
>> Before using, make sure that the camera battery is fully recharged.
>> Please make sure the Micro SD card is securely fitted into the SD card slot on
your camera. The camera will not work without a Micro SD card. A SDHC Class 10
Micro SD card is recommended.
6. Infrared LEDs
7. Mode Button
8. Power On/Off Button
9. Night Vision Button
10. Micro SD Card Slot
3.1. POWER ON/OFF
3.1.1. Power on the camera by pressing Power On/Off Button for 2 seconds. The
camera will vibrate once. The blue and red indicator lights will illuminate for 3 sec-
onds. Then the blue indicator light will go out and the red one will stay illuminated,
indicating the camera has entered into standby mode.
3.1.2. Power off the camera by pressing Power On/Off Button for 2 seconds. The
camera will vibrate once and the indicator lights will go out.
3.1.3. The camera will shut down automatically if it is in standby mode without any
operation more than 3 minutes.
[Note]:
1). If no micro SD card is fitted into the camera, the blue and red indicator lights will keep flashing for
10 seconds, then the camera will shut down automatically.
2). If the battery is low, the blue indicator light will flash fast and then the camera will shut down auto-
matically.
3.2. VIDEO RECORDING
3.2.1. Power on the camera by pressing Power On/Off Button for 2 seconds. The
camera will vibrate once. The blue and red indicator lights will illuminate for 3 sec-
onds. Then the blue indicator light will go out and the red one will stay illuminated,
indicating the camera has entered into standby mode.
3.2.2. Press Power On/Off Button once to record video. The camera will vibrate once
and the red indicator light will keep flashing slowly.
3.2.3. Press Power On/Off Button once again to stop video recording. The camera
will vibrate once. The red indicator light will stay illuminated, indicating the camera is
back to standby mode.
[Note]:
1). A video file will be generated and saved every 5 minutes automatically.
2). The camera can record video continuously for 1 hour on a full charge.
3). Video Resolution: 1920×1080P Video Format: AVI
3.3. CAMERA/STILL PHOTOGRAPHY
3.3.1. Power on the camera by pressing Power On/Off Button for 2 seconds. The
camera will vibrate once. The blue and red indicator lights will illuminate for 3 sec-
onds. Then the blue indicator light will go out and the red one will stay illuminated,
indicating the camera has entered into standby mode.
3.3.2. Press Mode Button once to enter into photograph mode. The camera will
vibrate once. The red indicator light will go out and the blue one will stay illuminated.
3.3.3. Press Power On/Off Button once to take a photo. The camera will vibrate
once. The blue indicator light will flash once and then stay illuminated, indicating the
camera is back to photograph mode.
3.3.4. Press Mode Button again to switch the modes, or press Power On/Off Button
for 2 seconds to exit the photograph mode and the camera will shut down.
3.4. AUDIO RECORDING
3.4.1. Power on the camera by pressing Power On/Off Button for 2 seconds. The
camera will vibrate once. The blue and red indicator lights will illuminate for 3 sec-
onds. Then the blue indicator light will go out and the red one will stay illuminated.
3.4.2. Press Mode Button twice in a row to enter into audio mode, the red and blue
indicator lights will stay illuminated. Each press will come with a vibration.
3.4.3. Press Power On/Off Button once to record audio. The camera will vibrate once.
The red indicator light will keep flashing slowly and the blue one will stay illuminated.
3.4.4. Press Power On/Off Button once again to stop recording audio. The camera
will vibrate once. The red and blue indicator lights will be stay illuminated, indicating
the camera is back to audio mode.
3.4.5. Press Mode Button again to switch the modes, or press Power On/Off Button
for 2 seconds to exit the photograph mode and the camera will shut down.
[Note]:
1). An audio file will be generated and saved every 20 minutes automatically.
2). Audio Format: WAV
3.5. MOTION DETECTION RECORDING
3.5.1. Power on the camera by pressing Power On/Off Button for 2 seconds. The
camera will vibrate once. The blue and red indicator lights will illuminate for 3
seconds. Then the blue indicator light will go out and the red one will stay illumi-
nated.
3.5.2. Press Mode Button 3 times in a row to enter into motion detection mode.
Each press will come with a vibration.
3.5.3. The camera will record video automatically when a movement is detected. The
red and the blue indicator lights will flash alternately.
3.5.4. Press Mode Button to exit motion detection mode. The camera will vibrate
once. The red indicator light will stay illuminated, indicating the camera is back to
standby mode.
3.6. IR NIGHT VISION MODE
Hold down Night Vision Button for 2 seconds to enter into the night vision mode. The
camera will vibrate twice. The yellow indicator light will stay illuminated and the infra-
red LEDs will be turned on.
Hold down Night Vision Button for 2 seconds to exit the night vision mode. The
camera will vibrate twice. The yellow indicator light will go out and the infrared LEDs
will be turned off.
IV. Resetting
If for any reason, the camera stops responding or isn’t working properly, a quick
reset will restore it back to normal operation.
Operation: Hold down the Mode Button and then press Power On/Off Button once
simultaneously. The camera will vibrate for 3 seconds and shut down automatically,
and the indicator lights will go out.
V. Video/Audio/Image Files Uploads
5.1. Method One: Direct Connection
5.1.1. When the camera is powered off and the Micro SD card fitted into the camera,
connect your camera to a PC computer by using the USB cable provided.
5.1.2. The camera will be recognized as a removable disk drive.
5.1.3. All the files can be accessed in the DCIM folder.
5.2. Method Two: Using Memory Card Reader
5.2.1. When the camera is powered off, remove the Micro SD card and insert it into
a card reader.
5.2.2. Insert the card reader into a PC computer.
5.2.3. Removable disk drive folder appears.
5.2.4. All the files can be accessed in the DCIM folder.
VI. Setting Time/Date Stamp
6.1. When the camera is powered off, remove the Micro SD card and insert it into a
card reader.
6.2. Insert the card reader into a PC computer.
6.3. Removable disk drive folder appears.
6.4. Click on the drive in the root directory and inside the root directory, create a file
“TIMERSET.TXT”.
6.5. Write the current date and time in the “TIMERSET.TXT” file with the correct
format:
YearMonthDayHourMinuteSecond Y (For example: 20160308142432 Y). Save this
file. If you do not need the time stamp on the video files, change Y into N.
6.6. Restart the camera and the system will upgrade the program automatically.
VII. Charging
7.1. Connect the camera to an outlet AC power socket by using the USB cable and
the DC 5V charging adapter provided.
7.2. The red indicator light will keep flashing slowly during the charging process.
7.3. It will take 2 hours to obtain a full charge.
7.4. The red indicator light will stay illuminated when the camera battery is fully
recharged.
VIII. Live Video Output
>> Before using, make sure that the camera battery is fully recharged.
>> Please make sure the Micro SD card is securely fitted into the camera SD card
slot. A SDHC Class 10 Micro SD card is recommended.
8.1. When the camera is powered off, connect it to your TV or monitor by using the
AV cable provided as below:
8.2. Select the camera video signal source on your TV or monitor.
8.3. Power on the camera and start recording video (See 3.2), then you can watch
the camera’s live video on the TV or monitor during the video recording process.
8.4. You can also experience other functions of this camera in the live view mode.

1. Camera Lens
2. Blue Indicator Light
3. Yellow Indicator Light
4. Red Indicator Light
5. Mini USB Port
II. What’s In the Box
-1×Car Key Camera
-1×USB/AV Cable
-1×DC5V Charging Adapter
III. Operation
>> Before using, make sure that the camera battery is fully recharged.
>> Please make sure the Micro SD card is securely fitted into the SD card slot on
your camera. The camera will not work without a Micro SD card. A SDHC Class 10
Micro SD card is recommended.
3.1. POWER ON/OFF
3.1.1. Power on the camera by pressing Power On/Off Button for 2 seconds. The
camera will vibrate once. The blue and red indicator lights will illuminate for 3 sec-
onds. Then the blue indicator light will go out and the red one will stay illuminated,
indicating the camera has entered into standby mode.
3.1.2. Power off the camera by pressing Power On/Off Button for 2 seconds. The
camera will vibrate once and the indicator lights will go out.
3.1.3. The camera will shut down automatically if it is in standby mode without any
operation more than 3 minutes.
[Note]:
1). If no micro SD card is fitted into the camera, the blue and red indicator lights will keep flashing for
10 seconds, then the camera will shut down automatically.
2). If the battery is low, the blue indicator light will flash fast and then the camera will shut down auto-
matically.
3.2. VIDEO RECORDING
3.2.1. Power on the camera by pressing Power On/Off Button for 2 seconds. The
camera will vibrate once. The blue and red indicator lights will illuminate for 3 sec-
onds. Then the blue indicator light will go out and the red one will stay illuminated,
indicating the camera has entered into standby mode.
3.2.2. Press Power On/Off Button once to record video. The camera will vibrate once
and the red indicator light will keep flashing slowly.
3.2.3. Press Power On/Off Button once again to stop video recording. The camera
will vibrate once. The red indicator light will stay illuminated, indicating the camera is
back to standby mode.
[Note]:
1). A video file will be generated and saved every 5 minutes automatically.
2). The camera can record video continuously for 1 hour on a full charge.
3). Video Resolution: 1920×1080P Video Format: AVI
3.3. CAMERA/STILL PHOTOGRAPHY
3.3.1. Power on the camera by pressing Power On/Off Button for 2 seconds. The
camera will vibrate once. The blue and red indicator lights will illuminate for 3 sec-
onds. Then the blue indicator light will go out and the red one will stay illuminated,
indicating the camera has entered into standby mode.
3.3.2. Press Mode Button once to enter into photograph mode. The camera will
vibrate once. The red indicator light will go out and the blue one will stay illuminated.
3.3.3. Press Power On/Off Button once to take a photo. The camera will vibrate
once. The blue indicator light will flash once and then stay illuminated, indicating the
camera is back to photograph mode.
3.3.4. Press Mode Button again to switch the modes, or press Power On/Off Button
for 2 seconds to exit the photograph mode and the camera will shut down.
3.4. AUDIO RECORDING
3.4.1. Power on the camera by pressing Power On/Off Button for 2 seconds. The
camera will vibrate once. The blue and red indicator lights will illuminate for 3 sec-
onds. Then the blue indicator light will go out and the red one will stay illuminated.
3.4.2. Press Mode Button twice in a row to enter into audio mode, the red and blue
indicator lights will stay illuminated. Each press will come with a vibration.
3.4.3. Press Power On/Off Button once to record audio. The camera will vibrate once.
The red indicator light will keep flashing slowly and the blue one will stay illuminated.
3.4.4. Press Power On/Off Button once again to stop recording audio. The camera
will vibrate once. The red and blue indicator lights will be stay illuminated, indicating
the camera is back to audio mode.
3.4.5. Press Mode Button again to switch the modes, or press Power On/Off Button
for 2 seconds to exit the photograph mode and the camera will shut down.
[Note]:
1). An audio file will be generated and saved every 20 minutes automatically.
2). Audio Format: WAV
3.5. MOTION DETECTION RECORDING
3.5.1. Power on the camera by pressing Power On/Off Button for 2 seconds. The
camera will vibrate once. The blue and red indicator lights will illuminate for 3
seconds. Then the blue indicator light will go out and the red one will stay illumi-
nated.
3.5.2. Press Mode Button 3 times in a row to enter into motion detection mode.
Each press will come with a vibration.
3.5.3. The camera will record video automatically when a movement is detected. The
red and the blue indicator lights will flash alternately.
3.5.4. Press Mode Button to exit motion detection mode. The camera will vibrate
once. The red indicator light will stay illuminated, indicating the camera is back to
standby mode.
3.6. IR NIGHT VISION MODE
Hold down Night Vision Button for 2 seconds to enter into the night vision mode. The
camera will vibrate twice. The yellow indicator light will stay illuminated and the infra-
red LEDs will be turned on.
Hold down Night Vision Button for 2 seconds to exit the night vision mode. The
camera will vibrate twice. The yellow indicator light will go out and the infrared LEDs
will be turned off.
IV. Resetting
If for any reason, the camera stops responding or isn’t working properly, a quick
reset will restore it back to normal operation.
Operation: Hold down the Mode Button and then press Power On/Off Button once
simultaneously. The camera will vibrate for 3 seconds and shut down automatically,
and the indicator lights will go out.
V. Video/Audio/Image Files Uploads
5.1. Method One: Direct Connection
5.1.1. When the camera is powered off and the Micro SD card fitted into the camera,
connect your camera to a PC computer by using the USB cable provided.
5.1.2. The camera will be recognized as a removable disk drive.
5.1.3. All the files can be accessed in the DCIM folder.
5.2. Method Two: Using Memory Card Reader
5.2.1. When the camera is powered off, remove the Micro SD card and insert it into
a card reader.
5.2.2. Insert the card reader into a PC computer.
5.2.3. Removable disk drive folder appears.
5.2.4. All the files can be accessed in the DCIM folder.
VI. Setting Time/Date Stamp
6.1. When the camera is powered off, remove the Micro SD card and insert it into a
card reader.
6.2. Insert the card reader into a PC computer.
6.3. Removable disk drive folder appears.
6.4. Click on the drive in the root directory and inside the root directory, create a file
“TIMERSET.TXT”.
6.5. Write the current date and time in the “TIMERSET.TXT” file with the correct
format:
YearMonthDayHourMinuteSecond Y (For example: 20160308142432 Y). Save this
file. If you do not need the time stamp on the video files, change Y into N.
6.6. Restart the camera and the system will upgrade the program automatically.
VII. Charging
7.1. Connect the camera to an outlet AC power socket by using the USB cable and
the DC 5V charging adapter provided.
7.2. The red indicator light will keep flashing slowly during the charging process.
7.3. It will take 2 hours to obtain a full charge.
7.4. The red indicator light will stay illuminated when the camera battery is fully
recharged.
VIII. Live Video Output
>> Before using, make sure that the camera battery is fully recharged.
>> Please make sure the Micro SD card is securely fitted into the camera SD card
slot. A SDHC Class 10 Micro SD card is recommended.
8.1. When the camera is powered off, connect it to your TV or monitor by using the
AV cable provided as below:
8.2. Select the camera video signal source on your TV or monitor.
8.3. Power on the camera and start recording video (See 3.2), then you can watch
the camera’s live video on the TV or monitor during the video recording process.
8.4. You can also experience other functions of this camera in the live view mode.

6. Infrarot-LEDs
7. Mode-Taste
8. Ein / Aus-Taste
9. Nachtsicht -Taste
10. Micro-SD-Kartensteckplatz
CK6000
Benutzerhandbuch
I. Produktübersicht
1. Kamera-Objektiv
2. Blau-Anzeigelampe
3. Yellow Indicator Light
4. Red Indicator Light
5. Mini USB-Anschluss
II. Was ist in der Box
-1×Auto-Schlüssel-Kamera
-1×USB / AV-Kabel
-1×5 V DC Ladeadapter
III. Betrieb
>> Vor der Verwendung, stellen Sie sicher, dass die Kamera-Akku vollständig aufge-
laden ist.
>> Bitte stellen Sie sicher, dass die Micro-SD-Karte sicher in den SD-Kartensteck-
platz an der Kamera angebracht ist. Die Kamera funktioniert nicht, ohne eine
Micro-SD-Karte. Eine SDHC Class 10 Micro-SD-Karte wird empfohlen.
3.1. EINSCHALTEN / AUSSCHALTEN
3.1.1. Schalten Sie die Kamera durch Betätigung der Taste Power On / Off-Taste für
2 Sekunden. Die Kamera wird einmal vibrieren. Die blauen und roten Kontrollleucht-
en für 3 Sekunden zu beleuchten. Dann wird die blaue Anzeigelampe erlischt und
die rote Leucht wird bleiben, was auf die Kamera hat sich in den Standby-Modus.
3.1.2. Schalten Sie die Kamera durch Betätigung der Taste Power On / Off-Taste für
2 Sekunden. Die Kamera vibriert einmal und leuchtet die Anzeige erlischt.
3.1.3. Die Kamera wird automatisch abgeschaltet, wenn er sich im Standby-Modus,
ohne den Betrieb von mehr als 3 Minuten.
[Hinweis]:
1). Wenn keine Micro-SD-Karte in die Kamera eingebaut ist, halten die blaue und die rote LED leuchtet
10 Sekunden lang blinkt, dann wird die Kamera automatisch heruntergefahren .
2). Wenn die Batterie schwach ist, wird die blaue Anzeigelampe schnell blinkt und dann wird die
Kamera automatisch abgeschaltet.
3.2. VIDEOAUFNAHME
3.2.1. Schalten Sie die Kamera durch Betätigung der Taste Power On / Off-Taste für
2 Sekunden. Die Kamera wird einmal vibrieren. Die blauen und roten Kontrollleucht-
en für 3 Sekunden zu beleuchten. Dann wird die blaue Anzeigelampe erlischt und
die rote Leucht wird bleiben, was auf die Kamera hat sich in den Standby-Modus.
3.2.2. Drücken Sie Power On / Off-Taste einmal aufzeichnen Video. Die Kamera
vibriert einmal und die rote LED blinkt langsam halten.
3.2.3. Drücken Sie Power On / Off-Taste noch einmal Videoaufzeichnung zu stop-
pen. Die Kamera wird einmal vibrieren. Die rote Anzeigelampe bleibt beleuchtet,
was die Kamera in den Standby-Modus ist wieder da.
[Hinweis]:
1). Eine Videodatei wird erzeugt und automatisch gespeichert, alle 5 Minuten werden.
2). Die Kamera kann Video kontinuierlich für 1 Stunde auf einer vollen Ladung aufzunehmen.
3). Video Auflösung: 1920×1080P Videoformat: AVI
3.3. KAMERA / STILL-FOTOGRAFIE
3.3.1. Schalten Sie die Kamera durch Betätigung der Taste Power On / Off-Taste
für 2 Sekunden. Die Kamera wird einmal vibrieren. Die blauen und roten Kontroll-
leuchten für 3 Sekunden zu beleuchten. Dann wird die blaue Anzeigelampe erl-
ischt und die rote Leucht wird bleiben, was auf die Kamera hat sich in den Stand-
by-Modus.
3.3.2. Drücken Sie einmal Mode-Taste in Foto-Modus zu gelangen. Die Kamera
wird einmal vibrieren. Die rote Kontrolllampe erlischt und die blaue leuchten blei-
ben.
3.3.3. Drücken Sie Power On / Off-Taste einmal um ein Foto aufzunehmen. Die
Kamera wird einmal vibrieren. Die blaue Anzeigelampe blinkt einmal und dann be-
leuchtet bleiben, die Kamera anzeigt, ist wieder auf Fotomodus .
3.3.4. Drücken Sie die Mode-Taste erneut um die Modi zu wechseln, oder drücken
Sie Power On / Off-Taste für 2 Sekunden, um das Foto-Modus zu verlassen und die
Kamera wird heruntergefahren .
3.4. AUDIO AUFNAHME
3.4.1. Schalten Sie die Kamera durch Betätigung der Taste Power On / Off-Taste für
2 Sekunden. Die Kamera wird einmal vibrieren. Die blauen und roten Kontrollleucht-
en für 3 Sekunden zu beleuchten. Dann wird die blaue Anzeigelampe erlischt und
die rote beleuchtet wird bleiben.
3.4.2. Drücken Sie die Mode-Taste zweimal hintereinander in Audio-Modus zu ge-
langen, die roten und blauen Anzeigeleuchten beleuchtet bleiben. Bei jedem Tasten-
druck wird mit einer Vibration.
3.4.3. Drücken Sie Power On / Off-Taste einmal, um Audio. Die Kamera wird einmal
vibrieren. Die rote Kontrollleuchte hält langsam und die blaue Beleuchtung wird blei-
ben zu blinken.
3.4.4. Drücken Sie Power On / Off-Taste noch einmal zu stoppen Audioaufnahme .
Die Kamera wird einmal vibrieren. Die roten und blauen Anzeigelampen beleuchtet
bleiben wird, was auf die Kamera auf den Audio-Modus ist wieder da.
3.4.5. Drücken Sie die Mode-Taste erneut um die Modi zu wechseln, oder drücken
Sie Power On / Off-Taste für 2 Sekunden, um das Foto-Modus zu verlassen und die
Kamera wird heruntergefahren.
[Hinweis]:
1). Eine Audiodatei wird alle 20 Minuten automatisch generiert und gespeichert werden.
2). Audio Format: WAV
3.5. ZUR BEWEGUNGSERKENNUNG
3.5.1. Schalten Sie die Kamera durch Betätigung der Taste Power On / Off-Taste für
2 Sekunden. Die Kamera wird einmal vibrieren. Die blauen und roten Kontrollleucht-
en für 3 Sekunden zu beleuchten. Dann wird die blaue Anzeigelampe erlischt und
die rote beleuchtet wird bleiben.
3.5.2. Drücken Sie die Mode-Taste 3-mal in Folge in die Bewegungserkennung
Modus zu gelangen. Bei jedem Tastendruck wird mit einer Vibration.
3.5.3. Die Kamera wird Video automatisch aufzeichnen, wenn eine Bewegung
erkannt wird. Die roten und die blauen Anzeigeleuchten blinken abwechselnd.
3.5.4. Drücken Sie die Mode-Taste Bewegungserkennung Modus zu verlassen. Die
Kamera wird einmal vibrieren. Die rote Anzeigelampe bleibt beleuchtet, was die
Kamera in den Standby-Modus ist zurück.
3.6. IR-NACHTSICHTMODUS
Halten Sie die Nachtsicht -Taste 2 Sekunden in den Nachtsichtmodus zu gelangen.
Die Kamera wird zweimal vibrieren. Die gelbe Anzeigelampe bleibt beleuchtet, und
die Infrarot-LEDs eingeschaltet werden.
Halten Sie die Nachtsicht -Taste 2 Sekunden, um die Nachtsichtmodus zu verlas-
sen. Die Kamera wird zweimal vibrieren. Die gelbe Kontrollleuchte erlischt und die
Infrarot-LEDs wird ausgeschaltet.
IV. Neueinstellung
Wenn aus irgendeinem Grund, reagiert die Kamera hält oder nicht ordnungsgemäß
funktioniert, ein einfaches Zurücksetzen wird es in den Normalbetrieb wiederherzus-
tellen zurück.
Betrieb: Halten Sie die Mode-Taste nach unten und dann gleichzeitig einmal Power
On / Off-Taste drücken. Die Kamera wird für 3 Sekunden vibrieren und automatisch
heruntergefahren , und die Anzeige leuchtet erlischt.
V. Video / Audio / Bilddateien Uploads
5.1. Eine Methode: Direkte Verbindung
5.1.1. Wenn die Kamera mit Strom versorgt wird ausgeschaltet und die Micro
SD-Karte in die Kamera ein, verbinden Sie die Kamera an einen PC über das
USB-Kabel verwenden.
5.1.2. Die Kamera wird als Wechsellaufwerk erkannt werden.
5.1.3. Alle Dateien können im DCIM-Ordner zugegriffen werden.
5.2. Methode zwei: Die Verwendung von Memory Card Reader
5.2.1. Wenn die Kamera ausgeschaltet ist, entfernen Sie die Micro SD-Karte und in
einen Kartenleser ein.
5.2.2. Setzen Sie den Kartenleser in einen PC-Computer.
5.2.3. Wechselplattenlaufwerk Ordner angezeigt wird.
5.2.4. Alle Dateien können im DCIM-Ordner zugegriffen werden.
VI. Einstellung von Uhrzeit / Datum-Stempel
6.1. Wenn die Kamera ausgeschaltet ist, entfernen Sie die Micro SD-Karte und in
einen Kartenleser ein.
6.2. Setzen Sie den Kartenleser in einen PC-Computer.
6.3. Wechselplattenlaufwerk Ordner angezeigt wird.
6.4. Klicken Sie auf das Laufwerk im Stammverzeichnis und im Inneren des
Root-Verzeichnis eine Datei "TIMERSET.TXT".
6.5. Schreiben Sie das aktuelle Datum und die Uhrzeit in der "TIMERSET.TXT"
Datei mit dem richtigen Format:
YearMonthDayHourMinuteSecond Y (Zum Beispiel: 20160308142432 Y). Speichern
Sie diese Datei. Wenn Sie den Zeitstempel auf den Video-Dateien nicht benötigen,
ändern Y in N.
6.6. Starten Sie die Kamera und das System wird das Programm automatisch aktu-
alisieren.
VII. Lade
7.1. Schließen Sie die Kamera an eine Steckdose an Steckdose mit dem USB-Kabel
und die DC 5V Ladeadapter zur Verfügung gestellt.
7.2. Die rote Kontrollleuchte hält langsam während des Ladevorgangs zu blinken.
7.3. Es dauert 2 Stunden dauern, bis eine volle Ladung erhalten.
7.4. Die rote Kontrollleuchte leuchtet bleiben, wenn die Kamera Akku vollständig ge-
laden ist.
VII. Live-Video-Ausgang
>> Vor der Verwendung, stellen Sie sicher, dass die Kamera-Akku vollständig aufge-
laden ist.
>> Bitte stellen Sie sicher, dass die Micro-SD-Karte sicher in die Kamera SD-Karten-
steckplatz ausgestattet ist. Eine SDHC Class 10 Micro-SD-Karte wird empfohlen.
8.1. Wenn die Kamera ausgeschaltet ist, schließen Sie es an Ihren Fernseher oder
Monitor durch das AV-Kabel wie unten angegeben mit:
8.2. Wählen Sie die Kamera Videosignalquelle an Ihrem Fernseher oder Monitor.
8.3. Schalten Sie die Kamera und starten Sie die Aufnahme von Video (siehe 3.2),
dann können Sie die Kamera-Live-Videos auf dem TV oder während der Videoauf-
zeichnung Prozess überwachen.
8.4. Sie können auch andere Funktionen dieser Kamera im Live-View-Modus erle-
ben.
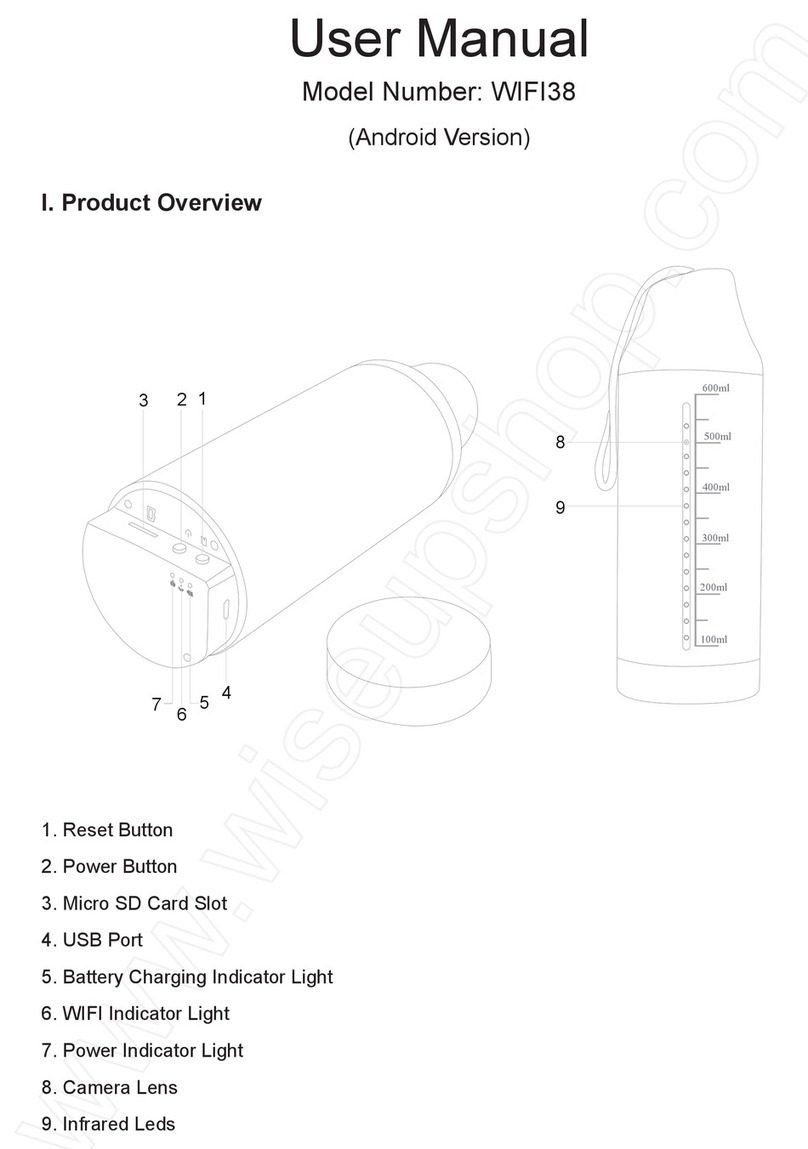
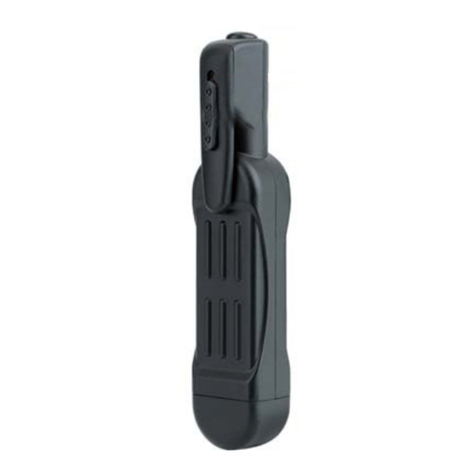
CK6000
Mode d'emploi
I. Présentation du produit
1. Objectif de la caméra
2. Voyant bleu
3. Témoin lumineux jaune
4. Voyant lumineux rouge
5. Mini USB Port
II. Qu'y a-t-il dans la boite
-1×Caméra Voiture Clef
-1×USB/AV Câble
-1×DC5V Adaptateur De Charge
III. Opération
>> Avant d'utiliser, assurez-vous que la batterie de l'appareil est complètement
rechargée.
>> S'il vous plaît assurez-vous que la carte Micro SD est bien insérée dans la fente
6. LED infrarouges
7. Bouton Mode
8. Marche / Arrêt Bouton
9. Nuit Vision Bouton
10. Micro SD Card Slot
de la carte SD de votre appareil photo. La caméra ne fonctionnera pas sans une
carte Micro SD. Une carte SD 10 Micro SDHC Class est recommandé.
3.1. MARCHE / ARRÊT
3.1.1. Allumez l'appareil photo en appuyant sur Marche / Arrêt Bouton pendant 2
secondes. L'appareil vibre une fois. Les voyants bleu et rouge s'allument pendant 3
secondes. Ensuite, le voyant lumineux bleu s'éteint et le rouge reste allumée, indi-
quant que l'appareil est entré en mode veille.
3.1.2. Mise hors tension de l'appareil photo en appuyant sur Marche / Arrêt Bouton
pendant 2 secondes. L'appareil vibre une fois et les voyants lumineux s'éteint.
3.1.3. L'appareil photo arrête automatiquement si elle est en mode veille sans
aucune opération de plus de 3 minutes.
[Remarque]:
1). Si aucune carte micro SD est insérée dans l'appareil photo, les voyants bleu et rouge continuent de
clignoter pendant 10 secondes, puis l'appareil arrête automatiquement.
2). Si la batterie est faible, le voyant lumineux bleu clignote rapidement, puis l'appareil arrête automa-
tiquement.
3.2. ENREGISTREMENT VIDEO
3.2.1. Allumez l'appareil photo en appuyant sur Marche / Arrêt Bouton pendant 2
secondes. L'appareil vibre une fois. Les voyants bleu et rouge s'allument pendant 3
secondes. Ensuite, le voyant lumineux bleu s'éteint et le rouge reste allumée, indi-
quant que l'appareil est entré en mode veille.
3.2.2. Appuyez sur le bouton d'alimentation Marche / Arrêt une fois pour enregistrer
la vidéo. L'appareil vibre une fois et le voyant rouge continue à clignoter lentement.
3.2.3. Appuyez sur le bouton d'alimentation Marche / Arrêt une fois de plus pour
arrêter l'enregistrement vidéo. L'appareil vibre une fois. Le voyant rouge reste
allumé, indiquant que l'appareil est en mode veille.
[Remarque]:
1). Un fichier vidéo sera généré et enregistré toutes les 5 minutes automatiquement.
2). La caméra peut enregistrer de la vidéo en continu pendant 1 heure sur une charge complète.
3). Résolution Vidéo: 1920×1080P Format Vidéo: AVI
3.3. APPAREIL PHOTO / LA PHOTOGRAPHIE
3.3.1. Allumez l'appareil photo en appuyant sur Marche / Arrêt Bouton pendant 2
secondes. L'appareil vibre une fois. Les voyants bleu et rouge s'allument pendant 3
secondes. Ensuite, le voyant lumineux bleu s'éteint et le rouge reste allumée, indi-
quant que l'appareil est entré en mode veille.
3.3.2. Appuyez sur le bouton Mode une fois pour entrer en mode photo. L'appareil
vibre une fois. Le voyant rouge éteint et le bleu reste allumée.
3.3.3. Appuyez sur le bouton d'alimentation Marche / Arrêt une fois pour prendre une
photo. L'appareil vibre une fois. Le voyant lumineux bleu clignote une fois, puis
rester allumé, indiquant que l'appareil est de retour en mode photographie.
3.3.4. Appuyez à nouveau sur le bouton Mode pour basculer entre les modes, ou ap-
puyez sur Marche / Arrêt Bouton pendant 2 secondes pour quitter le mode photo et
la caméra va fermer.
3.4. AUDIO ENREGISTREMENT
3.4.1. Allumez l'appareil photo en appuyant sur Marche / Arrêt Bouton pendant 2
secondes. L'appareil vibre une fois. Les voyants bleu et rouge s'allument pendant 3
secondes. Ensuite, le voyant lumineux bleu s'éteint et le rouge reste allumée.
3.4.2. Mode Appuyez sur le bouton deux fois de suite pour entrer en mode audio, les
voyants rouge et bleu reste allumée. Chaque pression viendra avec une vibration.
3.4.3. Appuyez sur le bouton d'alimentation Marche / Arrêt une fois pour enregistrer
l'audio. L'appareil vibre une fois. Le voyant rouge continue à clignoter lentement et
le bleu reste allumée.
3.4.4. Appuyez sur le bouton d'alimentation Marche / Arrêt une fois de plus pour
arrêter l'enregistrement audio. L'appareil vibre une fois. Les voyants lumineux rouge
et bleu seront rester allumés, ce qui indique que l'appareil est de nouveau en mode
audio.
3.4.5. Appuyez à nouveau sur le bouton Mode pour basculer entre les modes, ou ap-
puyez sur Marche / Arrêt Bouton pendant 2 secondes pour quitter le mode photo et
la caméra va fermer.
[Remarque]:
1). Un fichier audio sera généré et enregistré toutes les 20 minutes automatiquement.
2). Format Audio: WAV
3.5. DETECTION DE MOUVEMENT ENREGISTRE
3.5.1. Allumez l'appareil photo en appuyant sur Marche / Arrêt Bouton pendant 2
secondes. L'appareil vibre une fois. Les voyants bleu et rouge s'allument pendant 3
secondes. Ensuite, le voyant lumineux bleu s'éteint et le rouge reste allumée.
3.5.2. Appuyez sur le bouton Mode 3 fois de suite pour entrer en mode de détection
de mouvement. Chaque pression viendra avec une vibration.
3.5.3. L'appareil photo enregistre la vidéo automatiquement lorsqu'un mouvement
est détecté. Les feux rouges et le voyant bleu clignotent en alternance.
3.5.4. Appuyez sur le bouton Mode pour quitter le mode de détection de mouvement.
L'appareil vibre une fois. Le voyant rouge reste allumé, indiquant que l'appareil est
en mode veille.
3.6. IR VISION NOCTURNE
Maintenez Nuit Vision bouton pendant 2 secondes pour entrer dans le mode de
vision nocturne. L'appareil se met à vibrer deux fois. Le voyant jaune restera éclairé
et les LED infrarouges sera activée.
Maintenez Nuit Vision bouton pendant 2 secondes pour quitter le mode de vision
nocturne. L'appareil se met à vibrer deux fois. Le voyant jaune s'éteint et les LED
infrarouges sera désactivé.
IV. Réinitialisation
Si pour une raison quelconque, l'appareil cesse de répondre ou ne fonctionne pas
correctement, une réinitialisation rapide sera le restaurer à un fonctionnement
normal.
Opération: Maintenez le bouton Mode, puis appuyez sur le bouton d'alimentation
Marche / Arrêt une fois simultanément. La caméra va vibrer pendant 3 secondes et
éteint automatiquement et le voyant s'éteint.
V. Vidéo / Audio / Image Fichiers Envois
5.1. Première Méthode: Connexion directe
5.1.1. Lorsque l'appareil est mis hors tension et la carte Micro SD insérée dans l'ap-
pareil photo, connectez votre appareil à un ordinateur PC en utilisant le câble USB
fourni.
5.1.2. La caméra sera reconnu comme un lecteur de disque amovible.
5.1.3. Tous les fichiers peuvent être consultés dans le dossier DCIM.
5.2. Deuxième Méthode: Utilisation lecteur de carte mémoire
5.2.1. Lorsque l'appareil est mis hors tension, retirez la carte Micro SD et l'insérer
dans un lecteur de carte.
5.2.2. Insérez le lecteur de carte dans un ordinateur PC.
5.2.3. Dossier de disque amovible apparaît.
5.2.4. Tous les fichiers peuvent être consultés dans le dossier DCIM.
VI. Réglage de l'heure / Date
6.1. Lorsque l'appareil est mis hors tension, retirez la carte Micro SD et l'insérer dans
un lecteur de carte.
6.2. Insérez le lecteur de carte dans un ordinateur PC.
6.3. Dossier de disque amovible apparaît.
6.4. Cliquez sur le lecteur dans le répertoire racine et à l'intérieur du répertoire
racine, créez un fichier "TIMERSET.TXT".
6.5. Écrivez la date et l'heure actuelle dans le "TIMERSET.TXT" fichier avec le
format correct:
Année Mois Jour Heure Minute Seconde Y (Par exemple: 20160308142432 Y). En-
registrez ce fichier. Si vous n'avez pas besoin de l'horodatage sur les fichiers vidéo,
changer Y en N.
6.6. Redémarrez l'appareil photo et le système de mise à niveau du programme au-
tomatiquement.
VII. Se charge
7.1. Branchez l'appareil photo à une prise de courant alternatif de sortie en utilisant
le câble USB et l'adaptateur de charge DC 5V fourni.
7.2. Le voyant rouge continue à clignoter lentement pendant le processus de
charge.
7.3. Il faudra 2 heures pour obtenir une charge complète.
7.4. Le voyant rouge reste allumé lorsque la batterie de l'appareil est complètement
rechargée.
VIII. En direct Sortie vidéo
>> Avant d'utiliser, assurez-vous que la batterie de l'appareil est complètement
rechargée.
>> S'il vous plaît assurez-vous que la carte Micro SD est bien insérée dans la fente
caméra carte SD. Une SDHC Classe 10 carte Micro SD est recommandée.
8.1. Lorsque l'appareil est mis hors tension, connectez-le à votre téléviseur ou moni-
teur en utilisant le câble AV fourni comme ci-dessous:
8.2. Sélectionnez la source de signal caméra vidéo sur votre téléviseur ou moniteur.
8.3. Allumez l'appareil photo et commencer l'enregistrement vidéo (voir 3.2), alors
vous pouvez regarder la vidéo en direct de la caméra sur le téléviseur ou le moniteur
pendant le processus d'enregistrement vidéo.
8.4. Vous pouvez également rencontrer d'autres fonctions de cet appareil dans le
mode d'affichage en direct.

1. Objectif de la caméra
2. Voyant bleu
3. Témoin lumineux jaune
4. Voyant lumineux rouge
5. Mini USB Port
II. Qu'y a-t-il dans la boite
-1×Caméra Voiture Clef
-1×USB/AV Câble
-1×DC5V Adaptateur De Charge
III. Opération
>> Avant d'utiliser, assurez-vous que la batterie de l'appareil est complètement
rechargée.
>> S'il vous plaît assurez-vous que la carte Micro SD est bien insérée dans la fente
de la carte SD de votre appareil photo. La caméra ne fonctionnera pas sans une
carte Micro SD. Une carte SD 10 Micro SDHC Class est recommandé.
3.1. MARCHE / ARRÊT
3.1.1. Allumez l'appareil photo en appuyant sur Marche / Arrêt Bouton pendant 2
secondes. L'appareil vibre une fois. Les voyants bleu et rouge s'allument pendant 3
secondes. Ensuite, le voyant lumineux bleu s'éteint et le rouge reste allumée, indi-
quant que l'appareil est entré en mode veille.
3.1.2. Mise hors tension de l'appareil photo en appuyant sur Marche / Arrêt Bouton
pendant 2 secondes. L'appareil vibre une fois et les voyants lumineux s'éteint.
3.1.3. L'appareil photo arrête automatiquement si elle est en mode veille sans
aucune opération de plus de 3 minutes.
[Remarque]:
1). Si aucune carte micro SD est insérée dans l'appareil photo, les voyants bleu et rouge continuent de
clignoter pendant 10 secondes, puis l'appareil arrête automatiquement.
2). Si la batterie est faible, le voyant lumineux bleu clignote rapidement, puis l'appareil arrête automa-
tiquement.
3.2. ENREGISTREMENT VIDEO
3.2.1. Allumez l'appareil photo en appuyant sur Marche / Arrêt Bouton pendant 2
secondes. L'appareil vibre une fois. Les voyants bleu et rouge s'allument pendant 3
secondes. Ensuite, le voyant lumineux bleu s'éteint et le rouge reste allumée, indi-
quant que l'appareil est entré en mode veille.
3.2.2. Appuyez sur le bouton d'alimentation Marche / Arrêt une fois pour enregistrer
la vidéo. L'appareil vibre une fois et le voyant rouge continue à clignoter lentement.
3.2.3. Appuyez sur le bouton d'alimentation Marche / Arrêt une fois de plus pour
arrêter l'enregistrement vidéo. L'appareil vibre une fois. Le voyant rouge reste
allumé, indiquant que l'appareil est en mode veille.
[Remarque]:
1). Un fichier vidéo sera généré et enregistré toutes les 5 minutes automatiquement.
2). La caméra peut enregistrer de la vidéo en continu pendant 1 heure sur une charge complète.
3). Résolution Vidéo: 1920×1080P Format Vidéo: AVI
3.3. APPAREIL PHOTO / LA PHOTOGRAPHIE
3.3.1. Allumez l'appareil photo en appuyant sur Marche / Arrêt Bouton pendant 2
secondes. L'appareil vibre une fois. Les voyants bleu et rouge s'allument pendant 3
secondes. Ensuite, le voyant lumineux bleu s'éteint et le rouge reste allumée, indi-
quant que l'appareil est entré en mode veille.
3.3.2. Appuyez sur le bouton Mode une fois pour entrer en mode photo. L'appareil
vibre une fois. Le voyant rouge éteint et le bleu reste allumée.
3.3.3. Appuyez sur le bouton d'alimentation Marche / Arrêt une fois pour prendre une
photo. L'appareil vibre une fois. Le voyant lumineux bleu clignote une fois, puis
rester allumé, indiquant que l'appareil est de retour en mode photographie.
3.3.4. Appuyez à nouveau sur le bouton Mode pour basculer entre les modes, ou ap-
puyez sur Marche / Arrêt Bouton pendant 2 secondes pour quitter le mode photo et
la caméra va fermer.
3.4. AUDIO ENREGISTREMENT
3.4.1. Allumez l'appareil photo en appuyant sur Marche / Arrêt Bouton pendant 2
secondes. L'appareil vibre une fois. Les voyants bleu et rouge s'allument pendant 3
secondes. Ensuite, le voyant lumineux bleu s'éteint et le rouge reste allumée.
3.4.2. Mode Appuyez sur le bouton deux fois de suite pour entrer en mode audio, les
voyants rouge et bleu reste allumée. Chaque pression viendra avec une vibration.
3.4.3. Appuyez sur le bouton d'alimentation Marche / Arrêt une fois pour enregistrer
l'audio. L'appareil vibre une fois. Le voyant rouge continue à clignoter lentement et
le bleu reste allumée.
3.4.4. Appuyez sur le bouton d'alimentation Marche / Arrêt une fois de plus pour
arrêter l'enregistrement audio. L'appareil vibre une fois. Les voyants lumineux rouge
et bleu seront rester allumés, ce qui indique que l'appareil est de nouveau en mode
audio.
3.4.5. Appuyez à nouveau sur le bouton Mode pour basculer entre les modes, ou ap-
puyez sur Marche / Arrêt Bouton pendant 2 secondes pour quitter le mode photo et
la caméra va fermer.
[Remarque]:
1). Un fichier audio sera généré et enregistré toutes les 20 minutes automatiquement.
2). Format Audio: WAV
3.5. DETECTION DE MOUVEMENT ENREGISTRE
3.5.1. Allumez l'appareil photo en appuyant sur Marche / Arrêt Bouton pendant 2
secondes. L'appareil vibre une fois. Les voyants bleu et rouge s'allument pendant 3
secondes. Ensuite, le voyant lumineux bleu s'éteint et le rouge reste allumée.
3.5.2. Appuyez sur le bouton Mode 3 fois de suite pour entrer en mode de détection
de mouvement. Chaque pression viendra avec une vibration.
3.5.3. L'appareil photo enregistre la vidéo automatiquement lorsqu'un mouvement
est détecté. Les feux rouges et le voyant bleu clignotent en alternance.
3.5.4. Appuyez sur le bouton Mode pour quitter le mode de détection de mouvement.
L'appareil vibre une fois. Le voyant rouge reste allumé, indiquant que l'appareil est
en mode veille.
3.6. IR VISION NOCTURNE
Maintenez Nuit Vision bouton pendant 2 secondes pour entrer dans le mode de
vision nocturne. L'appareil se met à vibrer deux fois. Le voyant jaune restera éclairé
et les LED infrarouges sera activée.
Maintenez Nuit Vision bouton pendant 2 secondes pour quitter le mode de vision
nocturne. L'appareil se met à vibrer deux fois. Le voyant jaune s'éteint et les LED
infrarouges sera désactivé.
IV. Réinitialisation
Si pour une raison quelconque, l'appareil cesse de répondre ou ne fonctionne pas
correctement, une réinitialisation rapide sera le restaurer à un fonctionnement
normal.
Opération: Maintenez le bouton Mode, puis appuyez sur le bouton d'alimentation
Marche / Arrêt une fois simultanément. La caméra va vibrer pendant 3 secondes et
éteint automatiquement et le voyant s'éteint.
V. Vidéo / Audio / Image Fichiers Envois
5.1. Première Méthode: Connexion directe
5.1.1. Lorsque l'appareil est mis hors tension et la carte Micro SD insérée dans l'ap-
pareil photo, connectez votre appareil à un ordinateur PC en utilisant le câble USB
fourni.
5.1.2. La caméra sera reconnu comme un lecteur de disque amovible.
5.1.3. Tous les fichiers peuvent être consultés dans le dossier DCIM.
5.2. Deuxième Méthode: Utilisation lecteur de carte mémoire
5.2.1. Lorsque l'appareil est mis hors tension, retirez la carte Micro SD et l'insérer
dans un lecteur de carte.
5.2.2. Insérez le lecteur de carte dans un ordinateur PC.
5.2.3. Dossier de disque amovible apparaît.
5.2.4. Tous les fichiers peuvent être consultés dans le dossier DCIM.
VI. Réglage de l'heure / Date
6.1. Lorsque l'appareil est mis hors tension, retirez la carte Micro SD et l'insérer dans
un lecteur de carte.
6.2. Insérez le lecteur de carte dans un ordinateur PC.
6.3. Dossier de disque amovible apparaît.
6.4. Cliquez sur le lecteur dans le répertoire racine et à l'intérieur du répertoire
racine, créez un fichier "TIMERSET.TXT".
6.5. Écrivez la date et l'heure actuelle dans le "TIMERSET.TXT" fichier avec le
format correct:
Année Mois Jour Heure Minute Seconde Y (Par exemple: 20160308142432 Y). En-
registrez ce fichier. Si vous n'avez pas besoin de l'horodatage sur les fichiers vidéo,
changer Y en N.
6.6. Redémarrez l'appareil photo et le système de mise à niveau du programme au-
tomatiquement.
VII. Se charge
7.1. Branchez l'appareil photo à une prise de courant alternatif de sortie en utilisant
le câble USB et l'adaptateur de charge DC 5V fourni.
7.2. Le voyant rouge continue à clignoter lentement pendant le processus de
charge.
7.3. Il faudra 2 heures pour obtenir une charge complète.
7.4. Le voyant rouge reste allumé lorsque la batterie de l'appareil est complètement
rechargée.
VIII. En direct Sortie vidéo
>> Avant d'utiliser, assurez-vous que la batterie de l'appareil est complètement
rechargée.
>> S'il vous plaît assurez-vous que la carte Micro SD est bien insérée dans la fente
caméra carte SD. Une SDHC Classe 10 carte Micro SD est recommandée.
8.1. Lorsque l'appareil est mis hors tension, connectez-le à votre téléviseur ou moni-
teur en utilisant le câble AV fourni comme ci-dessous:
8.2. Sélectionnez la source de signal caméra vidéo sur votre téléviseur ou moniteur.
8.3. Allumez l'appareil photo et commencer l'enregistrement vidéo (voir 3.2), alors
vous pouvez regarder la vidéo en direct de la caméra sur le téléviseur ou le moniteur
pendant le processus d'enregistrement vidéo.
8.4. Vous pouvez également rencontrer d'autres fonctions de cet appareil dans le
mode d'affichage en direct.

CK6000
Guida utente
I. Panoramica del Prodotto
1. Obiettivo della fotocamera
2. indicatore luminoso blu
3. spia gialla
4. spia rossa
5. porta mini USB
II. Cosa c'è nella scatola
-1×Macchina fotografica di chiave
-1×USB / Cavo AV
-1×Adattatore di ricarica DC5V
III. Operazione
>> Prima di utilizzare, assicurarsi che la batteria sia completamente carica.
>> Si prega di accertarsi che la scheda Micro SD sia saldamente nello slot per
schede SD della fotocamera. La fotocamera non funziona senza una scheda Micro
6. LED a infrarossi
7. Pulsante Modalità
8. Power On / Off Pulsante
9. Pulsante visione notturna
10. Micro SD Card Slot
SD. Si raccomanda un SDHC Classe 10 scheda Micro SD.
3.1. ACCENSIONE / SPEGNIMENTO
3.1.1. Accendere la fotocamera premendo Accensione / spegnimento per 2 secondi.
La fotocamera vibrerà una volta. L'indicatore blu e rosso le luci si accendono per 3
secondi. Poi l'indicatore luminoso blu si spegne e quello rosso rimarrà illuminato,
indicando la telecamera è entrato in modalità standby.
3.1.2. Spegnere la fotocamera premendo Accensione / spegnimento per 2 secondi.
La fotocamera vibrerà una volta e le spie si spegne.
3.1.3. La fotocamera si spegne automaticamente se è in modalità standby, senza
alcuna operazione più di 3 minuti.
[Nota]:
1). Se nessuna scheda micro SD è montato nella telecamera, le luci di indicatore blu e rosso continuer-
anno a lampeggiare per 10 secondi, quindi la fotocamera si spegne automaticamente.
2). Se la batteria è scarica, l'indicatore luminoso blu lampeggia rapidamente e quindi la fotocamera si
spegne automaticamente.
3.2. REGISTRAZIONE VIDEO
3.2.1. Accendere la fotocamera premendo Accensione / spegnimento per 2 secondi.
La fotocamera vibrerà una volta. L'indicatore blu e rosso le luci si accendono per 3
secondi. Poi l'indicatore luminoso blu si spegne e quello rosso rimarrà illuminato,
indicando la telecamera è entrato in modalità standby.
3.2.2. Premere il pulsante di accensione / spegnimento una volta per registrare
video. La fotocamera vibrerà una volta e la spia rossa continua a lampeggiare lenta-
mente.
3.2.3. Premere il pulsante di accensione / spegnimento, ancora una volta per inter-
rompere la registrazione video. La fotocamera vibrerà una volta. La spia rossa rimar-
rà illuminato, indicando la fotocamera è in modalità standby.
[Nota]:
1). Un file video viene generato e salvato automaticamente ogni 5 minuti.
2). La fotocamera può registrare video in continuo per 1 ora su una carica completa.
3). Risoluzione video: 1920×1080P Formato video: AVI
3.3. CAMERA / LA FOTOGRAFIA
3.3.1. Accendere la fotocamera premendo Accensione / spegnimento per 2 secondi.
La fotocamera vibrerà una volta. L'indicatore blu e rosso le luci si accendono per 3
secondi. Poi l'indicatore luminoso blu si spegne e quello rosso rimarrà illuminato,
indicando la telecamera è entrato in modalità standby.
3.3.2. Premere il pulsante MODE una volta per entrare in modalità fotografia. La
fotocamera vibrerà una volta. La spia rossa si spegne e quello blu rimarrà illuminato.
3.3.3. Premere il pulsante di accensione / spegnimento una volta per scattare
una foto. La fotocamera vibrerà una volta. La spia blu lampeggia una volta e poi
rimanere illuminato, indicando la fotocamera è di nuovo in modalità fotografia.
3.3.4. Premere di nuovo il pulsante MODE per passare le modalità, oppure premere
Power On / Off per 2 secondi per uscire dalla modalità fotografia e la fotocamera si
spegne.
3.4. REGISTRAZIONE AUDIO
3.4.1. Accendere la fotocamera premendo Accensione / spegnimento per 2 secondi.
La fotocamera vibrerà una volta. L'indicatore blu e rosso le luci si accendono per 3
secondi. Poi l'indicatore luminoso blu si spegne e quello rosso rimarrà illuminato.
3.4.2. Premere il pulsante MODE due volte di fila per entrare in modalità audio, le
spie rossa e blu rimarrà illuminato. Ad ogni pressione sarà disponibile con una
vibrazione.
3.4.3. Premere il pulsante di accensione / spegnimento una volta per registrare l'au-
dio. La fotocamera vibrerà una volta. La spia rossa continua a lampeggiare lentam-
ente e quello blu rimarrà illuminato.
3.4.4. Premere il pulsante di accensione / spegnimento, ancora una volta per inter-
rompere la registrazione audio. La fotocamera vibrerà una volta. L'indicatore rosso
e blu saranno rimangono illuminate, indicando la fotocamera è tornato alla modalità
audio.
3.4.5. Premere di nuovo il pulsante MODE per passare le modalità, oppure premere
Power On / Off per 2 secondi per uscire dalla modalità fotografia e la fotocamera si
spegne.
[Nota]:
1). Un file audio viene generata e salvata automaticamente ogni 20 minuti.
2). Formato audio: WAV
3.5. RILEVAZIONE MOVIMENTO REGISTRAZIONE
3.5.1. Accendere la fotocamera premendo Accensione / spegnimento per 2 sec-
ondi. La fotocamera vibrerà una volta. L'indicatore blu e rosso le luci si accendo-
no per 3 secondi. Poi l'indicatore luminoso blu si spegne e quello rosso rimarrà
illuminato.
3.5.2. Premere Mode pulsante 3 volte di fila per entrare in modalità di rilevamento
del movimento. Ad ogni pressione sarà disponibile con una vibrazione.
3.5.3. La fotocamera registrare video automaticamente quando viene rilevato un
movimento. Le luci rosse e la spia blu lampeggiano alternativamente.
3.5.4. Premere il pulsante MODE per uscire dalla modalità di rilevamento del movi-
mento. La fotocamera vibrerà una volta. La spia rossa rimarrà illuminato, indicando
la fotocamera è in modalità standby.
3.6. IR MODALITÀ DI VISIONE NOTTURNA
Tenere premuto il pulsante di visione notturna per 2 secondi per entrare nella modal-
ità di visione notturna. La fotocamera vibrerà due volte. La spia gialla rimarrà acceso
e il LED a infrarossi verrà acceso.
Tenere premuto il pulsante di visione notturna per 2 secondi per uscire dalla modal-
ità di visione notturna. La fotocamera vibrerà due volte. La spia gialla si spegne e il
LED a infrarossi verrà disattivato.
IV. Ripristino
Se per qualsiasi motivo, la fotocamera smette di rispondere o non funziona corret-
tamente, eseguire un ripristino rapido ripristinerà di nuovo al normale funziona-
mento.
Funzionamento: Tenere premuto il tasto MODE e quindi premere il tasto POWER
ON / OFF una volta contemporaneamente. La fotocamera vibrerà per 3 secondi e
spegnere automaticamente, e le spie si spegne.
V. Video / Audio / Immagine Carica I File
5.1. Un metodo: connessione diretta
5.1.1. Quando la fotocamera è spenta e la scheda Micro SD inserita nella fotocam-
era, collegare la fotocamera a un computer PC utilizzando il cavo USB in dotazione.
5.1.2. La fotocamera viene riconosciuta come unità disco rimovibile.
5.1.3. Tutti i file sono accessibili nella cartella DCIM.
5.2. Metodo due: Uso della memoria Card Reader
5.2.1. Quando la fotocamera è spenta, rimuovere la scheda Micro SD e inserirla in
un lettore di schede.
5.2.2. Inserire il lettore di schede in un computer PC.
5.2.3. appare cartella sul disco rimovibile.
5.2.4. Tutti i file sono accessibili nella cartella DCIM.
VI. Impostazione Ora / Data
6.1. Quando la fotocamera è spenta, rimuovere la scheda Micro SD e inserirla in un
lettore di schede.
6.2. Inserire il lettore di schede in un computer PC.
6.3. appare cartella sul disco rimovibile.
6.4. Fare clic sul disco nella directory principale e all'interno della directory princi-
pale, creare un file "TIMERSET.TXT".
6.5. Scrivere la data e l'ora correnti nel file "TIMERSET.TXT" con il formato cor-
retto:
YearMonthDayHourMinuteSecond Y (per esempio: 20160308142432 Y). Salvare
il file. Se non è necessario il timestamp sui file video, cambiare Y in N.
6.6. Riavviare la telecamera e il sistema aggiornerà automaticamente il program-
ma.
VII. Ricarica
7.1. Collegare la fotocamera ad una presa di corrente alternata presa utilizzando il
cavo USB e l'adattatore di ricarica DC 5V fornita.
7.2. La spia rossa continua a lampeggiare lentamente durante il processo di carica.
7.3. Ci vorranno 2 ore per ottenere una carica completa.
7.4. La spia rossa rimarrà illuminato quando la batteria della fotocamera è completa-
mente carica.
VIII. Uscita video dal vivo
>> Prima di utilizzare, assicurarsi che la batteria sia completamente carica.
>> Si prega di accertarsi che la scheda Micro SD sia saldamente nello slot della
scheda SD della fotocamera. Si raccomanda un SDHC Classe 10 scheda Micro SD.
8.1. Quando la fotocamera è spenta, collegarlo al televisore o monitor utilizzando il
cavo AV in dotazione, come di seguito:
8.2. Selezionare la sorgente del segnale video della telecamera sul televisore o sul
monitor.
8.3. Accendere la fotocamera e avviare la registrazione video (vedere 3.2), allora si
può guardare il video in diretta della telecamera sul televisore o monitor durante il
processo di registrazione video.
8.4. È anche possibile sperimentare altre funzioni di questa fotocamera in modalità
live view.

1. Obiettivo della fotocamera
2. indicatore luminoso blu
3. spia gialla
4. spia rossa
5. porta mini USB
II. Cosa c'è nella scatola
-1×Macchina fotografica di chiave
-1×USB / Cavo AV
-1×Adattatore di ricarica DC5V
III. Operazione
>> Prima di utilizzare, assicurarsi che la batteria sia completamente carica.
>> Si prega di accertarsi che la scheda Micro SD sia saldamente nello slot per
schede SD della fotocamera. La fotocamera non funziona senza una scheda Micro
SD. Si raccomanda un SDHC Classe 10 scheda Micro SD.
3.1. ACCENSIONE / SPEGNIMENTO
3.1.1. Accendere la fotocamera premendo Accensione / spegnimento per 2 secondi.
La fotocamera vibrerà una volta. L'indicatore blu e rosso le luci si accendono per 3
secondi. Poi l'indicatore luminoso blu si spegne e quello rosso rimarrà illuminato,
indicando la telecamera è entrato in modalità standby.
3.1.2. Spegnere la fotocamera premendo Accensione / spegnimento per 2 secondi.
La fotocamera vibrerà una volta e le spie si spegne.
3.1.3. La fotocamera si spegne automaticamente se è in modalità standby, senza
alcuna operazione più di 3 minuti.
[Nota]:
1). Se nessuna scheda micro SD è montato nella telecamera, le luci di indicatore blu e rosso continuer-
anno a lampeggiare per 10 secondi, quindi la fotocamera si spegne automaticamente.
2). Se la batteria è scarica, l'indicatore luminoso blu lampeggia rapidamente e quindi la fotocamera si
spegne automaticamente.
3.2. REGISTRAZIONE VIDEO
3.2.1. Accendere la fotocamera premendo Accensione / spegnimento per 2 secondi.
La fotocamera vibrerà una volta. L'indicatore blu e rosso le luci si accendono per 3
secondi. Poi l'indicatore luminoso blu si spegne e quello rosso rimarrà illuminato,
indicando la telecamera è entrato in modalità standby.
3.2.2. Premere il pulsante di accensione / spegnimento una volta per registrare
video. La fotocamera vibrerà una volta e la spia rossa continua a lampeggiare lenta-
mente.
3.2.3. Premere il pulsante di accensione / spegnimento, ancora una volta per inter-
rompere la registrazione video. La fotocamera vibrerà una volta. La spia rossa rimar-
rà illuminato, indicando la fotocamera è in modalità standby.
[Nota]:
1). Un file video viene generato e salvato automaticamente ogni 5 minuti.
2). La fotocamera può registrare video in continuo per 1 ora su una carica completa.
3). Risoluzione video: 1920×1080P Formato video: AVI
3.3. CAMERA / LA FOTOGRAFIA
3.3.1. Accendere la fotocamera premendo Accensione / spegnimento per 2 secondi.
La fotocamera vibrerà una volta. L'indicatore blu e rosso le luci si accendono per 3
secondi. Poi l'indicatore luminoso blu si spegne e quello rosso rimarrà illuminato,
indicando la telecamera è entrato in modalità standby.
3.3.2. Premere il pulsante MODE una volta per entrare in modalità fotografia. La
fotocamera vibrerà una volta. La spia rossa si spegne e quello blu rimarrà illuminato.
3.3.3. Premere il pulsante di accensione / spegnimento una volta per scattare
una foto. La fotocamera vibrerà una volta. La spia blu lampeggia una volta e poi
rimanere illuminato, indicando la fotocamera è di nuovo in modalità fotografia.
3.3.4. Premere di nuovo il pulsante MODE per passare le modalità, oppure premere
Power On / Off per 2 secondi per uscire dalla modalità fotografia e la fotocamera si
spegne.
3.4. REGISTRAZIONE AUDIO
3.4.1. Accendere la fotocamera premendo Accensione / spegnimento per 2 secondi.
La fotocamera vibrerà una volta. L'indicatore blu e rosso le luci si accendono per 3
secondi. Poi l'indicatore luminoso blu si spegne e quello rosso rimarrà illuminato.
3.4.2. Premere il pulsante MODE due volte di fila per entrare in modalità audio, le
spie rossa e blu rimarrà illuminato. Ad ogni pressione sarà disponibile con una
vibrazione.
3.4.3. Premere il pulsante di accensione / spegnimento una volta per registrare l'au-
dio. La fotocamera vibrerà una volta. La spia rossa continua a lampeggiare lentam-
ente e quello blu rimarrà illuminato.
3.4.4. Premere il pulsante di accensione / spegnimento, ancora una volta per inter-
rompere la registrazione audio. La fotocamera vibrerà una volta. L'indicatore rosso
e blu saranno rimangono illuminate, indicando la fotocamera è tornato alla modalità
audio.
3.4.5. Premere di nuovo il pulsante MODE per passare le modalità, oppure premere
Power On / Off per 2 secondi per uscire dalla modalità fotografia e la fotocamera si
spegne.
[Nota]:
1). Un file audio viene generata e salvata automaticamente ogni 20 minuti.
2). Formato audio: WAV
3.5. RILEVAZIONE MOVIMENTO REGISTRAZIONE
3.5.1. Accendere la fotocamera premendo Accensione / spegnimento per 2 sec-
ondi. La fotocamera vibrerà una volta. L'indicatore blu e rosso le luci si accendo-
no per 3 secondi. Poi l'indicatore luminoso blu si spegne e quello rosso rimarrà
illuminato.
3.5.2. Premere Mode pulsante 3 volte di fila per entrare in modalità di rilevamento
del movimento. Ad ogni pressione sarà disponibile con una vibrazione.
3.5.3. La fotocamera registrare video automaticamente quando viene rilevato un
movimento. Le luci rosse e la spia blu lampeggiano alternativamente.
3.5.4. Premere il pulsante MODE per uscire dalla modalità di rilevamento del movi-
mento. La fotocamera vibrerà una volta. La spia rossa rimarrà illuminato, indicando
la fotocamera è in modalità standby.
3.6. IR MODALITÀ DI VISIONE NOTTURNA
Tenere premuto il pulsante di visione notturna per 2 secondi per entrare nella modal-
ità di visione notturna. La fotocamera vibrerà due volte. La spia gialla rimarrà acceso
e il LED a infrarossi verrà acceso.
Tenere premuto il pulsante di visione notturna per 2 secondi per uscire dalla modal-
ità di visione notturna. La fotocamera vibrerà due volte. La spia gialla si spegne e il
LED a infrarossi verrà disattivato.
IV. Ripristino
Se per qualsiasi motivo, la fotocamera smette di rispondere o non funziona corret-
tamente, eseguire un ripristino rapido ripristinerà di nuovo al normale funziona-
mento.
Funzionamento: Tenere premuto il tasto MODE e quindi premere il tasto POWER
ON / OFF una volta contemporaneamente. La fotocamera vibrerà per 3 secondi e
spegnere automaticamente, e le spie si spegne.
V. Video / Audio / Immagine Carica I File
5.1. Un metodo: connessione diretta
5.1.1. Quando la fotocamera è spenta e la scheda Micro SD inserita nella fotocam-
era, collegare la fotocamera a un computer PC utilizzando il cavo USB in dotazione.
5.1.2. La fotocamera viene riconosciuta come unità disco rimovibile.
5.1.3. Tutti i file sono accessibili nella cartella DCIM.
5.2. Metodo due: Uso della memoria Card Reader
5.2.1. Quando la fotocamera è spenta, rimuovere la scheda Micro SD e inserirla in
un lettore di schede.
5.2.2. Inserire il lettore di schede in un computer PC.
5.2.3. appare cartella sul disco rimovibile.
5.2.4. Tutti i file sono accessibili nella cartella DCIM.
VI. Impostazione Ora / Data
6.1. Quando la fotocamera è spenta, rimuovere la scheda Micro SD e inserirla in un
lettore di schede.
6.2. Inserire il lettore di schede in un computer PC.
6.3. appare cartella sul disco rimovibile.
6.4. Fare clic sul disco nella directory principale e all'interno della directory princi-
pale, creare un file "TIMERSET.TXT".
6.5. Scrivere la data e l'ora correnti nel file "TIMERSET.TXT" con il formato cor-
retto:
YearMonthDayHourMinuteSecond Y (per esempio: 20160308142432 Y). Salvare
il file. Se non è necessario il timestamp sui file video, cambiare Y in N.
6.6. Riavviare la telecamera e il sistema aggiornerà automaticamente il program-
ma.
VII. Ricarica
7.1. Collegare la fotocamera ad una presa di corrente alternata presa utilizzando il
cavo USB e l'adattatore di ricarica DC 5V fornita.
7.2. La spia rossa continua a lampeggiare lentamente durante il processo di carica.
7.3. Ci vorranno 2 ore per ottenere una carica completa.
7.4. La spia rossa rimarrà illuminato quando la batteria della fotocamera è completa-
mente carica.
VIII. Uscita video dal vivo
>> Prima di utilizzare, assicurarsi che la batteria sia completamente carica.
>> Si prega di accertarsi che la scheda Micro SD sia saldamente nello slot della
scheda SD della fotocamera. Si raccomanda un SDHC Classe 10 scheda Micro SD.
8.1. Quando la fotocamera è spenta, collegarlo al televisore o monitor utilizzando il
cavo AV in dotazione, come di seguito:
8.2. Selezionare la sorgente del segnale video della telecamera sul televisore o sul
monitor.
8.3. Accendere la fotocamera e avviare la registrazione video (vedere 3.2), allora si
può guardare il video in diretta della telecamera sul televisore o monitor durante il
processo di registrazione video.
8.4. È anche possibile sperimentare altre funzioni di questa fotocamera in modalità
live view.
Table of contents
Languages:
Other Wiseup Security Camera manuals

Wiseup
Wiseup MT-V8 User manual

Wiseup
Wiseup WIFI33 User manual

Wiseup
Wiseup WIFI38 User manual

Wiseup
Wiseup WIFI08 User manual

Wiseup
Wiseup DV-07-WIFI User manual

Wiseup
Wiseup WIFI04S User manual

Wiseup
Wiseup WIFI40 User manual

Wiseup
Wiseup CUP200 User manual

Wiseup
Wiseup W8200 User manual

Wiseup
Wiseup WIFI37 User manual

Wiseup
Wiseup WI-FI 21 User manual

Wiseup
Wiseup U11 User manual

Wiseup
Wiseup WIFI34 User manual

Wiseup
Wiseup H200 User manual

Wiseup
Wiseup DVR-0031-4 User manual

Wiseup
Wiseup WIFI28 User manual

Wiseup
Wiseup T186 User manual

Wiseup
Wiseup T183 User manual

Wiseup
Wiseup BC303 User manual

Wiseup
Wiseup P9000 User manual