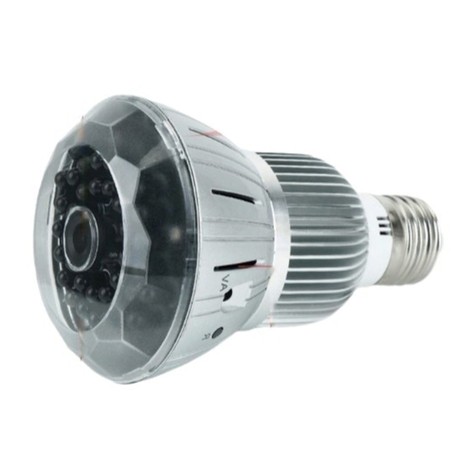
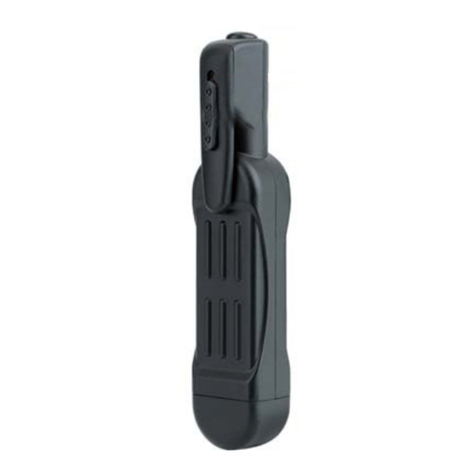
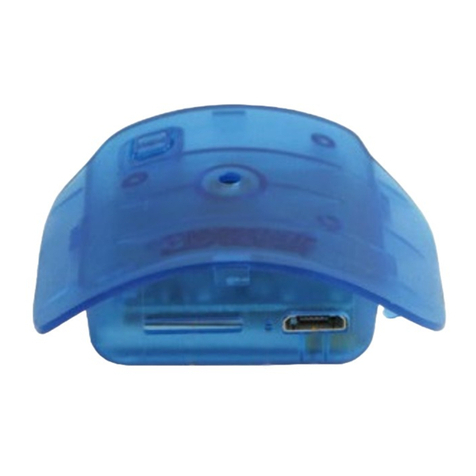
Wiseup DV-07-WIFI User manual

DV-07-WIFI
User Guide
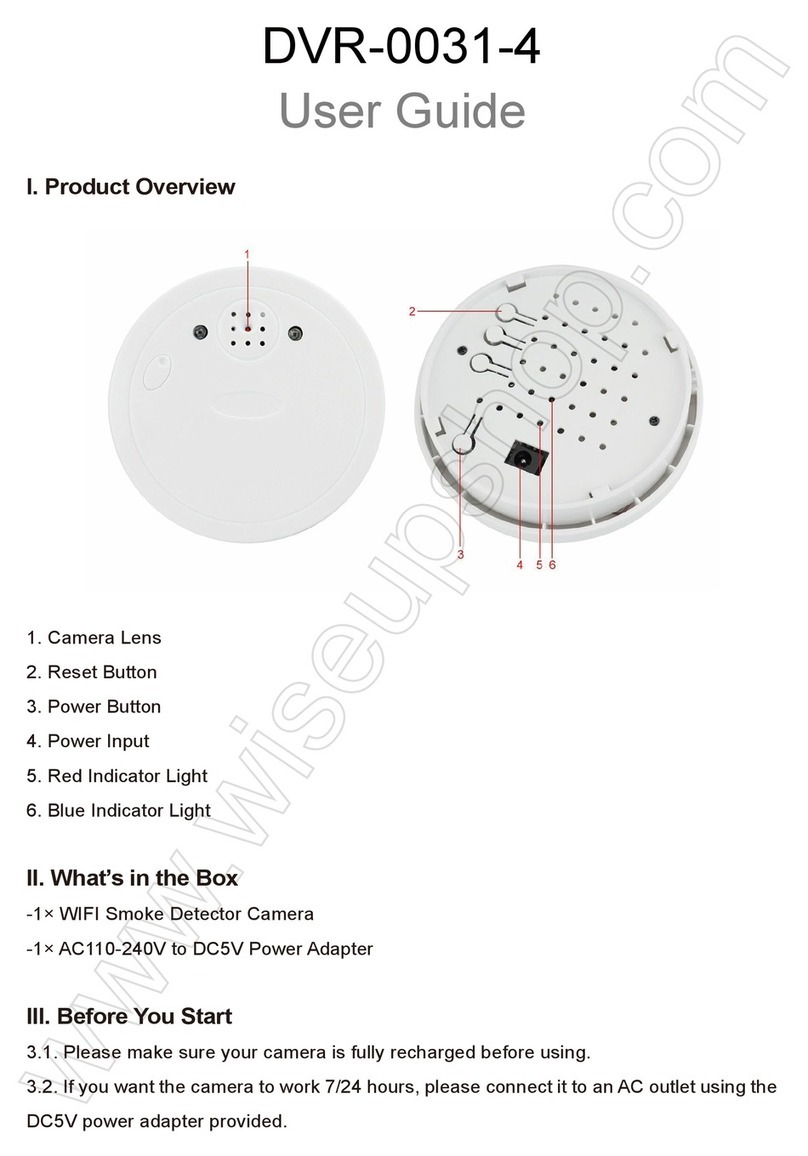
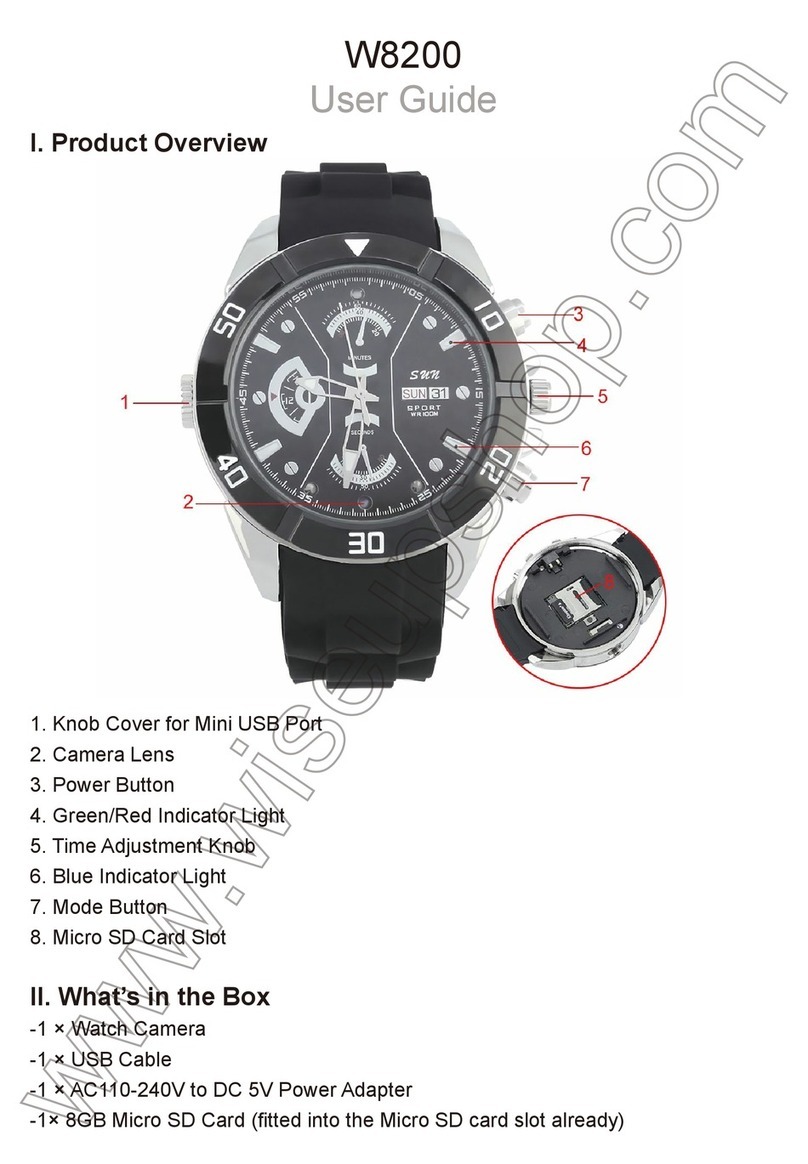
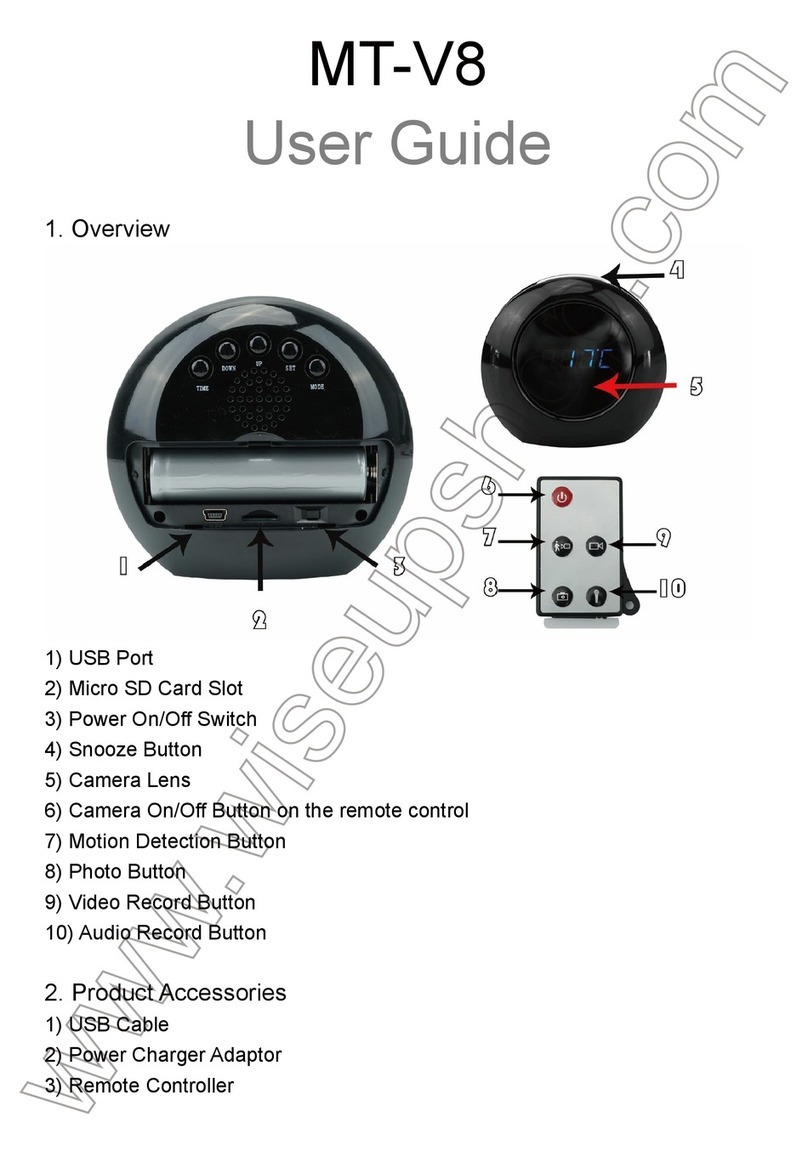
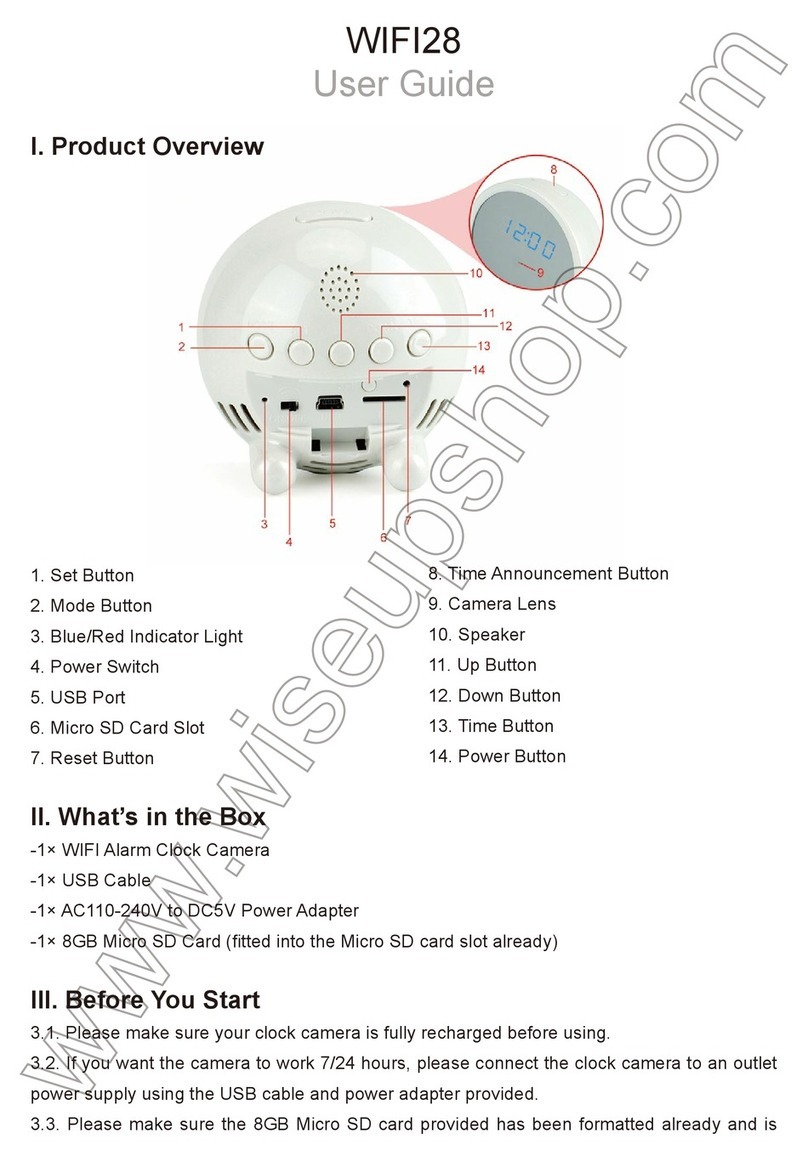
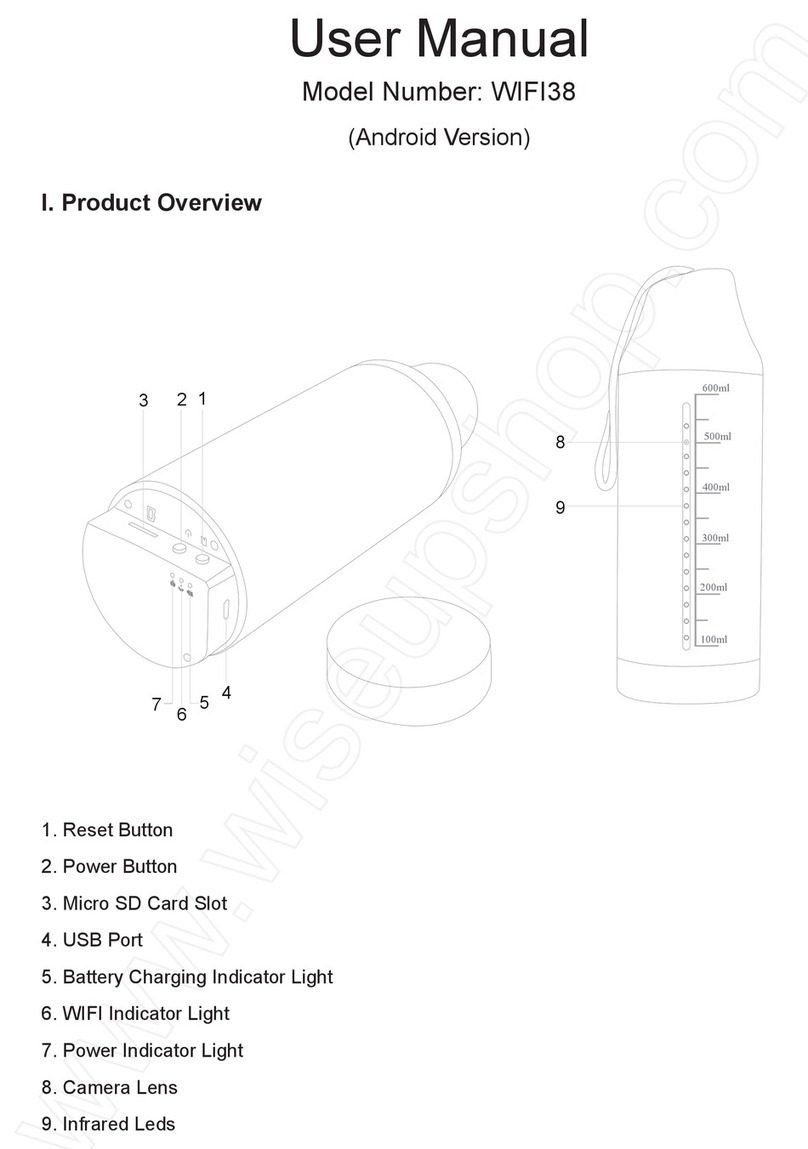
I. Product Overview
1. Red/Blue Indicator Light
2. Microphone
3. Camera Lens
4. IR LEDs
5. Camera Button
II. What’s in the Box
-1×Wifi Network Meeting Camcorder
-1× Card Reader
-1× 3m USB Cable
-1× AC110-230V to DC 5V Charging Adapter
-1× Mini Disc
-1 ×8GB Micro SD Card (fitted into the Micro SD card slot already)
III. Charging
3.1. Connect the camera to an outlet AC power socket by using the charging adapter
and USB cable provided.
3.2. It will take about 4 hours to obtain a full charge. The camera can work 3 hours
on a full charge. The indicator lights will NOT change when the camera battery is
charging or fully charged.
3.3. If you want this camera to work 24/7 days, keep it plugged onto an outlet AC
power socket.
[Note]: It is normal that the camera becomes hot while it is working or charging.
IV. Network Setup
4.1. Install the “BVCAM” APP on your smartphone or tablet PC
4.1.1. Search for “BVCAM” in App Store or Google Play and install it on your smart-
phone or tablet PC.
4.2. LAN or P2P Mode Setup
4.2.1. Power on the camera by sliding the power switch to the ON position. The blue
and red indicator lights will illuminate for 3 seconds and then off. Waiting for 15 sec-
onds,the blue and red indicator lights will start illuminating for 3 seconds again; the
red indicator light will be off again. Waiting for 8 seconds, the blue indicator light will
stay illuminated while the red one will start flashing, indicating the camera’s WIFI
signal is ready.
4.2.2. Go to the WIFI or WLAN settings on your smartphone or tablet PCand con-
nect to the camera’s WIFI signal. The camera’s WIFI network SSID starts with
“KD******” and will appear on your WIFI or WLAN settings page as below.Both red
and blue indicator lights will keep flashing, indicating the camera’s P2P connection
is done.
[Note]: If the camera’s WIFI signal cannot be found for a long time, press the Reset Button for 5 sec-
onds to reset all settings to factory default. The red and blue indicator lights will be turned off and the
camera will restart automatically in 5 seconds.
4.2.3. Launch the “BVCAM” APP.
4.2.4. Add the camera to the application.
For Android: Tap + > Search(Lan) >Tap the camera icon > Tap OK or √.
For IOS: Tap + >Tap Add new online Camera >Tap Search (LAN) >Tap the camera
icon >Tap OK.
4.2.5. If the camera shows “Online” on the “Live video” page, it means the P2P
(LAN) connection is successful and you can view a live video feed from the camera
in the P2P (LAN) mode.
[Note]: See the table below for an explanation of the different functions available:
4.3. WAN Mode or Remote View Setup
>>Before the WAN configuration, please confirm that the camera is successfully
added to your smartphone or tablet PC in the P2P (LAN) mode, and the P2P (LAN)
connection works well.
4.3.1. Launch the “BVCAM” APP.
4.3.2. Set up the WAN mode or remote view.
Step 1: Tap the setting icon on the “Live video” page and select “Advance Config”
(IOS: Device Settings).
Step 2:Tap “WIFI Config” and select a desired WIFI network to enroll the camera in.
Step 3: Tap “OK”to confirm the WIFI configuration.
4.3.3. The camera will reboot automatically.
Check if the WAN mode or remote view setting works!
1. Exit the “BVCAM” APP.
2. Go to the WIFI or WLAN setting page on your smartphone or tablet PC and join
to another WIFI network which must be different from the one that the camera is en-
rolled in, or you can use your mobilenetwork.
3. Launch the “BVCAM” APP again.If you see the camera is “Online” on the“Live
video” page, it indicates the WAN mode or remote view setting is successful.Now
you can watch the live video from the camera on your smartphone or tablet PC
remotely as long as you have access to the Internet.
[Note]: If the WAN mode setup fails, please reset the camera (See VIII) and re-configure it.
V. Motion Detection Setup
>>Make sure that the camera is added successfully to the APP in LAN or WAN
mode.
>>Please make sure theMicro SD card (4GB-64GB) has been formatted already
and is securely fitted into the SD card slot on your camera. A SDHC Class 10 Micro
SD card is recommended.
5.1. Motion Detection Photograph Setup
5.1.1. Launch the “BVCAM” APP.
5.1.2. Enable the motion detection function.
Step1: Tap the setting icon on the “Live video” page and then choose “Advance
Config” (IOS: Device Settings)
Step 2:Tap “Alarm Config” , choose a desired sensitivity level.
Step 3: Tap “OK” to confirm the setting.
5.1.3. The camera will take a screenshot of the live video automatically when a
movement is detected. Go back to the “Live video” page and tap “Alarm” at the
bottom of the screen to check out the screenshots.
5.2. Motion Detection Video Recording Setup
5.2.1. Tap the setting icon on the “Live video” page and choose“Advance Config”
(IOS: Device Settings).
5.2.2. Tap “SDCard Record Config” and select “Record when Alarms” (IOS: On
alarm).
5.2.3. Tap “OK” to confirm the Motion Detection Video Recording setting.
5.2.4. The camera will start recording video automatically when a movement is de-
tected.Go back to the “Live video” page, tap “Record” at the bottom of the screen
and then choose “Remote SD card”(IOS: ) to check out the video files.
[Note]: Video Resolution: 1280×720P Video Format: ASF
VI. Recording Video to Smartphone or Tablet PC
>> Before recording, make sure that the camera is added successfully to the APP in
LAN or WAN mode.
6.1. Launch the “BVCAM” APP. Tap the camera icon to view the live video.
6.2.Tap the remote video recording button to start or stop recording video.
The video files will be saved in your smartphone or tablet PC flash memory if you are
usingan Android device. However, the video files can only be found in the APP
“BVCAM” if you are an IOS device.
6.3. Go back to the “Live video” page, tap “Record” at the bottom of the screen and
then choose “Local” (IOS: ) to check out the video files.
[Note]: Video Resolution: 1280×720P Video Format: ASF
VII. Recording Video to the Local Micro SD Card
>>Make sure that the camera is added successfully to the APP in LAN or WAN
mode.
>>Make sure theMicro SD card (4GB-64GB) has been formatted already and is
securely fitted into the SD card slot on your camera. A SDHC Class 10 Micro SD
card is recommended.
7.1. Launch the “BVCAM” APP.
7.2. Tap the setting icon on the“Live video” page and choose “Advance Con-
fig”(IOS: Device Settings)
7.3. Select “SD Card Record Config” and choose a desired recording mode.
7.4. Tap “OK” to confirm the SD card recording setting.
6. Video Recording/Reset Button
7. Power Switch
8. Micro SD Card Slot
9. USB Port
Button Name FunctionDescription
Camera Button
Video Record-
ing/Reset Button
Taka a Photo: Press the Camera Button once to take a picture and the blue indi-
cator light will flash once. The pictures will be saved in the Micro SD card on the
camera.
Turn On/Off the Indicator Light: Press the Camera Button for 4 seconds to turn
on or off the indicator lights.
Record Video: Press the Video Recording Button once to start recording video
and the blue indicator light will flash slowly. The video files will be saved in Micro
SD card on the camera.
Reset the Camera: Press the Reset Button for 5 seconds to reset all settings to
factory default.
7.5. Check out the video files. (See 5.2.2)
VIII. Resetting
If for any reason the camera stops working or isn’t working properly, a reset will
restore it back to normal operation.
Operation: When the camera is powered on, press the Reset Button for 5 seconds
to reset all settings to factory default. The camera will reboot automatically with de-
fault settings in 5 seconds.
IX. Change the Camera’s Password
>>Please confirm that the camera is successfully added to the APP in the P2P (LAN)
mode, and the P2P (LAN) connection works well.
9.1. Launch the APP “BVCAM”.
9.2. Tap the settings icon on the “Live video” page,choose “Advance Config” (IOS:
Device Settings), and then click “Change P2P access password” (IOS: Change
password).
9.3. Enterthe user default password “8888”. Input a new password and confirm it,
then tap “OK” to save the change.
Check if the new password works!
1. Go back to the “Live video” page, tap the setting icon and delete the current
camera.
2. Follow 3.2.3 to add the camera again. Don’t forget to type the new password
before tapping “OK” or “√” to add the camera.
3. If the camera shows “Online”, it means the password has been changed success-
fully. If the camera shows “password mistake”, it means you input a wrong pass-
word.
Frequently Asked Questions
Q: What kind of memory card can I use in this camera?
A:You are recommended to use a SDHC Class 10 Micro SD card (4GB-64GB). If a
memory card does not work, remove and format it on a PC computer before trying it
in thecamera again.
Q: Why can’t I find the camera’s WIFI signal on my smartphone or tablet PC?
A: Recharge the camera. Or reset the camera to factory default (See VIII).
Q: Why can’t I play back video files or it shows the video files are corrupted?
A: It is mainly because the camera is powered off inappropriately.
Q: What media player software should I use to play back the video files on my
computer?
A: Click the link: http://www.videolan.org/vlc/index.html to download and install VLC
player to play back video files on your computer.
Q: How do I reset my camera back to the way I got it?
A:Reset the camera to factory default. (See VIII)
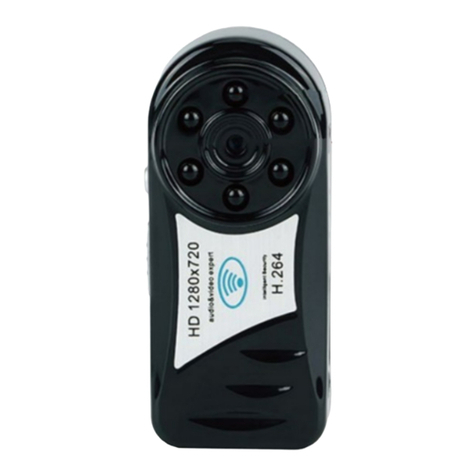
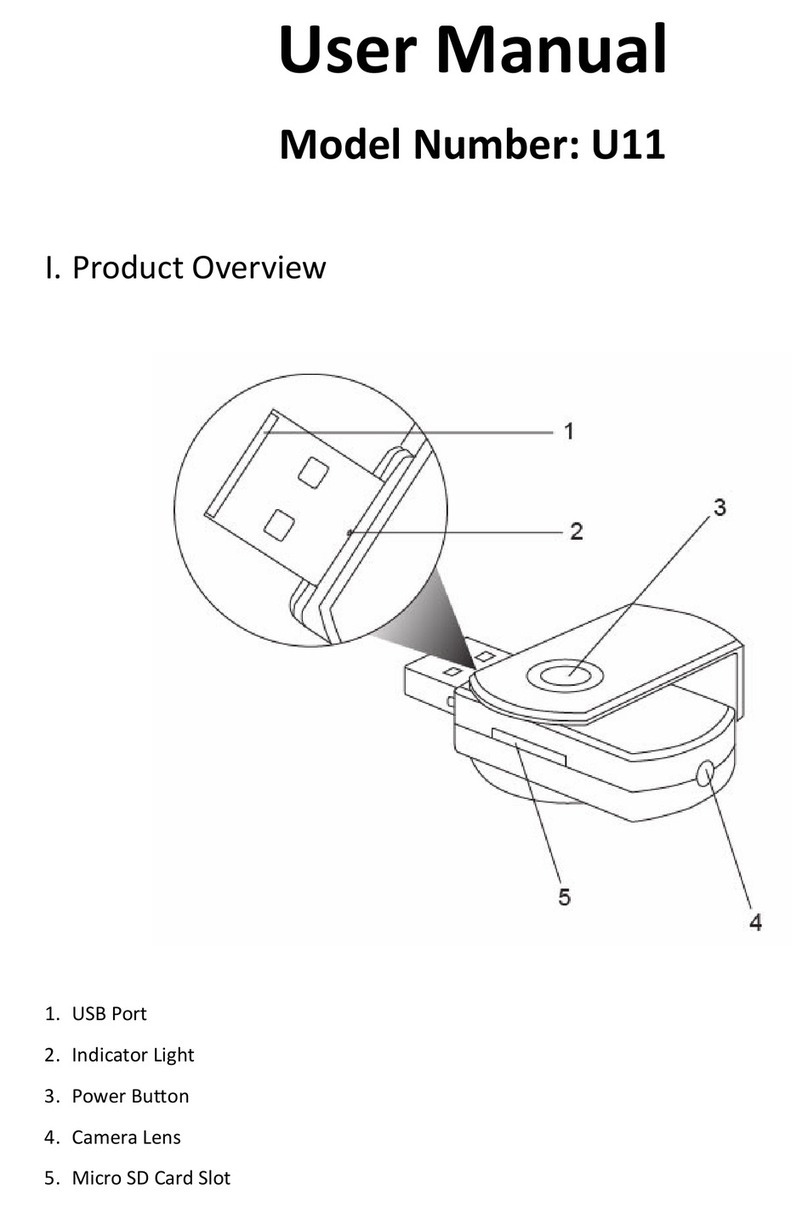
I. Product Overview
1. Red/Blue Indicator Light
2. Microphone
3. Camera Lens
4. IR LEDs
5. Camera Button
II. What’s in the Box
-1×Wifi Network Meeting Camcorder
-1× Card Reader
-1× 3m USB Cable
-1× AC110-230V to DC 5V Charging Adapter
-1× Mini Disc
-1 ×8GB Micro SD Card (fitted into the Micro SD card slot already)
III. Charging
3.1. Connect the camera to an outlet AC power socket by using the charging adapter
and USB cable provided.
3.2. It will take about 4 hours to obtain a full charge. The camera can work 3 hours
on a full charge. The indicator lights will NOT change when the camera battery is
charging or fully charged.
3.3. If you want this camera to work 24/7 days, keep it plugged onto an outlet AC
power socket.
[Note]: It is normal that the camera becomes hot while it is working or charging.
IV. Network Setup
4.1. Install the “BVCAM” APP on your smartphone or tablet PC
4.1.1. Search for “BVCAM” in App Store or Google Play and install it on your smart-
phone or tablet PC.
4.2. LAN or P2P Mode Setup
4.2.1. Power on the camera by sliding the power switch to the ON position. The blue
and red indicator lights will illuminate for 3 seconds and then off. Waiting for 15 sec-
onds,the blue and red indicator lights will start illuminating for 3 seconds again; the
red indicator light will be off again. Waiting for 8 seconds, the blue indicator light will
stay illuminated while the red one will start flashing, indicating the camera’s WIFI
signal is ready.
4.2.2. Go to the WIFI or WLAN settings on your smartphone or tablet PCand con-
nect to the camera’s WIFI signal. The camera’s WIFI network SSID starts with
“KD******” and will appear on your WIFI or WLAN settings page as below.Both red
and blue indicator lights will keep flashing, indicating the camera’s P2P connection
is done.
[Note]: If the camera’s WIFI signal cannot be found for a long time, press the Reset Button for 5 sec-
onds to reset all settings to factory default. The red and blue indicator lights will be turned off and the
camera will restart automatically in 5 seconds.
4.2.3. Launch the “BVCAM” APP.
4.2.4. Add the camera to the application.
For Android: Tap + > Search(Lan) >Tap the camera icon > Tap OK or √.
For IOS: Tap + >Tap Add new online Camera >Tap Search (LAN) >Tap the camera
icon >Tap OK.
4.2.5. If the camera shows “Online” on the “Live video” page, it means the P2P
(LAN) connection is successful and you can view a live video feed from the camera
in the P2P (LAN) mode.
[Note]: See the table below for an explanation of the different functions available:
4.3. WAN Mode or Remote View Setup
>>Before the WAN configuration, please confirm that the camera is successfully
added to your smartphone or tablet PC in the P2P (LAN) mode, and the P2P (LAN)
connection works well.
4.3.1. Launch the “BVCAM” APP.
4.3.2. Set up the WAN mode or remote view.
Step 1: Tap the setting icon on the “Live video” page and select “Advance Config”
(IOS: Device Settings).
Step 2:Tap “WIFI Config” and select a desired WIFI network to enroll the camera in.
Step 3: Tap “OK”to confirm the WIFI configuration.
4.3.3. The camera will reboot automatically.
Check if the WAN mode or remote view setting works!
1. Exit the “BVCAM” APP.
2. Go to the WIFI or WLAN setting page on your smartphone or tablet PC and join
to another WIFI network which must be different from the one that the camera is en-
rolled in, or you can use your mobilenetwork.
3. Launch the “BVCAM” APP again.If you see the camera is “Online” on the“Live
video” page, it indicates the WAN mode or remote view setting is successful.Now
you can watch the live video from the camera on your smartphone or tablet PC
remotely as long as you have access to the Internet.
[Note]: If the WAN mode setup fails, please reset the camera (See VIII) and re-configure it.
V. Motion Detection Setup
>>Make sure that the camera is added successfully to the APP in LAN or WAN
mode.
>>Please make sure theMicro SD card (4GB-64GB) has been formatted already
and is securely fitted into the SD card slot on your camera. A SDHC Class 10 Micro
SD card is recommended.
5.1. Motion Detection Photograph Setup
5.1.1. Launch the “BVCAM” APP.
5.1.2. Enable the motion detection function.
Step1: Tap the setting icon on the “Live video” page and then choose “Advance
Config” (IOS: Device Settings)
Step 2:Tap “Alarm Config” , choose a desired sensitivity level.
Step 3: Tap “OK” to confirm the setting.
5.1.3. The camera will take a screenshot of the live video automatically when a
movement is detected. Go back to the “Live video” page and tap “Alarm” at the
bottom of the screen to check out the screenshots.
5.2. Motion Detection Video Recording Setup
5.2.1. Tap the setting icon on the “Live video” page and choose“Advance Config”
(IOS: Device Settings).
5.2.2. Tap “SDCard Record Config” and select “Record when Alarms” (IOS: On
alarm).
5.2.3. Tap “OK” to confirm the Motion Detection Video Recording setting.
5.2.4. The camera will start recording video automatically when a movement is de-
tected.Go back to the “Live video” page, tap “Record” at the bottom of the screen
and then choose “Remote SD card”(IOS: ) to check out the video files.
[Note]: Video Resolution: 1280×720P Video Format: ASF
VI. Recording Video to Smartphone or Tablet PC
>> Before recording, make sure that the camera is added successfully to the APP in
LAN or WAN mode.
6.1. Launch the “BVCAM” APP. Tap the camera icon to view the live video.
6.2.Tap the remote video recording button to start or stop recording video.
The video files will be saved in your smartphone or tablet PC flash memory if you are
usingan Android device. However, the video files can only be found in the APP
“BVCAM” if you are an IOS device.
6.3. Go back to the “Live video” page, tap “Record” at the bottom of the screen and
then choose “Local” (IOS: ) to check out the video files.
[Note]: Video Resolution: 1280×720P Video Format: ASF
VII. Recording Video to the Local Micro SD Card
>>Make sure that the camera is added successfully to the APP in LAN or WAN
mode.
>>Make sure theMicro SD card (4GB-64GB) has been formatted already and is
securely fitted into the SD card slot on your camera. A SDHC Class 10 Micro SD
card is recommended.
7.1. Launch the “BVCAM” APP.
7.2. Tap the setting icon on the“Live video” page and choose “Advance Con-
fig”(IOS: Device Settings)
7.3. Select “SD Card Record Config” and choose a desired recording mode.
7.4. Tap “OK” to confirm the SD card recording setting.
7.5. Check out the video files. (See 5.2.2)
VIII. Resetting
If for any reason the camera stops working or isn’t working properly, a reset will
restore it back to normal operation.
Operation: When the camera is powered on, press the Reset Button for 5 seconds
to reset all settings to factory default. The camera will reboot automatically with de-
fault settings in 5 seconds.
IX. Change the Camera’s Password
>>Please confirm that the camera is successfully added to the APP in the P2P (LAN)
mode, and the P2P (LAN) connection works well.
9.1. Launch the APP “BVCAM”.
9.2. Tap the settings icon on the “Live video” page,choose “Advance Config” (IOS:
Device Settings), and then click “Change P2P access password” (IOS: Change
password).
9.3. Enterthe user default password “8888”. Input a new password and confirm it,
then tap “OK” to save the change.
Check if the new password works!
1. Go back to the “Live video” page, tap the setting icon and delete the current
camera.
2. Follow 3.2.3 to add the camera again. Don’t forget to type the new password
before tapping “OK” or “√” to add the camera.
3. If the camera shows “Online”, it means the password has been changed success-
fully. If the camera shows “password mistake”, it means you input a wrong pass-
word.
Frequently Asked Questions
Q: What kind of memory card can I use in this camera?
A:You are recommended to use a SDHC Class 10 Micro SD card (4GB-64GB). If a
memory card does not work, remove and format it on a PC computer before trying it
in thecamera again.
Q: Why can’t I find the camera’s WIFI signal on my smartphone or tablet PC?
A: Recharge the camera. Or reset the camera to factory default (See VIII).
Q: Why can’t I play back video files or it shows the video files are corrupted?
A: It is mainly because the camera is powered off inappropriately.
Q: What media player software should I use to play back the video files on my
computer?
A: Click the link: http://www.videolan.org/vlc/index.html to download and install VLC
player to play back video files on your computer.
Q: How do I reset my camera back to the way I got it?
A:Reset the camera to factory default. (See VIII)
I. Product Overview
1. Red/Blue Indicator Light
2. Microphone
3. Camera Lens
4. IR LEDs
5. Camera Button
II. What’s in the Box
-1×Wifi Network Meeting Camcorder
-1× Card Reader
-1× 3m USB Cable
-1× AC110-230V to DC 5V Charging Adapter
-1× Mini Disc
-1 ×8GB Micro SD Card (fitted into the Micro SD card slot already)
III. Charging
3.1. Connect the camera to an outlet AC power socket by using the charging adapter
and USB cable provided.
3.2. It will take about 4 hours to obtain a full charge. The camera can work 3 hours
on a full charge. The indicator lights will NOT change when the camera battery is
charging or fully charged.
3.3. If you want this camera to work 24/7 days, keep it plugged onto an outlet AC
power socket.
[Note]: It is normal that the camera becomes hot while it is working or charging.
IV. Network Setup
4.1. Install the “BVCAM” APP on your smartphone or tablet PC
4.1.1. Search for “BVCAM” in App Store or Google Play and install it on your smart-
phone or tablet PC.
4.2. LAN or P2P Mode Setup
4.2.1. Power on the camera by sliding the power switch to the ON position. The blue
and red indicator lights will illuminate for 3 seconds and then off. Waiting for 15 sec-
onds,the blue and red indicator lights will start illuminating for 3 seconds again; the
red indicator light will be off again. Waiting for 8 seconds, the blue indicator light will
stay illuminated while the red one will start flashing, indicating the camera’s WIFI
signal is ready.
4.2.2. Go to the WIFI or WLAN settings on your smartphone or tablet PCand con-
nect to the camera’s WIFI signal. The camera’s WIFI network SSID starts with
“KD******” and will appear on your WIFI or WLAN settings page as below.Both red
and blue indicator lights will keep flashing, indicating the camera’s P2P connection
is done.
[Note]: If the camera’s WIFI signal cannot be found for a long time, press the Reset Button for 5 sec-
onds to reset all settings to factory default. The red and blue indicator lights will be turned off and the
camera will restart automatically in 5 seconds.
4.2.3. Launch the “BVCAM” APP.
4.2.4. Add the camera to the application.
For Android: Tap + > Search(Lan) >Tap the camera icon > Tap OK or √.
For IOS: Tap + >Tap Add new online Camera >Tap Search (LAN) >Tap the camera
icon >Tap OK.
4.2.5. If the camera shows “Online” on the “Live video” page, it means the P2P
(LAN) connection is successful and you can view a live video feed from the camera
in the P2P (LAN) mode.
[Note]: See the table below for an explanation of the different functions available:
4.3. WAN Mode or Remote View Setup
>>Before the WAN configuration, please confirm that the camera is successfully
added to your smartphone or tablet PC in the P2P (LAN) mode, and the P2P (LAN)
connection works well.
4.3.1. Launch the “BVCAM” APP.
4.3.2. Set up the WAN mode or remote view.
Step 1: Tap the setting icon on the “Live video” page and select “Advance Config”
(IOS: Device Settings).
Step 2:Tap “WIFI Config” and select a desired WIFI network to enroll the camera in.
Step 3: Tap “OK”to confirm the WIFI configuration.
4.3.3. The camera will reboot automatically.
Check if the WAN mode or remote view setting works!
1. Exit the “BVCAM” APP.
2. Go to the WIFI or WLAN setting page on your smartphone or tablet PC and join
to another WIFI network which must be different from the one that the camera is en-
rolled in, or you can use your mobilenetwork.
3. Launch the “BVCAM” APP again.If you see the camera is “Online” on the“Live
video” page, it indicates the WAN mode or remote view setting is successful.Now
you can watch the live video from the camera on your smartphone or tablet PC
remotely as long as you have access to the Internet.
[Note]: If the WAN mode setup fails, please reset the camera (See VIII) and re-configure it.
V. Motion Detection Setup
>>Make sure that the camera is added successfully to the APP in LAN or WAN
mode.
>>Please make sure theMicro SD card (4GB-64GB) has been formatted already
and is securely fitted into the SD card slot on your camera. A SDHC Class 10 Micro
SD card is recommended.
5.1. Motion Detection Photograph Setup
5.1.1. Launch the “BVCAM” APP.
5.1.2. Enable the motion detection function.
Step1: Tap the setting icon on the “Live video” page and then choose “Advance
Config” (IOS: Device Settings)
Step 2:Tap “Alarm Config” , choose a desired sensitivity level.
Step 3: Tap “OK” to confirm the setting.
5.1.3. The camera will take a screenshot of the live video automatically when a
movement is detected. Go back to the “Live video” page and tap “Alarm” at the
bottom of the screen to check out the screenshots.
5.2. Motion Detection Video Recording Setup
5.2.1. Tap the setting icon on the “Live video” page and choose“Advance Config”
(IOS: Device Settings).
5.2.2. Tap “SDCard Record Config” and select “Record when Alarms” (IOS: On
alarm).
5.2.3. Tap “OK” to confirm the Motion Detection Video Recording setting.
5.2.4. The camera will start recording video automatically when a movement is de-
tected.Go back to the “Live video” page, tap “Record” at the bottom of the screen
and then choose “Remote SD card”(IOS: ) to check out the video files.
[Note]: Video Resolution: 1280×720P Video Format: ASF
VI. Recording Video to Smartphone or Tablet PC
>> Before recording, make sure that the camera is added successfully to the APP in
LAN or WAN mode.
6.1. Launch the “BVCAM” APP. Tap the camera icon to view the live video.
6.2.Tap the remote video recording button to start or stop recording video.
The video files will be saved in your smartphone or tablet PC flash memory if you are
usingan Android device. However, the video files can only be found in the APP
“BVCAM” if you are an IOS device.
6.3. Go back to the “Live video” page, tap “Record” at the bottom of the screen and
then choose “Local” (IOS: ) to check out the video files.
[Note]: Video Resolution: 1280×720P Video Format: ASF
VII. Recording Video to the Local Micro SD Card
>>Make sure that the camera is added successfully to the APP in LAN or WAN
mode.
>>Make sure theMicro SD card (4GB-64GB) has been formatted already and is
securely fitted into the SD card slot on your camera. A SDHC Class 10 Micro SD
card is recommended.
7.1. Launch the “BVCAM” APP.
7.2. Tap the setting icon on the“Live video” page and choose “Advance Con-
fig”(IOS: Device Settings)
7.3. Select “SD Card Record Config” and choose a desired recording mode.
7.4. Tap “OK” to confirm the SD card recording setting.
7.5. Check out the video files. (See 5.2.2)
VIII. Resetting
If for any reason the camera stops working or isn’t working properly, a reset will
restore it back to normal operation.
Operation: When the camera is powered on, press the Reset Button for 5 seconds
to reset all settings to factory default. The camera will reboot automatically with de-
fault settings in 5 seconds.
IX. Change the Camera’s Password
>>Please confirm that the camera is successfully added to the APP in the P2P (LAN)
mode, and the P2P (LAN) connection works well.
9.1. Launch the APP “BVCAM”.
9.2. Tap the settings icon on the “Live video” page,choose “Advance Config” (IOS:
Device Settings), and then click “Change P2P access password” (IOS: Change
password).
9.3. Enterthe user default password “8888”. Input a new password and confirm it,
then tap “OK” to save the change.
Check if the new password works!
1. Go back to the “Live video” page, tap the setting icon and delete the current
camera.
2. Follow 3.2.3 to add the camera again. Don’t forget to type the new password
before tapping “OK” or “√” to add the camera.
3. If the camera shows “Online”, it means the password has been changed success-
fully. If the camera shows “password mistake”, it means you input a wrong pass-
word.
Frequently Asked Questions
Q: What kind of memory card can I use in this camera?
A:You are recommended to use a SDHC Class 10 Micro SD card (4GB-64GB). If a
memory card does not work, remove and format it on a PC computer before trying it
in thecamera again.
Q: Why can’t I find the camera’s WIFI signal on my smartphone or tablet PC?
A: Recharge the camera. Or reset the camera to factory default (See VIII).
Q: Why can’t I play back video files or it shows the video files are corrupted?
A: It is mainly because the camera is powered off inappropriately.
Q: What media player software should I use to play back the video files on my
computer?
A: Click the link: http://www.videolan.org/vlc/index.html to download and install VLC
player to play back video files on your computer.
Q: How do I reset my camera back to the way I got it?
A:Reset the camera to factory default. (See VIII)
I. Product Overview
1. Red/Blue Indicator Light
2. Microphone
3. Camera Lens
4. IR LEDs
5. Camera Button
II. What’s in the Box
-1×Wifi Network Meeting Camcorder
-1× Card Reader
-1× 3m USB Cable
-1× AC110-230V to DC 5V Charging Adapter
-1× Mini Disc
-1 ×8GB Micro SD Card (fitted into the Micro SD card slot already)
III. Charging
3.1. Connect the camera to an outlet AC power socket by using the charging adapter
and USB cable provided.
3.2. It will take about 4 hours to obtain a full charge. The camera can work 3 hours
on a full charge. The indicator lights will NOT change when the camera battery is
charging or fully charged.
3.3. If you want this camera to work 24/7 days, keep it plugged onto an outlet AC
power socket.
[Note]: It is normal that the camera becomes hot while it is working or charging.
IV. Network Setup
4.1. Install the “BVCAM” APP on your smartphone or tablet PC
4.1.1. Search for “BVCAM” in App Store or Google Play and install it on your smart-
phone or tablet PC.
4.2. LAN or P2P Mode Setup
4.2.1. Power on the camera by sliding the power switch to the ON position. The blue
and red indicator lights will illuminate for 3 seconds and then off. Waiting for 15 sec-
onds,the blue and red indicator lights will start illuminating for 3 seconds again; the
red indicator light will be off again. Waiting for 8 seconds, the blue indicator light will
stay illuminated while the red one will start flashing, indicating the camera’s WIFI
signal is ready.
4.2.2. Go to the WIFI or WLAN settings on your smartphone or tablet PCand con-
nect to the camera’s WIFI signal. The camera’s WIFI network SSID starts with
“KD******” and will appear on your WIFI or WLAN settings page as below.Both red
and blue indicator lights will keep flashing, indicating the camera’s P2P connection
is done.
[Note]: If the camera’s WIFI signal cannot be found for a long time, press the Reset Button for 5 sec-
onds to reset all settings to factory default. The red and blue indicator lights will be turned off and the
camera will restart automatically in 5 seconds.
4.2.3. Launch the “BVCAM” APP.
4.2.4. Add the camera to the application.
For Android: Tap + > Search(Lan) >Tap the camera icon > Tap OK or √.
For IOS: Tap + >Tap Add new online Camera >Tap Search (LAN) >Tap the camera
icon >Tap OK.
4.2.5. If the camera shows “Online” on the “Live video” page, it means the P2P
(LAN) connection is successful and you can view a live video feed from the camera
in the P2P (LAN) mode.
[Note]: See the table below for an explanation of the different functions available:
4.3. WAN Mode or Remote View Setup
>>Before the WAN configuration, please confirm that the camera is successfully
added to your smartphone or tablet PC in the P2P (LAN) mode, and the P2P (LAN)
connection works well.
4.3.1. Launch the “BVCAM” APP.
4.3.2. Set up the WAN mode or remote view.
Step 1: Tap the setting icon on the “Live video” page and select “Advance Config”
(IOS: Device Settings).
Step 2:Tap “WIFI Config” and select a desired WIFI network to enroll the camera in.
Step 3: Tap “OK”to confirm the WIFI configuration.
4.3.3. The camera will reboot automatically.
Check if the WAN mode or remote view setting works!
1. Exit the “BVCAM” APP.
2. Go to the WIFI or WLAN setting page on your smartphone or tablet PC and join
to another WIFI network which must be different from the one that the camera is en-
rolled in, or you can use your mobilenetwork.
3. Launch the “BVCAM” APP again.If you see the camera is “Online” on the“Live
video” page, it indicates the WAN mode or remote view setting is successful.Now
you can watch the live video from the camera on your smartphone or tablet PC
remotely as long as you have access to the Internet.
[Note]: If the WAN mode setup fails, please reset the camera (See VIII) and re-configure it.
V. Motion Detection Setup
>>Make sure that the camera is added successfully to the APP in LAN or WAN
mode.
>>Please make sure theMicro SD card (4GB-64GB) has been formatted already
and is securely fitted into the SD card slot on your camera. A SDHC Class 10 Micro
SD card is recommended.
5.1. Motion Detection Photograph Setup
5.1.1. Launch the “BVCAM” APP.
5.1.2. Enable the motion detection function.
Step1: Tap the setting icon on the “Live video” page and then choose “Advance
Config” (IOS: Device Settings)
Step 2:Tap “Alarm Config” , choose a desired sensitivity level.
Step 3: Tap “OK” to confirm the setting.
5.1.3. The camera will take a screenshot of the live video automatically when a
movement is detected. Go back to the “Live video” page and tap “Alarm” at the
bottom of the screen to check out the screenshots.
5.2. Motion Detection Video Recording Setup
5.2.1. Tap the setting icon on the “Live video” page and choose“Advance Config”
(IOS: Device Settings).
5.2.2. Tap “SDCard Record Config” and select “Record when Alarms” (IOS: On
alarm).
5.2.3. Tap “OK” to confirm the Motion Detection Video Recording setting.
5.2.4. The camera will start recording video automatically when a movement is de-
tected.Go back to the “Live video” page, tap “Record” at the bottom of the screen
and then choose “Remote SD card”(IOS: ) to check out the video files.
[Note]: Video Resolution: 1280×720P Video Format: ASF
VI. Recording Video to Smartphone or Tablet PC
>> Before recording, make sure that the camera is added successfully to the APP in
LAN or WAN mode.
6.1. Launch the “BVCAM” APP. Tap the camera icon to view the live video.
6.2.Tap the remote video recording button to start or stop recording video.
The video files will be saved in your smartphone or tablet PC flash memory if you are
usingan Android device. However, the video files can only be found in the APP
“BVCAM” if you are an IOS device.
6.3. Go back to the “Live video” page, tap “Record” at the bottom of the screen and
then choose “Local” (IOS: ) to check out the video files.
[Note]: Video Resolution: 1280×720P Video Format: ASF
VII. Recording Video to the Local Micro SD Card
>>Make sure that the camera is added successfully to the APP in LAN or WAN
mode.
>>Make sure theMicro SD card (4GB-64GB) has been formatted already and is
securely fitted into the SD card slot on your camera. A SDHC Class 10 Micro SD
card is recommended.
7.1. Launch the “BVCAM” APP.
7.2. Tap the setting icon on the“Live video” page and choose “Advance Con-
fig”(IOS: Device Settings)
7.3. Select “SD Card Record Config” and choose a desired recording mode.
7.4. Tap “OK” to confirm the SD card recording setting.
7.5. Check out the video files. (See 5.2.2)
VIII. Resetting
If for any reason the camera stops working or isn’t working properly, a reset will
restore it back to normal operation.
Operation: When the camera is powered on, press the Reset Button for 5 seconds
to reset all settings to factory default. The camera will reboot automatically with de-
fault settings in 5 seconds.
IX. Change the Camera’s Password
>>Please confirm that the camera is successfully added to the APP in the P2P (LAN)
mode, and the P2P (LAN) connection works well.
9.1. Launch the APP “BVCAM”.
9.2. Tap the settings icon on the “Live video” page,choose “Advance Config” (IOS:
Device Settings), and then click “Change P2P access password” (IOS: Change
password).
9.3. Enterthe user default password “8888”. Input a new password and confirm it,
then tap “OK” to save the change.
Check if the new password works!
1. Go back to the “Live video” page, tap the setting icon and delete the current
camera.
2. Follow 3.2.3 to add the camera again. Don’t forget to type the new password
before tapping “OK” or “√” to add the camera.
3. If the camera shows “Online”, it means the password has been changed success-
fully. If the camera shows “password mistake”, it means you input a wrong pass-
word.
Frequently Asked Questions
Q: What kind of memory card can I use in this camera?
A:You are recommended to use a SDHC Class 10 Micro SD card (4GB-64GB). If a
memory card does not work, remove and format it on a PC computer before trying it
in thecamera again.
Q: Why can’t I find the camera’s WIFI signal on my smartphone or tablet PC?
A: Recharge the camera. Or reset the camera to factory default (See VIII).
Q: Why can’t I play back video files or it shows the video files are corrupted?
A: It is mainly because the camera is powered off inappropriately.
Q: What media player software should I use to play back the video files on my
computer?
A: Click the link: http://www.videolan.org/vlc/index.html to download and install VLC
player to play back video files on your computer.
Q: How do I reset my camera back to the way I got it?
A:Reset the camera to factory default. (See VIII)
I. Product Overview
1. Red/Blue Indicator Light
2. Microphone
3. Camera Lens
4. IR LEDs
5. Camera Button
II. What’s in the Box
-1×Wifi Network Meeting Camcorder
-1× Card Reader
-1× 3m USB Cable
-1× AC110-230V to DC 5V Charging Adapter
-1× Mini Disc
-1 ×8GB Micro SD Card (fitted into the Micro SD card slot already)
III. Charging
3.1. Connect the camera to an outlet AC power socket by using the charging adapter
and USB cable provided.
3.2. It will take about 4 hours to obtain a full charge. The camera can work 3 hours
on a full charge. The indicator lights will NOT change when the camera battery is
charging or fully charged.
3.3. If you want this camera to work 24/7 days, keep it plugged onto an outlet AC
power socket.
[Note]: It is normal that the camera becomes hot while it is working or charging.
IV. Network Setup
4.1. Install the “BVCAM” APP on your smartphone or tablet PC
4.1.1. Search for “BVCAM” in App Store or Google Play and install it on your smart-
phone or tablet PC.
4.2. LAN or P2P Mode Setup
4.2.1. Power on the camera by sliding the power switch to the ON position. The blue
and red indicator lights will illuminate for 3 seconds and then off. Waiting for 15 sec-
onds,the blue and red indicator lights will start illuminating for 3 seconds again; the
red indicator light will be off again. Waiting for 8 seconds, the blue indicator light will
stay illuminated while the red one will start flashing, indicating the camera’s WIFI
signal is ready.
4.2.2. Go to the WIFI or WLAN settings on your smartphone or tablet PCand con-
nect to the camera’s WIFI signal. The camera’s WIFI network SSID starts with
“KD******” and will appear on your WIFI or WLAN settings page as below.Both red
and blue indicator lights will keep flashing, indicating the camera’s P2P connection
is done.
[Note]: If the camera’s WIFI signal cannot be found for a long time, press the Reset Button for 5 sec-
onds to reset all settings to factory default. The red and blue indicator lights will be turned off and the
camera will restart automatically in 5 seconds.
4.2.3. Launch the “BVCAM” APP.
4.2.4. Add the camera to the application.
For Android: Tap + > Search(Lan) >Tap the camera icon > Tap OK or √.
For IOS: Tap + >Tap Add new online Camera >Tap Search (LAN) >Tap the camera
icon >Tap OK.
4.2.5. If the camera shows “Online” on the “Live video” page, it means the P2P
(LAN) connection is successful and you can view a live video feed from the camera
in the P2P (LAN) mode.
[Note]: See the table below for an explanation of the different functions available:
4.3. WAN Mode or Remote View Setup
>>Before the WAN configuration, please confirm that the camera is successfully
added to your smartphone or tablet PC in the P2P (LAN) mode, and the P2P (LAN)
connection works well.
4.3.1. Launch the “BVCAM” APP.
4.3.2. Set up the WAN mode or remote view.
Step 1: Tap the setting icon on the “Live video” page and select “Advance Config”
(IOS: Device Settings).
Step 2:Tap “WIFI Config” and select a desired WIFI network to enroll the camera in.
Step 3: Tap “OK”to confirm the WIFI configuration.
4.3.3. The camera will reboot automatically.
Check if the WAN mode or remote view setting works!
1. Exit the “BVCAM” APP.
2. Go to the WIFI or WLAN setting page on your smartphone or tablet PC and join
to another WIFI network which must be different from the one that the camera is en-
rolled in, or you can use your mobilenetwork.
3. Launch the “BVCAM” APP again.If you see the camera is “Online” on the“Live
video” page, it indicates the WAN mode or remote view setting is successful.Now
you can watch the live video from the camera on your smartphone or tablet PC
remotely as long as you have access to the Internet.
[Note]: If the WAN mode setup fails, please reset the camera (See VIII) and re-configure it.
V. Motion Detection Setup
>>Make sure that the camera is added successfully to the APP in LAN or WAN
mode.
>>Please make sure theMicro SD card (4GB-64GB) has been formatted already
and is securely fitted into the SD card slot on your camera. A SDHC Class 10 Micro
SD card is recommended.
5.1. Motion Detection Photograph Setup
5.1.1. Launch the “BVCAM” APP.
5.1.2. Enable the motion detection function.
Step1: Tap the setting icon on the “Live video” page and then choose “Advance
Config” (IOS: Device Settings)
Step 2:Tap “Alarm Config” , choose a desired sensitivity level.
Step 3: Tap “OK” to confirm the setting.
5.1.3. The camera will take a screenshot of the live video automatically when a
movement is detected. Go back to the “Live video” page and tap “Alarm” at the
bottom of the screen to check out the screenshots.
5.2. Motion Detection Video Recording Setup
5.2.1. Tap the setting icon on the “Live video” page and choose“Advance Config”
(IOS: Device Settings).
5.2.2. Tap “SDCard Record Config” and select “Record when Alarms” (IOS: On
alarm).
5.2.3. Tap “OK” to confirm the Motion Detection Video Recording setting.
5.2.4. The camera will start recording video automatically when a movement is de-
tected.Go back to the “Live video” page, tap “Record” at the bottom of the screen
and then choose “Remote SD card”(IOS: ) to check out the video files.
[Note]: Video Resolution: 1280×720P Video Format: ASF
VI. Recording Video to Smartphone or Tablet PC
>> Before recording, make sure that the camera is added successfully to the APP in
LAN or WAN mode.
6.1. Launch the “BVCAM” APP. Tap the camera icon to view the live video.
6.2.Tap the remote video recording button to start or stop recording video.
The video files will be saved in your smartphone or tablet PC flash memory if you are
usingan Android device. However, the video files can only be found in the APP
“BVCAM” if you are an IOS device.
6.3. Go back to the “Live video” page, tap “Record” at the bottom of the screen and
then choose “Local” (IOS: ) to check out the video files.
[Note]: Video Resolution: 1280×720P Video Format: ASF
VII. Recording Video to the Local Micro SD Card
>>Make sure that the camera is added successfully to the APP in LAN or WAN
mode.
>>Make sure theMicro SD card (4GB-64GB) has been formatted already and is
securely fitted into the SD card slot on your camera. A SDHC Class 10 Micro SD
card is recommended.
7.1. Launch the “BVCAM” APP.
7.2. Tap the setting icon on the“Live video” page and choose “Advance Con-
fig”(IOS: Device Settings)
7.3. Select “SD Card Record Config” and choose a desired recording mode.
7.4. Tap “OK” to confirm the SD card recording setting.
Button Function Name Function Description
Audio
Snapshot
Remote Video Recording
Horizontal Mirror
Vertical Mirror
Brightness
Contrast
Tap this button to enable or disable the live audio
output.
Tap this button to take a screenshot of the live
video.
Tap this button to start or stop remote video record-
ing.
Tap this button to flip the live video’s picture horizon-
tally.
Tap this button to flip the live video’s picture vertical-
ly.
Tap this button to adjust the live video’s brightness.
Tap this button to adjust the live video’s contrast
ratio.
7.5. Check out the video files. (See 5.2.2)
VIII. Resetting
If for any reason the camera stops working or isn’t working properly, a reset will
restore it back to normal operation.
Operation: When the camera is powered on, press the Reset Button for 5 seconds
to reset all settings to factory default. The camera will reboot automatically with de-
fault settings in 5 seconds.
IX. Change the Camera’s Password
>>Please confirm that the camera is successfully added to the APP in the P2P (LAN)
mode, and the P2P (LAN) connection works well.
9.1. Launch the APP “BVCAM”.
9.2. Tap the settings icon on the “Live video” page,choose “Advance Config” (IOS:
Device Settings), and then click “Change P2P access password” (IOS: Change
password).
9.3. Enterthe user default password “8888”. Input a new password and confirm it,
then tap “OK” to save the change.
Check if the new password works!
1. Go back to the “Live video” page, tap the setting icon and delete the current
camera.
2. Follow 3.2.3 to add the camera again. Don’t forget to type the new password
before tapping “OK” or “√” to add the camera.
3. If the camera shows “Online”, it means the password has been changed success-
fully. If the camera shows “password mistake”, it means you input a wrong pass-
word.
Frequently Asked Questions
Q: What kind of memory card can I use in this camera?
A:You are recommended to use a SDHC Class 10 Micro SD card (4GB-64GB). If a
memory card does not work, remove and format it on a PC computer before trying it
in thecamera again.
Q: Why can’t I find the camera’s WIFI signal on my smartphone or tablet PC?
A: Recharge the camera. Or reset the camera to factory default (See VIII).
Q: Why can’t I play back video files or it shows the video files are corrupted?
A: It is mainly because the camera is powered off inappropriately.
Q: What media player software should I use to play back the video files on my
computer?
A: Click the link: http://www.videolan.org/vlc/index.html to download and install VLC
player to play back video files on your computer.
Q: How do I reset my camera back to the way I got it?
A:Reset the camera to factory default. (See VIII)
I. Product Overview
1. Red/Blue Indicator Light
2. Microphone
3. Camera Lens
4. IR LEDs
5. Camera Button
II. What’s in the Box
-1×Wifi Network Meeting Camcorder
-1× Card Reader
-1× 3m USB Cable
-1× AC110-230V to DC 5V Charging Adapter
-1× Mini Disc
-1 ×8GB Micro SD Card (fitted into the Micro SD card slot already)
III. Charging
3.1. Connect the camera to an outlet AC power socket by using the charging adapter
and USB cable provided.
3.2. It will take about 4 hours to obtain a full charge. The camera can work 3 hours
on a full charge. The indicator lights will NOT change when the camera battery is
charging or fully charged.
3.3. If you want this camera to work 24/7 days, keep it plugged onto an outlet AC
power socket.
[Note]: It is normal that the camera becomes hot while it is working or charging.
IV. Network Setup
4.1. Install the “BVCAM” APP on your smartphone or tablet PC
4.1.1. Search for “BVCAM” in App Store or Google Play and install it on your smart-
phone or tablet PC.
4.2. LAN or P2P Mode Setup
4.2.1. Power on the camera by sliding the power switch to the ON position. The blue
and red indicator lights will illuminate for 3 seconds and then off. Waiting for 15 sec-
onds,the blue and red indicator lights will start illuminating for 3 seconds again; the
red indicator light will be off again. Waiting for 8 seconds, the blue indicator light will
stay illuminated while the red one will start flashing, indicating the camera’s WIFI
signal is ready.
4.2.2. Go to the WIFI or WLAN settings on your smartphone or tablet PCand con-
nect to the camera’s WIFI signal. The camera’s WIFI network SSID starts with
“KD******” and will appear on your WIFI or WLAN settings page as below.Both red
and blue indicator lights will keep flashing, indicating the camera’s P2P connection
is done.
[Note]: If the camera’s WIFI signal cannot be found for a long time, press the Reset Button for 5 sec-
onds to reset all settings to factory default. The red and blue indicator lights will be turned off and the
camera will restart automatically in 5 seconds.
4.2.3. Launch the “BVCAM” APP.
4.2.4. Add the camera to the application.
For Android: Tap + > Search(Lan) >Tap the camera icon > Tap OK or √.
For IOS: Tap + >Tap Add new online Camera >Tap Search (LAN) >Tap the camera
icon >Tap OK.
4.2.5. If the camera shows “Online” on the “Live video” page, it means the P2P
(LAN) connection is successful and you can view a live video feed from the camera
in the P2P (LAN) mode.
[Note]: See the table below for an explanation of the different functions available:
4.3. WAN Mode or Remote View Setup
>>Before the WAN configuration, please confirm that the camera is successfully
added to your smartphone or tablet PC in the P2P (LAN) mode, and the P2P (LAN)
connection works well.
4.3.1. Launch the “BVCAM” APP.
4.3.2. Set up the WAN mode or remote view.
Step 1: Tap the setting icon on the “Live video” page and select “Advance Config”
(IOS: Device Settings).
Step 2:Tap “WIFI Config” and select a desired WIFI network to enroll the camera in.
Step 3: Tap “OK”to confirm the WIFI configuration.
4.3.3. The camera will reboot automatically.
Check if the WAN mode or remote view setting works!
1. Exit the “BVCAM” APP.
2. Go to the WIFI or WLAN setting page on your smartphone or tablet PC and join
to another WIFI network which must be different from the one that the camera is en-
rolled in, or you can use your mobilenetwork.
3. Launch the “BVCAM” APP again.If you see the camera is “Online” on the“Live
video” page, it indicates the WAN mode or remote view setting is successful.Now
you can watch the live video from the camera on your smartphone or tablet PC
remotely as long as you have access to the Internet.
[Note]: If the WAN mode setup fails, please reset the camera (See VIII) and re-configure it.
V. Motion Detection Setup
>>Make sure that the camera is added successfully to the APP in LAN or WAN
mode.
>>Please make sure theMicro SD card (4GB-64GB) has been formatted already
and is securely fitted into the SD card slot on your camera. A SDHC Class 10 Micro
SD card is recommended.
5.1. Motion Detection Photograph Setup
5.1.1. Launch the “BVCAM” APP.
5.1.2. Enable the motion detection function.
Step1: Tap the setting icon on the “Live video” page and then choose “Advance
Config” (IOS: Device Settings)
Step 2:Tap “Alarm Config” , choose a desired sensitivity level.
Step 3: Tap “OK” to confirm the setting.
5.1.3. The camera will take a screenshot of the live video automatically when a
movement is detected. Go back to the “Live video” page and tap “Alarm” at the
bottom of the screen to check out the screenshots.
5.2. Motion Detection Video Recording Setup
5.2.1. Tap the setting icon on the “Live video” page and choose“Advance Config”
(IOS: Device Settings).
5.2.2. Tap “SDCard Record Config” and select “Record when Alarms” (IOS: On
alarm).
5.2.3. Tap “OK” to confirm the Motion Detection Video Recording setting.
5.2.4. The camera will start recording video automatically when a movement is de-
tected.Go back to the “Live video” page, tap “Record” at the bottom of the screen
and then choose “Remote SD card”(IOS: ) to check out the video files.
[Note]: Video Resolution: 1280×720P Video Format: ASF
VI. Recording Video to Smartphone or Tablet PC
>> Before recording, make sure that the camera is added successfully to the APP in
LAN or WAN mode.
6.1. Launch the “BVCAM” APP. Tap the camera icon to view the live video.
6.2.Tap the remote video recording button to start or stop recording video.
The video files will be saved in your smartphone or tablet PC flash memory if you are
usingan Android device. However, the video files can only be found in the APP
“BVCAM” if you are an IOS device.
6.3. Go back to the “Live video” page, tap “Record” at the bottom of the screen and
then choose “Local” (IOS: ) to check out the video files.
[Note]: Video Resolution: 1280×720P Video Format: ASF
VII. Recording Video to the Local Micro SD Card
>>Make sure that the camera is added successfully to the APP in LAN or WAN
mode.
>>Make sure theMicro SD card (4GB-64GB) has been formatted already and is
securely fitted into the SD card slot on your camera. A SDHC Class 10 Micro SD
card is recommended.
7.1. Launch the “BVCAM” APP.
7.2. Tap the setting icon on the“Live video” page and choose “Advance Con-
fig”(IOS: Device Settings)
7.3. Select “SD Card Record Config” and choose a desired recording mode.
7.4. Tap “OK” to confirm the SD card recording setting.
7.5. Check out the video files. (See 5.2.2)
VIII. Resetting
If for any reason the camera stops working or isn’t working properly, a reset will
restore it back to normal operation.
Operation: When the camera is powered on, press the Reset Button for 5 seconds
to reset all settings to factory default. The camera will reboot automatically with de-
fault settings in 5 seconds.
IX. Change the Camera’s Password
>>Please confirm that the camera is successfully added to the APP in the P2P (LAN)
mode, and the P2P (LAN) connection works well.
9.1. Launch the APP “BVCAM”.
9.2. Tap the settings icon on the “Live video” page,choose “Advance Config” (IOS:
Device Settings), and then click “Change P2P access password” (IOS: Change
password).
9.3. Enterthe user default password “8888”. Input a new password and confirm it,
then tap “OK” to save the change.
Check if the new password works!
1. Go back to the “Live video” page, tap the setting icon and delete the current
camera.
2. Follow 3.2.3 to add the camera again. Don’t forget to type the new password
before tapping “OK” or “√” to add the camera.
3. If the camera shows “Online”, it means the password has been changed success-
fully. If the camera shows “password mistake”, it means you input a wrong pass-
word.
Frequently Asked Questions
Q: What kind of memory card can I use in this camera?
A:You are recommended to use a SDHC Class 10 Micro SD card (4GB-64GB). If a
memory card does not work, remove and format it on a PC computer before trying it
in thecamera again.
Q: Why can’t I find the camera’s WIFI signal on my smartphone or tablet PC?
A: Recharge the camera. Or reset the camera to factory default (See VIII).
Q: Why can’t I play back video files or it shows the video files are corrupted?
A: It is mainly because the camera is powered off inappropriately.
Q: What media player software should I use to play back the video files on my
computer?
A: Click the link: http://www.videolan.org/vlc/index.html to download and install VLC
player to play back video files on your computer.
Q: How do I reset my camera back to the way I got it?
A:Reset the camera to factory default. (See VIII)
I. Product Overview
1. Red/Blue Indicator Light
2. Microphone
3. Camera Lens
4. IR LEDs
5. Camera Button
II. What’s in the Box
-1×Wifi Network Meeting Camcorder
-1× Card Reader
-1× 3m USB Cable
-1× AC110-230V to DC 5V Charging Adapter
-1× Mini Disc
-1 ×8GB Micro SD Card (fitted into the Micro SD card slot already)
III. Charging
3.1. Connect the camera to an outlet AC power socket by using the charging adapter
and USB cable provided.
3.2. It will take about 4 hours to obtain a full charge. The camera can work 3 hours
on a full charge. The indicator lights will NOT change when the camera battery is
charging or fully charged.
3.3. If you want this camera to work 24/7 days, keep it plugged onto an outlet AC
power socket.
[Note]: It is normal that the camera becomes hot while it is working or charging.
IV. Network Setup
4.1. Install the “BVCAM” APP on your smartphone or tablet PC
4.1.1. Search for “BVCAM” in App Store or Google Play and install it on your smart-
phone or tablet PC.
4.2. LAN or P2P Mode Setup
4.2.1. Power on the camera by sliding the power switch to the ON position. The blue
and red indicator lights will illuminate for 3 seconds and then off. Waiting for 15 sec-
onds,the blue and red indicator lights will start illuminating for 3 seconds again; the
red indicator light will be off again. Waiting for 8 seconds, the blue indicator light will
stay illuminated while the red one will start flashing, indicating the camera’s WIFI
signal is ready.
4.2.2. Go to the WIFI or WLAN settings on your smartphone or tablet PCand con-
nect to the camera’s WIFI signal. The camera’s WIFI network SSID starts with
“KD******” and will appear on your WIFI or WLAN settings page as below.Both red
and blue indicator lights will keep flashing, indicating the camera’s P2P connection
is done.
[Note]: If the camera’s WIFI signal cannot be found for a long time, press the Reset Button for 5 sec-
onds to reset all settings to factory default. The red and blue indicator lights will be turned off and the
camera will restart automatically in 5 seconds.
4.2.3. Launch the “BVCAM” APP.
4.2.4. Add the camera to the application.
For Android: Tap + > Search(Lan) >Tap the camera icon > Tap OK or √.
For IOS: Tap + >Tap Add new online Camera >Tap Search (LAN) >Tap the camera
icon >Tap OK.
4.2.5. If the camera shows “Online” on the “Live video” page, it means the P2P
(LAN) connection is successful and you can view a live video feed from the camera
in the P2P (LAN) mode.
[Note]: See the table below for an explanation of the different functions available:
4.3. WAN Mode or Remote View Setup
>>Before the WAN configuration, please confirm that the camera is successfully
added to your smartphone or tablet PC in the P2P (LAN) mode, and the P2P (LAN)
connection works well.
4.3.1. Launch the “BVCAM” APP.
4.3.2. Set up the WAN mode or remote view.
Step 1: Tap the setting icon on the “Live video” page and select “Advance Config”
(IOS: Device Settings).
Step 2:Tap “WIFI Config” and select a desired WIFI network to enroll the camera in.
Step 3: Tap “OK”to confirm the WIFI configuration.
4.3.3. The camera will reboot automatically.
Check if the WAN mode or remote view setting works!
1. Exit the “BVCAM” APP.
2. Go to the WIFI or WLAN setting page on your smartphone or tablet PC and join
to another WIFI network which must be different from the one that the camera is en-
rolled in, or you can use your mobilenetwork.
3. Launch the “BVCAM” APP again.If you see the camera is “Online” on the“Live
video” page, it indicates the WAN mode or remote view setting is successful.Now
you can watch the live video from the camera on your smartphone or tablet PC
remotely as long as you have access to the Internet.
[Note]: If the WAN mode setup fails, please reset the camera (See VIII) and re-configure it.
V. Motion Detection Setup
>>Make sure that the camera is added successfully to the APP in LAN or WAN
mode.
>>Please make sure theMicro SD card (4GB-64GB) has been formatted already
and is securely fitted into the SD card slot on your camera. A SDHC Class 10 Micro
SD card is recommended.
5.1. Motion Detection Photograph Setup
5.1.1. Launch the “BVCAM” APP.
5.1.2. Enable the motion detection function.
Step1: Tap the setting icon on the “Live video” page and then choose “Advance
Config” (IOS: Device Settings)
Step 2:Tap “Alarm Config” , choose a desired sensitivity level.
Step 3: Tap “OK” to confirm the setting.
5.1.3. The camera will take a screenshot of the live video automatically when a
movement is detected. Go back to the “Live video” page and tap “Alarm” at the
bottom of the screen to check out the screenshots.
5.2. Motion Detection Video Recording Setup
5.2.1. Tap the setting icon on the “Live video” page and choose“Advance Config”
(IOS: Device Settings).
5.2.2. Tap “SDCard Record Config” and select “Record when Alarms” (IOS: On
alarm).
5.2.3. Tap “OK” to confirm the Motion Detection Video Recording setting.
5.2.4. The camera will start recording video automatically when a movement is de-
tected.Go back to the “Live video” page, tap “Record” at the bottom of the screen
and then choose “Remote SD card”(IOS: ) to check out the video files.
[Note]: Video Resolution: 1280×720P Video Format: ASF
VI. Recording Video to Smartphone or Tablet PC
>> Before recording, make sure that the camera is added successfully to the APP in
LAN or WAN mode.
6.1. Launch the “BVCAM” APP. Tap the camera icon to view the live video.
6.2.Tap the remote video recording button to start or stop recording video.
The video files will be saved in your smartphone or tablet PC flash memory if you are
usingan Android device. However, the video files can only be found in the APP
“BVCAM” if you are an IOS device.
6.3. Go back to the “Live video” page, tap “Record” at the bottom of the screen and
then choose “Local” (IOS: ) to check out the video files.
[Note]: Video Resolution: 1280×720P Video Format: ASF
VII. Recording Video to the Local Micro SD Card
>>Make sure that the camera is added successfully to the APP in LAN or WAN
mode.
>>Make sure theMicro SD card (4GB-64GB) has been formatted already and is
securely fitted into the SD card slot on your camera. A SDHC Class 10 Micro SD
card is recommended.
7.1. Launch the “BVCAM” APP.
7.2. Tap the setting icon on the“Live video” page and choose “Advance Con-
fig”(IOS: Device Settings)
7.3. Select “SD Card Record Config” and choose a desired recording mode.
7.4. Tap “OK” to confirm the SD card recording setting.
7.5. Check out the video files. (See 5.2.2)
VIII. Resetting
If for any reason the camera stops working or isn’t working properly, a reset will
restore it back to normal operation.
Operation: When the camera is powered on, press the Reset Button for 5 seconds
to reset all settings to factory default. The camera will reboot automatically with de-
fault settings in 5 seconds.
IX. Change the Camera’s Password
>>Please confirm that the camera is successfully added to the APP in the P2P (LAN)
mode, and the P2P (LAN) connection works well.
9.1. Launch the APP “BVCAM”.
9.2. Tap the settings icon on the “Live video” page,choose “Advance Config” (IOS:
Device Settings), and then click “Change P2P access password” (IOS: Change
password).
9.3. Enterthe user default password “8888”. Input a new password and confirm it,
then tap “OK” to save the change.
Check if the new password works!
1. Go back to the “Live video” page, tap the setting icon and delete the current
camera.
2. Follow 3.2.3 to add the camera again. Don’t forget to type the new password
before tapping “OK” or “√” to add the camera.
3. If the camera shows “Online”, it means the password has been changed success-
fully. If the camera shows “password mistake”, it means you input a wrong pass-
word.
Frequently Asked Questions
Q: What kind of memory card can I use in this camera?
A:You are recommended to use a SDHC Class 10 Micro SD card (4GB-64GB). If a
memory card does not work, remove and format it on a PC computer before trying it
in thecamera again.
Q: Why can’t I find the camera’s WIFI signal on my smartphone or tablet PC?
A: Recharge the camera. Or reset the camera to factory default (See VIII).
Q: Why can’t I play back video files or it shows the video files are corrupted?
A: It is mainly because the camera is powered off inappropriately.
Q: What media player software should I use to play back the video files on my
computer?
A: Click the link: http://www.videolan.org/vlc/index.html to download and install VLC
player to play back video files on your computer.
Q: How do I reset my camera back to the way I got it?
A:Reset the camera to factory default. (See VIII)
I. Product Overview
1. Red/Blue Indicator Light
2. Microphone
3. Camera Lens
4. IR LEDs
5. Camera Button
II. What’s in the Box
-1×Wifi Network Meeting Camcorder
-1× Card Reader
-1× 3m USB Cable
-1× AC110-230V to DC 5V Charging Adapter
-1× Mini Disc
-1 ×8GB Micro SD Card (fitted into the Micro SD card slot already)
III. Charging
3.1. Connect the camera to an outlet AC power socket by using the charging adapter
and USB cable provided.
3.2. It will take about 4 hours to obtain a full charge. The camera can work 3 hours
on a full charge. The indicator lights will NOT change when the camera battery is
charging or fully charged.
3.3. If you want this camera to work 24/7 days, keep it plugged onto an outlet AC
power socket.
[Note]: It is normal that the camera becomes hot while it is working or charging.
IV. Network Setup
4.1. Install the “BVCAM” APP on your smartphone or tablet PC
4.1.1. Search for “BVCAM” in App Store or Google Play and install it on your smart-
phone or tablet PC.
4.2. LAN or P2P Mode Setup
4.2.1. Power on the camera by sliding the power switch to the ON position. The blue
and red indicator lights will illuminate for 3 seconds and then off. Waiting for 15 sec-
onds,the blue and red indicator lights will start illuminating for 3 seconds again; the
red indicator light will be off again. Waiting for 8 seconds, the blue indicator light will
stay illuminated while the red one will start flashing, indicating the camera’s WIFI
signal is ready.
4.2.2. Go to the WIFI or WLAN settings on your smartphone or tablet PCand con-
nect to the camera’s WIFI signal. The camera’s WIFI network SSID starts with
“KD******” and will appear on your WIFI or WLAN settings page as below.Both red
and blue indicator lights will keep flashing, indicating the camera’s P2P connection
is done.
[Note]: If the camera’s WIFI signal cannot be found for a long time, press the Reset Button for 5 sec-
onds to reset all settings to factory default. The red and blue indicator lights will be turned off and the
camera will restart automatically in 5 seconds.
4.2.3. Launch the “BVCAM” APP.
4.2.4. Add the camera to the application.
For Android: Tap + > Search(Lan) >Tap the camera icon > Tap OK or √.
For IOS: Tap + >Tap Add new online Camera >Tap Search (LAN) >Tap the camera
icon >Tap OK.
4.2.5. If the camera shows “Online” on the “Live video” page, it means the P2P
(LAN) connection is successful and you can view a live video feed from the camera
in the P2P (LAN) mode.
[Note]: See the table below for an explanation of the different functions available:
4.3. WAN Mode or Remote View Setup
>>Before the WAN configuration, please confirm that the camera is successfully
added to your smartphone or tablet PC in the P2P (LAN) mode, and the P2P (LAN)
connection works well.
4.3.1. Launch the “BVCAM” APP.
4.3.2. Set up the WAN mode or remote view.
Step 1: Tap the setting icon on the “Live video” page and select “Advance Config”
(IOS: Device Settings).
Step 2:Tap “WIFI Config” and select a desired WIFI network to enroll the camera in.
Step 3: Tap “OK”to confirm the WIFI configuration.
4.3.3. The camera will reboot automatically.
Check if the WAN mode or remote view setting works!
1. Exit the “BVCAM” APP.
2. Go to the WIFI or WLAN setting page on your smartphone or tablet PC and join
to another WIFI network which must be different from the one that the camera is en-
rolled in, or you can use your mobilenetwork.
3. Launch the “BVCAM” APP again.If you see the camera is “Online” on the“Live
video” page, it indicates the WAN mode or remote view setting is successful.Now
you can watch the live video from the camera on your smartphone or tablet PC
remotely as long as you have access to the Internet.
[Note]: If the WAN mode setup fails, please reset the camera (See VIII) and re-configure it.
V. Motion Detection Setup
>>Make sure that the camera is added successfully to the APP in LAN or WAN
mode.
>>Please make sure theMicro SD card (4GB-64GB) has been formatted already
and is securely fitted into the SD card slot on your camera. A SDHC Class 10 Micro
SD card is recommended.
5.1. Motion Detection Photograph Setup
5.1.1. Launch the “BVCAM” APP.
5.1.2. Enable the motion detection function.
Step1: Tap the setting icon on the “Live video” page and then choose “Advance
Config” (IOS: Device Settings)
Step 2:Tap “Alarm Config” , choose a desired sensitivity level.
Step 3: Tap “OK” to confirm the setting.
5.1.3. The camera will take a screenshot of the live video automatically when a
movement is detected. Go back to the “Live video” page and tap “Alarm” at the
bottom of the screen to check out the screenshots.
5.2. Motion Detection Video Recording Setup
5.2.1. Tap the setting icon on the “Live video” page and choose“Advance Config”
(IOS: Device Settings).
5.2.2. Tap “SDCard Record Config” and select “Record when Alarms” (IOS: On
alarm).
5.2.3. Tap “OK” to confirm the Motion Detection Video Recording setting.
5.2.4. The camera will start recording video automatically when a movement is de-
tected.Go back to the “Live video” page, tap “Record” at the bottom of the screen
and then choose “Remote SD card”(IOS: ) to check out the video files.
[Note]: Video Resolution: 1280×720P Video Format: ASF
VI. Recording Video to Smartphone or Tablet PC
>> Before recording, make sure that the camera is added successfully to the APP in
LAN or WAN mode.
6.1. Launch the “BVCAM” APP. Tap the camera icon to view the live video.
6.2.Tap the remote video recording button to start or stop recording video.
The video files will be saved in your smartphone or tablet PC flash memory if you are
usingan Android device. However, the video files can only be found in the APP
“BVCAM” if you are an IOS device.
6.3. Go back to the “Live video” page, tap “Record” at the bottom of the screen and
then choose “Local” (IOS: ) to check out the video files.
[Note]: Video Resolution: 1280×720P Video Format: ASF
VII. Recording Video to the Local Micro SD Card
>>Make sure that the camera is added successfully to the APP in LAN or WAN
mode.
>>Make sure theMicro SD card (4GB-64GB) has been formatted already and is
securely fitted into the SD card slot on your camera. A SDHC Class 10 Micro SD
card is recommended.
7.1. Launch the “BVCAM” APP.
7.2. Tap the setting icon on the“Live video” page and choose “Advance Con-
fig”(IOS: Device Settings)
7.3. Select “SD Card Record Config” and choose a desired recording mode.
7.4. Tap “OK” to confirm the SD card recording setting.
7.5. Check out the video files. (See 5.2.2)
VIII. Resetting
If for any reason the camera stops working or isn’t working properly, a reset will
restore it back to normal operation.
Operation: When the camera is powered on, press the Reset Button for 5 seconds
to reset all settings to factory default. The camera will reboot automatically with de-
fault settings in 5 seconds.
IX. Change the Camera’s Password
>>Please confirm that the camera is successfully added to the APP in the P2P (LAN)
mode, and the P2P (LAN) connection works well.
9.1. Launch the APP “BVCAM”.
9.2. Tap the settings icon on the “Live video” page,choose “Advance Config” (IOS:
Device Settings), and then click “Change P2P access password” (IOS: Change
password).
9.3. Enterthe user default password “8888”. Input a new password and confirm it,
then tap “OK” to save the change.
Check if the new password works!
1. Go back to the “Live video” page, tap the setting icon and delete the current
camera.
2. Follow 3.2.3 to add the camera again. Don’t forget to type the new password
before tapping “OK” or “√” to add the camera.
3. If the camera shows “Online”, it means the password has been changed success-
fully. If the camera shows “password mistake”, it means you input a wrong pass-
word.
Frequently Asked Questions
Q: What kind of memory card can I use in this camera?
A:You are recommended to use a SDHC Class 10 Micro SD card (4GB-64GB). If a
memory card does not work, remove and format it on a PC computer before trying it
in thecamera again.
Q: Why can’t I find the camera’s WIFI signal on my smartphone or tablet PC?
A: Recharge the camera. Or reset the camera to factory default (See VIII).
Q: Why can’t I play back video files or it shows the video files are corrupted?
A: It is mainly because the camera is powered off inappropriately.
Q: What media player software should I use to play back the video files on my
computer?
A: Click the link: http://www.videolan.org/vlc/index.html to download and install VLC
player to play back video files on your computer.
Q: How do I reset my camera back to the way I got it?
A:Reset the camera to factory default. (See VIII)

I. Product Overview
1. Red/Blue Indicator Light
2. Microphone
3. Camera Lens
4. IR LEDs
5. Camera Button
II. What’s in the Box
-1×Wifi Network Meeting Camcorder
-1× Card Reader
-1× 3m USB Cable
-1× AC110-230V to DC 5V Charging Adapter
-1× Mini Disc
-1 ×8GB Micro SD Card (fitted into the Micro SD card slot already)
III. Charging
3.1. Connect the camera to an outlet AC power socket by using the charging adapter
and USB cable provided.
3.2. It will take about 4 hours to obtain a full charge. The camera can work 3 hours
on a full charge. The indicator lights will NOT change when the camera battery is
charging or fully charged.
3.3. If you want this camera to work 24/7 days, keep it plugged onto an outlet AC
power socket.
[Note]: It is normal that the camera becomes hot while it is working or charging.
IV. Network Setup
4.1. Install the “BVCAM” APP on your smartphone or tablet PC
4.1.1. Search for “BVCAM” in App Store or Google Play and install it on your smart-
phone or tablet PC.
4.2. LAN or P2P Mode Setup
4.2.1. Power on the camera by sliding the power switch to the ON position. The blue
and red indicator lights will illuminate for 3 seconds and then off. Waiting for 15 sec-
onds,the blue and red indicator lights will start illuminating for 3 seconds again; the
red indicator light will be off again. Waiting for 8 seconds, the blue indicator light will
stay illuminated while the red one will start flashing, indicating the camera’s WIFI
signal is ready.
4.2.2. Go to the WIFI or WLAN settings on your smartphone or tablet PCand con-
nect to the camera’s WIFI signal. The camera’s WIFI network SSID starts with
“KD******” and will appear on your WIFI or WLAN settings page as below.Both red
and blue indicator lights will keep flashing, indicating the camera’s P2P connection
is done.
[Note]: If the camera’s WIFI signal cannot be found for a long time, press the Reset Button for 5 sec-
onds to reset all settings to factory default. The red and blue indicator lights will be turned off and the
camera will restart automatically in 5 seconds.
4.2.3. Launch the “BVCAM” APP.
4.2.4. Add the camera to the application.
For Android: Tap + > Search(Lan) >Tap the camera icon > Tap OK or √.
For IOS: Tap + >Tap Add new online Camera >Tap Search (LAN) >Tap the camera
icon >Tap OK.
4.2.5. If the camera shows “Online” on the “Live video” page, it means the P2P
(LAN) connection is successful and you can view a live video feed from the camera
in the P2P (LAN) mode.
[Note]: See the table below for an explanation of the different functions available:
4.3. WAN Mode or Remote View Setup
>>Before the WAN configuration, please confirm that the camera is successfully
added to your smartphone or tablet PC in the P2P (LAN) mode, and the P2P (LAN)
connection works well.
4.3.1. Launch the “BVCAM” APP.
4.3.2. Set up the WAN mode or remote view.
Step 1: Tap the setting icon on the “Live video” page and select “Advance Config”
(IOS: Device Settings).
Step 2:Tap “WIFI Config” and select a desired WIFI network to enroll the camera in.
Step 3: Tap “OK”to confirm the WIFI configuration.
4.3.3. The camera will reboot automatically.
Check if the WAN mode or remote view setting works!
1. Exit the “BVCAM” APP.
2. Go to the WIFI or WLAN setting page on your smartphone or tablet PC and join
to another WIFI network which must be different from the one that the camera is en-
rolled in, or you can use your mobilenetwork.
3. Launch the “BVCAM” APP again.If you see the camera is “Online” on the“Live
video” page, it indicates the WAN mode or remote view setting is successful.Now
you can watch the live video from the camera on your smartphone or tablet PC
remotely as long as you have access to the Internet.
[Note]: If the WAN mode setup fails, please reset the camera (See VIII) and re-configure it.
V. Motion Detection Setup
>>Make sure that the camera is added successfully to the APP in LAN or WAN
mode.
>>Please make sure theMicro SD card (4GB-64GB) has been formatted already
and is securely fitted into the SD card slot on your camera. A SDHC Class 10 Micro
SD card is recommended.
5.1. Motion Detection Photograph Setup
5.1.1. Launch the “BVCAM” APP.
5.1.2. Enable the motion detection function.
Step1: Tap the setting icon on the “Live video” page and then choose “Advance
Config” (IOS: Device Settings)
Step 2:Tap “Alarm Config” , choose a desired sensitivity level.
Step 3: Tap “OK” to confirm the setting.
5.1.3. The camera will take a screenshot of the live video automatically when a
movement is detected. Go back to the “Live video” page and tap “Alarm” at the
bottom of the screen to check out the screenshots.
5.2. Motion Detection Video Recording Setup
5.2.1. Tap the setting icon on the “Live video” page and choose“Advance Config”
(IOS: Device Settings).
5.2.2. Tap “SDCard Record Config” and select “Record when Alarms” (IOS: On
alarm).
5.2.3. Tap “OK” to confirm the Motion Detection Video Recording setting.
5.2.4. The camera will start recording video automatically when a movement is de-
tected.Go back to the “Live video” page, tap “Record” at the bottom of the screen
and then choose “Remote SD card”(IOS: ) to check out the video files.
[Note]: Video Resolution: 1280×720P Video Format: ASF
VI. Recording Video to Smartphone or Tablet PC
>> Before recording, make sure that the camera is added successfully to the APP in
LAN or WAN mode.
6.1. Launch the “BVCAM” APP. Tap the camera icon to view the live video.
6.2.Tap the remote video recording button to start or stop recording video.
The video files will be saved in your smartphone or tablet PC flash memory if you are
usingan Android device. However, the video files can only be found in the APP
“BVCAM” if you are an IOS device.
6.3. Go back to the “Live video” page, tap “Record” at the bottom of the screen and
then choose “Local” (IOS: ) to check out the video files.
[Note]: Video Resolution: 1280×720P Video Format: ASF
VII. Recording Video to the Local Micro SD Card
>>Make sure that the camera is added successfully to the APP in LAN or WAN
mode.
>>Make sure theMicro SD card (4GB-64GB) has been formatted already and is
securely fitted into the SD card slot on your camera. A SDHC Class 10 Micro SD
card is recommended.
7.1. Launch the “BVCAM” APP.
7.2. Tap the setting icon on the“Live video” page and choose “Advance Con-
fig”(IOS: Device Settings)
7.3. Select “SD Card Record Config” and choose a desired recording mode.
7.4. Tap “OK” to confirm the SD card recording setting.
7.5. Check out the video files. (See 5.2.2)
VIII. Resetting
If for any reason the camera stops working or isn’t working properly, a reset will
restore it back to normal operation.
Operation: When the camera is powered on, press the Reset Button for 5 seconds
to reset all settings to factory default. The camera will reboot automatically with de-
fault settings in 5 seconds.
IX. Change the Camera’s Password
>>Please confirm that the camera is successfully added to the APP in the P2P (LAN)
mode, and the P2P (LAN) connection works well.
9.1. Launch the APP “BVCAM”.
9.2. Tap the settings icon on the “Live video” page,choose “Advance Config” (IOS:
Device Settings), and then click “Change P2P access password” (IOS: Change
password).
9.3. Enterthe user default password “8888”. Input a new password and confirm it,
then tap “OK” to save the change.
Check if the new password works!
1. Go back to the “Live video” page, tap the setting icon and delete the current
camera.
2. Follow 3.2.3 to add the camera again. Don’t forget to type the new password
before tapping “OK” or “√” to add the camera.
3. If the camera shows “Online”, it means the password has been changed success-
fully. If the camera shows “password mistake”, it means you input a wrong pass-
word.
Frequently Asked Questions
Q: What kind of memory card can I use in this camera?
A:You are recommended to use a SDHC Class 10 Micro SD card (4GB-64GB). If a
memory card does not work, remove and format it on a PC computer before trying it
in thecamera again.
Q: Why can’t I find the camera’s WIFI signal on my smartphone or tablet PC?
A: Recharge the camera. Or reset the camera to factory default (See VIII).
Q: Why can’t I play back video files or it shows the video files are corrupted?
A: It is mainly because the camera is powered off inappropriately.
Q: What media player software should I use to play back the video files on my
computer?
A: Click the link: http://www.videolan.org/vlc/index.html to download and install VLC
player to play back video files on your computer.
Q: How do I reset my camera back to the way I got it?
A:Reset the camera to factory default. (See VIII)

I. Product Overview
1. Red/Blue Indicator Light
2. Microphone
3. Camera Lens
4. IR LEDs
5. Camera Button
II. What’s in the Box
-1×Wifi Network Meeting Camcorder
-1× Card Reader
-1× 3m USB Cable
-1× AC110-230V to DC 5V Charging Adapter
-1× Mini Disc
-1 ×8GB Micro SD Card (fitted into the Micro SD card slot already)
III. Charging
3.1. Connect the camera to an outlet AC power socket by using the charging adapter
and USB cable provided.
3.2. It will take about 4 hours to obtain a full charge. The camera can work 3 hours
on a full charge. The indicator lights will NOT change when the camera battery is
charging or fully charged.
3.3. If you want this camera to work 24/7 days, keep it plugged onto an outlet AC
power socket.
[Note]: It is normal that the camera becomes hot while it is working or charging.
IV. Network Setup
4.1. Install the “BVCAM” APP on your smartphone or tablet PC
4.1.1. Search for “BVCAM” in App Store or Google Play and install it on your smart-
phone or tablet PC.
4.2. LAN or P2P Mode Setup
4.2.1. Power on the camera by sliding the power switch to the ON position. The blue
and red indicator lights will illuminate for 3 seconds and then off. Waiting for 15 sec-
onds,the blue and red indicator lights will start illuminating for 3 seconds again; the
red indicator light will be off again. Waiting for 8 seconds, the blue indicator light will
stay illuminated while the red one will start flashing, indicating the camera’s WIFI
signal is ready.
4.2.2. Go to the WIFI or WLAN settings on your smartphone or tablet PCand con-
nect to the camera’s WIFI signal. The camera’s WIFI network SSID starts with
“KD******” and will appear on your WIFI or WLAN settings page as below.Both red
and blue indicator lights will keep flashing, indicating the camera’s P2P connection
is done.
[Note]: If the camera’s WIFI signal cannot be found for a long time, press the Reset Button for 5 sec-
onds to reset all settings to factory default. The red and blue indicator lights will be turned off and the
camera will restart automatically in 5 seconds.
4.2.3. Launch the “BVCAM” APP.
4.2.4. Add the camera to the application.
For Android: Tap + > Search(Lan) >Tap the camera icon > Tap OK or √.
For IOS: Tap + >Tap Add new online Camera >Tap Search (LAN) >Tap the camera
icon >Tap OK.
4.2.5. If the camera shows “Online” on the “Live video” page, it means the P2P
(LAN) connection is successful and you can view a live video feed from the camera
in the P2P (LAN) mode.
[Note]: See the table below for an explanation of the different functions available:
4.3. WAN Mode or Remote View Setup
>>Before the WAN configuration, please confirm that the camera is successfully
added to your smartphone or tablet PC in the P2P (LAN) mode, and the P2P (LAN)
connection works well.
4.3.1. Launch the “BVCAM” APP.
4.3.2. Set up the WAN mode or remote view.
Step 1: Tap the setting icon on the “Live video” page and select “Advance Config”
(IOS: Device Settings).
Step 2:Tap “WIFI Config” and select a desired WIFI network to enroll the camera in.
Step 3: Tap “OK”to confirm the WIFI configuration.
4.3.3. The camera will reboot automatically.
Check if the WAN mode or remote view setting works!
1. Exit the “BVCAM” APP.
2. Go to the WIFI or WLAN setting page on your smartphone or tablet PC and join
to another WIFI network which must be different from the one that the camera is en-
rolled in, or you can use your mobilenetwork.
3. Launch the “BVCAM” APP again.If you see the camera is “Online” on the“Live
video” page, it indicates the WAN mode or remote view setting is successful.Now
you can watch the live video from the camera on your smartphone or tablet PC
remotely as long as you have access to the Internet.
[Note]: If the WAN mode setup fails, please reset the camera (See VIII) and re-configure it.
V. Motion Detection Setup
>>Make sure that the camera is added successfully to the APP in LAN or WAN
mode.
>>Please make sure theMicro SD card (4GB-64GB) has been formatted already
and is securely fitted into the SD card slot on your camera. A SDHC Class 10 Micro
SD card is recommended.
5.1. Motion Detection Photograph Setup
5.1.1. Launch the “BVCAM” APP.
5.1.2. Enable the motion detection function.
Step1: Tap the setting icon on the “Live video” page and then choose “Advance
Config” (IOS: Device Settings)
Step 2:Tap “Alarm Config” , choose a desired sensitivity level.
Step 3: Tap “OK” to confirm the setting.
5.1.3. The camera will take a screenshot of the live video automatically when a
movement is detected. Go back to the “Live video” page and tap “Alarm” at the
bottom of the screen to check out the screenshots.
5.2. Motion Detection Video Recording Setup
5.2.1. Tap the setting icon on the “Live video” page and choose“Advance Config”
(IOS: Device Settings).
5.2.2. Tap “SDCard Record Config” and select “Record when Alarms” (IOS: On
alarm).
5.2.3. Tap “OK” to confirm the Motion Detection Video Recording setting.
5.2.4. The camera will start recording video automatically when a movement is de-
tected.Go back to the “Live video” page, tap “Record” at the bottom of the screen
and then choose “Remote SD card”(IOS: ) to check out the video files.
[Note]: Video Resolution: 1280×720P Video Format: ASF
VI. Recording Video to Smartphone or Tablet PC
>> Before recording, make sure that the camera is added successfully to the APP in
LAN or WAN mode.
6.1. Launch the “BVCAM” APP. Tap the camera icon to view the live video.
6.2.Tap the remote video recording button to start or stop recording video.
The video files will be saved in your smartphone or tablet PC flash memory if you are
usingan Android device. However, the video files can only be found in the APP
“BVCAM” if you are an IOS device.
6.3. Go back to the “Live video” page, tap “Record” at the bottom of the screen and
then choose “Local” (IOS: ) to check out the video files.
[Note]: Video Resolution: 1280×720P Video Format: ASF
VII. Recording Video to the Local Micro SD Card
>>Make sure that the camera is added successfully to the APP in LAN or WAN
mode.
>>Make sure theMicro SD card (4GB-64GB) has been formatted already and is
securely fitted into the SD card slot on your camera. A SDHC Class 10 Micro SD
card is recommended.
7.1. Launch the “BVCAM” APP.
7.2. Tap the setting icon on the“Live video” page and choose “Advance Con-
fig”(IOS: Device Settings)
7.3. Select “SD Card Record Config” and choose a desired recording mode.
7.4. Tap “OK” to confirm the SD card recording setting.
7.5. Check out the video files. (See 5.2.2)
VIII. Resetting
If for any reason the camera stops working or isn’t working properly, a reset will
restore it back to normal operation.
Operation: When the camera is powered on, press the Reset Button for 5 seconds
to reset all settings to factory default. The camera will reboot automatically with de-
fault settings in 5 seconds.
IX. Change the Camera’s Password
>>Please confirm that the camera is successfully added to the APP in the P2P (LAN)
mode, and the P2P (LAN) connection works well.
9.1. Launch the APP “BVCAM”.
9.2. Tap the settings icon on the “Live video” page,choose “Advance Config” (IOS:
Device Settings), and then click “Change P2P access password” (IOS: Change
password).
9.3. Enterthe user default password “8888”. Input a new password and confirm it,
then tap “OK” to save the change.
Check if the new password works!
1. Go back to the “Live video” page, tap the setting icon and delete the current
camera.
2. Follow 3.2.3 to add the camera again. Don’t forget to type the new password
before tapping “OK” or “√” to add the camera.
3. If the camera shows “Online”, it means the password has been changed success-
fully. If the camera shows “password mistake”, it means you input a wrong pass-
word.
Frequently Asked Questions
Q: What kind of memory card can I use in this camera?
A:You are recommended to use a SDHC Class 10 Micro SD card (4GB-64GB). If a
memory card does not work, remove and format it on a PC computer before trying it
in thecamera again.
Q: Why can’t I find the camera’s WIFI signal on my smartphone or tablet PC?
A: Recharge the camera. Or reset the camera to factory default (See VIII).
Q: Why can’t I play back video files or it shows the video files are corrupted?
A: It is mainly because the camera is powered off inappropriately.
Q: What media player software should I use to play back the video files on my
computer?
A: Click the link: http://www.videolan.org/vlc/index.html to download and install VLC
player to play back video files on your computer.
Q: How do I reset my camera back to the way I got it?
A:Reset the camera to factory default. (See VIII)
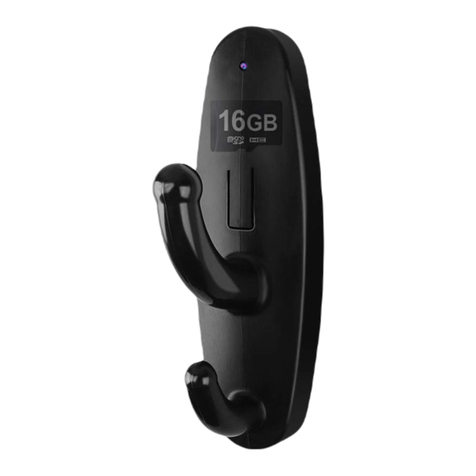
I. Product Overview
1. Red/Blue Indicator Light
2. Microphone
3. Camera Lens
4. IR LEDs
5. Camera Button
II. What’s in the Box
-1×Wifi Network Meeting Camcorder
-1× Card Reader
-1× 3m USB Cable
-1× AC110-230V to DC 5V Charging Adapter
-1× Mini Disc
-1 ×8GB Micro SD Card (fitted into the Micro SD card slot already)
III. Charging
3.1. Connect the camera to an outlet AC power socket by using the charging adapter
and USB cable provided.
3.2. It will take about 4 hours to obtain a full charge. The camera can work 3 hours
on a full charge. The indicator lights will NOT change when the camera battery is
charging or fully charged.
3.3. If you want this camera to work 24/7 days, keep it plugged onto an outlet AC
power socket.
[Note]: It is normal that the camera becomes hot while it is working or charging.
IV. Network Setup
4.1. Install the “BVCAM” APP on your smartphone or tablet PC
4.1.1. Search for “BVCAM” in App Store or Google Play and install it on your smart-
phone or tablet PC.
4.2. LAN or P2P Mode Setup
4.2.1. Power on the camera by sliding the power switch to the ON position. The blue
and red indicator lights will illuminate for 3 seconds and then off. Waiting for 15 sec-
onds,the blue and red indicator lights will start illuminating for 3 seconds again; the
red indicator light will be off again. Waiting for 8 seconds, the blue indicator light will
stay illuminated while the red one will start flashing, indicating the camera’s WIFI
signal is ready.
4.2.2. Go to the WIFI or WLAN settings on your smartphone or tablet PCand con-
nect to the camera’s WIFI signal. The camera’s WIFI network SSID starts with
“KD******” and will appear on your WIFI or WLAN settings page as below.Both red
and blue indicator lights will keep flashing, indicating the camera’s P2P connection
is done.
[Note]: If the camera’s WIFI signal cannot be found for a long time, press the Reset Button for 5 sec-
onds to reset all settings to factory default. The red and blue indicator lights will be turned off and the
camera will restart automatically in 5 seconds.
4.2.3. Launch the “BVCAM” APP.
4.2.4. Add the camera to the application.
For Android: Tap + > Search(Lan) >Tap the camera icon > Tap OK or √.
For IOS: Tap + >Tap Add new online Camera >Tap Search (LAN) >Tap the camera
icon >Tap OK.
4.2.5. If the camera shows “Online” on the “Live video” page, it means the P2P
(LAN) connection is successful and you can view a live video feed from the camera
in the P2P (LAN) mode.
[Note]: See the table below for an explanation of the different functions available:
4.3. WAN Mode or Remote View Setup
>>Before the WAN configuration, please confirm that the camera is successfully
added to your smartphone or tablet PC in the P2P (LAN) mode, and the P2P (LAN)
connection works well.
4.3.1. Launch the “BVCAM” APP.
4.3.2. Set up the WAN mode or remote view.
Step 1: Tap the setting icon on the “Live video” page and select “Advance Config”
(IOS: Device Settings).
Step 2:Tap “WIFI Config” and select a desired WIFI network to enroll the camera in.
Step 3: Tap “OK”to confirm the WIFI configuration.
4.3.3. The camera will reboot automatically.
Check if the WAN mode or remote view setting works!
1. Exit the “BVCAM” APP.
2. Go to the WIFI or WLAN setting page on your smartphone or tablet PC and join
to another WIFI network which must be different from the one that the camera is en-
rolled in, or you can use your mobilenetwork.
3. Launch the “BVCAM” APP again.If you see the camera is “Online” on the“Live
video” page, it indicates the WAN mode or remote view setting is successful.Now
you can watch the live video from the camera on your smartphone or tablet PC
remotely as long as you have access to the Internet.
[Note]: If the WAN mode setup fails, please reset the camera (See VIII) and re-configure it.
V. Motion Detection Setup
>>Make sure that the camera is added successfully to the APP in LAN or WAN
mode.
>>Please make sure theMicro SD card (4GB-64GB) has been formatted already
and is securely fitted into the SD card slot on your camera. A SDHC Class 10 Micro
SD card is recommended.
5.1. Motion Detection Photograph Setup
5.1.1. Launch the “BVCAM” APP.
5.1.2. Enable the motion detection function.
Step1: Tap the setting icon on the “Live video” page and then choose “Advance
Config” (IOS: Device Settings)
Step 2:Tap “Alarm Config” , choose a desired sensitivity level.
Step 3: Tap “OK” to confirm the setting.
5.1.3. The camera will take a screenshot of the live video automatically when a
movement is detected. Go back to the “Live video” page and tap “Alarm” at the
bottom of the screen to check out the screenshots.
5.2. Motion Detection Video Recording Setup
5.2.1. Tap the setting icon on the “Live video” page and choose“Advance Config”
(IOS: Device Settings).
5.2.2. Tap “SDCard Record Config” and select “Record when Alarms” (IOS: On
alarm).
5.2.3. Tap “OK” to confirm the Motion Detection Video Recording setting.
5.2.4. The camera will start recording video automatically when a movement is de-
tected.Go back to the “Live video” page, tap “Record” at the bottom of the screen
and then choose “Remote SD card”(IOS: ) to check out the video files.
[Note]: Video Resolution: 1280×720P Video Format: ASF
VI. Recording Video to Smartphone or Tablet PC
>> Before recording, make sure that the camera is added successfully to the APP in
LAN or WAN mode.
6.1. Launch the “BVCAM” APP. Tap the camera icon to view the live video.
6.2.Tap the remote video recording button to start or stop recording video.
The video files will be saved in your smartphone or tablet PC flash memory if you are
usingan Android device. However, the video files can only be found in the APP
“BVCAM” if you are an IOS device.
6.3. Go back to the “Live video” page, tap “Record” at the bottom of the screen and
then choose “Local” (IOS: ) to check out the video files.
[Note]: Video Resolution: 1280×720P Video Format: ASF
VII. Recording Video to the Local Micro SD Card
>>Make sure that the camera is added successfully to the APP in LAN or WAN
mode.
>>Make sure theMicro SD card (4GB-64GB) has been formatted already and is
securely fitted into the SD card slot on your camera. A SDHC Class 10 Micro SD
card is recommended.
7.1. Launch the “BVCAM” APP.
7.2. Tap the setting icon on the“Live video” page and choose “Advance Con-
fig”(IOS: Device Settings)
7.3. Select “SD Card Record Config” and choose a desired recording mode.
7.4. Tap “OK” to confirm the SD card recording setting.
7.5. Check out the video files. (See 5.2.2)
VIII. Resetting
If for any reason the camera stops working or isn’t working properly, a reset will
restore it back to normal operation.
Operation: When the camera is powered on, press the Reset Button for 5 seconds
to reset all settings to factory default. The camera will reboot automatically with de-
fault settings in 5 seconds.
IX. Change the Camera’s Password
>>Please confirm that the camera is successfully added to the APP in the P2P (LAN)
mode, and the P2P (LAN) connection works well.
9.1. Launch the APP “BVCAM”.
9.2. Tap the settings icon on the “Live video” page,choose “Advance Config” (IOS:
Device Settings), and then click “Change P2P access password” (IOS: Change
password).
9.3. Enterthe user default password “8888”. Input a new password and confirm it,
then tap “OK” to save the change.
Check if the new password works!
1. Go back to the “Live video” page, tap the setting icon and delete the current
camera.
2. Follow 3.2.3 to add the camera again. Don’t forget to type the new password
before tapping “OK” or “√” to add the camera.
3. If the camera shows “Online”, it means the password has been changed success-
fully. If the camera shows “password mistake”, it means you input a wrong pass-
word.
Frequently Asked Questions
Q: What kind of memory card can I use in this camera?
A:You are recommended to use a SDHC Class 10 Micro SD card (4GB-64GB). If a
memory card does not work, remove and format it on a PC computer before trying it
in thecamera again.
Q: Why can’t I find the camera’s WIFI signal on my smartphone or tablet PC?
A: Recharge the camera. Or reset the camera to factory default (See VIII).
Q: Why can’t I play back video files or it shows the video files are corrupted?
A: It is mainly because the camera is powered off inappropriately.
Q: What media player software should I use to play back the video files on my
computer?
A: Click the link: http://www.videolan.org/vlc/index.html to download and install VLC
player to play back video files on your computer.
Q: How do I reset my camera back to the way I got it?
A:Reset the camera to factory default. (See VIII)
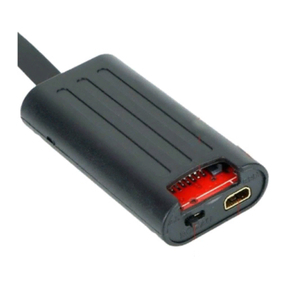
I. Product Overview
1. Red/Blue Indicator Light
2. Microphone
3. Camera Lens
4. IR LEDs
5. Camera Button
II. What’s in the Box
-1×Wifi Network Meeting Camcorder
-1× Card Reader
-1× 3m USB Cable
-1× AC110-230V to DC 5V Charging Adapter
-1× Mini Disc
-1 ×8GB Micro SD Card (fitted into the Micro SD card slot already)
III. Charging
3.1. Connect the camera to an outlet AC power socket by using the charging adapter
and USB cable provided.
3.2. It will take about 4 hours to obtain a full charge. The camera can work 3 hours
on a full charge. The indicator lights will NOT change when the camera battery is
charging or fully charged.
3.3. If you want this camera to work 24/7 days, keep it plugged onto an outlet AC
power socket.
[Note]: It is normal that the camera becomes hot while it is working or charging.
IV. Network Setup
4.1. Install the “BVCAM” APP on your smartphone or tablet PC
4.1.1. Search for “BVCAM” in App Store or Google Play and install it on your smart-
phone or tablet PC.
4.2. LAN or P2P Mode Setup
4.2.1. Power on the camera by sliding the power switch to the ON position. The blue
and red indicator lights will illuminate for 3 seconds and then off. Waiting for 15 sec-
onds,the blue and red indicator lights will start illuminating for 3 seconds again; the
red indicator light will be off again. Waiting for 8 seconds, the blue indicator light will
stay illuminated while the red one will start flashing, indicating the camera’s WIFI
signal is ready.
4.2.2. Go to the WIFI or WLAN settings on your smartphone or tablet PCand con-
nect to the camera’s WIFI signal. The camera’s WIFI network SSID starts with
“KD******” and will appear on your WIFI or WLAN settings page as below.Both red
and blue indicator lights will keep flashing, indicating the camera’s P2P connection
is done.
[Note]: If the camera’s WIFI signal cannot be found for a long time, press the Reset Button for 5 sec-
onds to reset all settings to factory default. The red and blue indicator lights will be turned off and the
camera will restart automatically in 5 seconds.
4.2.3. Launch the “BVCAM” APP.
4.2.4. Add the camera to the application.
For Android: Tap + > Search(Lan) >Tap the camera icon > Tap OK or √.
For IOS: Tap + >Tap Add new online Camera >Tap Search (LAN) >Tap the camera
icon >Tap OK.
4.2.5. If the camera shows “Online” on the “Live video” page, it means the P2P
(LAN) connection is successful and you can view a live video feed from the camera
in the P2P (LAN) mode.
[Note]: See the table below for an explanation of the different functions available:
4.3. WAN Mode or Remote View Setup
>>Before the WAN configuration, please confirm that the camera is successfully
added to your smartphone or tablet PC in the P2P (LAN) mode, and the P2P (LAN)
connection works well.
4.3.1. Launch the “BVCAM” APP.
4.3.2. Set up the WAN mode or remote view.
Step 1: Tap the setting icon on the “Live video” page and select “Advance Config”
(IOS: Device Settings).
Step 2:Tap “WIFI Config” and select a desired WIFI network to enroll the camera in.
Step 3: Tap “OK”to confirm the WIFI configuration.
4.3.3. The camera will reboot automatically.
Check if the WAN mode or remote view setting works!
1. Exit the “BVCAM” APP.
2. Go to the WIFI or WLAN setting page on your smartphone or tablet PC and join
to another WIFI network which must be different from the one that the camera is en-
rolled in, or you can use your mobilenetwork.
3. Launch the “BVCAM” APP again.If you see the camera is “Online” on the“Live
video” page, it indicates the WAN mode or remote view setting is successful.Now
you can watch the live video from the camera on your smartphone or tablet PC
remotely as long as you have access to the Internet.
[Note]: If the WAN mode setup fails, please reset the camera (See VIII) and re-configure it.
V. Motion Detection Setup
>>Make sure that the camera is added successfully to the APP in LAN or WAN
mode.
>>Please make sure theMicro SD card (4GB-64GB) has been formatted already
and is securely fitted into the SD card slot on your camera. A SDHC Class 10 Micro
SD card is recommended.
5.1. Motion Detection Photograph Setup
5.1.1. Launch the “BVCAM” APP.
5.1.2. Enable the motion detection function.
Step1: Tap the setting icon on the “Live video” page and then choose “Advance
Config” (IOS: Device Settings)
Step 2:Tap “Alarm Config” , choose a desired sensitivity level.
Step 3: Tap “OK” to confirm the setting.
5.1.3. The camera will take a screenshot of the live video automatically when a
movement is detected. Go back to the “Live video” page and tap “Alarm” at the
bottom of the screen to check out the screenshots.
5.2. Motion Detection Video Recording Setup
5.2.1. Tap the setting icon on the “Live video” page and choose“Advance Config”
(IOS: Device Settings).
5.2.2. Tap “SDCard Record Config” and select “Record when Alarms” (IOS: On
alarm).
5.2.3. Tap “OK” to confirm the Motion Detection Video Recording setting.
5.2.4. The camera will start recording video automatically when a movement is de-
tected.Go back to the “Live video” page, tap “Record” at the bottom of the screen
and then choose “Remote SD card”(IOS: ) to check out the video files.
[Note]: Video Resolution: 1280×720P Video Format: ASF
VI. Recording Video to Smartphone or Tablet PC
>> Before recording, make sure that the camera is added successfully to the APP in
LAN or WAN mode.
6.1. Launch the “BVCAM” APP. Tap the camera icon to view the live video.
6.2.Tap the remote video recording button to start or stop recording video.
The video files will be saved in your smartphone or tablet PC flash memory if you are
usingan Android device. However, the video files can only be found in the APP
“BVCAM” if you are an IOS device.
6.3. Go back to the “Live video” page, tap “Record” at the bottom of the screen and
then choose “Local” (IOS: ) to check out the video files.
[Note]: Video Resolution: 1280×720P Video Format: ASF
VII. Recording Video to the Local Micro SD Card
>>Make sure that the camera is added successfully to the APP in LAN or WAN
mode.
>>Make sure theMicro SD card (4GB-64GB) has been formatted already and is
securely fitted into the SD card slot on your camera. A SDHC Class 10 Micro SD
card is recommended.
7.1. Launch the “BVCAM” APP.
7.2. Tap the setting icon on the“Live video” page and choose “Advance Con-
fig”(IOS: Device Settings)
7.3. Select “SD Card Record Config” and choose a desired recording mode.
7.4. Tap “OK” to confirm the SD card recording setting.
7.5. Check out the video files. (See 5.2.2)
VIII. Resetting
If for any reason the camera stops working or isn’t working properly, a reset will
restore it back to normal operation.
Operation: When the camera is powered on, press the Reset Button for 5 seconds
to reset all settings to factory default. The camera will reboot automatically with de-
fault settings in 5 seconds.
IX. Change the Camera’s Password
>>Please confirm that the camera is successfully added to the APP in the P2P (LAN)
mode, and the P2P (LAN) connection works well.
9.1. Launch the APP “BVCAM”.
9.2. Tap the settings icon on the “Live video” page,choose “Advance Config” (IOS:
Device Settings), and then click “Change P2P access password” (IOS: Change
password).
9.3. Enterthe user default password “8888”. Input a new password and confirm it,
then tap “OK” to save the change.
Check if the new password works!
1. Go back to the “Live video” page, tap the setting icon and delete the current
camera.
2. Follow 3.2.3 to add the camera again. Don’t forget to type the new password
before tapping “OK” or “√” to add the camera.
3. If the camera shows “Online”, it means the password has been changed success-
fully. If the camera shows “password mistake”, it means you input a wrong pass-
word.
Frequently Asked Questions
Q: What kind of memory card can I use in this camera?
A:You are recommended to use a SDHC Class 10 Micro SD card (4GB-64GB). If a
memory card does not work, remove and format it on a PC computer before trying it
in thecamera again.
Q: Why can’t I find the camera’s WIFI signal on my smartphone or tablet PC?
A: Recharge the camera. Or reset the camera to factory default (See VIII).
Q: Why can’t I play back video files or it shows the video files are corrupted?
A: It is mainly because the camera is powered off inappropriately.
Q: What media player software should I use to play back the video files on my
computer?
A: Click the link: http://www.videolan.org/vlc/index.html to download and install VLC
player to play back video files on your computer.
Q: How do I reset my camera back to the way I got it?
A:Reset the camera to factory default. (See VIII)
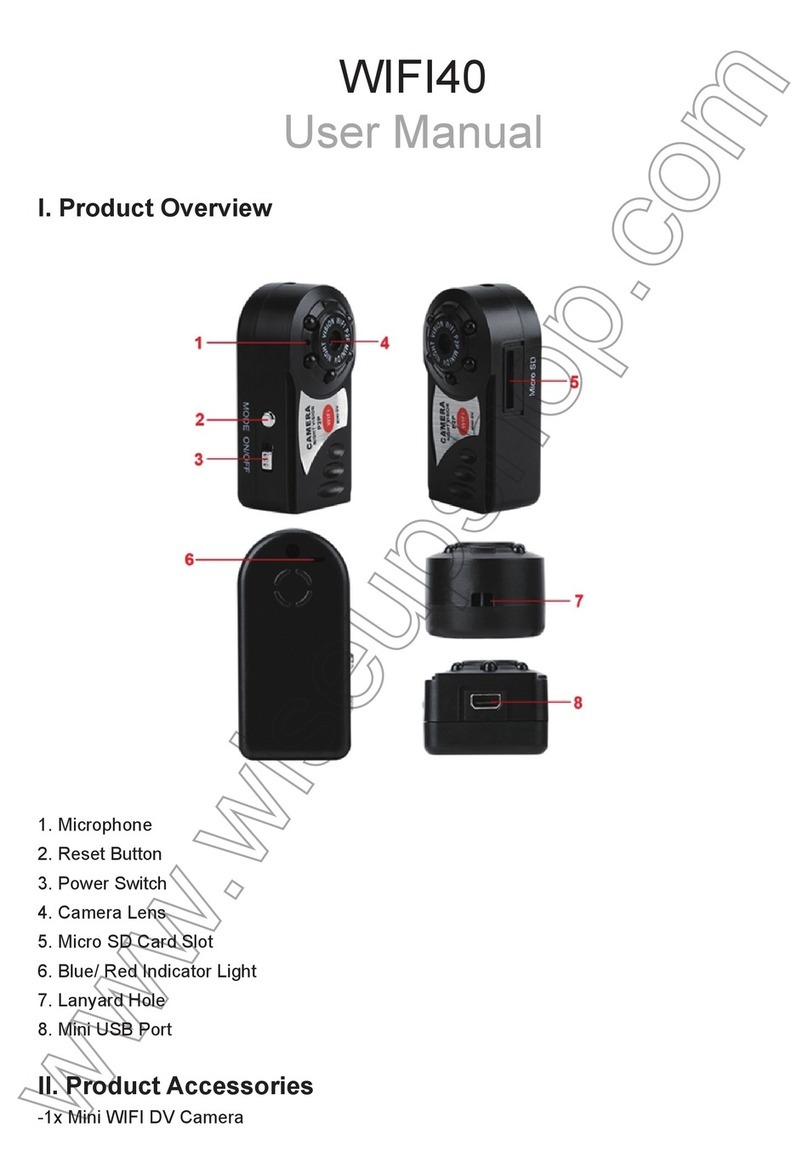
I. Product Overview
1. Red/Blue Indicator Light
2. Microphone
3. Camera Lens
4. IR LEDs
5. Camera Button
II. What’s in the Box
-1×Wifi Network Meeting Camcorder
-1× Card Reader
-1× 3m USB Cable
-1× AC110-230V to DC 5V Charging Adapter
-1× Mini Disc
-1 ×8GB Micro SD Card (fitted into the Micro SD card slot already)
III. Charging
3.1. Connect the camera to an outlet AC power socket by using the charging adapter
and USB cable provided.
3.2. It will take about 4 hours to obtain a full charge. The camera can work 3 hours
on a full charge. The indicator lights will NOT change when the camera battery is
charging or fully charged.
3.3. If you want this camera to work 24/7 days, keep it plugged onto an outlet AC
power socket.
[Note]: It is normal that the camera becomes hot while it is working or charging.
IV. Network Setup
4.1. Install the “BVCAM” APP on your smartphone or tablet PC
4.1.1. Search for “BVCAM” in App Store or Google Play and install it on your smart-
phone or tablet PC.
4.2. LAN or P2P Mode Setup
4.2.1. Power on the camera by sliding the power switch to the ON position. The blue
and red indicator lights will illuminate for 3 seconds and then off. Waiting for 15 sec-
onds,the blue and red indicator lights will start illuminating for 3 seconds again; the
red indicator light will be off again. Waiting for 8 seconds, the blue indicator light will
stay illuminated while the red one will start flashing, indicating the camera’s WIFI
signal is ready.
4.2.2. Go to the WIFI or WLAN settings on your smartphone or tablet PCand con-
nect to the camera’s WIFI signal. The camera’s WIFI network SSID starts with
“KD******” and will appear on your WIFI or WLAN settings page as below.Both red
and blue indicator lights will keep flashing, indicating the camera’s P2P connection
is done.
[Note]: If the camera’s WIFI signal cannot be found for a long time, press the Reset Button for 5 sec-
onds to reset all settings to factory default. The red and blue indicator lights will be turned off and the
camera will restart automatically in 5 seconds.
4.2.3. Launch the “BVCAM” APP.
4.2.4. Add the camera to the application.
For Android: Tap + > Search(Lan) >Tap the camera icon > Tap OK or √.
For IOS: Tap + >Tap Add new online Camera >Tap Search (LAN) >Tap the camera
icon >Tap OK.
4.2.5. If the camera shows “Online” on the “Live video” page, it means the P2P
(LAN) connection is successful and you can view a live video feed from the camera
in the P2P (LAN) mode.
[Note]: See the table below for an explanation of the different functions available:
4.3. WAN Mode or Remote View Setup
>>Before the WAN configuration, please confirm that the camera is successfully
added to your smartphone or tablet PC in the P2P (LAN) mode, and the P2P (LAN)
connection works well.
4.3.1. Launch the “BVCAM” APP.
4.3.2. Set up the WAN mode or remote view.
Step 1: Tap the setting icon on the “Live video” page and select “Advance Config”
(IOS: Device Settings).
Step 2:Tap “WIFI Config” and select a desired WIFI network to enroll the camera in.
Step 3: Tap “OK”to confirm the WIFI configuration.
4.3.3. The camera will reboot automatically.
Check if the WAN mode or remote view setting works!
1. Exit the “BVCAM” APP.
2. Go to the WIFI or WLAN setting page on your smartphone or tablet PC and join
to another WIFI network which must be different from the one that the camera is en-
rolled in, or you can use your mobilenetwork.
3. Launch the “BVCAM” APP again.If you see the camera is “Online” on the“Live
video” page, it indicates the WAN mode or remote view setting is successful.Now
you can watch the live video from the camera on your smartphone or tablet PC
remotely as long as you have access to the Internet.
[Note]: If the WAN mode setup fails, please reset the camera (See VIII) and re-configure it.
V. Motion Detection Setup
>>Make sure that the camera is added successfully to the APP in LAN or WAN
mode.
>>Please make sure theMicro SD card (4GB-64GB) has been formatted already
and is securely fitted into the SD card slot on your camera. A SDHC Class 10 Micro
SD card is recommended.
5.1. Motion Detection Photograph Setup
5.1.1. Launch the “BVCAM” APP.
5.1.2. Enable the motion detection function.
Step1: Tap the setting icon on the “Live video” page and then choose “Advance
Config” (IOS: Device Settings)
Step 2:Tap “Alarm Config” , choose a desired sensitivity level.
Step 3: Tap “OK” to confirm the setting.
5.1.3. The camera will take a screenshot of the live video automatically when a
movement is detected. Go back to the “Live video” page and tap “Alarm” at the
bottom of the screen to check out the screenshots.
5.2. Motion Detection Video Recording Setup
5.2.1. Tap the setting icon on the “Live video” page and choose“Advance Config”
(IOS: Device Settings).
5.2.2. Tap “SDCard Record Config” and select “Record when Alarms” (IOS: On
alarm).
5.2.3. Tap “OK” to confirm the Motion Detection Video Recording setting.
5.2.4. The camera will start recording video automatically when a movement is de-
tected.Go back to the “Live video” page, tap “Record” at the bottom of the screen
and then choose “Remote SD card”(IOS: ) to check out the video files.
[Note]: Video Resolution: 1280×720P Video Format: ASF
VI. Recording Video to Smartphone or Tablet PC
>> Before recording, make sure that the camera is added successfully to the APP in
LAN or WAN mode.
6.1. Launch the “BVCAM” APP. Tap the camera icon to view the live video.
6.2.Tap the remote video recording button to start or stop recording video.
The video files will be saved in your smartphone or tablet PC flash memory if you are
usingan Android device. However, the video files can only be found in the APP
“BVCAM” if you are an IOS device.
6.3. Go back to the “Live video” page, tap “Record” at the bottom of the screen and
then choose “Local” (IOS: ) to check out the video files.
[Note]: Video Resolution: 1280×720P Video Format: ASF
VII. Recording Video to the Local Micro SD Card
>>Make sure that the camera is added successfully to the APP in LAN or WAN
mode.
>>Make sure theMicro SD card (4GB-64GB) has been formatted already and is
securely fitted into the SD card slot on your camera. A SDHC Class 10 Micro SD
card is recommended.
7.1. Launch the “BVCAM” APP.
7.2. Tap the setting icon on the“Live video” page and choose “Advance Con-
fig”(IOS: Device Settings)
7.3. Select “SD Card Record Config” and choose a desired recording mode.
7.4. Tap “OK” to confirm the SD card recording setting.
7.5. Check out the video files. (See 5.2.2)
VIII. Resetting
If for any reason the camera stops working or isn’t working properly, a reset will
restore it back to normal operation.
Operation: When the camera is powered on, press the Reset Button for 5 seconds
to reset all settings to factory default. The camera will reboot automatically with de-
fault settings in 5 seconds.
IX. Change the Camera’s Password
>>Please confirm that the camera is successfully added to the APP in the P2P (LAN)
mode, and the P2P (LAN) connection works well.
9.1. Launch the APP “BVCAM”.
9.2. Tap the settings icon on the “Live video” page,choose “Advance Config” (IOS:
Device Settings), and then click “Change P2P access password” (IOS: Change
password).
9.3. Enterthe user default password “8888”. Input a new password and confirm it,
then tap “OK” to save the change.
Check if the new password works!
1. Go back to the “Live video” page, tap the setting icon and delete the current
camera.
2. Follow 3.2.3 to add the camera again. Don’t forget to type the new password
before tapping “OK” or “√” to add the camera.
3. If the camera shows “Online”, it means the password has been changed success-
fully. If the camera shows “password mistake”, it means you input a wrong pass-
word.
Frequently Asked Questions
Q: What kind of memory card can I use in this camera?
A:You are recommended to use a SDHC Class 10 Micro SD card (4GB-64GB). If a
memory card does not work, remove and format it on a PC computer before trying it
in thecamera again.
Q: Why can’t I find the camera’s WIFI signal on my smartphone or tablet PC?
A: Recharge the camera. Or reset the camera to factory default (See VIII).
Q: Why can’t I play back video files or it shows the video files are corrupted?
A: It is mainly because the camera is powered off inappropriately.
Q: What media player software should I use to play back the video files on my
computer?
A: Click the link: http://www.videolan.org/vlc/index.html to download and install VLC
player to play back video files on your computer.
Q: How do I reset my camera back to the way I got it?
A:Reset the camera to factory default. (See VIII)
I. Product Overview
1. Red/Blue Indicator Light
2. Microphone
3. Camera Lens
4. IR LEDs
5. Camera Button
II. What’s in the Box
-1×Wifi Network Meeting Camcorder
-1× Card Reader
-1× 3m USB Cable
-1× AC110-230V to DC 5V Charging Adapter
-1× Mini Disc
-1 ×8GB Micro SD Card (fitted into the Micro SD card slot already)
III. Charging
3.1. Connect the camera to an outlet AC power socket by using the charging adapter
and USB cable provided.
3.2. It will take about 4 hours to obtain a full charge. The camera can work 3 hours
on a full charge. The indicator lights will NOT change when the camera battery is
charging or fully charged.
3.3. If you want this camera to work 24/7 days, keep it plugged onto an outlet AC
power socket.
[Note]: It is normal that the camera becomes hot while it is working or charging.
IV. Network Setup
4.1. Install the “BVCAM” APP on your smartphone or tablet PC
4.1.1. Search for “BVCAM” in App Store or Google Play and install it on your smart-
phone or tablet PC.
4.2. LAN or P2P Mode Setup
4.2.1. Power on the camera by sliding the power switch to the ON position. The blue
and red indicator lights will illuminate for 3 seconds and then off. Waiting for 15 sec-
onds,the blue and red indicator lights will start illuminating for 3 seconds again; the
red indicator light will be off again. Waiting for 8 seconds, the blue indicator light will
stay illuminated while the red one will start flashing, indicating the camera’s WIFI
signal is ready.
4.2.2. Go to the WIFI or WLAN settings on your smartphone or tablet PCand con-
nect to the camera’s WIFI signal. The camera’s WIFI network SSID starts with
“KD******” and will appear on your WIFI or WLAN settings page as below.Both red
and blue indicator lights will keep flashing, indicating the camera’s P2P connection
is done.
[Note]: If the camera’s WIFI signal cannot be found for a long time, press the Reset Button for 5 sec-
onds to reset all settings to factory default. The red and blue indicator lights will be turned off and the
camera will restart automatically in 5 seconds.
4.2.3. Launch the “BVCAM” APP.
4.2.4. Add the camera to the application.
For Android: Tap + > Search(Lan) >Tap the camera icon > Tap OK or √.
For IOS: Tap + >Tap Add new online Camera >Tap Search (LAN) >Tap the camera
icon >Tap OK.
4.2.5. If the camera shows “Online” on the “Live video” page, it means the P2P
(LAN) connection is successful and you can view a live video feed from the camera
in the P2P (LAN) mode.
[Note]: See the table below for an explanation of the different functions available:
4.3. WAN Mode or Remote View Setup
>>Before the WAN configuration, please confirm that the camera is successfully
added to your smartphone or tablet PC in the P2P (LAN) mode, and the P2P (LAN)
connection works well.
4.3.1. Launch the “BVCAM” APP.
4.3.2. Set up the WAN mode or remote view.
Step 1: Tap the setting icon on the “Live video” page and select “Advance Config”
(IOS: Device Settings).
Step 2:Tap “WIFI Config” and select a desired WIFI network to enroll the camera in.
Step 3: Tap “OK”to confirm the WIFI configuration.
4.3.3. The camera will reboot automatically.
Check if the WAN mode or remote view setting works!
1. Exit the “BVCAM” APP.
2. Go to the WIFI or WLAN setting page on your smartphone or tablet PC and join
to another WIFI network which must be different from the one that the camera is en-
rolled in, or you can use your mobilenetwork.
3. Launch the “BVCAM” APP again.If you see the camera is “Online” on the“Live
video” page, it indicates the WAN mode or remote view setting is successful.Now
you can watch the live video from the camera on your smartphone or tablet PC
remotely as long as you have access to the Internet.
[Note]: If the WAN mode setup fails, please reset the camera (See VIII) and re-configure it.
V. Motion Detection Setup
>>Make sure that the camera is added successfully to the APP in LAN or WAN
mode.
>>Please make sure theMicro SD card (4GB-64GB) has been formatted already
and is securely fitted into the SD card slot on your camera. A SDHC Class 10 Micro
SD card is recommended.
5.1. Motion Detection Photograph Setup
5.1.1. Launch the “BVCAM” APP.
5.1.2. Enable the motion detection function.
Step1: Tap the setting icon on the “Live video” page and then choose “Advance
Config” (IOS: Device Settings)
Step 2:Tap “Alarm Config” , choose a desired sensitivity level.
Step 3: Tap “OK” to confirm the setting.
5.1.3. The camera will take a screenshot of the live video automatically when a
movement is detected. Go back to the “Live video” page and tap “Alarm” at the
bottom of the screen to check out the screenshots.
5.2. Motion Detection Video Recording Setup
5.2.1. Tap the setting icon on the “Live video” page and choose“Advance Config”
(IOS: Device Settings).
5.2.2. Tap “SDCard Record Config” and select “Record when Alarms” (IOS: On
alarm).
5.2.3. Tap “OK” to confirm the Motion Detection Video Recording setting.
5.2.4. The camera will start recording video automatically when a movement is de-
tected.Go back to the “Live video” page, tap “Record” at the bottom of the screen
and then choose “Remote SD card”(IOS: ) to check out the video files.
[Note]: Video Resolution: 1280×720P Video Format: ASF
VI. Recording Video to Smartphone or Tablet PC
>> Before recording, make sure that the camera is added successfully to the APP in
LAN or WAN mode.
6.1. Launch the “BVCAM” APP. Tap the camera icon to view the live video.
6.2.Tap the remote video recording button to start or stop recording video.
The video files will be saved in your smartphone or tablet PC flash memory if you are
usingan Android device. However, the video files can only be found in the APP
“BVCAM” if you are an IOS device.
6.3. Go back to the “Live video” page, tap “Record” at the bottom of the screen and
then choose “Local” (IOS: ) to check out the video files.
[Note]: Video Resolution: 1280×720P Video Format: ASF
VII. Recording Video to the Local Micro SD Card
>>Make sure that the camera is added successfully to the APP in LAN or WAN
mode.
>>Make sure theMicro SD card (4GB-64GB) has been formatted already and is
securely fitted into the SD card slot on your camera. A SDHC Class 10 Micro SD
card is recommended.
7.1. Launch the “BVCAM” APP.
7.2. Tap the setting icon on the“Live video” page and choose “Advance Con-
fig”(IOS: Device Settings)
7.3. Select “SD Card Record Config” and choose a desired recording mode.
7.4. Tap “OK” to confirm the SD card recording setting.
7.5. Check out the video files. (See 5.2.2)
VIII. Resetting
If for any reason the camera stops working or isn’t working properly, a reset will
restore it back to normal operation.
Operation: When the camera is powered on, press the Reset Button for 5 seconds
to reset all settings to factory default. The camera will reboot automatically with de-
fault settings in 5 seconds.
IX. Change the Camera’s Password
>>Please confirm that the camera is successfully added to the APP in the P2P (LAN)
mode, and the P2P (LAN) connection works well.
9.1. Launch the APP “BVCAM”.
9.2. Tap the settings icon on the “Live video” page,choose “Advance Config” (IOS:
Device Settings), and then click “Change P2P access password” (IOS: Change
password).
9.3. Enterthe user default password “8888”. Input a new password and confirm it,
then tap “OK” to save the change.
Check if the new password works!
1. Go back to the “Live video” page, tap the setting icon and delete the current
camera.
2. Follow 3.2.3 to add the camera again. Don’t forget to type the new password
before tapping “OK” or “√” to add the camera.
3. If the camera shows “Online”, it means the password has been changed success-
fully. If the camera shows “password mistake”, it means you input a wrong pass-
word.
Frequently Asked Questions
Q: What kind of memory card can I use in this camera?
A:You are recommended to use a SDHC Class 10 Micro SD card (4GB-64GB). If a
memory card does not work, remove and format it on a PC computer before trying it
in thecamera again.
Q: Why can’t I find the camera’s WIFI signal on my smartphone or tablet PC?
A: Recharge the camera. Or reset the camera to factory default (See VIII).
Q: Why can’t I play back video files or it shows the video files are corrupted?
A: It is mainly because the camera is powered off inappropriately.
Q: What media player software should I use to play back the video files on my
computer?
A: Click the link: http://www.videolan.org/vlc/index.html to download and install VLC
player to play back video files on your computer.
Q: How do I reset my camera back to the way I got it?
A:Reset the camera to factory default. (See VIII)
I. Product Overview
1. Red/Blue Indicator Light
2. Microphone
3. Camera Lens
4. IR LEDs
5. Camera Button
II. What’s in the Box
-1×Wifi Network Meeting Camcorder
-1× Card Reader
-1× 3m USB Cable
-1× AC110-230V to DC 5V Charging Adapter
-1× Mini Disc
-1 ×8GB Micro SD Card (fitted into the Micro SD card slot already)
III. Charging
3.1. Connect the camera to an outlet AC power socket by using the charging adapter
and USB cable provided.
3.2. It will take about 4 hours to obtain a full charge. The camera can work 3 hours
on a full charge. The indicator lights will NOT change when the camera battery is
charging or fully charged.
3.3. If you want this camera to work 24/7 days, keep it plugged onto an outlet AC
power socket.
[Note]: It is normal that the camera becomes hot while it is working or charging.
IV. Network Setup
4.1. Install the “BVCAM” APP on your smartphone or tablet PC
4.1.1. Search for “BVCAM” in App Store or Google Play and install it on your smart-
phone or tablet PC.
4.2. LAN or P2P Mode Setup
4.2.1. Power on the camera by sliding the power switch to the ON position. The blue
and red indicator lights will illuminate for 3 seconds and then off. Waiting for 15 sec-
onds,the blue and red indicator lights will start illuminating for 3 seconds again; the
red indicator light will be off again. Waiting for 8 seconds, the blue indicator light will
stay illuminated while the red one will start flashing, indicating the camera’s WIFI
signal is ready.
4.2.2. Go to the WIFI or WLAN settings on your smartphone or tablet PCand con-
nect to the camera’s WIFI signal. The camera’s WIFI network SSID starts with
“KD******” and will appear on your WIFI or WLAN settings page as below.Both red
and blue indicator lights will keep flashing, indicating the camera’s P2P connection
is done.
[Note]: If the camera’s WIFI signal cannot be found for a long time, press the Reset Button for 5 sec-
onds to reset all settings to factory default. The red and blue indicator lights will be turned off and the
camera will restart automatically in 5 seconds.
4.2.3. Launch the “BVCAM” APP.
4.2.4. Add the camera to the application.
For Android: Tap + > Search(Lan) >Tap the camera icon > Tap OK or √.
For IOS: Tap + >Tap Add new online Camera >Tap Search (LAN) >Tap the camera
icon >Tap OK.
4.2.5. If the camera shows “Online” on the “Live video” page, it means the P2P
(LAN) connection is successful and you can view a live video feed from the camera
in the P2P (LAN) mode.
[Note]: See the table below for an explanation of the different functions available:
4.3. WAN Mode or Remote View Setup
>>Before the WAN configuration, please confirm that the camera is successfully
added to your smartphone or tablet PC in the P2P (LAN) mode, and the P2P (LAN)
connection works well.
4.3.1. Launch the “BVCAM” APP.
4.3.2. Set up the WAN mode or remote view.
Step 1: Tap the setting icon on the “Live video” page and select “Advance Config”
(IOS: Device Settings).
Step 2:Tap “WIFI Config” and select a desired WIFI network to enroll the camera in.
Step 3: Tap “OK”to confirm the WIFI configuration.
4.3.3. The camera will reboot automatically.
Check if the WAN mode or remote view setting works!
1. Exit the “BVCAM” APP.
2. Go to the WIFI or WLAN setting page on your smartphone or tablet PC and join
to another WIFI network which must be different from the one that the camera is en-
rolled in, or you can use your mobilenetwork.
3. Launch the “BVCAM” APP again.If you see the camera is “Online” on the“Live
video” page, it indicates the WAN mode or remote view setting is successful.Now
you can watch the live video from the camera on your smartphone or tablet PC
remotely as long as you have access to the Internet.
[Note]: If the WAN mode setup fails, please reset the camera (See VIII) and re-configure it.
V. Motion Detection Setup
>>Make sure that the camera is added successfully to the APP in LAN or WAN
mode.
>>Please make sure theMicro SD card (4GB-64GB) has been formatted already
and is securely fitted into the SD card slot on your camera. A SDHC Class 10 Micro
SD card is recommended.
5.1. Motion Detection Photograph Setup
5.1.1. Launch the “BVCAM” APP.
5.1.2. Enable the motion detection function.
Step1: Tap the setting icon on the “Live video” page and then choose “Advance
Config” (IOS: Device Settings)
Step 2:Tap “Alarm Config” , choose a desired sensitivity level.
Step 3: Tap “OK” to confirm the setting.
5.1.3. The camera will take a screenshot of the live video automatically when a
movement is detected. Go back to the “Live video” page and tap “Alarm” at the
bottom of the screen to check out the screenshots.
5.2. Motion Detection Video Recording Setup
5.2.1. Tap the setting icon on the “Live video” page and choose“Advance Config”
(IOS: Device Settings).
5.2.2. Tap “SDCard Record Config” and select “Record when Alarms” (IOS: On
alarm).
5.2.3. Tap “OK” to confirm the Motion Detection Video Recording setting.
5.2.4. The camera will start recording video automatically when a movement is de-
tected.Go back to the “Live video” page, tap “Record” at the bottom of the screen
and then choose “Remote SD card”(IOS: ) to check out the video files.
[Note]: Video Resolution: 1280×720P Video Format: ASF
VI. Recording Video to Smartphone or Tablet PC
>> Before recording, make sure that the camera is added successfully to the APP in
LAN or WAN mode.
6.1. Launch the “BVCAM” APP. Tap the camera icon to view the live video.
6.2.Tap the remote video recording button to start or stop recording video.
The video files will be saved in your smartphone or tablet PC flash memory if you are
usingan Android device. However, the video files can only be found in the APP
“BVCAM” if you are an IOS device.
6.3. Go back to the “Live video” page, tap “Record” at the bottom of the screen and
then choose “Local” (IOS: ) to check out the video files.
[Note]: Video Resolution: 1280×720P Video Format: ASF
VII. Recording Video to the Local Micro SD Card
>>Make sure that the camera is added successfully to the APP in LAN or WAN
mode.
>>Make sure theMicro SD card (4GB-64GB) has been formatted already and is
securely fitted into the SD card slot on your camera. A SDHC Class 10 Micro SD
card is recommended.
7.1. Launch the “BVCAM” APP.
7.2. Tap the setting icon on the“Live video” page and choose “Advance Con-
fig”(IOS: Device Settings)
7.3. Select “SD Card Record Config” and choose a desired recording mode.
7.4. Tap “OK” to confirm the SD card recording setting.
7.5. Check out the video files. (See 5.2.2)
VIII. Resetting
If for any reason the camera stops working or isn’t working properly, a reset will
restore it back to normal operation.
Operation: When the camera is powered on, press the Reset Button for 5 seconds
to reset all settings to factory default. The camera will reboot automatically with de-
fault settings in 5 seconds.
IX. Change the Camera’s Password
>>Please confirm that the camera is successfully added to the APP in the P2P (LAN)
mode, and the P2P (LAN) connection works well.
9.1. Launch the APP “BVCAM”.
9.2. Tap the settings icon on the “Live video” page,choose “Advance Config” (IOS:
Device Settings), and then click “Change P2P access password” (IOS: Change
password).
9.3. Enterthe user default password “8888”. Input a new password and confirm it,
then tap “OK” to save the change.
Check if the new password works!
1. Go back to the “Live video” page, tap the setting icon and delete the current
camera.
2. Follow 3.2.3 to add the camera again. Don’t forget to type the new password
before tapping “OK” or “√” to add the camera.
3. If the camera shows “Online”, it means the password has been changed success-
fully. If the camera shows “password mistake”, it means you input a wrong pass-
word.
Frequently Asked Questions
Q: What kind of memory card can I use in this camera?
A:You are recommended to use a SDHC Class 10 Micro SD card (4GB-64GB). If a
memory card does not work, remove and format it on a PC computer before trying it
in thecamera again.
Q: Why can’t I find the camera’s WIFI signal on my smartphone or tablet PC?
A: Recharge the camera. Or reset the camera to factory default (See VIII).
Q: Why can’t I play back video files or it shows the video files are corrupted?
A: It is mainly because the camera is powered off inappropriately.
Q: What media player software should I use to play back the video files on my
computer?
A: Click the link: http://www.videolan.org/vlc/index.html to download and install VLC
player to play back video files on your computer.
Q: How do I reset my camera back to the way I got it?
A:Reset the camera to factory default. (See VIII)
I. Product Overview
1. Red/Blue Indicator Light
2. Microphone
3. Camera Lens
4. IR LEDs
5. Camera Button
II. What’s in the Box
-1×Wifi Network Meeting Camcorder
-1× Card Reader
-1× 3m USB Cable
-1× AC110-230V to DC 5V Charging Adapter
-1× Mini Disc
-1 ×8GB Micro SD Card (fitted into the Micro SD card slot already)
III. Charging
3.1. Connect the camera to an outlet AC power socket by using the charging adapter
and USB cable provided.
3.2. It will take about 4 hours to obtain a full charge. The camera can work 3 hours
on a full charge. The indicator lights will NOT change when the camera battery is
charging or fully charged.
3.3. If you want this camera to work 24/7 days, keep it plugged onto an outlet AC
power socket.
[Note]: It is normal that the camera becomes hot while it is working or charging.
IV. Network Setup
4.1. Install the “BVCAM” APP on your smartphone or tablet PC
4.1.1. Search for “BVCAM” in App Store or Google Play and install it on your smart-
phone or tablet PC.
4.2. LAN or P2P Mode Setup
4.2.1. Power on the camera by sliding the power switch to the ON position. The blue
and red indicator lights will illuminate for 3 seconds and then off. Waiting for 15 sec-
onds,the blue and red indicator lights will start illuminating for 3 seconds again; the
red indicator light will be off again. Waiting for 8 seconds, the blue indicator light will
stay illuminated while the red one will start flashing, indicating the camera’s WIFI
signal is ready.
4.2.2. Go to the WIFI or WLAN settings on your smartphone or tablet PCand con-
nect to the camera’s WIFI signal. The camera’s WIFI network SSID starts with
“KD******” and will appear on your WIFI or WLAN settings page as below.Both red
and blue indicator lights will keep flashing, indicating the camera’s P2P connection
is done.
[Note]: If the camera’s WIFI signal cannot be found for a long time, press the Reset Button for 5 sec-
onds to reset all settings to factory default. The red and blue indicator lights will be turned off and the
camera will restart automatically in 5 seconds.
4.2.3. Launch the “BVCAM” APP.
4.2.4. Add the camera to the application.
For Android: Tap + > Search(Lan) >Tap the camera icon > Tap OK or √.
For IOS: Tap + >Tap Add new online Camera >Tap Search (LAN) >Tap the camera
icon >Tap OK.
4.2.5. If the camera shows “Online” on the “Live video” page, it means the P2P
(LAN) connection is successful and you can view a live video feed from the camera
in the P2P (LAN) mode.
[Note]: See the table below for an explanation of the different functions available:
4.3. WAN Mode or Remote View Setup
>>Before the WAN configuration, please confirm that the camera is successfully
added to your smartphone or tablet PC in the P2P (LAN) mode, and the P2P (LAN)
connection works well.
4.3.1. Launch the “BVCAM” APP.
4.3.2. Set up the WAN mode or remote view.
Step 1: Tap the setting icon on the “Live video” page and select “Advance Config”
(IOS: Device Settings).
Step 2:Tap “WIFI Config” and select a desired WIFI network to enroll the camera in.
Step 3: Tap “OK”to confirm the WIFI configuration.
4.3.3. The camera will reboot automatically.
Check if the WAN mode or remote view setting works!
1. Exit the “BVCAM” APP.
2. Go to the WIFI or WLAN setting page on your smartphone or tablet PC and join
to another WIFI network which must be different from the one that the camera is en-
rolled in, or you can use your mobilenetwork.
3. Launch the “BVCAM” APP again.If you see the camera is “Online” on the“Live
video” page, it indicates the WAN mode or remote view setting is successful.Now
you can watch the live video from the camera on your smartphone or tablet PC
remotely as long as you have access to the Internet.
[Note]: If the WAN mode setup fails, please reset the camera (See VIII) and re-configure it.
V. Motion Detection Setup
>>Make sure that the camera is added successfully to the APP in LAN or WAN
mode.
>>Please make sure theMicro SD card (4GB-64GB) has been formatted already
and is securely fitted into the SD card slot on your camera. A SDHC Class 10 Micro
SD card is recommended.
5.1. Motion Detection Photograph Setup
5.1.1. Launch the “BVCAM” APP.
5.1.2. Enable the motion detection function.
Step1: Tap the setting icon on the “Live video” page and then choose “Advance
Config” (IOS: Device Settings)
Step 2:Tap “Alarm Config” , choose a desired sensitivity level.
Step 3: Tap “OK” to confirm the setting.
5.1.3. The camera will take a screenshot of the live video automatically when a
movement is detected. Go back to the “Live video” page and tap “Alarm” at the
bottom of the screen to check out the screenshots.
5.2. Motion Detection Video Recording Setup
5.2.1. Tap the setting icon on the “Live video” page and choose“Advance Config”
(IOS: Device Settings).
5.2.2. Tap “SDCard Record Config” and select “Record when Alarms” (IOS: On
alarm).
5.2.3. Tap “OK” to confirm the Motion Detection Video Recording setting.
5.2.4. The camera will start recording video automatically when a movement is de-
tected.Go back to the “Live video” page, tap “Record” at the bottom of the screen
and then choose “Remote SD card”(IOS: ) to check out the video files.
[Note]: Video Resolution: 1280×720P Video Format: ASF
VI. Recording Video to Smartphone or Tablet PC
>> Before recording, make sure that the camera is added successfully to the APP in
LAN or WAN mode.
6.1. Launch the “BVCAM” APP. Tap the camera icon to view the live video.
6.2.Tap the remote video recording button to start or stop recording video.
The video files will be saved in your smartphone or tablet PC flash memory if you are
usingan Android device. However, the video files can only be found in the APP
“BVCAM” if you are an IOS device.
6.3. Go back to the “Live video” page, tap “Record” at the bottom of the screen and
then choose “Local” (IOS: ) to check out the video files.
[Note]: Video Resolution: 1280×720P Video Format: ASF
VII. Recording Video to the Local Micro SD Card
>>Make sure that the camera is added successfully to the APP in LAN or WAN
mode.
>>Make sure theMicro SD card (4GB-64GB) has been formatted already and is
securely fitted into the SD card slot on your camera. A SDHC Class 10 Micro SD
card is recommended.
7.1. Launch the “BVCAM” APP.
7.2. Tap the setting icon on the“Live video” page and choose “Advance Con-
fig”(IOS: Device Settings)
7.3. Select “SD Card Record Config” and choose a desired recording mode.
7.4. Tap “OK” to confirm the SD card recording setting.
7.5. Check out the video files. (See 5.2.2)
VIII. Resetting
If for any reason the camera stops working or isn’t working properly, a reset will
restore it back to normal operation.
Operation: When the camera is powered on, press the Reset Button for 5 seconds
to reset all settings to factory default. The camera will reboot automatically with de-
fault settings in 5 seconds.
IX. Change the Camera’s Password
>>Please confirm that the camera is successfully added to the APP in the P2P (LAN)
mode, and the P2P (LAN) connection works well.
9.1. Launch the APP “BVCAM”.
9.2. Tap the settings icon on the “Live video” page,choose “Advance Config” (IOS:
Device Settings), and then click “Change P2P access password” (IOS: Change
password).
9.3. Enterthe user default password “8888”. Input a new password and confirm it,
then tap “OK” to save the change.
Check if the new password works!
1. Go back to the “Live video” page, tap the setting icon and delete the current
camera.
2. Follow 3.2.3 to add the camera again. Don’t forget to type the new password
before tapping “OK” or “√” to add the camera.
3. If the camera shows “Online”, it means the password has been changed success-
fully. If the camera shows “password mistake”, it means you input a wrong pass-
word.
Frequently Asked Questions
Q: What kind of memory card can I use in this camera?
A:You are recommended to use a SDHC Class 10 Micro SD card (4GB-64GB). If a
memory card does not work, remove and format it on a PC computer before trying it
in thecamera again.
Q: Why can’t I find the camera’s WIFI signal on my smartphone or tablet PC?
A: Recharge the camera. Or reset the camera to factory default (See VIII).
Q: Why can’t I play back video files or it shows the video files are corrupted?
A: It is mainly because the camera is powered off inappropriately.
Q: What media player software should I use to play back the video files on my
computer?
A: Click the link: http://www.videolan.org/vlc/index.html to download and install VLC
player to play back video files on your computer.
Q: How do I reset my camera back to the way I got it?
A:Reset the camera to factory default. (See VIII)
DV-07-WIFI
Benutzerhandbuch
I. Produktübersicht
1. Rote / blaue Anzeigelampe
2. Mikrofon
3. Kameraobjektiv
4. IR-LEDs
5. Kamerataste
II. Was ist in der Box
-1 × Wifi Netzwerk Besprechung Camcorder-1× Card Reader
-1 × 3m USB-Kabel
-1 × AC110-230V zu DC 5V aufladenadapter
-1 × Minidisc-
-1 × 8GB Micro SD-Karte (in den Micro SD-Kartensteckplatz bereits eingebaut)
III.Aufladen
3.1. Schließen Sie die Kamera an eine Netzsteckdose an, indem Sie den mitgelief-
erten Ladeadapter und das USB-Kabel verwenden.
3.2. Es dauert ungefähr 4 Stunden, um eine volle Gebühr zu erhalten. Die Kamera
kann 3 Stunden lang aufladen. Die Anzeige leuchtet nicht, wenn der Akku der
Kamera aufgeladen oder voll aufgeladen ist.
3.3. Wenn Sie diese Kamera 24/7 Tage arbeiten möchten, halten Sie sie an eine
Steckdose angeschlossen Steckdose.
[Hinweis]: Es ist normal, dass die Kamera während des Betriebs oder Aufladens heiß wird.
IV. Netzwerkeinrichtung
4.1. Installieren Sie die "BVCAM" APP auf Ihrem Smartphone oder
Tablet PC
4.1.1. Suchen Sie nach "BVCAM" im App Store oder Google Play und installieren
Sie es auf Ihrem Smartphone oder Tablet PC.
4.2. LAN oder P2P-Modus einstellen
4.2.1. Schalten Sie die Kamera ein, indem Sie den Netzschalter auf ON schieben.
Die blaue und rote Leuchtanzeige leuchten für 3 Sekunden und dann aus. Warten
Sie 15 Sekunden, die blaue und rote Leuchtanzeige leuchten für 3 Sekunden wieder
auf; Die rote Anzeigelampe erlischt wieder. Wartend für 8 Sekunden, bleibt die blaue
Anzeigelampe beleuchtet, während die rote blinkt, und zeigt an, dass das WIFI-Sig-
nal der Kamera bereit ist.
4.2.2. Go to the WIFI or WLAN settings on your smartphone or tablet PCand con-
nect to the camera’s WIFI signal. The camera’s WIFI network SSID starts with
“KD******” and will appear on your WIFI or WLAN settings page as below.Both red
and blue indicator lights will keep flashing, indicating the camera’s P2P connection
is done.
[Hinweis]: Wenn das WIFI-Signal der Kamera für längere Zeit nicht gefunden werden kann, drücken
Sie die Reset-Taste für 5 Sekunden, um alle Einstellungen auf die Werkseinstellungen zurückzuset-
zen. Die roten und blauen Kontrolllampen werden ausgeschaltet und die Kamera startet automatisch
in 5 Sekunden.
4.2.3. Starten Sie die "BVCAM" APP.
4.2.4. Fügen Sie der Anwendung die Kamera hinzu.
Für Android: Tippen Sie auf +> Suchen (Lan)> Tippen Sie auf das Kamerasymbol>
Tippen Sie auf OK oder√.
Für IOS: Tippen Sie auf +> Tap Add new online Kamera> Ip Search (LAN)> Tippen
Sie auf das Kamerasymbol> Tippen Sie auf OK.
4.2.5. Wenn die Kamera "Online" auf der Seite "Live Video" anzeigt, bedeutet dies,
dass die P2P (LAN) Verbindung erfolgreich ist und Sie können einen Live Video
Feed von der Kamera im P2P (LAN) Modus ansehen
[Hinweis]: Zur Erläuterung der verschiedenen Funktionen siehe folgende Tabelle:
4.3. WAN-Modus oder Fernansicht einrichten
>> Stellen Sie vor der WAN-Konfiguration sicher, dass die Kamera im P2P (LAN)
-Modus erfolgreich zu Ihrem Smartphone oder Tablet PC hinzugefügt wurde und die
P2P-Verbindung (LAN) gut funktioniert.
4.3.1. Starten Sie die "BVCAM" APP.
4.3.2. Richten Sie den WAN-Modus oder die Remote-Ansicht ein.
Schritt 1: Tippen Sie auf der Seite "Live Video" auf das Einstellungssymbol und
wählen Sie "Advance Config" (IOS: Geräteeinstellungen).
Schritt 2: Tippen Sie auf "WIFI Config" und wählen Sie ein gewünschtes WI-
FI-Netzwerk aus, um die Kamera einzuschreiben.
Schritt 3: Tippen Sie auf "OK", um die WIFI-Konfiguration zu bestätigen.
4.3.3. Die Kamera wird automatisch neu gestartet.
Überprüfen Sie, ob der WAN-Modus oder die Re-
mote-View-Einstellung funktioniert!
1. Beenden Sie die APP "BVCAM".
2. Gehen Sie zur WLAN- oder WLAN-Einstellungsseite auf Ihrem Smartphone oder
Tablet-PC und verbinden Sie sich mit einem anderen WIFI-Netzwerk, das sich von
demjenigen unterscheiden muss, zu dem die Kamera angemeldet ist, oder Sie
können Ihr Mobilfunknetz verwenden.
3. Starten Sie die "BVCAM" APP erneut. Wenn die Kamera auf der Seite "Live-Vid-
eo" auf "Online" steht, wird angezeigt, dass der WAN-Modus oder die Fernansicht
erfolgreich war. Jetzt können Sie die Live-Video von der Kamera auf Ihrem Smart-
phone oder Tablet-PC entfernt, solange Sie Zugriff auf das Internet haben.
[Hinweis]: Wenn der WAN-Modus nicht funktioniert, setzen Sie die Kamera zurück (siehe VIII) und
konfigurieren Sie sie neu.
V. Bewegungserkennung
>> Vergewissern Sie sich, dass die Kamera erfolgreich zum APP im LAN- oder
WAN-Modus hinzugefügt wurde.
>> Bitte stellen Sie sicher, dass die Micro SD-Karte (4GB-64GB) bereits formatiert
wurde und sicher in den SD-Kartensteckplatz Ihrer Kamera eingesetzt ist. Eine
SDHC Klasse 10 Micro SD-Karte wird empfohlen.
5.1. Bewegungserkennung
5.1.1. Starten Sie die "BVCAM" APP.
5.1.2. Aktivieren Sie die Bewegungserkennung.
Schritt 1: Tippen Sie auf der Seite "Live Video" auf das Einstellungssymbol und
wählen Sie "Advance Config" (IOS: Device Settings)
Schritt 2: Tippen Sie auf " Alarm Config", wählen Sie einen gewünschten Empfind-
lichkeitspegel aus.
Schritt 3: Tippen Sie auf "OK", um die Einstellung zu bestätigen.
5.1.3. Die Kamera nimmt automatisch einen Screenshot des Live-Videos auf, wenn
eine Bewegung erkannt wird. Gehen Sie zurück auf die Seite "Live-Video" und
tippen Sie auf "Alarm" am unteren Rand des Bildschirms, um die Screenshots.
5.2. Bewegungserkennung Videoaufnahme-Setup
5.2.1. Tippen Sie auf der Seite "Live Video" auf das Einstellungssymbol und wählen
Sie "Advance Config" (IOS: Device Settings).
5.2.2. Tippen Sie auf "SDCard Record Config" und wählen Sie "Record when
Alarms" (IOS: On Alarm).
5.2.3. Tippen Sie auf "OK", um die Einstellung der Motion Detection Video Record-
ing zu bestätigen.
5.2.4. Die Kamera startet automatisch, wenn eine Bewegung erkannt wird. Gehen
Sie zurück auf die Seite "Live-Video", tippen Sie auf "Record" am unteren Rand des
Bildschirms und wählen Sie dann "Remote-SD- card"(IOS: )Um die Video-Datei-
en auszuprobi
[Hinweis]: Video Auflösung: 1280×720P Videoformat: ASF
VI. Aufzeichnen von Video auf Smartphone oder Tablet PC
>> Vergewissern Sie sich vor der Aufnahme, ob die Kamera erfolgreich zum APP im
LAN- oder WAN-Modus hinzugefügt wurde.
6.1. Starten Sie die "BVCAM" APP. Tippen Sie auf das Kamerasymbol, um das
Live-Video anzuzeigen.
6.2.Tippen Sie auf die Fernaufnahmetaste um das Video zu starten oder zu
beenden. Die Videodateien werden in Ihrem Smartphone- oder Tab-
let-PC-Flash-Speicher gespeichert, wenn Sie ein Android-Gerät verwenden. Allerd-
ings können die Videodateien nur im APP "BVCAM" gefunden werden, wenn Sie ein
IOS-Gerät sind.
6.3. Gehen Sie zurück auf die Seite "Live-Video", tippen Sie auf "Record" am un-
teren Rand des Bildschirms und wählen Sie dann "Local"(IOS: ) um die Vid-
eo-Dateien auszuprobieren.
[Hinweis]: Video Auflösung: 1280×720P Videoformat: ASF
VII. Videoaufnahme zur lokalen Mikro-Sd-Karte
>> Vergewissern Sie sich, dass die Kamera erfolgreich zum APP im LAN- oder
WAN-Modus hinzugefügt wurde.
>> Vergewissern Sie sich, dass die Micro SD-Karte (4GB-64GB) bereits formatiert
wurde und sicher in den SD-Kartensteckplatz Ihrer Kamera eingesetzt ist. Eine
SDHC Klasse 10 Micro SD-Karte wird empfohlen.
7.1. Starten Sie die "BVCAM" APP.
7.2. Tippen Sie auf der Seite "Live Video" auf das Einstellungssymbol und wählen
Sie "Advance Config" (IOS: Device Settings)
7.3. Wählen Sie "SD Card Record Config" und wählen Sie einen gewünschten Auf-
nahmemodus.
7.4. Tippen Sie auf "OK", um die Einstellung der SD-Karten zu bestätigen.
6. Video-Aufnahme / Reset-Taste
7. Netzschalter
8. Mikro-Sd-Einbauschlitz
9. USB-Anschluss
Schaltflächenname Bedienungsanleitung
Kamera-Taste
Video-Aufnahme /
Reset-Taste
Nehmen Sie ein Foto auf: Drücken Sie die Kamera-Taste einmal, um ein Bild
aufzunehmen, und die blaue Leuchtanzeige blinkt einmal. Die Bilder werden in
der Micro SD-Karte auf der Kamera gespeichert.
Ein- / Ausschalten der Kontrolllampe: Drücken Sie die Kamerataste 4 Sekunden
lang, um die Kontrolllampen ein- oder auszuschalten.
Video aufnehmen: Drücken Sie die Video-Aufnahmetaste einmal, um die
Aufnahme zu starten, und die blaue Kontrolllampe blinkt langsam. Die Video-
dateien werden in der Micro SD-Karte auf der Kamera gespeichert.
Reset der Kamera: Drücken Sie die Reset-Taste für 5 Sekunden, um alle
Einstellungen auf die Werkseinstellungen zurückzusetzen.
7.5. Schauen Sie sich die Video-Dateien. (Siehe 5.2.2)
VIII. Rücksetzen
Wenn die Kamera aus irgendeinem Grund nicht mehr funktioniert, funktioniert die
Rückstellung nicht mehr.
Betrieb: Wenn die Kamera eingeschaltet ist, drücken Sie die Reset-Taste für 5
Sekunden, um alle Einstellungen auf die Werkseinstellungen zurückzusetzen. Die
Kamera startet automatisch mit den Standardeinstellungen in 5 Sekunden.
IX. Ändern Sie das Passwort der Kamera
>> Bitte bestätigen Sie, dass die Kamera im P2P (LAN) -Modus erfolgreich zum APP
hinzugefügt wurde und die P2P-Verbindung (LAN) gut funktioniert.
9.1. Starten Sie die APP "BVCAM".
9.2. Tippen Sie auf das Symbol "Live Video", wählen Sie "Advance Config" (IOS:
Device Settings und klicken Sie dann auf " Change P2P access password" (IOS:
Change password).
9.3. Geben Sie das Benutzer-Standardkennwort "8888" ein. Geben Sie ein neues
Passwort ein, bestätigen Sie es und tippen Sie auf "OK", um die Änderung zu spe-
ichern.
Prüfen Sie, ob das neue Passwort funktioniert!
1. Gehen Sie zurück zur Seite "Live Video", tippen Sie auf das Einstellungssymbol
und löschen Sie. die aktuelle Kamera
2. Folgen Sie 3.2.3, um die Kamera erneut hinzuzufügen. Vergessen Sie nicht, das
neue Passwort einzugeben, bevor Sie auf "OK" oder "√" klicken, um die Kamera
hinzuzufügen.
3. Wenn die Kamera "Online" anzeigt, bedeutet dies, dass das Passwort erfolgreich
geändert wurde. Wenn die Kamera " password mistake" anzeigt, bedeutet dies,
dass Sie ein falsches Passwort eingegeben haben.
Häufig gestellte Fragen
F: Welche Art von Speicherkarte kann ich in dieser Kamera verwenden?
A: Es wird empfohlen, eine SDHC Klasse 10 Micro SD-Karte (4GB-64GB) zu ver-
wenden. Wenn eine Speicherkarte nicht funktioniert, entfernen Sie sie und formatie-
ren Sie sie auf einem PC-Computer, bevor Sie sie in der Kamera erneut versuchen.
F: Warum kann ich das WIFI-Signal der Kamera nicht auf meinem Smartphone
oder Tablet-PC finden?
A: Laden Sie die Kamera wieder auf. Oder stellen Sie die Kamera auf die Werksein-
stellungen zurück (siehe VIII).
F: Warum kann ich keine Videodateien abspielen oder zeigt die Videodateien
beschädigt sind?
A: Vor allem, weil die Kamera unangemessen ausgeschaltet wird
F: Welche Media-Player-Software soll ich verwenden, um die Videodateien auf
meinem Computer wiederzugeben?
A: Klicken Sie auf den Link:http://www.videolan.org/vlc/index.htmlum VLC Player
herunterzuladen und zu installieren, um Videodateien auf Ihrem Computer wieder-
zugeben.
F: Wie kann ich meine Kamera zurücksetzen, so wie ich es habe?
A: Setzen Sie die Kamera auf die Werkseinstellungen zurück. (Siehe VIII)

I. Produktübersicht
1. Rote / blaue Anzeigelampe
2. Mikrofon
3. Kameraobjektiv
4. IR-LEDs
5. Kamerataste
II. Was ist in der Box
-1 × Wifi Netzwerk Besprechung Camcorder-1× Card Reader
-1 × 3m USB-Kabel
-1 × AC110-230V zu DC 5V aufladenadapter
-1 × Minidisc-
-1 × 8GB Micro SD-Karte (in den Micro SD-Kartensteckplatz bereits eingebaut)
III.Aufladen
3.1. Schließen Sie die Kamera an eine Netzsteckdose an, indem Sie den mitgelief-
erten Ladeadapter und das USB-Kabel verwenden.
3.2. Es dauert ungefähr 4 Stunden, um eine volle Gebühr zu erhalten. Die Kamera
kann 3 Stunden lang aufladen. Die Anzeige leuchtet nicht, wenn der Akku der
Kamera aufgeladen oder voll aufgeladen ist.
3.3. Wenn Sie diese Kamera 24/7 Tage arbeiten möchten, halten Sie sie an eine
Steckdose angeschlossen Steckdose.
[Hinweis]: Es ist normal, dass die Kamera während des Betriebs oder Aufladens heiß wird.
IV. Netzwerkeinrichtung
4.1. Installieren Sie die "BVCAM" APP auf Ihrem Smartphone oder
Tablet PC
4.1.1. Suchen Sie nach "BVCAM" im App Store oder Google Play und installieren
Sie es auf Ihrem Smartphone oder Tablet PC.
4.2. LAN oder P2P-Modus einstellen
4.2.1. Schalten Sie die Kamera ein, indem Sie den Netzschalter auf ON schieben.
Die blaue und rote Leuchtanzeige leuchten für 3 Sekunden und dann aus. Warten
Sie 15 Sekunden, die blaue und rote Leuchtanzeige leuchten für 3 Sekunden wieder
auf; Die rote Anzeigelampe erlischt wieder. Wartend für 8 Sekunden, bleibt die blaue
Anzeigelampe beleuchtet, während die rote blinkt, und zeigt an, dass das WIFI-Sig-
nal der Kamera bereit ist.
4.2.2. Go to the WIFI or WLAN settings on your smartphone or tablet PCand con-
nect to the camera’s WIFI signal. The camera’s WIFI network SSID starts with
“KD******” and will appear on your WIFI or WLAN settings page as below.Both red
and blue indicator lights will keep flashing, indicating the camera’s P2P connection
is done.
[Hinweis]: Wenn das WIFI-Signal der Kamera für längere Zeit nicht gefunden werden kann, drücken
Sie die Reset-Taste für 5 Sekunden, um alle Einstellungen auf die Werkseinstellungen zurückzuset-
zen. Die roten und blauen Kontrolllampen werden ausgeschaltet und die Kamera startet automatisch
in 5 Sekunden.
4.2.3. Starten Sie die "BVCAM" APP.
4.2.4. Fügen Sie der Anwendung die Kamera hinzu.
Für Android: Tippen Sie auf +> Suchen (Lan)> Tippen Sie auf das Kamerasymbol>
Tippen Sie auf OK oder√.
Für IOS: Tippen Sie auf +> Tap Add new online Kamera> Ip Search (LAN)> Tippen
Sie auf das Kamerasymbol> Tippen Sie auf OK.
4.2.5. Wenn die Kamera "Online" auf der Seite "Live Video" anzeigt, bedeutet dies,
dass die P2P (LAN) Verbindung erfolgreich ist und Sie können einen Live Video
Feed von der Kamera im P2P (LAN) Modus ansehen
[Hinweis]: Zur Erläuterung der verschiedenen Funktionen siehe folgende Tabelle:
4.3. WAN-Modus oder Fernansicht einrichten
>> Stellen Sie vor der WAN-Konfiguration sicher, dass die Kamera im P2P (LAN)
-Modus erfolgreich zu Ihrem Smartphone oder Tablet PC hinzugefügt wurde und die
P2P-Verbindung (LAN) gut funktioniert.
4.3.1. Starten Sie die "BVCAM" APP.
4.3.2. Richten Sie den WAN-Modus oder die Remote-Ansicht ein.
Schritt 1: Tippen Sie auf der Seite "Live Video" auf das Einstellungssymbol und
wählen Sie "Advance Config" (IOS: Geräteeinstellungen).
Schritt 2: Tippen Sie auf "WIFI Config" und wählen Sie ein gewünschtes WI-
FI-Netzwerk aus, um die Kamera einzuschreiben.
Schritt 3: Tippen Sie auf "OK", um die WIFI-Konfiguration zu bestätigen.
4.3.3. Die Kamera wird automatisch neu gestartet.
Überprüfen Sie, ob der WAN-Modus oder die Re-
mote-View-Einstellung funktioniert!
1. Beenden Sie die APP "BVCAM".
2. Gehen Sie zur WLAN- oder WLAN-Einstellungsseite auf Ihrem Smartphone oder
Tablet-PC und verbinden Sie sich mit einem anderen WIFI-Netzwerk, das sich von
demjenigen unterscheiden muss, zu dem die Kamera angemeldet ist, oder Sie
können Ihr Mobilfunknetz verwenden.
3. Starten Sie die "BVCAM" APP erneut. Wenn die Kamera auf der Seite "Live-Vid-
eo" auf "Online" steht, wird angezeigt, dass der WAN-Modus oder die Fernansicht
erfolgreich war. Jetzt können Sie die Live-Video von der Kamera auf Ihrem Smart-
phone oder Tablet-PC entfernt, solange Sie Zugriff auf das Internet haben.
[Hinweis]: Wenn der WAN-Modus nicht funktioniert, setzen Sie die Kamera zurück (siehe VIII) und
konfigurieren Sie sie neu.
V. Bewegungserkennung
>> Vergewissern Sie sich, dass die Kamera erfolgreich zum APP im LAN- oder
WAN-Modus hinzugefügt wurde.
>> Bitte stellen Sie sicher, dass die Micro SD-Karte (4GB-64GB) bereits formatiert
wurde und sicher in den SD-Kartensteckplatz Ihrer Kamera eingesetzt ist. Eine
SDHC Klasse 10 Micro SD-Karte wird empfohlen.
5.1. Bewegungserkennung
5.1.1. Starten Sie die "BVCAM" APP.
5.1.2. Aktivieren Sie die Bewegungserkennung.
Schritt 1: Tippen Sie auf der Seite "Live Video" auf das Einstellungssymbol und
wählen Sie "Advance Config" (IOS: Device Settings)
Schritt 2: Tippen Sie auf " Alarm Config", wählen Sie einen gewünschten Empfind-
lichkeitspegel aus.
Schritt 3: Tippen Sie auf "OK", um die Einstellung zu bestätigen.
5.1.3. Die Kamera nimmt automatisch einen Screenshot des Live-Videos auf, wenn
eine Bewegung erkannt wird. Gehen Sie zurück auf die Seite "Live-Video" und
tippen Sie auf "Alarm" am unteren Rand des Bildschirms, um die Screenshots.
5.2. Bewegungserkennung Videoaufnahme-Setup
5.2.1. Tippen Sie auf der Seite "Live Video" auf das Einstellungssymbol und wählen
Sie "Advance Config" (IOS: Device Settings).
5.2.2. Tippen Sie auf "SDCard Record Config" und wählen Sie "Record when
Alarms" (IOS: On Alarm).
5.2.3. Tippen Sie auf "OK", um die Einstellung der Motion Detection Video Record-
ing zu bestätigen.
5.2.4. Die Kamera startet automatisch, wenn eine Bewegung erkannt wird. Gehen
Sie zurück auf die Seite "Live-Video", tippen Sie auf "Record" am unteren Rand des
Bildschirms und wählen Sie dann "Remote-SD- card"(IOS: )Um die Video-Datei-
en auszuprobi
[Hinweis]: Video Auflösung: 1280×720P Videoformat: ASF
VI. Aufzeichnen von Video auf Smartphone oder Tablet PC
>> Vergewissern Sie sich vor der Aufnahme, ob die Kamera erfolgreich zum APP im
LAN- oder WAN-Modus hinzugefügt wurde.
6.1. Starten Sie die "BVCAM" APP. Tippen Sie auf das Kamerasymbol, um das
Live-Video anzuzeigen.
6.2.Tippen Sie auf die Fernaufnahmetaste um das Video zu starten oder zu
beenden. Die Videodateien werden in Ihrem Smartphone- oder Tab-
let-PC-Flash-Speicher gespeichert, wenn Sie ein Android-Gerät verwenden. Allerd-
ings können die Videodateien nur im APP "BVCAM" gefunden werden, wenn Sie ein
IOS-Gerät sind.
6.3. Gehen Sie zurück auf die Seite "Live-Video", tippen Sie auf "Record" am un-
teren Rand des Bildschirms und wählen Sie dann "Local"(IOS: ) um die Vid-
eo-Dateien auszuprobieren.
[Hinweis]: Video Auflösung: 1280×720P Videoformat: ASF
VII. Videoaufnahme zur lokalen Mikro-Sd-Karte
>> Vergewissern Sie sich, dass die Kamera erfolgreich zum APP im LAN- oder
WAN-Modus hinzugefügt wurde.
>> Vergewissern Sie sich, dass die Micro SD-Karte (4GB-64GB) bereits formatiert
wurde und sicher in den SD-Kartensteckplatz Ihrer Kamera eingesetzt ist. Eine
SDHC Klasse 10 Micro SD-Karte wird empfohlen.
7.1. Starten Sie die "BVCAM" APP.
7.2. Tippen Sie auf der Seite "Live Video" auf das Einstellungssymbol und wählen
Sie "Advance Config" (IOS: Device Settings)
7.3. Wählen Sie "SD Card Record Config" und wählen Sie einen gewünschten Auf-
nahmemodus.
7.4. Tippen Sie auf "OK", um die Einstellung der SD-Karten zu bestätigen.
7.5. Schauen Sie sich die Video-Dateien. (Siehe 5.2.2)
VIII. Rücksetzen
Wenn die Kamera aus irgendeinem Grund nicht mehr funktioniert, funktioniert die
Rückstellung nicht mehr.
Betrieb: Wenn die Kamera eingeschaltet ist, drücken Sie die Reset-Taste für 5
Sekunden, um alle Einstellungen auf die Werkseinstellungen zurückzusetzen. Die
Kamera startet automatisch mit den Standardeinstellungen in 5 Sekunden.
IX. Ändern Sie das Passwort der Kamera
>> Bitte bestätigen Sie, dass die Kamera im P2P (LAN) -Modus erfolgreich zum APP
hinzugefügt wurde und die P2P-Verbindung (LAN) gut funktioniert.
9.1. Starten Sie die APP "BVCAM".
9.2. Tippen Sie auf das Symbol "Live Video", wählen Sie "Advance Config" (IOS:
Device Settings und klicken Sie dann auf " Change P2P access password" (IOS:
Change password).
9.3. Geben Sie das Benutzer-Standardkennwort "8888" ein. Geben Sie ein neues
Passwort ein, bestätigen Sie es und tippen Sie auf "OK", um die Änderung zu spe-
ichern.
Prüfen Sie, ob das neue Passwort funktioniert!
1. Gehen Sie zurück zur Seite "Live Video", tippen Sie auf das Einstellungssymbol
und löschen Sie. die aktuelle Kamera
2. Folgen Sie 3.2.3, um die Kamera erneut hinzuzufügen. Vergessen Sie nicht, das
neue Passwort einzugeben, bevor Sie auf "OK" oder "√" klicken, um die Kamera
hinzuzufügen.
3. Wenn die Kamera "Online" anzeigt, bedeutet dies, dass das Passwort erfolgreich
geändert wurde. Wenn die Kamera " password mistake" anzeigt, bedeutet dies,
dass Sie ein falsches Passwort eingegeben haben.
Häufig gestellte Fragen
F: Welche Art von Speicherkarte kann ich in dieser Kamera verwenden?
A: Es wird empfohlen, eine SDHC Klasse 10 Micro SD-Karte (4GB-64GB) zu ver-
wenden. Wenn eine Speicherkarte nicht funktioniert, entfernen Sie sie und formatie-
ren Sie sie auf einem PC-Computer, bevor Sie sie in der Kamera erneut versuchen.
F: Warum kann ich das WIFI-Signal der Kamera nicht auf meinem Smartphone
oder Tablet-PC finden?
A: Laden Sie die Kamera wieder auf. Oder stellen Sie die Kamera auf die Werksein-
stellungen zurück (siehe VIII).
F: Warum kann ich keine Videodateien abspielen oder zeigt die Videodateien
beschädigt sind?
A: Vor allem, weil die Kamera unangemessen ausgeschaltet wird
F: Welche Media-Player-Software soll ich verwenden, um die Videodateien auf
meinem Computer wiederzugeben?
A: Klicken Sie auf den Link:http://www.videolan.org/vlc/index.htmlum VLC Player
herunterzuladen und zu installieren, um Videodateien auf Ihrem Computer wieder-
zugeben.
F: Wie kann ich meine Kamera zurücksetzen, so wie ich es habe?
A: Setzen Sie die Kamera auf die Werkseinstellungen zurück. (Siehe VIII)

I. Produktübersicht
1. Rote / blaue Anzeigelampe
2. Mikrofon
3. Kameraobjektiv
4. IR-LEDs
5. Kamerataste
II. Was ist in der Box
-1 × Wifi Netzwerk Besprechung Camcorder-1× Card Reader
-1 × 3m USB-Kabel
-1 × AC110-230V zu DC 5V aufladenadapter
-1 × Minidisc-
-1 × 8GB Micro SD-Karte (in den Micro SD-Kartensteckplatz bereits eingebaut)
III.Aufladen
3.1. Schließen Sie die Kamera an eine Netzsteckdose an, indem Sie den mitgelief-
erten Ladeadapter und das USB-Kabel verwenden.
3.2. Es dauert ungefähr 4 Stunden, um eine volle Gebühr zu erhalten. Die Kamera
kann 3 Stunden lang aufladen. Die Anzeige leuchtet nicht, wenn der Akku der
Kamera aufgeladen oder voll aufgeladen ist.
3.3. Wenn Sie diese Kamera 24/7 Tage arbeiten möchten, halten Sie sie an eine
Steckdose angeschlossen Steckdose.
[Hinweis]: Es ist normal, dass die Kamera während des Betriebs oder Aufladens heiß wird.
IV. Netzwerkeinrichtung
4.1. Installieren Sie die "BVCAM" APP auf Ihrem Smartphone oder
Tablet PC
4.1.1. Suchen Sie nach "BVCAM" im App Store oder Google Play und installieren
Sie es auf Ihrem Smartphone oder Tablet PC.
4.2. LAN oder P2P-Modus einstellen
4.2.1. Schalten Sie die Kamera ein, indem Sie den Netzschalter auf ON schieben.
Die blaue und rote Leuchtanzeige leuchten für 3 Sekunden und dann aus. Warten
Sie 15 Sekunden, die blaue und rote Leuchtanzeige leuchten für 3 Sekunden wieder
auf; Die rote Anzeigelampe erlischt wieder. Wartend für 8 Sekunden, bleibt die blaue
Anzeigelampe beleuchtet, während die rote blinkt, und zeigt an, dass das WIFI-Sig-
nal der Kamera bereit ist.
4.2.2. Go to the WIFI or WLAN settings on your smartphone or tablet PCand con-
nect to the camera’s WIFI signal. The camera’s WIFI network SSID starts with
“KD******” and will appear on your WIFI or WLAN settings page as below.Both red
and blue indicator lights will keep flashing, indicating the camera’s P2P connection
is done.
[Hinweis]: Wenn das WIFI-Signal der Kamera für längere Zeit nicht gefunden werden kann, drücken
Sie die Reset-Taste für 5 Sekunden, um alle Einstellungen auf die Werkseinstellungen zurückzuset-
zen. Die roten und blauen Kontrolllampen werden ausgeschaltet und die Kamera startet automatisch
in 5 Sekunden.
4.2.3. Starten Sie die "BVCAM" APP.
4.2.4. Fügen Sie der Anwendung die Kamera hinzu.
Für Android: Tippen Sie auf +> Suchen (Lan)> Tippen Sie auf das Kamerasymbol>
Tippen Sie auf OK oder√.
Für IOS: Tippen Sie auf +> Tap Add new online Kamera> Ip Search (LAN)> Tippen
Sie auf das Kamerasymbol> Tippen Sie auf OK.
4.2.5. Wenn die Kamera "Online" auf der Seite "Live Video" anzeigt, bedeutet dies,
dass die P2P (LAN) Verbindung erfolgreich ist und Sie können einen Live Video
Feed von der Kamera im P2P (LAN) Modus ansehen
[Hinweis]: Zur Erläuterung der verschiedenen Funktionen siehe folgende Tabelle:
4.3. WAN-Modus oder Fernansicht einrichten
>> Stellen Sie vor der WAN-Konfiguration sicher, dass die Kamera im P2P (LAN)
-Modus erfolgreich zu Ihrem Smartphone oder Tablet PC hinzugefügt wurde und die
P2P-Verbindung (LAN) gut funktioniert.
4.3.1. Starten Sie die "BVCAM" APP.
4.3.2. Richten Sie den WAN-Modus oder die Remote-Ansicht ein.
Schritt 1: Tippen Sie auf der Seite "Live Video" auf das Einstellungssymbol und
wählen Sie "Advance Config" (IOS: Geräteeinstellungen).
Schritt 2: Tippen Sie auf "WIFI Config" und wählen Sie ein gewünschtes WI-
FI-Netzwerk aus, um die Kamera einzuschreiben.
Schritt 3: Tippen Sie auf "OK", um die WIFI-Konfiguration zu bestätigen.
4.3.3. Die Kamera wird automatisch neu gestartet.
Überprüfen Sie, ob der WAN-Modus oder die Re-
mote-View-Einstellung funktioniert!
1. Beenden Sie die APP "BVCAM".
2. Gehen Sie zur WLAN- oder WLAN-Einstellungsseite auf Ihrem Smartphone oder
Tablet-PC und verbinden Sie sich mit einem anderen WIFI-Netzwerk, das sich von
demjenigen unterscheiden muss, zu dem die Kamera angemeldet ist, oder Sie
können Ihr Mobilfunknetz verwenden.
3. Starten Sie die "BVCAM" APP erneut. Wenn die Kamera auf der Seite "Live-Vid-
eo" auf "Online" steht, wird angezeigt, dass der WAN-Modus oder die Fernansicht
erfolgreich war. Jetzt können Sie die Live-Video von der Kamera auf Ihrem Smart-
phone oder Tablet-PC entfernt, solange Sie Zugriff auf das Internet haben.
[Hinweis]: Wenn der WAN-Modus nicht funktioniert, setzen Sie die Kamera zurück (siehe VIII) und
konfigurieren Sie sie neu.
V. Bewegungserkennung
>> Vergewissern Sie sich, dass die Kamera erfolgreich zum APP im LAN- oder
WAN-Modus hinzugefügt wurde.
>> Bitte stellen Sie sicher, dass die Micro SD-Karte (4GB-64GB) bereits formatiert
wurde und sicher in den SD-Kartensteckplatz Ihrer Kamera eingesetzt ist. Eine
SDHC Klasse 10 Micro SD-Karte wird empfohlen.
5.1. Bewegungserkennung
5.1.1. Starten Sie die "BVCAM" APP.
5.1.2. Aktivieren Sie die Bewegungserkennung.
Schritt 1: Tippen Sie auf der Seite "Live Video" auf das Einstellungssymbol und
wählen Sie "Advance Config" (IOS: Device Settings)
Schritt 2: Tippen Sie auf " Alarm Config", wählen Sie einen gewünschten Empfind-
lichkeitspegel aus.
Schritt 3: Tippen Sie auf "OK", um die Einstellung zu bestätigen.
5.1.3. Die Kamera nimmt automatisch einen Screenshot des Live-Videos auf, wenn
eine Bewegung erkannt wird. Gehen Sie zurück auf die Seite "Live-Video" und
tippen Sie auf "Alarm" am unteren Rand des Bildschirms, um die Screenshots.
5.2. Bewegungserkennung Videoaufnahme-Setup
5.2.1. Tippen Sie auf der Seite "Live Video" auf das Einstellungssymbol und wählen
Sie "Advance Config" (IOS: Device Settings).
5.2.2. Tippen Sie auf "SDCard Record Config" und wählen Sie "Record when
Alarms" (IOS: On Alarm).
5.2.3. Tippen Sie auf "OK", um die Einstellung der Motion Detection Video Record-
ing zu bestätigen.
5.2.4. Die Kamera startet automatisch, wenn eine Bewegung erkannt wird. Gehen
Sie zurück auf die Seite "Live-Video", tippen Sie auf "Record" am unteren Rand des
Bildschirms und wählen Sie dann "Remote-SD- card"(IOS: )Um die Video-Datei-
en auszuprobi
[Hinweis]: Video Auflösung: 1280×720P Videoformat: ASF
VI. Aufzeichnen von Video auf Smartphone oder Tablet PC
>> Vergewissern Sie sich vor der Aufnahme, ob die Kamera erfolgreich zum APP im
LAN- oder WAN-Modus hinzugefügt wurde.
6.1. Starten Sie die "BVCAM" APP. Tippen Sie auf das Kamerasymbol, um das
Live-Video anzuzeigen.
6.2.Tippen Sie auf die Fernaufnahmetaste um das Video zu starten oder zu
beenden. Die Videodateien werden in Ihrem Smartphone- oder Tab-
let-PC-Flash-Speicher gespeichert, wenn Sie ein Android-Gerät verwenden. Allerd-
ings können die Videodateien nur im APP "BVCAM" gefunden werden, wenn Sie ein
IOS-Gerät sind.
6.3. Gehen Sie zurück auf die Seite "Live-Video", tippen Sie auf "Record" am un-
teren Rand des Bildschirms und wählen Sie dann "Local"(IOS: ) um die Vid-
eo-Dateien auszuprobieren.
[Hinweis]: Video Auflösung: 1280×720P Videoformat: ASF
VII. Videoaufnahme zur lokalen Mikro-Sd-Karte
>> Vergewissern Sie sich, dass die Kamera erfolgreich zum APP im LAN- oder
WAN-Modus hinzugefügt wurde.
>> Vergewissern Sie sich, dass die Micro SD-Karte (4GB-64GB) bereits formatiert
wurde und sicher in den SD-Kartensteckplatz Ihrer Kamera eingesetzt ist. Eine
SDHC Klasse 10 Micro SD-Karte wird empfohlen.
7.1. Starten Sie die "BVCAM" APP.
7.2. Tippen Sie auf der Seite "Live Video" auf das Einstellungssymbol und wählen
Sie "Advance Config" (IOS: Device Settings)
7.3. Wählen Sie "SD Card Record Config" und wählen Sie einen gewünschten Auf-
nahmemodus.
7.4. Tippen Sie auf "OK", um die Einstellung der SD-Karten zu bestätigen.
7.5. Schauen Sie sich die Video-Dateien. (Siehe 5.2.2)
VIII. Rücksetzen
Wenn die Kamera aus irgendeinem Grund nicht mehr funktioniert, funktioniert die
Rückstellung nicht mehr.
Betrieb: Wenn die Kamera eingeschaltet ist, drücken Sie die Reset-Taste für 5
Sekunden, um alle Einstellungen auf die Werkseinstellungen zurückzusetzen. Die
Kamera startet automatisch mit den Standardeinstellungen in 5 Sekunden.
IX. Ändern Sie das Passwort der Kamera
>> Bitte bestätigen Sie, dass die Kamera im P2P (LAN) -Modus erfolgreich zum APP
hinzugefügt wurde und die P2P-Verbindung (LAN) gut funktioniert.
9.1. Starten Sie die APP "BVCAM".
9.2. Tippen Sie auf das Symbol "Live Video", wählen Sie "Advance Config" (IOS:
Device Settings und klicken Sie dann auf " Change P2P access password" (IOS:
Change password).
9.3. Geben Sie das Benutzer-Standardkennwort "8888" ein. Geben Sie ein neues
Passwort ein, bestätigen Sie es und tippen Sie auf "OK", um die Änderung zu spe-
ichern.
Prüfen Sie, ob das neue Passwort funktioniert!
1. Gehen Sie zurück zur Seite "Live Video", tippen Sie auf das Einstellungssymbol
und löschen Sie. die aktuelle Kamera
2. Folgen Sie 3.2.3, um die Kamera erneut hinzuzufügen. Vergessen Sie nicht, das
neue Passwort einzugeben, bevor Sie auf "OK" oder "√" klicken, um die Kamera
hinzuzufügen.
3. Wenn die Kamera "Online" anzeigt, bedeutet dies, dass das Passwort erfolgreich
geändert wurde. Wenn die Kamera " password mistake" anzeigt, bedeutet dies,
dass Sie ein falsches Passwort eingegeben haben.
Häufig gestellte Fragen
F: Welche Art von Speicherkarte kann ich in dieser Kamera verwenden?
A: Es wird empfohlen, eine SDHC Klasse 10 Micro SD-Karte (4GB-64GB) zu ver-
wenden. Wenn eine Speicherkarte nicht funktioniert, entfernen Sie sie und formatie-
ren Sie sie auf einem PC-Computer, bevor Sie sie in der Kamera erneut versuchen.
F: Warum kann ich das WIFI-Signal der Kamera nicht auf meinem Smartphone
oder Tablet-PC finden?
A: Laden Sie die Kamera wieder auf. Oder stellen Sie die Kamera auf die Werksein-
stellungen zurück (siehe VIII).
F: Warum kann ich keine Videodateien abspielen oder zeigt die Videodateien
beschädigt sind?
A: Vor allem, weil die Kamera unangemessen ausgeschaltet wird
F: Welche Media-Player-Software soll ich verwenden, um die Videodateien auf
meinem Computer wiederzugeben?
A: Klicken Sie auf den Link:http://www.videolan.org/vlc/index.htmlum VLC Player
herunterzuladen und zu installieren, um Videodateien auf Ihrem Computer wieder-
zugeben.
F: Wie kann ich meine Kamera zurücksetzen, so wie ich es habe?
A: Setzen Sie die Kamera auf die Werkseinstellungen zurück. (Siehe VIII)

I. Produktübersicht
1. Rote / blaue Anzeigelampe
2. Mikrofon
3. Kameraobjektiv
4. IR-LEDs
5. Kamerataste
II. Was ist in der Box
-1 × Wifi Netzwerk Besprechung Camcorder-1× Card Reader
-1 × 3m USB-Kabel
-1 × AC110-230V zu DC 5V aufladenadapter
-1 × Minidisc-
-1 × 8GB Micro SD-Karte (in den Micro SD-Kartensteckplatz bereits eingebaut)
III.Aufladen
3.1. Schließen Sie die Kamera an eine Netzsteckdose an, indem Sie den mitgelief-
erten Ladeadapter und das USB-Kabel verwenden.
3.2. Es dauert ungefähr 4 Stunden, um eine volle Gebühr zu erhalten. Die Kamera
kann 3 Stunden lang aufladen. Die Anzeige leuchtet nicht, wenn der Akku der
Kamera aufgeladen oder voll aufgeladen ist.
3.3. Wenn Sie diese Kamera 24/7 Tage arbeiten möchten, halten Sie sie an eine
Steckdose angeschlossen Steckdose.
[Hinweis]: Es ist normal, dass die Kamera während des Betriebs oder Aufladens heiß wird.
IV. Netzwerkeinrichtung
4.1. Installieren Sie die "BVCAM" APP auf Ihrem Smartphone oder
Tablet PC
4.1.1. Suchen Sie nach "BVCAM" im App Store oder Google Play und installieren
Sie es auf Ihrem Smartphone oder Tablet PC.
4.2. LAN oder P2P-Modus einstellen
4.2.1. Schalten Sie die Kamera ein, indem Sie den Netzschalter auf ON schieben.
Die blaue und rote Leuchtanzeige leuchten für 3 Sekunden und dann aus. Warten
Sie 15 Sekunden, die blaue und rote Leuchtanzeige leuchten für 3 Sekunden wieder
auf; Die rote Anzeigelampe erlischt wieder. Wartend für 8 Sekunden, bleibt die blaue
Anzeigelampe beleuchtet, während die rote blinkt, und zeigt an, dass das WIFI-Sig-
nal der Kamera bereit ist.
4.2.2. Go to the WIFI or WLAN settings on your smartphone or tablet PCand con-
nect to the camera’s WIFI signal. The camera’s WIFI network SSID starts with
“KD******” and will appear on your WIFI or WLAN settings page as below.Both red
and blue indicator lights will keep flashing, indicating the camera’s P2P connection
is done.
[Hinweis]: Wenn das WIFI-Signal der Kamera für längere Zeit nicht gefunden werden kann, drücken
Sie die Reset-Taste für 5 Sekunden, um alle Einstellungen auf die Werkseinstellungen zurückzuset-
zen. Die roten und blauen Kontrolllampen werden ausgeschaltet und die Kamera startet automatisch
in 5 Sekunden.
4.2.3. Starten Sie die "BVCAM" APP.
4.2.4. Fügen Sie der Anwendung die Kamera hinzu.
Für Android: Tippen Sie auf +> Suchen (Lan)> Tippen Sie auf das Kamerasymbol>
Tippen Sie auf OK oder√.
Für IOS: Tippen Sie auf +> Tap Add new online Kamera> Ip Search (LAN)> Tippen
Sie auf das Kamerasymbol> Tippen Sie auf OK.
4.2.5. Wenn die Kamera "Online" auf der Seite "Live Video" anzeigt, bedeutet dies,
dass die P2P (LAN) Verbindung erfolgreich ist und Sie können einen Live Video
Feed von der Kamera im P2P (LAN) Modus ansehen
[Hinweis]: Zur Erläuterung der verschiedenen Funktionen siehe folgende Tabelle:
4.3. WAN-Modus oder Fernansicht einrichten
>> Stellen Sie vor der WAN-Konfiguration sicher, dass die Kamera im P2P (LAN)
-Modus erfolgreich zu Ihrem Smartphone oder Tablet PC hinzugefügt wurde und die
P2P-Verbindung (LAN) gut funktioniert.
4.3.1. Starten Sie die "BVCAM" APP.
4.3.2. Richten Sie den WAN-Modus oder die Remote-Ansicht ein.
Schritt 1: Tippen Sie auf der Seite "Live Video" auf das Einstellungssymbol und
wählen Sie "Advance Config" (IOS: Geräteeinstellungen).
Schritt 2: Tippen Sie auf "WIFI Config" und wählen Sie ein gewünschtes WI-
FI-Netzwerk aus, um die Kamera einzuschreiben.
Schritt 3: Tippen Sie auf "OK", um die WIFI-Konfiguration zu bestätigen.
4.3.3. Die Kamera wird automatisch neu gestartet.
Überprüfen Sie, ob der WAN-Modus oder die Re-
mote-View-Einstellung funktioniert!
1. Beenden Sie die APP "BVCAM".
2. Gehen Sie zur WLAN- oder WLAN-Einstellungsseite auf Ihrem Smartphone oder
Tablet-PC und verbinden Sie sich mit einem anderen WIFI-Netzwerk, das sich von
demjenigen unterscheiden muss, zu dem die Kamera angemeldet ist, oder Sie
können Ihr Mobilfunknetz verwenden.
3. Starten Sie die "BVCAM" APP erneut. Wenn die Kamera auf der Seite "Live-Vid-
eo" auf "Online" steht, wird angezeigt, dass der WAN-Modus oder die Fernansicht
erfolgreich war. Jetzt können Sie die Live-Video von der Kamera auf Ihrem Smart-
phone oder Tablet-PC entfernt, solange Sie Zugriff auf das Internet haben.
[Hinweis]: Wenn der WAN-Modus nicht funktioniert, setzen Sie die Kamera zurück (siehe VIII) und
konfigurieren Sie sie neu.
V. Bewegungserkennung
>> Vergewissern Sie sich, dass die Kamera erfolgreich zum APP im LAN- oder
WAN-Modus hinzugefügt wurde.
>> Bitte stellen Sie sicher, dass die Micro SD-Karte (4GB-64GB) bereits formatiert
wurde und sicher in den SD-Kartensteckplatz Ihrer Kamera eingesetzt ist. Eine
SDHC Klasse 10 Micro SD-Karte wird empfohlen.
5.1. Bewegungserkennung
5.1.1. Starten Sie die "BVCAM" APP.
5.1.2. Aktivieren Sie die Bewegungserkennung.
Schritt 1: Tippen Sie auf der Seite "Live Video" auf das Einstellungssymbol und
wählen Sie "Advance Config" (IOS: Device Settings)
Schritt 2: Tippen Sie auf " Alarm Config", wählen Sie einen gewünschten Empfind-
lichkeitspegel aus.
Schritt 3: Tippen Sie auf "OK", um die Einstellung zu bestätigen.
5.1.3. Die Kamera nimmt automatisch einen Screenshot des Live-Videos auf, wenn
eine Bewegung erkannt wird. Gehen Sie zurück auf die Seite "Live-Video" und
tippen Sie auf "Alarm" am unteren Rand des Bildschirms, um die Screenshots.
5.2. Bewegungserkennung Videoaufnahme-Setup
5.2.1. Tippen Sie auf der Seite "Live Video" auf das Einstellungssymbol und wählen
Sie "Advance Config" (IOS: Device Settings).
5.2.2. Tippen Sie auf "SDCard Record Config" und wählen Sie "Record when
Alarms" (IOS: On Alarm).
5.2.3. Tippen Sie auf "OK", um die Einstellung der Motion Detection Video Record-
ing zu bestätigen.
5.2.4. Die Kamera startet automatisch, wenn eine Bewegung erkannt wird. Gehen
Sie zurück auf die Seite "Live-Video", tippen Sie auf "Record" am unteren Rand des
Bildschirms und wählen Sie dann "Remote-SD- card"(IOS: )Um die Video-Datei-
en auszuprobi
[Hinweis]: Video Auflösung: 1280×720P Videoformat: ASF
VI. Aufzeichnen von Video auf Smartphone oder Tablet PC
>> Vergewissern Sie sich vor der Aufnahme, ob die Kamera erfolgreich zum APP im
LAN- oder WAN-Modus hinzugefügt wurde.
6.1. Starten Sie die "BVCAM" APP. Tippen Sie auf das Kamerasymbol, um das
Live-Video anzuzeigen.
6.2.Tippen Sie auf die Fernaufnahmetaste um das Video zu starten oder zu
beenden. Die Videodateien werden in Ihrem Smartphone- oder Tab-
let-PC-Flash-Speicher gespeichert, wenn Sie ein Android-Gerät verwenden. Allerd-
ings können die Videodateien nur im APP "BVCAM" gefunden werden, wenn Sie ein
IOS-Gerät sind.
6.3. Gehen Sie zurück auf die Seite "Live-Video", tippen Sie auf "Record" am un-
teren Rand des Bildschirms und wählen Sie dann "Local"(IOS: ) um die Vid-
eo-Dateien auszuprobieren.
[Hinweis]: Video Auflösung: 1280×720P Videoformat: ASF
VII. Videoaufnahme zur lokalen Mikro-Sd-Karte
>> Vergewissern Sie sich, dass die Kamera erfolgreich zum APP im LAN- oder
WAN-Modus hinzugefügt wurde.
>> Vergewissern Sie sich, dass die Micro SD-Karte (4GB-64GB) bereits formatiert
wurde und sicher in den SD-Kartensteckplatz Ihrer Kamera eingesetzt ist. Eine
SDHC Klasse 10 Micro SD-Karte wird empfohlen.
7.1. Starten Sie die "BVCAM" APP.
7.2. Tippen Sie auf der Seite "Live Video" auf das Einstellungssymbol und wählen
Sie "Advance Config" (IOS: Device Settings)
7.3. Wählen Sie "SD Card Record Config" und wählen Sie einen gewünschten Auf-
nahmemodus.
7.4. Tippen Sie auf "OK", um die Einstellung der SD-Karten zu bestätigen.
7.5. Schauen Sie sich die Video-Dateien. (Siehe 5.2.2)
VIII. Rücksetzen
Wenn die Kamera aus irgendeinem Grund nicht mehr funktioniert, funktioniert die
Rückstellung nicht mehr.
Betrieb: Wenn die Kamera eingeschaltet ist, drücken Sie die Reset-Taste für 5
Sekunden, um alle Einstellungen auf die Werkseinstellungen zurückzusetzen. Die
Kamera startet automatisch mit den Standardeinstellungen in 5 Sekunden.
IX. Ändern Sie das Passwort der Kamera
>> Bitte bestätigen Sie, dass die Kamera im P2P (LAN) -Modus erfolgreich zum APP
hinzugefügt wurde und die P2P-Verbindung (LAN) gut funktioniert.
9.1. Starten Sie die APP "BVCAM".
9.2. Tippen Sie auf das Symbol "Live Video", wählen Sie "Advance Config" (IOS:
Device Settings und klicken Sie dann auf " Change P2P access password" (IOS:
Change password).
9.3. Geben Sie das Benutzer-Standardkennwort "8888" ein. Geben Sie ein neues
Passwort ein, bestätigen Sie es und tippen Sie auf "OK", um die Änderung zu spe-
ichern.
Prüfen Sie, ob das neue Passwort funktioniert!
1. Gehen Sie zurück zur Seite "Live Video", tippen Sie auf das Einstellungssymbol
und löschen Sie. die aktuelle Kamera
2. Folgen Sie 3.2.3, um die Kamera erneut hinzuzufügen. Vergessen Sie nicht, das
neue Passwort einzugeben, bevor Sie auf "OK" oder "√" klicken, um die Kamera
hinzuzufügen.
3. Wenn die Kamera "Online" anzeigt, bedeutet dies, dass das Passwort erfolgreich
geändert wurde. Wenn die Kamera " password mistake" anzeigt, bedeutet dies,
dass Sie ein falsches Passwort eingegeben haben.
Häufig gestellte Fragen
F: Welche Art von Speicherkarte kann ich in dieser Kamera verwenden?
A: Es wird empfohlen, eine SDHC Klasse 10 Micro SD-Karte (4GB-64GB) zu ver-
wenden. Wenn eine Speicherkarte nicht funktioniert, entfernen Sie sie und formatie-
ren Sie sie auf einem PC-Computer, bevor Sie sie in der Kamera erneut versuchen.
F: Warum kann ich das WIFI-Signal der Kamera nicht auf meinem Smartphone
oder Tablet-PC finden?
A: Laden Sie die Kamera wieder auf. Oder stellen Sie die Kamera auf die Werksein-
stellungen zurück (siehe VIII).
F: Warum kann ich keine Videodateien abspielen oder zeigt die Videodateien
beschädigt sind?
A: Vor allem, weil die Kamera unangemessen ausgeschaltet wird
F: Welche Media-Player-Software soll ich verwenden, um die Videodateien auf
meinem Computer wiederzugeben?
A: Klicken Sie auf den Link:http://www.videolan.org/vlc/index.htmlum VLC Player
herunterzuladen und zu installieren, um Videodateien auf Ihrem Computer wieder-
zugeben.
F: Wie kann ich meine Kamera zurücksetzen, so wie ich es habe?
A: Setzen Sie die Kamera auf die Werkseinstellungen zurück. (Siehe VIII)
Table of contents
Languages:
Other Wiseup Security Camera manuals

Wiseup
Wiseup WIFI34 User manual

Wiseup
Wiseup CUP200 User manual

Wiseup
Wiseup WIFI33 User manual

Wiseup
Wiseup WIFI38 User manual

Wiseup
Wiseup T183 User manual

Wiseup
Wiseup CK6000 User manual

Wiseup
Wiseup MT-V8 User manual

Wiseup
Wiseup WIFI08 User manual

Wiseup
Wiseup U11 User manual

Wiseup
Wiseup P3021 User manual

Wiseup
Wiseup BC303 User manual

Wiseup
Wiseup WIFI37 User manual

Wiseup
Wiseup WIFI40 User manual

Wiseup
Wiseup DVR-0031-4 User manual

Wiseup
Wiseup WI-FI 21 User manual

Wiseup
Wiseup WIFI04S User manual

Wiseup
Wiseup T186 User manual

Wiseup
Wiseup WIFI28 User manual

Wiseup
Wiseup P9000 User manual

Wiseup
Wiseup H200 User manual