Wiseup P9000 User manual

1/ 36
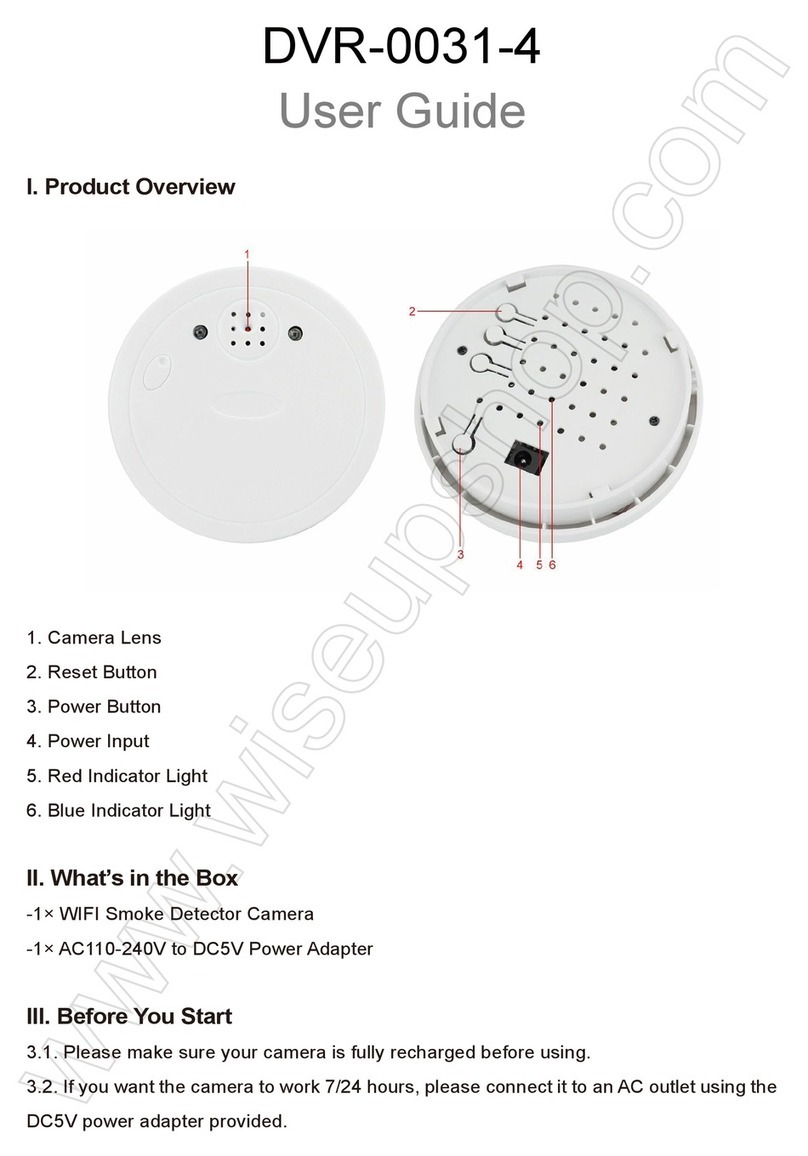
User Guide
Model Number: P9000
I. Product Overview
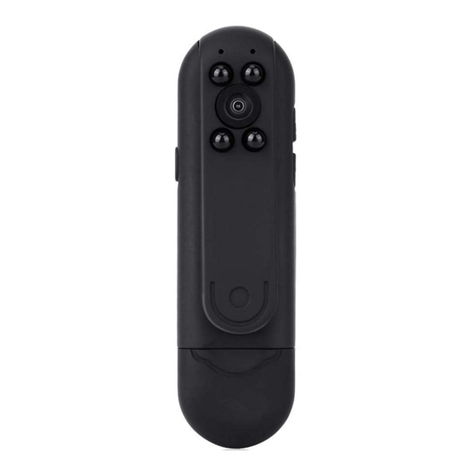
1. Microphone
2. Power Button
3. Camera Lens
4. Camera Button
5. Reset Button
6.Yellow Indicator Light
7. Blue Indicator Light
8. Micro SD Card Slot
9. Mini USB Port
II. What’s In the Box?

2/ 36
-1× Meeting Recorder Camera
-1× USB/AV Cable
III. Operation
>> Before using, make sure that the camera is fully recharged.
>> Please make sure the Micro SD card (4GB-32GB, format it for the first usage) is
securely fitted into the camera’s SD card slot, or the camera will not work. A SDHC Class 10 Micro SD
card is recommended.
[Note]: If no Micro SD card is fitted into the camera or the SD card cannot be read, the blue and yellow indicator
lights will flash four times and then turn off. The camera will shut downautomatically.
3.1 POWER ON/OFF
3.1.1 Power on the camera by pressing Power Button for two seconds. The blue and yellow indicator
lights will be illuminated for five seconds. Then the yellow onewill turn off, while the blue one will
stay illuminated, indicating the camera has entered into standby mode automatically.
3.1.2 Power off the camera by pressing Power Button for seven seconds when the camera is recording
or is in standby mode.
[Note]: The camera will shut down automatically if it is in standby mode without any operation more than one minute.
3.2 720P VIDEO RECORDING
3.2.1 Power on the camera by pressing Power Button for two seconds. The blue and yellow indicator
lights will be illuminated for five seconds. Then the yellow one will turn off, while the blue one will stay
illuminated, indicating the camera has entered into standby mode automatically.
3.2.2 Press Power Button once to record video with 1280×720P video resolution. The blue indicator light
will flash three times and then turn off.
3.2.3 Press Power Button once again to stop recording video. The blue indicator light will stay illuminated,
indicating the camera is back to standby mode.
[Notes]:
1). A video file will be generated and saved every 5 minutes automatically. 2). The camera can record video
continuously for 5.5 hours on a full charge.

3/ 36
3). Video Resolution: 1920×1080P Video Format: AVI
3.3 1080P VIDEO RECORDING
3.3.1 Power on the camera by pressing Power Button for two seconds. The blue and yellow indicator
lights will be illuminated for five seconds. Then the yellow one will turn off, while the blue one will stay
illuminated, indicating the camera has entered into standby mode automatically.
3.3.2 Hold down Power Button for three seconds to record video with 1920×1080P video resolution. The
yellow indicator light will flash three times and turn off.
3.3.3 Press Power Button once to stop recording video. The blue indicator light will stay illuminated,
indicating the camera is back to standby mode.
3.4 CAMERA/STILL PHOTOGRAPHY
3.4.1 Power on the camera by pressing Power Button for two seconds. The blue and yellow indicator
lights will be illuminated for five seconds. Then the yellow one will turn off, while the blue one will stay
illuminated, indicating the camera has entered into standby mode automatically.
3.4.2 Press Camera Button once to take a photo. The yellow indicator light will flash once and then turn
off. The blue indicator light will stay illuminated, indicating the camera is back to standby mode.
3.5 MICRO SD CARD FORMATTING
3.5.1 Power on the camera by pressing Power Button for two seconds. The blue and yellow indicator
lights will be illuminated for five seconds. Then the yellow onewill turn off, while the blue one will
stay illuminated, indicating the camera has entered into standby mode automatically.
3.5.2 Hold down Camera Button for three seconds. The blue and yellow indicator lights will flash four
times first, then they will be illuminated for five seconds and theyellow indicator light will turn off,
indicating the SD card formatting has been completed.
3.5.3 The blue indicator light will stay illuminated, indicating the camera is back to standby mode.

4/ 36
IV. Video/Image File Uploads
4.1 When the camera is powered off, remove the Micro SD card and insert it into a card reader.
4.2 Insert the card reader into a PC computer.
4.3 The Micro SD card will be recognized as a removable disk drive.
4.4 All the files can be accessed in the “DCIM” folder.
V. Setting Time/Date Stamp
5.1. Create a txt file named "TIMERSET" on your computer.
5.2. Input the current date and time in the “TIMERSET” file with the correct format:
YearMonthDateHourMinuteSecond Y. (For example: 20160412142432 Y), then save this file. If you don’t
need the stamp on the video files, please change “Y” into “N” .
5.3. Turn off the camera, then connect it to a proper computer with the USB cable attached.
5.4. Connect the camera to a PC computer when it is powered off.
5.5. When the removable disk drive folder appears, copy the txt file "TIMERSET" to the disk drive.
5.6. Disconnect the camera with the computer, and then turn on the camera. The system will upgrade
the program automatically.
5.7. Turn off the camera, then connect the camera to the computer again with the USB cable attached, the
txt file "TIMERSET" will disappear and the time stamp setting will be updated.
VI. Charging Only
6.1 Remove the Micro SD card from the camera.
6.2 Connect the camera to a PC computer by using the USB cable provided.

5/ 36
6.3 It will take 3 hours to obtain a full charge.
6.4 The blue indicator light will stay illuminated during the charging process.
6.5 When the camera is fully charged, the blue and yellow indicator lights will stay illuminated.
VII. Charging and Recording Simultaneously
7.1 Insert a Micro SD card into the camera.
7.2 Connect the camera to a PC computer by using the USB cable provided.
7.3 The blue indicator light will flash three times and then turn off, indicating the camera is recording
video with 1280x720P video resolution.
7.4 Press Power Button once to stop recording video. The blue indicator light will stay illuminated, 7.5
indicating the camera is back to standby mode.
[Note]: You could experience other functions of the camera in the charging process.
VIII. Resetting
If for any reason the camera stops responding or isn’t working properly, a quick resetwill restore it back to
normal operation.
Operation: Press the Reset Button once to reset the camera. The blue and yellowindicator lights will
turn off and the camera will shut down automatically.
IX. Live Video Output
9.1 Connect the camera to a TV or monitor by using the AV cable provided as below:

6/ 36
9.2 Select the camera video signal source on the TV or monitor.
9.3 Power on the camera and start recording video (See 3.2 or 3.3), then you can watch the camera’s
live video on the TV or monitor during the video recording process.
9.4 You could experience other functions of this camera in the live view mode.

7/ 36
Benutzerhandbuch
Modellnummer: P9000
I. Produktübersicht
1. Mikrofon
2. Einschaltknopf
3. Kameraobjektiv
4. Kamerataste
5. Reset-Taste
6. Gelbe Kontrollleuchte
7. Blaue Anzeigelampe
8. Micro SD-Kartensteckplatz
9. Mini-USB-Anschluss

8/ 36
II. Was ist in der Box?
-1 × Meeting Recorder Kamera
-1 × USB / AV-Kabel
III. Betrieb
>> Vergewissern Sie sich vor dem Gebrauch, dass die Kamera vollständig aufgeladen ist.
>> Bitte stellen Sie sicher, dass die Micro-SD-Karte (4 GB-32 GB, formatieren Sie sie für die erste
Verwendung) ist fest in den SD-Kartensteckplatz der Kamera eingesetzt, oder die Kamera funktioniert
nicht. Eine SDHC Class 10 Micro SD-Karte wird empfohlen.
[Hinweis]: Wenn keine Micro-SD-Karte in die Kamera eingesetzt ist oder die SD-Karte nicht gelesen werden kann,
blinken die blauen und gelben Anzeigelampen viermal und erlöschen dann. Die Kamera schaltet sich automatisch aus.
3.1 EIN / AUS
3.1.1 Schalten Sie die Kamera ein, indem Sie die Netztaste zwei Sekunden lang gedrückt halten. Die
blauen und gelben Anzeigelampen leuchten fünf Sekunden lang. Dann schaltet sich die gelbe aus,
während die blaue weiterhin leuchtet, was darauf hinweist, dass die Kamera automatisch in den
Standby-Modus geschaltet wurde.
3.1.2 Schalten Sie die Kamera aus, indem Sie die Netztaste sieben Sekunden lang drücken, während
die Kamera aufzeichnet oder sich im Standby-Modus befindet.
[Hinweis]: Die Kamera schaltet sich automatisch aus, wenn sie sich länger als eine Minute ohne Bedienung im
Standby-Modus befindet.
3.2 720P VIDEOAUFNAHME
3.2.1 Schalten Sie die Kamera ein, indem Sie die Netztaste zwei Sekunden lang gedrückt halten. Die
blauen und gelben Anzeigelampen leuchten fünf Sekunden lang. Dann schaltet sich die gelbe aus,
während die blaue weiterhin leuchtet, was darauf hinweist, dass die Kamera automatisch in den
Standby-Modus geschaltet wurde.
3.2.2 Drücken Sie die Netztaste einmal, um ein Video mit einer Videoauflösung von 1280 × 720 P
aufzunehmen. Die blaue Kontrollleuchte blinkt dreimal und erlischt dann.

9/ 36
3.2.3 Drücken Sie die Netztaste erneut, um die Videoaufnahme zu beenden. Die blaue Anzeigelampe
leuchtet weiter und zeigt damit an, dass die Kamera wieder im Standby-Modus ist.
[Anmerkungen]:
1). Eine Videodatei wird automatisch alle 5 Minuten generiert und gespeichert. 2). Die Kamera kann bei voller
Aufladung 5,5 Stunden lang ununterbrochen Videos aufzeichnen.
3). Videoauflösung: 1920 × 1080P Videoformat: AVI
3.3 1080P VIDEOAUFNAHME
3.3.1 Schalten Sie die Kamera ein, indem Sie die Netztaste zwei Sekunden lang gedrückt halten. Die
blauen und gelben Anzeigelampen leuchten fünf Sekunden lang. Dann schaltet sich die gelbe aus,
während die blaue weiterhin leuchtet, was darauf hinweist, dass die Kamera automatisch in den
Standby-Modus geschaltet wurde.
3.3.2 Halten Sie die Ein / Aus-Taste drei Sekunden lang gedrückt, um ein Video mit einer
Videoauflösung von 1920 × 1080 P aufzunehmen. Die gelbe Kontrollleuchte blinkt dreimal und erlischt.
3.3.3 Drücken Sie die Netztaste einmal, um die Videoaufnahme zu beenden. Die blaue Anzeigelampe
leuchtet weiter und zeigt damit an, dass die Kamera wieder im Standby-Modus ist.
3.4 KAMERA / NOCH FOTOGRAFIE
3.4.1 Schalten Sie die Kamera ein, indem Sie die Netztaste zwei Sekunden lang gedrückt halten. Die
blauen und gelben Anzeigelampen leuchten fünf Sekunden lang. Dann schaltet sich die gelbe aus,
während die blaue weiterhin leuchtet, was darauf hinweist, dass die Kamera automatisch in den
Standby-Modus geschaltet wurde.
3.4.2 Drücken Sie die Kamerataste einmal, um ein Foto aufzunehmen. Die gelbe Kontrollleuchte blinkt
einmal und erlischt dann. Die blaue Anzeigelampe leuchtet weiter und zeigt damit an, dass die Kamera
wieder im Standby-Modus ist.
3.5 MICRO SD-KARTENFORMATIERUNG
3.5.1 Schalten Sie die Kamera ein, indem Sie die Netztaste zwei Sekunden lang gedrückt halten. Die
blauen und gelben Anzeigelampen leuchten fünf Sekunden lang. Dann schaltet sich die gelbe aus,

10 / 36
während die blaue weiterhin leuchtet, was darauf hinweist, dass die Kamera automatisch in den
Standby-Modus geschaltet wurde.
3.5.2 Halten Sie die Kamerataste drei Sekunden lang gedrückt. Die blauen und gelben Anzeigelampen
blinken zuerst viermal, dann leuchten sie fünf Sekunden lang und die gelbe Anzeigelampe erlischt und
zeigt an, dass die SD-Kartenformatierung abgeschlossen ist.
3.5.3 Die blaue Anzeigelampe leuchtet weiter und zeigt an, dass die Kamera wieder in den Standby-
Modus geschaltet ist.
IV. Hochladen von Video- / Bilddateien
4.1 Entfernen Sie bei ausgeschalteter Kamera die Micro-SD-Karte und legen Sie sie in einen Kartenleser
ein.
4.2 Stecken Sie den Kartenleser in einen PC.
4.3 Die Micro SD-Karte wird als Wechseldatenträger erkannt.
4.4 Auf alle Dateien kann im Ordner "DCIM" zugegriffen werden.
V. Einstellen des Zeit- / Datumsstempels
5.1. Erstellen Sie eine TXT-Datei mit dem Namen "TIMERSET" auf Ihrem Computer.
5.2. Geben Sie das aktuelle Datum und die Uhrzeit im richtigen Format in die Datei "TIMERSET" ein:
Jahr Monat Datum Stunde Minute Sekunde Y. (Beispiel: 20160412142432 Y) und speichern Sie diese
Datei. Wenn Sie den Stempel für die Videodateien nicht benötigen, ändern Sie "Y" in "N".
5.3. Schalten Sie die Kamera aus und schließen Sie sie mit dem angeschlossenen USB-Kabel an einen
geeigneten Computer an.
5.4. Schließen Sie die Kamera im ausgeschalteten Zustand an einen PC an.
5.5. Wenn der Ordner des Wechseldatenträgers angezeigt wird, kopieren Sie die TXT-Datei
"TIMERSET" auf das Laufwerk.

11 / 36
5.6. Trennen Sie die Kamera vom Computer und schalten Sie die Kamera ein. Das System aktualisiert
das Programm automatisch.
5.7. Schalten Sie die Kamera aus und schließen Sie sie mit dem angeschlossenen USB-Kabel wieder an
den Computer an. Die txt-Datei "TIMERSET" verschwindet und die Zeitstempeleinstellung wird
aktualisiert.
VI. Nur aufladen
6.1 Entfernen Sie die Micro SD-Karte aus der Kamera.
6.2 Schließen Sie die Kamera mit dem mitgelieferten USB-Kabel an einen PC an.
6.3 Die vollständige Aufladung dauert 3 Stunden.
6.4 Die blaue Anzeigelampe leuchtet während des Ladevorgangs.
6.5 Wenn die Kamera vollständig aufgeladen ist, leuchten die blauen und gelben Anzeigelampen weiter.
VII. Gleichzeitiges Laden und Aufnehmen
7.1 Legen Sie eine Micro SD-Karte in die Kamera ein.
7.2 Schließen Sie die Kamera mit dem mitgelieferten USB-Kabel an einen PC an.
7.3 Die blaue Anzeigelampe blinkt dreimal und erlischt dann, um anzuzeigen, dass die Kamera ein
Video mit einer Videoauflösung von 1280 x 720 P aufzeichnet.
7.4 Drücken Sie die Netztaste einmal, um die Videoaufnahme zu beenden. Die blaue Anzeigelampe
leuchtet weiter und zeigt an, dass die Kamera wieder im Standby-Modus ist.
[Hinweis]: Während des Ladevorgangs können andere Funktionen der Kamera auftreten.
VIII. Zurücksetzen
Wenn die Kamera aus irgendeinem Grund nicht mehr reagiert oder nicht richtig funktioniert, wird sie
durch ein schnelles Zurücksetzen wieder in den Normalbetrieb versetzt.

12 / 36
Bedienung: Drücken Sie die Reset-Taste einmal, um die Kamera zurückzusetzen. Die blaue und gelbe
Kontrollleuchte erlischt und die Kamera schaltet sich automatisch aus.
IX. Live-Videoausgabe
9.1 Schließen Sie die Kamera mit dem folgenden AV-Kabel an ein Fernsehgerät oder einen Monitor an:
9.2 Wählen Sie die Kamera-Videosignalquelle am Fernsehgerät oder Monitor aus.
9.3 Schalten Sie die Kamera ein und starten Sie die Videoaufnahme (siehe 3.2 oder 3.3). Anschließend
können Sie das Live-Video der Kamera während der Videoaufnahme auf dem Fernseher oder Monitor
ansehen.
9.4 Sie können andere Funktionen dieser Kamera in der Liveansicht erleben.

13 / 36
Mode d'emploi
Numéro du modèle: P9000
I. Présentation du produit
1. Microphone
2. Bouton d'alimentation
3. Objectif de la caméra
4. Bouton de l'appareil photo
5. Bouton de réinitialisation
6. Voyant lumineux jaune
7. Voyant lumineux bleu
8. Emplacement pour carte Micro SD
9. Mini port USB

14 / 36
II. Qu'y a-t-il dans la boite?
-1 × Caméra enregistreur de réunion
-1 × câble USB / AV
III. Opération
>> Avant utilisation, assurez-vous que l'appareil photo est complètement rechargé.
>> Veuillez vous assurer que la carte Micro SD (4 Go-32 Go, formatez-la pour la première utilisation) est
correctement inséré dans la fente pour carte SD de la caméra, sinon la caméra ne fonctionnera pas.
Une carte Micro SD SDHC Classe 10 est recommandée.
[Remarque]: Si aucune carte Micro SD n'est insérée dans l'appareil photo ou si la carte SD ne peut pas être lue, les
voyants lumineux bleu et jaune clignotent quatre fois puis s'éteignent. La caméra s'éteindra automatiquement.
3.1 MARCHE / ARRÊT
3.1.1 Allumez la caméra en appuyant sur le bouton d'alimentation pendant deux secondes. Les voyants
lumineux bleu et jaune seront allumés pendant cinq secondes. Ensuite, le jaune s'éteindra, tandis que le
bleu restera allumé, indiquant que l'appareil photo est entré automatiquement en mode veille.
3.1.2 Éteignez l'appareil photo en appuyant sur le bouton d'alimentation pendant sept secondes lorsque
l'appareil photo enregistre ou est en mode veille.
[Remarque]: l'appareil photo s'éteint automatiquement s'il est en mode veille sans aucune opération de plus d'une
minute.
3.2 ENREGISTREMENT VIDÉO 720P
3.2.1 Allumez la caméra en appuyant sur le bouton d'alimentation pendant deux secondes. Les voyants
lumineux bleu et jaune seront allumés pendant cinq secondes. Ensuite, le jaune s'éteindra, tandis que le
bleu restera allumé, indiquant que l'appareil photo est entré automatiquement en mode veille.
3.2.2 Appuyez une fois sur le bouton d'alimentation pour enregistrer une vidéo avec une résolution vidéo
de 1280 × 720P. Le voyant bleu clignote trois fois, puis s'éteint.
3.2.3 Appuyez à nouveau sur le bouton d'alimentation pour arrêter l'enregistrement vidéo. Le voyant
bleu restera allumé, indiquant que l'appareil photo est de retour en mode veille.

15 / 36
[Remarques]:
1). Un fichier vidéo sera généré et enregistré automatiquement toutes les 5 minutes. 2). La caméra peut enregistrer de
la vidéo en continu pendant 5,5 heures sur une charge complète.
3). Résolution vidéo: 1920 × 1080P Format vidéo: AVI
3.3 ENREGISTREMENT VIDÉO 1080P
3.3.1 Allumez la caméra en appuyant sur le bouton d'alimentation pendant deux secondes. Les voyants
lumineux bleu et jaune seront allumés pendant cinq secondes. Ensuite, le jaune s'éteindra, tandis que le
bleu restera allumé, indiquant que l'appareil photo est entré automatiquement en mode veille.
3.3.2 Maintenez le bouton d'alimentation enfoncé pendant trois secondes pour enregistrer une vidéo
avec une résolution vidéo de 1920 × 1080P. Le voyant jaune clignote trois fois et s'éteint.
3.3.3 Appuyez une fois sur le bouton d'alimentation pour arrêter l'enregistrement vidéo. Le voyant bleu
restera allumé, indiquant que l'appareil photo est de retour en mode veille.
3.4 CAMÉRA / PHOTOGRAPHIE TOUJOURS
3.4.1 Allumez la caméra en appuyant sur le bouton d'alimentation pendant deux secondes. Les voyants
lumineux bleu et jaune seront allumés pendant cinq secondes. Ensuite, le jaune s'éteindra, tandis que le
bleu restera allumé, indiquant que l'appareil photo est entré automatiquement en mode veille.
3.4.2 Appuyez une fois sur le bouton de l'appareil photo pour prendre une photo. Le voyant jaune
clignote une fois puis s'éteint. Le voyant bleu restera allumé, indiquant que l'appareil photo est de retour
en mode veille.
3.5 FORMATAGE DE LA CARTE MICRO SD
3.5.1 Allumez la caméra en appuyant sur le bouton d'alimentation pendant deux secondes. Les voyants
lumineux bleu et jaune seront allumés pendant cinq secondes. Ensuite, le jaune s'éteindra, tandis que le
bleu restera allumé, indiquant que l'appareil photo est entré automatiquement en mode veille.
3.5.2 Maintenez le bouton de la caméra enfoncé pendant trois secondes. Les voyants lumineux bleu et
jaune clignotent d'abord quatre fois, puis ils s'allument pendant cinq secondes et le voyant jaune s'éteint,
indiquant que le formatage de la carte SD est terminé.
3.5.3 Le voyant bleu restera allumé, indiquant que l'appareil photo est de retour en mode veille.

16 / 36
IV. Téléchargement de fichiers vidéo / image
4.1 Lorsque l'appareil photo est hors tension, retirez la carte Micro SD et insérez-la dans un lecteur de
carte.
4.2 Insérez le lecteur de carte dans un ordinateur PC.
4.3 La carte Micro SD sera reconnue comme un lecteur de disque amovible.
4.4 Tous les fichiers sont accessibles dans le dossier "DCIM".
V. Réglage de l'heure et de la date
5.1. Créez un fichier txt nommé "TIMERSET" sur votre ordinateur.
5.2. Saisissez la date et l'heure actuelles dans le fichier "TIMERSE" au format correct:
Année Mois Date Heure Minute Seconde Y. (Par exemple: 20160412142432 Y), puis enregistrez ce
fichier. Si vous n'avez pas besoin du tampon sur les fichiers vidéo, veuillez changer "Y" en "N".
5.3. Éteignez l'appareil photo, puis connectez-le à un ordinateur approprié avec le câble USB connecté.
5.4. Connectez l'appareil photo à un ordinateur PC lorsqu'il est hors tension.
5.5. Lorsque le dossier du lecteur de disque amovible apparaît, copiez le fichier txt "TIMERSET" sur le
lecteur de disque.
5.6. Déconnectez l'appareil photo de l'ordinateur, puis allumez l'appareil photo. Le système mettra à jour
le programme automatiquement.
5.7. Éteignez l'appareil photo, puis reconnectez l'appareil photo à l'ordinateur avec le câble USB
connecté, le fichier txt "TIMERSET" disparaîtra et le réglage de l'horodatage sera mis à jour.
VI. Chargement uniquement
6.1 Retirez la carte Micro SD de la caméra.
6.2 Connectez l'appareil photo à un ordinateur PC à l'aide du câble USB fourni.

17 / 36
6.3 Il faudra 3 heures pour obtenir une charge complète.
6.4 Le voyant bleu restera allumé pendant le processus de charge.
6.5 Lorsque l'appareil photo est complètement chargé, les voyants lumineux bleu et jaune restent
allumés.
VII. Chargement et enregistrement simultanés
7.1 Insérez une carte Micro SD dans la caméra.
7.2 Connectez l'appareil photo à un ordinateur PC à l'aide du câble USB fourni.
7.3 Le voyant bleu clignote trois fois puis s'éteint, indiquant que la caméra enregistre une vidéo avec une
résolution vidéo de 1280x720P.
7.4 Appuyez une fois sur le bouton d'alimentation pour arrêter l'enregistrement vidéo. Le voyant bleu
restera allumé, 7,5 indiquant que l'appareil photo est de retour en mode veille.
[Remarque]: Vous pouvez découvrir d'autres fonctions de l'appareil photo pendant le processus de charge.
VIII. Réinitialisation
Si, pour une raison quelconque, l’appareil photo ne répond plus ou ne fonctionne pas correctement, une
réinitialisation rapide rétablira son fonctionnement normal.
Opération: Appuyez une fois sur le bouton de réinitialisation pour réinitialiser la caméra. Les voyants
lumineux bleu et jaune s'éteignent et l'appareil photo s'éteint automatiquement.
IX. Sortie vidéo en direct
9.1 Connectez l'appareil photo à un téléviseur ou à un moniteur à l'aide du câble AV fourni comme ci-
dessous:

18 / 36
9.2 Sélectionnez la source du signal vidéo de la caméra sur le téléviseur ou le moniteur.
9.3 Allumez la caméra et commencez à enregistrer la vidéo (voir 3.2 ou 3.3), puis vous pouvez regarder
la vidéo en direct de la caméra sur le téléviseur ou le moniteur pendant le processus d'enregistrement
vidéo.
9.4 Vous pouvez découvrir d'autres fonctions de cet appareil photo en mode d'affichage en direct.

19 / 36
Guida Utente
Numero del Modello: P9000
I. Panoramica del prodotto
1. Microfono
2. Pulsante di accensione
3. Obiettivo della fotocamera
4. Pulsante fotocamera
5. Pulsante di ripristino
6. Indicatore luminoso giallo
7. Indicatore luminoso blu
8. Slot per scheda Micro SD
9. Porta mini USB

20 / 36
II. Cosa c'è nella scatola?
-1 × Videoregistratore per riunioni
-1 × Cavo USB / AV
III. Operazione
>> Prima dell'uso, assicurarsi che la fotocamera sia completamente ricaricata.
>> Assicurati che la scheda Micro SD (4 GB-32 GB, formattala per il primo utilizzo) sia
inserito saldamente nello slot per scheda SD della fotocamera, altrimenti la fotocamera non funzionerà.
Si consiglia una scheda Micro SD SDHC classe 10.
[Nota]: se nella fotocamera non è installata alcuna scheda Micro SD o non è possibile leggere la scheda SD, le spie blu
e gialla lampeggeranno quattro volte, quindi si spegneranno. La fotocamera si spegne automaticamente.
3.1 ACCENSIONE / SPEGNIMENTO
3.1.1 Accendere la fotocamera premendo il pulsante di accensione per due secondi. Le spie blu e gialla
si accenderanno per cinque secondi. Quindi quello giallo si spegnerà, mentre quello blu rimarrà
illuminato, indicando che la fotocamera è entrata automaticamente in modalità standby.
3.1.2 Spegnere la fotocamera premendo il pulsante di accensione per sette secondi quando la
fotocamera sta registrando o è in modalità standby.
[Nota]: la fotocamera si spegne automaticamente se è in modalità standby senza alcuna operazione per più di un
minuto.
3.2 REGISTRAZIONE VIDEO 720P
3.2.1 Accendere la fotocamera premendo il pulsante di accensione per due secondi. Le spie blu e gialla
si accenderanno per cinque secondi. Quindi quello giallo si spegnerà, mentre quello blu rimarrà
illuminato, indicando che la fotocamera è entrata automaticamente in modalità standby.
3.2.2 Premere il pulsante di accensione una volta per registrare video con risoluzione video 1280 × 720P.
La spia blu lampeggerà tre volte e poi si spegnerà.
3.2.3 Premere nuovamente il pulsante di accensione per interrompere la registrazione del video. La spia
blu rimarrà accesa, indicando che la fotocamera è tornata in modalità standby.
Table of contents
Languages:
Other Wiseup Security Camera manuals

Wiseup
Wiseup WIFI04S User manual

Wiseup
Wiseup T186 User manual

Wiseup
Wiseup CUP200 User manual

Wiseup
Wiseup WIFI28 User manual

Wiseup
Wiseup WIFI40 User manual

Wiseup
Wiseup U11 User manual

Wiseup
Wiseup WIFI37 User manual

Wiseup
Wiseup CK6000 User manual

Wiseup
Wiseup H200 User manual

Wiseup
Wiseup WIFI33 User manual

Wiseup
Wiseup WIFI38 User manual

Wiseup
Wiseup BC303 User manual

Wiseup
Wiseup DV-07-WIFI User manual

Wiseup
Wiseup WI-FI 21 User manual

Wiseup
Wiseup W8200 User manual

Wiseup
Wiseup T183 User manual

Wiseup
Wiseup P3021 User manual

Wiseup
Wiseup WIFI39 User manual

Wiseup
Wiseup MT-V8 User manual

Wiseup
Wiseup WIFI34 User manual