Wiseup MT-V8 User manual

MT-V8
User Guide
1
. Overview
1
) USB Port
2
) Micro SD Card Slot
3
) Power On/Off Switch
4
) Snooze Button
5
) Camera Lens
6
) Camera On/Off Button on the remote control
7
) Motion Detection Button
8
) Photo Button
9
) Video Record Button
1
0) Audio Record Button
2
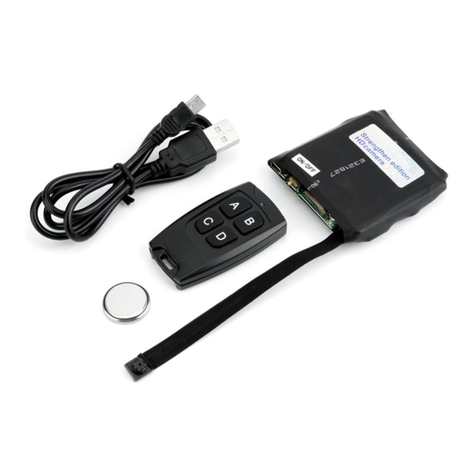
. Product Accessories
1
) USB Cable
2
) Power Charger Adaptor
3
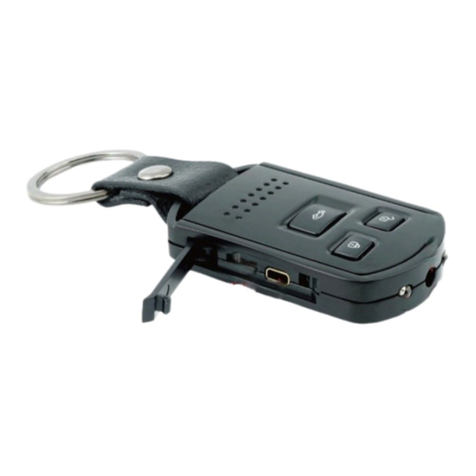
) Remote Controller

3
. Operation
>
> Please make sure your camera is fully charged before using.
>
> Please make sure the Micro SD card is securely fitted into the SD card slo
t
o
n your camera. Camera will not work without a Micro SD card. SDHC 4 micr
o
S
D card is recommended.
>
> Please make sure you have pointed the remote controller to the camer
a
e
very time you press the buttons.
>
> Please make sure you have removed the insulating film from the camer
a
a
nd the remote controller.
1
) CAMERA ON/OFF
>
> Please make sure the Power On/Off Switch on the camera has bee
n
m
oved to the “on” position.
(
1) Press the Camera On/Off Button on the remote control once, the camera
w
ill be turned on and enter into standby mode automatically. The blue light
i
ndicator will be solid on.
(
2) Turn off the camera by pressing the Camera On/Off Button on the remote
c
ontrol for 3 seconds. The camera will be turned off. The blue light indicator
w
ill turn off.
(
3) The camera will shut down automatically if the camera is in standby mode
w
ithout any operation in 3 minutes.
2
) VIDEO RECORDING
>
> Please make sure the Power On/Off Switch on the camera has bee
n
moved to the “on” position.

(
1) Turn on the camera by pressing the Camera On/Off Button on the remote
c
ontrol once and the camera will enter into standby mode automatically.
(
2) Press Video Record Button once, the camera will start video recording. Th
e
b
lue indicator light will blink 3 times then turn off.
(
3) To stop video recording, press the Video Record Button once again and th
e
c
amera will enter into standby mode. The indicator light will be solid blue.
(
4) Press the Video Record Button once to resume video recording.
A
ttention:
The camera will save video files automatically every 20 minutes.
When the Micro SD card is full, the first video file will be covered by the new file
a
utomatically.
Video format: avi
Video resolution: 1280x 960
3
) CAMERA/STILL PHOTOGRAPHY
>
> Please make sure the Power On/Off Switch on the camera has bee
n
m
oved to the “on” position.
(
1) Turn on the camera by pressing the Camera On/ Off Button on the remote
c
ontrol once.
(
2) Press the Photo Button once to take a photo. The blue light indicator will
b
link every time you take a photo.
4
) AUDIO RECORDING
>
> Please make sure the Power On/Off Switch on the camera has bee
n
m
oved to the “on” position.
(
1) Turn on the camera by pressing the Camera On/Off Button on the remote
c
ontrol once.
(
2) Press the Audio Record Button once to record audio. The blue light will
b
link once and then turn off indicating the camera is recording audio only.
(
3) To stop audio recording, press the Audio Record Button again. The
i
ndicator light will be solid blue.
5
) MOTION DETECTION RECORDING
>
> Please make sure the Power On/Off Switch on the camera has bee
n
m
oved to the “on” position.
(
1) Turn on the camera by pressing the Camera On/ Off Button on the remote
control once.

(
2) Press the Motion Detection Button once and the camera will automatically
e
nter into motion detection mode.
(
3) Camera will start video recording automatically when motion is detected.
O
nce motion is detected, the blue light indicator will blink twice and then turn
o
ff. The camera now is recording video.
(
4) To stop motion detection mode, press the Motion Detection Button once
a
gain and the camera will enter into standby mode and the indicator light will
b
e solid blue.
A
ttention:
T
he camera will record a video clip for 3 minutes automatically if a movement is detected.
6
) VIDEO/PHOTO FILE UPLOADS
O
ption 1:
(
1) Remove the Micro SD card from the camera and insert it into a card reader
.
(
2) Connect the card reader to a proper PC computer USB port.
(
3) The micro SD card will be recognized as a removable disk drive.
(
4) All of your video, photo and audio files can be accessed in the drive.
O
ption 2:
(
1) Power on the camera by pressing Power On/Off Switch on the camera.
N
ote: DO NOT press the Camera On/ Off Button on the remote control at this
t
ime. The indicator light should be off.
(
2) Connect the camera to a proper PC computer USB port with the USB cabl
e
p
rovided.
(
3) Press the Camera On/ Off Button on the remote control to turn on the
c
amera. The blue indicator light will turn on.
(
4) The camera will be recognized as a removable disk drive.
(
5) All of your video and photo files can be accessed in the drive.
7
) SET THE DATE/TIME STAMP
O
ption 1:
(
1) Remove the Micro SD card from the camera and insert it into a card reader
.
(
2) Connect the card reader to a proper PC computer USB port.
(
3) Removable disk drive folder appears
(
4) Click on the drive in the root directory and inside the root directory, create
a
t
ime.txt file.
(5) Write the desired date and time in the txt file with the correct format:

Y
ear.Month.Date Hour:Minute:Second. For example: 2016.01.17 16:17:59
S
ave this file.
(
6) Restart the camera and the system will upgrade the program automatically
.
O
ption 2:
(
1) Power on the Power On/Off Switch on the camera.
N
ote: DO NOT press the Camera On/ Off Button on the remote control at this
t
ime. The indicator light should be off.
(
2) Connect the camera to a proper PC computer USB port with the USB cabl
e
p
rovided.
(
3) Press the Camera On/ Off Button on the remote control to turn on the
c
amera. The blue indicator light will turn on.
(
4) Removable disk drive folder appears
(
5) Click on the drive in the root directory and inside the root directory, create
a
t
ime.txt file.
(
6) Write the desired date and time in the txt file with the correct format:
Y
ear.Month.Date Hour:Minute:Second. For example: 2016.01.17 16:17:59
S
ave this file.
(
7) Restart the camera and the system will upgrade the program automatically
.
8
) CHARGING
(
1) Connect the camera to a PC computer with the USB cable or the DC 5V
c
harger adapter and plug it onto an outlet AC power socket. (Recommended)
(
2) The red light indicator will stay illuminated during the charging process.
(
3) It will take up to 8 hours to obtain a full charge.
(
4) The camera can record videos for 5 hour continuously with a fully charged
b
attery.
9
) CHARGING WHILE RECORDING
(
1) Connect the camera to the DC 5V charger adapter and plug it onto an
o
utlet A/C power socket. (Recommended)
(
2) The red light indicator will stay illuminated during the charging process.
(
3) The camera can process charging and video recording simultaneously.
A
ttention:
C
amera cannot record video while the camera is connected to a computer.
4. Setting the time and alarms

1
) SETTING THE TIME
(
1) Press the SET button on the camera once, the YEAR digit will flash.
(
2) Press the UP or DOWN button on the camera to set the desired value of
t
he flashing digits.
(
3) Press the SET button on the camera again, the next digit will flash. Press
U
P and DOWN button on the camera to change its value.
(
4) Repeat above operations to change the time and calendar in this order:
Y
EAR>MONTH>DAY>HOUR>MINUTE
(
5) Press SET button on the camera to save and exit the setting.
2
) SETTING THE ALARM
(
1) Press the MODE button on the camera once, then press the SET button o
n
t
he camera once, the HOUR digit will flash.
(
2) Press the UP or DOWN button on the camera to set the desired value.
(
3) Press the SET button on the camera again, the MINUTE digit will flash.
P
ress the UP or DOWN button on the camera to set the desired value.
(
4) Press the SET button on the camera again to set the alarm duration (1-60
m
inutes).
(
5) Press the SET button on the camera again to set the alarm melodies. Pres
s
t
he UP or DOWN button on the camera to select the desired alarm ringtones (
6
d
ifferent alarm ringtones).
(
6) Press the MODE button on the camera to save and exit the setting.
N
ote:
I
n normal time mode, press the UP button on the camera to switch the time
d
isplay mode between 12-hour format and 24-hour.
I
n normal time mode, press the DOWN button on the camera to switch the
temperature display mode between Celsius and Fahrenheit.

MT-V8
Benutzerhandbuch
1
. Übersicht
1
) USB-Anschluss
2
) Micro SD-Kartensteckplatz
3
) Ein / Aus-Schalter
4
) Snooze-Taste
5
) Kameraobjektiv
6
) Kamera Ein / Aus-Taste auf der Fernbedienung
7
) Motion Detection-Knopf
8
) Foto-Knopf
9
) Videoaufnahmetaste
1
0) Audio Aufnahmetaste
2
. Produktzubehör
1
) USB-Kabel
2
) Power Charger Adapter
3
) Remote Controller

3
. Bedienung
>
> Stellen Sie bitte Ihre Kamera vor dem Gebrauch voll aufgeladen.
>
> Bitte stellen Sie sicher, dass die Micro SD-Karte fest in den SD-Kartenslo
t
a
uf der Kamera ausgestattet. Die Kamera funktioniert nicht ohne eine Micro
S
D-Karte zu arbeiten. SDHC 4 Micro SD-Karte empfohlen.
>
> Bitte stellen Sie sicher, dass Sie die Fernbedienung, um die Kamera jede
s
M
al, wenn Sie die Tasten drücken hingewiesen haben.
>
> Bitte stellen Sie sicher, dass Sie den isolierenden Film aus der Kamera un
d
d
em Remote-controller.entfernt haben
1
) CAMERA ON / OFF
>
> Bitte stellen Sie sicher, dass die Power On / Off Schalten Sie die Kamera i
n
d
ie Position "Ein" verschoben.
(
1) Drücken Sie die Kamera Ein / Aus-Taste auf der Fernbedienung einmal
,
w
ird die Kamera eingeschaltet und geht automatisch in den Standby-Modus
.
D
ie blaue Leuchtanzeige ist fest an sein.
(
2) Schalten Sie die Kamera durch Drücken der Kamera Ein / Aus-Taste auf
d
er Fernbedienung für 3 Sekunden. Wird die Kamera abgeschaltet. Die blaue
L
euchtanzeige erlischt.
(
3) Die Kamera wird automatisch heruntergefahren, wenn die Kamera im
S
tandby-Modus ohne irgendeinen Betrieb in 3 Minuten.
2
) VIDEO-AUFNAHME
>
> Bitte stellen Sie sicher, dass die Power On / Off Schalten Sie die Kamera i
n
die Position "Ein" verschoben.

(
1) Schalten Sie die Kamera durch Drücken der Kamera Ein / Aus-Taste auf
d
er Fernbedienung einmal, und die Kamera automatisch in den
S
tandby-Modus zu gelangen.
(
2) Drücken Sie Videoaufnahmetaste einmal, wird die Kamera Videoaufnahme
z
u starten. Die blaue Kontrollleuchte 3 Mal blinken dann schalten.
(
3) Um die Videoaufzeichnung zu stoppen, drücken Sie die
V
ideoaufnahmetaste erneut und die Kamera wird in den Standby-Modus z
u
g
elangen. Die Anzeigelampe leuchtet durchgehend blau sein.
(
4) Drücken Sie die Videoaufnahmetaste einmal, um Video-Aufnahm
e
f
ortzusetzen.
A
ufmerksamkeit:
①
The Kamera Video-Dateien automatisch alle 20 Minuten zu speichern.
②
When die Micro SD-Karte voll ist, wird der erste Video-Datei durch die neue Datei
a
utomatisch abgedeckt werden.
③
Videoformat: AVI
④
Videoauflösung: 1280x 960
3
) CAMERA / FOTOGRAFIE
>
> Bitte stellen Sie sicher, dass die Power On / Off Schalten Sie die Kamera i
n
d
ie Position "Ein" verschoben.
(
1) Schalten Sie die Kamera durch Drücken der Kamera Ein / Aus-Taste auf
d
er Fernbedienung einmal.
(
2) Drücken Sie die PHOTO-Taste einmal, um ein Foto aufzunehmen. Die
b
laue Leuchtanzeige wird jedes Mal, wenn Sie ein Foto zu blinken.
4
) AUDIOAUFNAHME
>
> Bitte stellen Sie sicher, dass die Power On / Off Schalten Sie die Kamera i
n
d
ie Position "Ein" verschoben.
(
1) Schalten Sie die Kamera durch Drücken der Kamera Ein / Aus-Taste auf
d
er Fernbedienung einmal.
(
2) Drücken Sie die Audio-Aufnahme-Taste einmal, um Ton aufnehmen. Da
s
b
laue Licht blinkt einmal, und schalten Sie dann die Kamera anzeigt, wird nur
d
ie Aufzeichnung von Audio.
(
3) Um die Tonaufnahme zu stoppen, drücken Sie die Audio-Aufnahme-Tast
e
e
rneut. Die Anzeigelampe leuchtet durchgehend blau sein.
5
) Bewegungserkennung
>
> Bitte stellen Sie sicher, dass die Power On / Off Schalten Sie die Kamera i
n
d
ie Position "Ein" verschoben.
(
1) Schalten Sie die Kamera durch Drücken der Kamera Ein / Aus-Taste auf
d
er Fernbedienung einmal.
(
2) Drücken Sie die Motion-Detection-Taste einmal, und die Kamer
a
a
utomatisch in den Bewegungserkennungsmodus zu gelangen.
(3) Die Kamera funktioniert Videoaufzeichnung automatisch gestartet, wenn
e
ine Bewegung erkannt wird. Sobald eine Bewegung erkannt wird, wird die
b
laue Leuchtanzeige zweimal aufleuchten und erlöschen dann. Die Kamera
w
ird nun die Aufnahme von Video.
(
4) Um die Bewegungserkennung-Modus zu beenden, drücken Sie die
M
otion-Detection-Taste erneut und die Kamera wird in den Standby-Modus z
u
w
echseln, und die Anzeige leuchtet durchgehend blau sein.
A
ufmerksamkeit:
D
ie Kamera nimmt einen Videoclip für 3 Minuten automatisch aufzeichnen, wenn eine
B
ewegung erkannt wird.
6
) Video / Foto-Datei-Uploads
O
ption 1:
(
1) Entfernen Sie die Micro-SD-Karte aus der Kamera und setzen Sie sie in
e
inen Kartenleser.
(
2) Schließen Sie das Kartenlesegerät an einem geeigneten PC USB Port des
C
omputers.
(
3) Die Micro-SD-Karte wird als Wechseldatenträger erkannt.
(
4) Alle Ihre Videos, Fotos und Audiodateien können in das Laufwerk
z
ugegriffen werden.
O
ption 2:
(
1) Schalten Sie die Kamera durch Drücken von Power On / Off Schalten Sie
d
ie Kamera ein.
H
inweis: Drücken Sie nicht die Kamera Ein / Aus-Taste auf der Fernbedienun
g
z
u diesem Zeitpunkt. Die Anzeigelampe ausgeschaltet sein.
(
2) Schließen Sie die Kamera auf einen geeigneten PC-Compute
r
U
SB-Anschluss mit dem mitgelieferten USB-Kabel.
(
3) Drücken Sie die Kamera Ein / Aus-Taste auf der Fernbedienung, um di
e
Kamera einzuschalten. Die blaue Anzeige leuchtet auf.

(
4) Die Kamera wird als Wechseldatenträger erkannt.
(
5) Alle Ihre Video- und Fotodateien können in das Laufwerk zugegriffen
w
erden.
7
) Stellen Sie die Datums- / Zeitstempel
O
ption 1:
(
1) Entfernen Sie die Micro-SD-Karte aus der Kamera und setzen Sie sie in
e
inen Kartenleser.
(
2) Schließen Sie das Kartenlesegerät an einem geeigneten PC USB Port des
C
omputers.
(
3) Wechselplattenlaufwerk Ordner erscheint
(
4) Klicken Sie auf das Laufwerk in das Root-Verzeichnis und im Inneren de
s
R
oot-Verzeichnis, erstellen Sie eine time.txt Datei.
(
5) Geben Sie das gewünschte Datum und die Uhrzeit in der txt-Datei mit de
m
r
ichtigen Format:
Y
ear.Month.Date Stunde: Minute: Sekunde. Zum Beispiel: 2016.01.1
7
1
6:17:59
S
peichern Sie diese Datei.
(
6) Starten Sie die Kamera und das System wird das Programm automatisc
h
z
u aktualisieren.
O
ption 2:
(
1) Schalten Sie den Power On / Off Schalten Sie die Kamera ein.
H
inweis: Drücken Sie nicht die Kamera Ein / Aus-Taste auf der Fernbedienun
g
z
u diesem Zeitpunkt. Die Anzeigelampe ausgeschaltet sein.
(
2) Schließen Sie die Kamera auf einen geeigneten PC-Compute
r
U
SB-Anschluss mit dem mitgelieferten USB-Kabel.
(
3) Drücken Sie die Kamera Ein / Aus-Taste auf der Fernbedienung, um di
e
K
amera einzuschalten. Die blaue Anzeige leuchtet auf.
(
4) Wechselplattenlaufwerk Ordner erscheint
(
5) Klicken Sie auf das Laufwerk in das Root-Verzeichnis und im Inneren de
s
R
oot-Verzeichnis, erstellen Sie eine time.txt Datei.
(
6) Geben Sie das gewünschte Datum und die Uhrzeit in der txt-Datei mit de
m
r
ichtigen Format:
Y
ear.Month.Date Stunde: Minute: Sekunde. Zum Beispiel: 2016.01.1
7
1
6:17:59
Speichern Sie diese Datei.

(
7) Starten Sie die Kamera und das System wird das Programm automatisc
h
z
u aktualisieren.
8
) Lade
(
1) Schließen Sie die Kamera an einen PC-Computer mit dem USB-Kabe
l
o
der dem DC 5V-Ladeadapter und schließen Sie es an eine Steckdos
e
N
etzsteckdose. (Empfohlen)
(
2) Die rote Leuchtanzeige wird während des Ladevorgangs beleuchte
t
b
leiben.
(
3) Es wird zu 8 Stunden dauern, bis eine volle Ladung zu erhalten.
(
4) Die Kamera kann Videos für 5 Stunden kontinuierlich mit einem vollständi
g
a
ufgeladenen Akku aufnehmen.
9
) ladend beim Notieren
(
1) Schließen Sie die Kamera an den DC 5V-Ladeadapter und schließen Si
e
e
s an eine Steckdose A / C-Steckdose. (Empfohlen)
(
2) Die rote Leuchtanzeige wird während des Ladevorgangs beleuchte
t
b
leiben.
(
3) Die Kamera kann verarbeiten Aufladung und Video gleichzeitig die
A
ufnahme.
A
ufmerksamkeit:
K
amera kann kein Video aufgenommen, während die Kamera an einen Compute
r
a
ngeschlossen.
4
. Einstellen der Uhrzeit und Alarme

1
) EINSTELLUNG DER ZEIT
(
1) Drücken Sie die SET-Taste an der Kamera einmal, wird das Jahr stellige
n
b
linken.
(
2) Drücken Sie die UP oder DOWN Taste an der Kamera, um de
n
g
ewünschten Wert der blinkenden Stellen setzen.
(
3) Drücken Sie die SET-Taste auf der Kamera erneut, wird die nächste Ziffe
r
z
u blinken. Drücken Sie AUF und AB-Taste an der Kamera, um den Wert z
u
ä
ndern.
(
4) Wiederholen Sie die obigen Operationen, um die Zeit und den Kalender i
n
d
ieser Reihenfolge zu ändern:
Y
EAR> Monat> Tag> HOUR> MINUTE
(
5) Drücken Sie die SET-Taste an der Kamera, um zu speichern und di
e
E
instellung.
2
) Einstellen der ALARM
(
1) Drücken Sie die MODE-Taste an der Kamera einmal, dann drücken Sie di
e
S
ET-Taste an der Kamera an, sobald die Stundenanzeige blinkt.
(
2) Drücken Sie die UP oder DOWN Taste an der Kamera, um de
n
g
ewünschten Wert einzustellen.
(
3) Drücken Sie die SET-Taste auf der Kamera erneut, wird die Minutenziffer
n
b
linken. Drücken Sie die UP oder DOWN Taste an der Kamera, um de
n
g
ewünschten Wert einzustellen.
(
4) Drücken Sie die SET-Taste auf der Kamera erneut, um die Alarmdaue
r
(
1-60 Minuten).
(
5) Drücken Sie die SET-Taste auf der Kamera erneut, um die Alarm Melodie
n
g
esetzt. Drücken Sie die UP oder DOWN Taste an der Kamera, um di
e
g
ewünschten Alarm Klingeltöne (6 verschiedene Alarm ringtones) zu wählen.
(
6) Drücken Sie die MODE-Taste an der Kamera, um zu speichern und di
e
E
instellung.
N
otiz:
I
m normalen Zeitmodus, drücken Sie die UP-Taste an der Kamera, um de
n
Z
eitanzeigemodus zwischen 12-Stunden-Format und 24-Stunden wechseln.
I
m normalen Zeitmodus, drücken Sie die DOWN-Taste an der Kamera, um di
e
T
emperatur-Anzeigemodus zwischen Celsius und Fahrenheit umschalten.

MT-V8
Mode d'emploi
1
. Vue d'ensemble
1
) Port USB
2
) slot Micro SD Card
3
) Power On / Off
4
) bouton Snooze
5
) Camera Lens
6
) Caméra Bouton On / Off de la télécommande
7
) Bouton de détection de mouvement
8
) Photo Bouton
9
) Bouton d'enregistrement vidéo
1
0) bouton Enregistrement audio
2
. Accessoires de produit
1
) Câble USB
2
) Chargeur Adaptateur
3
) Télécommande

3
. Fonctionnement
>
> S'il vous plaît assurez-vous que votre appareil est complètement charg
é
a
vant de l'utiliser.
>
> Faire S'il vous plaît vous que la carte Micro SD est bien insérée dans l
a
f
ente de la carte SD de votre appareil photo. Caméra ne fonctionnera pas san
s
u
ne carte Micro SD. SDHC 4 micro carte SD est recommandé.
>
> Faire S'il vous plaît assurer que vous avez fait de la télécommande pou
r
l
'appareil photo chaque fois que vous appuyez sur les touches.
>
> Faire S'il vous plaît que vous avez retiré le film isolant de l'appareil et l
a
t
élécommande controller.
1
) CAMERA ON / OFF
>
> S'il vous plaît assurez-vous que le commutateur Marche / Arrêt su
r
l
'appareil photo a été déplacé à la position "on".
(
1) Appuyez sur la caméra Bouton On / Off de la télécommande une fois, l
a
c
améra sera allumé et entrer automatiquement en mode veille. L'indicateur d
e
l
a lumière bleue sera solide sur.
(
2) Eteignez l'appareil photo en appuyant sur l'appareil photo Bouton On / Of
f
d
e la télécommande pendant 3 secondes. La caméra sera désactivé. L
e
v
oyant lumineux bleu se éteint.
(
3) La caméra sera arrêté automatiquement si l'appareil est en mode veill
e
s
ans aucune opération en 3 minutes.
2
) ENREGISTREMENT VIDÉO
>> S'il vous plaît assurez-vous que le commutateur Marche / Arrêt sur

l
'appareil photo a été déplacé à la position "on".
(
1) Mettez l'appareil photo en appuyant sur l'appareil photo Bouton On / Off d
e
l
a télécommande une fois l'appareil photo passe automatiquement en mode
v
eille.
(
2) Appuyez sur enregistrement vidéo, une fois, la caméra va commencer
l
'enregistrement vidéo. Le voyant lumineux bleu clignote 3 fois puis éteignez.
(
3) Pour arrêter l'enregistrement vidéo, appuyez sur le bouton
d
'enregistrement vidéo encore une fois et l'appareil photo passe en mode
v
eille. Le voyant sera bleu solide.
(
4) Appuyez sur le bouton d'enregistrement vidéo, une fois pour reprendre
l
'enregistrement vidéo.
A
ttention:
①
The caméra enregistre les fichiers vidéo automatiquement toutes les 20 minutes.
②
When la carte Micro SD est pleine, le premier fichier vidéo sera couvert par le nouvea
u
f
ichier automatiquement.
③
le format vidéo: avi
④
résolution vidéo: 1280x 960
3
) CAMERA / PHOTOGRAPHIE
>
> S'il vous plaît assurez-vous que le commutateur Marche / Arrêt su
r
l
'appareil photo a été déplacé à la position "on".
(
1) Mettez l'appareil photo en appuyant sur l'appareil photo Bouton Marche /
A
rrêt sur la télécommande.
(
2) Appuyez sur le bouton photo une fois pour prendre une photo. L'indicateur
d
e la lumière bleue clignote chaque fois que vous prenez une photo.
4
) ENREGISTREMENT AUDIO
>
> S'il vous plaît assurez-vous que le commutateur Marche / Arrêt su
r
l
'appareil photo a été déplacé à la position "on".
(
1) Mettez l'appareil photo en appuyant sur l'appareil photo Bouton Marche /
A
rrêt sur la télécommande.
(
2) Appuyez sur le bouton Enregistrement audio une fois pour enregistrer de
l
'audio. La lumière bleue clignote une fois puis éteignez indiquant qu
e
l
'appareil enregistre l'audio uniquement.
(
3) Pour arrêter l'enregistrement audio, appuyez de nouveau sur le bouton
E
nregistrement audio. Le voyant sera bleu solide.

5
) DET.MOUV ENREGISTREMENT
>
> S'il vous plaît assurez-vous que le commutateur Marche / Arrêt su
r
l
'appareil photo a été déplacé à la position "on".
(
1) Mettez l'appareil photo en appuyant sur l'appareil photo Bouton Marche /
A
rrêt sur la télécommande.
(
2) Appuyez sur le bouton de détection de mouvement, une fois l'apparei
l
p
hoto passe automatiquement en mode de détection de mouvement.
(3) Caméra va commencer l'enregistrement vidéo automatiquement lorsqu'un
m
ouvement est détecté. Une fois que le mouvement est détecté, le voyant
b
leu clignote deux fois puis éteignez. La caméra est l'enregistrement vidéo.
(
4) Pour arrêter le mode de détection de mouvement, appuyez sur le bouton
d
e détection de mouvement une fois de plus et l'appareil photo passe en mode
v
eille et le voyant lumineux sera bleu.
A
ttention:
L
a caméra va enregistrer un clip vidéo pendant 3 minutes automatiquement si un
m
ouvement est détecté.
6
) UPLOADS VIDEO / PHOTO DE FICHIERS
O
ption 1:
(
1) Retirez la carte Micro SD de l'appareil photo et l'insérer dans un lecteur de
c
arte.
(
2) Branchez le lecteur de carte à un port USB de l'ordinateur bon PC.
(
3) La carte micro SD sera reconnu comme un disque dur amovible.
(
4) Tous vos vidéos, photos et fichiers audio peuvent être consultés dans le
l
ecteur.
O
ption 2:
(
1) Allumez l'appareil photo en appuyant sur POWER interrupteur marche
/
a
rrêt sur l'appareil photo.
R
emarque: NE PAS appuyer sur l'appareil photo Bouton On / Off de la
t
élécommande à cette époque. Le voyant doit être éteint.
(
2) Branchez l'appareil photo à un port USB de l'ordinateur PC appropriée
a
vec le câble USB fourni.
(
3) Appuyez sur la caméra bouton Marche / Arrêt sur la télécommande pour
a
llumer l'appareil photo. Le voyant lumineux bleu se mettra en marche.
(
4) L'appareil photo sera reconnu comme un disque dur amovible.
(5) Tous vos fichiers vidéo et photo peut être consulté dans le lecteur.

7
) RÉGLER LA DATE / HEURE STAMP
O
ption 1:
(
1) Retirez la carte Micro SD de l'appareil photo et l'insérer dans un lecteur de
c
arte.
(
2) Branchez le lecteur de carte à un port USB de l'ordinateur bon PC.
(
3) le dossier amovible de disque apparaît
(
4) Cliquez sur le lecteur dans le répertoire racine et à l'intérieur du répertoire
r
acine, créer un fichier time.txt.
(
5) Ecrire la date et l'heure souhaitée dans le fichier txt avec le format correct:
Y
ear.Month.Date Heure: Minute: Seconde. Par exemple:
2
016.01.17 16:17:59 Enregistrez ce fichier.
(
6) Redémarrez la caméra et le système de mise à niveau le programme
a
utomatiquement.
O
ption 2:
(
1) Allumez l'interrupteur Marche / Arrêt sur l'appareil photo.
R
emarque: NE PAS appuyer sur l'appareil photo Bouton On / Off de la
t
élécommande à cette époque. Le voyant doit être éteint.
(
2) Branchez l'appareil photo à un port USB de l'ordinateur PC appropriée
a
vec le câble USB fourni.
(
3) Appuyez sur la caméra bouton Marche / Arrêt sur la télécommande pou
r
a
llumer l'appareil photo. Le voyant lumineux bleu se mettra en marche.
(
4) amovible dossier du disque dur apparaît
(
5) Cliquez sur le lecteur dans le répertoire racine et à l'intérieur du répertoire
r
acine, créer un fichier time.txt.
(
6) Ecrire la date et l'heure souhaitée dans le fichier txt avec le format correct:
Y
ear.Month.Date Heure: Minute: Seconde. Par exemple:
2
016.01.17 16:17:59 Enregistrez ce fichier.
(
7) Redémarrez la caméra et le système de mise à niveau le programme
a
utomatiquement.
8
) CHARGE
(
1) Branchez l'appareil photo à un ordinateur PC avec le câble USB ou
l
'adaptateur chargeur DC 5V et de le brancher sur une prise de courant
a
lternatif de sortie. (Conseillé)
(
2) Le voyant rouge reste allumée pendant le processus de charge.
(3) Il peut prendre jusqu'à 8 heures pour obtenir une charge complète.

(
4) La caméra peut enregistrer des vidéos pour 5 heures en continu avec un
e
b
atterie complètement chargée.
9
) CHARGE LORS D'UN ENREGISTREMENT
(
1) Branchez l'appareil photo à l'adaptateur chargeur DC 5V et de le branche
r
s
ur une prise de courant de sortie A / C. (Conseillé)
(
2) Le voyant rouge reste allumée pendant le processus de charge.
(
3) L'appareil photo peut traiter le chargement et l'enregistrement vidé
o
s
imultanément.
A
ttention:
A
ppareil ne peut pas enregistrer de la vidéo lorsque l'appareil est connecté à u
n
o
rdinateur.
4
. Réglage de l'heure et des alarmes
1
) MISE À L'HEURE
(
1) Appuyez sur le bouton SET de la caméra une fois, le chiffre de l'anné
e
c
lignotent.
(
2) Appuyez sur la touche HAUT ou BAS sur la caméra pour régler la valeu
r
s
ouhaitée des chiffres clignotants.
(
3) Appuyez sur le bouton SET de l'appareil photo, le chiffre suivant clignote
.
A
ppuyez sur UP et DOWN sur l'appareil photo pour modifier sa valeur.
(
4) Répéter les opérations ci-dessus pour changer l'heure et le calendrier dan
s
c
et ordre:
A
NNÉE> MOIS> JOURNÉE> HEURE> MINUTE
(
5) Appuyez sur le bouton SET de la caméra pour enregistrer et quitter l
e
réglage.

2
) REGLAGE DE L'ALARME
(
1) Appuyez sur le bouton de mode de l'appareil une fois, puis appuyez sur le
b
outon SET de la caméra une fois, le chiffre de l'heure clignote.
(
2) Appuyez sur la touche HAUT ou BAS sur la caméra pour régler la valeur
s
ouhaitée.
(
3) Appuyez sur le bouton SET de l'appareil photo, le chiffre des minutes
c
lignote. Appuyez sur le bouton HAUT ou BAS sur l'appareil photo pour défini
r
l
a valeur souhaitée.
(
4) Appuyez sur le bouton SET de la caméra pour définir la durée d'alarme
(
1-60 minutes).
(
5) Appuyez sur le bouton SET de la caméra pour définir les mélodies d'alarm
e.
A
ppuyez sur le bouton HAUT ou BAS sur l'appareil photo pour sélectionner le
s
s
onneries d'alarme souhaités (6 sonneries d'alarme différents).
(
6) Appuyez sur le bouton MODE sur l'appareil photo pour enregistrer et quitte
r
l
e réglage.
N
ote:
E
n mode normal de l'heure, appuyez sur le bouton UP sur l'appareil photo
p
our changer le mode d'affichage de l'heure entre le format de 12 heures et 2
4
h
eures.
E
n mode normal de l'heure, appuyez sur le bouton DOWN sur l'appareil photo
p
our changer le mode d'affichage de la température entre Celsius et
F
ahrenheit.
Table of contents
Languages:
Other Wiseup Security Camera manuals

Wiseup
Wiseup W8200 User manual

Wiseup
Wiseup WIFI33 User manual

Wiseup
Wiseup T186 User manual

Wiseup
Wiseup WIFI08 User manual

Wiseup
Wiseup CUP200 User manual

Wiseup
Wiseup CK6000 User manual

Wiseup
Wiseup H200 User manual

Wiseup
Wiseup P3021 User manual

Wiseup
Wiseup WIFI40 User manual

Wiseup
Wiseup WIFI34 User manual

Wiseup
Wiseup U11 User manual

Wiseup
Wiseup WIFI04S User manual

Wiseup
Wiseup DVR-0031-4 User manual

Wiseup
Wiseup T183 User manual

Wiseup
Wiseup WIFI38 User manual

Wiseup
Wiseup WIFI28 User manual

Wiseup
Wiseup BC303 User manual

Wiseup
Wiseup DV-07-WIFI User manual

Wiseup
Wiseup WI-FI 21 User manual

Wiseup
Wiseup P9000 User manual