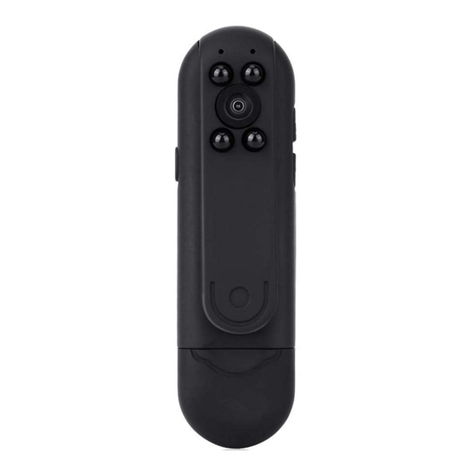
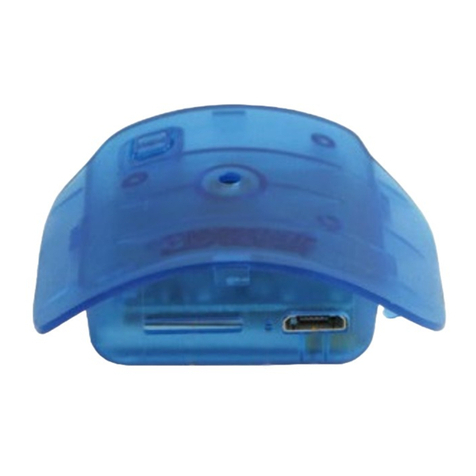
Wiseup WIFI40 User manual

WIFI40
User Manual
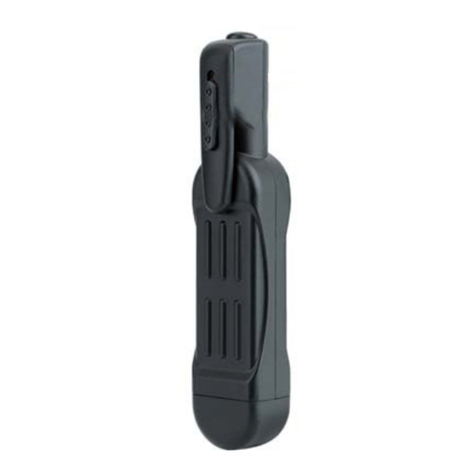
I. Product Overview
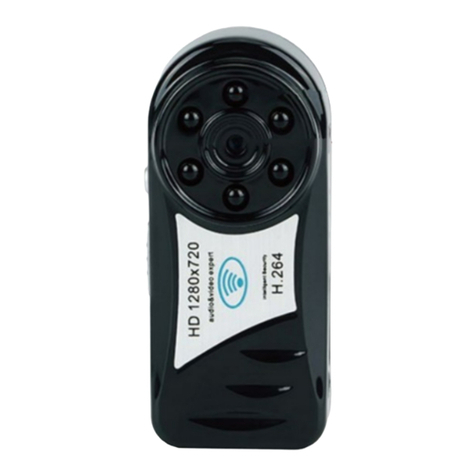
1. Microphone
2. Reset Button
3. Power Switch
4. Camera Lens
5. Micro SD Card Slot
6. Blue/ Red Indicator Light
7. Lanyard Hole
8. Mini USB Port
II. Product Accessories
-1x Mini WIFI DV Camera
-1x USB Cable
-1x DC 5V 2A Power Adapter
-1x Card Reader
-1x Lanyard
-1x Holder
-1x 16GB Micro SDHC Class 10 SD card (fitted into the Micro SD card slot already)
III. Get Camera Ready
3.1 Before power on the camera, please make sure:
a. The camera is fully charged or connected to an external power source with the power adapt-
er provided.
b. A micro SD card has been formatted in advance and is securely fitted into the camera’s SD
card slot.
Note: Please use a Micro SDHC Class 10 SD card for this camera.
3.2 Slide the power switch to the on position, both the red and blue indicator light will be turned
on simultaneously, then the red indicator light turns off and the blue indicator light starts flashing
slowly, indicating that the camera is ready for network configuration.
IV. Network Configuration
4.1 Search for “9527” in Google Play or APP Store, then download and install
“Plug&Play” or “P2PCamViewer” APP on your mobile device.
4.2 P2P or LAN Mode Configuration
4.2.1 Go to the WIFI or WLAN setting page on your mobile device, connect your mobile device
to the camera’s WIFI hotspot. The SSID is “Q7”, the default password is “12345678”.
【Note】: If the camera’s wifi hotspot “Q7” cannot be found , please recharge the camera or
reset the camera to try again.
4.2.2 Launch the APP “Plug & Play” or “P2PCamViewer”, if the camera is shown “Online”,
that means the LAN mode configuration is successful and the camera is added to the APP
already, you can watch the live video through the APP right now.
【Note】:The effective connection distance between the camera and mobile device is around
8 meters (26 feet) in the open air.
4.2.3 You could use your fingers to zoom in or zoom out the video images.
4.3 Remote Network Configuration (WAN Mode)
4.3.1 Before you start the remote network configuration, please make sure that the camera is
successfully added to the APP and online status in the LAN mode.
4.3.2 Use Android APP for Configuration
Step 1: Launch the “Plug & Play” APP, tap "LAN", tap the arrow icon , tap "Wi-Fi" to enter
the “Wi-Fi” setting page.
Step 2: Select “Use wifi” , tap "search", tap “ ” to search for the available WIFI hotspots.
Step 3: Select a desired WIFI hotspot to enroll the camera in.
Step 4: Tap “OK” to complete the remote network configuration and the camera will reboot
automatically. The blue indicator light will keep flashing slowly when the camera is rebooted
successfully.
4.3.3 Use IOS APP for Configuration
Step 1: Launch the“P2PCamViewer” APP, tap “Local cameras” , tap icon , enter “Wire-
less settings” page.
Step 2: Enable “WiFi”, tap to search for available WIFI hotspots.
Step 3: Select a desired WIFI hotspot to enroll the camera in.
Step 4: Tap“Done” to complete the remote network configuration and the camera will reboot
automatically. The blue indicator light will keep flashing slowly when the camera is rebooted
successfully.
4.4 Watch the live video in the WAN mode.
4.4.1 Exit APP “Plug&Play” or “P2PCamViewer”, go back to WIFI or WLAN setting page on
your mobile device, disconnect your mobile device from the current WIFI hotspot, enroll your
mobile device in another WIFI hotspot, or you can enable your mobile data connection.
4.4.2 Re-launch the APP “Plug&Play” or “P2PCamViewer” .
4.4.3 Tap “WAN” or “My cameras”, login the camera by inputting the camera's id and the login
password printed on the back of camera.
4.4.4 You could now watch the live video or remote control this camera in the WAN mode if the
camera is showing “Online”, and the red indicator light keeps flashing.
Note: If the camera is showing “Offline”, it means the remote network configuration failed and
you need to go back to 4.3.2 or 4.3.3 to check if the password of the wifi hotspot is wrong, or
restart the remote network setting.
V. Remote Video Recording Setup
5.1 Before you start, please make sure that the camera is successfully added to the APP and
online.
5.2 Launch the APP “Plug&Play”or “P2PCamViewer”, tap "LAN" or "Local Cameras" to enter
the camera, tap the video record button to start or stop video recording.
5.3 Tap and button to enable audio recording function during the video recording pro-
cess.
5.4 Return to the previous page, tap the “Files” icon check video files.
【Note】: Video Resolution:640x480 Video Format:AVI,MOV
VI. Local SD Card Video Recording Setup
6.1 Please make sure that the camera is successfully added to the APP and online before you
start.
6.2 Setup in the Andriod Device
Step 1: Launch APP “Plug&Play”
Step 2: Tap “WAN” or “LAN” , then tap icon to “SD-Card settings” page.
Step 3: Tick “Start automatic recording” and “Voice recording”, select the memory size for
each video clip.
Step 4: Tap “OK” to confirm the setting.
6.3 Setup in the IOS Device
Step 1: Launch APP “Plug&Play”
Step 2: Tap “Local” or “My cameras” , then tap icon to the “SD-Card settings” page.
Step 3: Enable “Auto start recording” and “Record Audio”, select the memory size for each
video clip.
Step 4: Tap “Done” to confirm the setting.
6.4 Play local video files
Step 1: Power off the camera, take out the micro sd card.
Step 2: Insert the micro sd card into a card reader, inserted the card reader into a PC USB port.
Step 3: Copy the video files to PC.
Step 4: Play the video files on PC.
We suggest you to copy all the video files to your PC before you play the videos.
【Note】:
1) Video Resolution:640x480 Video Format:AVI
2). The memory usage displayed on“SD-Card settings”page may not reflect the real usage.
VII. Change Remote Login Password
7.1 Please make sure that the camera is successfully added to the APP and online before you
start.
7.2 Tap “WAN”or “My cameras”, tap "+" or “Options”, tap “Update login password” or
“Change login Password”.
7.3 Input the new password
7.4 Tap “OK”or “Done” to confirm the change.
VIII. Reset
When the camera is powered on, long press the reset button for 3 seconds, the red and blue
indicator light will be solid on for 20 seconds, then the red indicator light turns off and blue indi-
cator light starts flashing slowly, indicating that the reset is completed and the camera is reboot-
ed automatically.
IX. Charging
9.1 Connect the camera to an outlet power source by using the power adapter and USB cable
provided.
9.2 It should take about 1.5 hours to obtain a full charge.
9.3 The camera could record video continuously for around 45 minutes after fully charged.

WIFI40
Benutzerhandbuch
I.Der Überblick des Produkt
1. Microfon
2. Rückstellknopf
3. Power-Taste
4. Kameraobjektiv
5. Micro-SD-Karte-Steckplatz
6. Rote/blaue Kontrolllampe
7. Schlüsselband Loch
8. Mini-USB Schnittstelle
II. Was ist in der Box
-1xMini WIFI DV Kamera
-1x USB-Kabel
-1x DC 5V 2A Netzadapter
-1x Speicherkartenlesegerät
-1x Schlüsselband
-1x Halterung
-1x 16GB Micro SDHC Class 10 SD Karte(wurde bereits in den Kartensteckplatz gesteckt)
III. Machen die Karema Fertig
3.1 Bitte bestätigen Sie vor der Einschaltung:
a. Die Kamera-Batterie ist vollständig aufgeladen, oder die kamera war verbunden mit an eine
externe Stromquelle anzuschließen.
b. Die Kamera hat bereits eine Micro-SD-Karte eingelegt und diese Karte wurde vorformatiert.
Hinweis: Bitte verwenden Sie Micro SDHC Class 10 SD-Karte.
3.2 Stellen Sie den Netzschalter auf die Position ON, die roten und blauen LEDs erstrahlen gle-
ichzeitig, dann erlischt das rote Licht und das blaue Licht anhaltend langsam blitzt, um anzuzei-
gen, dass jetzt die Kamera zum Netzwerkkonfiguration bereit ist.
IV. Netzwerk Konfiguration
4.1 Suchen Sie nach "9527" bei Google Play oder APP Store, laden Sie die
App "Plug & Play" oder "P2PCamViewer" herunter und installieren Sie sie.
4.2 P2P oder LAN Modus Konfiguration
4.2.1Eintreten in WIFI- oder WLAN-Einstellungsseite Ihres Handys oder anderen Mobilgeräts
ein und stellen Sie eine Verbindung zu einem WLAN-Hotspot mit dem SSID-Namen "Q7" her.
Das Standardkennwort für den Q7 WIFI-Hotspot lautet "12345678".
【Hinweis】: Wenn Sie den WIFI-Hotspot mit dem Namen "Q7" nicht finden können, laden Sie
die Kamera auf oder drücken Sie die Reset-Taste, um die Kamera zurückzusetzen, und ver-
suchen Sie es nochmal.
4.2.2 Starten Sie die Anwendung "Plug & Play" oder "P2PCamViewer". Wenn "Online" ange-
zeigt wird, ist die P2P (LAN) -Konfiguration der Kamera erfolgreich und die Kamera wurde
erfolgreich zur APP hinzugefügt und Sie können beim P2P (LAN) -Modus durch APP Live-Vid-
eo oder Video ansehen.
【Hinweis】: Die effektive Verbindungsdistanz zwischen dem WLAN-Hotspot der Kamera und
dem mobilen Gerät ist etwa 8 Metern (26 Fuß).
4.2.3 Während Sie Livevideos ansehen, können Sie Ihre Finger verwenden, um das Video zu
vergrößern oder zu verkleinern.
4.3 Remote-Netzwerk Konfiguration(WAN Modus)
4.3.1 Vergewissern Sie sich vorher, dass die Kamera erfolgreich zur APP hinzugefügt wurde
und im P2P (LAN) -Modus online ist.
4.3.2 Konfiguration bei der Android-App
Schritt 1: Starten Sie die App "Plug & Play". Tippen Sie auf "LAN", tippen das Pfeilsymbol
und tippen Sie auf "Wi-Fi", um die WLAN-Einstellungsseite.
Schritt 2:Wählen Sie "Use wifi" aus, tippen Sie auf "search" und tippen Sie auf " ", um
nach verfügbaren WLAN-Hotspots zu suchen.
Schritt 3: Wählen Sie einen gewünschten WIFI-Hotspot aus, in dem die Kamera registriert
werden soll.
Schritt 4: Tippen Sie auf "OK", um die Remote-Netzwerkkonfiguration abzuschließen. Die
Kamera wird automatisch neu gestartet. Wenn Sie sehen, dass das blaue Licht anhaltendlang-
sam blinkt, bedeutet dies, dass die Kamera erfolgreich neu gestartet wurde.
4.3.3 Konfiguration bei der IOS APP
Schritt 1: Starten Sie die App "P2PCamViewer", tippen Sie auf "Local cameras", tippen Sie
auf das Symbol und rufen Sie die Seite "Wireless-settings"auf.
Schritt 2: Starten Sie die "WiFi" -Funktion. Tippen Sie auf das Ausrufezeichen , um in diesem
Bereich nach verfügbaren WIFI-Hotspots zu suchen.
Schritt 3: Wählen Sie den gewünschten WLAN-Hotspot für die Registrierung der Kamera aus.
Schritt 4: Tippen Sie auf "Done", um die Remote-Netzwerkkonfiguration abzuschließen. Die
Kamera wird automatisch neu gestartet. Wenn Sie sehen, dass das blaue Licht anhaltend lang-
sam blinkt, bedeutet dies, dass die Kamera erfolgreich neu gestartet wurde.
4.4 Betrachten Sie das Live-Video im Remote-Netzwerkmodus
4.4.1 BeendenSie die App "Plug & Play" oder "P2PCamViewer" und wechseln Sie zurück zur
WLAN- oder WLAN-Einstellungsseite Ihres Handys oder mobilen Geräts. Trennen Sie den
aktuellen WIFI-Hotspot, verbinden Sie Ihr Handy oder mobiles Gerät mit einem anderen
WLAN-Hotspot, oder deaktivieren Sie WLAN oder Wi-Fi, dann die mobile Datenverbindung
einschalten.
4.4.2 Starten Sie erneut die App "Plug & Play" oder "P2PCamViewer".
4.4.3 Tippen Sie auf "WAN" oder "My cameras"unten auf dem Bildschirm , geben Sie den auf
der Rückseite der Kamera geschriebenen Benutzername (die Cam-ID / User) und das Log-
in-Passwort ein und klicken Sie auf "Login".
4.4.4 Sie können jetzt das Live-Video ansehen oder diese Kamera im WAN-Modus fern-
steuern, wenn die Kamera "Online" angezeigt wird und die rote Anzeigelampe blinkt.
Hinweis: Wenn "Offline" angezeigt wird, schlägt die Remote-Netzwerkkonfiguration der
Kamera gescheitert, kehren sie zu Seite 4.3.2 oder 4.3.3 zurück, um zu überprüfen, ob das
Passwort des WLAN-Hotspots falsch eingegeben wurde, oder Sie können die Remote-Netzw-
erkeinstellung neu starten.
V. Einstellungen für die Remote-Aufzeichnung
5.1 Bitte vergewissern Sie sich hervor, dass die Kamera erfolgreich zu der APP hinzugefügt
wurde und sie ist online.
5.2 Tippen Sie auf “Plug&Play” oder “P2PCamViewer”APP an, um zum Live-Video-Bildschirm
zu gelangen. Tippen Sie auf die Schaltfläche Videoaufzeichnung um die Videoaufzeich-
nung zu starten oder zu stoppen.
5.3 Klicken Sie während der Aufnahme auf die Tasten und Schaltflächen in der APP, um
die audioaufnahmefunktion zu aktivieren.
5.4 Zurück zur Startseite der APP und tippen Sie auf "Files" am unteren Bildschrim, um die Vid-
eodateien zu überprüfen.
【Hinweis】: Die Videoauflösung auf dem mobilen Gerät beträgt 640 x 480 und das Videofor-
mat ist AVI oder MOV.
VI. Lokale SD-Karte Videoaufnahme-Einstellung
6.1 Bitte vergewissern Sie sich vorher, dass die Kamera erfolgreich zu der APP hinzugefügt
wurde und sie ist online.
6.2 Richten Sie die lokale Videoaufnahme in der Android-App ein.
Schritt 1: Starten Sie die App "Plug & Play".
Schritt 2: Klicken Sie auf die Schaltfläche auf der Seite "WAN" oder "LAN", um die Seite
"SD-Card settings" aufzurufen.
Schritt 3: Aktivieren Sie die Funktionen "Start automatic recording" und "Voice recording"
und wählen Sie die Speichergröße jedes Videoclips aus..
Schritt 4: Tippen Sie auf "OK", um die Einstellung zu bestätigen.
6.3 Richten Sie die lokale Videoaufzeichnung in der IOS APP ein.
Schritt 1:Starten Sie die App "P2PCamViewer".
Schritt 2: Klicken Sie die Taste auf die Seite "Local" oder "My cameras", um die Seite
"SD-Card settings" aufzurufen.
Schritt 3: Aktivieren Sie die Funktionen "Auto start recording" und "Record Audio" und
wählen sie die Speichergröße jedes Videoclips aus.
Schritt 4: Tippen Sie auf "Done", um die Einstellung zu bestätigen.
6.4 Wiedergabe lokaler Videoaufnahmen.
Schritt 1: Schalten Sie die Kamera aus und entfernen Sie die Mini-SD-Karte.
Schritt 2: Stecken Sie die Mini-SD-Karte in den Kartenleser und stecken Sie den Kartenleser in
den Computer.
Schritt 3: Kopieren Sie die Videodatei auf den Computer.
Schritt 4: Abspielen von Videodateien auf dem Computer.
Wir empfehlen Ihnen,alle Videodateien vor dem Abspielen auf einen PC zu kopieren.
【Hinweis】:
1) Videoauflösung: 640x480 Videoformat: AVI
2) Die auf der Seite "SD-Card settings" angezeigte Speicherauslastung stimmt möglicher-
weise nicht mit der tatsächlichen Situation überein.
VII. Ändern Sie das Anmeldepasswort
7.1 Bitte vergewissern Sie sich vorher, dass die Kamera erfolgreich zu der APP hinzugefügt
wurde und sie ist online, bevor Sie beginnen.
7.2 Tippen Sie auf “+” oder “Options”auf der Seite “WAN” oder“My cameras”, wählen Sie
“Update login password”oder “Change login Password” aus.
7.3 Geben Sie das neue Passwort ein
7.4 Bestätigen Sie die Änderung mit "OK" oder "Done".
VIII. Der Reset
Wenn die Kamera eingeschaltet ist, drücken und halten Sie die Reset-Taste 3 Sekunden lang,
die rote und blaue LED leuchten 20 Sekunden lang, dann erlischt die rote Lampe und das
blaue Licht blinkt langsam. Dies bedeutet, dass die Kamera automatisch zurückgesetzt und
neu gestartet wurde.
IX. Aufladen
9.1 Mit dem Netzadapter und dem USB-Kabel schließen Sie die Kamera an eine externe
Stromquelle an, um den Ladevorgang zu starten.
9.2 Es dauert ungefähr 1,5 Stunden, um voll aufzuladen.
9.3 Wenn die Akku voll ist, kann die Kamera Videoetwa 45 Minuten aufnahmen.
Table of contents
Languages:
Other Wiseup Security Camera manuals

Wiseup
Wiseup WIFI04S User manual

Wiseup
Wiseup H200 User manual

Wiseup
Wiseup MT-V8 User manual

Wiseup
Wiseup DV-07-WIFI User manual

Wiseup
Wiseup CK6000 User manual

Wiseup
Wiseup WIFI08 User manual

Wiseup
Wiseup DVR-0031-4 User manual

Wiseup
Wiseup WIFI37 User manual

Wiseup
Wiseup T183 User manual

Wiseup
Wiseup CUP200 User manual

Wiseup
Wiseup WIFI33 User manual

Wiseup
Wiseup WI-FI 21 User manual

Wiseup
Wiseup WIFI39 User manual

Wiseup
Wiseup W8200 User manual

Wiseup
Wiseup U11 User manual

Wiseup
Wiseup P9000 User manual

Wiseup
Wiseup T186 User manual

Wiseup
Wiseup BC303 User manual

Wiseup
Wiseup WIFI34 User manual

Wiseup
Wiseup WIFI28 User manual