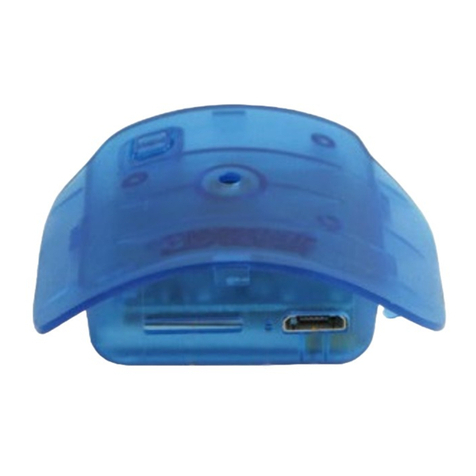
Wiseup T186 User manual

User Manual
Model Number: T186
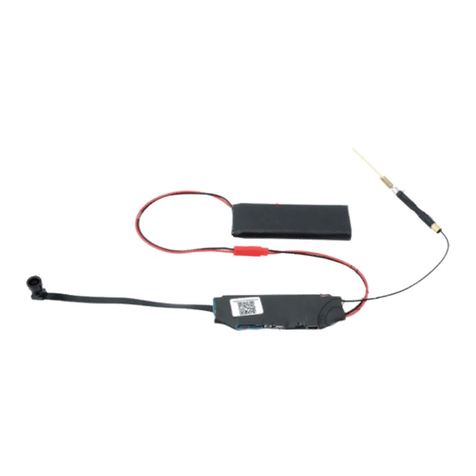
I. Product Overview
1. Camera Lens
2. Indicator Light
3. Micro SD card slot
4. Power Switch
5. Mini USB Port
6. Battery
7. Button A
8. Button B
9. Button C
10. Button D

II. What's in the box?
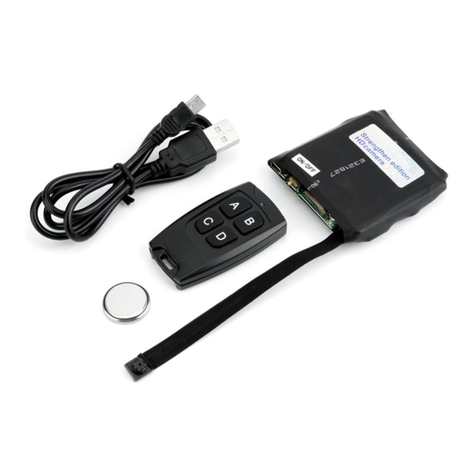
-1× Mini Camera Module
-1x 2.4GHz Remote Controller
-1x DC5V 1A Charger Adapter
-1x Backup Battery (optional)
-1x USB/RCA Cable
-7x Disguised Clothes Buttons
Note: the backup battery will not be included in the package in particular countries or regions due to
the local battery transport regulations.
III. Get the camera ready
3.1 Make sure that a micro SD memory card was inserted into this camera already.
3.2 Make sure that the camera was connected to a power bank or a battery already.
Note:
1. The memory card capacity should not exceed 128GB, and the memory card must be micro SDHC
or SDHX type.
2. A power bank should be connected to the mini USB port on the camera for power supply.
3. The camera will format the memory card automatically after you connect the camera to a
power bank, so please make sure that there is no important files in the memory card before you
insert the memory card into this camera.

IV. Turn On/Off
4.1 When the camera is connected to a power bank:
4.1.1 The camera will be turned on and enter into standby mode automatically after it is connected
to a power bank. The camera will vibrate 5 times, the red indicator light will flash twice and then be
solid on.
4.1.2 Turn off the camera by disconnecting the camera from the power bank.
Note: the camera will be turned on automatically no matter the power switch is in the position “ON”
or “OFF”.
4.2 When the camera is connected to a battery:
4.2.1 Slide the power switch to the position “ON”, then press button A once on the remote
controller to turn on the camera. The camera will vibrate once and the red indicator light will be
solid on.

4.2.2 Hold down the button A on the remote controller for 3 seconds to turn off this camera, then
slide the power switch to the position “OFF”. The camera will vibrate once and the red indicator
light will go off.
Note:
1. The camera will be turned off after you press button A if there is no memory card inserted into
this camera. The camera will vibrate 5 times, and the red indicator light will flash 5 times and then
go off.
2. The camera will be turned off automatically if there is no operation in 1 minute. The camera will
vibrate once and the red indicator light will go off.
V. Record Video
5.1 Record video in 1280x720 HD resolution
5.1.1 Press button B once to record video. The camera will vibrate twice, the red indicator light
will flash twice and then go off.

5.1.2 Press button B once again to stop video recording. The camera will vibrate once, the red
indicator light will be solid on.
5.2 Record video in 1920x1080 HD resolution
5.2.1 Hold down the button C for 3 seconds to record video. The camera will vibrate 3 times, the red
indicator light will flash once and then go off.
5.2.2 Press button c once to stop video recording. The camera will vibrate once, the red indicator
light will be solid on.

VI. Photographing
6.1 Press button C once to take a photo. The camera will vibrate once, the red indicator light will
flash once and then be solid on.
VII.Motion Detection
7.1 Press button D once to enter into motion detection mode, the camera will record video
automatically when motion is detected. The camera will vibrate 3 times, the red indicator light will
flash 3 times and then go off.

7.2 Press button D once again to exit motion detection mode. The camera will vibrate twice, the red
indicator light will be solid on.
Note: the video resolution in the motion detection mode cannot be changed, the default video
resolution is 1280x720 in the motion detection mode.
VIII. Set date and time stamp
8.1 Turn off the camera, take out the memory card.

8.2 Insert the memory card into a card reader.
8.3 Insert the card reader into a computer.
8.4 Removable disk drive appears.

8.5 Click on the drive in the root directory, click or create a file named “TIME.txt” inside the root
directory.
8.6 Input the current date and time in the “TIME.txt” file with the correct format:
YYYYMMDDHHMMSS Y (For example: 20210701123532 Y). If you don’t need the time stamp on the
video footage, change “Y” into “N” (For example: 20210701123532 N).
8.7 Save this file, remove the card reader from the computer.
8.8 Insert the memory card into the camera, the system will upgrade the program automatically
after you restart the camera.
IX. Upload video/image files

9.1 Turn off the camera, take out the memory card.
9.2 Insert the memory card into a card reader.
9.4 Insert the card reader into a computer.

9.5 Removable disk drive appears, all the files can be accessed in the folders “VIDEO” and
“PHOTO” .
X. Format the memory card
Hold down the button D for about 5 seconds to format the memory card. The camera will vibrate 4
times.
XI. Charge the backup battery
11.1 Take out the memory card, connect the battery to the camera.
11.2 Slide the power switch to the position “ON”.

11.3 Plug the camera onto an external power socket with the DC5V 1A USB charger adapter and the
USB cable. The red indicator light will be solid on during the charging process. The red indicator light
will go off after the battery is fully charged.
Note: we suggest you to charge the battery no more than 6 hours even if the battery is not fully
charged.
XII. Important notes
12.1 Each video clip will be generated and saved every 5 or 1 minute automatically.
12.2 Video resolution: 1920x1080 or 1280x720; video format: AVI; image pixels: 4032x3024.
12.3 The operating battery life time is about 8 hours on a full charge.

Benutzerhandbuch
Modellnummer: T186
I. Produktübersicht
1. Kameraobjektiv
2. Kontrollleuchte
3. Micro-SD-Kartensteckplatz
4. Netzschalter
5. Mini-USB-Anschluss
6. Batterie
7. Taste A
8. Taste B
9. Taste C
10. Taste D

II. Was ist in der Box?
-1× Mini-Kameramodul
-1x 2,4 GHz Fernbedienung
-1x DC5V 1A Ladegerät Adapter
-1x Backup-Batterie (optional)
-1x USB/RCA-Kabel
-7x Verkleidete Kleiderknöpfe
Hinweis: Die Backup-Batterie ist in bestimmten Ländern oder Regionen aufgrund der örtlichen
Batterietransportbestimmungen nicht im Lieferumfang enthalten.
III. Mach die Kamera bereit
3.1 Stellen Sie sicher, dass bereits eine Micro-SD-Speicherkarte in diese Kamera eingelegt wurde.
3.2 Stellen Sie sicher, dass die Kamera bereits an eine Powerbank oder einen Akku angeschlossen
war.
Hinweis:
1. Die Speicherkartenkapazität sollte 128 GB nicht überschreiten und die Speicherkarte muss vom
Typ micro SDHC oder SDHX sein.

2. Zur Stromversorgung sollte eine Powerbank an den Mini-USB-Anschluss der Kamera
angeschlossen werden.
3. Die Kamera formatiert die Speicherkarte automatisch, nachdem Sie die Kamera an eine
Powerbank angeschlossen haben. Stellen Sie daher bitte sicher, dass sich keine wichtigen Dateien
auf der Speicherkarte befinden, bevor Sie die Speicherkarte in diese Kamera einsetzen.
IV. An / Ausschalten
4.1 Wenn die Kamera an eine Powerbank angeschlossen ist:
4.1.1 Die Kamera wird eingeschaltet und wechselt automatisch in den Standby-Modus, nachdem sie
an eine Powerbank angeschlossen wurde. Die Kamera vibriert 5-mal, die rote Kontrollleuchte blinkt
zweimal und leuchtet dann dauerhaft.
4.1.2 Schalten Sie die Kamera aus, indem Sie die Kamera von der Powerbank trennen.
Hinweis: Die Kamera wird automatisch eingeschaltet, egal ob sich der Netzschalter in der Position
“ON” oder “OFF” befindet.
4.2 Wenn die Kamera an einen Akku angeschlossen ist:
4.2.1 Schieben Sie den Netzschalter auf die Position “ON” und drücken Sie dann einmal die Taste A
auf der Fernbedienung, um die Kamera einzuschalten. Die Kamera vibriert einmal und die rote
Kontrollleuchte leuchtet dauerhaft.

4.2.2 Halten Sie die Taste A auf der Fernbedienung 3 Sekunden lang gedrückt, um diese Kamera
auszuschalten, und schieben Sie dann den Netzschalter in die Position „OFF“. Die Kamera vibriert
einmal und die rote Kontrollleuchte erlischt.
Hinweis:
1. Die Kamera wird ausgeschaltet, nachdem Sie die Taste A gedrückt haben, wenn keine
Speicherkarte in diese Kamera eingesetzt ist. Die Kamera vibriert 5 Mal und die rote Kontrollleuchte
blinkt 5 Mal und erlischt dann.
2. Die Kamera wird automatisch ausgeschaltet, wenn 1 Minute lang keine Bedienung erfolgt. Die
Kamera vibriert einmal und die rote Kontrollleuchte erlischt.
V. Video aufnehmen

5.1 Video in 1280x720 HD-Auflösung aufnehmen
Drücken Sie einmal die Taste B, um ein Video aufzunehmen. Die Kamera vibriert zweimal, die rote
Kontrollleuchte blinkt zweimal und erlischt dann.
5.1.2 Drücken Sie die Taste B erneut, um die Videoaufnahme zu stoppen. Die Kamera vibriert einmal,
die rote Kontrollleuchte leuchtet dauerhaft.
5.2 Videos in 1920x1080 HD-Auflösung aufnehmen
5.2.1 Halten Sie die Taste C 3 Sekunden lang gedrückt, um ein Video aufzunehmen. Die Kamera
vibriert dreimal, die rote Kontrollleuchte blinkt einmal und erlischt dann.
5.2.2 Drücken Sie einmal die Taste c, um die Videoaufnahme zu stoppen. Die Kamera vibriert einmal,
die rote Anzeige Licht wird dauerhaft leuchten.

VI. Fotografieren
6.1 Drücken Sie einmal die Taste C, um ein Foto aufzunehmen. Die Kamera vibriert einmal, die rote
Kontrollleuchte blinkt einmal und leuchtet dann dauerhaft.
VII. Bewegungserkennung
7.1 Drücken Sie die Taste D einmal, um in den Bewegungserkennungsmodus zu gelangen. Die
Kamera nimmt automatisch Videos auf, wenn eine Bewegung erkannt wird. Die Kamera vibriert
dreimal, die rote Kontrollleuchte blinkt dreimal und erlischt dann.

7.2 Drücken Sie die Taste D erneut, um den Bewegungserkennungsmodus zu verlassen. Die Kamera
vibriert zweimal, die rote Kontrollleuchte leuchtet durchgehend.
Hinweis: Die Videoauflösung im Bewegungserkennungsmodus kann nicht geändert werden, die
Standardvideoauflösung beträgt 1280x720 im Bewegungserkennungsmodus.
VIII. Datum und Zeitstempel setzen
8.1 Schalten Sie die Kamera aus, nehmen Sie die Speicherkarte heraus.

8.2 Stecken Sie die Speicherkarte in einen Kartenleser.
8.3 Stecken Sie den Kartenleser in einen Computer.
8.4 Wechseldatenträger erscheint.
Table of contents
Languages:
Other Wiseup Security Camera manuals

Wiseup
Wiseup U11 User manual

Wiseup
Wiseup WIFI37 User manual

Wiseup
Wiseup WIFI34 User manual

Wiseup
Wiseup WIFI40 User manual

Wiseup
Wiseup T183 User manual

Wiseup
Wiseup WI-FI 21 User manual

Wiseup
Wiseup W8200 User manual

Wiseup
Wiseup P9000 User manual

Wiseup
Wiseup MT-V8 User manual

Wiseup
Wiseup WIFI04S User manual

Wiseup
Wiseup P3021 User manual

Wiseup
Wiseup BC303 User manual

Wiseup
Wiseup WIFI39 User manual

Wiseup
Wiseup CUP200 User manual

Wiseup
Wiseup WIFI33 User manual

Wiseup
Wiseup H200 User manual

Wiseup
Wiseup DV-07-WIFI User manual
Wiseup
Wiseup WIFI08 User manual

Wiseup
Wiseup DVR-0031-4 User manual
Wiseup
Wiseup CK6000 User manual