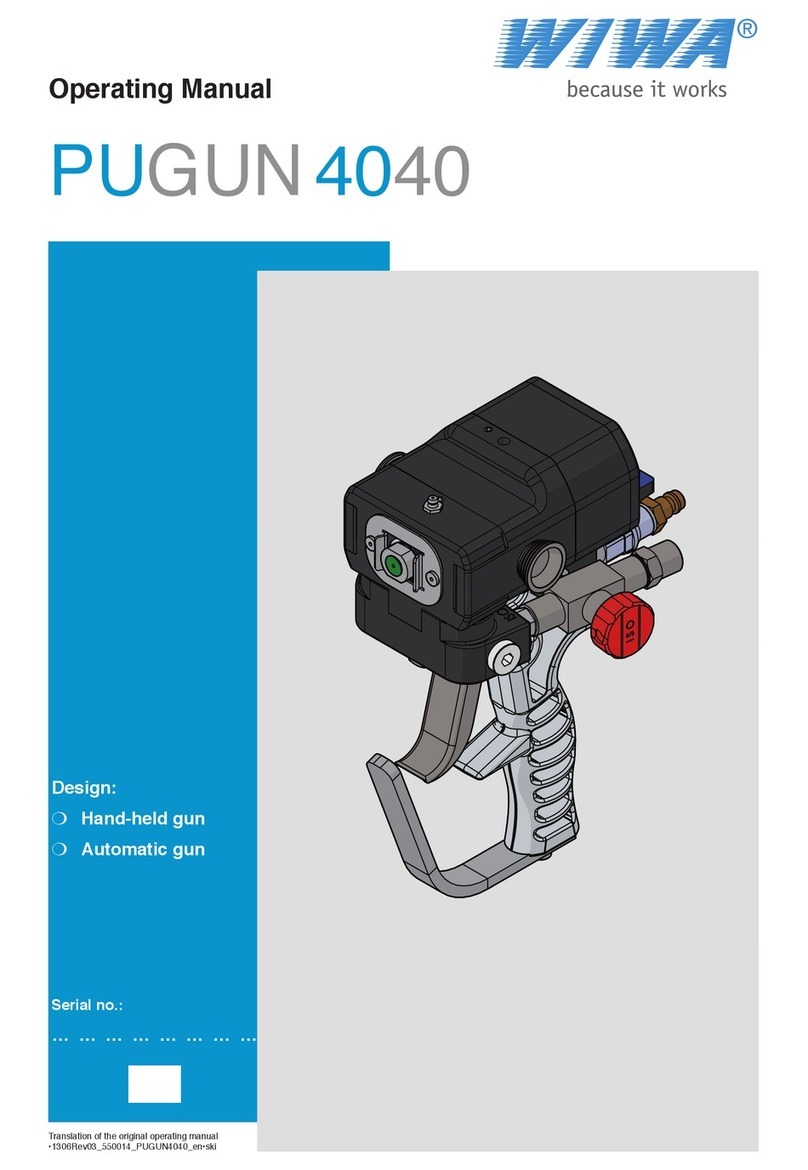
wiwa 500 Instruction Manual

WIWA Wilhelm Wagner GmbH & Co. KG
Gewerbestraße 1 – 3
35633 Lahnau, Germany
Tel. +49 64 41-6 09-0
Fax +49 64 41-6 09-50
Internet: www.wiwa.de
WIWA Wilhelm Wagner LP
3734A Cook Blvd.
Chesapeake, VA 23323, USA
Tel. +1-757-436-2223
Toll free +1-866-661-2139
Fax +1-757-436-2103
Internet: www.wiwa.com
user's handbook Airless Spray Gun
SP500 • 550001 • e • 05.08
Für künftige Verwendung aufbewahren! • Keep for future use! • A conserver soigneusement • Opbevares for fremtidig anvendelse! • Skal
oppbevares for senere bruk ! • Spara för senare användning! • Voor toekomstig gebruik bewaren! • Guardar para a utilização futura! • ¡Guár-
dese para un futuro uso! • Conservare per usi futuri! • ¡· Ê˘Ï·¯Ù› ÁÈ· ÌÂÏÏÔÓÙÈ΋ ¯Ú‹ÛË! Сохранять для последующего использования!
user's handbook
WIWA Airless Spray Gun
❍ 500 ❍ 500 D ❍ 500 F

2 user's handbook Airless Spray Gun
SP500 • 550001 • e • 05.08
e
1 Contents
First read, then start
Remember that Airless Paint Spra-
ying Equipment works under extreme
pressure and that high levels of spra-
ying pressure are created!
Never hold your nger or hand in front of the ➤
gun and never reach into the spray.
Never point the spray gun towards yourself,➤
other people or other living creatures.
Always pay close attention to the references➤
and specications found in the user's hand-
book!
Before each usage, be especially certain to:
Check the grounding conditions (for the unit➤
and the object to be sprayed).
Check the seal of all connecting and moun-➤
ted parts.
Observe the maximal allowed pressure of ➤
the unit and accessory parts.
Before beginning any work on the equip-
ment, and at any pause during operation, it
is absolutely required to:
Shut down the spraying equipment in ac-➤
cordance with the instructions in the User's
Handbook.
Release the pressure found in the spray gun➤
and hose.
Secure the spray gun.➤
Pay attention to safety!
The accident prevention regulation "Handling of
Coating Materials" (BGV D25) and the guide-
lines covering uid sprayers (ZH1/406) from the
German Employer's Liability Insurance Associ-
ation are to be observed without fail. To ensure
a safe operating environment, the condition of
uid sprayers must be inspected by an expert
every 12 months or sooner, if deemed necessa-
ry. A written record of the inspection results is to
be kept.
Remaining paint and solvent are to be dispo-
sed of according to legal regulations. This also
applies for environmently friendly water based
lacquer or enamel systems.
In case of injuries, consult a physician or go to
the next hospital without delay. If paint/material
or solvent has gone into the skin, the physician
has to be informed about the type of paint/ma-
terial or the solvent applied. Therefore, always
ensure that the product specication sheet, with
address and telephone number of the manufac-
turer, is at your disposal!
1.1 Preface
This User’s Handbook must always
be available to operating staff!
The operating authority of the equip-
ment must ensure that a user`s hand-
book is available to the operator in a
language which he understands.
Dear customer!
Thank you for your decision to purchase
equipment.
In the user’s handbook, you can nd all infor-
mation required for the proper handling of your
Spray Gun. However, for safe operati-
on, there are further essential details which you
should adhere to:
Please read and observe the guidlines valid for
your country.
In Germany, the "Richtlinien für Flüssigkeits-
strahler" (Guidelines for Fluid Sprayers) publis-
hed by: Hauptverband der Gewerblichen Be-
rufsgenossenschaften (Industrial Employer's
Liability Insurance Association) are valid.
Manufacturer’s notes and operating guidelines
for coating and pumping materials should be
observed at all times.
No method of operation should be exercised
which impairs the safety of products
and the operating personnel.
We wish you much success and excellent work-
ing results when using your Spray
Gun.
WIWA Wilhelm Wagner GmbH & Co. KG

user's handbook Airless Spray Gun 3
SP500 • 550001 • e • 05.08
e
Copyright
The copyright for this user’s handbook remains with WIWA
Wilhelm Wagner GmbH & Co. KG. The user’s handbook is
intended for preparation, operating and maintenance staff. It
contains technical regulations and drawings which may not, in
whole or in part, be copied, distributed or be used by or passed
on as information to others for whatever purposes without
authorisation.
WIWA WILHELM WAGNER GmbH & Co. KG
Gewerbestraße 1-3 • 35633 Lahnau
Tel.: +49 6441/609-0 • Fax.: +49 6441/609-50
Note:
We reserve the right to make changes to the contents of this
handbook. WIWA Wilhelm Wagner GmbH & Co. KG. is not
liable for any mistakes found in this documentation or any
assessable damages resulting from it's delivery or usage, as
far as legally allowed.
The manufacturer reserves the right to make technical changes
in order to improve the products, which may not be documen-
ted in this user’s handbook.
Contents 1
1.2 Table of contents
1 Contents 2
First read, then start 2
1.1 Preface 2
1.2 Table od contents 3
2 Safety 4
2.1 Description of symbols 4
2.2 Dangers arising from the equipment 4
2.3 Spray gun applications 5
2.4 Modications and emissions 6
2.5 Sources of danger 6
2.6 Operating staff 7
2.7 Installation site 8
2.8 Behavior in case of emergency 8
2.9 Protective equipment 9
2.10 Service and auxiliary materials 9
3 Equipment description 11
3.1 Spray gun models 11
3.2 Spray gun accessories 12
4 Set-up for operation 14
Installation of the spray tip 14
Installation of the lter insert 14
Connection of the material hose 14
5 Operation 15
Working pressure 15
Spraying - painting 15
Pausing while working 15
Spraying tips 15
Cleaning 15
6 Operational disturbances
and trouble-shooting 17
7 Maintenance and repair 18
7.1 Packing and needle exchange 18
7.2 Pressure unit and handle grip 19
8 Appendix 21
8.1 Declaration of conformity 21
8.2 Technical data and spare parts lists 22

4 user's handbook Airless Spray Gun
SP500 • 550001 • e • 05.08
e
2.1 Description of symbols
The signs and symbols used in this manual
have the following meaning:
Note
marks a section of text which is espe-
cially relevant to safety. Special attention
should be paid to this section and it's
contents strictly observed.
WARNING
marks a situation which could be dan-
gerous. If not observed,death or very
serious injuries could result.
DANGER OF EXPLOSION
marks a situation, where there is danger
of explosion.
Observation of this information is absolu-
tely essential.
ELECTRICAL VOLTAGE
marks a situation, where there is a dan-
ger of explosion through an electostatic
charge.
Observation of this information is absolu-
tely essential.
USE EAR PLUGS
For health reasons, it is very important to
pay attention to this warning.
USE BREATHING PROTECTION
For health reasons, it is very important to
pay attention to this warning.
WEAR PROTECTIVE GLOVES
To prevent burns, wear protective gloves
with lower arm protection.
Observation of this information is essen-
tial.
HEALTH DANGER
marks materials which are hazardous to
your health.
Observation of this information is absolu-
tely essential.
FIRST AID
In case of injuries or accidents, these in-
structions should be absolutely adhered
to.
2.2 Dangers arising from the
equipment
This spray gun was designed and built in ac-
cordance with all safety aspects. It corresponds
with the present standards of technical regulati-
ons and current rules for accident prevention.
It left the factory in perfect condition, insuring
a high level of safety. However, the following
dangers exist if operated incorrectly or used
inappropriately:
to life and limb of operator➤ or third personso
for the machine and other property belonging➤
to owner of machine
for the efcient working of the machine ➤
All personnel involved in the starting, operation,
and maintenance of the spray gun and associ-
ated equipment must read the following notes
and observe them. It is a matter of their safety!
We recommend that the operation management
have this conrmed in writing.
Additionally, please pay attention to the
following:
Please, read and observe the guidlines valid for
your country.
In Germany the "Richtlinien für Flüssigkeits-
strahler" (Guidelines for Fluid Sprayers) pub-
lished by: Hauptverband der Gewerblichen
Berufsgenossenschaften (Industrial Employer's
Liability Insurance Association) are valid.
We recommend adding a copy of all guidelines
and accident prevention regulations into the
user's manual.
Manufacturer’s notes and operating guideli-
nes for coating material and pumping material
should be observed at all times.
2 Safety

user's handbook Airless Spray Gun 5
SP500 • 550001 • e • 05.08
e
Safety 2
In principle, no method of working should be
exercised which impairs the safety of
products or the operating personnel.
2.3 Spray Gun Applications
This spray gun is suitable for the Airless-spray-
ing, transfer and injection of sprayable materi-
als.
The maximum allowable
operating pressure for the
500 Series Spray
Gun is 500 Bar.
Each Spray Gun has
a label showing the maximum
allowable operating pressure
(picture 2.3.1)
Using this equipment in areas requiring pro-
tection from explosions
Marking: II 2G cT4
This equipment fullls the explosion-proof
requirements found in the guideline 94/9/EC
for the type of explosion, equipment cata-
gory and temperature class found on the
nameplate).
This equipment is able to be installed in areas
requiring Zone I explosion protection. Due to
the possibility that explosive gases and over-
spray may be created, this unit is to be consi-
dered as Group II, Equipment Catagory 2G.
The ash point for the materials being spray-
ed, as well as the solvent being used, must be
above 200°C.
When operating this equipment, the User‘s
Handbook must be followed closely.
The required inspection and maintenance inter-
vals must be adhered to strictly.
All information found on the unit‘s signs or
plates must be adhered to and not excee-
ded. Do not allow this unit to be overloaded.
It is the responsibility of the operator of this
equipment to determine the explosion risk
(zone determination according to EC regulation
94/9/EC, Appendix II, Nr. 2.1-2.3) in the area
of usage, in accordance with local regulatory
authority guidelines. Furthermore, it is the
responsibility of the operator on-sight to
check and ensure that the technical speci-
cations and markings according to ATEX
are compliant with local requirements.
Please observe that some components have
their own nameplate with separate markings ac-
cording to ATEX. The marking with the lowest
rating for explosion protection becomes
valid for the entire system. If the intended ap-
plication could lead to injury of personnel if this
equipment malfunctions, on-sight precautions
and preventive measures must be implemented
If this equipment appears to be malfunctio-
ning or behaving strangely during operati-
on, the unit must be shut down immediately
and Customer Service contacted as
soon as possible.
It must be ensured that the unit is grounded
either separately or together with the equipment
it is mounted to (maximum resistance 106 Ω).
Other usage is not in accordance with regula-
tions. Before equipment is used for
other purposes or with other materials, and
therefore not according to the regulations, per-
mission should be obtained from the manufac-
turer as the guarantee is otherwise invalid. The
observation of technical documentation and the
compliance with specied operational, mainte-
nance and starting guidelines are manditory in
accordance with the valid regulations.
picture 2.3.1

6 user's handbook Airless Spray Gun
SP500 • 550001 • e • 05.08
e
2.4 Modications and emissions
Rebuilds and changes
For safety reasons, it is not allowed to carry
out rebuilds or changes without authorization.
Protective equipment may not be dismounted,
altered or neglected.
If using components which are not produced
or delivered by , warranty coverage is
negated as well as liability.
The spray gun may only be operated within the
prescribed limits and machine parameters.
Danger caused by attachments and spare
parts
If you use original attachments and original
spare parts from
,
the compatability
with our equipment is guaranteed. It is, howe-
ver, essential that the safety regulations of the
attachments and spare parts are observed. You
can nd these safety regulations in the User’s
Handbook located with the spare parts lists.
If you use attachments and spare parts from
another source, cannot guarantee the
safety of the entire system.
In this case, our guarantee does not cover any
damage or injury caused by such attachments
and spare parts.
Emissions
It is possible for solvent vapours to occur,
depending on the materials used. Therefore,
please ensure the workplace is sufciently ven-
tilated in order to avoid damage to health and
property. Always observe the processing infor-
mation given by the material manufacturer.
The spray gun itself produces no noise. Ple-
ase observe the maximum noise level of the
spraying equipment.
2.5 Sources of danger
Pay attention to the following
notes:
The spray gun must meet or exceed the➤
maximum operational pressure of the paint
spraying equipment being used.
Because of the electrostatic charges produ-➤
ced by spraying, the spray gun may only be
mounted to conductive hoses. All original
hoses are conductive and matched
to spray equipment.
Please, always use an open container. Due➤
to possible electro static charges, it is impe-
rative to ensure that the spraying gun has
contact to the container walls when working
with metal containers.
It is possible for a static charge to occur due➤
to the high ow speeds during the airless
spraying procedure. Static charges can lead
to re and explosions.
➤ Therefore, the complete unit (including
the spray gun) and the object to be
sprayed must be grounded properly.
The original airless spray machine
is tted with a ground cable as standard. If
lost or defective, please, order an immediate
replacement (order no.: 0474487).
Never point the spray gun towards yourself,
other people or other living creatures.
➤ Never point the spray gun to-
wards yourself, other people or
other living creatures.
Never➤ hold your nger or hand in front of the
gun and never reach into the spray.
Hold the spray gun securely, as the high➤
operating pressure can result in severe kick-
back.
Never➤ try to seal leaks on joints and high
pressure hoses with your hand or by binding
the spot. Should a leak occur, the whole
system (gun, hose, pressure lter, pump,
etc.) are to be depressurized immediately.
Defective parts are to be replaced.
The spray gun is to be secured and the safe-➤
ty device checked during every interruption
while working, regardless how short.
2 Safety

user's handbook Airless Spray Gun 7
SP500 • 550001 • e • 05.08
e
Safety 2
➤ If working with heated materials, al-
ways wear the proper hand protection.
BURN DANGER!
The entire system is to be depressurized ➤
upon work interruption or shift end. Read
and follow the instructions in the User's
Handbook for the spray equipment. The
spray gun should be opened shortly after
the equipment is shut down to release any
pressure in the spray lines.
The entire system is to be depressurized ➤
before maintenance and cleaning work is
carried out. Read and follow the User's
Handbook for the spray equipment.
Remove the spray gun from the spraying
equipment before carrying out this work.
Never➤ spray solvents or materials containing
solvents into a narrow-necked can or barrel
with bung hole.
DANGER OF EXPLOSION!
➤ Always use an open container. Due
to possible electrostatic charges, it
is imperative to ensure that the
spray gun is grounded to the contai-
ner walls when working with metal
containers.
Never dip a hot spray gun into solvent.➤
DANGER OF EXPLOSION!
Never use this equipment outdoors during a➤
thunderstorm.
In closed or pressurised systems where➤
aluminium or galvanised parts come into
contact with the solvent, dangerous chemical
reactions can occur if 1.1.1-Trichlorethylene,
Methylene Chloride or other solvents contai-
ning halogenated chlorinated hydrocarbons
(CFCs) are used. If you wish to work with the
above solvents, or with lacquers and paints
which contain them, we recommend you
contact either the customer service of your
distributor or directly.
Smoking, open ames or any other possible ➤
ignition sources are not allowed anywhere
near the area of operation
A list of materials used in the construction of➤
the spray gun can be provided upon request
in order to determine the compatibility with
the materials to be sprayed.
2.6 Operating staff
Authorised Operators
People under the age of 16 should not operate
this equipment. The management in charge of
the operation of the spray gun must make the
User’s Handbook available to the operator and
must make sure that he has read and under-
stood it. Only then may the system be put into
operation.
We recommend that the manager has this
conrmed in writing.
The operator of the spray gun is required to re-
port any changes in the spray gun which might
affect its safety supervisor, as he must ensure
that the spray gun functions safely.
The responsibilities for the different activities
on the system must be laid down clearly and
adhered to. No unclear responsibilities may
remain as these could endanger the safety of
the user.
The operator must make sure that only autho-
rised persons work on the equipment. He is re-
sponsible for third parties in the working vicinity
of the system.
The operator of the equipment is required to
repeat instruction about dangers and safety
measures at regular intervals (at least once a
year, for young persons twice a year).
Personal protective equipment
We call to your attention that the valid guide-➤
lines and requirements in accordance with
work surroundings (mining, closed areas
etc.) must be absolutely adhered to.
Please wear the prescribed protective➤
clothing at all times, as solvent vapours
and solvent splashes cannot be completely
avoided.
➤ Although spraying fog is kept to a
minimum when the correct pres-
sure setting and proper method of
operation are observed, the operat-
ing painter should wear a protective
breathing mask.

8 user's handbook Airless Spray Gun
SP500 • 550001 • e • 05.08
e
➤ To avoid burns, use protective gloves
when working with heated materials.
➤ Never use solvent or other materials
which present a health hazard for
cleaning skin. Only suitable skin pro-
tective, skin cleansing and skin care.
2.7 Installation site
Safety measures at installation site
Ensure there is sufcient ventilation at the ➤
workplace to prevent damage to health and
property. Observe the manufacturer’s pro-
cessing instructions at all times.
Despite the fact that no legal regulations➤
exist covering the low-fog airless spraying
method, dangerous solvent fumes and par-
ticles of paint should be removed by vaccu-
um.
Protect all objects in the vecinty of the ob-➤
jects to be sprayed from damage by over-
spray.
The owner / operator of this equipment is ➤
required to ensure that proper protection
against lightning strikes is available.
Comply strictly with the current rules
for accident prevention.
2.8 Behavior in case of emergency
Leaks
If leaks occur in the spray gun, the
equipment must be shut down imme-
diately and the entire system depres-
surized:
Follow the instructions in the User's Handbook
for the spraying equipment.
Replace defective parts immediately.
Injury
➤ Should an injury occur through con-
tact with liquid spray, we recommend
a doctor be called immediately.
Inform the doctor of the material sprayed➤
(e.g.paint) and the solvent (thinner). Have
the product data sheet at hand (address
and telephone number of supplier or ma-
nufacturer, name of material and material
number).
Know the local emergency phone numbers.➤
Be familiar with the rst-aid measures.➤
Fires
Read the instructions for re alarm and es-➤
cape routes put up in your factory.
Know the local emergency phone numbers.➤
Know the location and operation of re ➤
alarms, re extinguishers and sprinkler in-
stallations.
Take care that sufcient information for re ➤
prevention is provided.
Do not use any other extinguishing agents➤
than those which are prescribed by the ma-
nufacturer of the materials.
2 Safety

user's handbook Airless Spray Gun 9
SP500 • 550001 • e • 05.08
e
Safety 2
2.9 Protective equipment
The safety devices on the spray gun
are pressribed by law and may not be
removed for any reason.
All equipment is delivered with the following
safety devices (picture 2.10.1):
1. Finger Guard (Typ Guard)
Spray Gun Safety2.
Hand Guard3.
Spray Gun safety
By turning the safety lever to the horizontal
position, the spray gun is secured against acci-
dental operation.
The spray gun safety must be engaged upon
each work interruption, however short.
Hand Guard
The hand guard protects against accidental
operation of the spray gun, for example, by
contact with the workpiece or through dropping
the spray gun.
Tip Guard
The tip guard prevents damage to the tip, for
example, through dropping the spray gun.
Additionally, it protects the hand against contact
with the spray stream directly at the tip.
To prevent serious injury and
property damage, never operate
the spray gun without the tip
guard.
Pict. 2.10.1
1 2
3
All protection devices must be checked!
Before each commissioning of the spray gun!➤
Before beginning work on or with the spray➤
gun!
After all aligning work!➤
After cleaning and servicing!➤
After maintenance and repair!➤
Check list for inspecting the protection
features when the unit is in a depressurized
state
The safety lever on the Airless spray gun➤
should be checked for proper function.
The tip guard should be checked for tight-➤
ness.
The hand guard should be checked for da-➤
mage and for proper mounting.
If a protective device is not fully
operative, or another defect is de-
tected on the spray gun. interrupt
the compressed air supply to the
spray gun immediately and open
the drain valve.
The machine may be restarted only
if perfect function is restore
2.10 Service and
auxiliary materials
Alignment, servicing, maintenance and re-
pair of the spray gun
Alignment when changing production, as well
as servicing and cleaning, may be carried out
by trained operating personnel only.
Maintenance and repair may be carried out by
trained, qualied personnel only.
Before beginning such work, the spray equip-
ment must be turned off and the pressure relea-
sed. Follow the instructions in the User`s Guide
for the spray equipment.
Operate the spray gun again momentarily to

10 user's handbook Airless Spray Gun
SP500 • 550001 • e • 05.08
e
release any residual pressure before the spray
gun is removed from the spray equipment.
Proceed carefully! Residual pressure could be
present!
In any case, the function of all protective de-
vices, as well as perfect function of the machi-
ne, must be checked after completion of the
work.
Handling of auxiliary materials
When handling auxillary materials suchas
paint, solvents, oils, grease and other chemical
substances, comply with the safety and dosing
instructions of the manufacturer and the gener-
ally applicable regulations.
Leftover solvents, oils, grease and other chemi-
cal substances must be collected according to
the legal regulations for recycling and waste
disposal.
The local ofcial laws for the protection of waste
water must be observed.
2 Safety

user's handbook Airless Spray Gun 11Airless Spray Gun 11
SP500 • 550001 • e • 05.08
e
3 Equipment description
3.1 Spray gun models
The spray guns Model 500, Model 500 F,
Model 500 D and Model 500 D/FI are
suitable for airless spraying with a 500 bar maximum allow-
able pressure. These models are equipped with a 4-nger
trigger.
Additionally, model 500 FI is a gun lter (gun lter
insert) inside the spray gun handle.
The models 500 D and 500 D/FI are
additionally equipped with a swivel joint on the spray gun
handle. Due to this joint, the spray guns may be employed
exibly, that means without being impeded by the material
hose during spraying operation.The spray gun model
500 D-Fi is provided with a gun lter (gun lter
insert) inside the spray gun handle.
The spray gun Model 500 F is suitable for airless
spraying with a 500 bar maximum allowable pressure. This
model is equipped with a 4-nger trigger and a front-end
connector for the material hose.
Due to this front-end connector, the material to be applied
does not ow through the spray gun handle as in other mod-
els. This spray gun is especially suitable for the spraying
of water-based materials and hot spraying operations. The
material to be applied comes in contact only with parts made
of rust- and acid resistant material.
Description of positions:
paint unit1.
reversing switch2.
3a3. nger guard
3b standard-tip protection
suspension hook4.
safety frame5.
trigger6.
Models 500 + 500 FI
(with Finger Guard and Reversing Switch)
Models 500 D + WIWA 500 D/FI
(with Standard-Tip Protection)
Model 500 F
(with Standard-Tip Protection)
pressure unit7.
safety lock8.
grip9.
double nipple10.
swivel joint11.
front inlet12.

12 user's handbook Airless Spray Gun
SP500 • 550001 • e • 05.08
e
3.2 Spray gun accessories
Tip Filter (disk lter) (Picture 3.2.1)
Avoids clogging of the spray tip
Gun Filter Insert (Picture 3.2.2)
Accessory, avoids clogging of spray tip. Equipped with a wider lter area
than the tip lters.
Standard Tips (Picture 3.2.3)
The standard tips are suitable for all airless spray guns. They are produced
with high-quality, hard metal. The tip size depends on the eld of applica-
tion of the spray gun. For a tabular list of tip sizes and elds of application,
please refer to the Product Data Sheet for Airless Spay Guns.
Adjustable Tips (Picture 3.2.4)
They are especially suitable for the spraying of heavily abrasive materials.
Adjustable tips can be employed in any airless spray gun. Through a fast
opening of the tip, clogging in the tip can be easily removed.
Furthermore, the spray jet stream can be set at the adjustable tip without
removing the tip from the spray gun. Adjustable tips are suitable for a maxi-
mum allowable spraying pressure of 250 bar.
Standard-Tip Protection (Picture 3.2.5)
The tip protection avoids damage to the spray tip (for example by dropping
the spray gun.).
Reversing Switch with SphericalTip (Picture 3.2.6)
These spray tips are manufactured from high-quality tungsten carbide and
are suitable for all spray guns which are tted with a nger guard.
The tip size will depend on the application of the spray gun.
Cleaning and/or ushing of the tip is accomplished by turning the grip to
reverse the direction of the tip. Spraying is done in the direction of the ar-
row (Picture 3.2.8), ushing in the opposite direction (Picture 3.2.9).
Follow the separateinstructions for installation of the reversing switch.
Pict. 3.2.1
Pict. 3.2.2
Pict. 3.2.3
Pict. 3.2.4
Pict. 3.2 5
Pict. 3.2.6
3 Equipment description

user's handbook Airless Spray Gun 13Airless Spray Gun 13
SP500 • 550001 • e • 05.08
e
Finger Guard (Picture 3.2.7-3.2.9)
The nger guard prevents accidental contact of the hand / nger
directly with the spray stream.
The nger guard also functions as receiver for the reversing switch
with spherical tip.
The nger guard is always to be mounted together with the reversib-
le switch.Follow the separate instructions.
For further information on accessories (gun extensions, dis-
tributors etc.) please refer to the Product Data Sheet
for Airless Spray Guns.
Arrow: t"Spray"
Pict. 3.2.8
Arrow: u"Flush"
Pict. 3.2.9
Pict. 3.2 7
Equipment description 3

14 user's handbook Airless Spray Gun
SP500 • 550001 • e • 05.08
e
Prior to screwing the spray gun to the materi-
al hose of the spraying system, assemble all
required parts onto the spray gun.
The spray gun can be operated with the fol-
lowing accessories:
Standard tip➤
Reversing switch with tips➤
Adjustable tips➤
Tip protection cap➤
Gun lter inserts➤
Swivel joints➤
Spray gun extension➤
Distributor➤
Installation of the Spray Tip
The spray tip size is selected
according to the application of
the spray gun, the material to be
sprayed and object to be sprayed.
➤ Turn the safety lever to the
horizontal position (picture
4.1.1) to prevent accidental
operations of the spray
gun trigger.
Use a wrench to unscrew the tip protection➤
together with the retaining cap.
Remove the gasket from the tip protection➤
Place the appropriate spray tip exactly in the➤
recess of the tip protection.
Place the gasket into the tip protection➤
Mount the tip protection together with the➤
retaining cap onto the spray gun and adjust
the position of the tip protection according to
the desired spray pattern.
vertical➤ :
O
horizontal➤ :
O
Use a wrench to tighten the tip protection.➤
Pict. 4.1.1
4 Set-up for operation
Installation of the lter insert
The lter is available as a special accessory
from WIWA. Note: Filter is not suitable for the
WIWA 500 F (front inlet ).
Unscrew the male adapter orswivel from➤
the gun grip taking care not to damage the
seal. Use a wrench SW 19 on the gun grip,
turning in the opposite direction. Remove the
nut on the safety guard with a wrench SW17
to loosen the swivel.
Turn the safety guard to the side.➤
Detach the gun handle grip.➤
➤ Place the gun lter insert
into the conical gasket
of the gun body, with
long end piece pointed
towards the top. (Picture
4.1.2).
Re-install the handle and the safety frame in➤
the reverse order.
Assure the proper positioning of the
gasket.
Damaged gaskets must be replaced.
Connection of the material hose
Fasten the material hose at the inlet thread➤
of the spray gun by using a swivel nut.
The spray gun is ready for operation.➤
Insert this end piece
into the conical gasket
Pict. 4.1.2

user's handbook Airless Spray Gun 15Airless Spray Gun 15
SP500 • 550001 • e • 05.08
e
This will assure an even, soft and smooth
overlapping of the spray jet and will avoid
excessive material being coated when begin-
ning spraying.
Release the trigger before ending your mo-
vement.
Pict. 5.1.2 Pict. 5.1.3
Pausing while working
Secure the trigger when making a pause in➤
working.
Place the tip into a container with a suitable➤
solvent. This will prevent the paint from har-
dening in the tip, causing a blockage.
Spraying tips
Replace the spraying tip before it is
worn out.
Worn tips lead to excessive paint
consumption and lower the quality of
the paint's coating.
Cleaning
The spray gun and the spraying
system must be cleaned after each
application of 2K – coating material or
a water-based enamel.
Please refer to the advice given in the
user’s manual of the spraying system
(Chapter ”Out of operation”) Utilize
only the manufacturer-recommended
solvent appropriate for the spraying
material.
➤ Engage the safety on the
spray gun (picture 5.1.3).
Complete all necessary preparation on the➤
spray equipment following the instructions in
the User´s Guide of the spray equipment.
When using metal containers, due to
the possibility of static charges, insure
that the spray gun is grounded to the
container walls.
Disengage the gun safety catch and trigger➤
to begin coating.
Working pressure
The optimal working pressure is reached➤
when there is an even coating of material
with graduated edges.
Operate machine with only as much com-
pressed air as is necessary to achieve good
atomisation at the recommended spraying
distance of 30 cm.
If the pressure is too high, it leads to increa-➤
sed material consumption and paint mist.
If pressure is too low, it results in stripes and➤
varying coating thickness.
Spraying - painting
Hold the spraying gun at a right angle (90°)➤
to the area to be sprayed.
As soon as the spraying gun is held at ano-
ther angle, the coating will become uneven
and spotted (picture 5.1.1).
Move your spraying arm evenly.➤
Be certain to move at a constant speed and
to keep the spraying gun parallel to the area
being sprayed.
Manouver the spraying gun using your arm,
not your wrist.
Waving with the spraying gun leads to an
uneven coating (picture 5.1.2).
Have the spraying gun in motion before➤
pulling the trigger.
Pict. 5.1.1
Operation 5

16 user's handbook Airless Spray Gun
SP500 • 550001 • e • 05.08
e
5 Operation
Do not use narrow-necked cans or
barrels with bungholes.
If you do not have a user’s manual for the
spraying system at your disposal, rinse as
follows:
Close the compressed-air shutoff valve of➤
the spraying system.
Perform a compressed-air relief of the spra-➤
ying system
Set the safety of the spray gun➤
Detach the tip guard and the spray tip from➤
the spray gun. These parts need to be clea-
ned separately.
Place the suction pipe of the spraying sy-➤
stem in a container lled with solvent.
Open the air control valve and set to a low ➤
pressure of maximum 2 bar.
Direct the spray gun into the container and➤
spray the material remaining in the spraying
system into the container.
Ensure that the spray gun always maintains
contact with the container. As soon as sol-
vent emerges from the spray gun, release
the trigger and secure the safety on the
spray gun.
Direct the spray gun into an empty container➤
and spray until clean solvent emerges.
Secure the spray gun safety device (Picture➤
5.1.3).
Close the compressed-air shutoff valve of➤
the spraying system and perform the com-
pressed-air release.

user's handbook Airless Spray Gun 17Airless Spray Gun 17
SP500 • 550001 • e • 05.08
e
Operational disturbances and trouble-shooting 6
Fault Probable cause Remedies
Spray gun doesn’t close pro-
perly
Valve seat defective➤ Exchange valve seat and➤
needle (see chapter 7.1)
Spray gun leaks at gland
screw
Packing is not sufciently ➤
tightened
Package defective➤
Gently tighten packing➤
screw
Exchange package➤
(see chapter 7.1)
Spray gun won’t close or open Guiding sleeve clogged with➤
hardened paint
Valve seat defective➤
Remove pressure piece➤
(see chapter 7.2)
Exchange valve seat and➤
needle

18 user's handbook Airless Spray Gun
SP500 • 550001 • e • 05.08
e
Before maintenance or repair work is
performed, the spraying equipment
must be turned off and the pressure
released.
Follow the instructions in the User`s
Guide for the spray equipment.
Shortly hereafter, operate the spray
gun to ensure pressure release be-
fore detaching the spray gun from the
spraying system. Proceed carefully!
The spray gun requires regular application of
lubricants.
Therefore, proceed in the following manner:
Remove the screw from the closing screw on➤
the spray gun body.
Squeeze the trigger to its stopping point.➤
Fill silicone-free lubricant into the opening of➤
the closing screw.
Release the trigger.➤
Replace the screw in the closing screw.➤
If the spray gun is equipped with a gun lter
insert, clean the insert regularly.
Proceed in the following manner:
Dismount the material hose from the spray➤
gun.
Loosen the swivel joint (if applicable) from➤
the spray gun handle grip.
Screw the enclosed ring bolt (if applicable)➤
into the gun lter insert.
Pull the gun lter insert with the ring bolt out ➤
from underneath.
Clean the gun lter insert with the manufac-➤
turer recommended solvent.
Reinstall the gun lter insert in the reverse ➤
order.
7.1 Packing and
needle exchange
If the spray gun is leaking or does not close
properly, perform the following:
Loosen the tip guard including the spray tip➤
and gasket from the spray gun (SW22).
Depress the trigger completely and hold.➤
Remove the valve seat including gasket.➤
Insert the enclosed Allen key into one of the➤
holes at the front end of the guide sleeve
(Picture 7.1.1).
Pict. 7.1.1 Pict. 7.1.2
Turn the guide sleeve until the set screw is➤
positioned at the recess of the spray gun
body.
Loosen the setting screw one turn by using➤
the Allen key.
Remove the needle through the front end by➤
using small (needle nose) pliers. Ensure that
the ball-shaped head of the needle is not
damaged during this process.
Loosen the nut between the trigger and➤
spray gun body while holding the trigger in
the squeezed position.
Place the enclosed extraction ring onto the➤
insert and tightly screw on the tip guard or
the swivel nut, as appropriate.
Take out the gasket.➤
Remove the packing screw and remove the➤
packing from the insert.
Note: It can be pressed out from the reverse
side using a scribe, a screw or something
similar.
Clean all parts with a manufacturer recom-➤
mended solvent and then lubricate with
silicone-free grease.
Always replace damaged gaskets and pack-➤
ings.
7 Maintenance and repair

user's handbook Airless Spray Gun 19Airless Spray Gun 19
SP500 • 550001 • e • 05.08
e
Maintenance and repair 7
Reinstall in the reverse order.
Ensure the proper positioning of the
packing (V to pressure-released side)
and the needle (ball-shaped head to
the front).
Push the packing screw together with the➤
packing onto the valve needle and place into
the gun body. Pull the valve needle out and
tighten the packing screw snugly by hand.
Adjust the trigger play to 2-3 mm:➤
Loosen the setting screw one turn by➤
using the Allen key.
Remove the small screw from the closure➤
screw.
Place the Allen key through the hole in➤
the closure screw into the shoulder screw.
The shoulder screw is found behind the
springs.
Adjust the position of the guide sleeve by➤
turning the Allen key.
There must be noticeable play at the
trigger.
Turn clockwise for more play.➤
Turn counter-clockwise for less play➤
Replace the small screw in the closure➤
screw.
Fasten the set screw by using the Allen➤
key.
Tighten the closure screw (max.➤ 1/4turn).
Check the spray gun for leaks.
If leaking is present: Turn off the unit and
perform pressure release on all components
(incl. gun).
Tighten the packing screw an additional 1/4
turn.
7.2 Pressure unit and handle grip
Pressure unit
In case of difcultyin
operation caused by
contamination in the pres-
surized section (Picture
7.2.1), proceed as follows:
Insert the included hex➤
wrench into one of the
holes at the front end of
the guide sleeve.
Turn the guide sleeve until the set screw is➤
positioned at the recess of the spray gun
body.
Loosen the setting screw one turn using the➤
hex wrench.
Loosen the small screw on the closing screw.➤
Place the spray gun in a stock und loosen➤
the closing screw with a wrench SW 24.
Take the compression spring(s) out of the➤
guide sleeve.
Remove the guide sleeve.➤
Grease the guide sleeve and spring(s) with➤
acid- and silicon-free grease.
Place the guide sleeve back in the gun body.➤
Attention! The threaded part of the guide
sleeve must close tightly on the gun body.
Place the compression spring(s) into the➤
guide sleeve.
Coat the threads of the closing screw with➤
soft setting(red) Loctite and screw the clo-
sing screw tightly into the gun body.
Adjust the trigger play to 2-3 mm:➤
Remove the small screw from the closure➤
screw.
Remove the small screw from the closure➤
screw.
Place the Allen key through the hole in➤
the closure screw into the shoulder screw.
The shoulder screw is found behind the
springs.
Adjust the position of the guide sleeve by➤
turning the Allen key.
There must be noticeable play at the
trigger.
Turn clockwise for more play.➤
Pict 7.2.1
Pressure unit

20 user's handbook Airless Spray Gun
SP500 • 550001 • e • 05.08
e
Turn counter-clockwise for less play.➤
Replace the small screw in the closure➤
screw.
Fasten the set screw by using the Allen➤
key.
Tighten the closure screw (max.➤ 1/4turn).
Check the spray gun for leaks.
If leaking is present: Turn off the unit and
perform pressure release on all components
(incl. gun).
Tighten the packing screw an additional➤ 1/4
turn.
Handle grip
Loosen the screw, which connects the➤
handle to the spray gun body (Picture 7.2.2).
➤
➤ If applicable, screw the
male adapter or the
swivel off the gun body
and take the gasket out
of the handle.
Turn the safety guard➤
away from the handle.
Unscrew the handle.➤
Test the gasket between the spray gun body➤
and the handle for damage.
Replace all damaged gaskets.➤
If required, exchange the gun lter insert (if ➤
applicable) of the handle.
Reassemble the handle in the reverse order.➤
Pict. 7.2.2
7 Maintenance and repair
Other manuals for 500
1
This manual suits for next models
5
Other wiwa Paint Sprayer manuals

wiwa
wiwa 14025 R/F User manual

wiwa
wiwa AIRCOMBI ProFit Series User manual

wiwa
wiwa DUOMIX 270 User manual

wiwa
wiwa HERKULES PFP User manual

wiwa
wiwa 500 User manual

wiwa
wiwa PHOENIX 6530 User manual

wiwa
wiwa PUGUN 4040 User manual

wiwa
wiwa AirCombi PHOENIX GX Series User manual

wiwa
wiwa OPTIMA 2100 User manual

wiwa
wiwa Duomix 333 Instruction Manual
Popular Paint Sprayer manuals by other brands

Pulmic
Pulmic INDUSTRIAL 35 manual

Silvan Selecta
Silvan Selecta UP100-S7 instruction manual

C.A. Technologies
C.A. Technologies Jaguar 300H Product information

Nordson
Nordson Kinetix 334593-04 Customer product manual

Hardi
Hardi New NAVIGATOR 1100 Operator's manual

Hyundai
Hyundai HSPA800-AC Original instructions