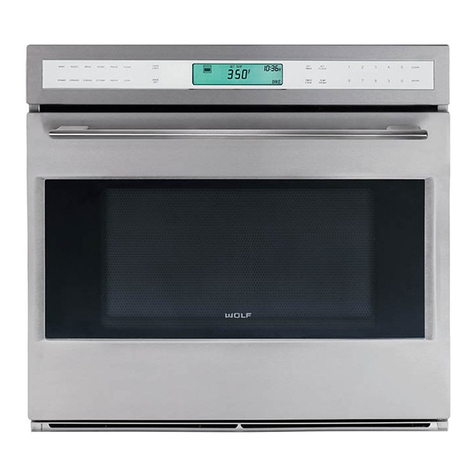
Wolf E Series Configuration guide

SERVICE MANUAL INTRODUCTION
This service manual helps with troubleshooting and diagnosing
malfunctions, completion of repairs, and return of the product to
proper operating condition. Read the complete instructions
contained within before initiating any repairs.
This guide is intended for use by Factory Certified Service. Wolf
Appliance, Inc. recommends that only Factory Certified Service
companies do repairs.
Warning and Caution product safety labels appear throughout
this manual. Product safety labels appear at the beginning of
some sections. Follow the instructions in the product safety
labels to avoid personal injury and/or product damage. The
sample safety labels explain the types of notices that appear in
this manual.
WARNING
States a hazard that may cause serious injury or
death if precautions are not followed.
CAUTION
Indicates minor injury or product damage may occur
if precautions are not followed.
IMPORTANT NOTE: Highlights especially important information.
TIP: Indicates additional, useful information.
Information and images contained herein are copyright of Wolf
Appliance, Inc. Neither this manual nor any information or
images contained herein may be copied or used in whole or in
part without the express written consent of Wolf Appliance, Inc.
©Wolf Appliance, Inc., all rights reserved.
WOLF PRODUCT RATING PLATE INFORMATION
Important information for each product is listed on the product
rating plate. Rating plates identify:
• Model
• Serial number
• Electrical information
MODEL DESCRIPTIONS AND SALES ACCESSORIES
For more details on individual model descriptions and a listing
of all compatible sales accessories, see the
Wolf Product and
Sales Accessory Reference Guide
.
E SERIES OVEN MODEL KEY
Model Character Description
ICB International designation
SO Single oven
DO Double oven
24, 30 Width (in inches)
50 Model differentiator
PE Professional E Series
TE Transitional E Series
CE Contemporary E Series
/B Black trim
/S Stainless steel trim
/T Tubular handle
/P Professional handle
PRODUCT USE AND CARE AND INSTALLATION GUIDES
Product use and care guides, installation guides, and other
product specifications are available in the
Product
Specifications and Manuals Library
.
UNIT WARRANTY
Product warranty is determined by the installation location and
the date of installation.
• View product warranties at
https://www.subzero-wolf.com/
warranty
.
• Warranties start on the day of product installation.
• Search for warranty and service information by serial
number, customer last name, and address using Unit
History at
http://service.subzero.com/Tools/UnitHistory
.
E Series Oven
General Information
GENERAL INFORMATION
service.subzero.com
829345 REVA 1

E SERIES OVEN CONTROL PANEL
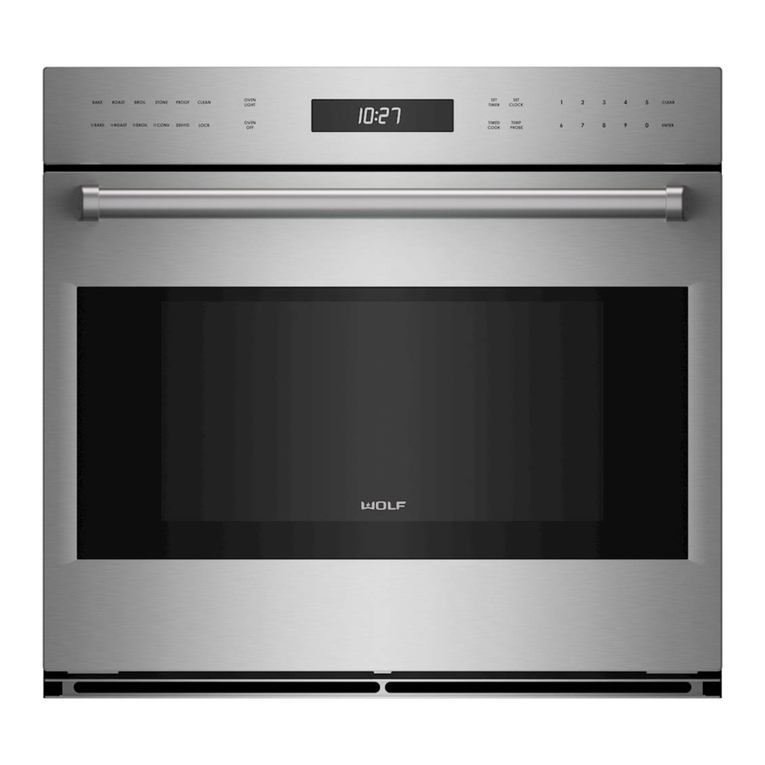
The E Series Ovens control panel allows you to turn the oven on
or off, select cooking modes, and set the timer and
temperature.
Single Oven Control Panel
Double Oven Control Panel
INITIAL POWER-UP SCREEN
When turning on the unit for the first time, the Set Model screen
appears.
When the unit is energized after the model has been set:
• On a 50 Hz electrical supply, the Set Language screen
appears, then the Set Time Format screen.
• On a 60 Hz electrical supply, the Set Time Format screen
appears.
Set the Model
1Scroll up or down to highlight the correct model number.
2Touch Set or Start/Enter. The confirmation screen appears.
3If the model number is correct, touch Confirm or Start/Enter.
The Set Language or Set Time Format screen appears.
Set the Language on Power-Up
1The Language Selection screen appears.
The available languages are:
• English
• Spanish
• French
• German
• Italian
• Dutch
• Chinese
E Series Oven
Settings
SETTINGS
service.subzero.com
829345 REVA 2

2Scroll left or right to highlight the desired language. Touch
Start/Enter or the highlighted selection. The Set Language
screen appears.
3Touch Start/Enter or Set.
Set the Time on Power-Up
1The Select Time Format screen appears.
2Scroll left or right to highlight the 12-Hour or 24-Hour
option. Touch Start/Enter or the highlighted selection. The
Select Current Time screen appears.
3Enter the current time on the keypad. Touch AM or PM.
4Touch Start/Enter. The Home screen appears.
E Series Oven
Settings
SET THE LANGUAGE ON POWER-UP (continued)
service.subzero.com
829345 REVA 3

SETTINGS
Settings allow the user to select preferences as listed in the table below.
SETTINGS
Name Function
Time Set the day and select between 12-hour and 24-hour formats. Scroll up and down to adjust
hours, minutes, 12-hour or 24-hour clock, and AM or PM (for 12-hour clock).
Sabbath This appliance is certified by Star-K to meet strict regulations along with the specific
instructions found on www.star-k.org. The modes available while in Sabbath Mode are Bake,
Roast, Warm, and Proof.
Clock Change the way the clock appears when the oven is not in operation.
Connect Turn on or off the unit's ability to connect to the Sub-Zero Group Owner's App.
Standby Low-power draw while the oven is idle. When Standby is on, the display is off while the oven
is idle. When Standby is off, the display shows the clock while the oven is idle.
Language Change the language of the unit. Choices include Dutch, English, French, German, Italian,
Chinese, and Spanish.
Units Set the measurement units to either imperial or metric.
Showroom For use by showrooms only. If Showroom Mode is on, the oven is not useful for normal
operation.
Info Information about the icons on the UIM, settings, and cooking modes.
About System information, including the oven serial number.
Temp Offset Increase or decrease the temperature up to 35°F (19°C) from the RTD temperature being
used by the controls. This internal offset is reflected in the temperature display. Wolf
Appliance's assistance is recommended.
Calibration Calibrate the touch location to graphic elements on the display. This setting is useful when
touching the screen from sharp angles.
Sound Adjust the volume and frequency of the beeper and chime tone.
Brightness Allows you to adjust the brightness of the display.
SET THE TIME
1Touch the screen. The Home screen appears.
2Touch Settings. The Settings screen appears.
E Series Oven
Settings
service.subzero.com
829345 REVA 4

3Touch Start/Enter or Time. The Select Time Format screen
appears.
4Scroll left or right to highlight the 12-Hour or 24-Hour
option. Touch Start/Enter or the highlighted selection. The
Select Current Time screen appears.
5Enter the current time on the keypad. Touch AM or PM.
6Touch Start/Enter. The Home screen appears.
SET SABBATH MODE
1Touch the screen. The Home screen appears.
2Touch Settings. The Settings screen appears.
3Scroll to select Sabbath on the UIM. Touch Sabbath or
Start/Enter. The Sabbath screen appears.
4Scroll left or right to highlight the On or Off option. Touch
the highlighted selection or Start/Enter. The Sabbath Set
screen appears.
E Series Oven
Settings
SET THE TIME (continued)
service.subzero.com
829345 REVA 5

5Touch Set or Start/Enter. The Home screen with the
Sabbath icon appears.
6Touch Bake, Roast, More, or Warm on the control panel.
The other modes are not available in Sabbath.
7Touch the control panel to enter the termperature. Then
touch Start/Enter.
8Touch Light to turn the oven light on or off for Sabbath.
9Touch Timed Cook. The Select Cook Time Duration screen
appears.
10 Touch the control panel to enter the cook time duration.
11 Touch Start/Enter. The Stop Time screen appears.
• Touch the control panel to enter the stop time.
• Changing the stop time changes the time the oven
starts heating.
• If the stop time is not adjusted, the oven starts
immediately.
• If the stop time is the next day, "Tomorrow" appears.
12 Touch Start/Enter. The cooking mode screen appears.
SET THE CLOCK STYLE
1Touch the screen. The Home screen appears.
E Series Oven
Settings
SET SABBATH MODE (continued)
service.subzero.com
829345 REVA 6

2Touch Settings. The Settings screen appears.
3Scroll to Clock on the UIM. Touch Clock or Start/Enter. The
Clock Display Style screen appears.
4Scroll left or right to highlight the Analog, Logo, Blank, or
Digital option. Touch the highlighted selection or Start/
Enter. The Clock Set screen appears.
5Touch Set or Start/Enter. The Home screen appears.
ENABLE THE CONNECTED FEATURE
1Touch the screen. The Home screen appears.
2Touch Settings. The Settings screen appears.
E Series Oven
Settings
SET THE CLOCK STYLE (continued)
service.subzero.com
829345 REVA 7

3Scroll to Connect on the UIM. Touch Connect or Start/Enter.
The Connect On or Off screen appears.
4Scroll left or right to highlight On or Off. Touch the
highlighted selection or Start/Enter. The Connect Set screen
appears.
5Touch Set or Start/Enter. The Home screen appears.
SET STANDBY
1Touch the screen. The Home screen appears.
2Touch Settings. The Settings screen appears.
3Scroll to Standby on the UIM. Touch Standby or Start/Enter.
The Standby screen appears.
E Series Oven
Settings
ENABLE THE CONNECTED FEATURE (continued)
service.subzero.com
829345 REVA 8

4Scroll left or right to highlight the On or Off option. Touch
the highlighted selection or Start/Enter. The Standby set
screen appears.
5Touch Set or Start/Enter. The Home screen appears.
SET THE LANGUAGE
1Touch the screen. The Home screen appears.
2Touch Settings. The Settings screen appears.
3Scroll to Language on the UIM. Touch Language or Start/
Enter. The Language Selection screen appears.
The available languages are:
• English
• Spanish
• French
• German
• Italian
• Dutch
• Chinese
E Series Oven
Settings
SET STANDBY (continued)
service.subzero.com
829345 REVA 9

4Scroll left or right to highlight the desired language. Touch
Start/Enter or the highlighted selection. The Set Language
screen appears.
5Touch Start/Enter or Set. The Home screen appears.
CHANGE TEMPERATURE UNITS
1Touch the screen. The Home screen appears.
2Touch Settings. The Settings screen appears.
3Scroll to Units on the UIM. Touch Units or Start/Enter. The
Units Selection screen appears.
4Scroll left or right to highlight the desired units. Touch the
highlighted selection or Start/Enter. The Set Units screen
appears.
5Touch Set or Start/Enter. The Home screen appears.
SET SHOWROOM MODE
1Touch the screen. The Home screen appears.
E Series Oven
Settings
SET THE LANGUAGE (continued)
service.subzero.com
829345 REVA 10

2Touch Settings. The Settings screen appears.
3Scroll to Showroom on the UIM. Touch Showroom or Start/
Enter. The Showroom screen appears.
4Scroll left or right to highlight the On or Off option. Touch
the selection or Start/Enter. The Set Showroom screen
appears.
5Touch Set or Start/Enter. The Home screen appears. When
the unit is in Showroom Mode, "Showroom" appears on the
Home screen.
OPTION INFO
1Touch the screen. The Home screen appears.
2Touch Settings. The Settings screen appears.
3Scroll to Info on the UIM.
E Series Oven
Settings
SET SHOWROOM MODE (continued)
service.subzero.com
829345 REVA 11

4Touch Info or Start/Enter. The Info screen appears.
• Info has three options:
• Home
• Settings
• Cooking
5Scroll until the desired option is centered on the UIM. Touch
the option or Start/Enter. The home screen of that option
appears. Selecting an option gives information on what the
option is. The available options are below.
The options under the Home menu are:
• Lock
• Time
• Settings
• Timer 1
• Light
• Timer 2
The options under the Settings menu are:
• Sabbath
• Clock
• Standby
• Language
• Units
• Showroom
• About
• Temp Offset
• Calibration
• Sound
• Brightness
• Time
• Info
The options under the Cooking menu are:
• Mode
• Bake
• Broil
• Roast
• Connect
• Proof
• Dehydrate
• Stone
• Clean
• Gourmet
• Warm
• Convection Roast
• Convection
E Series Oven
Settings
OPTION INFO (continued)
service.subzero.com
829345 REVA 12

ABOUT (UNIT INFORMATION)
1Touch the screen. The Home screen appears.
2Touch Settings. The Settings screen appears.
3Scroll to About on the UIM. Touch About or Start/Enter. The
About screen appears.
4The About screen provides information on the unit.
• Company internet address.
• Unit model number.
• Unit serial number.
• MCB (main control board) version number.
• LVM (low voltage module) version number.
• HVM (high-voltage module) version number.
ADJUST TEMPERATURE OFFSET
1Touch the screen. The Home screen appears.
2Touch Settings. The Settings screen appears.
3Scroll to Temp Offset on the UIM. Touch Temp Offset or
Start/Enter. The Temp Offset screen appears.
E Series Oven
Settings
About (Unit Information) (continued)
service.subzero.com
829345 REVA 13

4Scroll to set the Temp Offset between -35°F to 35°F (-19°C
to 19°C). Touch the temperature offset or Start/Enter. The
Temp Offset Set screen appears.
5Touch Set or Start/Enter. The Home screen appears.
CALIBRATE THE SCREEN
1Touch the screen. The Home screen appears.
2Touch Settings. The Settings screen appears.
3Scroll to Calibration on the UIM. Touch Calibration or Start/
Enter. The Calibration screen appears.
4Touch the white dot on the display.
5After touching the white dot in the four corners of the
display, the white dot appears in the center. Touch the
center white dot. The calibration is complete, and the Home
screen appears.
ADJUST VOLUME AND TONE
1Touch the screen. The Home screen appears.
E Series Oven
Settings
ADJUST TEMPERATURE OFFSET (continued)
service.subzero.com
829345 REVA 14

2Touch Settings. The Settings screen appears.
3Scroll to Sound on the UIM. Touch Sound or Start/Enter.
The Sound screen appears.
4Scroll to Alert or Keypad to set the sound for that option.
Touch the selected option or Start/Enter. The Volume
screen appears.
5Scroll to select Mute, 1, 2, 3, 4, or 5. Touch the selected
volume or Start/Enter. The Tone screen appears.
6Scroll to select Low, Medium, or High. Touch the selected
tone or Start/Enter. The Set screen appears.
7Touch Set or Start/Enter. The Home screen appears.
ADJUST BRIGHTNESS
1Touch the screen. The Home screen appears.
E Series Oven
Settings
ADJUST VOLUME AND TONE (continued)
service.subzero.com
829345 REVA 15

2Touch Settings. The Settings screen appears.
3Scroll to Brightness on the UIM. Touch Brightness or Start/
Enter. The Brightness screen appears.
4Scroll to adjust the brightness between 0% and 100% in
5% increments. Touch the selected percentage or Start/
Enter. The Brightness Set screen appears.
5Touch Set or Start/Enter. The Home screen appears.
E Series Oven
Settings
ADJUST BRIGHTNESS (continued)
service.subzero.com
829345 REVA 16

OVEN COOKING MODES
Touching a mode on the control panel shows the mode or mode options on the user interface module (UIM).
COOKING MODES
Mode Preset Temperature Minimum Temperature Maximum Temperature
Bake 350°F (175°C) 200°F (95°C) 550°F (285°C)
Roast 350°F (175°C) 200°F (95°C) 550°F (285°C)
Broil High Low High
Warm 180°F (80°C) 140°F (60°C) 200°F (95°C)
Clean Clean mode
Conv 325°F (160°C) 200°F (95°C) 550°F (285°C)
Roast 325°F (160°C) 200°F (95°C) 550°F (285°C)
Proof 85°F (30°C) 85°F (30°C) 110°F (45°C)
Gourmet Access the Gourmet programmed recipes. See the Gourmet Mode section.
More Access the More Mode menu. See the More Mode section.
BAKE MODE
1Touch the screen. The Home screen appears.
2Touch Bake on the control panel. The Bake screen appears.
3Touch the control panel to enter the temperature. Then
touch Start/Enter.
• Touching Start/Enter without adjusting the temperature
turns the oven on at the preset temperature.
• Touching Cancel on the control panel clears the
temperature setting.
• After touching Start/Enter, the oven enters preheat.
• When the preheat is complete, the oven chimes once.
E Series Oven
Oven Modes
OVEN MODES
service.subzero.com
829345 REVA 17

ROAST MODE
1Touch the screen. The Home screen appears.
2Touch Roast on the control panel. The Roast screen
appears.
3Touch the control panel to enter the temperature. Then
touch Start/Enter.
• Touching Start/Enter without adjusting the temperature
turns the oven on at the preset temperature.
• Touching Cancel on the control panel clears the
temperature setting.
• After touching Start/Enter, the oven enters preheat.
• When the preheat is complete, the oven chimes once.
BROIL MODE
1Touch the screen. The Home screen appears.
E Series Oven
Oven Modes
Roast Mode (continued)
service.subzero.com
829345 REVA 18

2Touch Broil on the control panel. The Broil screen appears.
3Touch 1 on the control panel to set the Broil to low, touch 2
to set the Broil to medium, and touch 3 to set the Broil to
High. Then touch Start/Enter.
• Touching Start/Enter without adjusting the temperature
turn the broil on at High.
• There is no preheat for Broil Mode.
WARM MODE
1Touch the screen. The Home screen appears.
2Touch Warm on the control panel. The Warm screen
appears.
3Touch the control panel to enter the temperature. Then
touch Start/Enter.
• Touching Start/Enter without adjusting the temperature
turns the oven on at the preset temperature.
• Touching Cancel on the control panel clears the
temperature setting.
• There is no preheat for the Warm Mode.
CLEAN MODE
1Touch the screen. The Home screen appears.
E Series Oven
Oven Modes
BROIL MODE (continued)
service.subzero.com
829345 REVA 19

2Touch Clean on the control panel. The Clean screen
appears.
3Touch Start or Start/Enter. The "Remove oven racks ..."
message appears.
4Touch OK or Start/Enter.
• Touching OK or Start/Enter turns the oven on and
locks the oven door.
5When the Clean cycle is complete, the oven chimes four
times.
• The oven door unlocks when the temperature is below
550°F (288°C).
CONVECTION MODE
1Touch the screen. The Home screen appears.
2Touch Conv on the control panel. The Conv screen appears.
E Series Oven
Oven Modes
CLEAN MODE (continued)
service.subzero.com
829345 REVA 20
Other manuals for E Series
7
Table of contents
Other Wolf Oven manuals

Wolf
Wolf ICBSO24TE User manual

Wolf
Wolf CONVECTION STEAM OVENS User manual

Wolf
Wolf M Series User manual

Wolf
Wolf M Series User manual

Wolf
Wolf L Series User manual

Wolf
Wolf DO30F/S L Series User manual

Wolf
Wolf e Series User manual

Wolf
Wolf DO30U/B User manual

Wolf
Wolf e Series User manual

Wolf
Wolf CSO30TE/S/TH User manual

Wolf
Wolf e Series User manual

Wolf
Wolf e Series User manual

Wolf
Wolf L Series SO30F User manual

Wolf
Wolf M Series User manual

Wolf
Wolf DO30F User manual

Wolf
Wolf SO30-2U User manual

Wolf
Wolf L Series User manual

Wolf
Wolf L Series SO30F Guide

Wolf
Wolf SPO30M User manual

Wolf
Wolf 48" (1219) Dual Fuel Ranges Instructions for use