Wolf E Series User manual

Guía de uso y mantenimiento
Guide d’utilisation et d’entretien
Guida all’uso e alla manutenzione
Bedienungs- und Pflegeanleitung
Gids voor gebruik en onderhoud
使用和维护指南
E Series Oven
Use and Care Guide

2 | English
E Series Oven
Customer Care
The model and serial number are listed on the product
rating plate. Refer to page 5 for rating plate location. For
warranty purposes, you will also need the date of installa-
tion and name of your authorized Wolf dealer. Record this
information below for future reference.
SERVICE INFORMATION
Model Number
Serial Number
Date of Installation
Certified Service Name
Certified Service Number
Authorized Dealer
Dealer Number
Important Note
To ensure this product is installed and operated as safely
and eciently as possible, take note of the following types
of highlighted information throughout this guide:
IMPORTANT NOTE highlights information that is especially
important.
CAUTION indicates a situation where minor injury or prod-
uct damage may occur if instructions are not followed.
WARNING states a hazard that may cause serious injury or
death if precautions are not followed.
Contents
3Safety Precautions
5E Series Oven Features
5Oven Operation
10 Care Recommendations
11 Troubleshooting
11 Wolf Warranty

wolfappliance.com | 3
Safety Precautions
IMPORTANT INSTRUCTIONS
GENERAL SAFETY PRECAUTIONS
• Read this guide carefully before using this appliance to reduce
risk of fire, electric shock or injury.
• This appliance must be properly installed and serviced by a
qualified installer or service agency and grounded (earthed) by
a qualified technician.
• Clean only those parts listed in this guide.
• Do not use oven cleaners. No commercial oven cleaner or
oven liner protective coating of any kind should be used in or
around any part of the oven.
• Do not use a steam cleaner.
• Do not use harsh abrasive cleaners or sharp metal scrapers to
clean the oven door glass since they can scratch the surface,
which may result in shattering of the glass.
CAUTION
Before using self-clean, remove any excess spillage as well
as the broiler pan, oven racks, oven rack guides and any
other utensils.
WARNING
The appliance and its accessible parts become hot during
use. Care should be taken to avoid touching heating ele-
ments. Children less than 8 years of age shall be kept away
unless continuously supervised.
WARNING
This appliance can be used by children aged from 8 years
and above and persons with reduced physical, sensory or
mental capabilities or lack of experience and knowledge if
they have been given supervision or instruction concerning
use of the appliance in a safe way and understand the haz-
ards involved. Children shall not play with the appliance.
Cleaning and user maintenance shall not be made by chil-
dren without supervision.

4 | English
Safety Precautions
IMPORTANT INSTRUCTIONS
GENERAL SAFETY PRECAUTIONS
• Always use dry pot holders when removing pans from this
appliance. Wet or damp pot holders can cause steam burns.
Do not use a towel or bulky cloth in place of pot holders.
• Exercise caution when opening the oven door. Let hot air or
steam escape before looking or reaching into the oven.
• Be sure that the oven cool air intake (located above the door)
and oven exhaust vent (located below the door) are unob-
structed at all times.
• Position oven racks in desired locations when oven is cool. If
a rack must be repositioned after the oven is already hot, be
sure pot holder does not contact a hot heating element in the
oven.
• Do not repair or replace any part of this appliance unless spe-
cifically recommended in literature accompanying this appli-
ance.
• Do not use aluminum foil to line any part of this appliance.
• Never use this appliance to warm or heat the room.
• Do not use water on grease fires. Smother the flame or use a
dry chemical or foam-type extinguisher.
• Do not heat unopened food containers, such as baby food jars
and cans. Pressure build-up may cause the container to burst
and cause injury.
• Do not store or use gasoline or other flammable vapors and
liquids in the vicinity of this or any other appliance.
• Do not store items of interest to children above or at the back
of this appliance, as they could climb on the appliance to
reach items and be injured.
• Do not clean oven gasket; rubbing or moving the gasket may
compromise the door seal.
• Wear proper apparel. Loose-fitting or hanging garments
should never be worn while using this appliance.

wolfappliance.com | 5
Getting Started
We know you are eager to start cooking, but before you
do, please take some time to read this use and care guide.
Whether you are an occasional cook or an expert chef, it
will be to your benefit to familiarize yourself with the safety
practices, features, operation, and care recommendations
of your Wolf E Series Oven.
To ensure the best results, review the cooking modes and
special features on page 8.
CAUTION
Do not place cookware on the oven floor or use
aluminum foil or other material to line the oven
floor or side walls. Failure to adhere to this notice
will damage the porcelain interior and will void your
warranty.
Oven Operation
To insert a full-extension rack, place the two rear tabs onto
the rack guide (one tab above and one below). Refer to
the illustration below. Angle the rack slightly and slide back
until the front rack notch engages the front rack guide.
Oven Racks
OVEN RACK GUIDES
To install the rack guides in the oven, locate the mount-
ing screws on the oven side walls. Place the rack guide
mounting tabs over the top screws, pivot inward, and slide
down until fully seated. Refer to the illustration below.
OVEN RACKS
To insert a standard rack in the oven, place the rack anti-tip
lock under the side rack guide rails. Slide the rack back
and lift up to clear the rack stops. Continue to slide the
rack back until completely inside the oven. Refer to the
illustration below.
REAR TAB
Full-extension rack
E Series Oven Features
FEATURES
1Product Rating Plate
2Adjustable Oven Rack
3Full-Extension Oven Racks
4Control Panel
5Touchscreen
6Convection Fans
7Temperature Probe Receptacle
8Halogen Lighting
E Series Oven
4
7
8
3
62
1
5
MOUNTING
TABANTI-TIP
LOCK
RACK
STOP
Oven rack guide
Oven rack anti-tip lock

6 | English
Controls
Wolf E Series Ovens use a combination of a control panel
and touchscreen. The oven has ten cooking modes—Bake,
Convection, Roast, Convection Roast, Broil, Proof, Warm,
Gourmet, Stone, and Dehydrate. Stone and Dehydrate
require accessories.
To start cooking:
Touch the desired cooking mode or touch (More) to
access additional modes.
1 Touch (Start/Enter) to select the preset temperature
or use the number pads to change the temperature.
NOTE: Touch (Clear) at any time to go back.
2 Touch (Start/Enter).
CONTROL LOCK
The lock feature prevents unwanted control panel and
touchscreen operation. The lock feature must be reset
after a power outage.
To lock or unlock:
1 Touch and hold (Lock) for three seconds.
Touchscreen
Oven Operation
PRIOR TO USE
To ensure all residual oil from the manufacturing process
has been removed, the oven must go through the follow-
ing procedure:
1 Clean the oven thoroughly with hot water and a mild
detergent. Rinse and dry with a soft cloth.
2 Turn on ventilation. Some smoke and odor is normal.
3 Touch (Convection Roast) and set the temperature
to 260°C for one hour.
4 Touch (O) and allow the oven to cool with the
door closed.
OVEN LIGHT
The oven light turns on automatically when the door is
open and o when closed. To turn the light on while the
door is closed, touch (Light) on the touchscreen.
PREHEAT
During preheat, the oven is heated as quickly and evenly
as possible and is not ideal for cooking. Preheat should
be used for all cooking modes except Broil, Proof, Warm,
Dehydrate, and some modes in Gourmet. Once preheat
is complete, a chime indicates the oven has reached set
temperature.
CLOCK
The clock is visible on the touchscreen during all cooking
modes. It is very important the clock be set to the correct
time if a timed cook feature is used. The clock must be
reset after a power outage.
Setting clock:
1 Touch (Settings), then select Time.
2 Touch 12 Hour or 24 Hour mode and use the control
panel to set the time.
3 Select AM or PM, then touch (Start/Enter). A chime
indicates the clock has been set.
Time can also be adjusted by touching the time on the
touchscreen.
Oven Operation
10:30
Control panel
CONTROL PANEL TOUCH PADS
O
Clear
Start/Enter
Bake
Convection
Roast
Convection Roast
Broil
Proof
Warm
Gourmet
Clean
More

wolfappliance.com | 7
Oven Operation
Cooking Modes
GOURMET
Gourmet provides a variety of quick and convenient meal
preparations. Choose from six categories—Meat, Fish,
Baked Goods, Pizza, Vegetables, and One Dish Meals.
After a selection is made, Gourmet recommends the
proper rack position, sets the cooking mode, and automat-
ically adjusts the temperature—sometimes using multiple
modes and temperatures. The oven does not turn o
automatically when the cook time is complete.
For more information regarding Gourmet, refer to the
techniques and recipes guide included with your appliance.
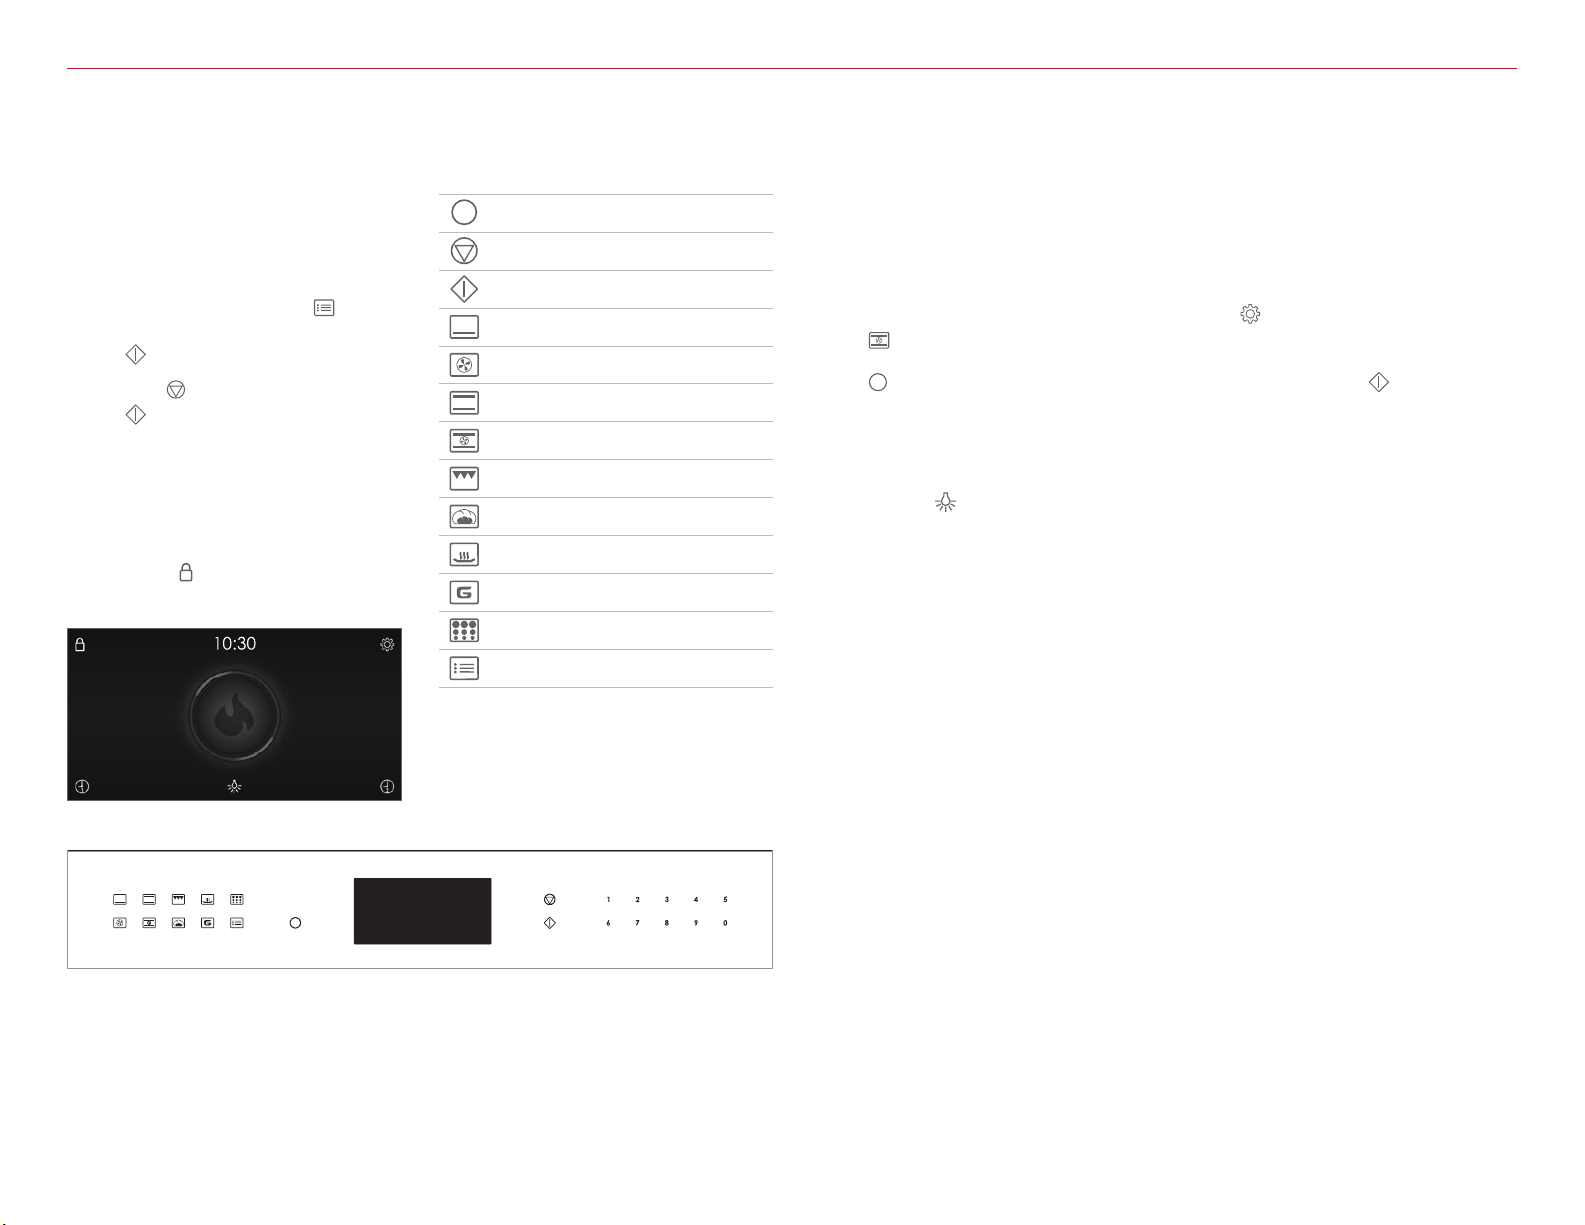
Setting controls:
1 Touch (Gourmet).
2 Use the touchscreen to select the desired settings.
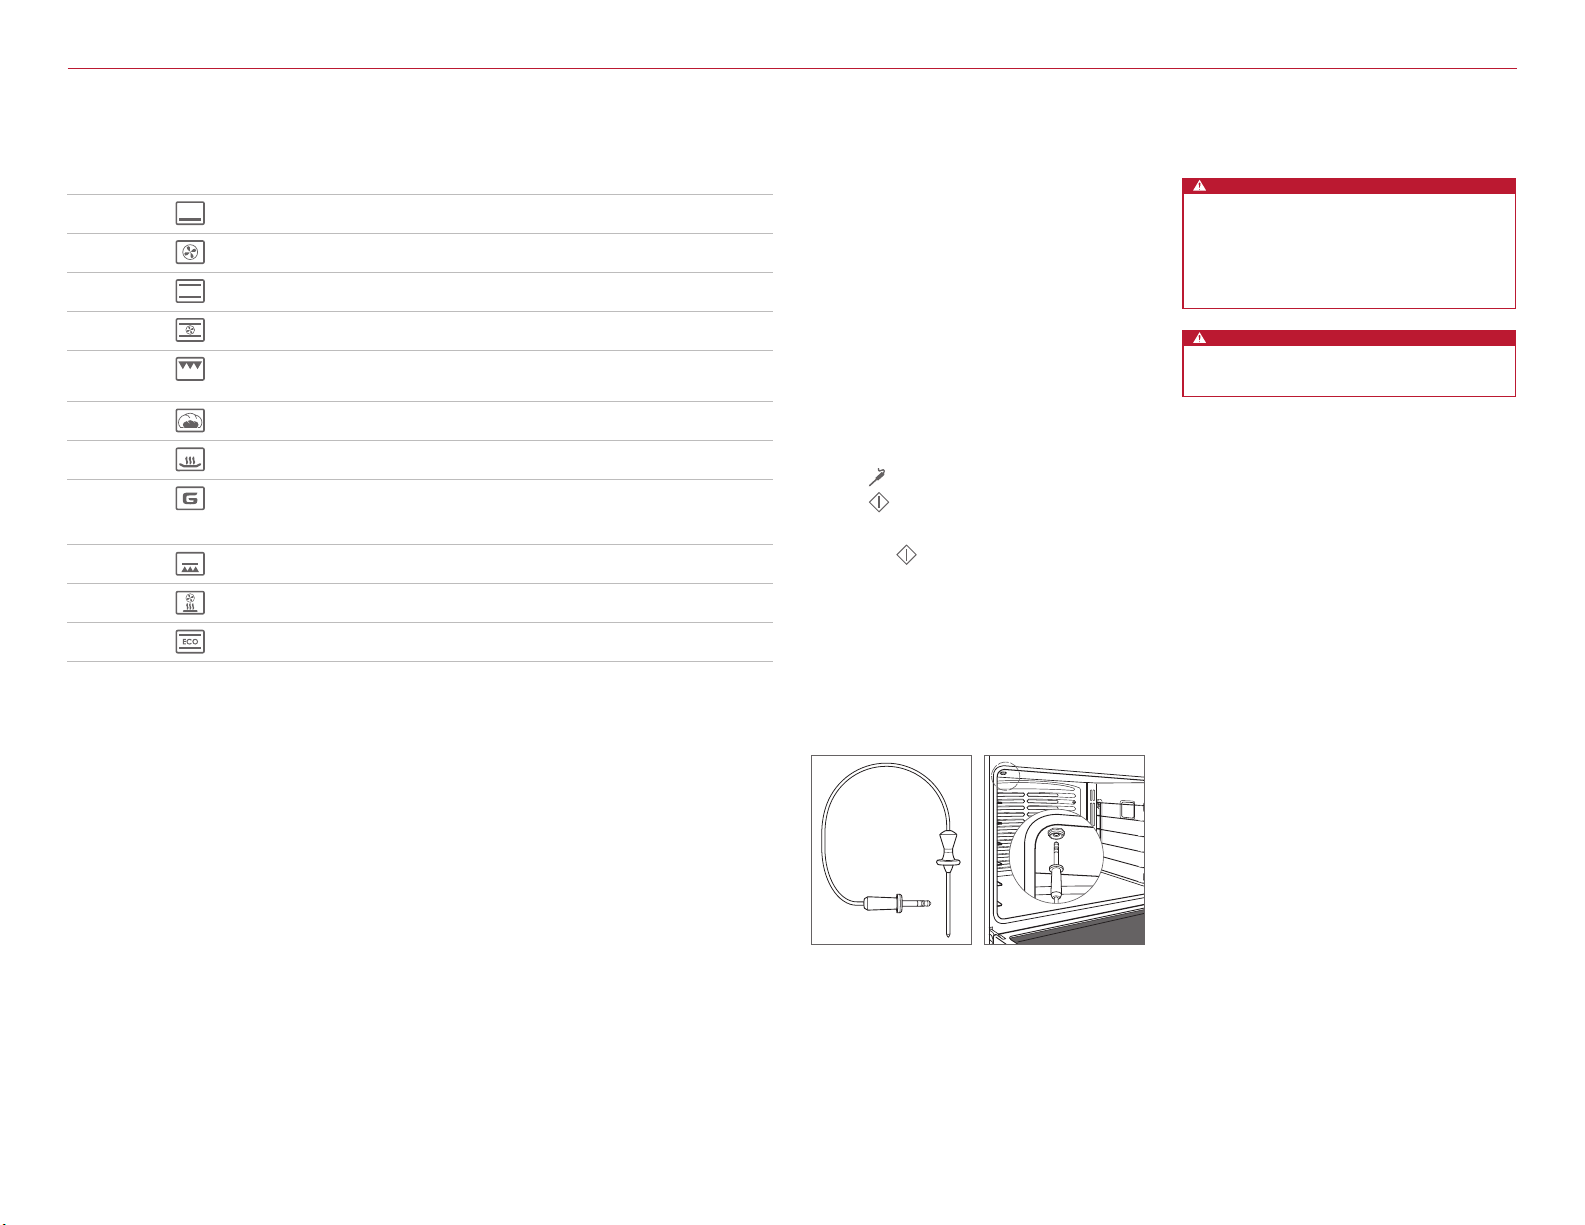
EXTENDED OPTIONS
Touch (Settings) to access extended options. Use the
slide bar to scroll to the desired option and touch the
option to select. If more information is needed, touch Info.
OPTIONS
Time Select 12 hour or 24 hour.
Sabbath Turn Sabbath on or o.
Clock Select digital, analog, blank, or logo.
Standby Turn standby power on or o.
Language Select: English, Spanish, French, Italian,
German, Dutch, or Chinese.
Units °F/Imperial or °C/Metric.
Showroom For showroom use only.
Info Access helpful tips and product information.
About For service only.
Temp Oset For service only.
Calibration Adjust display calibration.
Sound Mute, 1-5 and high, medium, low.
Brightness Adjust display brightness: 0-100%.
GOURMET GUIDE
MEAT Beef* steak, tenderloin, roast,
prime rib, meatloaf, slow cook
Poultry* whole bird, fresh pieces,
whole breast
Pork* ribs, tenderloin, roast, steak,
chop, whole ham
Lamb* leg, roast, rib rack
FISH Steak*
Fillet*
Breaded
BAKED GOODS Cookies
Cake sheet, fluted, angel, pound,
cupcakes
Pie single crust, double crust
Bread quick bread, yeast loaf,
yeast rolls, biscuits
PIZZA Fresh
Par-Baked
Calzone
VEGETABLES Roasted
Sweet Potato*
Baked Potato*
ONE DISH MEALS Casserole*
Lasagna*
Quiche
*Does not require preheat.
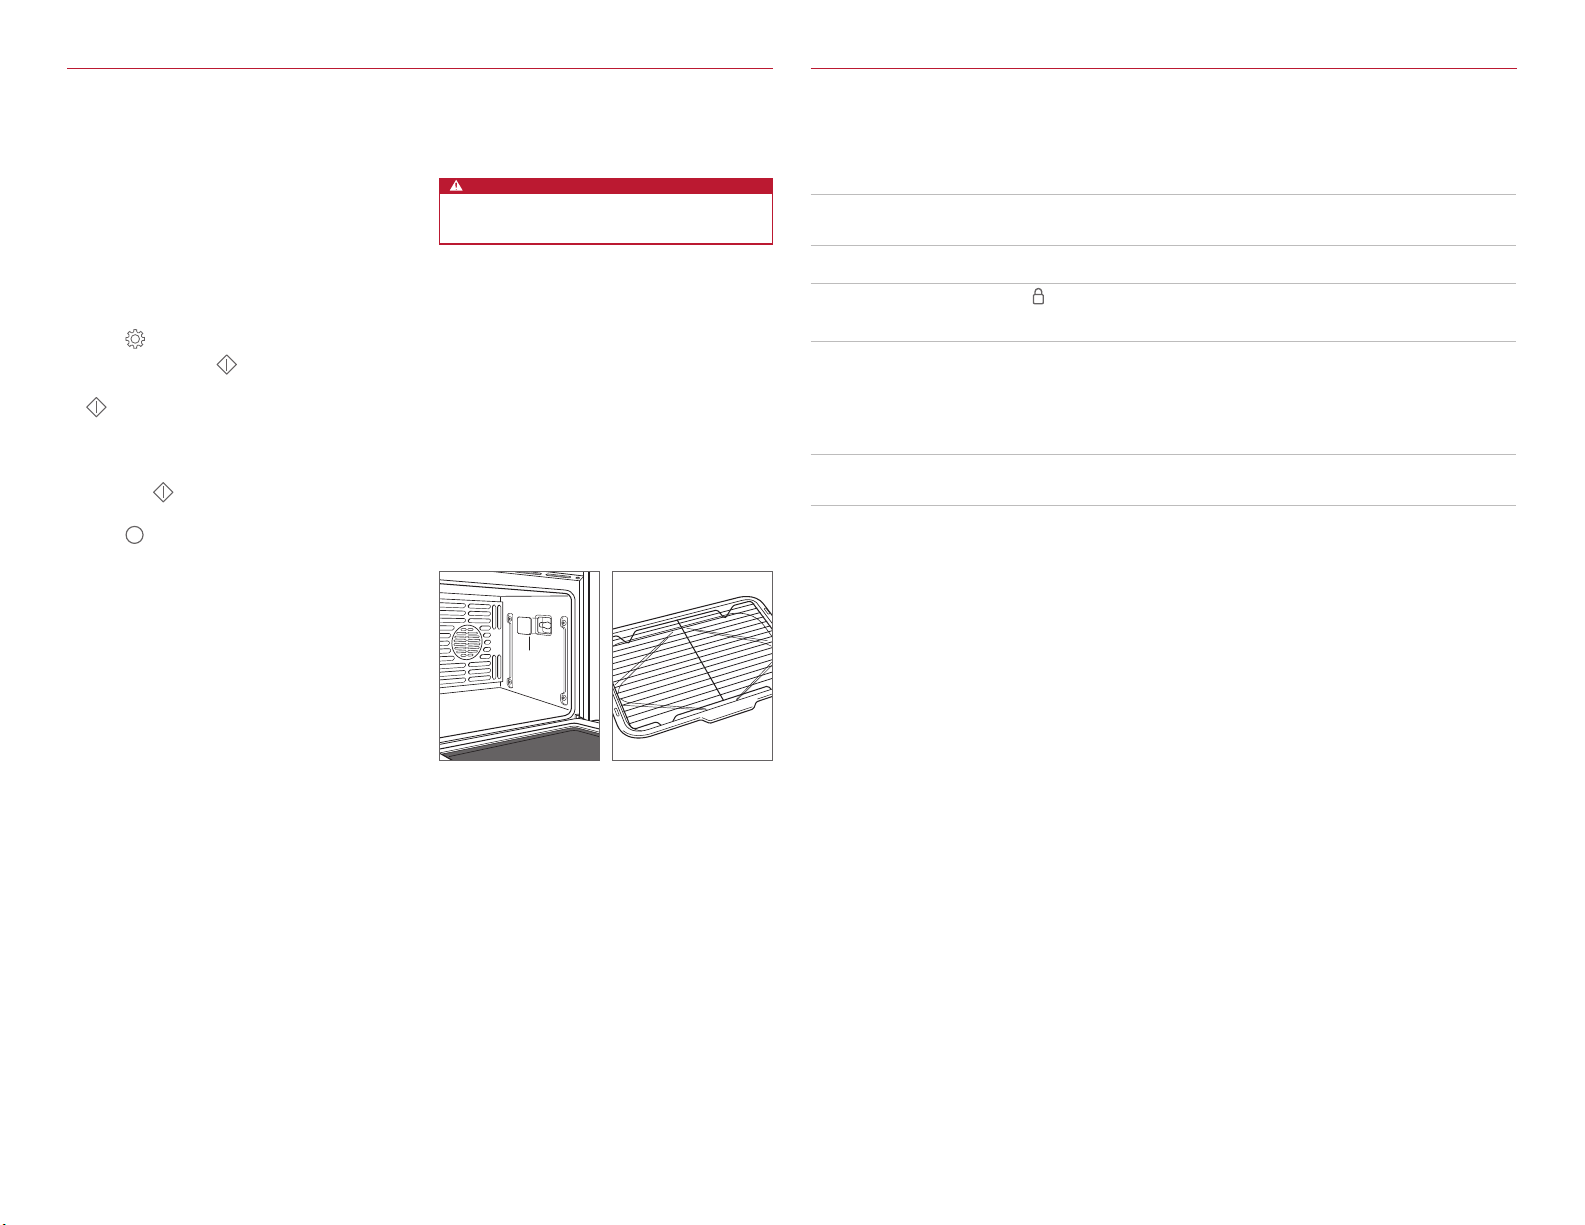
Oven Operation
TIMER
Each timer can be set for a maximum of 99 hours and 59
minutes. Once a time is set, the countdown is illuminated
on the touchscreen. The timer is independent from the
oven. Setting the timer does not aect cook time or stop
time.
Setting timer:
1 Touch (Timer 1) or (Timer 2).
2 Use the control panel to set the duration, then touch
(Start/Enter). A chime indicates the timer has been
set.
3 To cancel or edit, touch the countdown time on the
touchscreen.
4 The timer chimes with one minute remaining. The timer
chimes and flashes when complete.
5 Touch the flashing time to clear.

8 | English
Oven Operation
Temperature Probe
Use only the temperature probe shipped with this appli-
ance. Refer to the illustration below. The temperature
probe measures the internal temperature of food while
cooking. The probe can be used to monitor the tempera-
ture without setting a desired temperature and can be used
with all cooking modes except Broil, Proof, and Dehydrate.
Setting controls:
1 Preheat the oven to the desired oven temperature in
the desired mode.
2 Completely insert the probe sensor into the thickest
area of the food.
3 When preheat is complete, place food in the oven.
4 Insert the probe into the probe receptacle. Refer to the
illustration below. Close the oven door.
5 Touch (Probe) on the touchscreen.
6 Touch (Start/Enter) on the control panel to select
the preset temperature. To change the temperature,
use the control panel to select the desired temperature,
then touch (Start/Enter).
7 A chime indicates the temperature is 1°C below the
set temperature. The oven chimes and the set tempera-
ture flashes when the internal temperature reaches the
setpoint.
8 Remove, then reinsert the probe to verify the internal
temperature.
9 Touch the flashing temperature to clear.
Temperature probe
Probe receptacle
CAUTION
Pull straight down when removing the probe from
the receptacle. Bending or pulling the probe at an
angle during removal may damage the probe and
oven. Do not place a rack or accessory in rack posi-
tion six when using the probe, as it interferes with
probe removal.
CAUTION
The probe and probe receptacle will be very hot.
Handle with care.
Cooking Modes
MODE PRESET RANGE PROBE USES
BAKE 175°C 95–290°C •Best for single-rack cooking, primarily baked foods. Use for
standard recipes.
CONVECTION 165°C 95–290°C •Uniform air movement makes it possible to multi-level rack
cook with even browning.
ROAST 175°C 95–290°C •Best for roasting less tender cuts of meat, such as chuck roasts
and stew meat that should be covered.
CONVECTION
ROAST
165°C 95–290°C •Gently browns the exterior and seals in juices. Perfect for roast-
ing tender cuts of beef, lamb, pork, and poultry.
BROIL High
Med
Low
290°C
230°C
175°C
Best for broiling meats, fish, and poultry pieces up to 1" thick.
Use a two-piece broiler pan and always broil with the oven door
closed.
PROOF 30°C 30–45°C Ideal for proofing, or rising bread dough.
WARM 80°C 60–95°C •Designed to keep foods at serving temperature.
GOURMET — — •Gourmet provides quick and convenient meal preparations with
recommendations for cooking mode and rack position. Refer
to page 7. Preset temperature and range are dependent on the
food and desired doneness.
STONE 230°C 95–290°C •Baking on a ceramic stone. Great for pizza and bread. Stone
accessory required.
DEHYDRATE 60°C 45–75°C Dry a variety of fruits, vegetables, herbs, and meat strips.
Accessory racks required.
ECO 190°C 95–285°C Energy saving mode designed for roasting thin cuts of meat and
delicate fish. No preheat required.
NOTE: The temperature probe can be used with all cooking modes except Broil, Proof, and Dehydrate.

wolfappliance.com | 9
Oven Operation
Auto Program
TIMED COOK
Timed Cook automatically turns the oven o at a specified
time. The oven begins to heat immediately and turns o
at the desired stop time. If preheat is required, the preheat
time must be accounted for when determining the cook-
ing duration. The clock must be set to the correct time to
function properly. Use in any cooking mode except Broil,
Gourmet, or Stone. The temperature probe cannot be used
during Timed Cook.
Setting controls:
1 Touch the desired cooking mode and select the desired
temperature.
2 Touch (Timed Cook), then select the desired cook-
ing duration.
3 Touch (Start/Enter) to start.
4 To cancel, touch the flashing duration/stop time on the
touchscreen.
5 The oven turns o automatically when the cook time is
complete.
6 Touch (O) to clear.
DELAYED START
Delayed Start automatically turns the oven on and o at
specified times. The oven remains idle until the desired
start time and turns o at the desired stop time. If preheat
is required, the preheat time must be accounted for when
determining the cooking duration. The clock must be set
to the correct time to function properly. Use in any cook-
ing mode except Broil, Gourmet, or Stone. The tempera-
ture probe cannot be used during Delayed Start.
Setting controls:
1 Touch the desired cooking mode and select the desired
temperature.
2 Touch (Timed Cook), then select the desired cook-
ing duration.
3 Use the control panel to select the desired stop time,
then touch (Start/Enter).
4 To cancel, touch the flashing duration/stop time on the
touchscreen.
5 The oven turns o automatically when the cook time is
complete.
6 Touch (O) to clear.
Clean
During Clean, the oven is heated to an extremely high
temperature to burn o food soil. The oven lights are
disabled. Clean lasts approximately four hours.
Setting controls:
1 Turn on ventilation. Some smoke and odor is normal.
2 Touch (Clean).
3 Touch (Start/Enter), then open the oven door.
4 Remove the oven racks and rack guides, then touch Ok.
5 The oven door locks and remains locked until cleaning
is complete and the oven temperature is below 290°C.
6 Touch (O) to clear.
Porcelain is made from natural products and, therefore,
can chip or develop fine lines and cracks due to the expan-
sion and contraction that occurs as oven temperature
fluctuates (particularly when the self-cleaning function
is employed). This can result in cosmetic imperfections,
such as a cloudy, dull or scratched appearance. Cosmetic
imperfections may be more visible in a colored oven cavity.
DELAYED CLEAN
Setting controls:
1 Turn on ventilation. Some smoke and odor is normal.
2 Touch (Clean).
3 Touch (Delayed Clean) and use the control panel to
select the desired start time.
4 Touch (Start/Enter), then open the oven door.
5 Remove the oven racks and rack guides, then touch Ok.
6 The oven door locks and remains locked until cleaning
is complete and the oven temperature is below 290°C.
7 Touch (O) to clear.
CAUTION
During Clean, exterior surfaces may get hotter than
usual. Children should be kept away.

10 | English
Care RecommendationsOven Operation
Sabbath
This appliance is certified by Star-K to meet strict religious
regulations in conjunction with specific instructions found
on www.star-k.org.
Bake, Roast, Proof, and Warm modes can be used in
Sabbath.
Setting controls:
1 Turn the oven light on or o.
2 Touch (Settings), then select Sabbath.
3 Touch On, then touch (Start/Enter).
4 Select the cooking mode and temperature, then touch
(Start/Enter).
5 After 10 seconds, the unit enters Sabbath.
6 To change the oven temperature while in Sabbath, use
the control panel to select the desired temperature,
then touch (Start/Enter). The temperature changes
randomly after the new temperature is selected.
7 Touch (O) to end the mode. The Sabbath icon
goes away after 10 seconds.
Oven Light
WARNING
Verify power is disconnected from the electrical box
before replacing a light bulb.
Allow the oven to cool completely, then remove the oven
racks and rack guides. To remove the light cover, gently pry
the bottom edge with a flat screwdriver. Remove the exist-
ing bulb and replace with a 40-watt halogen bulb. Refer to
the illustration below. Do not touch the new bulb with bare
hands. Wear rubber gloves or use a paper towel to hold the
bulb during installation.
To replace the light bulb located on the top of the oven
cavity, contact Wolf Factory Certified Service.
Broiler Pan
For broiling, use the two-piece broiler pan and rack
included with the range. Refer to the illustration below.
Care Recommendations
CLEANING
Stainless steel Use a nonabrasive stainless steel cleaner and apply with a soft lint-free cloth. To bring out the natural luster,
lightly wipe the surface with a water-dampened microfiber cloth followed by a dry polishing chamois. Always
follow the grain of the stainless steel.
Oven racks and
rack guides
Remove and place on a flat surface near the sink. Clean with hot water and mild detergent or paste of baking
soda and water. Do not immerse in water. Towel dry.
Control panel and
touchscreen
Touch and hold (Lock) for 3 seconds to lock the control panel and touchscreen. Use a spray degreaser to
remove fingerprints and food soil. Spray on a cloth before wiping the controls.
IMPORTANT NOTE: Do not spray cleaners directly on the control panel or touchscreen.
Oven interior IMPORTANT NOTE: Remove all food spills (especially sugary, acidic, and tomato-based sauces) when the oven
interior is safe to touch. Some blemishes are permanent, but do not aect the function of the porcelain.
Before using the Clean feature, spray stubborn stains with a mild abrasive cleaner or spray degreaser and
scrub with a no-scratch Scotch-Brite™ pad (pink or blue). Wash the entire oven cavity with soap and water to
remove cleaning chemicals before entering Clean mode. If residue is not cleaned from the cavity, etching of
the porcelain may occur. Once the Clean cycle is complete, allow the oven to cool completely and wipe out
ash with a damp cloth.
Broiler pan To clean the rack, use a mild detergent and scouring pad. Rinse and dry. To clean the pan, discard grease and
wash with hot water and mild detergent. Rinse and dry. The rack is dishwasher safe, but, do not place the pan
in the dishwasher.
LIGHT
COVER
Light bulb replacement
Broiler pan and rack

wolfappliance.com | 11
Troubleshooting
Wolf Appliance International Limited Warranty
FOR RESIDENTIAL USE
FULL TWO YEAR WARRANTY*
For two years from the date of original installation, this Wolf Appliance product warranty covers all parts and labor to repair or
replace, under normal residential use, any part of the product that proves to be defective in materials or workmanship. All service
provided by Wolf Appliance under the above warranty must be performed by Wolf Factory Certified Service, unless otherwise speci-
fied by Wolf Appliance, Inc. Service will be provided during normal business hours.
LIMITED FIVE YEAR WARRANTY
For five years from the date of original installation, Wolf Appliance will repair or replace the following parts that prove to be defective
in materials or workmanship: stainless steel briquette trays, gas valves, drip pans, electronic control boards and electric heating ele-
ments. If the owner uses Wolf Factory Certified Service, the service provider will repair or replace these parts with the owner paying
for all other costs, including labor. If the owner uses non-certified service, the owner must contact Wolf Appliance, Inc. (using the
information below) to receive repaired or replacement parts. Wolf Appliance will not reimburse the owner for parts purchased from
non-certified service or other sources.
For more information regarding your Wolf product warranty, contact your authorized Wolf dealer. Warranties must comply to all
country, state, city, local and or ordinance.
*Stainless steel (doors, panels, handles, product frames and interior surfaces) are covered by a limited 60-day parts and labor warranty
for cosmetic defects.
Warranty
Sub-Zero, Sub-Zero & Design, Sub-Zero & Snowflake Design, Dual Refrigeration, The Living Kitchen, Great American Kitchens The Fine Art of Kitchen Design, Wolf, Wolf &
Design, Wolf Gourmet, W & Design, red colored knobs, Cove, and Cove & Design are registered trademarks and service marks of Sub-Zero Group, Inc. and its subsidiaries.
All other trademarks are property of their respective owners in the United States and other countries.
Troubleshooting
OPERATION
Oven does not operate.
• Verify power is on.
• Verify electrical power to the oven and home circuit
breaker is on.
• The oven automatically turns o after 12 hours of con-
tinual use, except in Dehydration or Sabbath mode.
Oven temperature issue.
• Contact Wolf Factory Certified Service.
No response from the control panel and touchscreen.
• Unit is in Sabbath mode ( is displayed on the touch-
screen), refer to page 10.
• Turn the circuit breaker o for 20 seconds, then turn
back on.
“Probe Shorted” is displayed on the touchscreen.
• Touch (O). Verify the probe connector is fully
seated into the receptacle. Reset the oven temperature
and probe temperature.
Oven “pops” or “bangs” during preheat or cool down.
• Normal with new oven cavity expansion and contrac-
tion.
• Run a clean cycle. If it persists, contact Wolf Factory
Certified Service.
SERVICE
• Maintain the quality built into your product by contact-
ing Wolf Factory Certified Service.
• When contacting service, you will need the model and
serial number of your product. Both numbers are listed
on the product rating plate. Refer to page 5 for rating
plate location.
• For warranty purposes, you will also need the date of
installation and name of your authorized Wolf dealer.
This information should be recorded on page 2.
SERVICE (FOR AUSTRALIA ONLY)
• Yearly maintenance is recommended.
• Maintain the quality built into your product by contact-
ing Wolf Factory Certified Service.
• When contacting service, you will need the model and
serial number of your product. Both numbers are listed
on the product rating plate. Refer to page 5 for rating
plate location.
• For warranty purposes, you will also need the date of
installation and name of your authorized Wolf dealer.
This information should be recorded on page 2.
• For Australia only, contact:
Sub-Zero Group Australia Pty Ltd
Level 10, 469 La Trobe Street
Melbourne Victoria 3000
Phone 03 9600 2218
subzero-wolf.com.au
SERVICE (FOR UNITED KINGDOM ONLY)
• Sub-Zero & Wolf Ltd
9 The Street, Heybridge, Maldon, Essex, CM9 4XB
020 8418 3800
www.subzero-wolf.co.uk

2 | Español
Horno de la serie E
Atención al cliente
La información relativa al número de serie y el modelo se
muestra en la placa de datos del producto. Consulte la
página 5 para ver la ubicación de la placa de datos. Para
cuestiones relacionadas con la garantía, también necesita
saber la fecha de instalación y el nombre de su distribuidor
autorizado de Wolf. Guarde la siguiente información para
tenerla como referencia en el futuro.
INFORMACIÓN SOBRE EL MANTENIMIENTO
Referencia del modelo
Número de serie
Fecha de instalación
Nombre del servicio certificado
Número de servicio certificado
Distribuidor autorizado
Número del distribuidor
Nota importante:
Para garantizar que este producto se instala y funciona de
la forma más eficaz y segura posible, tenga en cuenta la
información que se destaca en esta guía:
Cuando aparece NOTA IMPORTANTE, se resalta
información que resulta especialmente importante.
PRECAUCIÓN indica una situación en la que se pueden
sufrir heridas leves o provocar daños al producto si no se
siguen las instrucciones.
AVISO indica el peligro de que se produzcan heridas graves
o incluso la muerte si no se respetan las precauciones.
Índice
3Precauciones de seguridad
5Características de los hornos de la serie E
5Funcionamiento del horno
10 Recomendaciones de mantenimiento
11 Localización y solución de problemas
11 Garantía Wolf

wolfappliance.com | 3
Precauciones de seguridad
INSTRUCCIONES IMPORTANTES
PRECAUCIONES GENERALES DE SEGURIDAD
• Lea detenidamente esta guía antes de utilizar la unidad
para reducir el riesgo de que se produzca un incendio, una
descarga eléctrica o de sufrir lesiones.
• Este aparato debe ser instalado y revisado de manera
correcta por un instalador cualificado o por una agencia
de mantenimiento y conectado a tierra por un técnico
cualificado.
• Limpie solo las piezas que se especifican en esta guía.
• No utilice nunca limpiadores para hornos. No utilice en el
horno ni en sus alrededores ningún limpiador de horno
comercial ni materiales para proteger el revestimiento en
ninguna parte del horno.
• No utilice un limpiador de vapor.
• No utilice limpiadores abrasivos ni rasquetas metálicas
afiladas para limpiar el cristal de la puerta del horno ya que
pueden rayar la superficie, lo que podría hacer que el cristal
se rompiera.
PRECAUCIÓN
Antes de utilizar el modo de limpieza automática, limpie
cualquier posible derrame, y extraiga la bandeja para asar,
las rejillas y las guías de las rejillas y cualquier otro utensilio
que tenga dentro del horno.
AVISO
El aparato y sus zonas accesibles pueden calentarse durante
su uso. Tenga cuidado de no tocar los elementos caloríficos.
Mantenga alejados a los niños menores de ocho años, salvo
que estén bajo supervisión permanente.
AVISO
Este aparato puede ser utilizado por niños de más de ocho
años y personas con discapacidades físicas, sensoriales
o mentales, o con falta de experiencia o conocimientos,
siempre y cuando cuenten con supervisión o se les haya
enseñado cómo utilizarlo de forma segura y comprendan
los peligros que supone. Los niños no deben jugar con el
aparato. Los niños no pueden realizar las tareas de limpieza
y mantenimiento sin supervisión.

4 | Español
Precauciones de seguridad
INSTRUCCIONES IMPORTANTES
PRECAUCIONES GENERALES DE SEGURIDAD
• Utilice siempre elementos aislantes secos para retirar las
cazuelas de este aparato. Si los elementos aislantes están
húmedos o mojados pueden producirle quemaduras por
vapor. No utilice un paño de cocina o un paño acolchado en
lugar de un elemento aislante.
• Tenga especial cuidado al abrir la puerta del horno. Deje que el
aire caliente o el vapor salgan antes de mirar en el interior del
horno o de alcanzar algún alimento.
• Asegúrese que la entrada de aire frío (situada encima de la
puerta) y la rejilla extractora del horno (situada debajo de la
puerta) no están nunca obstruidas.
• Coloque las rejillas en las ubicaciones que desee cuando el
horno esté frío. En el caso de que tenga que colocar una rejilla
cuando el horno todavía está caliente, asegúrese de que los
elementos aislantes no toquen ningún elemento calefactor
del horno.
• No repare ni sustituya ninguna pieza de este aparato, a menos
que esto se recomiende específicamente en los documentos
proporcionados con este aparato.
• No utilice papel de aluminio para forrar ninguna parte de
este aparato.
• No utilice nunca este aparato para calentar la habitación.
• No utilice agua para apagar los incendios producidos por
grasa. Baje la llama o utilice un agente químico seco o un
extintor en espuma.
• No caliente recipientes con alimentos que estén cerrados, por
ejemplo, envases de comida para bebés o latas. La formación
de presión puede hacer que el recipiente explote y causar
heridas personales.
• No almacene ni utilice gasolina ni otros vapores ni líquidos
inflamables cerca de este o de otros aparatos.
• No almacene artículos que puedan gustar a los niños encima
o detrás de este aparato, ya que podrían saltar sobre él para
alcanzarlos y resultar heridos.
• No limpie la junta del horno ya que al frotar o mover la junta,
el sellado hermético de la puerta puede quedar dañado.
• Lleve ropa adecuada. No lleve nunca prendas sueltas u
holgadas mientras esté utilizando este aparato.

wolfappliance.com | 5
Primeros pasos
Sabemos que está deseando empezar a cocinar,
pero, antes de hacerlo, debe leer esta guía de uso y
mantenimiento. Tanto si es un cocinero novato como
si es un chef experto, le resultará útil familiarizarse
con las prácticas de seguridad, las características, el
funcionamiento y las recomendaciones de mantenimiento
del horno de la serie E de Wolf.
Para asegurarse de que logra los mejores resultados,
consulte la sección Características especiales y modos de
cocción de la página 8.
PRECAUCIÓN
No coloque ningún utensilio de cocina sobre la
superficie del horno, ni utilice papel de aluminio u otro
material para forrar la superficie o las paredes del horno.
Si no sigue esta advertencia, la porcelana interior del
horno se dañará y la garantía quedará anulada.
Funcionamiento del horno
Para insertar una rejilla de extracción total, coloque las dos
pestañas traseras en la guía de la rejilla (una pestaña por
arriba y otra por debajo). Observe la siguiente ilustración.
Incline ligeramente la rejilla y deslícela hacia atrás hasta
que la muesca de la rejilla frontal encaje en la guía de la
rejilla frontal.
Rejillas del horno
GUÍAS DE LA REJILLA DEL HORNO
Para instalar las guías de la rejilla en el horno, localice los
tornillos de montaje en las paredes laterales del horno.
Coloque las pestañas de montaje de las guías de la rejilla
sobre los tornillos superiores, gírelas hacia adentro y
deslícelas hasta que se introduzcan en su totalidad.
Observe la siguiente ilustración.
REJILLAS DEL HORNO
Para insertar una rejilla estándar en el horno, coloque el
bloqueo anti-vuelco de la rejilla debajo de los rieles de
las guías de rejilla laterales. Deslice la rejilla hacia atrás
y levántela para pasarla por los topes de la rejilla. Siga
deslizando la rejilla hacia atrás hasta que esté complemente
dentro del horno. Observe la siguiente ilustración.
PESTAÑA
TRASERA
Rejilla de extracción total
Características de los hornos de la serie E
CARACTERÍSTICAS
1Placa de datos del producto
2Bandeja de horno ajustable
3Bandejas de horno de extracción total
4Panel de mandos
5Pantalla táctil
6Ventiladores de convección
7Receptáculo y sensor de temperatura
8Luces halógenas
Horno de la serie E
4
7
8
3
62
1
5
PESTAÑA
DE MONTAJE BLOQUEO
ANTI-VUELCO
TOPE DE
LA REJILLA
Guía de la rejilla del horno
Bloqueo anti-vuelvo de
la rejilla del horno

6 | Español
Mandos
Los hornos de la serie E de Wolf incorporan un panel de
mandos y una pantalla táctil. El horno cuenta con diez
modos de cocción: horneado, asado, parrilla, asado con
convección, convección, Gourmet, fermentación, piedra,
deshidratación y calentar. La piedra y la deshidratación
requieren accesorios.
Para empezar la cocción:
Pulse el modo de cocción deseado o (Más) para
acceder a más modos.
1 Pulse (Iniciar/Intro) para seleccionar la temperatura
predeterminada o utilice los teclados numéricos para
cambiar la temperatura. NOTA: Pulse (Clear) en
cualquier momento para retroceder.
2 Pulse (Iniciar/Intro).
BLOQUEO DE CONTROL
La función de bloqueo evita que el panel de mandos y la
pantalla táctil se pongan en funcionamiento de forma no
deseada. La función de bloqueo debe restablecerse en
caso de corte en el suministro de alimentación.
Para bloquear y desbloquear:
1 Pulse y mantenga pulsado (Bloqueo) durante
tres segundos.
Pantalla táctil
Funcionamiento del horno
ANTES DE SU USO
Para asegurarse de que se han eliminado todos los restos
de aceite del proceso de fabricación, el horno debe
someterse al siguiente procedimiento:
1 Limpie el horno a fondo con agua caliente y detergente
suave. Aclare y seque con un paño suave.
2 Encienda la ventilación. Es normal que aparezca un
poco de humo y olor.
3 Pulse (Asado con convección) y ajuste la
temperatura a 260 °C durante una hora.
4 Pulse (O) y deje que el horno se enfríe con la
puerta cerrada.
LUZ DEL HORNO
La luz del horno se enciende automáticamente cuando se
abre la puerta, y se apaga al cerrarla. Para encender la luz
con la puerta cerrada, pulse (Luz) en la pantalla táctil.
PRECALENTAMIENTO
Durante el precalentamiento, el horno se calienta lo
más rápido y uniformemente posible y no es el modo
ideal para cocinar. Se debe usar el precalentamiento en
todos los modos de cocción salvo en los modos parrilla,
fermentación, deshidratación, calentar y algunos modos
en Gourmet. Cuando haya finalizado el precalentamiento,
un pitido indica que el horno ha alcanzado la
temperatura establecida.
RELOJ
El reloj se puede ver en la pantalla táctil en todos los
modos. Es muy importante que el reloj esté configurado
con la hora correcta si se utiliza la función de cocción
programada. La hora debe restablecerse en caso de corte
en el suministro de alimentación.
Configuración del reloj:
1 Pulse (Ajustes) y, a continuación, seleccione Hora.
2 Pulse el modo de 12 Horas o 24 Horas y utilice el panel
de mandos para fijar la hora.
3 Seleccione AM o PM, y, a continuación, pulse
(Iniciar/Intro). Un pitido indica que ha configurado
el reloj.
También podrá configurar la hora pulsando la hora en
pantalla en la pantalla táctil.
Funcionamiento del horno
10:30
Panel de mandos
MANDOS DEL PANEL DE CONTROL
Apagado
Borrar
Iniciar/Intro
Horneado
Convección
Asado
Asado con convección
Parrilla
Fermentación
Calentar
Gourmet
Limpieza
Más

wolfappliance.com | 7
Funcionamiento del horno
Modos de cocción
GOURMET
Gourmet ofrece una variedad de preparaciones de
comidas prácticas y rápidas. Elija entre seis categorías:
carne, pescado, alimentos horneados, pizza, verduras y
comidas de plato único.
Una vez que haya hecho la selección, Gourmet
recomienda la posición adecuada de la rejilla, configura
el modo de cocción y ajusta automáticamente la
temperatura; a veces utiliza varios modos y temperaturas.
El horno no se apaga automáticamente cuando el tiempo
de cocción finaliza.
Si desea obtener más información sobre el modo
Gourmet, consulte la guía de técnicas y recetas que se
incluye con el aparato.
Controles de configuración:
1 Pulse (Gourmet).
2 Utilice la pantalla táctil para seleccionar la
configuración que desee.
OPCIONES AVANZADAS
Pulse (Ajustes) para acceder a las opciones avanzadas.
Use la barra de desplazamiento para desplazarse hasta la
opción que desee y pulse la opción para seleccionarla. Si
necesita obtener más información, pulse Info.
OPCIONES
Hora Seleccione 12 horas o 24 horas.
Sabbath Encienda y apague el modo Sabbath.
Reloj Seleccione digital, analógico, en blanco o
logotipo.
Espera Encienda o apague el modo de espera.
Idioma Seleccione: inglés, español, francés, italiano,
alemán, neerlandés o chino.
Unidades °F/Imperial o °C/Métrico.
Salón de
exposición
Solo para su uso en salones
de exposiciones.
Información Acceso a consejos útiles e información
sobre el producto.
Acerca de Solo para uso del servicio técnico.
Intervalo de temp. Solo para uso del servicio técnico.
Calibración Ajuste la calibración de la pantalla.
Sonido Silencio, 1-5 y alto, medio, bajo.
Brillo Ajuste el brillo de la pantalla: 0-100 %.
GUÍA GOURMET
CARNE Ternera* bistec, solomillo, asado,
costilla de primera, pastel de
carne, asado a fuego lento
Aves de
corral*
ave entera, piezas frescas,
pechuga entera
Cerdo* costillas, solomillo, asado,
filete, chuleta, jamón entero
Cordero* pierna, asado, costilla
PESCADO Bistec*
Filete*
Empanado
REPOSTERÍA Galletas
Bizcocho base rectangular, acanalado,
ángel, libra, magdalenas
Tarta una capa, dos capas
Pan pan rápido, pan de molde,
pan bombón, galletas
PIZZA Fresca
Prehorneada
Calzone
VERDURAS Asadas
Boniato*
Patatas asadas*
COMIDAS DE
PLATO ÚNICO
Guiso*
Lasaña*
Quiche
*No es necesario precalentar el horno.
Funcionamiento del horno
TEMPORIZADOR
Puede programar el temporizador para un máximo de
99 horas y 59 minutos. Cuando haya programado el
temporizador, el cronómetro se iluminará en la pantalla
táctil. El temporizador es independiente del horno.
Programar el temporizador no afecta a la hora de cocción
o a la de parada.
Programar el temporizador:
1 Pulse (Temporizador 1) o (Temporizador 2).
2 Utilice el panel de mandos para configurar la duración
y, a continuación, pulse (Iniciar/Intro). Un pitido
indica que ha configurado el temporizador.
3 Para cancelar o editar, pulse el tiempo de cuenta atrás
en la pantalla táctil.
4 El temporizador emitirá un pitido cuando quede un
minuto de cocción. El temporizador emite un pitido y
parpadea cuando haya finalizado.
5 Pulse el tiempo parpadeante para borrarlo.

8 | Español
Funcionamiento del horno
Sensor de temperatura
Utilice solamente la sonda enviada con este aparato.
Observe la siguiente ilustración. El sensor de temperatura
mide la temperatura interna de la comida durante su
cocción. El sensor se puede utilizar para controlar la
temperatura sin que tenga que configurar una temperatura
en concreto, y se puede utilizar con todos los modos de
cocción excepto con los modos de parrilla, fermentación
y deshidratación.
Controles de configuración:
1 Precaliente el horno con la temperatura que desee en
el modo en que vaya a cocinar.
2 Introduzca el sensor de temperatura completamente
en el trozo más grueso de la comida.
3 Cuando haya finalizado el precalentamiento, coloque la
comida en el horno.
4 Inserte el sensor en el receptáculo. Observe la siguiente
ilustración. Cierre la puerta del horno.
5 Pulse (Sensor) en la pantalla táctil.
6 Pulse (Iniciar/Intro) en el panel de manos para
seleccionar la temperatura predeterminada. Para
modificar la temperatura, utilice el panel de mandos
para seleccionar la temperatura deseada, y luego pulse
(Iniciar/Intro).
7 Un pitido indica que la temperatura está 1 °C por debajo
de la temperatura establecida. El horno emitirá un
pitido y la temperatura establecida parpadea cuando la
temperatura interna alcanza la temperatura predefinida.
8 Retire y, a continuación, vuelva a introducir el sensor
para comprobar la temperatura interna.
9 Pulse la temperatura parpadeante para borrarla.
Sensor de temperatura
Receptáculo para sensor
de temperatura
PRECAUCIÓN
Tire hacia abajo cuando retire la sonda del receptá-
culo. Doblar o tirar de la sonda en ángulo durante
la extracción puede dañar la sonda y el horno. No
coloque una rejilla o accesorio en la posición seis de
la rejilla cuando utilice la sonda, ya que interfiere con
la extracción de la sonda.
PRECAUCIÓN
El receptáculo y el sensor estarán muy calientes.
Sujételos con cuidado.
Modos de cocción
MODO
VALORES
PREDETERMINADOS
COCINA
SENSOR
USOS
HORNEADO 175 °C 95-290 °C •Diseñado especialmente para cocinar con una sola
rejilla, principalmente alimentos horneados. Utilícelo
para cocinar las recetas de siempre.
CONVECCIÓN 165 °C 95-290 °C •El movimiento de aire uniforme hace posible que
pueda cocinar en rejillas situadas en varios niveles,
incluso dorando alimentos.
ASADO 175 °C 95-290 °C •Ideal para asar trozos de carne menos tiernos, que
deben taparse para cocerse, como carne de espalda y
carne para guisar.
ASADO CON
CONVECCIÓN
165 °C 95-290 °C •Dora suavemente el exterior y deja los alimentos muy
jugosos por dentro. Perfecto para asar filetes tiernos de
ternera, cordero, cerdo o pollo.
PARRILLA Alta
Media
Baja
290 °C
230 °C
175 °C
El más apropiado para asar piezas de carne, pescado
y pollo con un grosor de 25 mm. Use la bandeja para
asar de dos piezas y cocine siempre con la puerta del
horno cerrada.
FERMENTACIÓN 30 °C 30-45 °C Ideal para fermentar o para hacer subir la masa del pan.
CALENTAR 80 °C 60-95 °C •Diseñado para mantener los alimentos a temperatura
para servir.
GOURMET — — •Gourmet proporciona una variedad de preparaciones
de comidas prácticas y rápidas con recomendaciones
para la posición de la bandeja y el modo de cocción.
Consulte la página 7. El rango y la temperatura
predeterminados dependen de los alimentos y del
punto de cocción deseado.
PIEDRA 230 °C 95-290 °C •Hornear en una piedra cerámica. Ideal para pizza y pan.
Se necesita accesorio para hornear a la piedra.
DESHIDRATACIÓN 60 °C 45-75 °C Seca una gran variedad de frutas, verduras, hierbas y
carnes. Se necesitan bandejas adicionales.
ECO 190 °C 95-285 °C Modo de ahorro de energía diseñado para asar filetes
de carne o pescado finos. No es necesario precalentar.
NOTA: El sensor de temperatura puede utilizarse con todos los modos de cocción, salvo con los modos de parrilla, fermentación y deshidratación.

wolfappliance.com | 9
Funcionamiento del horno
Programa automático
COCCIÓN PROGRAMADA
La cocción programada apaga automáticamente el horno
a una hora determinada. El horno empieza a calentarse
inmediatamente y se apaga a la hora de parada que desee.
Si es necesario precalentar el horno, deberá tener en cuenta
el tiempo de precalentamiento al determinar la duración de
la cocción. El reloj debe configurarse a la hora correcta para
que el inicio programable funcione correctamente. Podrá
utilizarlo en cualquier modo de cocción, salvo en parrilla,
Gourmet o piedra. El sensor de temperatura no se puede
utilizar durante la cocción programada.
Controles de configuración:
1 Pulse el modo de cocción deseado y seleccione la
temperatura deseada.
2 Pulse (Cocción programada), y seleccione la
duración de la cocción que desee.
3 Pulse (Iniciar/Intro) para empezar.
4 Para cancelar, pulse la hora de parada/duración de la
cocción parpadeante que aparece en la pantalla táctil.
5 El horno se apaga automáticamente cuando el tiempo
de cocción finaliza.
6 Pulse (O) para borrarlo.
INICIO PROGRAMABLE
El inicio programable enciende y apaga el horno
automáticamente a unas horas determinadas. El horno
permanece en espera hasta la hora de inicio que desee y
se apaga a la hora de apagado que desee. Si es necesario
precalentar el horno, deberá tener en cuenta el tiempo de
precalentamiento al determinar la duración de la cocción.
El reloj debe configurarse a la hora correcta para que
el inicio programable funcione correctamente. Podrá
utilizarlo en cualquier modo de cocción, salvo en parrilla,
Gourmet o piedra. El sensor de temperatura no se puede
utilizar durante el inicio programable.
Controles de configuración:
1 Pulse el modo de cocción deseado y seleccione la
temperatura deseada.
2 Pulse (Cocción programada), y seleccione la
duración de la cocción que desee.
3 Utilice el panel de mandos para Seleccione la hora
de parada deseada y, a continuación, pulse
(Iniciar/Intro).
4 Para cancelar, pulse la hora de parada/duración de la
cocción parpadeante que aparece en la pantalla táctil.
5 El horno se apaga automáticamente cuando el tiempo
de cocción finaliza.
6 Pulse (O) para borrarlo.
Limpieza
Durante la limpieza, el horno se calienta a una temperatura
muy alta para quemar las manchas de alimentos. Las luces
del horno se apagan. La limpieza dura aproximadamente
cuatro horas.
Controles de configuración:
1 Encienda la ventilación. Es normal que aparezca un
poco de humo y olor.
2 Pulse (Limpiar).
3 Pulse (Iniciar/Intro), luego abra la puerta del horno.
4 Retire previamente del horno las rejillas y sus guías y, a
continuación, pulse OK.
5 La puerta del horno se bloqueará y permanecerá
bloqueada hasta que finalice el ciclo de limpieza
automática y la temperatura del horno se haya enfriado
por debajo de 290 ºC.
6 Pulse (O) para borrarlo.
La porcelana está fabricada con productos naturales, por
lo que puede romperse, agrietarse o formarse en ella líneas
finas debido a la expansión y contracción que se produce
como resultado de la fluctuación de la temperatura
del horno (especialmente cuando se hace uso de la
función de limpieza automática). Esto puede ocasionar
imperfecciones superficiales como por ejemplo un
aspecto pálido, decolorado o rayado. Las imperfecciones
superficiales pueden ser más visibles en una cavidad para
horno de color.
LIMPIEZA PROGRAMADA
Controles de configuración:
1 Encienda la ventilación. Es normal que aparezca un
poco de humo y olor.
2 Pulse (Limpiar).
3 Pulse (Limpieza (programada) y utilice el panel de
mandos para seleccionar la hora de inicio deseada.
4 Pulse (Iniciar/Intro), luego abra la puerta del horno.
5 Retire previamente del horno las rejillas y sus guías y, a
continuación, pulse OK.
6 La puerta del horno se bloqueará y permanecerá
bloqueada hasta que finalice el ciclo de limpieza
automática y la temperatura del horno se haya enfriado
por debajo de 290 ºC.
7 Pulse (O) para borrarlo.
PRECAUCIÓN
Durante la limpieza, las superficies exteriores pueden
estar más calientes de lo habitual. Mantenga alejados
a los niños.

10 | Español
Recomendaciones de mantenimientoFuncionamiento del horno
Sabbath
Este aparato lleva el certificado Star-K que indica que
cumple rigurosas normas e instrucciones específicas que
aparecen en la página www.star-k.org.
Los modos de horneado, asado, fermentación y calentar se
pueden utilizar en Sabbath.
Controles de configuración:
1 Encienda y apague la iluminación.
2 Pulse (Ajustes) y, a continuación, seleccione
Sabbath.
3 Pulse On y, a continuación, pulse (Iniciar/Intro).
4 Seleccione el modo de cocción y la temperatura, y
luego pulse (Iniciar/Intro).
5 Después de 10 segundos, el horno entra en
modo Sabbath.
6 Para modificar la temperatura del horno mientras ese
está en el modo Sabbath, utilice el panel de mandos
para seleccionar la temperatura deseada, y luego
pulse (Iniciar/Intro). La temperatura cambia de
manera aleatoria después de seleccionarse la
nueva temperatura.
7 Pulse (O) para finalizar este modo. El icono del
modo Sabbath desaparece después de 10 segundos.
Luz del horno
AVISO
Compruebe que la unidad esté desconectada de la
caja de conexiones antes de cambiar la bombilla.
Deje que el horno se enfríe completamente y retire las
guías y las rejillas del horno. Para extraer la cubierta de
la luz, toque suavemente el extremo inferior con un
destornillador plano. Retire la bombilla y sustitúyala por
una bombilla halógena de 40 vatios. Observe la siguiente
ilustración. No toque la bombilla nueva con las manos sin
protección. Lleve unos guantes de goma o use papel de
cocina para sujetar la bombilla mientras la coloca.
Para sustituir la bombilla situada en la parte superior de la
cavidad del horno, póngase en contacto con un servicio
técnico autorizado de Wolf.
Bandeja de la parrilla
Para asar a la parrilla, utilice la bandeja de dos piezas y
la rejilla que se incluyen con la cocina. Observe la
siguiente ilustración.
Recomendaciones de mantenimiento
LIMPIEZA
Acero inoxidable Utilice un limpiador de acero inoxidable no abrasivo y aplíquelo con un paño suave que no deje pelusas. Para
que el acero inoxidable adquiera un brillo natural, frote suavemente la superficie con un paño de microfibra
empapado en agua y con una gamuza seca para pulir. Siga siempre la dirección del acero inoxidable.
Rejillas del horno y
guías de la rejilla
Quítelas y colóquelas en una superficie plana cerca del fregadero. Limpie con agua caliente y detergente suave
o con bicarbonato sódico y agua. No las sumerja en agua. Séquelas con una toalla.
Panel de mandos y
pantalla táctil
Mantenga pulsado (Bloqueo) durante 3 segundos para bloquear el panel de mandos y la pantalla táctil.
Utilice un limpiador en spray para eliminar las huellas y las manchas de alimentos. Aplique el producto de
limpieza sobre un paño antes de limpiar los mandos.
NOTA IMPORTANTE: No aplique los limpiadores directamente sobre el panel de mandos o la pantalla táctil.
Interior del horno NOTA IMPORTANTE: Limpie todas las salpicaduras de comida (especialmente si son de azúcares, ácidos
y salsas de tomate) cuando pueda tocar el interior del horno de manera segura. Algunas manchas son
permanentes, pero no afectan al funcionamiento de la porcelana.
Antes de usar la función de limpieza, pulverice las manchas resistentes con un limpiador que no sea demasiado
abrasivo o con un desengrasante y frote con un estropajo anti-ralladuras Scotch-Brite™ (rosa o azul). Lave
toda la cavidad del horno con jabón y agua para eliminar todos los productos químicos de limpieza antes de
introducir el modo de limpieza. Si no se limpian los residuos de la cavidad, la porcelana puede decaparse.
Cuando haya finalizado el ciclo de limpieza, deje que el horno se enfríe completamente y limpie la ceniza con
un paño húmedo.
Bandeja de la parrilla Limpie la rejilla con un detergente suave y un estropajo empapado. Aclare y seque. Para limpiar la bandeja,
elimine la grasa y límpiela con agua caliente y un detergente suave. Aclare y seque. La rejilla puede lavarse en
el lavavajillas, pero no coloque ninguna sartén en el lavavajillas.
CUBIERTA
DE LA LUZ
Cambio de la bombilla
Bandeja para asar y rejilla
Other manuals for E Series
7
Table of contents
Other Wolf Oven manuals

Wolf
Wolf CSO3050CMB User manual

Wolf
Wolf L Series SO30F Guide

Wolf
Wolf e Series User manual

Wolf
Wolf E Series SO30-2F/S Instructions for use

Wolf
Wolf M Series Guide

Wolf
Wolf e Series User manual

Wolf
Wolf e Series User manual

Wolf
Wolf e Series User manual

Wolf
Wolf DO30PE/S/PH User manual

Wolf
Wolf L Series User manual

Wolf
Wolf e Series User manual

Wolf
Wolf ICBSO24 Configuration guide

Wolf
Wolf SO36U Instructions for use

Wolf
Wolf e Series Installation and operation manual

Wolf
Wolf WGCO100S User manual

Wolf
Wolf DO30F/S L Series User manual

Wolf
Wolf e Series User manual

Wolf
Wolf e Series User manual

Wolf
Wolf L Series SO30F User manual

Wolf
Wolf Sub-Zero ICBIG15/S Guide