Worlde Panda User manual

HANGZHOU WORLDE DIGITAL PIANO CO.,LTD
PANDA MIDI CONTROLLER
USER’S MANUAL
HANGZHOU WORLDE
HANGZHOU WORLDE DIGITAL PIANO CO.,LTD
HANGZHOU WORLDE MUSIC
ELECTRONIC
PANDA MIDI CONTROLLER
USER’S MANUAL
HANGZHOU WORLDE
MUSI
C ELECTRONIC
ELECTRONIC
CO., LTD
PANDA MIDI CONTROLLER
C ELECTRONIC
CO.LTD

HANGZHOU WORLDE DIGITAL PIANO CO.,LTD HANGZHOU WORLDE MUSIC ELECTRONIC CO., LTD
Contents
Introduction .................................................................................................................................................................................. 4
What’s in the Box? ..................................................................................................................................................................... 4
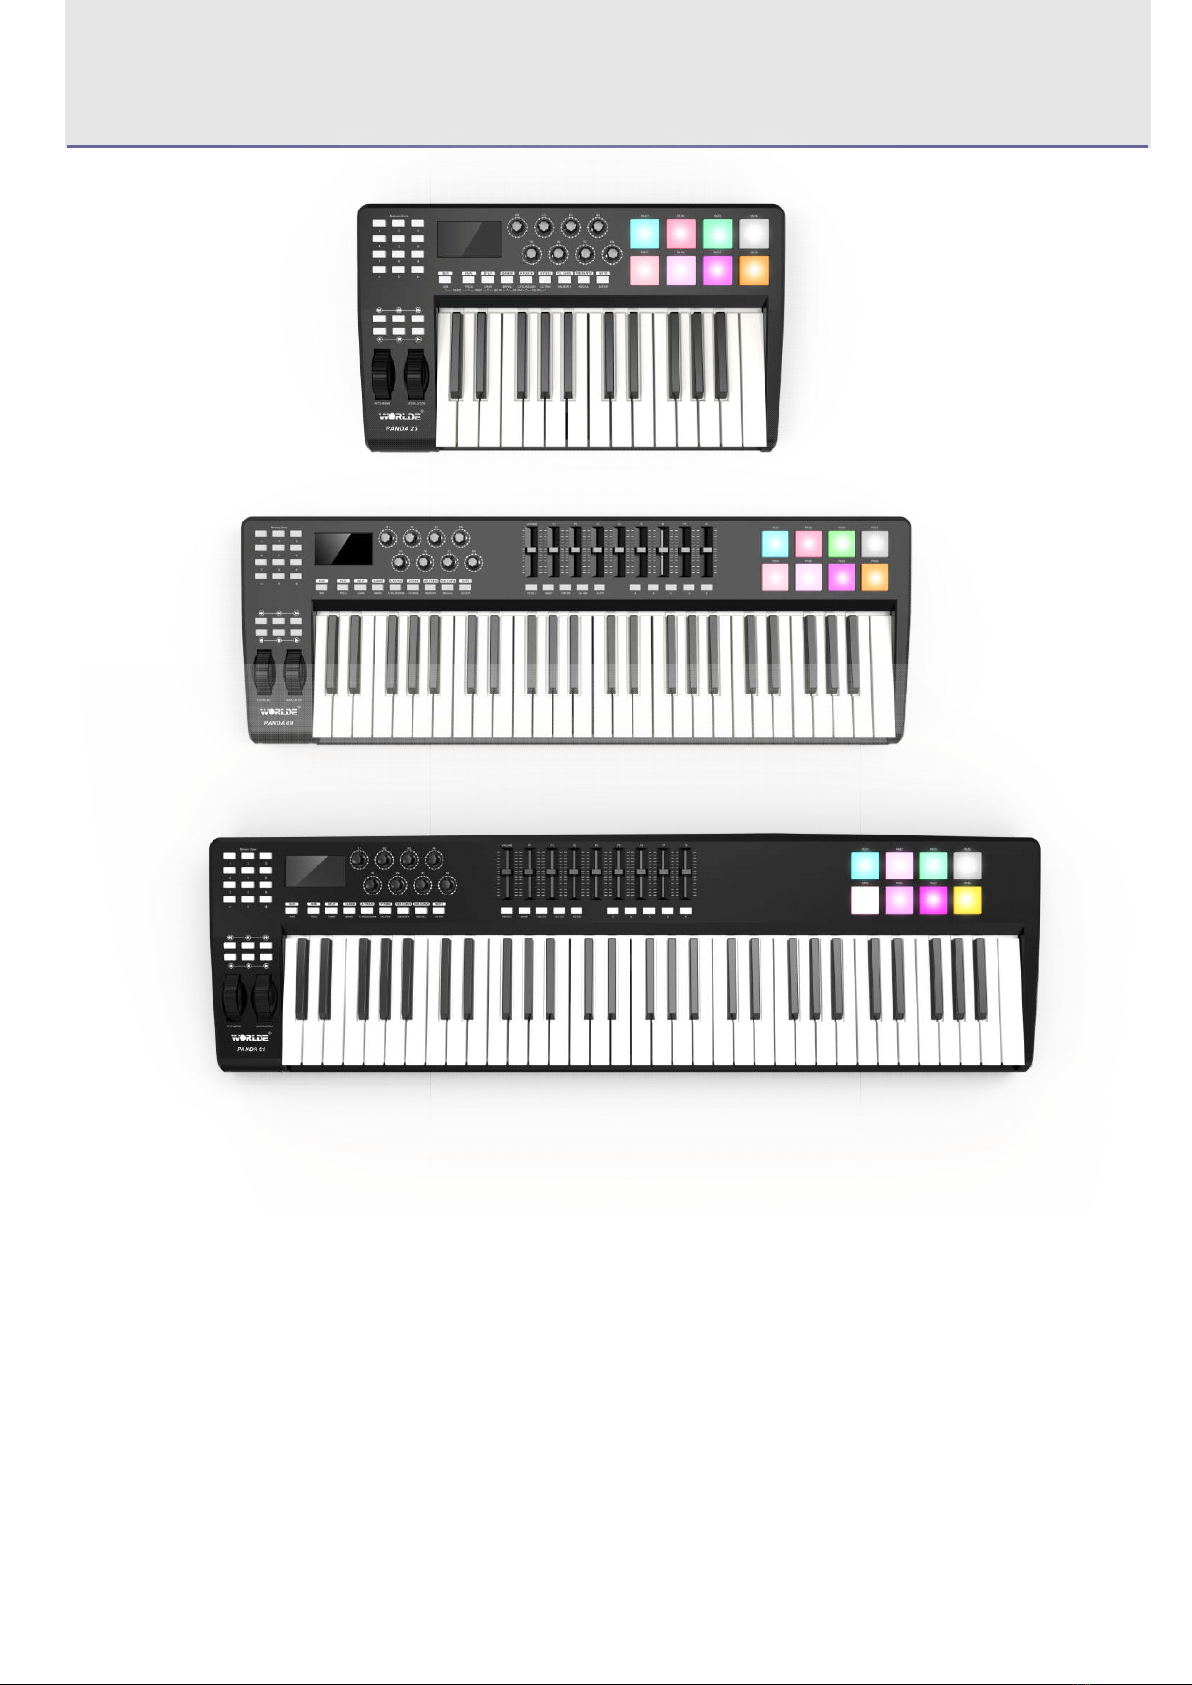
Panda Keyboard overview ........................................................................................................................................................ 4
Section1: Getting ........................................................................................................................................................................ 5
1.1 Panda Keyboards Overview ...................................................................................................................................... 5
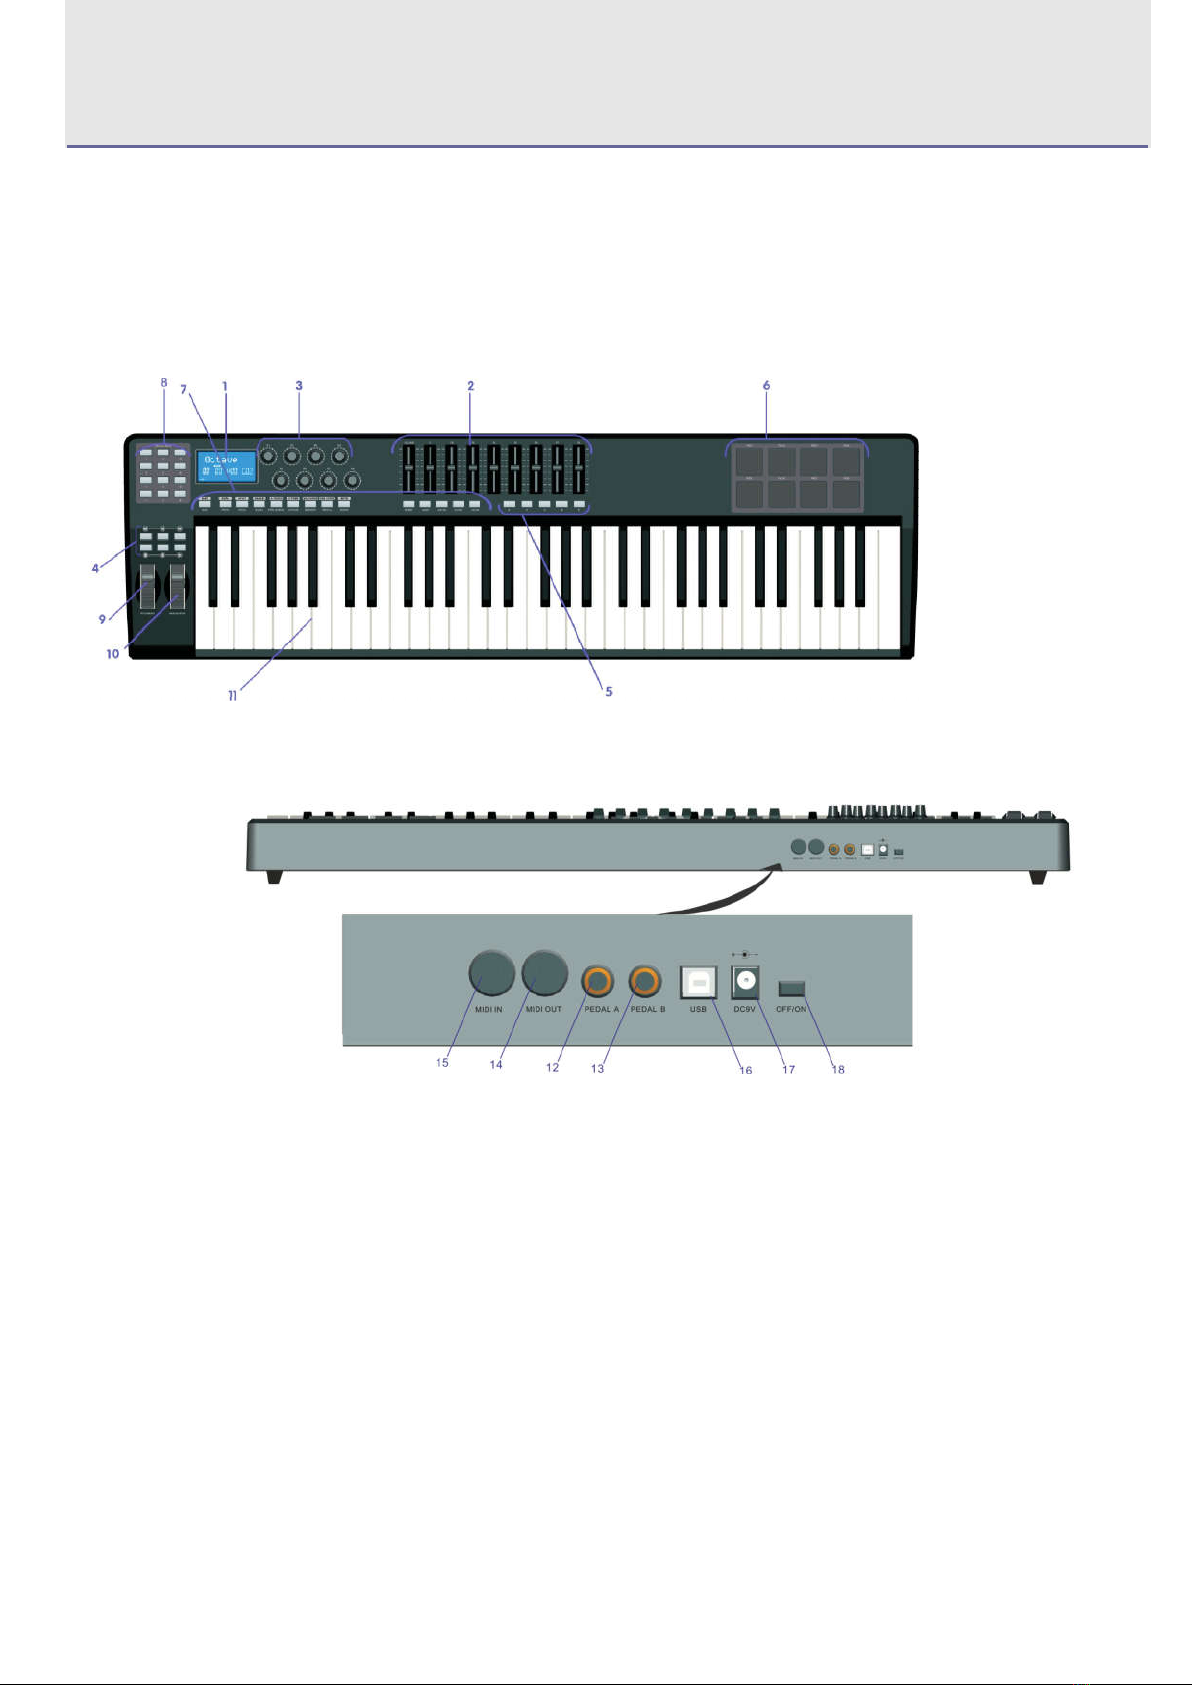
1.1.1 Top Panel Overview ......................................................................................................................................... 5
1.1.2 Rear Panel Overview ....................................................................................................................................... 5
1.1.3 Control Definitions ............................................................................................................................................ 5
1.2Setup............................................................................................................................................................................... 6
1.2.1 Minimum System Requirements .................................................................................................................... 6
1.3Using The Panda With Your Software ....................................................................................................................... 6
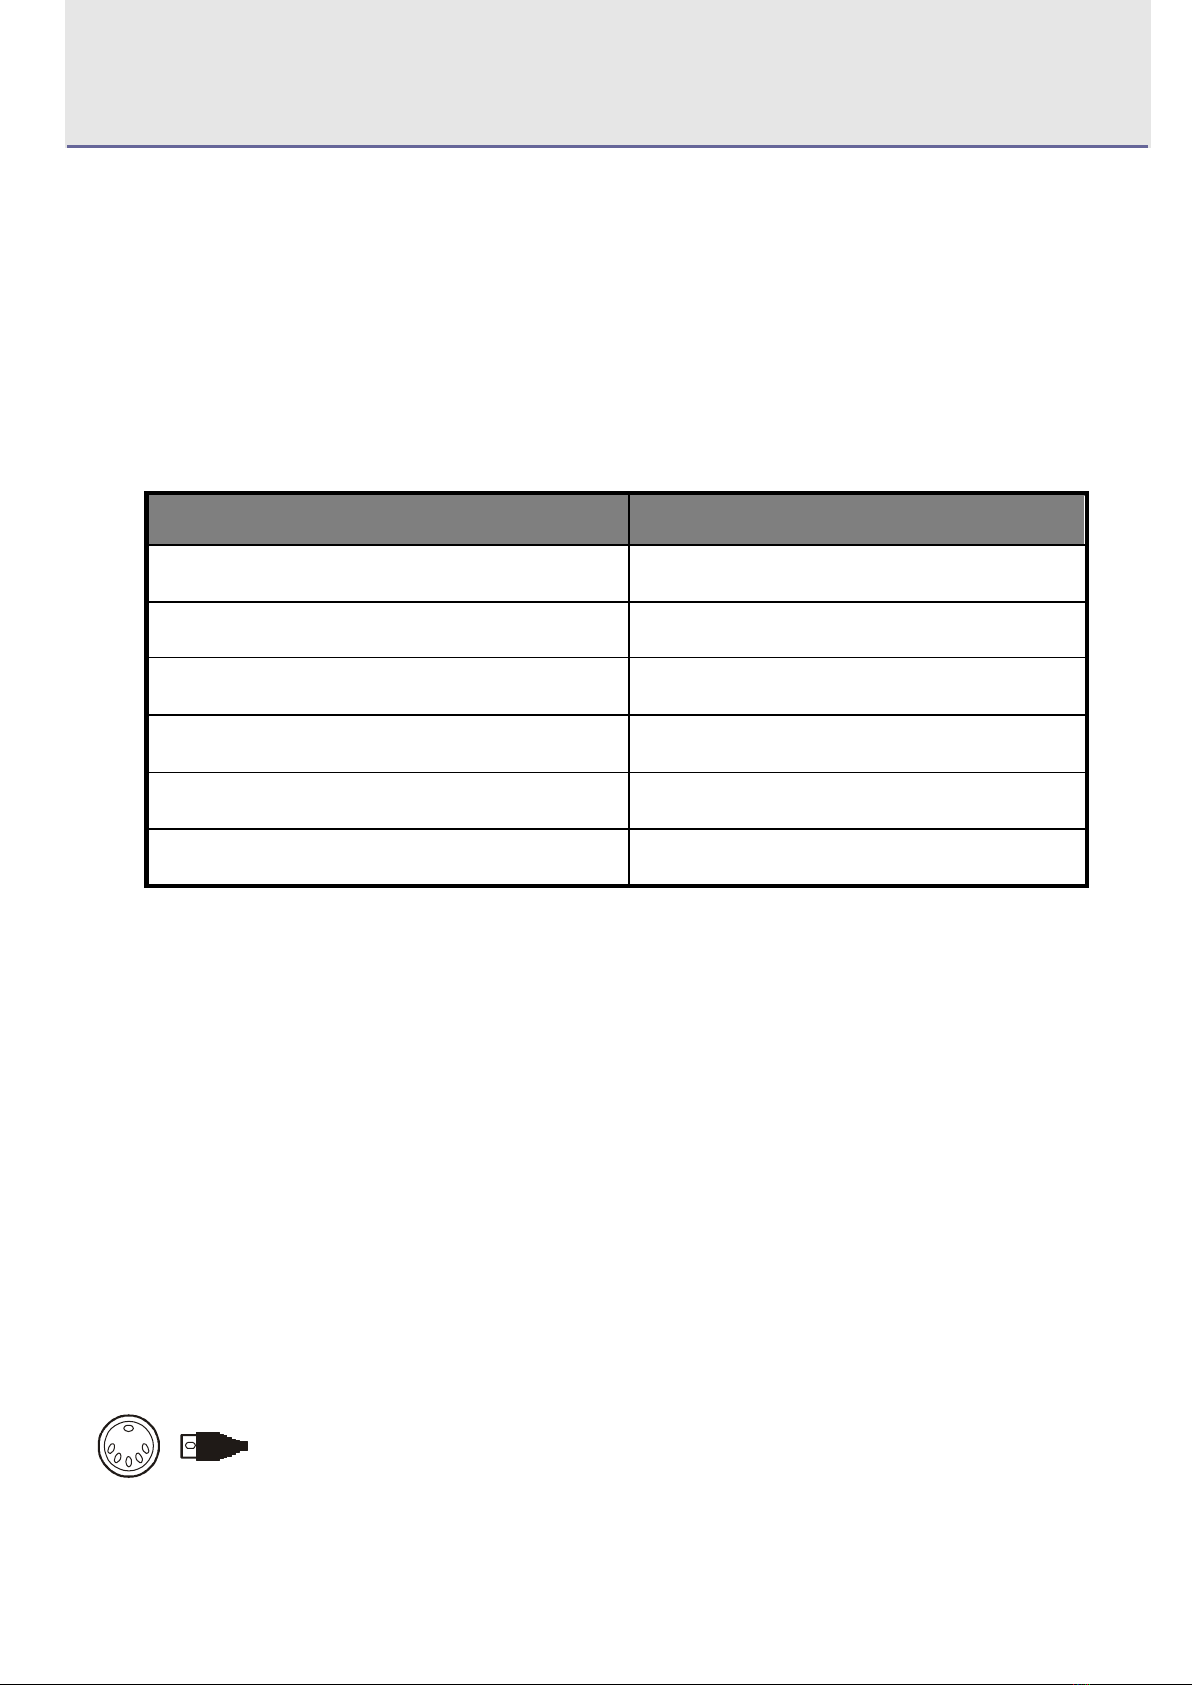
1.4 MIDI Connections ........................................................................................................................................................ 6
1.5 Power Supply ............................................................................................................................................................... 7
Section 2:Basic MIDI Control From Your Panda ................................................................................................................... 7
2. 1 Function Keys ............................................................................................................................................................. 7
2.1.1 Panda49 and 61 Functions ............................................................................................................................. 7
2.1.2 Panda25 Functions .......................................................................................................................................... 8
2.2 The Keyboard ............................................................................................................................................................... 8
2.2.1 Velocity Curve ................................................................................................................................................... 8
2.2.2 OCTAVE ............................................................................................................................................................ 9
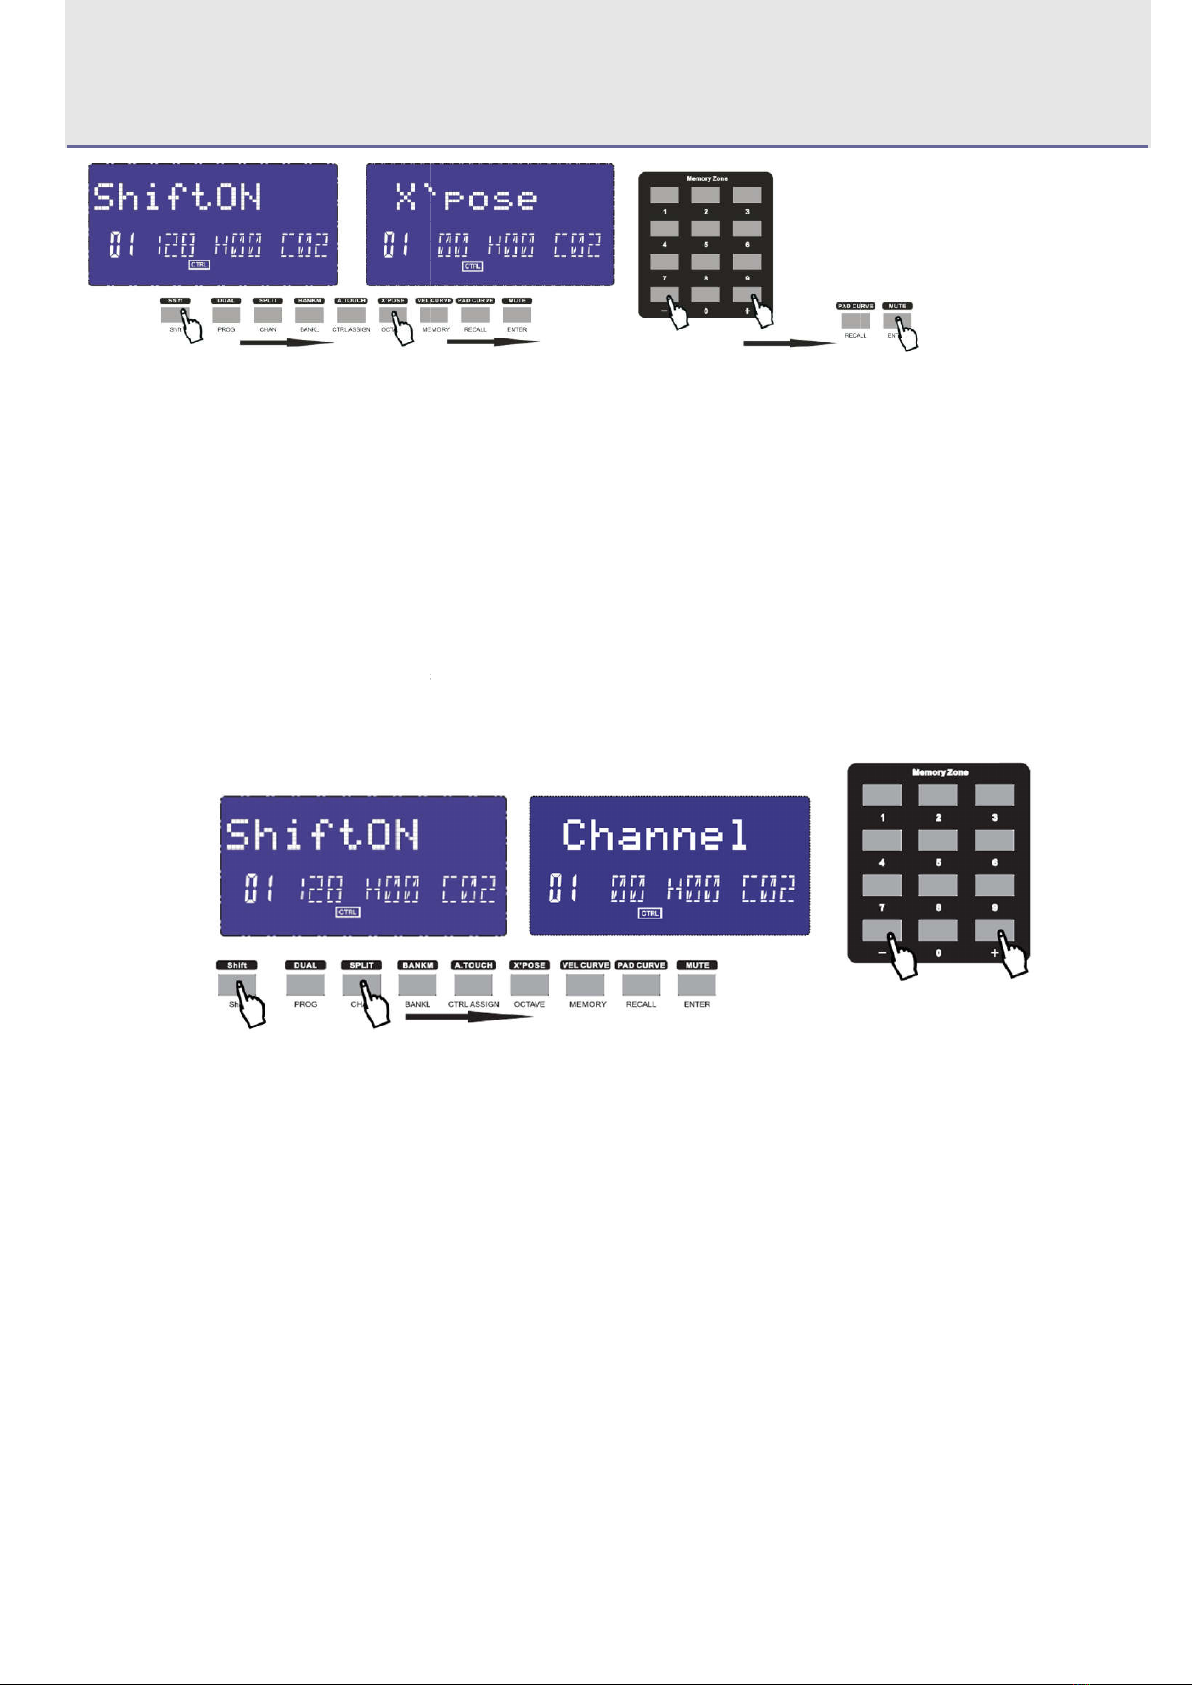
2.2.3 TRANSPOSE .................................................................................................................................................... 9
2.3 CHANNEL ................................................................................................................................................................... 10
2.4 CHANGING VOICE AND VOICE BANK ................................................................................................................ 10
2.4.1 PROGRAM ...................................................................................................................................................... 10
2.4.2 BANK L/M ........................................................................................................................................................ 11
2.5 MIDI Controller Messages ........................................................................................................................................ 11
2.5.1 Programming the Controls on Your Panda ................................................................................................ 12
2.5.2 ASSIGNABLE DIAL ....................................................................................................................................... 12
2.5.3ASSIGNABLE SLIDER ................................................................................................................................... 13
2.5.4 ASSIGNABLE WHEEL .................................................................................................................................. 13
2.5.5 ASSIGNABLE PEDAL ................................................................................................................................... 13
2.5.6 MASTER VOLUME ........................................................................................................................................ 13
2.5.7 PAD SETTING ................................................................................................................................................ 13
2.5.8 Groups: A,B,C,D,E(49/61) ............................................................................................................................. 14
Section 3. Advanced Settings ................................................................................................................................................ 14
3.1 How to make good use of the keyboard ................................................................................................................. 14
3.1.1 DUAL ................................................................................................................................................................ 14
3.1.2 SPLIT ............................................................................................................................................................... 15
3.1.3 A. TOUCH........................................................................................................................................................ 15
3.2 Other controls ............................................................................................................................................................. 16
3.2.1 MUTE ............................................................................................................................................................... 16
3.2.2 ASSIGN ........................................................................................................................................................... 16
3.2.3 GM .................................................................................................................................................................... 16
3.2.4 GS ..................................................................................................................................................................... 17
3.2.5 XG ..................................................................................................................................................................... 17
3.2.6 Reset ................................................................................................................................................................ 17

HANGZHOU WORLDE DIGITAL PIANO CO.,LTD HANGZHOU WORLDE MUSIC ELECTRONIC CO., LTD
3.2.7 SNAP SHOT.................................................................................................................................................... 17
3.3 Memory and data call back ...................................................................................................................................... 18
3.3.1 MEMORY ......................................................................................................................................................... 18
3.3.2 RECALL ........................................................................................................................................................... 18
3.4 Control functions ........................................................................................................................................................ 18
3.4.1 SHIFT ............................................................................................................................................................... 18
3.4.2 ENTER ............................................................................................................................................................. 19
3.5 Pad Control ................................................................................................................................................................. 19
3.5.1 Pressure Control ............................................................................................................................................. 19
3.5.2 Pad Curve ........................................................................................................................................................ 19
3.5.3 Pads Note setting ........................................................................................................................................... 19
3.6 MMC(MIDI MACHINE CONTROL) ......................................................................................................................... 20
3.7 NRPN/RPN setting .................................................................................................................................................... 20
Section 4: Usage Examples.................................................................................................................................................... 21
4.1 Recording Your Performance On A Sequencer .................................................................................................... 21
Section 5: MIDI Information Specification............................................................................................................................. 21
5.1 Program & Bank Changes Explained ..................................................................................................................... 21
Section 6: Troubleshooting ..................................................................................................................................................... 22
Section 7: Technical Info ......................................................................................................................................................... 23
Section 8: Appendices ............................................................................................................................................................. 24
Appendix A ——MIDI IMPLEMENTATION CHART ................................................................................................... 24
Appendix B – Useful MIDI Data Tables ........................................................................................................................ 25
Appendix C - General MIDI Controller Numbers (MIDI CC's) ................................................................................... 27
Appendix D – Assignable Controller Numbers to Linear Controllers ....................................................................... 28
Appendix E-Assignable Controller Numbers to Non-Linear Controllers .................................................................. 28
Appendix F – Assignable Controller Numbers to Rotary Encoders .......................................................................... 29
Appendix G – Assignable Controller Numbers to Pressure Pads ............................................................................. 29
Appendix H - Factory Presets......................................................................................................................................... 30
Appendix I - Hexadecimal Conversion Chart ............................................................................................................... 31

HANGZHOU WORLDE DIGITAL PIANO CO.,LTD HANGZHOU WORLDE MUSIC ELECTRONIC CO., LTD
Introduction
The eight fully assignable pads give you the ability to trigger samples. The eight fully assignable endless rotary encoders
and sliders can be assigned as 135 controllers.
The versatile and easy-to-use Panda keyboard is a great controller in the studio and live on stage.
What’s in the Box?
< Panda keyboard
< USB cable
Panda Keyboard overview
Here is a rundown of some of the great features the Panda keyboards have to offer:
< 8 high quality velocity & pressure sensitive performance trigger pads with RGB backlit.
< 2xAssinable Pedal Interfaces (PEDAL A(PEDAL A(switch pedal, default as sustain pedal),PEDAL B(continuous pedal,
default as expression pedal ), which can be assigned as 135 controllers.
< 8xAssignable Dials. Each dial can establish an independent channel, and can be assigned as 135 controllers.
< 8xAssignable Slider, each slider can be assigned as 135 controllers.
< Assignable Pitch Bend Wheel and Modulation Wheel(Wheel P & Wheel M),which can be assigned as 135 controllers.
< 6 Buttons for MMC.
< 1xMaster Volume Slider.
< 8 double Function button with shift, providing 15 functions like PROGRAM, CHANNEL, VEL-CURVE, OCTAVE,
TRANSPOSE,BANK M, BANK L, DUAL, SPLIT, MUTE, AFTER TOUCH, CONTROL ASSIGN and etc.
< 10xData entry and +/- button.
< Built-in Memory, which can store/load 6 groups of user's parameter.
< 1xMIDI OUT,1X MIDI IN.
< USB interface, adaptable to USB 2.0(FULL SPEED). Power supplied by USB and DC 9 V.
< Have the ability for future upgrading via USB(Please visit www.worlde.com.cn)
<Compatible with Windows XP/Vista/Windows7/8/10 and Mac OSX. Drive free and hot-plug supported.

HANGZHOU WORLDE DIGITAL PIANO CO.,LTD HANGZHOU WORLDE MUSIC ELECTRONIC CO., LTD
Section1: Getting
1.1 Panda Keyboards Overview
1.1.1 Top Panel Overview
1.1.2 Rear Panel Overview
1.1.3 Control Definitions
The controls are referred by name throughout this manual. 9:Pitch Bend wheel 18:Power switch
1: LCD DISPLAY 10:Modulation wheel
2: Slider(49/61 only )
3: Encoders
11:Keyboard with Aftertouch
12:Pedal A (default as sustain pedal)
4:Transport buttons
13:Pedal B( default as expression pedal , press ‘Shift’ button to select
the polarity of Pedal B when switch on the unit)
5:Assignable buttons(49/61 only)
6:Trigger Pads(with RGB backlit, refer to 3.5.4 for more info)
14:MIDI OUT port
15:MIDI IN port
7:Function buttons 16:USB 2.0 port
8:Numeric keypad 17:DC power socket

HANGZHOU WORLDE DIGITAL PIANO CO.,LTD HANGZHOU WORLDE MUSIC ELECTRONIC CO., LTD
1.2Setup
If you intend to connect your Panda keyboard to a computer, please read sections 1.2 and 1.3 first. If you only intend to
use your Panda keyboard to control a sound module or synthesizer using the external MIDI OUT you should skip to
section 1.4.
1.2.1 Minimum System Requirements
If you are using your Panda with a computer, the following minimum system requirements apply:
Windows Mac OS
Pentium 3 800 MHz or higher Macintosh G3* 800/G4* 733 MHz or higher
(CPU requirement may be higher for laptops) (CPU requirement may be higher for laptops)
256 MB RAM OS X 10.3.9 with 256 MB RAM,
DirectX 9.0b or higher OS X 10.4.2 or greater with 512 MB RAM
Windows XP (SP2) or higher *G3/G4 accelerator cards are not supported.
(Windows 98, Me, NT or 2000 not supported)
WORLDE suggests you also check the minimum system requirements for your software, as they may be greater
than the above.
USB hubs are not supported. WORLDE suggests that you connect directly to one of your computer’s built in USB ports.
1.3Using The Panda With Your Software
When installed, the Panda appears as a simple MIDI device with one input port and one output port. You should select
the listed Panda input port as the MIDI input device in your software. Once this is set, your software should be able to
receive notes and controller data from the Panda.
If you have connected external MIDI gear like a drum machine or another keyboard to your Panda’s MIDI IN port, this
gear can be interfaced to the computer by selecting the listed Panda input port. This way, your Panda is acting as a MIDI
to USB interface.
The port names are defined as USB Audio Device when connecting to USB port.
It will appear as a single USB Composite Device in the Device Manager.
1.4 MIDI Connections
The MIDI Out port accepts a standard 5-pin DIN-type MIDI plug(available from most professional audio retailers).
The MIDI Out port can be used to connect the Panda to a hardware sequencer, an external synthesizer or sound module,
for example.

HANGZHOU WORLDE DIGITAL PIANO CO.,LTD HANGZHOU WORLDE MUSIC ELECTRONIC CO., LTD
1.5 Power Supply
If you are using your Panda with a computer via its USB port, there is no need for an external power supply. Your Panda
will draw its power from the computer.
However, if you are intending to use your Panda without connecting to a computer’s USB port, then you will need to use
an external power supply. No power supply is included in the box, so please select one that meets the following
requirements:
<9V DC <250mA-300mA <Center positive
Section 2:Basic MIDI Control From Your Panda
Your Panda controller will not make any sound unless it is connected to a computer or other external MIDI gear. This is
because the Panda sends MIDI data when you play it and does not produce sound on its own. Instead, it is used to
control a virtual instrument on your computer or a MIDI sound module to generate sounds.
This is a good place to introduce you to the way we approach the differences between the Panda61 and 49 and the
Panda25. The appearance and functionality of the Panda61 and 49 are the same, it’s just the size of the keyboard that is
different, so when we give instructions for these models, these two are always grouped together. The Panda25 looks
different and a number of its functions are accessed in a different way, so for this model we will always give you a
separate set of instructions.
2. 1 Function Keys
2.1.1 Panda49 and 61 Functions

HANGZHOU WORLDE DIGITAL PIANO CO.,LTD HANGZHOU WORLDE MUSIC ELECTRONIC CO., LTD
2.1.2 Panda25 Functions
Numeric Keypad:
Use the numeric keypad to enter values during programming. The LCD display will show the values as you enter
them.
2.2 The Keyboard
When you play the keyboard, MIDI note messages are sent. These messages are read by your computer software or
external MIDI gear and used to generate sound accordingly.
2.2.1 Velocity Curve
Every time you press a key, a MIDI note message is sent with a velocity value between 0 and the maximum; this value
specifies how hard you pressed the key. Since different people have different playing styles, your Panda offers 6 different
velocity curves as shown below. The default is the first one. You should experiment with the different velocity curves to
seek the curve that best suits your playing style.

HANGZHOU WORLDE DIGITAL PIANO CO.,LTD
To change the velocity curve:
Press Velocity Curve
button to start the
the ‘VelCURVE' and the Number
of current velocity curve. It can be adjusted by +/
confirmed by Enter button.
The initial value is 1, adjusting scale is 1
(1)
Press the SHIFT button for one or two times un
(2) Press the “VEL CURVE”
button for one or two times until the LCD displays
(3) Press “+” or “-”
button to adjust the keyboard velocity curve, the LCD will display the current selected velocity curve on the bottom
(4) Press the “Enter”
button to confirm and the LCD will display
2.2.2 OCTAVE
Press Octave button to adjust
the octave function
octave. When this button is valid, the LCD shows the ‘OCTAVE’ and the value of current transposition. It can be adjusted
by +/- button. The initial value is 0, a
djusting
(1)
Press the SHIFT button for one or two times until the LCD displays
(2)Press the “Octave”
button for one or two times until the LCD displays
(3)Press “+” or “-” button to adjust the keyboard
octave
(4)Press the “Enter”
button to confirm and the LCD will display
2.2.3 TRANSPOSE
Transpose adjusting function allows the keyboard to change
the LCD displays the ‘x’pose’ and the value of current transpose. It can be adjusted by +/
adjusting scale is -12~12. The
operation steps and
HANGZHOU WORLDE DIGITAL PIANO CO.,LTD
HANGZHOU WORLDE MUSIC
ELECTRONIC
button to start the
selection function of velocity curve
. When this button is valid, the LCD displays
of current velocity curve. It can be adjusted by +/
-
button or Numeric Button and
The initial value is 1, adjusting scale is 1
~6.The operation steps and
LCD displays the following:
Press the SHIFT button for one or two times un
til the LCD displays “Shift ON”.
button for one or two times until the LCD displays
“velcurve”.
button to adjust the keyboard velocity curve, the LCD will display the current selected velocity curve on the bottom
button to confirm and the LCD will display
“Done”.
the octave function
.
This function allows the keyboard to change the Pitch up/down by
octave. When this button is valid, the LCD shows the ‘OCTAVE’ and the value of current transposition. It can be adjusted
djusting
scale is -4~5. The operation steps and
LCD displays the following:
Press the SHIFT button for one or two times until the LCD displays
“Shift ON”.
button for one or two times until the LCD displays
“Octave”.
octave
, the LCD will display the current octave on the bottom-
button to confirm and the LCD will display
“Done”.
Transpose adjusting function allows the keyboard to change
the Pitch up/down by semi
-
the LCD displays the ‘x’pose’ and the value of current transpose. It can be adjusted by +/
operation steps and
LCD displays the following:
ELECTRONIC
CO., LTD
. When this button is valid, the LCD displays
button or Numeric Button and
LCD displays the following:
button to adjust the keyboard velocity curve, the LCD will display the current selected velocity curve on the bottom
- left corner.
This function allows the keyboard to change the Pitch up/down by
octave. When this button is valid, the LCD shows the ‘OCTAVE’ and the value of current transposition. It can be adjusted
LCD displays the following:
left corner.
-
tone. When this button is valid,
the LCD displays the ‘x’pose’ and the value of current transpose. It can be adjusted by +/
-button. The initial value is 00,

HANGZHOU WORLDE DIGITAL PIANO CO.,LTD
(1)
Press the SHIFT button for one or two times until the LCD displays
(2)Press the “X’pose”
button for one or two times until the LCD displays
(3)Press “+” or “-” button to adjust the keyboard
transpose
(4)Press the “Enter”
button to confirm and the LCD will display
2.3 CHANNEL
Press the
Channel selection function button
displays the Channel’ and the current channel number. The channel can be selected with +/
and confirmed by Enter b
utton. The initial setting is 1
following:
(1)
Press the SHIFT button for one or two times until the LCD displays
(2)Press the “Channel”
button for one or two times until the LCD displays
(3)Press “+” or “-” button to adjust the keyboard
channel
(4)Press the “Enter”
button to confirm and the LCD will display
2.4
CHANGING VOICE AND VOICE BANK
2.4.1 PROGRAM
Press Program button to adjust the
voice of current channel. When this button is valid, the LCD
displays the ‘Program’ and the current voice number. The voice can be adjusted or selected with NUMERIC
HANGZHOU WORLDE DIGITAL PIANO CO.,LTD
HANGZHOU WORLDE MUSIC
ELECTRONIC
Press the SHIFT button for one or two times until the LCD displays
“Shift ON”.
button for one or two times until the LCD displays
“X’pose”.
transpose
, the LCD will display the
current keyboard transpose
button to confirm and the LCD will display
“Done”.
Channel selection function button
to adjust the
current MIDI channel. When this button is valid, the LCD
displays the Channel’ and the current channel number. The channel can be selected with +/
utton. The initial setting is 1
, adjusting scale is 1~16.The
operation steps and
Press the SHIFT button for one or two times until the LCD displays
“Shift ON”.
button for one or two times until the LCD displays
“Channel”.
channel
, the LCD will display the current keyboard channel
on the bottom
button to confirm and the LCD will display
“Done”.
CHANGING VOICE AND VOICE BANK
voice of current channel. When this button is valid, the LCD
displays the ‘Program’ and the current voice number. The voice can be adjusted or selected with NUMERIC
ELECTRONIC
CO., LTD
current keyboard transpose
on the bottom- left corner.
current MIDI channel. When this button is valid, the LCD
displays the Channel’ and the current channel number. The channel can be selected with +/
- Button or Numeric button
operation steps and
LCD displays the
on the bottom
- left corner.
voice of current channel. When this button is valid, the LCD
displays the ‘Program’ and the current voice number. The voice can be adjusted or selected with NUMERIC

HANGZHOU WORLDE DIGITAL PIANO CO.,LTD
button or +/-Bu
tton. The initial setting is 00
(1)
Press the SHIFT button for one or two times until the LCD displays
(2)Press the “Program”
button for one or two times until the LCD displays
(3)Press “+” or “-” button to adjust the keyboard
program
(4)Press the “Enter”
button to confirm and the LCD will display
2.4.2 BANK L/M
Press Bank L/M button to adjust
the voice bank of current channel. When these buttons are valid, the LCD displays the
‘BANK L/M’ and the current voice bank number. The voice can be adjusted or selected with NUMERIC button or +/
Button. The initial setting is 00,
adjusting scale is 0~12
(1)
Press the SHIFT button for one or two times until the LCD displays
(2)Press the “Bank L/M”
button for one or two times until the LCD displays
(3)Press “+” or “-” button to adjust the
keyboard Bank L/M
(4)Press the “Enter”
button to confirm and the LCD will display
2.5 MIDI Controller Messages
There are 135 MIDI controller messages that are used for controlling the MIDI
on your external MIDI gear
(0 to127 is the standard MIDI control parameter,128 to 134 is the special MIDI control
HANGZHOU WORLDE DIGITAL PIANO CO.,LTD
HANGZHOU WORLDE MUSIC
ELECTRONIC
tton. The initial setting is 00
, adjusting scale is 0~127.The
operation steps and
Press the SHIFT button for one or two times until the LCD displays
“Shift ON”.
button for one or two times until the LCD displays
“Program”.
program
, the LCD will display the current keyboard program
on the bottom
button to confirm and the LCD will display
“Done”.
the voice bank of current channel. When these buttons are valid, the LCD displays the
‘BANK L/M’ and the current voice bank number. The voice can be adjusted or selected with NUMERIC button or +/
adjusting scale is 0~12
7. The operation steps and
LCD displays the following:
Press the SHIFT button for one or two times until the LCD displays
“Shift ON”.
button for one or two times until the LCD displays
“Bank L/M”.
keyboard Bank L/M
, t
he LCD will display the current keyboard bank L/M value
button to confirm and the LCD will display
“Done”.
There are 135 MIDI controller messages that are used for controlling the MIDI
-
adjustable parameters in your software
(0 to127 is the standard MIDI control parameter,128 to 134 is the special MIDI control
ELECTRONIC
CO., LTD
operation steps and
LCD displays the following:
on the bottom
- left corner.
the voice bank of current channel. When these buttons are valid, the LCD displays the
‘BANK L/M’ and the current voice bank number. The voice can be adjusted or selected with NUMERIC button or +/
-
LCD displays the following:
he LCD will display the current keyboard bank L/M value
on the bottom- left corner.
adjustable parameters in your software
or
(0 to127 is the standard MIDI control parameter,128 to 134 is the special MIDI control

HANGZHOU WORLDE DIGITAL PIANO CO.,LTD HANGZHOU WORLDE MUSIC ELECTRONIC CO., LTD
parameter). Examples of these controllable parameters include volume, pan, expression, reverb, chorus and portamento.
Each of the controls on your Panda keyboard is able to send any of the 128 standard MIDI controller messages to control
such parameters. Please note that in order for these effects to work, the MIDI device you are sending to must be able to
receive these messages. A full list of these control messages is given in Appendix C.
For example, you may want to set the Modulation wheel to control the reverb amount. This is done by assigning
controller 91 to the Modulation wheel.
Examples of other popular effects are listed in the table below. (Please consult Appendix C for the full list.)
Effect Control
Modulation 1
Volume 7
Pan 10
Expression 11
Reverb depth
Chorus depth
There are many different types of virtual instruments available and most of these respond to MIDI controller messages,
allowing you to control a variety of parameters from your Panda keyboard. Please review the manual that came with
your software or external gear to see what these controller numbers are.
2.5.1 Programming the Controls on Your Panda
When programming a physical controller on your Panda, the controller that was last used will be the first one selected for
programming. To select a different physical controller for programming, the method is: Move the physical controller you
wish to program, and press the assignable button.
When in assign, the LCD displays the following:
2.5.2 ASSIGNABLE DIAL
There’re 8 dials that can be assigned channel and controller No. independently. First press the “Assign” button.
Then operate the dial to select the dial, and the LCD shows the controller number and the controller value.
Input the No. with NUMERIC button or +/- button when the dial is selected. The numbers are the controllers. you also
need to use the ‘Enter’ button to confirm the data. For example: if you want to assign R1 to volume control 7, operation
steps is shown as below:
(1)Press the SHIFT button for one or two times until the LCD displays “Shift Off”.
(2)Press the “Ctrl Assign” button and the LCD displays “Assign”.
(3)Operate R1 knob.
(4)Press numeric button “7” and the LCD will display “7” on the bottom- left corner.

HANGZHOU WORLDE DIGITAL PIANO CO.,LTD HANGZHOU WORLDE MUSIC ELECTRONIC CO., LTD
(5)Press the “Enter” button to confirm and the LCD will display “Done”.
2.5.3ASSIGNABLE SLIDER
There’re 9 sliders that can be assigned controller No(49/61 only)independently. First press the “assign” button Then
operate the slider, and the LCD shows the controller number and the controller value. Input the No. with NUMERIC
button or +/-button when the slider is selected, The numbers are the controllers. You also need to use the “Enter” button
to confirm the data.
For example: if you want to assign RF1 to Expression control 11, operation steps is shown as below:
(1)Press the SHIFT button for one or two times until the LCD displays “Shift Off”.
(2)Press the “Ctrl Assign” button and the LCD displays “Assign”.
(3)Operate F1 slider.
(4)Press numeric button “11” twice and the LCD will display “11” on the bottom- left corner.
(5)Press the “Enter” button to confirm and the LCD will display “Done”.
2.5.4 ASSIGNABLE WHEEL
The modulation and pitch bend are the default function of the 2 wheels. It can be assigned controller No. independently.
First press the “assign” button. Then operate the wheel to select the wheel, and the LCD shows the controller number
and the controller value. Input the No. with NUMERIC button or +/- button when the wheel is selected. The numbers are
the controllers. You also need to use the ‘’Enter’’ button to confirm the data.
2.5.5 ASSIGNABLE PEDAL
2 pedal interfaces that can be assigned controller No. independently. First press the ”assign” button. Then operate the
pedal to select it, and the LCD shows the controller number and the controller value. Input the No. with NUMERIC button
or +/- button when the pedal is selected. You need to use enter to confirm the data.
2.5.6 MASTER VOLUME
It sends GM Master Volume message(F0 7F 7F 04 01 00 xx F7).
2.5.7 PAD SETTING
Activate a pad and press the Ctrl Assign button, the LCD display will display the currently assigned controller
of the pad. The controller number 128 is for pad note. Press “shift” to edit the Pad note. Enter the new pad
number you want the pad to be assigned with the numeric button or +/- button. For example: if you want to assign PAD1
to control 34, operation steps is shown as below:
(1)Press Pad1.
(2)Press the SHIFT button for one or two times until the LCD displays “Shift Off”.
(3)Press the “Ctrl Assign” button and the LCD displays “Assign”.

HANGZHOU WORLDE DIGITAL PIANO CO.,LTD HANGZHOU WORLDE MUSIC ELECTRONIC CO., LTD
(4)Press “Shift” button and the LCD will display “Pad Note”.
(5)Press numeric button “3” and “4” and the LCD will display “34” on the bottom- left corner.
(6)Press the “Enter” button to confirm and the LCD will display “Done”.
2.5.8 Groups: A,B,C,D,E(49/61)
The button can be assigned as a controller. Press the ‘CTRL ASSIGN’ button, then press a button, the LCD
will display ‘ctrldata1’, input the number of the controller that you want to operate, press the 'enter' to confirm the value.
The LCD will display 'ctrldata2',at this moment, you can input the value that the controller should be send. For example: if
you want to assign A to control 18 which will send value 127, operation steps is shown as below:
(1)Press the SHIFT button for one or two times until the LCD displays “Shift Off”.
(2)Press the “Ctrl Assign” button and the LCD displays “Assign”.
(3)Press the “A” button and the LCD displays “ctrldata1”.
(4)Press numeric button “1” and “8” and the LCD will display “18” on the bottom- left corner.
(5)Press the “Enter” button to confirm and the LCD will display “ctrldata2”.
(6) Press numeric button “1”, “2” and “7” and the LCD will display “127” on the bottom- left corner.
(7)Press the “Enter” button to confirm and the LCD will display “Done”.
Section 3. Advanced Settings
3.1 How to make good use of the keyboard
3.1.1 DUAL
Dual switch function button.
When Dual is ON, the LCD displays the ‘DUAL_ON', Keyboard sends MIDI info of two channels, with the voice
/channel of both channels adjustable. The 2nd voice and channel of 2 layer can be adjusted currently (Dual is ON).
Dual and Split can not be used at the same time. When Dual is ON, Split is OFF. The operation steps and LCD displays
the following:
(1)Press the SHIFT button for one or two times until the LCD displays “Shift ON”.
(2)Press the “DUAL” button for one or two times until the LCD displays “Dual_ON”.
(3)Press the “Enter” button to confirm and the LCD will display “Done”.

HANGZHOU WORLDE DIGITAL PIANO CO.,LTD HANGZHOU WORLDE MUSIC ELECTRONIC CO., LTD
3.1.2 SPLIT
Keyboard Split ON/OFF function button. When Split is ON, the LCD displays the ’SPLIT_ON’., the keyboard is split to
right section and left section by the split point, with each section use it’s own channel. The voice /channel of both
channels is adjustable. The voice and channel of right section can be adjusted currently(Split is ON),Dual and Split can
not be used at the same time. When Split is ON, Dual is OFF. The operation steps and LCD displays the following:
(1)Press the SHIFT button for one or two times until the LCD displays “Shift ON”.
(2)Press the “SPLIT” button for one or two times until the LCD displays “Split_ON”.
(3)Hold “SPLIT” button until the LCD displays “CHO”.
(4)Press the key that will be used as the Split point and the LCD will display “Done”.
SPLIT POINT
Default Split Point is the central C (MIDI No. 60). User can choose the Split Point. Hold the Split button,
LCD shows CHO, reminding user to select the SPLIT POINT. Press the key that needs to be the new
Split Point, LCD shows “done”, meaning this key is set to be the new Split Point.
3.1.3 A. TOUCH
Channel After Touch ON/OFF function button. When Touch is ON, the LCD shows ‘TOUCH ON’
and the system sends Channel After Touch info when pressing the keys.
The operation steps and LCD displays the following:
(1)Press the SHIFT button for one or two times until the LCD displays “Shift ON”.
(2)Press the “A.TOUCH” button for one or two times until the LCD displays “A.T ON”.
(3)Press the “Enter” button to confirm and the LCD will display “Done”.

HANGZHOU WORLDE DIGITAL PIANO CO.,LTD HANGZHOU WORLDE MUSIC ELECTRONIC CO., LTD
3.2 Other controls
3.2.1 MUTE
MUTE ON/OFF function button. When MUTE function is ON, The LCD shows ‘MUTE ON’
no MIDI info will be sent. The operation steps and LCD displays the following:
(1)Press the SHIFT button for one or two times until the LCD displays “Shift ON”.
(2)Press the “MUTE” button for one or two times until the LCD displays “Mute_ON”.
(3)Press the “Enter” button to confirm and the LCD will display “Done”.
3.2.2 ASSIGN
ASSIGN mode ON/OFF function button. When ASSIGN mode is ON, The LCD shows ‘ASSIGN’,
default as assigning the controller number. that is assignable. Operate the controller to be assigned
and select the very controller LCD shows the controller No. of current controller. Input the desired
controller No. with NUMERIC button or +/- button (e.g. when a dial is selected, LCD shows the default
No. 007. If you input 010, the dial is assigned as PAN).The LCD displays the following:
3.2.3 GM
GM:Press CHAN and BANK L buttons at the same time(25)/GM ON button(49 and 61)to send GM ON message
F0 7E 7F 09 01 F7). The LCD shows ‘GM ON’ when the message is sent. The LCD displays the following:

HANGZHOU WORLDE DIGITAL PIANO CO.,LTD HANGZHOU WORLDE MUSIC ELECTRONIC CO., LTD
3.2.4 GS
Press CTRL ASSIGN and BANK L buttons at the same time(25)/GS ON button (49 and 61)to send GM ON message
F0 41 10 42 12 40 00 7F 00 41 F7).LCD shows 'GS ON' when the message is sent. The LCD displays the following:
3.2.5 XG
Press CTRL ASSIGN and OCTAVE buttons at the same time(25)/XG ON button (49 and 61)to send GM ON message
(F0 43 10 4C 00 00 7E 00 F7). LCD shows ‘XG ON’ when the message is sent. The LCD displays the following:
3.2.6 Reset
Press PROGRAM and SHIFT buttons at the same time(25)/RESET button (49 and 61) to reset the system restoring to
factory setting, sending system initial setting info at the same time.
3.2.7 SNAP SHOT
Press CHAN and PROG buttons at the same time(25)/SANP button (49 and 61) to send message of all user settings.
LCD shows SNAP when the message is sent. The LCD displays the following:

HANGZHOU WORLDE DIGITAL PIANO CO.,LTD HANGZHOU WORLDE MUSIC ELECTRONIC CO., LTD
3.3 Memory and data call back
3.3.1 MEMORY
Press the MEMORY button. The system enters the storing state, it stores 6 groups setup value. Using the NUMERIC
button1~6 to select the memory area. Press ENTER to store the control setting. The operation steps and LCD displays
the following:
(1)Press the SHIFT button for one or two times until the LCD displays “Shift ON”.
(2)Press the “Memory” button for one or two times until the LCD displays “Memory”.
(3)Press the Numeric button “1” and the LCD displays “A”.
(4)Press the “Enter” button to confirm and the LCD will display “Done”.
3.3.2 RECALL
Press the RECALL button, the system enters the recall state. Using the NUMERIC button 1~6 to select the memory area.
Press ENTER to recall the parameters. The operation steps and LCD displays the following:
(1)Press the SHIFT button for one or two times until the LCD displays “Shift ON”.
(2)Press the “Recall” button for one or two times until the LCD displays “Recall”.
(3)Press the Numeric button “1” and the LCD displays “A”.
(4)Press the “Enter” button to confirm and the LCD will display “Done”.
3.4 Control functions
3.4.1 SHIFT
Use SHIFT button to select the upper function of the buttons. The LCD displays the following:

HANGZHOU WORLDE DIGITAL PIANO CO.,LTD HANGZHOU WORLDE MUSIC ELECTRONIC CO., LTD
3.4.2 ENTER
Press ENTER to confirm the data.
3.5 Pad Control
3.5.1 Pressure Control
Using the pressure control, the pads give you a different type of performance option on your Panda. You can control
parameters on your software in a way that would not be possible on a standard dial or slider. The pressure pads can
be used to make some very interesting effects.
As we’ve seen above, each pad can be assigned an individual MIDI controller number.
As you apply more and more pressure to the pad, the value of the controller you are sending will increase, until the
maximum value is reached. On release, the pad will return to the minimum value.
3.5.2 Pad Curve
The Pad Curve setting is used to set the response curve of all eight pads. It is not possible to set the response curve o
the pads independently.
3.5.3 Pads Note setting
Press one pad, then press assign. After that you shall press shift, then you can set the MIDI note by numeric
buttons or +/- buttons. and press ENTER to confirm.

HANGZHOU WORLDE DIGITAL PIANO CO.,LTD HANGZHOU WORLDE MUSIC ELECTRONIC CO., LTD
3.5.4 Select the Backlit RGB Color of 8 Pads
Press “SHIFT” button and the LCD displays “SHIFT ON”, the knobs R1, R2 and R3 are used for RGB color. R1 is
for red color. R2 is for blue color and R3 is for green color. Press the pad you want to change the RGB color and
then operate the knob R1,R2,R3 to change the RGB color of this pad. Press “SHIFT” button to exit the RGB color
setting mode. The operate steps are following:
(1) Press the “SHIFT” button for one or two times until the LCD displays “SHIFT ON”.
(2) Press one of the 8 PADs and the LCD displays “PAD”.
(3) Operate R1,R2,R3 to change the RGB color of the pad. During operation, the LCD displays the current RGB
color No. on the bottom-left corner. Maximum is 127, 0 means LED lights off.
(4) Press the “SHIFT” button to exit the RGB color setting mode.
(5) Reference RGB No. for some colors:
COLOR R. G. B
WHITE 127 127 127
BLACK 0 0 0
RED 127 0 0
GREEN 0 127 0
BLUE 0 0 127
CYAN 0 127 127
MAGENTA 127 0 127
YELLOW 127 127 0
ORANGE 127 82 0
3.6 MMC(MIDI MACHINE CONTROL)
There are 6 buttons used for MMC-[|<<],[<<],[>>],[O],[stop],[play].It is common to set the 6
buttons as Sequencer remote control buttons, it needs to be working with sequencer software.
3.7 NRPN/RPN setting
Assign the controller to 132~135, after that you can set the NRPN or RPN by numeric buttons.
Please consult Appendix D on Page 18 for full list.
Other manuals for Panda
1
Table of contents
Other Worlde Recording Equipment manuals

Worlde
Worlde Orca PAD48 User manual

Worlde
Worlde Orca PAD64 User manual

Worlde
Worlde PANDAMINI II User manual

Worlde
Worlde KSA SERIES User manual

Worlde
Worlde KS25B User manual

Worlde
Worlde EASYPAD User manual

Worlde
Worlde Orca PAD48 User manual

Worlde
Worlde ORCA PAD16 User manual

Worlde
Worlde Panda User manual

Worlde
Worlde TUNA MINI User manual
Popular Recording Equipment manuals by other brands

ALZA
ALZA Maonocaster AU-AM100 user manual

Olimpia splendid
Olimpia splendid B1014 Installation and maintenance instruction

Tascam
Tascam MMP-16 SCSI Tips

Kenwood
Kenwood Nexedge KTI-3 Service manual

RODE Microphones
RODE Microphones Caster Pro II quick start guide

Radial Engineering
Radial Engineering Pro48 user guide