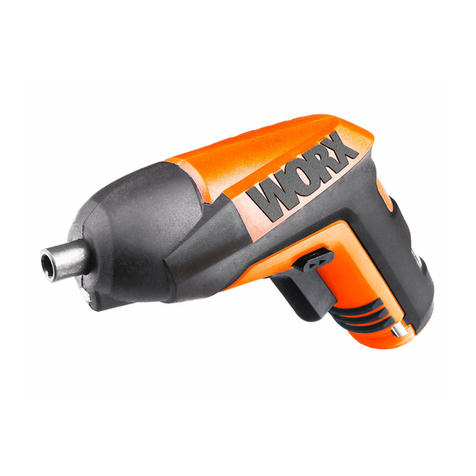
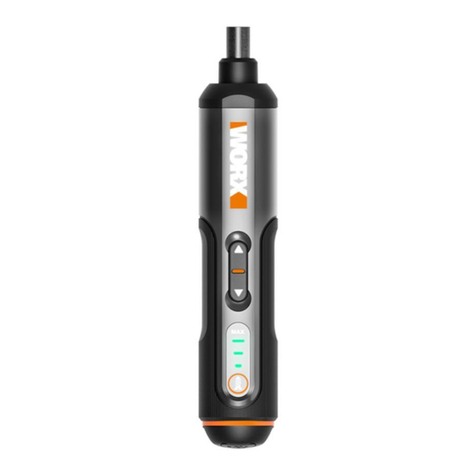
Worx WX254L User manual

WX254L
HELPLINE NUMBER
1-866-354-WORX (9679)
HELPLINE NUMBER

EN
F
ES
P06
P14
P23

8
2
1
4
5
6
3
9
7

A B
C1 C2

1
2
2
1
D E1
E2 F

7
6
1. COVER
2. FORWARD/REVERSE ROTATION CONTROL
3. SOFT GRIP HANDLE
4. ON/OFF SWITCH
5. LED LIGHT
6. BIT HOLDER OR CHUCK
7. BIT CARTRIDGE
8. CHARGING INDICATOR
9. CHARGING SOCKET
TECHNICAL DATA
Charger voltage 120V~ 60Hz
Rated voltage 4V Max*
Rated speed 230/min
Drilling capacity in wood 3/32”
Max screw diameter 3/16”
Machine weight 1.1 lbs
Charging time 5 hours
* Voltage measured without workload. Initial battery voltage reaches maximum of 4 volts.
Nominal voltage is 3.6 volts.

7
6
ACCESSORIES
1” Hex Shank Screwdriver Bits 11
Screw Starter Drill Bit 1
5hr Charger 1
Bit Cartridges 2
We recommend that you purchase your accessories from the same store that sold you the tool. Use good
quality accessories marked with a well-known brand name. Choose the type according to the work you intend
to undertake. Refer to the accessory packaging for further details. Store personnel can assist you and offer
advice.

9
8
GENERAL POwER TOOL SAfETy wARNINGS
WARNING: Read all safety warnings and
instructions. Failure to follow the warnings
and instructions may result in electric shock, fire
and/or serious injury.
Save all warnings and instructions for future
reference.
The term power tool in the warnings refers to your
mains-operated (corded) power tool or battery-
operated (cordless) power tool.
1) WORK AREA SAFETY
a) Keep work area clean and well lit. Cluttered
or dark areas invite accidents.
b) Do not operate power tools in explosive
atmospheres, such as in the presence of
flammable liquids, gases or dust. Power
tools create sparks which may ignite the dust or
fumes.
c) Keep children and bystanders away while
operating a power tool. Distractions can
cause you to lose control.
2) ELECTRICAL SAFETY
a) Power tool plugs must match the outlet.
Never modify the plug in any way. Do
not use any adapter plugs with grounded
power tools. Unmodified plugs and matching
outlets will reduce risk of electric shock.
b) Avoid body contact with grounded
surfaces such as pipes, radiators, ranges
and refrigerators. There is an increased risk
of electric shock if your body is earthed or
grounded.
c) Do not expose power tools to rain or wet
conditions. Water entering a power tool will
increase the risk of electric shock.
d) Do not abuse the cord. Never use the
cord for carrying, pulling or unplugging
the power tool. Keep cord away from
heat, oil, sharp edges or moving parts.
Damaged or entangled cords increase the risk
of electric shock.
e) When operating a power tool outdoors,
use an extension cord suitable for outdoor
use marked “W-A” or “W”. Use of a cord
suitable for outdoor use reduces the risk of
electric shock.
f) If operating a power tool in a damp
location is unavoidable, use a Ground
Fault Circuit Interupter (GFCI) protected
supply. Use of a GFCI reduces the risk of
electric shock.
3) PERSONAL SAFETY
a) Stay alert, watch what you are doing and
use common sense when operating a
power tool. Do not use a power tool while
you are tired or under the influence of
drugs, alcohol or medication. A moment

9
8
of inattention while operating power tools may
result in serious personal injury.
b) Use personal protective equipment.
Always wear eye protection. Protective
equipment such as dust mask, non-skid safety
shoes, hard hat, or hearing protection used for
appropriate conditions will reduce personal
injuries.
c) Prevent unintentional starting. Ensure
the switch is in the off-position before
connecting to power source and/or
battery pack, picking up or carrying the
tool. Carrying power tools with your finger on
the switch or energizing power tools that have
the switch on invites accidents.
d) Remove any adjusting key or wrench
before turning the power tool on. A wrench
or a key left attached to a rotating part of the
power tool may result in personal injury.
e) Do not overreach. Keep proper footing
and balance at all times. This enables
better control of the power tool in unexpected
situations.
f) Dress properly. Do not wear loose
clothing or jewelry. Keep your hair,
clothing and gloves away from moving
parts. Loose clothes, jewelry or long hair can
be caught in moving parts.
g) If devices are provided for the connection
of dust extraction and collection facilities,
ensure these are connected and properly
used. Use of dust collection can reduce dust-
related hazards.
4) POWER TOOL USE AND CARE
a) Do not force the power tool. Use the
correct power tool for your application.
The correct power tool will do the job better and
safer at the rate for which it was designed.
b) Do not use the power tool if the switch
does not turn it on and off. Any power tool
that cannot be controlled with the switch is
dangerous and must be repaired.
c) Disconnect the plug from the power
source and/or the battery pack from
the power tool before making any
adjustments, changing accessories, or
storing power tools. Such preventive safety
measures reduce the risk of starting the power
tool accidentally.
d) Store idle power tools out of the reach
of children and do not allow persons
unfamiliar with the power tool or these
instructions to operate the power tool.
Power tools are dangerous in the hands of
untrained users.
e) Maintain power tools. Check for
misalignment or binding of moving parts,
breakage of parts and any other condition
that may affect the power tools operation.
If damaged, have the power tool repaired
before use. Many accidents are caused by


11
10
poorly maintained power tools.
f) Keep cutting tools sharp and clean.
Properly maintained cutting tools with sharp
cutting edges are less likely to bind and are
easier to control.
g) Use the power tool, accessories and
tool bits etc., in accordance with
these instructions and in the manner
intended for the particular type of power
tool, taking into account the working
conditions and the work to be performed.
Use of the power tool for operations different
from those intended could result in a hazardous
situation.
h) Use clamps or another practical way to
secure and support the workpiece to a
stable platform.
i) Holding the work by hand or against your
body leaves it unstable and may lead to
loss of control.
5) BATTERY TOOL USE AND CARE
a) Recharge only with the charger specified
by the manufacturer. A charger that is
suitable for one type of battery pack may create
a risk of fire when used with another battery
pack.
b) Use power tools only with specifically
designated battery packs. Use of any other
battery packs may create a risk of injury and
fire.
c) When battery pack is not in use, keep it
away from other metal objects, like paper
clips, coins, keys, nails, screws or other
small metal objects, that can make a
connection from one terminal to another.
Shorting the battery terminals together may
cause burns or a fire.
d) Under abusive conditions, liquid may be
ejected from the battery; avoid contact.
If contact accidentally occurs, flush with
water. If liquid contacts eyes, additionally
seek medical help. Liquid ejected from the
battery may cause irritation or burns.
6) SERVICE
a) Have your power tool serviced by a
qualified repair person using only identical
replacement parts. This will ensure that the
safety of the power tool is maintained.
WARNING: Some dust created by power
sanding, sawing, grinding, drilling and other
construction activities contains chemicals known to
the State of California to cause cancer, birth defects
or other reproductive harm. Some examples of these
chemicals are:
• Leadfromlead-basedpaints;
• Crystallinesilicafrombricksandcementand
other masonry products and
• Arsenicandchromiumfromchemically-treated
lumber.

11
10
Your risk from these exposures varies, depending on
how often you do this type of work.To reduce your
exposure to these chemicals:
• Workinawellventilatedarea,and
• Workwithapprovedsafetyequipment,suchas
those dust masks that are specially designed to
filter out microscopic particles.
ADDITIONAL SAfETy RULES fOR yOUR
CORDLESS SCREwDRIVER
1. Hold power tool by insulated gripping
surfaces, when performing an operation
where the fastener may contact hidden
wiring. Fasteners contacting a “live” wire may
make exposed metal parts of the power tool
“live” and could give the operator an electric
shock.
SyMBOL
Do not stare directly
into the tool holder.
When changing the tool
insert, it can be thrown
out toward the front.
Wear eye protection
To reduce the risk of injury, user must read
instruction manual
Do not expose to rain or water

13
12
OPERATING INSTRUCTIONS
NOTE: Before using the tool, read the
instruction book carefully.
BEFORE OPERATING THIS TOOL
A) CHARGE THE BATTERY
The battery charger supplied is only for the Li-Ion
battery installed in the machine. Do not use another
battery charger.
The Li-Ion battery is protected against deep
discharging. When the battery is empty, the machine
is switched off by means of a protective circuit:The
Chuck (6) no longer rotates.
When the battery is charged for the first time or after
prolonged storage, the battery will accept a 100%
charge after several charge and discharge cycles.
B) CHARGING (See Fig. A)
Plug the Charger into a suitable power outlet. Next,
connect the screwdriver to the Battery Charger at the
Charging Socket (9).The Indicator (8) will illuminate
Red during charging.
Let the battery charge for 5 hours.The battery is fully
charged as soon as the Indicator is no longer lit. Then
unplug the Charger. Disconnect the Charger from the
screwdriver. The screwdriver is ready to be used.
IMPORTANT:
When charging, the Charger and screwdriver may
becomewarmtothetouch;thisisnormalanddoes
not indicate a problem.
2. OPERATING INSTRUCTIONS
Inspect the screwdriver before using to ensure all
the parts are running smoothly and there are no
abnormal sounds or sparks. Before driving fasteners,
check behind walls for wires and other electrical
hazards or plumbing.
OPERATION
1. INSERTING THE BIT CARTRIDGE (See Fig. B)
Pull the Cover (1) back completely to insert the Bit
Cartridge (7).
2. SELECTING A BIT
1. Slide the Cover fully open, past the red line
on the tool. The Bit Cartridge will advance
automatically. (The Bit Cartridge can be manually
rotated to left direction if preferred.)
Slide the cover forward completely to close
(See Fig. C1, C2).
2. Move the top Cover back and forth until the
desired bit is in place.
If the bits in the Bit Cartridge need to be replaced,
remove Bit Cartridge by pushing it up from the
window underneath. Replace the bits with the
desired bits. Ensure the bits are properly positioned
in the Cartridge and are not protruding from the back
of the Bit Cartridge.
Or, simply pull a bit from the holder, and replace it
with the desired bit. It will load into the Cartridge
automatically when the cover is opened (See Fig. D).
NOTE:
1. Only 1” long, ¼” hex shank bits are compatible

13
12
with the screwdriver.
2. If the Cover is not open fully, the Bit Cartridge
will get stuck when taking it out from the tool.
Pull the Cover all the way back.
3. The Cover may not fully close if the Bit Cartridge
is not properly aligned inside. Make sure the Bit
Cartridge has clicked into place when selecting
the desired bit to use. If the Cover cannot
properly close, just turn the Cartridge clockwise
or counter-clockwise a little bit and try again.
3. SWITCH LOCK
The On/off Switch (4) can be locked in the OFF
position.This helps to reduce the possibility of
accidental starting when the screwdriver is not in
use.To lock the On/off Switch, place the Forward/
Reverse Rotation Control (2) in the center position.
4. FORWARD/REVERSE ROTATION CONTROL
(See Fig. E1, E2)
For drilling and screw driving in a clockwise rotation,
move the switch marked “ ” lever to the left. For
reverse rotation, move the switch marked “ ”
lever to the right).
WARNING: Never change the direction of
rotation when the Chuck is rotating, wait
until it has stopped!
5. FULLY AUTOMATIC SPINDLE LOCKING
(AUTO-LOCK) (See Fig. F)
The screwdriver Chuck (6) is locked when the On/Off
Switch (4) is not pressed.
This allows the driver to be used manually when
needed.
IMPORTANT:
When using as a manual tool, do not press the On/
Off Switch (4). Otherwise the screwdriver will be
damaged.
6. USING THE LED LIGHT
To turn on the Light (5) simply press the On/Off
Switch. When you release the On/Off Switch, the
Light will go off.
LED Light increases visibility and is great for dark or
enclosed areas.
7. PROTECTION AGAINST DEEP DISCHARGING
The Li-Ion battery is protected against deep
discharging by the “Discharging Protection
System”.When the battery is empty, the machine
is switched off by means of a protective circuit.The
Chuck longer rotates. When this occurs, recharge the
battery.
MAINTENANCE
Your tool requires no additional lubrication or
maintenance.
There are no user serviceable parts in your power
tool. Never use water or chemical cleaners to clean
your power tool. Wipe clean with a dry cloth. Always
store your power tool in a dry place. Keep the motor
ventilation slots clean. Keep all working controls free
of dust. Occasionally you may see sparks through the
ventilation slots.This is normal and will not damage
your power tool.

15
14
1. COUVERCLE
2. SÉLECTEUR DE SENS DE ROTATION
3. POIGNÉE SOUPLE
4. INTERRUPTEUR MARCHE/ARRÊT AVEC COMMANDE DE VITESSE
5. LUMIÈRE DE VISIBILITÉ
6. PORTE-EMBOUT OU MANDRIN
7. BARILLET D’EMBOUTS
8. INDICATEUR DE CHARGE
9. CONNECTEUR DE CHARGE
DONNÉES TECHNIQUES
Tension 120V~ 60Hz
Tension nominale 4V Max*
Vitesse nominale 230/min
Capacité de forage (bois) 2mm(3/32”)
Diamètre maximal des vis 5mm(3/16”)
Poids de la machine 0.5kg(1.1 lbs)
Temps de recharge 5 heures
*Tension mesurée hors fonctionnement. La tension initiale de la batterie atteint le maximum de 4 volts. La
tension nominale est de 3.6 V.

15
14
ACCESSORIES:
Embouts de tournevis, tige hexagonale, 2,54 cm (1 po)11
Perceuse avec amorce de vis 1
5hr chargeur 1
Barillets d’embouts 2
Nous vous recommandons d’acheter tous vos accessoires au même magasin où vous avez acheté l’outil.
N’utilisez que des accessoires de bonne qualité et de marque renommée. Choisissez le type d’outil approprié
au travail que vous désirez entreprendre. Pour de plus amples renseignements, consultez l’emballage de
l’accessoire. Le personnel du magasin peut également vous conseiller.

17
16
AVERTISSEMENTS GENERAUX CONCERNANT
LA SECURITE DES OUTILS ELECTRIQUES
AVERTISSEMENT! Lisez et assimilez
toutes les instructions. Le non-respect des
instructions ci-après peut entraîner un risque de
choc électrique, d’incendie et/ou de blessures
graves.
Conservez tous les avertissements et
instructions pour pouvoir les consulter
ultérieurement.
L’expression « outil électrique » dans tous les
avertissements énumérés ci-dessous se réfère
à votre outil électrique fonctionnant sur secteur
(branché) ou à batterie (sans-fil).
1. AIRE DE TRAVAIL
a) Veillez à ce que l’aire de travail soit
propre et bien éclairée. Le désordre et le
manque de lumière favorisent les accidents.
b) N’utilisez pas d’outils électriques dans un
milieu présentant un risque d’explosion,
par exemple en présence de liquides,
de gaz ou de poussières inflammables.
Les outils électriques créent des étincelles qui
pourraient enflammer les poussières ou les
vapeurs.
c) Gardez à distance les curieux, les enfants
et les visiteurs lorsque vous travaillez
avec un outil électrique. Ils pourraient
vous distraire et vous faire faire une fausse
manoeuvre.
2. SÉCURITÉ ÉLECTRIQUE
a) Les fiches des outils électriques doivent
correspondre aux prises murales. Ne
jamais modifier la fiche de quelque façon
que ce soit. Ne pas utiliser de fiches
d’adaptation avec des outils électriques
mis à la terre (mis à la masse). Des
fiches non modifiées et des prises qui leur
correspondent réduiront le risque de choc
électrique.
b) Évitez tout contact corporel avec des
surfaces mises à la terre (tuyauterie,
radiateurs, cuisinières, réfrigérateurs,
etc.). Le risque de choc électrique est plus
grand si votre corps est en contact avec la terre.
c) N’exposez pas les outils électriques à la
pluie ou à l’eau. La présence d’eau dans un
outil électrique augmente le risque de choc
électrique.
d) Ne maltraitez pas le cordon. Ne
transportez jamais l’outil par son cordon
et ne débranchez jamais la fiche en tirant
sur le cordon. N’exposez pas le cordon
à la chaleur, à des huiles, à des arrêtes
vives ou à des pièces en mouvement. Un
cordon endommagé augmente le risque de
choc électrique.
e) Quand vous utilisez un outil électrique

17
16
àl’extérieur, utilisez une rallonge qui
convient à un usage à l’extérieur. Ces
cordons sont prévus pour être utilisés à
l’extérieur et pour réduire le risque de choc
électrique.
f) Si l’utilisation d’un outil électrique dans un
endroit humide est inévitable, utilisez une
alimentation protégée par un disjoncteur
de fuite de terre (GFCI). L’utilisation d’un
GFCI réduit les risques d’électrocution.
3. SÉCURITÉ DES PERSONNES
a) Restez alerte, concentrez-vous sur
votre travail et faites preuve de bon
sens. N’utilisez pas un outil électrique si
vous êtes fatigué ou sous l’influence de
drogues, d’alcool ou de médicaments. Un
instant d’inattention lors de l’utilisation d’outils
électriques peut entraîner des blessures graves.
b) Utilisez des accessoires de sécurité.
Portez toujours une protection oculaire.
De l’équipement de sécurité tel que le
masque antipoussière, les chaussures de
sécurité antidérapantes, des casques durs
ou des protections antibruit utilisés dans des
conditions appropriées réduiront les blessures
corporelles.
c) Évitez les démarrages accidentels. Avant
d’insérer la batterie dans l’outil, assurez-
vous que son interrupteur est en position
« OFF » (Arrêt) ou verrouillée. Le fait
de transporter un outil avec le doigt sur la
détente/l’interrupteur ou d’insérer la batterie
dans un outil dont la détente est en position
« ON » (Marche) peut causer un accident.
d) Retirer les clés de réglage avant de
mettre l’outil sous tension. Une clé restée
attachée à une partie mobile de l’outil pourrait
entraîner des blessures corporelles.
e) Ne vous penchez pas trop en avant.
Maintenez un bon appui et restez en
équilibre en tout temps. Une bonne stabilité
vous permet de mieux réagir à une situation
inattendue.
f) Habillez-vous convenablement. Ne portez
ni vêtements flottants ni bijoux. Gardez
les cheveux, les vêtements et les gants
éloignés des pièces en mouvement. Les
vêtements flottants, les bijoux ou les cheveux
longs risquent d’être happés par des pièces en
mouvement.
g) Si un sac de récupération de la poussière
est fourni avec un connecteur pour
aspirateur, assurez vous qu’il est
correctement relié et utilisé de façon
appropriée. L’utilisation de ce système réduit
les dangers physiques et physiologiques liés à
la poussière.
4. UTILISATION ET ENTRETIEN DE L’OUTIL
a) Ne forcez pas l’outil. Utilisez l’outil
approprié à la tâche. L’outil approprié

19
18
fonctionne mieux et de façon plus sécuritaire.
Respectez aussi la vitesse de travail qui lui est
propre.
b) N’utilisez pas un outil si l’interrupteur
ne le met pas en marche ou ne peut
l’arrêter. Un outil qui ne peut être contrôlé par
l’interrupteur est dangereux et doit être réparé.
c) Débranchez la batterie de l’outil ou mettez
son interrupteur en position « OFF »
(Arrêt) ou « LOCKED » (Verrouillé) avant
d’effectuer un réglage, de changer
d’accessoire ou de ranger l’outil. De telles
mesures de sécurité préventive réduisent le
risque de démarrage accidentel de l’outil.
d) Rangez les outils hors de portée
des enfants et d’autres personnes
inexpérimentées. Les outils sont dangereux
dans les mains d’utilisateurs novices.
e) Prenez soin de bien entretenir les outils.
Soyez attentif à tout désalignement ou
coincement des pièces en mouvement,
à tout bris ou à toute autre condition
préjudiciable au bon fonctionnement de
l’outil. Si vous constatez qu’un outil est
endommagé, faites-le réparer avant de
vous en servir. De nombreux accidents sont
causés par des outils en mauvais état.
f) Les outils de coupe doivent être toujours
bien affûtés et propres. Des outils
bien entretenus, dont les arêtes sont bien
tranchantes, sont moins susceptibles de se
coincer et plus faciles à contrôler.
g) Utilisez l’outil électrique, les accessoires
et les forets etc., en conformité avec ces
instructions et de la manière conçue pour
le type particulier d’outil électrique, prend
en compte les conditions de travail et le
travail qui doit être accompli. L’emploi de
l’outil électrique pour des opérations différentes
de celles pour lesquelles il a été conçu pourrait
entraîner une situation dangereuse.
h) Inférieur dont la température et l’humidité
soient contrôlabes pour éviter le polluant
électrique,et fixer les pièces à raffiner
sur une table stable avec pince ou par
d’autres façons.
i) Les opération comme fixation des pièces à
raffiner par main ou contre le corps soient
conduire à une déstabilisation, et peut-
être un dérapage.
5. UTILISATION DE LA BATTERIE ET
ENTRETIEN
a) Un outil à batterie avec batteries
incorporées ou une batterie séparée
doit être rechargé uniquement avec le
chargeur indiqué pour la batterie. Un
chargeur qui peut être adéquat pour un type de
batterie peut créer un risque d’incendie lorsqu’il
est utilisé avec une autre batterie.
b) Utiliser un outil à batterie uniquement
avec la batterie désignée. L’emploi de toute

19
18
autre batterie peut créer un risque d’incendie.
c) Lorsque la batterie n’est pas utilisée,
tenez-la à l’écart d’autres objets
métalliques tels que trombones, pièces de
monnaie, clés, clous, vis ou autres petits
objets métalliques susceptibles d’établir
une connexion d’une borne à une autre.
Le court-circuitage des bornes de batterie
peut causer des étincelles, des brûlures, une
explosion ou un incendie.
d) Dans le cadre de conditions d’abus, du
fluide peut être éjecté de la batterie,
évitez tout contact. Si un contact se
produisait accidentellement, rincez
abondamment avec de l’eau. Si le fluide
touche les yeux, cherchez en plus de la mesure
précédente de l’aide médicale. Le fluide éjecté
de la batterie peut causer des irritations ou des
brûlures.
6. ENTRETIEN
a) Ayez votre outil électrique entretenu
par un réparateur agréé n’utilisant que
des pièces de rechange identiques. Cela
assurera que la sécurité de l’outil électrique est
maintenue.
AVERTISSEMENT! Certaines des poussières
produites en utilisant des outils électriques sont
considérées par l’État de Californie comme
susceptibles de provoquer le cancer, des anomalies
congénitales et d’autres problèmes de reproduction.
Voici des exemples de ces produits chimiques :
• Plombissudepeintureàbasedeplomb
• Silicecrystallineissuedebriquesetduciment
et autres produits de maçonnerie
• Arsenicetchromeissusdeboistraité
chimiquement
Votre risque de ces expositions varie en fonction de
la fréquence à laquelle vous effectuez ce travail. Pour
réduire votre exposition à ces produits chimiques :
• Travaillezdansunezonebienventilée;
• Portezunéquipementdesécuritéapprouvé,tel
que des masques antipoussières spécialement
conçus pour éliminer les particules
microscopiques par filtrage.
INSTRUCTIONS SUPPLÉMENTAIRES
CONCERNANT LA SÉCURITÉ DE VOTRE OUTIL
1. Lors de l’exécution d’une opération au
cours de laquelle l’outil de coupe peut
venir en contact avec les fils cachés ou
son propre cordon, tenez l’outil par ses
surfaces isolées de préhension. Le contact
avec un fil sous tension rendra les pièces
métalliques exposées de l’outil sous tension et
causera des chocs à l’opérateur.

21
20
SyMBOLES
Ne regardez jamais
directement dans
le baril de l’embout
lorsque vous changez
celui-ci puisqu’il
pourrait être projeté
vers l’extérieur.
Portez une protection auditive
Avertissement-Afin de réduire les risques
de blessure, l’utilisateur doit lire ce mode
d’emploi.
Ne pas exposez pas à la pluie et à l’eau
INSTRUCTIONS D’UTILISATION
REMARQUE: Avant d’utiliser cet outil,
assurez-vous de lire attentivement le manuel
d’utilisation.
AVANT D’UTILISER CET OUTIL
A) CHARGER LA BATTERIE
Le chargeur de batterie fourni s’adapte à la batterie
au Lithium ion installée dans l’appareil. Ne pas
utiliser d’autre chargeur de batterie.
La batterie au Lithium ion est protégée contre une
décharge importante. Lorsque la batterie est vide, la
machine s’éteint grâce à un circuit de protection. La
poignée de l’outil s’arrête de tourner.
Lorsque la batterie est chargée pour la première fois
et après un entreposage prolongé, après plusieurs
cycles de chargement et déchargement, la batterie
acceptera une chargement à 100%.
B) CHARGEMENT (Voir Fig. A)
Branchez le chargeur à une prise de courant adaptée.
Le voyant lumineux sera vert. Puis, branchez la
visseuse à la prise du chargeur. Le voyant lumineux
passera au rouge tout au long de la charge.
Permettez à la pile de se charger pendant 5 heures.
La pile est chargée à fond lorsque le voyant lumineux
s’éteint. Débranchez alors le chargeur. Débranchez
la visseuse du chargeur. La visseuse est prête pour
l’utilisation. Le tournevis étant prêt à être utilisé.
Table of contents
Languages:
Other Worx Power Screwdriver manuals

Worx
Worx WX254 Installation manual

Worx
Worx WX255.1 Slide Driver User manual

Worx
Worx SLIDE DRIVER WX254L.2 User manual

Worx
Worx WX252 User manual

Worx
Worx SWITCHDRIVER WX176L User manual

Worx
Worx WX240 Installation manual

Worx
Worx LithiumDrive WU252 User manual

Worx
Worx WX200 User manual

Worx
Worx FORCEDRIVER WX270L User manual

Worx
Worx WX183 User manual