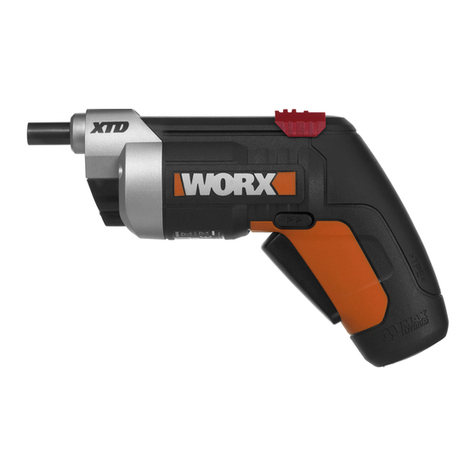
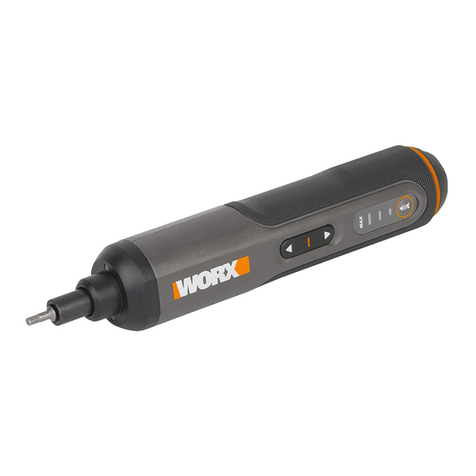
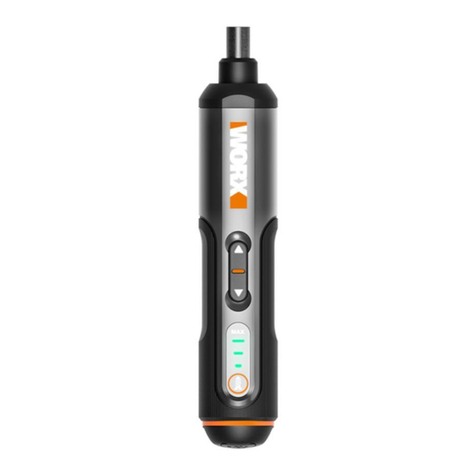
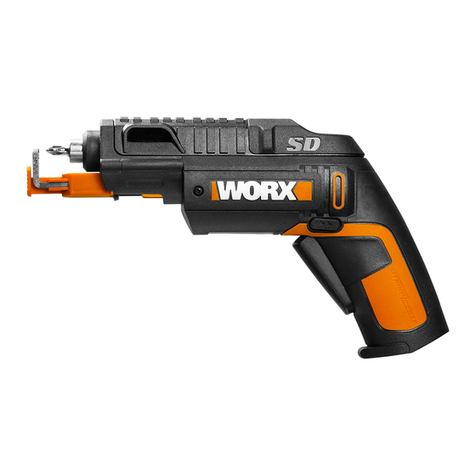
Worx WX254 User manual

WX254 WX254.1 WX254.4


EN
DK
FIN
NOR
SV
Original instructions
Original brugsanvisning
Alkuperäiset ohjeet
Original driftsinstruks
Bruksanvisning i original
EN
DK
FIN
NOR
SV
P06
P17
P28
P38
P48

9
2
1
4
5
6
3
8
7

A1 A2 B
C1
C2 D
2
1
E1
1
2
E2
F

6
1. COVER
2. FORWARD/REVERSE ROTATION CONTROL
3. SOFT GRIP HANDLE
4. ON/OFF SWITCH
5. LED LIGHT
6. BIT HOLDER OR CHUCK
7. BIT CARTRIDGE
8. CHARGING INDICATOR
9. CHARGING SOCKET
Not all the accessories illustrated or described are included in standard delivery.
TECHNICAL DATA
Type WX254 WX254.1 WX254.4 (250~269-designation of machinery, representative of Battery-
powered Screwdriver)
Charger voltage 230V/240V~50Hz
Rated voltage 4V Max*
Rated speed 230/min
Machine weight 0.5kg
Charging time 3-5 hours
*Voltage measured without workload. Initial battery voltage reaches maximum of 4 volts. Nominal voltage is 3.6 volts.

7
NOISE INFORMATION
A weighted sound pressure LpA: 65dB(A)
A weighted sound power LwA: 76dB(A)
KpA&KwA 3.0dB(A)
Wear ear protection when sound pressure is over 80dB(A)
VIBRATION INFORMATION
Vibration total values (triax vector sum) determined according to EN 60745:
Drilling into metal Vibration emission value ah= 0.7m/s²
Uncertainty K = 1.5m/s²
WARNING: The vibration emission value during actual use of the power tool can differ from the declared value
depending on the ways in which the tool is used dependant on the following examples and other variations on
how the tool is used:
How the tool is used and the materials being cut or drilled.
The tool being in good condition and well maintained.
The use the correct accessory for the tool and ensuring it is sharp and in good condition.
The tightness of the grip on the handles and if any anti vibration accessories are used.
And the tool is being used as intended by its design and these instructions.
This tool may cause hand-arm vibration syndrome if its use is not adequately managed.

8
WARNING:To be accurate, an estimation of exposure level in the actual conditions of use should also take
account of all parts of the operating cycle such as the times when the tool is switched off and when it is running
idle but not actually doing the job.This may significantly reduce the exposure level over the total working period.
Helping to minimize your vibration exposure risk.
ALWAYS use sharp chisels, drills and blades.
Maintain this tool in accordance with these instructions and keep well lubricated (where appropriate).
If the tool is to be used regularly then invest in anti vibration accessories.
Avoid using tools in temperatures of 100C or less.
Plan your work schedule to spread any high vibration tool use across a number of days.
ACCESSORIES
WX254 WX254.1 WX254.4
1” Hex Shank Screwdriver Bits 511 5
25mm Pilot hole drill Bit 1 1 1
3-5hr Charger 1 1 1
Bit Cartridge 1 2 1
Holster / 1 /
Cradle 1 1 /

9
SCREw DRIVER AND IMpACT wRENCH SAFETy
wARNINg
1. Hold power tool by insulated gripping
surfaces, when performing an operation where
the fastener may contact hidden wiring.
Fasteners contacting a “live” wire may make
exposed metal parts of the power tool “live” and
could give the operator an electric shock.
gENERAL SAFETy wARNINgS FOR yOuR
BATTERy CHARgER
WARNING: Read all safety warnings and all
instructions. Failure to follow the warnings and
instructions may result in electric shock, fire and/or
serious injury.
Save all warnings and instructions for future
reference.
- This appliance is not intended for use by persons
(including children) with reduced physical, sensory
or mental capabilities, or lack of experience and
knowledge, unless they have been given supervision
or instruction concerning use of the appliance by a
person responsible for their safety.
- Children should be supervised to ensure that they do
not play with the appliance.
ADDITIONAL SAFETy INSTRuCTIONS FOR yOuR
BATTERy CHARgER
1. Before charging, read the instructions.
2. After charging, disconnect the battery charger
from the supply mains. Then remove the chassis
connection and then the battery connection.
3. Do not charge a leaking battery.
4. Do not use chargers for works other than those for
which they are designed.
5. Before charging, ensure your charger is matching
the local AC supply.
6. For indoor use, or do not expose to rain.
7. The charging device must be protected from
moisture.
8. Do not use the charging device in the open.
9. Do not short out the contacts of battery or charger.
10. Respect the polarity “+/-“ when charging.
11. Do not open the unit and keep out of the reach of
children.
12. Do not charge the batteries of other manufactures or
ill-suited models.
13. Ensure that the connection between the battery
charger and battery is correctly positioned and is not
obstructed by foreign bodies.
14. Keep battery charger’s slots are free of foreign
objects and protect against dirt and humidity. Store
in a dry and frost-free place.
15. When charging batteries, ensure that the battery
charger is in a well-ventilated area and away from
inflammable materials. Batteries can get hot during
charging. Do not overcharge any batteries. Ensure
that batteries and chargers are not left unsupervised
during charging.
16. Do not recharge non-rechargeable batteries, as they

10
can overheat and break.
17. Longer life and better performance can be
obtained if the battery pack is charged when the
air temperature is between 18°C and 24°C. Do not
charge the battery pack in air temperatures below
4.5°C, or above 40.5°C. This is important as it can
prevent serious damage to the battery pack.
18. Charge only battery pack of the same model
provided by WORX and of models recommended by
WORX.
SAFETy INSTRuCTIONS FOR BATTERy pACk
1. Do not dismantle, open or shred cells or battery
pack.
2. Do not short-circuit a battery pack. Do not store
battery packs haphazardly in a box or drawer where
they may short-circuit each other or be short-
circuited by conductive materials.
3. Do not expose battery pack to heat or fire. Avoid
storage in direct sunlight.
4. Do not subject battery pack to mechanical shock.
5. In the event of battery leaking, do not allow the
liquid to come into contact with the skin or eyes. If
contact has been made, wash the affected area with
copious amounts of water and seek medical advice.
6. Seek medical advice immediately if a cell or battery
pack has been swallowed.
7. Keep battery pack clean and dry.
8. Wipe the battery pack terminals with a clean dry
cloth if they become dirty.
9. Battery pack needs to be charged before use. Always
refer to this instruction and use the correct charging
procedure.
10. Do not maintain battery pack on charge when not in
use.
11. After extended periods of storage, it may be
necessary to charge and discharge the battery pack
several times to obtain maximum performance.
12. Battery pack gives its best performance when it is
operated at normal room temperature (20°C ± 5°C).
13. When disposing of battery packs, keep battery packs
of different electrochemical systems separate from
each other.
14. Recharge only with the charger specified by
POSITEC. A charger that is suitable for one type of
battery pack may create a risk of fire when used with
another battery pack.
15. When battery pack is not in use, keep it away from
other metal objects, like paper clips, coins, keys,
nails, screws or other small metal objects, that can
make a connection from one terminal to another.
Shorting the battery terminals together may cause
burns or a fire.
16. Under abusive conditions, liquid may be ejected
from the battery pack; avoid contact. If contact
accidentally occurs, flush with water. If liquid
contacts eyes, additionally seek medical help. Liquid
ejected from the battery may cause irritation or
burns.
17. Clean the battery pack contacts and also those of the
equipment prior to battery installation.
18. Remove exhausted battery pack promptly.
19. Do not use any charger other than that specifically
provided for use with the equipment.
20. Do not use any battery pack which is not designed
for use with the equipment.
21. Keep battery pack out of the reach of children.


11
22. After extended periods of storage, it may be
necessary to charge and discharge the battery pack
several times to obtain maximum performance.
23. Retain the original product literature for future
reference.
24. Remove the battery from the equipment when not in
use.
25. Dispose of properly.

12
SyMBOLS
Do not stare directly into the
tool holder. When changing the tool
insert, it can be thrown out toward the
front
To reduce the risk of injury, user must read
instruction manual
For indoor use only
Wear eye protection
Wear ear protection
Wear dust mask
The output plug is with positive center pole
and negative outer pole
Do not burn
Do not expose to rain or water
This product has been marked with a symbol
relating to removing electric and electronic
waste.This means that this product shall
not be discarded with household waste
but that it shall be returned to a collection
system which conforms to the European
Directive 2002/96/CE. It will then be recycled
or dismantled in order to reduce the impact
on the environment. Electric and electronic
equipment can be hazardous for the
environment and for human health since they
contain hazardous substances.
Do not dispose of batteries, Return exhausted
batteries to your local collection or recycling
point.

13
OpERATINg INSTRuCTIONS
NOTE: Before using the tool, read the instruction
book carefully.
INTENDED USE
The power tool is intended for driving in and loosening
screws as well as for drilling in wood, metal and plastic.
1. BEFORE OPERATING THIS TOOL
A) CHARGE THE BATTERY
The battery charger supplied is only for the Li-ion battery
installed in the machine. Do not use another battery
charger.
The Li-ion battery is protected against deep discharging.
When the battery is empty, the machine is switched off by
means of a protective circuit:The chuck no longer rotates.
When the Battery Pack is charged for the first time or after
prolonged storage, the Battery Pack will accept a 100%
charge after several charge and discharge cycles.
B) CHARGING (See Fig. A)
The screwdriver has two ways to charge.
1. Plug the Charger into a suitable power outlet. Next,
connect the screwdriver to the Battery Charger at the
Charging Socket.The Indicator will illuminate Red
during charging.
2. Recharge the screwdriver from the charging base.
Follow the same steps as above, plug the charger
plug into a suitable power outlet, the indicator won’t
illuminate. Next, connect the base with the battery
charger, the indicator (Red) will illuminate during
charging.
Let the battery charge for 3-5 hours.The battery is fully
charged as soon as the indicator is no longer lit.Then
unplug the Charger. Disconnect the Charger from the
screwdriver. The screwdriver is ready to be used.
IMPORTANT:
When charging, the Charger and screwdriver may
become warm to the touch; this is normal and does not
indicate a problem.
2. OPERATING INSTRUCTIONS
Inspect the Screwdriver before using to ensure all the
parts are running smoothly and there are no abnormal
sounds or sparks. Before driving fasteners, check behind
walls for wires and other electrical hazards or plumbing.
OPERATION
1. INSERTING THE BIT CARTRIDGE
(See Fig. B)
Pull the Cover back completely to insert the Bit Cartridge
(7).
2.SELECTING A BIT
1. Slide the Cover fully open, past the red line on the
tool. The Bit Cartridge will advance automatically.
(The Bit Cartridge can be manually rotated to left
direction if preferred.) (See Fig. C1, C2).
2. Move the top Cover back and forth until the desired
Bit Is in place.
If the Bits in the Bit Cartridge need to be replaced,
remove Bit Cartridge by pushing it up from the window
underneath. Replace the Bits with the desired Bits.
Ensure the Bits are properly positioned in the Cartridge
and are not protruding from the back of the Bit Cartridge.
Or, simply pull a Bit from the holder, and replace it
with the desired Bit. It will load into the Cartridge

14
automatically when the cover is opened. (See Fig. D).
NOTE:
1. Only 25mm hex shank Bits are compatible with the
screwdriver.
2. If the Cover is not open fully, the Bit Cartridge will
get stuck when taking it out from the tool. Pull the
cover all the way back.
3. The Cover may not fully close if the Bit Cartridge
is not properly aligned inside. Make sure the Bit
Cartridge has clicked into place when selecting the
desired Bit to use. If the cover cannot properly close,
just turn the Cartridge clockwise or counter-clockwise
a little Bit and try again.
3. SWITCH LOCK
The On/off Switch can be locked in the OFF position.This
helps to reduce the possibility of accidental starting when
the screwdriver is not in use.To lock the On/off Switch,
place the Forward/Reverse Rotation Control in the center
position.
4. FORWARD/REVERSE ROTATION CONTROL (See
Fig. E1, E2)
For drilling and screw driving in a clockwise rotation,
move the switch marked “ ” lever to the left. For
reverse rotation, move the switch marked “ ” lever to
the right.
WARNING: Never change the direction of
rotation when the Chuck is rotating, wait
until it has stopped!
5. FULLY AUTOMATIC SPINDLE LOCKING (AUTO-
LOCK) (See Fig. F)
The screwdriver Chuck (6) is locked when the On/Off
Switch (4) is not pressed.
This allows the driver to be used manually when needed.
IMPORTANT:
When using as a manual tool, do not press the On/Off
Switch (4). Otherwise the screwdriver will be damaged.
6. USING THE LED LIGHT
To turn on the light simply press the On/Off Switch. When
you release the On/Off Switch, the light will go off.
LED light increases visibility and is great for dark or
enclosed areas.
7. PROTECTION AGAINST DEEP DISCHARGING
The Li-Ion battery is protected against deep discharging
by the “Discharging Protection System”. When the battery
is empty, the machine is switched off by means of a
protective circuit.The Chuck longer rotates. When this
occurs, recharge the battery.
MAINTENANCE
Your tool requires no additional lubrication or
maintenance.
There are no user serviceable parts in your power tool.
Never use water or chemical cleaners to clean your
power tool. Wipe clean with a dry cloth. Always store
your power tool in a dry place. Keep the motor ventilation
slots clean. Keep all working controls free of dust.
Occasionally you may see sparks through the ventilation
slots.This is normal and will not damage your power tool.

15
ENVIRONMENTAL pROTECTION
This product has been marked with a symbol
relating to removing electric and electronic
waste.This means that this product shall not be
discarded with household waste but that it shall be
returned to a collection system which conforms to the
European Directive 2002/96/CE. It will then be recycled
or dismantled in order to reduce the impact on the
environment. Electric and electronic equipment can be
hazardous for the environment and for human health
since they contain hazardous substances.

16
DECLARATION OF CONFORMITy
We,
POSITEC Germany GmbH Konrad-Adenauer-Ufer 37 50668 Köln
Declare that the product,
Description Cordless Screwdriver
Type WX254 WX254.1 WX254.4 (250~269-designation of machinery, representative of Battery-
powered Screwdriver)
Function Tightening and loosening screws, nuts
Complies with the following directives,
Machinery directive 2006/42/EC
Low voltage directive 2006/95/EC
Electromagnetic compatibility directive 2004/108/EC
RoHS directive 2011/65/EU
Standards conform to:
EN 55014-1 EN 55014-2
EN 60745-1 EN 60745-2-2
EN 60335-1 EN 60335-2-29
EN 61000-3-2 EN 61000-3-3
EN 62233
The person authorized to compile the technical file,
Name Russell Nicholson
Address Positec Power Tools (Europe) Ltd, PO Box 152, Leeds, LS10 9DS, UK
2014/03/18
LeoYue
POSITEC Quality Manager

17
1. DÆKSEL
2. HØJRE/VENSTRE LØB
3. BLØDT GUMMI GREB
4. TÆND/SLUK-KONTAKTEN
5. SYNSBELYSNING
6. BITHOLDER ELLER BOREPATRON
7. BIT-PATRON
8. OPLADEINDIKATOR
9. OPLADESTIK
Illustreret eller beskrevet tilbehør er kun delvis indeholdt i leverancen.
TEkNISk DATA
Type WX254 WX254.1 WX254.4 (250~269- udpegning af maskiner, repræsentant for
Akku-boreskruemaskine)
Oplader spænding 230V/240V~50Hz
Nominel Spænding 4V Max*
Nominelt omdrejningstal 230/min
Maskinvægt 0.5kg
Opladningstid 3-5 time
*Spænding er mål mens maskinen er i stilstand. Batterispændingen når i starten op på 4 volt. Den nominelle spænding er
3,6 volt.

18
STØJINFORMATION
A-vægtet lydtryksniveau LpA: 65dB(A)
A-vægtet lydeffektniveau LwA: 76dB(A)
KpA&KwA 3.0dB(A)
Bær høreværn, når lydtrykket er over 80dB(A)
VIBRATIONSINFORMATION
Den totale værdi for vibration malt ifølge EN 60745:
Boring i metal Værdi for vibration ah= 0.7m/s²
Usikkerhed K = 1.5m/s²
ADVARSEL: Vibrationsværdien under den faktiske brug af maskinværktøjet kan afvige fra den opgivne værdi
afhængigt af måderne, værktøjet benyttes på. Se følgende eksempler på, hvad vibrationerne kan afhænge af:
Hvordan værktøjet bruges og materialerne, der skæres eller bores i.
Værktøjets stand og vedligeholdelse.
Anvendelse af korrekt tilbehør og kontrol med, at det er skarpt og i en i det hele taget god tilstand.
Hvor kraftigt, der holdes fast i håndtaget og, om der benyttes antivibrationsudstyr.
Om værktøjet anvendes i henhold til dets konstruktion og nærværende anvisninger.
Værktøjet kan medføre et hånd/arm-vibrationssyndrom, hvis det ikke bruges på rigtig måde.
ADVARSEL: En vurdering af udsættelsesgraden under det aktuelle brug skal omfatte alle dele af
arbejdscyklussen, herunder antallet af gange værktøjet slås til og fra, og tomgangsdriften uden for selve

19
arbejdsopgaven. Dette kan afgørende reducere udsættelsesniveauet i den samlede arbejdsperiode.
Sådan kan du minimiere risikoen for udsættelse for vibrationer:
Brug ALTID skarpe mejsler, bor og blade.
Vedligehold værktøjet i overensstemmelse med disse instruktioner og hold det korrekt smurt.
Hvis værktøjet bruges ofte, bør du anskaffe antivibrationsudstyr.
Brug ikke værktøjet i temperaturer på 100C eller lavere.
Planlæg dit arbejde, så du kan fordele arbejde med kraftige vibrationer over flere dage.
TILBEHØR
WX254 WX254.1 WX254.4
25mm Skruetrækkerbits 511 5
25mm Pilothul borebit 1 1 1
3-5Times batterioplader 1 1 1
Bitholder 1 2 1
Hylster / 1 /
Vuggen 1 1 /

20
SIkkERHEDSADVARSLER TIL SkRuETRækkEREN
Og SLAgSkRuENØgLEN
1. Sørg for at holde boremaskinen på de
isolerede overflader, når du bruger den på
steder, hvor spændemekanismen kan komme
i kontakte med skjulte ledninger. Hvis værktøjet
rammer en strømførende ledning, bliver dets
elektriske dele også strømførende, hvilket kan give
brugeren elektrisk stød.
gENERELLE SIkkERHEDSADVARSLER TIL
BATTERIOpLADEREN
ADVARSEL: Læs alle sikkerhedsadvarsler og
alle instruktioner. Læs samtlige anvisninger.
Manglende overholdelse af nedenstående anvisninger
kan resultere i elektrisk stød, brand og/eller alvorlig
personskade.
Gem alle advarsler og instruktioner for fremtidig
reference.
- Dette redskab må ikke bruges af personer (herunder
børn) med nedsatte fysiske, sensoriske eller mentale
evner eller med manglende erfaring og viden,
medmindre brugen foregår under opsyn, eller de er
blevet instrueret i brugen af redskabet af en person,
ansvarlig for deres sikkerhed.
- Børn skal være under opsyn, så de ikke leger med
redskabet.
yDERLIgERE SIkkERHEDSINSTRukTIONER FOR
BATTERIOpLADEREN
1. Læs instruktionerne inden opladning.
2. Efter opladning frakobles batteriopladeren først fra
lysnettet. Derefter fjernes chassisforbindelsen og
derefter batteriforbindelsen.
3. Oplad ikke et lækkende batteri.
4. Brug ikke opladerne til andet arbejde, end det de er
designet til.
5. Forbind kun opladeren til en AC stikkontakt.
6. Må kun anvendes indenfor, må ikke udsættes for
regn eller vand.
7. Opladeenheden skal beskyttes mod fugt.
8. Brug ikke opladeenheden udendørs.
9. Kortslut ikke kontakterne på batteriet eller oplader.
10. Respekter polariteten “+/-“ når du burger opladeren.
11. Åbn ikke enheden og hold den uden for børns
rækkevidde.
12. Oplad ikke andre fabrikanters batterier.
13. Forvis dig om at forbindelsen imellem
batteriopladeren og batteriet er korrekt placeret og
ikke bliver forhindret af fremmedlegemer.
14. Hold batteriopladerens åbninger fri for
fremmedlegemer og beskyt mod snavs og
fugtighed. Opbevar den på et tørt og frostfrit sted.
15. Når der oplades batterier, skal du forvisse dig om at
batteriopladeren står på en sted med god ventilation
og langt væk fra letantændelige materialer.
Batterierne kan blive varme under opladning. Over
oplad ikke batterierne. Forvis dig om at batterierne
og opladeren ikke efterlades uden opsyn under
opladning.
16. Oplad ikke ikke-opladelige batterier, eftersom de kan
blive overophedet og lække.
Other manuals for WX254
3
This manual suits for next models
2
Table of contents
Languages:
Other Worx Power Screwdriver manuals

Worx
Worx PROFESSIONAL WU253 User manual

Worx
Worx SLIDE DRIVER WX254L.2 User manual

Worx
Worx WX176.1 User manual

Worx
Worx WX240 Installation manual

Worx
Worx WX251 User manual

Worx
Worx WX252 User manual

Worx
Worx WX254 User manual

Worx
Worx WX255 Installation manual

Worx
Worx WX254 Installation manual

Worx
Worx WX254 User manual

Worx
Worx WX255 User manual

Worx
Worx WX254L User manual

Worx
Worx WX255.1 Slide Driver User manual

Worx
Worx WX200 User manual

Worx
Worx WX240L User manual

Worx
Worx WX240 Installation manual

Worx
Worx WX252 User manual

Worx
Worx WX183 User manual

Worx
Worx WX252.1 Installation manual

Worx
Worx WX252 Installation manual