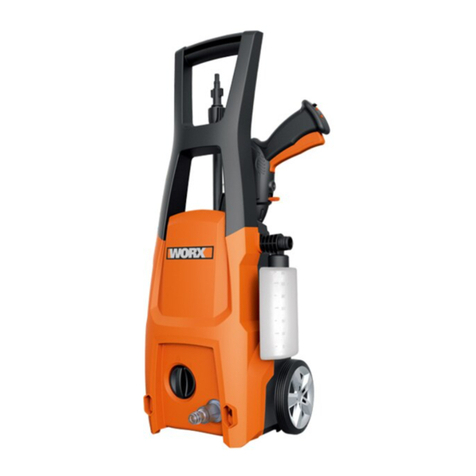
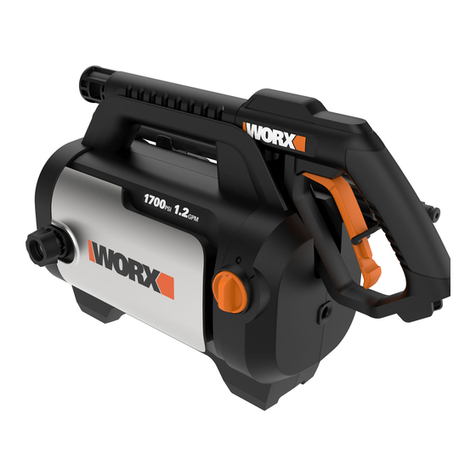
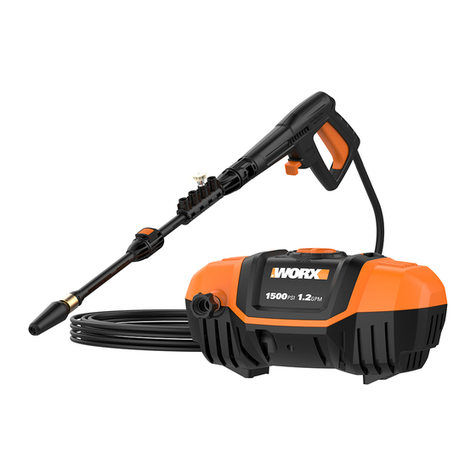
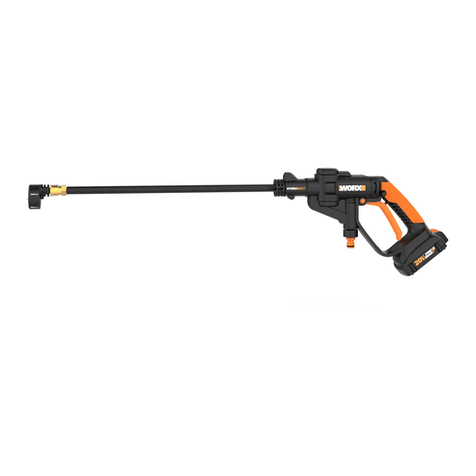
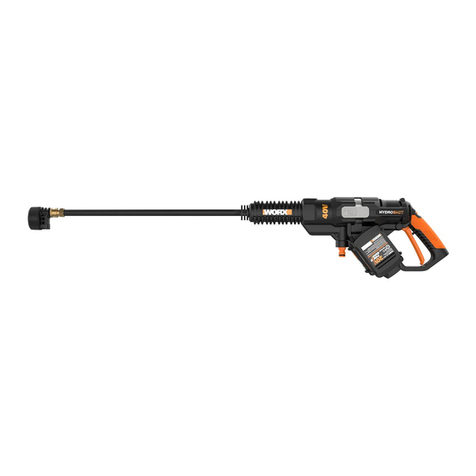
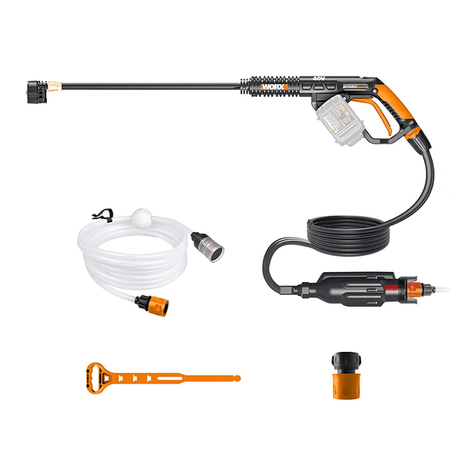
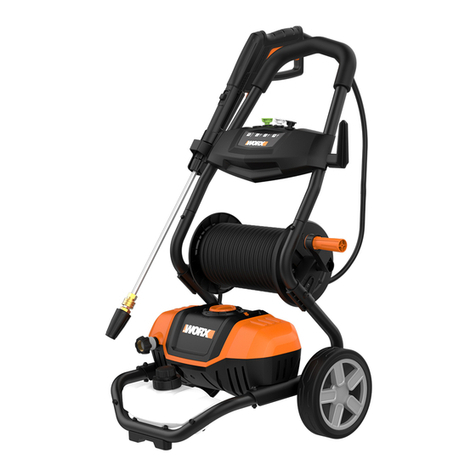
Worx WG603E Installation manual

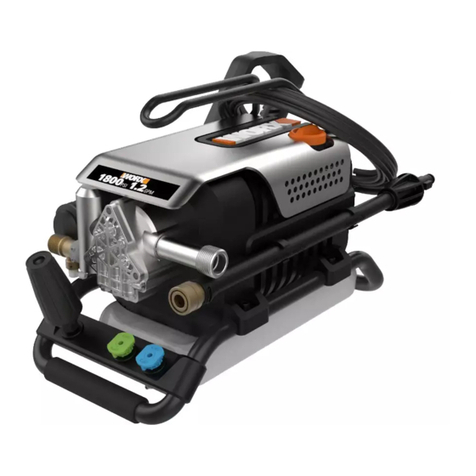
High pressure cleaner WG603E WG604E WG605E
SAFETY AND OPERATING MANUAL

3
2
High pressure cleaner WG603E WG604E WG605E
GENERAL POWER TOOL
SAFETY WARNINGS
WARNING: Read all safety
warnings and all instructions.
Failure to follow the warnings and instructions
may result in electric shock, fire and/or serious
injury.
Save all warnings and instructions for
future reference.
- This appliance is not intended for use by
persons (including children) with reduced
physical, sensory or mental capabilities,
or lack of experience and knowledge,
unless they have been given supervision
or instruction concerning use of the
appliance by a person responsible for
their safety.
- Children should be supervised to ensure
that they do not play with the appliance.
If the supply cord is damaged, it must be
replaced by the manufacturer, its service
agent or similarly qualified persons in order
to avoid a hazard.
ADDITIONAL POWER TOOL
SAFETY WARNINGS
WARNING: Do not use the
appliance without reading the
instruction sheet.
- Safety boots, safety gloves, safety helmets
with visors, hearing protection etc. shall
be worn while operating the machine.
- When opening the trigger gun, there is
a danger of the kickback force and the
sudden torque on the spray assembly.
Please hold the nozzles tightly.
- WARNING:This machine has been
designed for use with the cleaning
agent supplied or recommended by the
manufacturer.The use of other cleaning
agents or chemicals may adversely affect
the safety of the machine.
- WARNING: High pressure jets can be
dangerous if subject to misuse.The jet
must not be directed at persons, live
electrical equipment or the machine itself.
- WARNING: Do not use the machine
within range of persons unless they wear
protective clothing.
- WARNING: Do not direct the jet against
yourself or others in order to clean clothes
or foot-wear.
- Disconnect from the electrical power
supply before carrying out user
maintenance
- High pressure cleaner should not be taken
by children or untrained persons.
- WARNING: Risk of explosion – Do not
spray flammable liquids.
- WARNING:To ensure machine safety,
use only original spare parts from
the manufacturer or approved by the
manufacturer.
- WARNING: High pressure hoses, fittings
and couplings are important for the safety
of the appliance. Use only hoses, fittings
and couplings recommended by the
manufacturer.
- WARNING: Water that has flown through
backflow preventers is considered to be
non-potable.
- WARNING:The machine shall be
disconnected from its power source by
removing the plug from the socket-outlet
during cleaning or maintenance and when
replacing parts or converting the machine
to another function.
- WARNING: Do not use machine if a supply
cord or important parts of the machine
are damaged, e.g. safety devices, high
pressure hoses, trigger gun.
- WARNING: If an extension cord is used,
the plug and socket must be of watertight
construction.
- WARNING: Inadequate extension cords
can be dangerous.
- The electric supply connection shall
be made by a qualified electrician
and comply with IEC 60364-1. It is
recommended that the electric supply
to this machine should include either a
residual current device that will interrupt
the supply if the leakage current to earth
exceeds 30 mA for 30 ms or a device that
will prove the earth circuit.
- The tool should be used when the
temperature is above 0°.
3
2
High pressure cleaner WG603E WG604E WG605E
SYMBOLS
WARNING! Do not direct the
jet at persons, animals and
electrical equipment.
Read the manual
Machine not suitable for
connection to potable water
mains
Double insulation
RCM approval mark

5
4
High pressure cleaner WG603E WG604E WG605E
12
13
WG603E
11
4
3
10
9
8
7
6
14
19
24
27 28
25 26
20 21 22 23
15 16 17 18
1
2
5
29

5
4
High pressure cleaner WG603E WG604E WG605E
12
13
WG603E
11
4
3
10
9
8
7
6
14
19
24
27 28
25 26
20 21 22 23
15 16 17 18
1
2
5
29

7
6
High pressure cleaner WG603E WG604E WG605E
1. STORAGE FOR ACCESSORIES AND MAIN CONNECTION CABLE
2. TRANSPORT HANDLE
3. DETERGENT TANK
4. HIGH PRESSURE HOSE DRUM
5. HAND CRANK FOR HOSE DRUM
6. FOOT STABILIZER
7. WHEEL
8. APPLIANCE SWITCH “0/OFF”/”I/ON”
9. DOSAGE REGULATOR FOR DETERGENT
10. GUN HOLDER
11. HIGH PRESSURE HOSE CONNCETION
12. STORAGE FOR ACCESSORIES
13. WATER CONNECTION
14. HOSE (8M/12M)
15. WATER FILTER
16. METAL TRIGGER GUN
17. LANCE
18. EXTENSION LANCE
19. STANDARD ADJUSTABLE LANCE
20. STANDARD TURBO LANCE
21. FOAM NOZZLE
22. UNDERBODY NOZZLE
23. ROTARY BRUSH
24. FIXED BRUSH
25. PATIO CLEANER WA4040
26. PATIO CLEANER WA4041
27. WALL MOUNT BRACKET
28. PIPE CLEANER KIT
29. ADAPTER
Not all the accessories illustrated or described are included in standard delivery.

7
6
High pressure cleaner WG603E WG604E WG605E
TECHNICAL SPECIFICATIONS
WG603E WG604E WG605E
Voltage 220-240V~50Hz
Power 1700W 2100W 2400W
Rated pressure 90Bar 110Bar 120Bar
Max. pressure 1885psi(130Bar) 2030psi(140Bar) 2200psi(150Bar)
Hose length 8m 12m 12m
Cable length 5m
Maximum rated flow 6.4L/min 7.5L/min 8.2L/min
Protection class / II I
Weight 10.3kg 18.7kg 19.1kg
ACCESSORIES
WG603E WG604E WG605E
Hose (8m) 1 0 0
Hose (12m) 0 1 1
Water filter 1 1 1
Metal trigger gun 1 1 1
Lance 0 0 1
Extension lance 0 1 1
Standard adjustable lance 1 1 1
Standard turbo lance 1 1 1
Foam nozzle 1 1 1
Underbody nozzle 0 0 1
Rotary brush 1 1 1
Fixed brush 0 0 1
Adapter 1 1 2
Patio cleaner (WA4040) 0 1 0
Patio cleaner (WA4041) 0 0 1
Wall mount bracket 1 1 1
Pipe cleaner kit 0 0 1
We recommend that you purchase only original WORX accessories from the same store that
sold you the tool. Choose the type of accessory according to the work you intend to undertake.
Refer to the accessory packaging for further details. Store personnel can assist you and offer
advice.

9
8
High pressure cleaner WG603E WG604E WG605E
OPERATING INSTRUCTIONS
NOTE: Before using the tool, read the
instruction book carefully.
ASSEMBLY
1. UNPACK
Unpack all of that supplied equipment on a clean flat
surface.
Compare and match the accessories and contents of
the box to the accessory list included in the manual.
If you find that parts are missing or damaged do not
use the product and contact your dealer. The use of
incomplete or damaged products is a potential hazard
to people and or property.
2. ITEMS NEEDED FOR ASSEMBLY (NOT
SUPPLIED)
Philips screwdriver/Crosshead screwdriver
Water hose with suitable connectors.
3. MAIN ASSEMBLY (See Fig. A1 A2)
1) On the left side of the pressure cleaner power
washer above the wheel pull out the knob on the
handle to unlock the lower half of the handle and
raise it upright into a 90 degree angle. (See Fig. A1)
2) Attach the upper half of the handle to the lower half
by sliding it down over the narrower tubing. It will
click when it is secure. (See Fig. A2)
Pull up on the handle to confirm it is secured. It
should not move.
Attachment for the metal gun holster and brush clamp.
Located below the accessory are two screw holes.
Mount the holster so that the brush clamp is in
between the two handle bars with the holster’s
opening facing forwards. Secure in place using the
two supplied screws. (See Fig. A2)
3) Next attach the water filter to the water connection
on the rear of the machine between the wheels by
lining up the threads and rotating in a clockwise
direction. (See Fig. B)
4) When product is not in use the power cord may be
securely wrapped around the accessory bracket for
safe storage. (See Fig. C)
Located on the main body of the product is the
detergent tank. Check that the detergent tank is
properly seated into the slot and that the regulator cap
and hose are connected to the tank. If the regulator cap
is not properly connected depress the regulator cap.
(See Fig. D)
1
2
1
2
H
F1
F2
G
C
D
E
A1
A2
B

9
8
High pressure cleaner WG603E WG604E WG605E
NOTE: It may require a fair amount of pressure to seat
the tank into the slot.
4. PRESSURE HOSE ASSEMBLY (ONLY FOR
WG603E)
To attach the pressure hose to the high pressure
connection, insert the metal connector of the high
pressure hose until it locked in position. (See Fig. E)
After the hose is attached, check the connection by
gently pulling upon the hose. It should not pull out.
5. TRIGGER GUN ASSEMBLY
1. To attach the pressure hose to the metal trigger gun
located in front of the trigger latch and connecting
port.
Press the latch towards the trigger and insert the
connector of the hose.
Release the latch to lock the hose in place.
Confirm the connection by gently pulling upon the
hose. It should not pull out. (See Fig.F1)
2. Removing
To release press the latch towards the hose and pull
out the hose.(See Fig.F2)
3. Storage
On the side of the handle there is a holster for the
metal trigger gun to be stored in when not in use.
(See Fig. G)
1
2
1
2
H
F1
F2
G
C
D
E
A1
A2
B
1
2
1
2
H
F1
F2
G
C
D
E
A1
A2
B

11
10
High pressure cleaner WG603E WG604E WG605E
ATTACHMENT OF ACCESSORIES
Illustration Description Application
Standard adjustable
lance
Adjustable from direct spray to high
pressure fan spray for general cleaning
applications
Standard turbo lance High pressure turbo spray for deeper
cleaning
Foam nozzle
Provides detergent suds for deeper
cleaning of dirt. Used in conjunction
with metal trigger gun
Extension lance Extension to be used with lances,
nozzles, brushes, and patio cleaners
Patio cleaner WA4040
(WG604E only)
Cleaning of floors, patios, concrete.
Used in conjunction with extension
lance
Patio cleaner WA4041
(WG605E only)
Cleaning of floors, patios, concrete.
Used in conjunction with extension
lance
Lance (WG605E only) For attaching underbody nozzle.
Underbody nozzle
(WG605E only)
For cleaning the underside of vehicles.
used in conjunction with lance

11
10
High pressure cleaner WG603E WG604E WG605E
Rotary brush
For cleaning cars, boats and
motorcycles. Used in conjunction with
adapter
Fixed brush (WG605E
only)
For cleaning the wheels and rims of
cars. Used in conjunction with adapter
Adapter Connects brushes to metal trigger gun
Pipe cleaner kit
(WG605E only)
For cleaning out pipes and gutters.
Used in conjunction with extension
lance
Wall mount bracket Used to attach product to wall for
storage

13
12
High pressure cleaner WG603E WG604E WG605E
1. ATTACHMENT OF LANCES AND ACCESSORIES
A number of accessories have been supplied with this
product and are required for use in different cleaning
applications. All accessories require that a lance or
adaptor be attached to the trigger gun.
DO NOT ATTEMPTTO USE CLEANING WITHOUT A
LANCE OR ANY ACCESSORIES ATTACHED
2. ATTACHING LANCES
Suitable for: Standard Adjustable Lance, Standard
Turbo Lance, Extension Lance, Lance (WG605E only)
To attach the lance to the metal trigger gun align the
ridges on the lance with the grooves of the metal
trigger gun and insert it.
Securely fit the lance by pressing lance and metal gun
firmly together and rotating the lance towards you in
a clockwise direction.This may require some pressure
due to a spring inside of the metal trigger gun. (See
Fig.H)
Removing
Press the lance towards the metal gun and rotate it
anti-clockwise to remove it.
Standard adjustable lance can be adjusted for different
styles of spray jets.
Rotate the nozzle of standard adjustable lance clockwise
for direct water spray.
Rotate nozzle of standard adjustable lance anti-
clockwise for fan spray.
Storage
Lances may be stored on the back of the handle in the
click on notches. (See Fig. I)
3. FOAM NOZZLE (See Fig. J )
To attach the foam nozzle to the metal trigger gun align
the ridges on the nozzle with the grooves of the metal
trigger gun.
Press together and turn the foam nozzle clockwise to
secure it.
Removing (See Fig. K)
Press the foam nozzle towards the metal trigger gun
and rotate it anti-clockwise to remove it.
NOTE: Use of the foam nozzle requires that the
detergent tank contains liquid detergent.The regulator
cap on the detergent tank may be rotated to adjust
concentration of detergent.(See Fig. K)
Q
R1
R2
S
T
N2
O
P
L
M
N1
I
J
K
1
2
1
2
H
F1
F2
G
C
D
E
A1
A2
B

13
12
High pressure cleaner WG603E WG604E WG605E
4. PATIO CLEANER WA4040 (WG604E ONLY)
(See Fig. L)
Always use the patio cleaner together with the lance
extension when cleaning patios or garden floors. Align
the angle connector on the top of the patio cleaner and
the rotating nozzle on the bottom.
Screw the rotating nozzle clockwise to tighten onto the
thread of the angle connector.
To attach the patio cleaner to the extension lance align
the ridges on the angle connector with the two grooves
on the extension lance.
Press together and rotate the patio cleaner clockwise to
secure it. (See Fig. L)
Removing
Press the patio cleaner towards the extension lance and
rotate it anti-clockwise to remove it.
If the angle of the patio cleaner assembly to the trigger
gun and extension lance is incorrect, detach the patio
cleaner from the extension lance, rotate the patio
cleaner 180 degrees, align ridges and grooves, and
connect again.
Patio Cleaner water pressure may be adjusted.
Turning the regulator knob clockwise increases the
pressure, anti-clockwise decreases the pressure (See
Fig. M).
5. PATIO CLEANER WA4041 (WG605E ONLY)
Always use the patio cleaner together with the lance
extension when cleaning patios or garden floors.
To attach the patio cleaner to the extension lance align
the ridges on the angle connector with the two grooves
on the extension lance.
Press together and rotate the patio cleaner clockwise to
secure it.
Removing
Press the patio cleaner towards the extension lance and
rotate it anti-clockwise to remove it
If the angle of the patio cleaner assembly to the metal
trigger gun and extension lance is incorrect, detach the
patio cleaner from the extension lance, rotate the patio
cleaner 180degrees , align ridges and grooves, and
connect again.(See Fig.N1 N2 )
Patio Cleaner water pressure may be adjusted.
Turning the regulator knob clockwise increases the
pressure, anti-clockwise decreases the pressure (See
Fig. O).
6. ROTARY BRUSH ASSEMBLY
Always use the rotary brush together with the lance
extension.
Q
R1
R2
S
T
N2
O
P
L
M
N1
I
J
K

15
14
High pressure cleaner WG603E WG604E WG605E
To attach the rotary brush to the extension lance an
adapter is needed.
Insert the rotary brushe into the open end of the brush
adapter.
Rotate the adapter clockwise to tighten and secure the
rotary brush.
Pull gently on the rotary brush to confirm it is secure. It
should not pull out.
Next, attach the adapter to the lance extension by
aligning the ridges on the adapter with the grooves in
the extension lance.
Press together and rotate the adapter clockwise to
secure it.
Removing
Press the adapter towards the extension lance and
rotate it anti-clockwise to remove it.
7. FIXED BRUSH ASSEMBLY (WG605E ONLY)
Always use the fixed brush together with the lance
extension.
To attach the fixed brush to the extension lance an
adapter is needed.
Insert the fixed brushe into the open end of the brush
adapter.
Rotate the adapter clockwise to tighten and secure the
fixed brush.
Pull gently upon the fixed brush to confirm it is secure.
It should not pull out.
Next, attach the adapter to the lance extension by
aligning the ridges on the adapter with the grooves in
the extension lance.
Press together and rotate the adapter clockwise to
secure it.
Removing
Press the adapter towards the extension lance and
rotate it anti-clockwise to remove it.
Storage
Brushes may be stored in the brush compartment
located on the inner side of the handle shaft. (See Fig. Q)
8. UNDERBODY NOZZLE (WG605E ONLY)
ASSEMBLY
Press the lock button on the standard lance (WG605E
only) and insert the underbody nozzle into the lance.
Align the ridge on the nozzle with the notch on the
lance. (See Fig. R1)
Release the button to secure the nozzle in place.
Check that the nozzle is firmly attached by pulling on it.
It should not pull out.(See Fig. R2)
Q
R1
R2
S
T
N2
O
P
L
M
N1
I
J
K

15
14
High pressure cleaner WG603E WG604E WG605E
9. PIPE CLEANER KIT ASSEMBLY (WG605E
ONLY)
Always use the pipe cleaner together with the lance
extension.
To attach the pipe cleaner to the extension lance align
the ridges on the angle connector with the two grooves
on the extension lance.
Press together and rotate the pipe cleaner clockwise to
secure it.
Pull gently upon the pipe cleaner to confirm it is secure.
It should not pull out.
Removing
Press the pipe cleaner towards the extension lance and
rotate it anti-clockwise to remove it
10. WALL MOUNT BRACKET
Wall mount bracket is an optional storage solution.
1. Select and appropriate section of the wall to attach
the wall mount bracket.
2. Locate the studs or exposed wooden beam.
3. Turn the wall mount bracket so the hooks are
pointing upward.
4. Screw the wall mount bracket into the wall using the
four supplied screws.
5. Confirm that the wall mount bracket is securely
fastened to the wall.
11. TO ATTACH THE MACHINE TO THE WALL (See
Fig. S)
1. First pull the knob located on the lower left hand
side of the handle to allow the handle to lay flat
against the machine.
2. On the bottom of the machine are two slots that will
align with the two hooks on the wall bracket.
3. Lift up the machine and slide the hooks into the slots
on the bottom of the machine
OPERATION
Connection to the water supply
Attach a suitable water hose with the correct connection
to the water supply and then attach the other end to the
water inlet filter on the washer.
Once, the hose connection is secure, turn on the water
supply.
Alternative water supply
A self priming mechanism allows for the
product to optionally be connected to a bucket
Q
R1
R2
S
T
N2
O
P
L
M
N1
I
J
K

17
16
High pressure cleaner WG603E WG604E WG605E
or water tank instead of a water supply main.
With the hose inserted into the bucket or water
tank, the self priming mechanism will draw
water directly from the bucket or tank.
Note: Pay close attention to the amount of
water in the bucket or water tank to ensure
that there is an adequate supply of water to
avoid running the pump dry.
Connection to the power supply
1. Check the voltage.The voltage must
comply with the information on the rating
label at the beginning of this manual.
2. Make sure that the on/off switch on the
front of machine is in the OFF position.
3. Connect the plug with a suitable socket or
extension cord.
Your product is now fully assembled and
ready for use.
The metal gun is equipped with a trigger lock
to prevent accidental activation.
Use the trigger lock when the washer is not in
use, when it is being left unattended, or when
setting the product down to avoid accidental
operation. (See Fig.T)
1. Activate the trigger lock by pressing the
lock button located closest to the trigger on
the bottom of the grip.
2. Deactivate the trigger lock by pressing the
unlock button located further back on the
bottom of the grip to start operation again.
Testing the machine for the first time.
1. Fully assemble the product and attach
lance.
2. Connect water supply hose to product.
3. Turn water supply ON.
4. Make sure the on/off switch located at the
front of the machine is on “off”.
5. Insert the plug into a correct voltage power
outlet/socket.
6. Turn the on/off switch to “on”.
7. Deactivate the trigger lock by pressing the
unlock button.
8. Direct the nozzle away from yourself and
others.
9. Hold the metal trigger gun with both hands
firmly.
10.Press the trigger, a water jet sprays out of
the nozzle.
12.Release the trigger to stop the spray.
13.Activate the trigger lock by pressing the
lock button to lock the trigger into its off
position.
14.Turn the on/off switch to “OFF” position.
15.Turn water supply OFF.
General Operation
• Beforeeachusechecktheproduct,its
power cord, plug and accessories for
damage. Do not use if the product if
damaged or shows signs of wear.
• Doublecheckthataccessoriesareproperly
attached.
• Alwaysholdtheproductbythemetal
trigger gun and lance, never by the nozzle.
• Checktomakesurethattheairvents
located on the back of the product are
unobstructed and clear. Clean them if
necessary with a soft brush and or remove
large blockage. Blocked air vents can cause
overheating and damage the product.
Operation
1. Assemble the machine as described in
manual and switch it “on”
2. Hold the metal trigger gun with both hands
3. Direct the nozzle of your chosen attachment
away from yourself and others towards the
surface to be cleaned.
4. Press the trigger and direct the water jet at
the selected object to be washed.
5. Hold the lance the appropriate distance
away from the surface being cleaned
to avoid damaging it. If working on a
delicate surface a further away distance is
advised (see below for suggested cleaning
methods)
6. Release the trigger to stop the water jet
NOTE: Many cleaning tasks may be
completed through the use of water only, but
the removal of dirt is more efficient when a
suitable detergent is used.
In situations where detergent is needed
1. Unscrew the regulator cap of the detergent
tank, pour liquid detergent into the tank,
then screw the cap back in.
2. The machine will suck detergent

17
16
High pressure cleaner WG603E WG604E WG605E
automatically, when using foam nozzle, rotary
brush, fixed brush, and patio cleaner (yes)
3. Rotate the regulator cap to adjust foam
amount.
Cleaning vertical walls
1. For best results first dissolve dirt by
applying a detergent mixed with water to
the surface while the surface is still dry.
2. Allow the detergent to soak into the
surface for 1-3 minutes but do not let the
detergent dry.
3. Start from the bottom of the wall using
the high pressure rotor (turbo) nozzle at a
minimum distance of 30cm and work in the
upward direction.
4. Do not let the rinse water flow into
unwashed areas.
5. If working on a large section of wall divide
the wall into sections to be cleaned.
6. On some walls high pressure cleaning
using the rotor (turbo) nozzle might not be
the best solution for cleaning dirt especially
if the surface is painted or has delicate
parts it may get damaged. In that case
a suitable brush may be use instead to
remove dirt.
Wood and Vinyl Decks (Lances)
1. Divide your work area into sections and
clean each section individually for best
results
2. Rinse at high pressure using the Standard
adjustable lance keeping the tip of the
nozzle at least 15-25cm away from the
surface. If using the standard turbo lance
with direct spray increase the distance
from the surface.
NOTE: If your deck is made of a softer wood
increase the minimum distance from the
nozzle tip.
Cement patios, stone, and brick (Lances)
1. Rinse at high pressure in a sweeping motion
while keeping the nozzle tip approximately
7-15 cm away from the surface.
2. Increase the distance if using the direct
spray from the standard turbo lance or if
the patio slabs have damaged grouting or
use sand.
Wood and Vinyl Decks, Cement Patios,
Stone, and Brick (Patio Cleaner WG604E
WG605E only)
1. Attach patio cleaner to extension lance.
2. If using detergent fill up detergent tank and
regulate detergent concentration using
regulator cap.
3. Adjust water pressure on patio cleaner.
Higher pressure is suited for brick, stone,
and concrete and lower pressure is suited
for wood.
4. Divide your work area into sections and
clean each section for best results. Using
patio cleaner make sweeping strokes to
clean a section then move on.
5. If there is excess detergent residue rinse off
with standard adjustable lance set to fan
spray after.
Cars, boats and motorcycles
To achieve best results clean one side at
a time.
1. Apply foam using the foam nozzle to one
side and then rinse it off using the standard
adjustable lance in a sweeping motion
2. Maintain a distance of at least 20cm away
from the cleaning surface.
3. If using a direct spray from the standard
turbo lance, maintain a further distance.
4. Fixed brush and rotary brush may also be
used for cleaning of vehicle
5. Wipe the surface dry using an appropriate
cloth for a highly polished finish and shine
WARNING: Never clean the engine or
motor using this product
NOTE: Use of the foam nozzle requires that
the detergent tank contains liquid detergent.
The regulator cap on the detergent tank
may be rotated to adjust concentration of
detergent.
Pipes
1. Using pipe cleaner angle pipe cleaner head
down the pipe and press the trigger.
2. Move the pipe cleaner in up and down
motions as you go down the pipe to clean
the sides thoroughly.
3. Work slowly to avoid pipe water backup
and splashing if there is blockage that has
not yet been dislodged.

19
18
High pressure cleaner WG603E WG604E WG605E
After use
1. Release the trigger.
2. Turn the on/off switch to “O” (off).
3. Turn off the water supply tap.
4. Press the trigger to relieve the pressure still
present inside the product and hose
5. Lock the trigger by pressing the lock button
located on the grip
6. Disconnect the water hose from the water
filter inlet.
7. Disconnect from the power supply/outlet.
8. Wind up excess hose in the reel by winding
anti-clockwise.
9. If you will not be using this product for
a long period of time, dismantle the
accessories.
10.Check, Clean and store the product.
MAINTENANCE
Before performing any inspection,
maintenance and cleaning disconnect from
the power supply and let the product cool
down.
Inspect the product for damaged or worn parts
before each use. Do not operate it if you find
damaged or worn parts. Contact your supplier
or the manufacturer for replacement parts.
Filter maintenance
1. Unscrew the water filter/hose connector
from the back of the machine.
2. Use a blunt tool to remove the rubber seal
from the water filter/hose connector.
3. Use a blunt tool to remove the water filter
from within the hose connector.
4. Rinse the parts with clear water before
reassembling.
5. Insert the water filter into the hose
connecter in the same manner in which
you removed it using only your fingers.
6. Insert the rubber seal back into the water
filter/hose connector.
7. Screw the water filter/hose connector back
onto the inlet located at the back of the
machine.
Nozzle Maintenance
1. Remove any dirt deposits from the nozzles
using a needle. Using a needle at the back
of instruction manual.
Decalcification
From time to time calcium deposits will form
in the products and accessories.The frequency
of the deposit formation depends on the
degree of hardness of your tap water. (You
can check with your local water company to
determine the hardness of your water)
1. To dissolve calcium deposits make a
mixture of one part vinegar or citric acid to
two parts hot water (40oC).
2. Pour the mixture into a suitable container
e.g. in a bowl or tray.
3. Lay the detachable accessories in the
mixture.
4. Leave them for approximately 12 hours
depending on the severity of the deposits.
5. Finally rinse the accessories with clear
water, dry them, and put them away.
Power Cord Replacement
If the power cord appears damaged or worn,
it must be replaced by the manufacturer, a
service agent or a similarly qualified person in
order to avoid a safety hazard. Do not attempt
to use the product with a damaged power
cord!
CLEANING/STORAGE
Clean the moulded plastic housing of the
machine using a soft brush and clean cloth. Do
not use water, solvents or polishes. Remove
all debris, especially from the motor cooling
vents.
Store in a secure, dry place out of the reach of
children.
Do not place other objects on the product.

19
18
High pressure cleaner WG603E WG604E WG605E
TROUBLE-SHOOTING
Disconnect from the electrical power supply before carrying out any user maintenance or
checking for correct product functions.
Please check the following before contacting the service organization:
Symptom Cause Recommended action
1. Product
does not
start.
1.1 Not connected to power supply.
1.2 Power cord or plug is defective.
1.3 Other electrical defect to the
product.
1.4Trigger lock has not been unlocked.
1.1 Connect to power supply.
1.2 Check by a specialist electrician/
manufacture/supplier.
1.3 Check by a specialist electrician /
manufacture/ supplier.
1.4 Unlock the trigger.
2. Product
does not
reach full
power.
2.1 Extension cord or socket not
suitable for operation with this
product.
2.2 Power source has too low voltage.
2.3 Air vents are blocked.
2.1 Use a proper extension cord or
socket.
2.2 Connect to another power source.
2.3 Clean the air vents.
3. No water
stream.
3.1Trigger is not pressed.
3.2Trigger lock is activated.
3.3 Water supply not turned on.
3.1 Press the trigger.
3.2 Deactivate the trigger lock.
3.3 Turn on water supply.
4. Excessive
pressure
fluctuations.
4.1 Nozzle is blocked.
4.2 Water inlet volume is too low.
4.3 High-pressure hose is leaking.
4.4 Seals are worn/brittle/ broken.
4.1 Clean the nozzle.
4.2 Increase water inlet quantity by
turning up tap.
4.3 Replace High- pressure hose.
4.4 Replace the seals.
5. Water
leakage from
product.
5.1 Small leaks in the product are
normal and not a problem.
5.1 Have electrician/supplier or
manufacturer examine in case of
heavy leaks.
6. Excessive
vibration/
noise.
6.1 Screw and nuts loosened.
6.2 Motor problems.
6.1 Check screws and nuts for
tightness and re-tighten if loose.
6.2 Have the product
examined by qualified electrician/
supplier/manufacturer.
* Please remember any process outside customer maintenance in which the product housing
must be disassembled, must be carried out by qualified persons. If undertaken by anyone other
than a qualified person the manufacturer has the right to void warranty.

Copyright © 2013, Positec. All Rights Reserved.
2SHW003PK11000A1
This manual suits for next models
2
Table of contents
Other Worx Pressure Washer manuals

Worx
Worx HYDROSHOT ULTRA User manual

Worx
Worx WG607 User manual

Worx
Worx HydroShot WG629.1 User manual

Worx
Worx HYDROSHOT WG620E Installation manual

Worx
Worx WG602 User manual

Worx
Worx HydroShot WP650E User manual

Worx
Worx Hydroshot WG644 User manual

Worx
Worx HYDROSHOT WG620 User manual

Worx
Worx WG604 User manual

Worx
Worx WG605 User manual