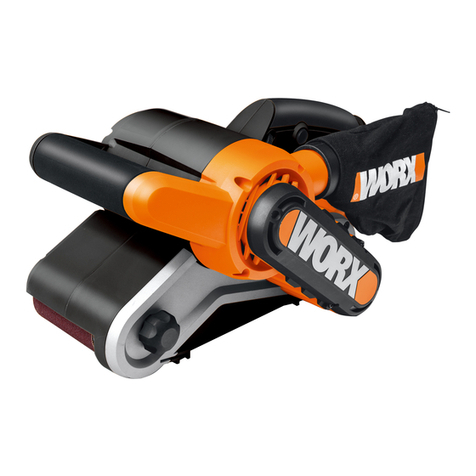
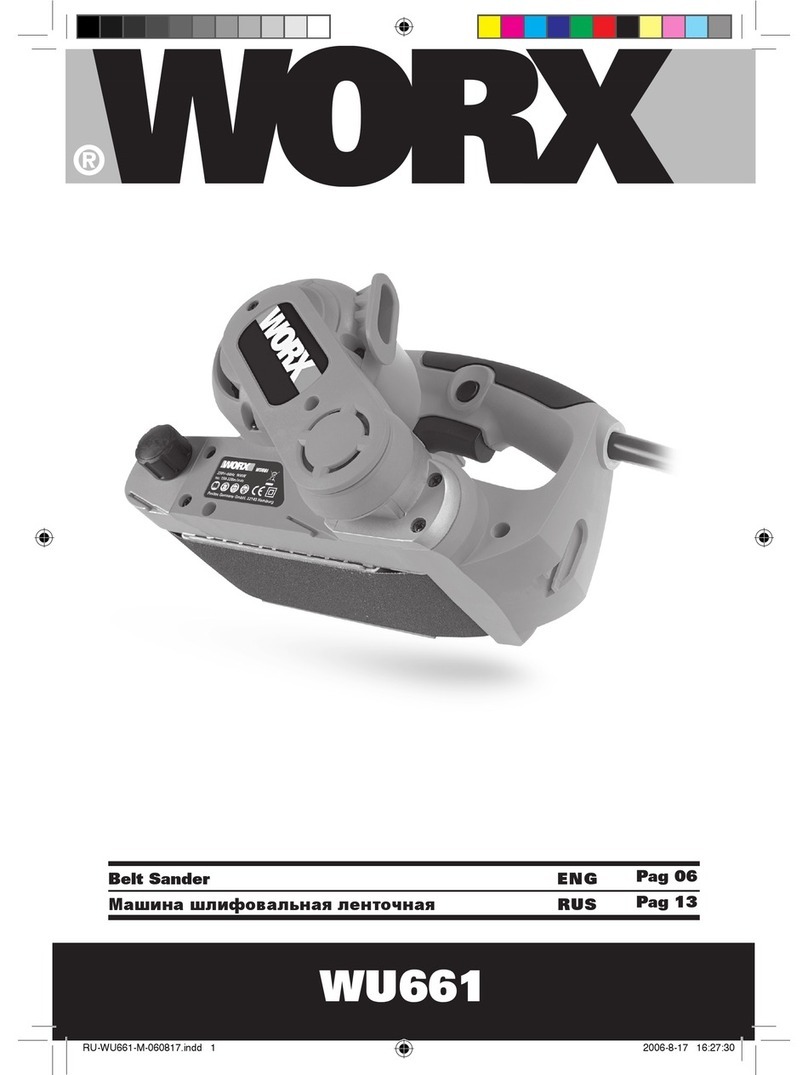
Worx WX661 User manual

P05
P12
P19
P26
P33
EN
RU
ET
LV
LT
Belt sander
Ленточная шлифовальная машина
Taldlihvimismasin
Siksnas slīpmašīna
Juostinis šlifuotuvas
WX661 WX661.1

Original instructions EN
Перевод исходных инструкций RU
Algsete juhiste tõlge ET
Oriģinālo instrukciju tulkojums LV
Originalių instrukcijų vertimas LT

2 3 4 5
67
8
9
10
1

54
b
a
ABC
EF
13a
D
12
11
G
13b

Belt sander EN
54
1. VARIABLE SPEED CONTROL
2. ON/OFF SWITCH
3. SWITCH LOCK-ON BUTTON
4. HAND GRIP AREAS
5. DUST BAG
6. DUST EXTRACTION OUTLET
7. BELT TENSION RELEASE LEVER
8. ROTATION DIRECTION ARROW
9. BELT CENTERING CONTROL KNOB
10. FRONT HANDLE
11. SANDING BELT (See Fig D)﹡
12. BASE-PLATE (See Fig D)
13. DUST EXTRACTION ADAPTER (See Fig F, G )
﹡Not all the accessories illustrated or described are included in standard delivery.

Belt sander EN
76
TECHNICAL DATA
Type WX661 WX661.1 (660-669-designation of machinery, representative of
belt sander)
Rated voltage 220-240V~50Hz
Rated power 950W
Rated no load speed 240-350/opm
Belt size 76mmx533mm
Sanding area 76mmx130mm
Protection class /II
Machine weight 3.3kg
NOISE AND VIBRATION DATA
A weighted sound pressure LpA: 86.5dB(A)
A weighted sound power LwA: 97.5dB(A)
KpA&KwA 3.0dB(A)
Wear ear protection when sound pressure is over 80dB(A)
WARNING: The vibration emission value during actual use of the power tool can differ
from the declared value depending on the ways in which the tool is used dependant on
the following examples and other variations on how the tool is used:
How the tool is used and the materials being cut or drilled.
The tool being in good condition and well maintained
The use the correct accessory for the tool and ensuring it is sharp and in good condition.
The tightness of the grip on the handles and if any anti vibration accessories are used.
And the tool is being used as intended by its design and these instructions.
This tool may cause hand-arm vibration syndrome if its use is not adequately
managed.
WARNING: To be accurate, an estimation of exposure level in the actual conditions of
use should also take account of all parts of the operating cycle such as the times when
the tool is switched off and when it is running idle but not actually doing the job.This may
VIBRATION INFORMATION
Vibration total values (triax vector sum) determined according to EN 60745:
Typical weighted vibration Vibration emission value ah= 9.22m/s2
Uncertainty K = 1.5m/s²

Belt sander EN
76
ACCESSORIES
Dust bag 1
Sanding belt (80 grit) 2
35mm Dust extraction adapter 1
32mm Dust extraction adapter 1
We recommend that you purchase your accessories from the same store that sold you the
tool. Use good quality accessories marked with a well-known brand name. Choose the type
according to the work you intend to undertake. Refer to the accessory packaging for further
details. Store personnel can assist you and offer advice.
significantly reduce the exposure level over the total working period.
Helping to minimise your vibration exposure risk.
ALWAYS use sharp chisels, drills and blades
Maintain this tool in accordance with these instructions and keep well lubricated (where
appropriate)
If the tool is to be used regularly then invest in anti vibration accessories.
Avoid using tools in temperatures of 100C or less.
Plan your work schedule to spread any high vibration tool use across a number of days.

Belt sander EN
98
ADDITIONAL SPECIFIC
SAFETY INSTRUCTIONS
FOR BELT SANDER
1. Hold tool by insulated gripping
surfaces when performing an
operation where the cutting tool
may contact hidden wiring. Contact
with a‘live’wire will also make ex-posed
metal parts of the tool ‘live’ and shock the
operator.
SYMBOLS
To reduce the risk of injury, user
must read instruction manual
Warning
Double insulation
Wear eye protection
Wear ear protection
Wear dust mask
Waste electrical products should
not be disposed of with household
waste. Please recycle where
facilities exist. Check with your
Local Authority or retailer for
recycling advice.

Belt sander EN
98
OPERATING INSTRUCTIONS
NOTE: Before using the tool, read the
instruction book carefully.
INTENDED USE
The machine is intended for dry sanding–with
high removal capacity–of wood, plastic, metal,
filler as well as varnished surfaces.
1. ON/OFF SWITCH
Depress to start and release to stop your tool.
2. SWITCH LOCK-ON BUTTON
(See Fig. A)
Depress on/off switch (2) then lock on button
(3).Your tool is now locked on for continuous
use.To switch off your tool just depress and
release the on/off switch.
3. VARIABLE SPEED CONTROL DIAL
Adjust the variable speed control (1) to
increase or decrease the speed according to
the material and sanding belt specification
to be used (also possible during no load
operation). See the table below for general
guidance on speed selection. Avoid prolonged
use at very low speed as this may damage
your sander’s motor.
Material Speed selection Belt grit
Solid wood 5-6 80
Veneer 2-4 150
Chipboard 1-5 60/80
Plastics 2-5 100
Steel 5-6 80
Paint
removal 640/60
Balsa wood 1-3 100
Acrylic 1-2 100
4. CHANGING A SANDING BELT (See Fig. B, C)
WARNING!WARNING! Remove the
main plug from the socket before
changing sanding belt.
Pull the lever (7) to release the belt tension.
Remove and fit a new belt over both rollers.
Ensure the direction of rotation arrows on the
belt and the sander are the same. Close the
lever to tension the belt.
5. BELT CENTERING CONTROL (See Fig. D)
WARNING! Wear eye protection
before carrying out a belt centering
adjustment.
Turn the machine upside down, hold it firmly
with one hand, start the motor and release the
switch immediately after observing tracking
of sanding belt. If abrasive belt runs outward,
turn tracking adjustment knob counter-
clockwise and clockwise if belt runs inward.
Adjust the belt until the outer edge of the belt
is even with the outer edge of the base-plate
(12). Belt life will be greatly increased by
keeping the tracking adjustment set properly.
6. DUST BAG (See Fig. E)
Always operate your sander with the dust bag
fitted. For the best performance always empty
the dust bag in time. Remove the shaft from
the dust bag and shake out dust.To remove
the bag, slide the mounting bracket out and
away from the sander. To refit the bag, firmly
push the mounting bracket into the location
on the sander housing.
7. ASSEMBLE THE DUST EXTRACTION
ADAPTER (See Fig. F, G)
Your sander is equipped with two dust
extraction adapters, which are designed for
connecting the hose of a vacuum cleaner.
Insert the 35mm adapter (13a) into the outlet
until it is secured (See F), then insert the 32
mm adapter (13b) into the back of the 35 mm
adapter (Fig. G).
8. DRIVE BELT REPLACEMENT.
WARNING! Remove the main plug
from the socket before carrying out
a drive belt replacement.
Remove the three screws and the belt cover.
Carefully cut the drive belt if not already
broken and remove from your belt sander. Fit
your new drive belt around the large pulley.
Belt sander EN
1110
Then install onto the small pulley by rotating
clockwise and pushing the drive belt shown
around the small pulley at the same time.The
drive belt will be a tight fit. Fit the belt cover
and two screws.
WORKING HINTS FOR YOUR
BELT SANDER
If your power tool becomes too hot, especially
when used at low speed, set the speed to
maximum and run with no load for 2-3
minutes to cool the motor. Avoid prolonged
usage at very low speed. Always use a
sanding belt suited to the material you wish
to sand. Always ensure the work-piece is
firmly held or clamped to prevent movement.
Support large panels close to the sanding
area. Any movement of the material may
affect the quality of the sanding finish. Start
your sander before sanding and turn off only
after stopping sanding. For best results sand
wood in the direction of the grain. Do not start
sanding without the sanding belt fitted. Empty
the dust bag every 5 minutes or sooner to
ensure efficient dust collection.
MAINTAINANCE
Remove the plug from the socket before
carrying out any adjustment, servicing or
maintenance.
Your power tool requires no additional
lubrication or maintenance.There are no
user serviceable parts in your power tool.
Never use water or chemical cleaners to
clean your power tool. Wipe clean with a
dry cloth. Always store your power tool in a
dry place. Keep the motor ventilation slots
clean. Keep all working controls free of dust.
Occasionally you may see sparks through the
ventilation slots.This is normal. If the supply
cord is damaged, it must be replaced by the
manufacturer, its service agent or similarly
qualified persons in order to avoid a hazard.
ENVIRONMENTAL
PROTECTION
Waste electrical products should not
be disposed of with household waste.
Please recycle where facilities exist.
Check with your Local Authority or retailer for
recycling advice.

Belt sander EN
1110
PLUG REPLACEMENT
(UK & IRELAND ONLY)
If you need to replace the fitted plug then
follow the instructions below.
IMPORTANT
The wires in the mains lead are colored in
accordance with the following code:
BLUE = NEUTRAL
Brown = Live
As the colors of the wires in the mains lead of
this appliance may not correspond with the
colored markings identifying the terminals
in your plug, proceed as follows.The wire
which is colored blue must be connected to
the terminal which is marked with N.The wire
which is colored brown must be connected to
the terminal which is marked with L.
WARNING: Never connect live or neutral
wires to the earth terminal of the plug. Only
fit an approved 13ABS1363/A plug and the
correct rated fuse.
NOTE: If a moulded plug is fitted and has to
be removed take great care in disposing of the
plug and severed cable, it must be destroyed
to prevent engaging into a socket.
Connect
Blue to N
(neutral)
Outer sleeve
firmly clamped
Cable grip
Brown L (live)
13 Amp fuse approved
to BS1362
DECLARATION OF
CONFORMITY
We,
POSITEC Germany GmbH
Konrad-Adenauer-Ufer 37
50668 Köln
Declare that the product
Description WORX Belt Sander
Type WX661 WX661.1
(660-669-designation of machinery,
representative of belt sander)
Function Remove surface material with an
endless abrasive belt
Complies with the following Directives,
2006/42/EC
2011/65/EU
2004/108/EC
Standards conform to
EN 55014-1
EN 61000-3-3
EN 55014-2
EN 60745-1
EN 61000-3-2
EN 60745-2-4
The person authorized to compile the
technical file,
Name Russell Nicholson
Address Positec Power Tools (Europe)
Ltd, PO Box 152,Leeds,LS10 9DS,UK
Suzhou 2014/12/05
Allen Ding
Deputy Chief Engineer,Testing & Certification

Ленточная шлифовальная машина
R U
1312
1. РЕГУЛЯТОР СКОРОСТИ
2. ВЫКЛЮЧАТЕЛЬ ПИТАНИЯ
3. КНОПКА ФИКСАЦИИ ВУКЛЮЧАТЕЛЯ ПИТАНИЯ
4. ОБЛАСТЬ ЗАХВАТА РУКОЙ
5. МЕШОК ДЛЯ СБОРА ПЫЛИ
6. УДАЛЕНИЕ ОПИЛОК
7. РЫЧАГ НАТЯЖЕНИЯ ШЛИФОВАЛЬНОЙ ЛЕНТЫ
8. УКАЗАТЕЛЬ НАПРАВЛЕНИЯ ВРАЩЕНИЯ ЛЕНТЫ
9. РЕГУЛЯТОР ЦЕНТРИРОВАНИЯ ШЛИФОВАЛЬНОЙ ЛЕНТЫ
10. ДОПОЛНИТЕЛЬНАЯ РУКОЯТКА
11. ШЛИФОВАЛЬНАЯ ЛЕНТА (См. Рис. D)﹡
12. ШЛИФОВАЛЬНАЯ ПЛАТФОРМА (См. Рис. D)
13. АДАПТЕР ПЫЛЕОТВОДА (См. Рис. F, G)
﹡ Не все принадлежности, иллюстрированные или описанные включены в
стандартную поставку.

Ленточная шлифовальная машина
RU
1312
ТЕХНИЧЕСКИЕ ХАРАКТЕРИСТИКИ
Моделей WX661 WX661.1 (660-669-обозначение инструмента, Ленточная
шлифовальная машина)
Номинальное напряжение 220-240В ~ 50Гц
Потребляемая мощность 950Вт
Скорость без нагрузки 240-350/мин
Размер ленты 76ммx533мм
Шлифовальная поверхность 76ммx130мм
Двойная изоляция /II
Вес 3.3кг
ХАРАКТЕРИСТИКИ ШУМА И ВИБРАЦИИ
Звуковое давление LpA: 86.5дБ(A)
Акустическая мощность LwA: 97.5дБ(A)
KpA&KwA 3.0дБ(A)
Максимально допустимое звуковое давление без использования средств защиты 80дБ(A)
ВНИМАНИЕ: Вибрация, производимая при работе механизированного инструмента,
может отличаться от заявленных значений в зависимости от способов использования
устройства. Ниже перечислены некоторые условия, от которых зависит интенсивность
вибрации:
Способ использования инструмента и свойства обрабатываемого материала.
Состояние инструмента и уровень техобслуживания
Тип используемых принадлежностей и их техническое состояние.
Сила удержания рукояток и наличие противовибрационных средств.
Используемые рабочие инструменты, соответствие применения инструментов их назначению.
При неправильном обращении данное устройство может стать причиной
синдрома дрожания рук.
ВНИМАНИЕ: Для точной оценки воздействия вибрации во время эксплуатации
необходимо также учитывать все этапы рабочего процесса, включая время, когда
ХАРАКТЕРИСТИКИ ВИБРАЦИИ
Суммарные значения вибрации, определенные согласно EN 60745:
Изззмеренная вибрация Уровень вибрации ah = 9.22м/с2
Погрешность K = 1.5м/с2

Ленточная шлифовальная машина
R U
1514
ПРИНАДЛЕЖНОСТИ
Мешок для сбора пыли 1
Шлифовальная лента (абразив №80) 2
35mm адаптер пылеотвода 1
32mm адаптер пылеотвода 1
Рекомендуется приобретать все принадлежности в том же магазине, где был куплен
инструмент. Используйте качественные принадлежности общеизвестной торговой марки.
Более подробные рекомендации указаны в разделе «Рекомендации по использованию
ленточной шлифовальной машины» этой инструкции или на упаковке принадлежностей.
Помощь и консультацию можно также получить у продавца.
устройство выключено или включено, но бездействует. Эти перерывы значительно снижают
общее влияние вибрации в ходе всего рабочего цикла.
Следующие рекомендации помогут снизить опасность воздействия вибрации при работе.
ВСЕГДА пользуйтесь только острыми инструментами (резцами, сверлами, пилами и т.д.).
Проводите техобслуживание в соответствии с указаниями, тщательно смазывайте устройство в
соответствующих местах.
Если устройство используется регулярно, приобретите противовибрационные средства.
Избегайте применения устройства при температурах ниже 100C.
Распределите задачи так, чтобы работы, сопровождающиеся высоким уровнем вибрации,
проводились через большие промежутки времени.

Ленточная шлифовальная машина
RU
1514
ДОПОЛНИТЕЛЬНЫЕ
ПРАВИЛА ТЕХНИКИ
БЕЗОПАСНОСТИ
ПРИ РАБОТЕ С
ШЛИФОВАЛЬНОЙ
МАШИНОЙ
1. Держите инструмент
изолированной поверхностью
захвата при исполнении операций,
когда режущий инструмент
может контактировать со скрытой
проводкой. Контакт с проводом
под напряжением может подвергнуть
металлические части инструмента
напряжению и поразить оператора.
УСЛОВНЫЕ
ОБОЗНАЧЕНИЯ
Для сокращения риска травмы
пользователь должен прочитать
руководство по эксплуатации
прибора
Предупреждение
Двойная изоляция
Наденьте защитные очки
Наденьте защитные наушники
Наденьте респиратор
Отходы электротехнической
продукции не следует
утилизировать с бытовыми
отходами. Они должны быть
доставлены в местный центр
утилизации для надлежащей
переработки.

Ленточная шлифовальная машина
R U
1716
ЭКСПЛУАТАЦИЯ
ВНИМАНИЕ: Перед использованием
инструмента, внимательно прочитайте
руководство по эксплуатации.
ПРИМЕНЕНИЕ ПО НАЗНАЧЕНИЮ
Настоящий электроинструмент предназначен
для сухого плоского шлифования с
большим съемом древесины, синтетических
материалов, шпаклевки и лакированных
поверхностей.
1. ВЫКЛЮЧАТЕЛЬ ПИТАНИЯ
Нажмите для включения и отпустите для
выключения инструмента.
2. КНОПКА ФИКСАЦИИ
ВЫКЛЮЧАТЕЛЯ ПИТАНИЯ(См. Рис. А)
Нажмите выключатель питания(2), затем
кнопку фиксации (3), отпустите сперва
выключатель питания, затем кнопку фиксации.
Теперь выключатель включен для постоянной
работы. Для выключения нажмите и отпустите
выключатель питания.
3. РЕГУЛЯТОР СКОРОСТИ
Поворачивая регулятор скорости (1), Вы
можете увеличивать или уменьшать скорость в
соответствии с обрабатываемым материалом
и типом шлифовального листа. (регулировка
скорости также возможна на холостом
ходу). Смотрите. ниже таблицу для общего
руководства на выбору скорости. Избегайте
длительного использования на очень низкой
скорости, поскольку это может повредить
двигатель шлифовальной машины.
Материал
Положение
регулятора
скорости
Зернистость
шлифовальной
ленты
Твердое
дерево 5-6 80
Фанера 2-4 150
ДСП 1-5 60/80
Пластик 2-5 100
Сталь 5-6 80
Удаление
краски 640/60
Мягкое
дерево 1-3 100
Акриловые
смолы и
краски
1-2 100
4. ЗАМЕНА ШЛИФОВАЛЬНОЙ ЛЕНТЫ
(См. Рис. B, C)
ВНИМАНИЕ! Перед заменой
шлифовальной ленты следует
вынуть вилку электропитания из
розетки.
Отведите рычаг (7), чтобы ослабить натяжку
шлифовальной ленты. Удалите старую
ленту и установите новую ленту поверх
обоих роликов. Убедитесь, что направление
указателей вращения на шлифовальной
ленте и ленточной шлифовальной машине
совпадают. Закройте рычаг натяжения
шлифовальной ленты..
5. РЕГУЛЯТОР ЦЕНТРИРОВАНИЯ
ШЛИФОВАЛЬНОЙ ЛЕНТЫ (См. Рис. D)
ВНИМАНИЕ! Надевайте
защитные очки перед
регулировкой по центрированию
шлифовальной ленты.
Переверните шлифовальную машину
шлифовальной лентой вверх. Крепко
удерживая машину одной рукой, включите
двигатель и немедленно отпустите
выключатель питания после определения
направления смещения шлифовальной
ленты. Если шлифовальная лента смещается
наружу, поверните регулятор центрирования
ленты против часовой стрелки, а если лента
смещается внутрь, поверните регулятор по
часовой стрелке. Установите ленту, чтобы
внешний край ленты был вровень с краем
шлифовальной платформы (12). Срок
службы шлифовальной ленты значительно
увечится, если регулировка центрирования
шлифовальной ленты будет выполнена
должным образом.

Ленточная шлифовальная машина
RU
1716
6. МЕШОК ДЛЯ СБОРА ПЫЛИ (См. Рис. E)
Всегда при работе с шлифовальной машиной
используйте мешок для сбора пыли. Выньте
патрубок из мешка и вытряхните из мешка
пыль. Откройте «молнию» и освободите
мешок от пыли Для удаления мешка для
сбора пыли освободите зажим. Для установки
мешка введите патрубок в отверстие
пылеотвода. Для более качественной работы
всегда освобождайте мешок для сбора пыли
от пыли, когда он наполовину полон.
7. КРЕПЛЕНИЕ ПЕРЕХОДНИКА ДЛЯ
ПЫЛЕУДАЛЕНИЯ (См. Рис F. G)
Шлифовальная машина оснащена двумя
переходниками пылеудаления, которые
служат для соединения со шлангом пылесоса.
Вставьте и закрепите переходник 35 мм (13a) в
выход пылеудаления (см. F), затем вставьте в
него переходник 32 мм (13b) (рис. G).
8. ЗАМЕНА РЕМНЯ ДВИГАТЕЛЯ.
ВНИМАНИЕ! Перед заменой
ремня двигателя следует вынуть
вилку электропитания из розетки.
Снимите кожух ремня, вывинтив три болта,
аккуратно перережьте старый ремень, если
он целый, и удалите его. Установите новый
ремень на большой шкив. Затем установите
ремень на малый шкив, вращая большой шкив
по часовой стрелке и одновременно натягивая
ремень на малый шкив. Ремень двигателя
должен быть хорошо натянут. Установите
кожух ремня и два винта.
РЕКОМЕНДАЦИИ ПО
ИСПОЛЬЗОВАНИЮ
ЛЕНТОЧНОЙ
ШЛИФОВАЛЬНОЙ
МАШИНЫ
Если электроинструмент перегрелся,
особенно если он использовался на низкой
скорости, установите регулятор скорости
в максимальное положении и дайте ему
поработать без нагрузки 2-3 минуты
для охлаждения двигателя. Избегите
длительного использования на очень низких
скоростях. Всегда используйте наждачную
бумагу, которая является подходящей
для обрабатываемого материала. Всегда
проверяйте, что заготовка надежно
закреплена или зажата, чтобы предотвратить
движение. Любое движение материала может
повлиять на качество шлифования. При
включении и выключении шлифовальная
машина не должна касаться поверхности.
Для достижения лучших результатов работы
шлифуйте вдоль структуры материала.
Не шлифуйте без закрепленной наждачной
бумаги. Освобождайте мешок для сбора пыли
от пыли каждые 5 минут или чаще для более
эффективного удаления пыли.
ТЕХНИЧЕСКОЕ
ОБСЛУЖИВАНИЕ
До выполнения любых работ по
регулировке, обслуживанию и уходу
следует вынуть вилку электропитания
из розетки.
Данный электроинструмент не требует
дополнительной смазки или технического
обслуживания. В инструменте отсутствуют
детали, подлежащие обслуживанию
пользователем. Никогда не используйте
воду или химические чистящие средства
для чистки электроинструмента. Протирайте
его сухой тканью. Всегда храните
электроинструмент в сухом месте. Содержите
в чистоте вентиляционные отверстия
двигателя. Очищайте от пыли все рабочие
органы управления. Некоторое искрение,
заметное сквозь вентиляционные отверстия,
является нормальным и не наносит вред
электроинструменту. Если сетевой шнур
поврежден, то, во избежание опасности
поражения током, он должен быть заменен
изготовителем, его сервисным агентом или
уполномоченным квалифицированные лицом.

1918
Ленточная шлифовальная машина
R U
1918
ЗАЩИТА
ОКРУЖАЮЩЕЙ СРЕДЫ
Отходы электрической продукции не
следует утилизировать с бытовыми
отходами. Этот инструмент необходимо
доставить на местный центр утилизации для
надлежащей обработки.
ДЕКЛАРАЦИЯ
СООТВЕТСТВИЯ
Мы,
POSITEC Germany GmbH
Konrad-Adenauer-Ufer 37
50668 Köln
Заявляем, что продукция,
Марки WORX Ленточная шлифовальная
машина
Моделей WX661 WX661.1
(660-669-обозначение инструмента,
Ленточная шлифовальная машина)
Назначению Удаление поверхностного
слоя материала абразивной
пластиной
Соответствует положениям Директив,
2006/42/EC
2011/65/EU
2004/108/EC
И стандартам
EN 55014-1
EN 61000-3-3
EN 55014-2
EN 60745-1
EN 61000-3-2
EN 60745-2-4
Лицо с правом компилирования данного
технического файла,
Имя: Russell Nicholson
Адрес Positec Power Tools (Europe)
Ltd, PO Box 152,Leeds,LS10 9DS,UK
Suzhou 2014/12/05
Allen Ding
Заместитель главного инженера, Тестирование
и сертификация

Taldlihvimismasin
ET
1918 1918
1. KIIRUSEREGULAATORI KETAS
2. SISSE/VÄLJALÜLITI
3. LÜLITI LUKUSTUSNUPP
4. KÄTEGA HAARAMISE KOHAD
5. TOLMUKOTT
6. TOLMU ÄRAJUHTIMISE VÄLJALASKEAVA
7. LIHVIMISLINDI HOOB
8. PÖÖRLEMISSUUNA NOOL
9. LINDI KESKASETUSE JUHTIMINE
10. LISAKÄEPIDE
11. LIHVIMISLINT (Vt D)﹡
12. BASE-PLATE (Vt D)
13. TOLMUIMEJA ÜLEMINEK (Vt F, G)
﹡ Mitte kõik kirjeldatud ja joonistel kujutatud lisavarustuskomponendid ei kuulu
standardvarustusse.

Taldlihvimismasin
ET
2120
TEHNILISED ANDMED
Tüüp WX661 WX661.1 (660-669- seadme tüübitähis, mis tähistab
Taldlihvimismasin)
Nimipinge 220-240V~50Hz
Nimivõimsus 950W
Koormuseta rihma liikumiskiirus 240-350/opm
Lihvimisala 76mmx533mm
lihvimisala suurus 76mmx130mm
Kahekordne isolatsio /II
Masina kaal 3.3kg
MÜRA JA VIBRATSIOONI ANDMED
Mõõdetud helirõhk LpA: 86.5dB(A)
Mõõdetud müra võimsustase LwA: 97.5dB(A)
KpA & KwA 3.0dB(A)
Kui müratase ületab 80dB(A), tuleb kasutada kuulmekaitsevahendeid.
HOIATUS: Vibratsiooni emissiooniväärtus elektriseadme tegeliku kasutamise ajal võib
erineda märgitud väärtusest, sõltuvalt sellest, kuidas tööriista kasutatakse (vt näited allpool):
Kuidas tööriista kasutatakse ning millised on lõigatavad või puuritavad materjalid.
Kui heas seisundis tööriist on ning kuidas seda hooldatakse.
Kas kasutatakse õigeid lisatarvikuid ning veendutakse, et tööriist on terav ja heas seisundis.
Kui tugevalt hoitakse käepidemest ning kas kasutatakse vibratsioonivastaseid lisatarvikuid.
Kas tööriista kasutatakse sihtotstarbeliselt, järgides selle ehitust ning kasutusjuhiseid.
Tööriist võib põhjustada käsivarre ja käe vibratsioonisündroomi, kui selle
kasutamine pole õigesti korraldatud.
HOIATUS: Kui hinnatakse vibratsiooniga kokkupuutumise taset tegelikes kasutustingimustes,
tuleb arvestada ka kasutustsükli kõiki osi, näiteks aega, kui seade on välja lülitatud ja kui see
on käivitatud, kuid seda hetkel ei kasutata. See võib märkimisväärselt vähendada vibratsiooniga
kokkupuutumist tööperioodi kestel.
INFORMATSIOON VIBRATSIOONI KOHTA
Vibratsiooni koguväärtused (kolmesuunalise vektori summa), mis on määratud EN 60745 järgi:
Tüüpiline kaalutud vibratsioon
on
Vibratsiooni emissiooniväärtus ah = 9.22m/s2
Määramatuse koetsent K = 1,5m/s²
Other manuals for WX661
5
This manual suits for next models
1
Table of contents
Languages:
Other Worx Sander manuals