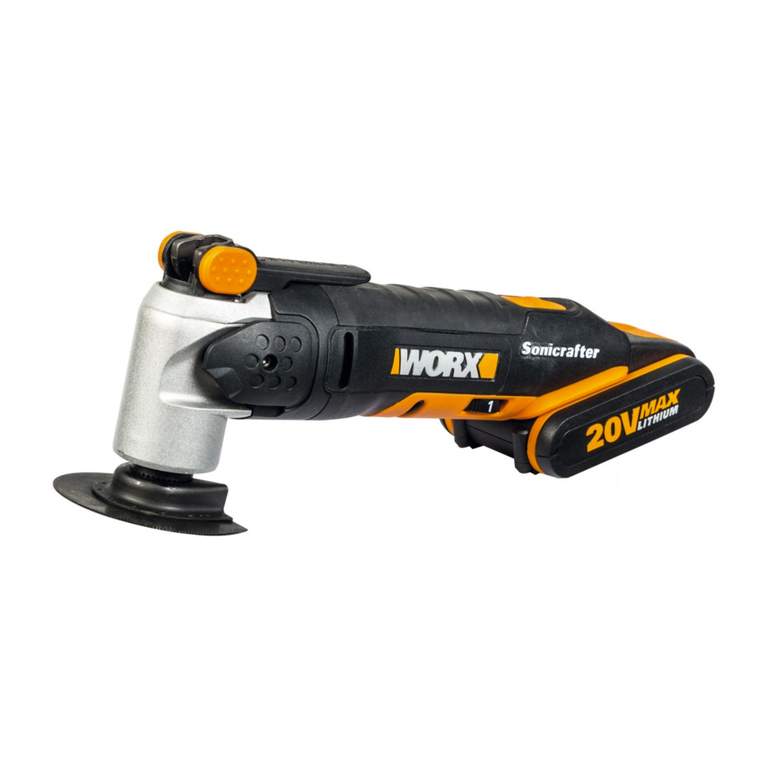
Worx Sonicrafter WX677 User manual

WX677
P06
P14
P23
P32
P41
P50
P59
P67
P75
P83
P91
P99
P107
P116
EN
D
F
I
ES
PT
NL
DK
FIN
NOR
SV
TR
GR
RU
High frequency multi-function tool
Hochfrequenz-Multifunktionswerkzeug
Outil multifonction de haute fréquence
Attrezzo multi funzione ad alta frequenza
Herramienta multifunción de alta frecuencia
Ferramenta multifunções de alta-frequência
Multifunctioneeel gereedschap met hoge frequentie
Højfrekvens multifunktionsredskab
Suuritaajuuksinen monitoimityökalu
Høyfrekvent multi-funksjonsverktøy
Multifunktionsverktyg för höga hastigheter

Original instructions EN
Originalbetriebsanleitung D
Notice originale F
Istruzioni originali I
Manual original ES
Manual original PT
Oorspronkelijke gebruiksaanwijzing NL
Original brugsanvisning DK
Alkuperäiset ohjeet FIN
Original driftsinstruks NOR
Bruksanvisning i original SV


1
2 3
4567
8
9
10

A B C
D
E F1
F2 F3
F4 F5 G

6
High Frequency Multi-function Tool EN
1. LED LIGHT
2. ON/OFF SWITCH
3. BATTERY PACK
4. BATTERY PACK LATCH
5. VARIABLE SPEED DIAL
6. VENTING SLOTS
7. UNIVERSAL FITTM ACCESSORY INTERFACE*
8. FLANGE
9. ALLEN KEY
10. SMALL FLANGE FOR OTHER BRANDS’ SANDING PADS
* Works with other oscillating tool brands’ accessories.
The following compatible brands are trademarks owned by third parties which may
be registered by their respective owners: Bosch®, Black & Decker®, Makita®and
Fein®.
TECHNICAL DATA
Type WX677 (6-designation of machinery, representative of high frequency
oscillation tool)
Voltage 12 V
Oscillations speed 5000-20000 /min
Oscillations angle 3.2°
Machine weight 1kg
NOISE INFORMATION
A weighted sound pressure LpA: 75dB(A)
A weighted sound power LwA: 86dB(A)
KpA&KwA 3.0dB(A)
Wear ear protection when sound pressure is over 80dB(A)

7
High Frequency Multi-function Tool EN
VIBRATION INFORMATION
Vibration total values (triax vector sum) determined according to EN 60745:
Typical weighted vibration Vibration emission value ah= 3.14m/s2
Uncertainty K = 1.5m/s²
WARNING: The vibration emission value during actual use of the power tool can differ
from the declared value depending on the ways in which the tool is used dependant on
the following examples and other variations on how the tool is used:
How the tool is used and the materials being cut or drilled.
The tool being in good condition and well maintained
The use the correct accessory for the tool and ensuring it is sharp and in good condition.
The tightness of the grip on the handles and if any anti vibration accessories are used.
And the tool is being used as intended by its design and these instructions.
This tool may cause hand-arm vibration syndrome if its use is not adequately
managed.
WARNING: To be accurate, an estimation of exposure level in the actual conditions of
use should also take account of all parts of the operating cycle such as the times when
the tool is switched off and when it is running idle but not actually doing the job.This may
significantly reduce the exposure level over the total working period.
Helping to minimize your vibration exposure risk.
ALWAYS use sharp chisels, drills and blades.
Maintain this tool in accordance with these instructions and keep well lubricated (where
appropriate).
If the tool is to be used regularly then invest in anti vibration accessories.
Avoid using tools in temperatures of 100C or less.
Plan your work schedule to spread any high vibration tool use across a number of days.

8
High Frequency Multi-function Tool EN
SAFETy INSTRuCTION FOR
CuTTINg
1. Hold power tool by insulated
gripping surfaces, when performing
an operation where the cutting
accessory may contact hidden
wiring. Cutting accessory contacting a
“live” wire may make exposed metal
parts of the power tool “live” and could
give the operator an electric shock.
2. Always wear a dust mask
SAFETy WARNINgS FOR
BATTERy pACk
a) Do not dismantle, open or shred
cells or battery pack.
b) Do not short-circuit a battery
pack. Do not store battery packs
haphazardly in a box or drawer
where they may short-circuit each
other or be short-circuited by
conductive materials.
c)
Do not expose battery pack to heat or
fire. Avoid storage in direct sunlight.
d) Do not subject battery pack to
mechanical shock.
e) In the event of battery leaking, do
not allow the liquid to come into
contact with the skin or eyes. If
contact has been made, wash the
affected area with copious amounts
of water and seek medical advice.
f) Seek medical advice immediately
if a cell or battery pack has been
swallowed.
g) Keep battery pack clean and dry.
h)
Wipe the battery pack terminals with
a clean dry cloth if they become dirty.
i) Battery pack needs to be charged
before use. Always refer to this
instruction and use the correct
charging procedure.
j) Do not maintain battery pack on
charge when not in use.
k) After extended periods of storage,
it may be necessary to charge
and discharge the battery pack
several times to obtain maximum
performance.
l)
Battery pack gives its best
performance when it is operated at
normal room temperature (20°C ± 5°C).
m) When disposing of battery packs,
keep battery packs of different
electrochemical systems separate
from each other.
n) Recharge only with the charger
specified by POSITEC. A charger that
is suitable for one type of battery pack
may create a risk of fire when used with
another battery pack.
o) When battery pack is not in use,
keep it away from other metal
objects, like paper clips, coins, keys,
nails, screws or other small metal
objects, that can make a connection
from one terminal to another.
Shorting the battery terminals together
may cause burns or a fire.
p) Under abusive conditions, liquid may
be ejected from the battery pack;
avoid contact. If contact accidentally
occurs, flush with water. If liquid
contacts eyes, additionally seek
medical help. Liquid ejected from the
battery may cause irritation or burns.
q) Clean the battery pack contacts and also
those of the equipment prior to battery
installation.
r) Remove exhausted battery pack promptly.
s) Do not use any charger other than that
specifically provided for use with the
equipment.
t) Do not use any battery pack which is not
designed for use with the equipment.
u) Keep battery pack out of the reach of
children.
v) After extended periods of storage, it may
be necessary to charge and discharge
the battery pack several times to obtain
maximum performance.
w) Retain the original product literature for
future reference.
x) Remove the battery from the equipment
when not in use.
y) Dispose of properly.

9
High Frequency Multi-function Tool EN
OpERATION INSTRuCTIONS
NOTE: Before using the tool, read the
instruction book carefully.
INTENDED USE
The power tool is intended for sawing and
separating wooden materials, plastic, plaster,
non-ferrous metals and fasteners (e.g.
nails and clamps) as well as for working on
soft wall tiles and for dry grinding of small
surfaces. It is especially suitable for working
close to edges and for flush cutting.
1. MOUNTING ACCESSORIES
CAUTION: For all work or when
changing accessories, always wear
protective gloves and make sure battery is
removed. Avoid danger of injury from the
sharp edges of the accessories. Accessories
can become very hot while working,
presenting danger of burns!
WARNING: To reduce the risk of
injury, do not let the sharp side of
the accessory face back toward the
user’s hand.
-Loosen the Flange
Use the Allen Key to rotate the Flange
clockwise (See Fig. A).
- Insert Accessories
Insert the Accessory onto the Universal FitTM
Accessory Interface (See Fig. B).
-Tighten the Flange
- Use the Allen Key to rotate the Flange
counterclockwise until accessory is tightened
securely (See Fig. C).
NOTE: For prior model WORX Sonicrafter
hex-interface
accessories and most other non-WORX
branded accessories, the Flange must be
completely removed to install accessory
(See Fig. D).
2. MOUNTING / CHANGING THE
SANDING SHEET (See Fig. E)
Align the sanding sheet and press it onto the
sanding pad by hand.
Firmly press the power tool with the sanding
sheet against a flat surface and briefly switch
the power tool on.This provides for good
To reduce the risk of injury, user
must read instruction manual
Warning
Wear eye protection
Wear ear protection
Wear dust mask
Do not burn
Do not expose to rain or water
Do not dispose of batteries, Return
exhausted batteries to your local
collection or recycling point.
SyMBOLS

10
High Frequency Multi-function Tool EN
adhesion and prevents premature wear.
If one point has become worn, pull off the
sanding sheet, turn it 120° and place it on
again.
NOTE: For other various brands’ sanding
pad, use smaller flange provided.
3.MOUNTING THE SUCTION DEVICE
(See Fig. F1-F5 )
When vacuuming, mount the suction device
as shown in F1-F5.
NOTE: Using the sanding pad perforated.You
can only do the vacuuming after fitting the
dust collector.
4. OPERATING THE ON/OFF SWITCH
To start the machine, push the On/Off switch
forward so that the “I” is indicated on the
switch.
To switch off the machine, push the On/
Off switch toward the rear so that the “0” is
indicated on the switch.
5. USING THE VARIABLE SPEED DIAL
Select oscillation frequency (speed) while the
motor is running.
The Variable Speed Dial can be used to set
the optimum oscillating frequency according
to the accessories used and the respective
application.
High oscillation frequency:
Sanding, sawing, rasping and polishing stone
and metal.
Low oscillation frequency:
Scraping, polishing varnishes.
6. REMOVE OR INSTALL BATTERY PACK
(See Fig. G )
Depress the Battery Pack Latches on both
sides to release Battery Pack.
After recharging, insert the Battery Pack
into battery port. A simple push and slight
pressure will be sufficient.
7. LED LIGHT
The sight light allows you to keep a clear
view under less illuminated circumstances.
To turn on the light simply press the on/off
switch. When you release the on/off switch,
the light will be off.
LED is also a battery capacity indicator. It will
flash when power gets low.

11
High Frequency Multi-function Tool EN
AppLICATION
WARNING: The sawing teeth are very sharp. Do not touch during mounting
and application. The workpiece must be clamped tightly before it is cut.
Pic Name Application
Sawing
Universal Metal/Wood End Cut
Blade.
Wood, plastic, fiberglass,
nails, non-ferrous metals, thin
sheet metal, hardened fillers.
Standard Wood End Cut Blade. Wood, plastic, drywall.
Precision Wood Cut Blade. Wood, soft plastics.
HSS Semicircle Saw Blade.
Thin wood, plastic, fiberglass,
non-ferrous metals, thin
sheet metal, hardened fillers,
window glazing.
Sanding
Sanding Pad (Perforated). Wood, plastic, hardened
fillers.
Sanding Finger Pad. Wood, plastic, hardened
fillers.
Rasping
Triangular Carbide Grit Rasp, Wood, hardened adhesives, ,
thin set, masonry.
Carbide Rasp (Finger Shaped). Wood, hardened adhesives,
thin set, masonry.
Removing
grout
Carbide Grit Semicircle Saw
Blade. Grout, porous concrete,
masonry.
Diamond-Coated Semicircle
Saw Blade. Ceramic and stone tile,
backerboard.
Scraping
Rigid Scraper Blade. Old paint, hardened
adhesives, caulk, carpet.
Flexible Scraper Blade. Elastic sealants, paint,
adhesive residues, carpet.
NOTE: When plunging and sawing use a slight pendulum motion, to allow sufficient chip removal.
The saw blade lasts longer if the wear is distributed evenly.To ensure an even distribution, loosen
the saw blade, rotate it and retighten firmly.
Cut/Sand with a constant movement and light pressure.
Heavy pressure does not increase the cut/removal rate – the accessory merely wears faster.
Excessive use and heat build up drastically reduces the life of Sonicrafter (& other branded) saw blades.

12
High Frequency Multi-function Tool EN
DISpOSAL OF AN
EXHAuSTED BATTERy
pACk
To preserve natural resources,
please recycle or dispose of
the battery pack properly.
This battery pack contains Lithium batteries.
Consult your local waste authority for
information regarding available recycling and/
or disposal options. Discharge your battery
pack by operating your tool, then remove the
battery pack from the tool housing and cover
the battery pack connections with heavy-duty
adhesive tape to prevent short circuit and
energy discharge. Do not attempt to open or
remove any of the components.
WORkINg HINTS FOR yOuR
TOOL
If your power tool becomes too hot,
especially when used at low speed, set the
speed to maximum and run it with no load
for 2-3 minutes to cool the motor. Avoid
prolonged usage at very low speeds. Always
keep the blade sharp.
Always ensure the workpiece is firmly held or
clamped to prevent movement.
Any movement of the material may affect the
quality of the cutting or sanding finish.
Start your tool before working and turn it off
only after you stop working.
Do not start sanding without having the
sandpaper fitted.
Do not allow the sandpaper to wear away , it
will damage the sanding pad.The guarantee
does not cover sanding pad wear and tear.
Use coarse grit paper to sand rough surfaces,
medium grit for smooth surfaces and fine grit
for finishing surfaces. If necessary, first make
a test run on scrap material.
Excessive force will reduce the working
efficiency and cause motor overload.
Replacing the accessory regularly will
maintain optimum working efficiency.
MAINTAIN TOOLS WITH
CARE
Your power tool requires no additional
lubrication or maintenance. There are no
user serviceable parts in your power tool.
Never use water or chemical cleaners to
clean your power tool. Wipe clean with a
dry cloth. Always store your power tool in a
dry place. Keep the motor ventilation slots
clean. Keep all working controls free of dust.
Occasionally you may see sparks through the
ventilation slots.This is normal and will not
damage your power tool.
ENVIRONMENTAL
pROTECTION
Waste electrical products should not
be disposed of with household waste.
Please recycle where facilities exist.
Check with your Local Authority or retailer for
recycling advice.

13
High Frequency Multi-function Tool EN
pLug REpLACEMENT
(uk & IRELAND ONLy)
If you need to replace the fitted plug then
follow the instructions below.
IMPORTANT
The wires in the mains lead are colored in
accordance with the following code:
Blue – Neutral
Brown – Live
As the colors of the wires in the mains lead of
this appliance may not correspond with the
coloured markings identifying the terminals
in your plug, proceed as follows.The wire
which is coloured blue must be connected to
the terminal which is marked with N.The wire
which is coloured brown must be connected
to the terminal which is marked with L.
WARNING: Never connect live or
neutral wires to the earth terminal of the
plug. Only fit an approved BS1363/A plug and
the correct rated fuse.
NOTE: If a moulded plug is fitted and has to
be removed take great care in disposing of the
plug and severed cable, it must be destroyed
to prevent engaging into a socket.
Connect
Blue to N
(neutral)
Outer sleeve
firmly clamped
Cable grip
Brown L (live)
13 Amp fuse approved
to BS1362
DECLARATION OF
CONFORMITy
We,
POSITEC Germany GmbH
Konrad-Adenauer-Ufer 37
50668 Köln
Declare that the product,
Description WORX Sonicrafter
®
Type WX677 (6-designation of
machinery, representative of high
frequency oscillation tool)
Function Sanding, sawing, rasping,
scraping polishing
Complies with the following directives,
Machinery directive 2006/42/EC
Electromagnetic compatibility directive
2004/108/EC
RoHS directive 2011/65/EU
Standards conform to
EN 55014-1
EN 55014-2
EN 60745-1
EN 60745-2-4
The person authorized to compile the
technical file,
Name Russell Nicholson
Address Positec Power Tools (Europe)
Ltd, PO Box 152, Leeds, LS10 9DS, UK
2013/02/25
LeoYue
POSITEC Quality Manager

14
Hochfrequenz-Multifunktionswerkzeug
D
1. ARBEITSLICHT
2. EIN/AUS-SCHALTER
3. AKKU
4. AKKUVERRIEGELUNG
5. VARIABLER GESCHWINDIGKEIT
6. LÜFTUNGSSCHLITZE
7. UNIVERSAL FITTM ZUBEHÖRSCHNITTSTELLE*
8. FLANSCH
9. INBUSSCHLÜSSEL
10. KLEINER FLANSCH FÜR SCHLEIFPADS ANDERER MARKEN
* Funktioniert mit dem Zubehör von anderen oszillierenden Markenwerkzeugen
Die folgenden kompatiblen Marken sind Warenzeichen, die im Eigentum Dritter
stehen und von den jeweiligen Eigentümern eingetragen sein können: Black &
Decker®, Bosch®, Makita®und Fein®.
TECHNISCHE DATEN
Typ WX677 (6-Bezeichnung der Maschine, Repräsentant des
Hochfrequenz-Multifunktionswerkzeug )
Nennspannung 12 V
Schwingfrequenz 5000-20000 /min
Schwingwinkel 3.2°
Gewicht 1kg
INFORMATIONEN ÜBER LÄRM
Gewichteter Schalldruck LpA: 75dB(A)
Gewichtete Schallleistung LwA: 86dB(A)
KpA&KwA 3.0dB(A)
Tragen Sie bei einem Schalldruck über einen Gehörschutz 80dB(A)

15
Hochfrequenz-Multifunktionswerkzeug
D
INFORMATIONEN ÜBER VIBRATIONEN
Vibrationsgesamtmesswertermittlung gemäß EN 60745:
Typischer gewichteter Vibrationswert Vibrationsemissionswert ah= 3.14m/s2
Unsicherheit K = 1.5m/s²
WARNUNG: Der Vibrationsemissionswert kann während des tatsächlichen Gebrauchs
des Elektrowerkzeugs vom angegebenen Wert abweichen, je nachdem, wie das Werkzeug
gemäß folgenden Beispielen und weiteren Verwendungsmöglichkeiten eingesetzt wird:
Die Verwendung des Werkzeugs und die Art, wie die Materialien geschnitten oder angebohrt
werden.
Der Pflege- und Wartungszustand des Werkzeugs.
Die Verwendung des richtigen Zubehörs und dessen Schärfe und Zustand.
Die Festigkeit der Handgriffe und die Benutzung von Antivibrationszubehör.
Der bestimmungsgemäß eund diesen Anweisungen entsprechende Gebrauch.
Wird dieses Werkzeug nicht angemessen gehandhabt, kann es zum Auftreten des
Hand-Arm-Vibrationssyndroms kommen.
WARNUNG: Sie sollten die tatsächlichen Arbeitsabschnitte genau ermitteln, um so den
Belastungsrad abzuschätzen. Auf diese Weise kann der Belastungsgrad während der
gesamten Arbeitszeit möglicherweise wesentlich gemindert werden.
So minimieren Sie das Risiko, dem Sie bei Vibrationen ausgesetzt sind.
Verwenden Sie IMMER scharfe Meißel, Bohrer und Sägeblätter.
Pflegen Sie dieses Werkzeug den Anweisungen entsprechend und achten Sie stets auf eine
gutes Einfetten (wo erforderlich).
Bei regelmäßiger Verwendung von Elektrowerkzeug sollten Sie in Antivibrationszubehör
investieren.
Vermeiden Sie den Einsatz von Werkzeugen beiTemperaturen von 10ºC oder darunter.
Erstellen Sie einen Arbeitsplan, um die Verwendung von hochvibrierenden Werkzeugen auf
mehrereTage zu verteilen.

16
Hochfrequenz-Multifunktionswerkzeug
D
SICHERHEITSHINWEISE
zuM SCHNEIDEN
1. Halten Sie das Werkzeug an den
isolierten Griffen, wenn die Gefahr
besteht, dass Sie beim Arbeiten in
Wänden, Decken usw. verborgene
Leitungen oder das Netzkabel
berühren könnten. Metallteile am
Werkzeug, die mit stromführenden
Drähten in Berührung kommen, werden
selbst stromführend und können der
Bedienperson einen elektrischen Schlag
versetzen.
2. Tragen Sie immer eine Staubmaske.
SICHERHEIT HINWEISE
FÜR AkkupACk
a) Zellen bzw. Akkupack nicht zerlegen,
öffnen oder zerdrücken.
b) Akkupack nicht kurzschließen.
Akkupacks nicht wahllos in
einer Schachtel oder Schublade
aufbewahren, wo sie einander
kurzschließen oder durch
andere leitfähige Materialien
kurzgeschlossen werden könnten.
c) Zellen bzw. Akkupacks nicht Hitze
oder Feuer aussetzen. Lagerung in
direktem Sonnenlicht vermeiden.
d) Akkupack nicht mechanischen
Stößen aussetzen.
e) Im Fall, dass Flüssigkeit aus dem
Akku austritt, darf diese nicht in
Kontakt mit der Haut oder den
Augen kommen. Sollte dies dennoch
geschehen, den betroffenen Bereich
sofort mit viel Wasser spülen und
einen Arzt aufsuchen.
f) Beim Verschlucken einer Zelle oder
eines Akkupacks muss sofort ein
Arzt herangezogen werden.
g) Akkupack sauber und trocken halten.
h) Sollten die Klemmen des Akkupacks
schmutzig werden, diese mit
einem sauberen, trockenen Tuch
abwischen.
i) Akkupackmuss vor Gebrauch
aufgeladen werden. Immer dieses
Anweisungen beachten und den
korrekten Ladevorgang ausführen.
j) Akkupack bei Nichtverwendung
nicht längere Zeit aufladen lassen.
k) Nach längerer Lagerung des Gerätes
ist es eventuell notwendig, die
Zellen oder das Akkupack mehrere
Male aufzuladen und zu entladen, um
eine optimale Leistung zu erhalten.
l) Akkupacks funktionieren bei
normaler Zimmertemperatur (20°C ±
5°C) am besten.
m) Beim Entsorgen von Akkupacks
sollten Akkupacks mit verschiedenen
elektrochemischen Systemen
voneinander getrennt gehalten
werden.
n) Nur mit dem von POSITEC
bezeichneten Ladegerät aufladen.
Ein Ladegerät, das für eine bestimmte
Art von Akkupackgeeignet ist, kann bei
Verwendung mit einem anderen Akkupack
eine Brandgefahr darstellen.
o) Bei Nichtverwendung des Akkupacks
ist dieses von Metallgegenständen
fernzuhalten, wie etwa
Büroklammern, Münzen, Nägeln,
Schrauben oder anderen kleinen
Metallgegenständen, wo sich die
Batterieklemmen berühren könnten.
Das Kurzschließen der Batterieklemmen
kann Verbrennungen bzw. einen Brand
verursachen.
p) Bei Missbrauch kann es sein, dass
Flüssigkeit aus dem Akkupack
austritt; Berührung vermeiden. Sollte
es doch versehentlich zum Kontakt
kommen, mit Wasser spülen. Falls
die Flüssigkeit in die Augen gerät,
muss ärztliche Hilfe beansprucht
werden. Aus dem Akku austretende
Flüssigkeit kann zu Reizungen oder
Verbrennungen führen.
q) Die Kontaktstellen des Akkupacks sowie
die des Gerätes vor dem Einsetzen des
Akkus reinigen.
r) Erschöpftes Akkupack sofort
herausnehmen.
s) Kein Ladegerät verwenden, das nicht

17
Hochfrequenz-Multifunktionswerkzeug
D
ausdrücklich für den Gebrauch mit dem
Gerät vorgesehen ist.
t) Kein Akkupack verwenden, das nicht für
den Gebrauch mit dem Gerät vorgesehen
ist.
u) Akkupacks von Kindern fernhalten.
v) Nach längerer Lagerung des Gerätes ist
es eventuell notwendig, die Zellen oder
das Akkupack mehrere Male aufzuladen
und zu entladen, um eine optimale
Leistung zu erhalten.
w) Die originalen Produktunterlagen zum
späteren Nachschlagen aufbewahren.
x) Den Akku bei Nichtverwendung aus dem
Gerät nehmen.
y) Ordnungsgemäß entsorgen.
Zur Reduzierung der
Verletzungsgefahr bitte die
Bedienungsanleitung durchlesen
Warnung
Tragen Sie eine Schutzbrille
Tragen Sie einen Gehörschutz
Tragen Sie eine Staubmaske
Nicht verbrennen
Vor Regen und Feuchtigkeit schützen
Akku nicht in den Haushaltsmüll
geben. Bringen Sie den leeren
Akku zu Ihrer lokalen Sammel- oder
Recyclingstelle.
SyMBOLE

18
Hochfrequenz-Multifunktionswerkzeug
D
HINWEISE zuM BETRIEB
HINWEIS: Lesen Sie das Handbuch
vor Inbetriebnahme des Werkzeuges
sorgfältig durch.
BESTIMMUNGSGEMÄSSER GEBRAUCH
Das Elektrowerkzeug ist bestimmt zum
Sägen undTrennen von Holzwerkstoffen,
Kunststoff, Gips, Nichteisen-Metallen
und Befestigungselementen (z.B. Nägel,
Klammern) sowie zum Bearbeiten von
weichen Wandfliesen und zum trockenen
Schleifen kleiner Flächen. Es ist besonders
zum randnahen und bündigen Arbeiten
geeignet.
1. ANBRINGEN VON ZUBEÖR
ACHTUNG: Bei allen Arbeiten oder
beim Austausch von Werkzeugen
müssen Sie Schutzhandschuhe tragen.
Vermeiden Sie die Gefahr von Verletzungen
aufgrund von scharfen Kanten an den
Arbeitswerkzeugen. Arbeitswerkzeuge
können sehr heiss werden, während Sie
damit arbeiten, was zu gefährlichen
Verbrennungen führen kann!
WARNUNG: Um das Risiko von
Verletzungen zu mindern, lassen
Sie nicht zu, dass die Universalend-
Schneiden oder andere Abschnitte der
Sägeblätter zur Hand des Benutzers
weisen.
- Flansch lösen
Drehen Sie den Flansch mit dem
Sechskantschlüssel im Uhrzeigersinn (Siehe
Abb. A).
- Zubehör anbringen
Setzen Sie das Zubehör in den Universal
FitTM-Verbinder ein (Siehe Abb. B).
- Flansch anziehen
Drehen Sie den Flansch mit dem
Sechskantschlüssel gegen den Uhrzeigersinn,
bis das Zubehör fest sitzt (
Siehe Abb.
C).
Hinweis: Für alle anderen
Markenzubehörteile von oszillierenden
Werkzeugen (einschließlich dem originalen
WORX SoniCrafter) muss der Flansch
vollständig entfernt werden, um diese
Zubehörteile zu verwenden (Siehe Abb. D).
2. SCHLEIFBLATT ANBRINGEN/
WECHSELN (Siehe Abb. E)
Richten Sie das Schleifblatt aus und drücken
Sie es mit der Hand auf die Schleifscheibe
auf.
Drücken Sie das Elektrowerkzeug mit dem
Schleifblatt fest gegen eine flache Oberfläche
und schalten Sie das Elektrowerkzeug kurz
ein. Auf diese Weise wird gute Haftung
gewährleistet und eine vorzeitige Abnutzung
verhindert.
Hat sich eine Stelle abgenutzt, ziehen Sie das
Schleifblatt ab, drehen Sie es um 120° und
bringen Sie es wieder an.
HINWEIS: Für den Schleifpad diverser
anderer Hersteller den kleinen Flansch
verwenden, der im Lieferumfang enthalten ist.
3. STAUBABSAUGUNG ANBRINGEN
(Siehe Abb. F1-F5)
Für das Absaugen montieren Sie die
Absaugvorrichtung wie in F1-F5 dargestellt
ist.
HINWEIS: Verwenden Sie das perforierte
Schleifpad. Es kann nur nach Anbringung des
Staubauffangs abgesaugt werden.
4. BEDIENUNG DES EIN-/
AUSSCHALTERS
Zum Einschalten des Elektrowerkzeugs
schieben Sie den Ein-/Ausschalter nach vorn,
sodass am Schalter „I“ erscheint.
Zum Ausschalten des Elektrowerkzeugs
schieben Sie den Ein-/Ausschalter nach
hinten, sodass am Schalter „0“ erscheint.
5 SCHALTER FÜR VARIABLE
DREHZAHLSTEUERUNG
Bestimmen Sie die Schwingungsfrequenz
(Geschwindigkeit) während der Motor läuft.
Mit der variablen Geschwindigkeitskontrolle
kann eine optimale Schwingfrequenz
entsprechend dem verwendeten Zubehör
und der auszuführenden Arbeit eingestellt
werden.
Hohe Schwingfrequenz:
Sägen, Raspeln, Polieren von Stein und
Metall.
Niedrige Schwingfrequenz:
schaben, polieren von Lacken.

19
Hochfrequenz-Multifunktionswerkzeug
D
6. ANBRINGEN UND ENTFERNEN DES
AKKUS (Siehe Abb. G)
Drücken Sie die Akkuverriegelung hinein,
um den Akku zu entriegeln, und ziehen Sie
ihn aus dem Bohrer heraus. Schieben Sie
ihn nach dem Aufladen wieder in den Bohrer
hinein. Schieben Sie ihn mit leichtem Druck
ganz in die Aufnahme hinein.
7. ARBEITSLICHT
Das Arbeitslicht leuchtet bereits bei geringem
Druck auf den Ein-Aus-Schalter, das Gerät
läuft aber noch nicht an. Wenn Sie den Ein-/
Ausschalter loslassen, geht das Licht wieder
aus.
Die LED informiert Sie auch über den
Energiestand des Akkus. Bei niedrigem
Energiestand blinkt die LED.

20
Hochfrequenz-Multifunktionswerkzeug
D
ANWENDuNg
WARNUNG: Die Sägezähne sind sehr scharf. Bei Montage und Anwendung
nicht berühren. Das Werkstück muss vor dem Schneiden festgespannt werden.
Abb. Name Anwendung
Sägen
Universalklinge.
Holz, Plastik, Fiberglas,
Nägel, nicht-eiserne Metalle,
dünnes Metallblech, gehärtete
Füllstoffe.
Vornschneideklinge. Holz, Plastik, Gipskarton.
Präzisions-Holzsägeblatt. Holz, weiche Kunststoffe.
HSS Segmentsägeblatt.
Holz, Plastik, Fiberglas,
nicht-eiserne Metalle, dünnes
Metallblech, gehärtete
Füllstoffe.
Schleifen
Schleifpapierfolie. Holz, Plastik,
gehärtete Füllstoffe.
Schleifausatz. Holz, Plastik,
gehärtete Füllstoffe.
Raspeln
Dreieckige Raspel. Holz, gehärtete Klebstoffe,
Keramik, Mauerwerk.
Finger-Raspel. Holz, gehärtete Klebstoffe,
Keramik, Mauerwerk.
Mörtel
entfernen
Karbid-Sandstrahlklinge. Schrot, poröser Beton,
Mauerwerk.
Diamant-Sandstrahlklinge. Keramik und Steinfliesen,
Rigipsplatte.
Schaben
Fester Kratzer. Alte Farbe, gehärtete
Klebstoffe und Kitt,Teppich.
Flexibler Abkratzer. Elastische Dichtungsmittel,
Farbe, Klebstoffreste,Teppich.
HINWEIS: Beim Eintauchen und Sägen mit einer leichten Pendelbewegung für eine ausreichende
Spanabfuhr sorgen.
Das Sägeblatt hält länger, wenn es gleichmäßig abgenutzt wird. Dazu das Sägeblatt lösen, etwas
weiterdrehen und wieder festspannen.
Schneiden/Schleifen Sie mit gleichmäßigen Bewegungen und leichtem Druck.
Other manuals for Sonicrafter WX677
2
Table of contents
Languages:
Other Worx Tools manuals

Worx
Worx Sonicrafter WX678 User manual

Worx
Worx MAKERX WX744 Installation manual

Worx
Worx WG518 User manual

Worx
Worx MAKERX WX744 User manual

Worx
Worx MAKERX WA7160 Installation manual

Worx
Worx WX891 User manual

Worx
Worx WX253 Installation manual

Worx
Worx WX856 User manual

Worx
Worx MAKER X WX739L User manual

Worx
Worx WA0040 User manual