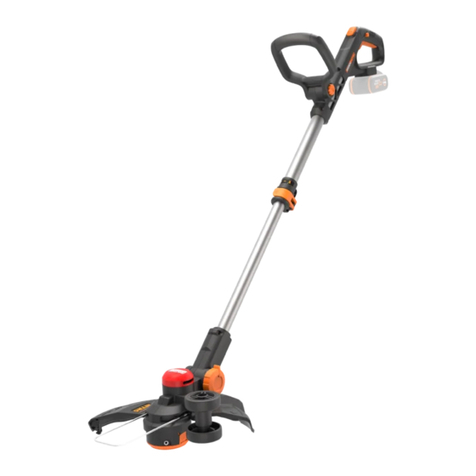
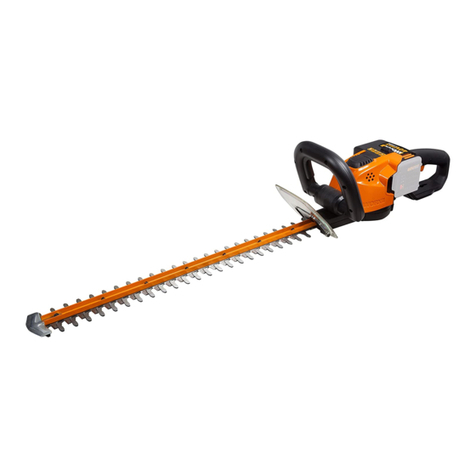
Worx WG163E User manual

WG163E WG163E.1 WG163E.2 WG163E.9
20V 2-in-1 Grass Trimmer/Edger
טלוו 20 אשד םזוג


12
13
15
14
9
3
5
6
7
8
10
11
12
4

1
1
2
2
1
1
1
2
22
2
2
2
1
2
3
1
1
2
1
3Click!
100%
0%
For WA3551.1 battery
For WA3551 battery
For WA3551 battery
100 %
0%
2
2
100 %
0%
WA3760 WA3880
D1 D2
C
D3 E
A1 A2
B
F G1

TM
1
1
2
2
1
2
90o
One click
L
MN1
N2
O1 O2
J2
K
O3 O4
I2
J1
I1
G2 H
N3
1
1
2
2
1
1
1
2
22
2
2
2
1
2
3
1
1
2
1
3Click!
100%
0%
For WA3551.1 battery
For WA3551 battery
For WA3551 battery
100 %
0%
2
2
100 %
0%
WA3760 WA3880
D1 D2
C
D3 E
A1 A2
B
F G1

TM
1
1
2
2
1
2
90o
One click
L
MN1
N2
O1 O2
J2
K
O3 O4
I2
J1
I1
G2 H
N3

TM
1
1
2
2
1
2
90o
One click
L
MN1
N2
O1 O2
J2
K
O3 O4
I2
J1
I1
G2 H
N3

98
TM
1
1
2
2
1
2
90o
One click
L
MN1
N2
O1 O2
J2
K
O3 O4
I2
J1
I1
G2 H
N3

20V 2-in-1 Grass Trimmer/Edger EN
98
GENERAL SAFETY
WARNINGS
WARNING: Read all safety warnings and
all instructions. Failure to follow the warnings
and instructions may result in electric shock, fire and/
or serious injury.
Carefully read the instructions for the safe
operation of the machine.
Save all warnings and instructions for future
reference.
-This appliance is not intended for use by persons
(including children) with reduced physical, sensory or
mental capabilities, or lack of experience and knowledge,
unless they have been given supervision or instruction
concerning use of the appliance by a person responsible
for their safety.
- Children should be supervised to ensure that they do not
play with the appliance.
-The appliance is only to be used with the power supply
unit provided with the appliance.
IMPORTANT
READ CAREFULLY BEFORE USE
KEEP FOR FUTURE REFERENCE
SAFE OPERATING PRACTICES
Training
a) Read the instructions carefully. Be familiar with
the controls and the proper use of the machine.
b) Never allow people unfamiliar with these
instructions or children to use the machine. Local
regulations can restrict the age of the operator.
c) Keep in mind that the operator or user is
responsible for accidents or hazards occurring to
other people or their property.
Preparation
a) Never operate the machine while people,
especially children, or pets are nearby.
b) Wear eye protection and stout shoes at all times
while operating the machine.
Operation
a) Use the machine only in daylight or good
artificial light.
b) Never operate the machine with damaged
guards or shields or without guards or shields in
place.
c) Switch on the motor only when the hands and
feet are away from the cutting means.
d) Always remove or disconnect battery pack :
– whenever leaving the machine unattended;
– before clearing a blockage;
– before checking, cleaning or working on the
machine;
– after striking a foreign object;
– whenever the machine starts vibrating
abnormally.
e) Take care against injury to feet and hands from
the cutting means.
f) Always ensure that the ventilation openings are
kept clear of debris.
Maintenance and storage
a) Always remove or disconnect battery pack before
carrying out maintenance or cleaning work.
b) Use only the manufacturer’s recommended
replacement parts and accessories.
c) Inspect and maintain the machine regularly.
Have the machine repaired only by an authorized
repairer.
d) When not in use, store the machine out of the
reach of children.
SAFETY WARNINGS FOR
BATTERY PACK
a) Do not dismantle, open or shred cells or
battery pack.
b) Do not short-circuit a battery pack. Do not
store battery packs haphazardly in a box or
drawer where they may short-circuit each
other or be short-circuited by conductive
materials. When battery pack is not in use,
keep it away from other metal objects, like paper
clips, coins, keys, nails, screws or other small
metal objects, that can make a connection from
one terminal to another. Shorting the battery
terminals together may cause burns or a fire.
c) Do not expose battery pack to heat or fire.
Avoid storage in direct sunlight.
d) Do not subject battery pack to mechanical
shock.
e) In the event of battery leaking, do not
allow the liquid to come into contact
with the skin or eyes. If contact has been
made, wash the affected area with copious
amounts of water and seek medical advice.
f) Seek medical advice immediately if a cell
or battery pack has been swallowed.
g) Keep battery pack clean and dry.
h) Wipe the battery pack terminals with a
clean dry cloth if they become dirty.
i) Battery pack needs to be charged before
use. Always refer to this instruction and
use the correct charging procedure.
j) Do not maintain battery pack on charge
when not in use.
k) After extended periods of storage, it may
be necessary to charge and discharge
the battery pack several times to obtain
maximum performance.
l) Battery pack gives its best performance
when it is operated at normal room
temperature (20 °C ± 5 °C).
m) When disposing of battery packs, keep
battery packs of different electrochemical
systems separate from each other.
n) Recharge only with the charger specified
by WORX. Do not use any charger other
than that specifically provided for use with
the equipment. A charger that is suitable for
one type of battery pack may create a risk of fire
when used with another battery pack.


20V 2-in-1 Grass Trimmer/Edger EN
1110
o) Do not use any battery pack which is not
designed for use with the equipment.
p) Keep battery pack out of the reach of
children.
q) Retain the original product literature for
future reference.
r) Remove the battery from the equipment
when not in use.
s) Dispose of properly.
t) Do not mix cells of different manufacture,
capacity, size or type within a device.
u) Do not remove battery pack from its
original packaging until required for use.
v) Observe the plus (+) and minus (–) marks
on the battery and ensure correct use.
SYMBOLS
Read operator’s manual
Wear eye protection
Keep bystanders away
Do not expose to moisture
Li-Ion battery. This product has
been marked with a symbol
relating to ‘separate collection’
for all battery packs and battery
pack. It will then be recycled or
dismantled in order to reduce
the impact on the environment.
Battery packs can be hazardous
for the environment and for
human health since they contain
hazardous substances.
Do not burn
Do not expose to rain or water
Edging
Trimming
Make sure the battery is removed
prior to changing accessories.
Lock
Unlock
Wear protective gloves

20V 2-in-1 Grass Trimmer/Edger EN
1110
* Not all the accessories illustrated or
described are included in standard delivery.
TECHNICAL DATA
WG163E
WG163E.1 WG163E.2 WG163E.9
Voltage 20V MAX**
No load
speed 7600/min
Cutting
diameter 30cm
Line
diameter 1.65mm
Charging
time 5hr 1 hr /
Machine
weight 2.4kg 2kg
**Voltage measured without workload. Initial battery
voltage reaches maximum of 20 volts. Nominal
voltage is 18 volts.
ACCESSORIES
WG163E WG163E.1 WG163E.2
WG163E.9
Flower
guard
1 1 1
1
Charger
1
(WA3760)
1
(WA3760)
1
(WA3880)
/
Battery
pack
2
(WA3551.1)
1
(WA3551)
1
(WA3551)
/
Spool
(WA0004) 1 1 1
1
Safety
guard
1 1 1
1
Edger
wheel
1 1 1
1
We recommend that you purchase your accessories
from the same store that sold you the tool. Refer to
the accessory packaging for further details. Store
personnel can assist you and offer advice.
ASSEMBLY AND OPERATION
NOTE: Before using the tool, read the
instruction book carefully.
Intended Use
The machine is intended for the cutting of grass and
weeds under bushes, as well as on slopes and edges
that can not be reached with the lawn mower.
WARNING!The charger and battery pack are
specially designed to work together so do not
attempt to use any other devices. Never insert or
allow metallic objects into your charger or battery
pack connections because of an electrical failure and
hazard will occur.
WARNING! Always wear the eye protection.
Never lean over the trimmer head. Rocks or
debris can ricochet or be thrown into eyes and face
and cause blindness or other serious injury. When
operating unit, check for the following:
Wear eye protection and heavy clothing. Hold front
handle with one hand and auxiliary handle with
the other hand. Keep unit below waist level. Work
only from your right to your left to ensure debris is
thrown away from you. Without bending over, keep
line near and parallel to the ground (perpendicular
when edging) and not crowded into material being
cut.
WARNING! Make sure that line is fed out
before operation. Make sure motor is up
to full speed before trimming or edging.
1. LOCK OFF BUTTON
2. REAR HANDLE
3. ON/OFF SWITCH
4. BATTERY PACK *
5. HANDLE UNLOCK BUTTON
6. UPPER SHAFT
7. LOCKING COLLAR
8. LOWER SHAFT
9. SAFETY GUARD
10. FLOWER GUARD
11. AUXILIARY HANDLE
12. COMMAND FEED BUTTON
13. EDGER WHEEL
14. LINE FEED BUTTON
15. LINE CUTTER
COMPONENT LIST

20V 2-in-1 Grass Trimmer/Edger EN
1312
WARNING! Only use 1.65mm diameter
cutting line. Other sizes of line will not feed
properly and will result in improper cutting head
function or can cause serious injury. Do not use other
material such as wire, string, rope, etc. Wire can
break off during cutting and become a dangerous
projectile that can cause serious injury.
ASSEMBLY & OPERATION
Action Figure
Assembly
Assembling the Safety Guard See Fig. A1, A2
Mounting the Edger Wheel
WARNING: Make Sure
the ON/OFF Switch
is Locked Off to Prevent
Accidental Starting.
See Fig. B
Installing and Removing the
Battery Pack See Fig. C
Charging the battery pack
More details can be found in
charger’s manual
See Fig. D1, D2
Checking the battery condition
(Only for WG163E.1, WG163E.2) See Fig. D3
Operation
Safety ON/OFF Switch
WARNING! The cutting
head continues to rotate
after the trimmer has been
switched off; wait until it has
completely stopped then lay down
the tool.
See Fig. E
Trimming
- Adjusting the Shaft
WARNING! Make Sure the
ON/OFF Switch is Locked
Off to Prevent Accidental Starting.
See Fig. F
- Adjusting theTrimmer Head See Fig. G1, G2
- Adjusting the Auxiliary handle See Fig. H
-Trimming See Fig. I1
- Using the Flower Guard See Fig. I2
Edging
- Changing the tool into the
Edging mode See Fig. J1, J2
- Edging See Fig. K
Command feeding the line
- Note: Press as needed. See Fig. L
Manually feeding the line See Fig. M
Replacing the trimmer Spool See Fig. N1, N2,
N3
Manually winding the line See Fig. O1, O2,
O3, O4
WORKING HINTS
1. AUTOMATIC LINE FEED SYSTEM
When initially switching on the trimmer, a small
length of line is fed out.
A ‘clattering’ noise will be heard when the lines hit
the Line Cutter. DO NOT BE ALARMED.This is quite
normal. After about 5 seconds the line will be cut to
the correct length and the noise will reduce as the
motor gains full speed.
If the noise of the line being cut can’t be heard, more
line will need to be fed out.
To feed more line, it is first necessary to allow the
trimmer to stop completely; it must come to a
complete rest, then restart, allowing the motor to
reach full speed.
Repeat above until you hear the line hitting against
the Line Cutter.
2. (See Fig. L)
Your grass trimmer is equipped with a Command
Feed System. Just press the button while the
machine is running, new line will feed out and then
stop when you hear the ‘clattering’ noise of the
new line being cut.The motor stops briefly when
the Command Feed button is pressed, and restarts
when released.This process enables the machine to
automatically feed out new line.
3. MANUALLY FEEDING THE LINE (See Fig. M)
Press and release manual line feed button (14), whilst
gently pull out the lines until the lines reaches the
line cutter.
If the line extends past the line cutter, too much line
has been fed out.
If too much line is fed out, remove the cutting head
cover and rotate the spool anti-clockwise until the
line is at the desired length.
MAINTENANCE
After use, disconnect the battery from the tool and
check for damage.
Your power tool requires no additional lubrication
or maintenance.There are no user serviceable parts
in your power tool. Never use water or chemical
cleaners to clean your power tool. Wipe clean with a
dry cloth. Always store your power tool in a dry room
temperature location. Keep the motor ventilation
slots clean. Keep all working controls free of dust.

20V 2-in-1 Grass Trimmer/Edger EN
1312
TROUBLESHOOTING
The following table gives problems and actions that you can perform if your machine does not operate
correctly.
WARNING: Switch the machine off and remove the battery prior to any troubleshooting.
Problems Possible Causes Corrective Action
Trimmer fails to
operate.
Battery discharged.
Battery too hot/cold.
Motor is broken.
Internal wiring of machine damaged.
Recharge battery; also see
the content in charger manual.
Allow to cool/warm.
Contact Service Agent.
Trimmer runs
intermittently.
Motor is broken.
Battery not fully charged.
On/Off switch defective.
Contact Service Agent.
Recharge battery.
Contact Service Agent.
Excessive vibrations/
noise.
Machine defective.
Line spool is not wound well.
Contact Service Agent.
Rewind the line. See “MANUALLY
WINDINGTHE LINE” (Fig. O1, O2,
O3, O4).
Cutting time per
battery charge too
short.
Battery has not been used for long
period or only charged for short term.
Grass too high.
Battery defective.
Recharge battery; also see
the content in charger manual.
Cut in stages.
Replace the battery.
Machine does not cut. Line broken.
Battery not fully charged.
Motor is broken (speed is too low).
Grass entangled around cutting head.
Replace the line.
Recharge battery; also see
the content in charger manual.
Contact Service Agent.
Remove grass.
Continuous lighting
of the battery charge
indicator.No charging
procedure possible.
Battery not (properly) inserted.
Battery contacts contaminated.
Battery defective.
Properly insert battery into battery
charger.
Clean the battery contacts or replace
the battery.
Replace the battery.
Battery charge
indicator does not
light up.
Plug of battery charger not plugged in
(properly).
Socket outlet, mains cable or battery
charger defective.
Insert mains plug (fully) into the
socket outlet.
Check the mains voltage; have
the battery charger checked by an
authorized after-sales service agent.
Auto Feed/Command
feed does not work
Cutting line is not wound well.
The line is tangled.
Line is used up.
Manually feed the line, if still cannot
feed out, remove the Spool out and
rewind the line.
Replace with a new spool of line.
ENVIRONMENTAL PROTECTION
Disposal
The machine, its accessories and packaging materials should be sorted for environmentally friendly
recycling.
The plastic components are labeled for categorized recycling.


טלוו 20 אשד םזוג HE
5
מ”עב סיסקל םוקימס :הרבחה םש
הדוהי ןבא 9090 .ד.ת המידק יברעמ ת”א :תבותכ
09-7611222 :ןופלט
www.semicom.co.il
תנקתמ הלועפ םיירשפא םימרוג תויעב
.
.
תיתביבס הנגה
הכלשה

טלוו 20 אשד םזוג HE
4
רויא הלועפ
הבכרה
B
:הרהזא
C
D3
הלעפה
E
!הרהזא
F
:הרהזא
H
I1
I2
K
L
:הרעה
M
ילכה םע הדובעל םיפיט
תיטמוטוא טוח תנזהל תכרעמ .1
)L רויא האר( .2
)M רויא האר( טוחה לש תינדי הנזהל .3
14
הקוזחת
תויעב ןורתפ
:הרהזא

טלוו 20 אשד םזוג HE
3
םיקלח תמישר
הליענ גתמ .1
תירוחא תידי .2
יוביכ/הלעפה גתמ .3
*תוללוס זראמ .4
רזע תידי לש הליענ ספת .5
ןוילע טומ .6
תידי תליענ רפרפ .7
ותחת ריפ .8
תוחיטב ןגמ .9
םיחרפ ןגמ .10
רזע תידי .11
הדוקפ תנזה ןצחל .12
תווצק םוזיג תלגלג .13
טוח תנזה ןצחל .14
טוח ךתוח .15
חולשמב םילולכ םיראותמה וא םיגצומה םירזיבאה לכ אל *
.יטרדנטס
םיינכט םינותנ
WG163E.9 WG163E.2
WG163E
WG163E.1
20
7600
30
1.65
5
22.4
20
18
םירזיבא
WG163E.9 WG163E.2 WG163E.1 WG163E
1 1
1
1
1
WA3880
1
WA3760
1
WA3760
1
1
WA3551
1
WA3551
2
WA3551.1
1 1 1 1
1 1 1 1
111
הלעפהו הבכרה
:הרעה
דעוימ שומיש
!הרהזא
:הרהזא
:הרהזא
1.65:הרהזא

טלוו 20 אשד םזוג HE
2
םילמס

טלוו 20 אשד םזוג HE
1
תויללכ תוחיטב תורהזא
.תוארוהה לכ תאו תוחיטבה תורהזא לכ תא ארק :הרהזא
וא/ו הפרש ,תולמשחתהל םורגל לולע ולא תוארוהל תויצ יא
.הרומח העיצפל
.הנוכמה לש החוטב הלעפהל בטיה תוארוהה תא אורקל שי
.ידיתע שומישל הלעפההו תוחיטבה ךירדמ תא רומש
בושח
.שומישה ינפל בטיה ארק
ידיתע ןויעל רומש
החוטב הלעפהל תוטיש
הרשכה
הנכה
.תוחיטב
ןוסחאו הקוזחת
תוללוסה זראמל תוחיטב תורהזא
.תוללוסה זראמ וא תוללוסה תא סורגל וא חותפל ,קרפל ןיא )א
תוללוס יזראמ ןסחאל ןיא .תוללוסה זראמ תא רצקל ןיא )ב
רצקל םילולע םה הבש הריגמב וא הספוקב ןכוסמ ןפואב
.םתוא רצקל םילולע םיכילומ םירמוחש וא הז תא הז
ןוסחאמ ענמיה .שאל וא םוחל תוללוסה זראמ תא ףושחל ןיא )ג
.רישי שמש רואל ףושח םוקמב
.תוללוסה זראמב תיזיפ העיגפ עונמל שי )ד
םע םילזונה לש עגמ רשפאל ןיא ,הללוס תפילד לש הרקמב )ה
רוזאה תא ףוטשל שי ,עגמ לש הרקמב .םייניעה וא רועה
.יאופר לופיטל תונפלו םימ לש תולודג תויומכב עוגנה
וא הללוס תעילב לש הרקמב יאופר לופיטל דימ תונפל שי )ו
.תוללוס זראמ
.שביו יקנ תוללוסה זראמ תא רומשל שי )ז
תילטמב םתוקנל שי ,םיכלכלתמ תוללוסה זראמ יקדה םא )ח
.הייקנו השבי
דיפקהל שי .שומישה ינפל תוללוסה זראמ תא ןועטל שי )ט
.ןוכנה הניעטה ךילהב שמתשהלו הלא תוארוה לע דימת
וניא רשאכ הניעטב תוללוסה זראמ תא ריאשהל ןיא )י
.שומישב
ןועטל ךרוצ היהיש ןכתיי ,ןוסחא לש תוכשוממ תופוקת רחאל )אי
םיעוציב תגשהל םימעפ המכ תוללוסה זראמ תא קורפלו
.םייברמ
לעופ אוה רשאכ םייבטימ םיעוציב קפסמ תוללוסה זראמ )בי
.)20°C ± 5°C( הליגרה רדחה תרוטרפמטב
יזראמ הזמ הז דירפהל שי ,תוללוס יזראמ לש הכלשה תעב )גי
.תונוש תוימיכ-ורטקלא תוטישב םילעופה תוללוס
ידי-לע ןיוצמה ןעטמה תועצמאב קר שדחמ ןועטל שי )די
קפוסמה ןעטמה דבלמ ןעטמ םושב שמתשהל ןיא .WORX
.דויצה םע שומישל דחוימב
.דויצה םע שומישל דעונ אלש תוללוס זראמב שמתשהל ןיא )וט
.םידלי לש םדי גשיהמ תוללוסה זראמ תא קיחרהל שי )זט
.דיתעב ןויעל םיירוקמה רצומה יכמסמ תא רומשל שי )זי
.שומישב וניא רשאכ דויצהמ הללוסה תא איצוהל שי )חי
.הכלהכ ךילשהל שי )טי
םינוש גוס וא לדוג ,תלוביק ,רוציי לש תוללוס בברעל ןיא )כ
.ןקתהב
דע תירוקמה ותזיראהמ תוללוסה זראמ תא ריסת לא )אכ
.שרדייש
ידכ הללוסה לע )-( סונימו )+( סולפ םינמיסל בל םיש )בכ
.ןוכנ שומיש חיטבהל

www.worx.com
Copyright © 2019, Positec. All Rights Reserved.
AR01417400
Other manuals for WG163E
5
This manual suits for next models
3
Table of contents
Languages:
Other Worx Trimmer manuals

Worx
Worx WG259E Installation manual

Worx
Worx WG259E User manual

Worx
Worx WG169E.5 User manual

Worx
Worx WG112 User manual

Worx
Worx WG150 User manual

Worx
Worx WG154E User manual

Worx
Worx WG101E User manual

Worx
Worx WG156 9 Series User manual

Worx
Worx WG118E Installation manual

Worx
Worx WG286E Installation manual