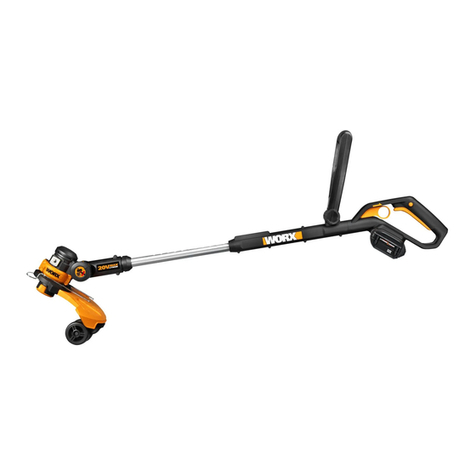
Worx WG169E User manual

WG169E WG169E.1 WG169E.2
WG169E.5 WG169E.9
3 in 1: Trimmer / Edger / Mini mower
3 in 1: Trimmer / Kantenschneider / Mini-Mäher
3 en 1: Taille-haies / Taille-bordures / Mini tondeuse
3 in 1: Potatrice / Tagliabordi / Mini-tosaerba
3 en 1: desbrozadora / cortabordes / minicortacésped
3-in-1: Trimmer / Snoeimes / Minimaaier
3 w 1: trymer / krawedziarka / mini kosiarka
3 az 1-ben: Nyesőgép / Szegélyvágó / Mini fűnyíró
3 în 1: Trimmer / Maşină de bordurare / Minicositoare de iarbă
3 in 1: Střihací nůžky / Zarovnávač / Mini sekačka
3 in 1: Strihacie nožnice / Zarovnávač / Mini kosačka
3 em 1: Cortador / Flanqueador / Mini cortador de relva
3 i 1: Trimmer / Kantskärare / Mini-gräsklippare
3 v 1: Rezalnik / robni rezalnik / mini kosilnica
P09
P18
P27
P36
P45
P54
P63
P72
P81
P90
P99
P108
P117
P126
EN
D
F
I
ES
NL
PL
HU
RO
CZ
SK
PT
SV
SL

Original instructions EN
Übersetzung der Originalanleitung D
Traduction des instructions initiales F
Traduzione delle istruzioni originali I
Traducción de las instrucciones originales ES
Vertaling van de oorspronkelijke instructies NL
Tłumaczenie oryginalnych instrukcji PL
Eredeti használati utasítás fordítása HU
Traducerea instrucţiunilor iniţiale RO
Překlad původních pokynů CZ
Preklad pôvodných pokynov SK
Tradução das instruções originais PT
Översättning av originalinstruktionerna SV
Prevod izvirna navodila SL

4
6
7910
2
1
5
8
3
14
15
13
12
11

a
b
C D
A B1
B3
B2

910
15
14
11
16
E F1
G H
F2 F3

2
1
2
1
K1
I J1
K2 L
J2

2
1
2
1
17
M N1
N2 O
P Q1

18
20
22
21
19
Q2 Q3
R1 R2
R3 R4

9
3 in 1: Trimmer / Edger / Mini mower EN
1. REAR HANDLE
2. BATTERY PACK
3. TELESCOPIC SHAFT
4. PIVOT HEAD LOCKING KNOB
5. SAFETY GUARD
6. FLOWER GUARD/EDGE GUIDE
7. AUXILIARY HANDLE
8.
TELESCOPIC SHAFT ADJUSTMENT TRIGGER
9. LOCK OFF BUTTON
10. ON/OFF SWITCH
11. AUXILIARY HANDLE LOCKING LEVER
12. EDGE /TRIMMING SUPPORT WHEELS
13. LINE CUTTER
14. LOWER SHAFT COUPLING
15. UPPER SHAFT
16. MOTOR HOUSING OF TRIMMER HEAD (See Fig. H)
17. LINE FEED BUTTON (See Fig. P)
18. SPOOL CAP COVER (See Fig. Q2)
19. CAP RELEASE LATCH (See Fig. Q2)
20. SPOOL (See Fig. Q2)
21. CUTTING HEAD (See Fig. Q2)
22. EYELET (See Fig. Q2)
Not all the accessories illustrated or described are included in standard delivery.
TECHNICAL DATA
Type WG169E WG169E.1 WG169E.2 WG169E.5 WG169E.9 (1-designation of machinery,
representative of Grass Trimmer)
WG169E WG169E.1 WG169E.2 WG169E.5 WG169E.9
Voltage 20V Max*
No load speed 7600/min
Cutting diameter 30cm
Line diameter 1.65mm
Charging time 5hr 1hr /
Machine weight 2.6kg 2.2kg
*Voltage measured without workload. Initial battery voltage reaches Maximum of 20volts. Nominal voltage is
18volts.

10
3 in 1: Trimmer / Edger / Mini mower EN
NOISE DATA
A weighted sound pressure LpA = 78dB(A)
KpA 3.0dB(A)
A weighted sound power LwA = 94dB(A)
Wear ear protection
VIBRATION INFORMATION
Typical weighted vibration ah= 2.8m/s²
Uncertainty K = 1.5m/s²
The declared vibration total value may be used for comparing one tool with another, and may also be used in a
preliminary assessment of exposure.
WARNING! The vibration emission value during actual use of the power tool can differ from the declared
value depending on the ways in which the tool is used dependant on the following examples and other
variations on how the tool is used:
How the tool is used and the materials being cut or drilled.
The tool being in good condition and well maintained.
The use the correct accessory for the tool and ensuring it is sharp and in good condition.
The tightness of the grip on the handles and if any anti vibration accessories are used.
And the tool is being used as intended by its design and these instructions.
This tool may cause hand-arm vibration syndrome if its use is not adequately managed.
WARNING! To be accurate, an estimation of exposure level in the actual conditions of use should also
take account of all parts of the operating cycle such as the times when the tool is switched off and when it is
running idle but not actually doing the job.This may significantly reduce the exposure level over the total working
period.
Helping to minimize your vibration exposure risk.
ALWAYS use sharp chisels, drills and blades.
Maintain this tool in accordance with these instructions and keep well lubricated (where appropriate).
If the tool is to be used regularly then invest in anti vibration accessories.
Avoid using tools in temperatures of 10ºC or less.
Plan your work schedule to spread any high vibration tool use across a number of days.
ACCESSORIES
WG169E WG169E.1 WG169E.2 WG169E.5 WG169E.9
Charger 1 (WA3760) 1 (WA3760) 1(WA3760) 1 (WA3860) /
Battery Pack 1 (WA3551.1) 1 (WA3551.1) 2 (WA3551.1) 1 (WA3551.1) /
Edge/Trimming Support Wheel 11111
Spool 1 (WA0004) 2 (WA0004) 1(WA0004) 1 (WA0004) 1 (WA0004)
Safety Guard 1 1 1 1 1

11
3 in 1: Trimmer / Edger / Mini mower EN
We recommend that you purchase genuine
accessories listed in the above list from the same
store that sold you the tool. Refer to the accessory
packaging for further details. Store personnel can
assist you and offer advice.
PRODUCT SAFETY
GENERAL SAFETY
WARNINGS
WARNING: Read all
safety warnings and all
instructions. Failure to follow the
warnings and instructions may
result in electric shock, fire and/or
serious injury.
Save all warnings and
instructions for future
reference.
The appliance is only to be used
with the power supply unit
provided with the appliance.
IMPORTANT
READ CAREFULLY BEFORE
USE
KEEP FOR FUTURE
REFERENCE
SAFE OPERATING PRACTICES
1. TRAINING
a) Read the instructions carefully.
Be familiar with the controls
and the correct use of the
machine.
b) Never allow children, persons
with reduced physical, sensory
or mental capabilities or lack
of experience and knowledge
or people unfamiliar with
these instructions to use the
machine, local regulations may
restrict the age of the operator.
c) Keep in mind that the operator
or user is responsible for
accidents or hazards occurring
to other people or their
property.
2. PREPARATION
a) Before use, always visually
inspect the machine for
damaged, missing or
misplaced guards or shields.
b) Never operate the machine
while people, especially
children, or pets are nearby.
3. OPERATION
a) Wear eye protection, long
trousers and stout shoes at
all times while operating the
machine.
b) Avoid using the machine
in bad weather conditions
especially when there is a risk
of lightning.
c) Use the machine only in
daylight or good artificial light.
d) Never operate the machine
with damaged guards or
shields or without guards or
shields in place.
e) Switch on the motor only when
the hands and feet are away
from the cutting means.
f) Always disconnect the machine
from the power supply (e.g.
remove the battery pack from
the machine)
1) whenever the machine is left
unattended;
2) before clearing a blockage;
3) before checking, cleaning or

12
3 in 1: Trimmer / Edger / Mini mower EN
working on the machine;
4) after striking a foreign object;
5) whenever the machine starts
vibrating abnormally.
g) Take care against injury to feet
and hands from the cutting
means. h) Always ensure that
the ventilation openings are
kept clear of debris.
i) Never fit metal cutting
elements.
j) Always be sure of your footing
on slopes.
k) Walk, never run.
l) Not overreach and keep the
balance at all times.
m) Not to touch moving hazardous
parts before removing the
battery pack from the machine
and the moving hazardous
parts have come to a complete
stop.
4. MAINTENANCE AND
STORAGE
a) Disconnect the machine from
the power supply (e.g. remove
the battery pack from the
machine) before carrying out
maintenance or cleaning work.
b) Use only the manufacturer’s
recommended replacement
parts and accessories.
c) Inspect and maintain the
machine regularly. Have the
machine repaired only by an
authorized repairer.
d) When not in use, store the
machine out of the reach of
children.
SAFETY WARNINGS FOR
BATTERY PACK
a) Do not dismantle, open or
shred cells or battery pack.
b) Do not short-circuit a
battery pack. Do not store
battery packs haphazardly
in a box or drawer where
they may short-circuit each
other or be short-circuited
by conductive materials.
When battery pack is not in
use, keep it away from other
metal objects, like paper clips,
coins, keys, nails, screws or
other small metal objects,
that can make a connection
from one terminal to another.
Shorting the battery terminals
together may cause burns or a
fire.
c) Do not expose battery
pack to heat or fire. Avoid
storage in direct sunlight.
d) Do not subject battery pack
to mechanical shock.
e) In the event of battery
leaking, do not allow the
liquid to come into contact
with the skin or eyes. If
contact has been made,
wash the affected area with
copious amounts of water
and seek medical advice.
f) Seek medical advice
immediately if a cell or
battery pack has been
swallowed.
g) Keep battery pack clean
and dry.
h) Wipe the battery pack

13
3 in 1: Trimmer / Edger / Mini mower EN
terminals with a clean dry
cloth if they become dirty.
i) Battery pack needs to be
charged before use. Always
refer to this instruction and
use the correct charging
procedure.
j)
Do not maintain battery pack
on charge when not in use.
k) After extended periods
of storage, it may be
necessary to charge and
discharge the battery pack
several times to obtain
maximum performance.
l) Battery pack gives its best
performance when it is
operated at normal room
temperature (20°C ± 5°C).
m) When disposing of battery
packs, keep battery packs
of different electrochemical
systems separate from
each other.
n) Recharge only with the
charger specified by
WORX. Do not use any
charger other than that
specifically provided for
use with the equipment. A
charger that is suitable for one
type of battery pack may create
a risk of fire when used with
another battery pack.
o) Do not use any battery
pack which is not designed
for use with the equipment.
p) Keep battery pack out of
the reach of children.
q) Retain the original product
literature for future
reference.
r) Remove the battery from
the equipment when not in
use.
s) Dispose of properly.
SYMBOL
Read operator’s manual
Do not expose to rain or water
Do not burn
Wear eye and ear protection
Keep bystanders away
Do not expose to rain
Waste electrical products
must not be disposed of with
household waste. Please recycle
where facilities exist. Check with
your local authorities or retailer
for recycling advice.
Edging
Trimming

14
3 in 1: Trimmer / Edger / Mini mower EN
Make sure the battery is removed
prior to changing accessories.
Lock
Unlock
Do not dispose of batteries,
Return exhausted batteries to
your local collection or recycling
point.
xINR18/65-y: Cylindrical lithium Ion battery
cells with max diameter of 18mm and max height
of 65mm; “x” represents a number cells serial
connected, blank if 1; “-y” represents a number of
cells paralleled connected, blank if 1.
ASSEMBLY AND OPERATION
NOTE: Before using the tool, read the
instruction book carefully.
Intended Use
The machine is intended for the cutting of grass and
weeds under bushes, as well as on slopes and edges
that can not be reached with the lawn mower.
WARNING!The charger and battery pack are
specially designed to work together so do not
attempt to use any other devices. Never insert or
allow metallic objects into your charger or battery
pack connections because of an electrical failure and
hazard will occur.
WARNING! Always wear the eye protection.
Never lean over the trimmer head. Rocks or
debris can ricochet or be thrown into eyes and face
and cause blindness or other serious injury. When
operating unit, check for the following:
Wear eye protection and heavy clothing. Hold front
handle with one hand and auxiliary handle with
the other hand. Keep unit below waist level. Work
only from your right to your left to ensure debris is
thrown away from you. Without bending over, keep
line near and parallel to the ground (perpendicular
when edging) and not crowded into material being
cut.
WARNING! Make sure that line is fed out
before operation. Make sure motor is up
to full speed before trimming or edging.
WARNING! Only use 1.65mm diameter
cutting line. Other sizes of line will not feed
properly and will result in improper cutting head
function or can cause serious injury. Do not use other
material such as wire, string, rope, etc. Wire can
break off during cutting and become a dangerous
projectile that can cause serious injury.
Action Figure
Assembly
Assembling the Safety Guard See Fig. A
Mounting the Edger Wheel
WARNING: Make Sure
the Safety Switch
is Locked Off to Prevent
Accidental Starting.
See Fig. B1, B2,
B3
Installing and Removing the
Battery Pack See Fig. C
Charging the battery pack
More details can be found in
charger’s manual See Fig. D
Operation
Safety ON/OFF Switch
WARNING! The cutting
head continues to rotate
after the trimmer has been
switched off; wait until it has
completely stopped then lay down
the tool.
See Fig. E
Trimming
- Adjusting the Shaft
WARNING!Make Sure the
Safety Switch is Locked Off
to Prevent Accidental Starting.
See Fig. F1,
F2, F3
- Adjusting the Auxiliary handle See Fig. G
-Trimming See Fig. H
- Using the Flower Guard See Fig. I
Edging
- Changing the tool into the
Edging mode See Fig. J1, J2
- Adjusting the Shaft See Fig. K1, K2
- Adjust the edge guide See Fig. L

15
3 in 1: Trimmer / Edger / Mini mower EN
- Edging See Fig. M
Mowing
- Adjusting the wheel
Position 1: Using the guide wheels
when trimming Side to Side(See
Fig. N1).
Position 2: Using the guide wheels
when trimming in a forward or
reverse direction.(See Fig. N2)
See Fig. N1, N2
- Mowing See Fig. O
Manually feeding the line See Fig. P
Replacing the trimmer Spool See Fig. Q1, Q2,
Q3
Manually winding the line See Fig. R1, R2,
R3, R4
MAINTENANCE
After use, disconnect the battery from the tool
and check for damage.
Your power tool requires no additional lubrication
or maintenance.There are no user serviceable parts
in your power tool. Never use water or chemical
cleaners to clean your power tool. Wipe clean with a
dry cloth. Always store your power tool in a dry room
temperature location. Keep the motor ventilation
slots clean. Keep all working controls free of dust.
ENVIRONMENTAL
PROTECTION
Waste electrical products must not be disposed
of with household waste. Please recycle where
facilities exist. Check with your local authorities
or retailer for recycling advice.

16
3 in 1: Trimmer / Edger / Mini mower EN
TROUBLESHOOTING
The following table gives problems and actions that you can perform if your machine does not operate
correctly.
WARNING: Switch the machine off and remove the battery prior to any troubleshooting.
Problems Possible Causes Corrective Action
Trimmer fails to
operate. Battery discharged.
Battery too hot/cold.
Motor is broken.
Internal wiring of machine damaged.
Recharge battery; also see “HOWTO
CHARGEYOUR BATTERY “.
Allow to cool/warm.
Contact Service Agent.
Trimmer runs
intermittently. Motor is broken.
Battery not fully charged.
On/Off switch defective.
Contact Service Agent.
Recharge battery.
Contact Service Agent.
Excessive vibrations/
noise. Machine defective.
Line spool is not wound well. Contact Service Agent.
Rewind the line. See ’’To fit spool and
line assembly.’’
Cutting time per
battery charge too
short.
Battery has not been used for long
period or only charged for short term.
Grass too high.
Battery defective.
Fully charge battery; also see
“HOWTO CHARGEYOUR BATTERY “.
Cut in stages.
Replace the battery.
Machine does not cut. Line broken.
Battery not fully charged.
Motor is broken (speed is too low).
Grass entangled around cutting head.
Replace the line.
Recharge battery; also see “HOWTO
CHARGEYOUR BATTERY “.
Contact Service Agent.
Remove grass.
Continuous lighting
of the battery charge
indicator.No charging
procedure possible.
Battery not (properly) inserted.
Battery contacts contaminated.
Battery defective.
Properly insert battery into battery
charger.
Clean the battery contacts or replace
the battery.
Replace the battery.
Battery charge
indicator does not
light up.
Plug of battery charger not plugged in
(properly).
Socket outlet, mains cable or battery
charger defective.
Insert mains plug (fully) into the
socket outlet.
Check the mains voltage; have
the battery charger checked by an
authorized after-sales service agent.
Auto feed does not
work Cutting line is not wound well.
The line is tangled.
Line is used up.
Manually feed the line, if still can not
feed out, remove the Spool out and
rewind the line.
Replace with a new spool of line.

17
3 in 1: Trimmer / Edger / Mini mower EN
DECLARATION OF
CONFORMITY
We,
POSITEC Germany GmbH
Konrad-Adenauer-Ufer 37
50668 Köln
Declare that the product,
Description 3 in 1 Grass Trimmer/Edger/Mini
Mower
Type WG169E WG169E.1 WG169E.2 WG169E.5
WG169E.9 (1-designation of machinery,
representative of Grass Trimmer)
Function Cutting grass and similar soft
vegetation and for trimming grass edges
Complies with the following Directives,
2006/42/EC, 2014/30/EU, 2011/65/EU,
2000/14/EC amended by 2005/88/EC
2000/14/EC amended by 2005/88/EC:
- Conformity Assessment Procedure as per
Annex VI
- Measured Sound Power Level 90.91dB(A)
- Declared Guaranteed Sound Power Level
94dB(A)
-The notified body involved
Name: Intertek Testing & Certification Ltd
(notified body 0359)
Address: Davy Avenue, Knowlhill, Milton
Keynes, MK5 8NL
Standards conform to:
EN 60335-1
EN 50636-2-91
EN 62233
EN ISO 3744
EN 55014-1
EN 55014-2
The person authorized to compile the technical file,
Name: Russell Nicholson
Address: Positec Power Tools (Europe)Ltd,
PO Box 6242, Newbury, RG14 9LT, UK
Suzhou 2016/07/06
Allen Ding
Deputy Chief Engineer,Testing & Certification

3 in 1: Trimmer / Kantenschneider / Mini-Mäher
D
18
1. HANDGRIFF HINTEN
2. AKKU
3. TELESKOPSCHAFT
4. VERRIEGELUNGSKNOPF DES SCHWENKKOPFES
5. SICHERHEITSSCHUTZ
6. BLUMENSCHUTZ/KANTENFÜHRER
7. ZUSATZHANDGRIFF
8. EINSTELLHEBEL TELESKOPSCHAFT
9. EINSCHALTSPERRE
10. EIN/AUS-SCHALTER
11. FESTSTELLHEBEL ZUSATZHANDGRIFF
12. STÜTZRÄDER ZUM KANTENSCHNEIDEN/TRIMMEN
13. SCHNEIDFADEN
14. KUPPLUNG FÜR UNTEREN SCHAFT
15. OBERE ACHSE
16. MOTORGEHÄUSE DES TRIMMKOPFES (Siehe Abb H)
17. FADENZUFUHRKNOPF (Siehe Abb P)
18 SPULENKAPPENABDECKUNG (Siehe Abb Q2)
19 KAPPENENTRIEGELUNG (Siehe Abb Q2)
20. SPULE (Siehe Abb Q2)
21. SCHNEIDKOPF (Siehe Abb Q2)
22. ÖSE (Siehe Abb Q2)
Abgebildetes oder beschriebenes Zubehör gehört teilweise nicht zum Lieferumfang.
KOMPONENTEN
Typ WG169E WG169E.1 WG169E.2 WG169E.5 WG169E.9 (1- Bezeichnung der Maschine,
Repräsentant Rasentrimmer)
WG169E WG169E.1 WG169E.2 WG169E.5 WG169E.9
Nennspannung 20V Max*
Leerlaufnenndrehzahl 7600/min
Fadenlänge 30cm
Fadenstärke 1.65mm
Ladezeit Ca. 5 stunden
Ca. 1 stunden
/
Gewicht 2.6kg 2.2kg
*
Spannung ohne Arbeitslast gemessen. Anfangsakkuspannung erreicht maximal 20 Volt. Nennspannung ist 18 Volt.

3 in 1: Trimmer / Kantenschneider / Mini-Mäher
D
19
LÄRMPEGEL UND VIBRATIONEN
Gewichteter Schalldruck LpA = 78dB(A)
KpA 3.0dB(A)
Gewichtete Schallleistung LwA = 94dB(A)
Tragen Sie Gehörschutz.
INFORMATIONEN ÜBER VIBRATIONEN
Typischer gewichteter Vibrationswert ah= 2.8m/s²
Unsicherheit K = 1.5m/s²
Der angegebene Gesamtvibrationswert kann zum Vergleich eines Werkzeugs mit einem anderen und auch zur
vorläufigen Expositionsbewertung verwendet werden.
WARNUNG: Der Vibrationsemissionswert während des tatsächlichen Gebrauchs des Elektrowerkzeugs
kann vom angegebenen Wert abweichen, je nachdem, wie dasWerkzeug gemäß folgender Beispiele und
anderweitiger Verwendungsmöglichkeiten eingesetzt wird:
Die Verwendung des Werkzeugs und die Art, wie die Materialien geschnitten oder angebohrt werden.
Das Werkzeug ist in gutem Zustand und gut gepflegt
Verwendung des richtigen Zubehörs für das Werkzeug und Gewährleistung seiner Schärfe und seines guten Zustands.
Die Festigkeit der Handgriffe und ob Antivibrationszubehör verwendet wird.
Und ob das verwendete Werkzeug dem Design und diesen Anweisungen entsprechend verwendet wird.
Wird dieses Werkzeug nicht anemessen gehandhabt, kann es ein Hand-Arm-Vibrationssyndrom erzeugen
WARNUNG: Um genau zu sein, sollte ein Abschätzung des Belastungsgrades aller Arbeitsabschnitte
während tatsächlicherVerwendung berücksichtigt werden, z.B. die Zeiten, wenn dasWerkzeug ausgeschaltet
ist, und wenn es sich im Leerlauf befindet und eigentlich nicht eingesetzt wird. Auf dieseWeise kann der
Belastungsgrad während der gesamten Arbeitszeit wesentlich gemindert werden.
Minimieren Sie Ihr Risiko, dem Sie bei Vibrationen ausgesetzt sind.
Verwenden Sie IMMER scharfe Meißel, Bohrer und Sägeblätter.
Pflegen Sie dieses Werkzeug diesen Anweisungen entsprechend und achten Sie auf eine gute Einfettung (wo erforderlich).
Bei regelmäßiger Verwendung dieses Werkzeugs sollten Sie in Antivibrationszubehör investieren.
Vermeiden Sie den Einsatz von Werkzeugen beiTemperaturen von 10ºC oder darunter.
Machen Sie einen Arbeitsplan, um dieVerwendung von hochvibrierenden Werkzeugen auf mehrereTage zu verteilen.
ZUBEHÖRTEILE
WG169E WG169E.1 WG169E.2 WG169E.5 WG169E.9
Ladegerät 1 (WA3760) 1 (WA3760) 1(WA3760) 1 (WA3860) /
Akku 1 (WA3551.1) 1 (WA3551.1) 2 (WA3551.1) 1 (WA3551.1) /
Stützräder zum Kantenschneiden/
Trimmen 11111
Spule 1 (WA0004) 2 (WA0004) 1(WA0004) 1 (WA0004) 1 (WA0004)
Sicherheitsschutz 1 1 1 1 1

3 in 1: Trimmer / Kantenschneider / Mini-Mäher
D
20
Wir empfehlen Ihnen, sämtliche Zubehörteile beim
selben Fachhändler zu beziehen, bei dem Sie auch
Ihr Elektrowerkzeug gekauft haben. Die Güteklasse
muss entsprechend der Anwendung gewählt werden.
Weitere Informationen finden Sie auf derVerpackung
der Zubehörteile. Auch Ihr Fachhändler berät Sie gerne.
PRODUKTSICHERHEIT
ALLGEMEINE
SICHERHEITSHINWEISE
WARNUNG: Lesen Sie
alle Sicherheitshinweise
und Anweisungen.
Versäumnisse bei der Einhaltung
der Sicherheitshinweise
und Anweisungen können
elektrischen Schlag, Brand und/
oder schwere Verletzungen
verursachen.
Bewahren Sie alle
Sicherheitshinweise und
Anweisungen für die Zukunft
auf.
Das Gerät darf nur mit dem
mitgelieferten Netzteil verwendet
werden.
WICHTIG
VOR GEBRAUCH BITTE
GENAU DURCHLESEN
FÜR SPÄTERE BEZUGNAHME
AUFBEWAHREN
SICHERE
ARBEITSVERFAHREN
1. TRAINING
a) Die Anweisungen aufmerksam
durchlesen. Machen Sie sich
mit den Bedienelementen
und dem vorschriftsmäßigen
Gebrauch dieses Gerät
vertraut.
b) Lassen Sie niemals Kinder,
Personen mit eingeschränkten
physischen, sensorischen oder
mentalen Fähigkeiten und
Erfahrung oder Personen, die
nicht mit diesen Anweisungen
vertraut sind, die Maschine
bedienen. Lokale Vorschriften
können das Alter des Bedieners
einschränken.
c) Die Bedienperson bzw. der
Benutzer ist für Unfälle oder
Schäden an anderen Menschen
oder deren Eigentum
verantwortlich.
2. VORBEREITUNG
a) Bevor Sie die Maschine
verwenden, untersuchen
Sie diese stets auf sichtbare
Schäden, fehlende oder falsch
platzierte Abdeckungen oder
Schutzschilde.
b) Benutzen Sie die Maschine
niemals während sich
Personen, insbesondere
Kinder, oderTiere in
unmittelbarer Nähe aufhalten.
3. BETRIEB
a) Tragen Sie beim Betrieb der
Maschine stets Augenschutz,
lange Hosen und festes
Schuhwerk.
b) Vermeiden Sie die Nutzung
der Maschine bei schlechtem
Wetter, besonders wenn die
Gefahr eines Blitzschlags
besteht.
c) Verwenden Sie die Maschine
nur beiTageslicht oder gutem
künstlichen Licht.
Other manuals for WG169E
4
This manual suits for next models
4
Table of contents
Languages:
Other Worx Trimmer manuals