X10WirelessTechnology,Inc.LimitedOneYearWarranty
X10.com, a division of X10 Wireless Technology, Inc. (X10) warrants X10
productstobefreefromdefectivematerialandworkmanshipforaperiodofone
(1)yearfromtheoriginaldateofpurchaseatretail.X10agreestorepairorreplace,
atitssolediscretion,adefectiveX10productifreturnedtoX10withinthewarranty
periodandwithproofofpurchase.Ifserviceisrequiredunderthiswarranty:
Forhelpormoreinformationonsetup,pleasevisit:
http://www.x10.com/support
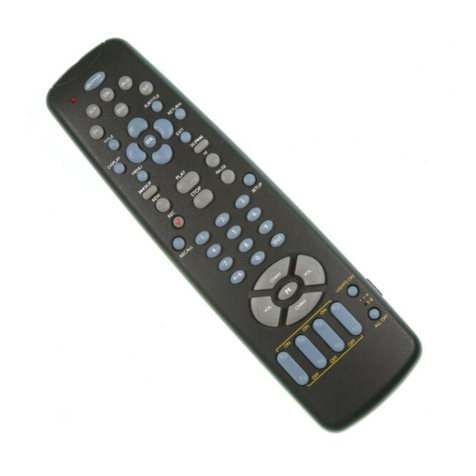
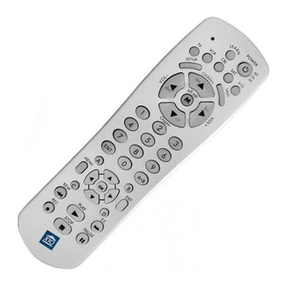
Installation and operating instructions for ScanCam Remote Control
with Camera Scanning Feature, Model CR12A
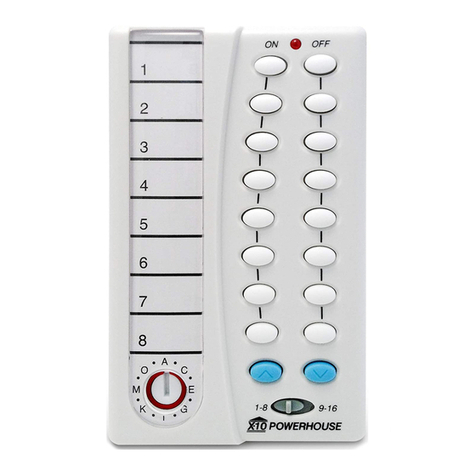
The CR12A Remote Control sends Wireless Radio Frequency (RF) signals to any X10
Transceiver (RR501 or TM751, etc.). The Transceiver then passes the signals onto your
housewiringtocontrollights,appliances,orWirelessCamerasaroundyourhome.Youplug
lights and appliances into X10 Modules (sold separately). You plug Wireless Cameras into
AddressablePowerSupplies(sold separately).TheCR12Aalsoletsyouautomaticallyscan
each of up to 4 Cameras in turn (forward or backward) so as to display the image from each
camera in turn on your TV. When you first insert the batteries in the CR12A it defaults to
control Cameras connected to Addressable Power Supplies that are set to Unit Codes 1, 2,
3, and 4 (the other buttons control regular X10 Modules). You can however set it to control
cameras set to 5, 6, 7, and 8, OR 9, 10, 11, and 12, OR 13, 14, 15, and 16.
1. Install4AAA alkaline batteries(soldseparately)in the CR12A’sbatterycompartment.
2. Use a dime to set the Housecode dial to match the X10 Modules, Camera Power
Supplies, and Transceiver you want to control.
3. Plug in an X10 Transceiver (RR501 or TM751, sold separately).
4. Set the CR12A’s slide switch to 1-8 to control X10 Modules set to Unit Codes 1 thru 8
and/or Camera Power Supplies set to Unit Codes 1 thru 4 OR 5 thru 8.
5. Set the CR12A’s slide switch to 9-16 to control X10 Modules set to Unit Codes 9 thru
16 and/or Camera Power Supplies set to Unit Codes 9 thru 12 OR 13-16.
6. Press the corresponding ON or OFF button to turn X10 Modules or Camera Power
Supplies on and off
7. To control up to 4 Cameras, plug each one into its own Addressable Power Supply. In
the default state the CR12A controls Addressable Power Supplies set to 1 thru 4.
PressinganynumberON(inthatgroup)turnsthatcameraonandtheotherthreecameras
(in the group) off. Then, each press of either the blue UP (or DOWN) button will turn
on the next (or previous) camera in the group while turning the current camera off. (You
set all Cameras to the same channel as the Video Receiver connected to your TV
(Channel A, B, C, D).
8. If you press any number ON or OFF that is NOT in the group (1-4) any X10 Module set
to that code turns on or off. Then if you press the BLUE UP or DOWN buttons, that
Module (set to the number just pressed) brightens or dims (only affects Lamp Modules
and Wall Switch Modules, not Appliance Modules).
CR12A-11/02
9. To change the group of 4 codes for camera control from 1-4 to 5-8: Press (and hold) the
5-ON button then flip the 1-8/9-16 switch to the right and then back to the left.
10. To change the group of 4 codes for camera control to 9-12: Move the slide switch to 9-
16. Press (and hold) the 9-ON button then flip the 1-8/9-16 switch to the left and then
back to the right. Then release the 9-ON button.
11. To change the group of 4 codes for camera control to 13-16: Move the slide switch to
9-16.Press(andhold)the13-ONbuttonthenflipthe1-8/9-16switchtotheleftandthen
back to the right. Then release the 13-ON button.
F.C.C. CAUTION - THIS DEVICE COMPLIES WITH PART 15 OF THE FCC RULES.
OPERATIONISSUBJECTTOTHEFOLLOWINGTWOCONDITIONS:(1)THISDEVICE
MAYNOTCAUSEHARMFULINTERFERENCE,AND(2)THISDEVICEMUSTACCEPT
ANYINTERFERENCERECEIVED,INCLUDINGINTERFERENCETHATMAYCAUSE
UNDESIRED OPERATION. NOTE: NO CHANGES OR MODIFICATIONS MAY BE
MADE TO THE UNITS. ANY CHANGES MADE TO THE UNITS WILL VOID THE
USER'S AUTHORITY TO OPERATE THE EQUIPMENT.
