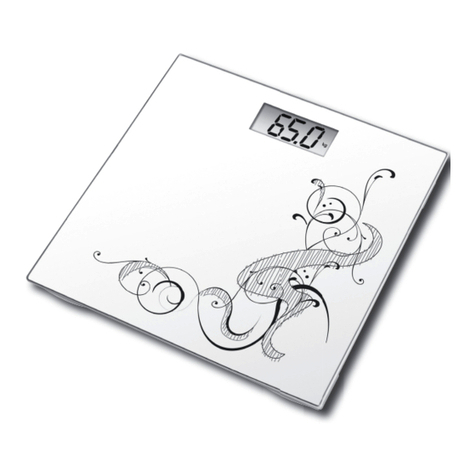
Xavax Picta User manual

00095306man_cs_de_el_en_es_fi_fr_hu_it_nl_pl_pt_ro_ru_sk_sv_tr.indd 2 21.10.13 10:43

00095306man_cs_de_el_en_es_fi_fr_hu_it_nl_pl_pt_ro_ru_sk_sv_tr.indd 3 21.10.13 10:43

00095306man_cs_de_el_en_es_fi_fr_hu_it_nl_pl_pt_ro_ru_sk_sv_tr.indd 4 21.10.13 10:43

00095306man_cs_de_el_en_es_fi_fr_hu_it_nl_pl_pt_ro_ru_sk_sv_tr.indd 5 21.10.13 10:43

00095306man_cs_de_el_en_es_fi_fr_hu_it_nl_pl_pt_ro_ru_sk_sv_tr.indd 2 21.10.13 10:43

3
4. Controls and Displays
• UNIT button: for selecting the units of weight:
kilograms (kg), pounds (lb) or stones (st:lb)
• Time display
5. Getting Started
5.1 Insert the batteries:
• Use a PCS CR2032 coin cell battery.
• To change the battery, open the battery cover
on the back of the device, insert a CR2032
battery with the correct polarity into the battery
compartment. Close the battery compartment fully
Note
• Before using the scales for the first time
or after moving the scales they must be
restarted. Without restarting them, the
measurements could be incorrect.
6. Operation
• Place the scale on a clean and level surface.
• Ensure that the scale is stable.
Weighing:
• The scale switches on automatically when you
step on it. Your body weight flashes on the
display during the weighing process.
• Wait until the displayed weight stops flashing.
Once the weight has stabilised, it is displayed for
another ten seconds.
• The scale then switches off automatically
Error messages
• The error message “Err” is displayed when the
scale is overloaded.
• The message “LO” indicates that the battery
is nearly dead. Replace the battery as soon as
possible.
Note
• To ensure accurate measurements, we
recommend that you weigh yourself at the
same time each day (e.g. in the morning right
after you wake up)
Note
• When the weight displayed by the scales
seems to be incorrect, check that the contact
between battery and the contacts is in proper
working order. If you haven’t used the scales
in a long time, change the battery and try
again
7. Setting the time
To set the time, remove the battery briefly and then
reinsert it. Once you have inserted the battery in the
scales, the time flashes “12:00” in the display. You
can now set the correct time using the “kg/lb/st”
button on the back of the scales. Press the button
repeatedly to set the hour to the correct time. Once
you have reached the correct hour, press and hold
the button for approximately 5 seconds to confirm.
At this point the minutes will begin flashing. Press
the button again to set the minutes to the correct
time and then press and hold for approximately
5 seconds to confirm. The time is continuously
displayed in standby mode.
8. Integrated picture frame
A picture frame is integrated into the surface of
the scales. The insert can be removed and replaced
with your own photos, drawings, collages, etc.
Open the plastic cover on the back of the scales by
pulling the two clips upwards. You can then remove
the plastic cover and replace the insert. Insert size:
up to 24.50 cm x 19.50 cm
00095306man_cs_de_el_en_es_fi_fr_hu_it_nl_pl_pt_ro_ru_sk_sv_tr.indd 3 21.10.13 10:43
00095306man_cs_de_el_en_es_fi_fr_hu_it_nl_pl_pt_ro_ru_sk_sv_tr.indd 4 21.10.13 10:43

5
DBedienungsanleitung
Inhalt
Erklärung von Warnsymbolen und Hinweisen ......5
Packungsinhalt ....................................................5
Sicherheitshinweise .............................................5
Bedienungselemente ...........................................6
Inbetriebnahme...................................................6
Betrieb.................................................................6
Wartung und Pflege............................................. 7
Gewährleistungsausschluß...................................7
Service und Support............................................. 7
Technische Daten................................................. 7
Vielen Dank, dass Sie sich für ein Xavax Produkt
entschieden haben! Nehmen Sie sich Zeit und lesen
Sie die folgenden Anweisungen und Hinweise
zunächst ganz durch. Bewahren Sie diese
Bedienungsanleitung anschließend an einem
sicheren Ort auf, um bei Bedarf darin nachschlagen
zu können.
1. Erklärung von Warnsymbolen und Hinweisen
Warnung
• Wird verwendet, um Sicherheitshinweise zu
kennzeichnen oder um Aufmerksamkeit auf
besondere Gefahren und Risiken zu lenken.
Hinweis
• Wird verwendet, um zusätzlich Informationen
oder wichtige Hinweise zu kennzeichnen.
Gefahr eines elektrischen Schlages
• Dieses Symbol weist auf eine
Berührungsgefahr mit nicht isolierten Teilen
des Produktes hin, die möglicherweise eine
gefährliche Spannung von solcher Höhe
führen, dass die Gefahr eines elektrischen
Schlags besteht.
2. Packungsinhalt
• Personenwaage „Picta”
• 1 Fotoeinleger
• 1 Knopfzelle CR2032
• Informationsblatt zur Entsorgung
• diese Bedienungsanleitung
3. Sicherheitshinweise
• Das Produkt ist für den privaten, nicht-
gewerblichen Haushaltsgebrauch vorgesehen.
• Schützen Sie das Produkt vor Schmutz,
Feuchtigkeit und Überhitzung und verwenden Sie
es nur in trockenen Räumen.
• Lassen Sie das Produkt nicht fallen und setzen Sie
es keinen heftigen Erschütterungen aus.
• Betreiben Sie das Produkt nicht außerhalb
seiner in den technischen Daten angegebenen
Leistungsgrenzen.
• Öffnen Sie das Produkt nicht und betreiben Sie es
bei Beschädigungen nicht weiter.
• Halten Sie Kinder unbedingt von dem
Verpackungsmaterial fern, es besteht
Erstickungsgefahr.
• Entsorgen Sie das Verpackungsmaterial
sofort gemäß den örtlich gültigen
Entsorgungsvorschriften.
• Nehmen Sie keine Veränderungen am
Gerät vor. Dadurch verlieren sie jegliche
Gewährleistungsansprüche.
00095306man_cs_de_el_en_es_fi_fr_hu_it_nl_pl_pt_ro_ru_sk_sv_tr.indd 5 21.10.13 10:43

00095306man_cs_de_el_en_es_fi_fr_hu_it_nl_pl_pt_ro_ru_sk_sv_tr.indd 6 21.10.13 10:43

7
7. Uhrzeit einstellen
Um die Uhrzeit einzustellen, muss die Batterie kurz
entnommen und wieder eingelegt werden. Sobald
Sie die Batterien wieder in die Waage einlegen,
blinkt die Uhrzeit „12:00“ im Display. Mit der
Taste „kg/lb/st“ auf der Rückseite können Sie nun
die richtige Uhrzeit einstellen. Durch Drücken der
Taste erhöhen sich die Stunden. Ist die richtige
Stunde erreicht, halten Sie zum Bestätigen der
Stunden die Taste so lange gedrückt (ca. 5 Sek.)
bis die Minuten anfangen zu blinken. Bitte wieder
durch mehrfaches Drücken die Minuten einstellen
und durch längeres Gedrückhalten (ca. 5 Sek.)
bestätigen. Die Uhrzeit wird im Standby-Betrieb
konstant im Display angezeigt.
8. Funktion des integrierten Bilderrahmens
In der Wiegefläche der Waage ist ein Bilderrahmen
integriert. Der Einleger kann gegen eigene
Vorlagen wie Fotos, Zeichnungen, Collagen etc.
ausgetauscht werden.
Öffnen Sie dazu die Plastikabdeckung auf der
Rückseite, indem Sie die zwei Laschen fest nach
oben ziehen. Dann können Sie die Abdeckung ganz
einfach entfernen und den Einleger austauschen.
Vorlagengröße: maximal 24,50 cm x 19,50 cm
9. Wartung und Pflege
Reinigen Sie dieses Produkt nur mit einem
fusselfreien, leicht feuchten Tuch und verwenden
Sie keine aggressiven Reiniger. Achten sie darauf,
dass kein Wasser in die Waage eindringt.
10. Gewährleistungsausschluß
Die Hama GmbH & Co. KG übernimmt keinerlei
Haftung oder Gewährleistung für Schäden, die
aus unsachgemäßer Installation, Montage und
unsachgemäßem Gebrauch des Produktes oder
einer Nichtbeachtung der Bedienungsanleitung
und/oder der Sicherheitshinweise resultieren.
11. Service and Support
Bitte wenden Sie sich bei Fragen zum Produkt
gerne an die Hama-Produktberatung.
Hotline: +49 9091 502-115 (Deu/Eng)
Weitere Supportinformationen finden sie hier:
www.xavax.eu
12. Technische Daten
Die hochpräzise Sensortechnik sorgt für hohe
Wiegegenauigkeit und genaue Gewichtskontrolle.
Max. Gewicht 150 kg
Skalenteilung 100 g
Einheit Kilogramm (kg),
Pfund (lb) und
Stone (st:lb)
Anzeige bei niedrigem Batteriestand
und Überlastung
Automatische Abschaltung
Funktionstasten: UNIT (Rückseite)
Uhrzeit-Anzeige
Integrierter Bilderrahmen
Stromversorgung 1 Knopfzelle des
Typs CR2032
00095306man_cs_de_el_en_es_fi_fr_hu_it_nl_pl_pt_ro_ru_sk_sv_tr.indd 7 21.10.13 10:43

00095306man_cs_de_el_en_es_fi_fr_hu_it_nl_pl_pt_ro_ru_sk_sv_tr.indd 8 21.10.13 10:43

9
Avertissement concernant la pile
• Respectez impérativement la polarité de
la pile (marquage + et -) lors de l‘insertion
dans le boîtier; risques d‘écoulement et
d‘explosion de la pile si tel n‘est pas le cas.
• Ne mettez pas la pile en court-circuit.
• Ne tentez pas de recharger la pile.
• Ne jetez pas de piles au feu.
• Conservez les piles hors de portée des enfants
• N‘autorisez pas à des enfants de remplacer
les piles d‘un appareil sans surveillance.
• Retirez la pile de l‘appareil si vous ne comptez
pas utiliser ce dernier pendant un certain temps
4. Éléments de commande et d'affichage
• Touche UNIT : sélection de l‘unité de poids:
kilogramme (kg), livre (lb) ou stone (ST)
• Achage de l‘heure
Remarque
• Il est nécessaire de redémarrer le pèse-
personne avant la première utilisation ou
après un changement d‘emplacement. Des
mesures inexactes sont susceptibles de
survenir si vous ne redémarrez pas l‘appareil.
5. Mise en service
5.1 Insertion de la pile:
• Utilisez une pile bouton de type PCS CR 2032
• Ouvrez le compartiment à pile sur la face arrière
de la balance, puis insérez une pile de type
CR2032 dans le compartiment conformément
à sa polarité. Refermez le couvercle du
compartiment.
Remarque
• Il est nécessaire de redémarrer le pèse-
personne avant la première utilisation ou
après un changement d‘emplacement. Des
mesures inexactes sont susceptibles de
survenir si vous ne redémarrez pas l‘appareil.
6. Fonctionnement
• Placez la balance sur une surface propre et plane.
• Assurez-vous que la balance soit parfaitement
stable.
Pesée:
• La balance s‘allume automatiquement dès que
vous montez sur cette dernière. Votre poids
clignote à l‘écran pendant la procédure de pesée.
• Patientez jusqu‘à ce que l’achage se soit
stabilisé. Votre poids reste aché pendant dix
secondes après la stabilisation de l‘achage.
• La balance s‘éteint ensuite automatiquement.
Messages d‘erreur
• La balance est surchargée si le message d‘erreur
«Err» apparaît à l‘écran.
• La pile de la balance est usée lorsque «LO»
apparaît à l‘écran. Remplacez la pile au plus vite.
Remarque
• Afin de garantir une mesure exacte,
nous vous conseillons de vous peser
quotidiennement au même moment (le matin,
juste après vous être levé(e), par exemple)
Remarque
• Si vous trouvez le résultat de la pesée inexact,
assurez-vous que la pile est correctement
insérée dans le logement et qu‘elle adhère
parfaitement aux contacts. Remplacez les
la pile et refaites un essai si vous n‘avez pas
utilisé la balance pendant un certain temps
00095306man_cs_de_el_en_es_fi_fr_hu_it_nl_pl_pt_ro_ru_sk_sv_tr.indd 9 21.10.13 10:43

00095306man_cs_de_el_en_es_fi_fr_hu_it_nl_pl_pt_ro_ru_sk_sv_tr.indd 10 21.10.13 10:43

11
EInstrucciones de uso
Índice
Explicación de los símbolos de aviso y de las
indicaciones.......................................................11
Contenido del paquete ...................................... 11
Instrucciones de seguridad ................................11
Elementos de manejo e indicadores...................12
Puesta en funcionamiento .................................12
Funcionamiento.................................................12
Mantenimiento y cuidado.................................. 12
Exclusión de responsabilidad............................. 13
Servicio y soporte...............................................13
Datos técnicos...................................................13
Le agradecemos que se haya decidido por un
producto de Xavax. Tómese tiempo y léase primero
las siguientes instrucciones e indicaciones. Después,
guarde estas instrucciones de manejo en un lugar
seguro para poder consultarlas cuando sea necesario.
1. Explicación de los símbolos de aviso y de las
indicaciones
Aviso
• Se utiliza para caracterizar las indicaciones
de seguridad o para llamar la atención sobre
peligros y riesgos especiales.
Nota
• Se utiliza para caracterizar informaciones
adicionales o indicaciones importantes.
Peligro de sufrir una descarga eléctrica
• Este símbolo hace referencia al peligro de
contacto con partes no aisladas del producto
que pueden conducir una tensión peligrosa
de una intensidad tal que puede provocar
una descarga eléctrica.
2. Contenido del paquete
• Báscula personal „Picta”
• 1 soporte para fotos
• 1 pila redonda CR2032
• Hoja de información sobre el desecho
• Estas instrucciones de manejo
3. Instrucciones de seguridad
• El producto es para el uso doméstico privado,
no comercial.
• Proteja el producto de la suciedad, la humedad,
el calor excesivo y utilícelo sólo en recintos secos.
• No deje caer el producto ni lo someta a
sacudidas fuertes.
• No opere el producto fuera de los límites de
potencia indicados en los datos técnicos.
• No abra el producto y no lo siga operando de
presentar deterioros.
• Mantenga el material de embalaje fuera del
alcance de los niños, existe peligro de asfixia.
• Deseche el material de embalaje en conformidad
con las disposiciones locales sobre el desecho
vigentes.
• No realice cambios en el aparato. Esto conllevaría
la pérdida de todos los derechos de la garantía
00095306man_cs_de_el_en_es_fi_fr_hu_it_nl_pl_pt_ro_ru_sk_sv_tr.indd 11 21.10.13 10:43

00095306man_cs_de_el_en_es_fi_fr_hu_it_nl_pl_pt_ro_ru_sk_sv_tr.indd 12 21.10.13 10:43

13
7. Ajustar la hora
• Para ajustar la hora es necesario retirar
brevemente la pila y volver a colocarla. Una vez
colocadas las pilas, la hora, „12:00”, comienza a
parpadear en la pantalla. Ahora puede ajustar la
hora correcta mediante la tecla „kg/lb/st” situada
en la parte posterior. Pulsando la tecla, aumenta
la cifra de las horas. Cuando haya alcanzado la
hora correcta, mantenga pulsada la tecla hasta
que los minutos comiencen a parpadear (tras
aprox. 5 seg.) para confirmar la hora. Repita
el procedimiento para ajustar los minutos,
pulsando la tecla repetidamente y confirmando
la introducción manteniendo pulsada la tecla
(durante aprox. 5 seg.). En el modo standby, la
hora se muestra en la pantalla sin interrupción.
8. Función del marco para fotografías integrado
• En la superficie de pesaje se ha integrado un
marco para fotografías. El soporte intermedio se
puede sustituir por documentos personales como
fotos, dibujos, collages, etc.
• Para ello, abra la cubierta de plástico de la
parte posterior tirando fuertemente de las dos
lengüetas. Ahora puede retirar la cubierta sin
impedimento y sustituir el soporte intermedio.
Dimensiones del documento: máximo 24,50 cm
x 19,50 cm
9. Mantenimiento y cuidado
• Limpie este producto sólo con un paño
ligeramente humedecido que no deje pelusas y
no utilice detergentes agresivos. Asegúrese de
que no entre agua en el interior de la báscula.
10. Exclusión de responsabilidad
Hama GmbH & Co KG no se responsabiliza ni
concede garantía por los daños que surjan por
una instalación, montaje o manejo incorrectos
del producto o por la no observación de las
instrucciones de manejo y/o de las instrucciones
de seguridad.
11. Servicio y soporte
Si tiene que hacer alguna consulta sobre el
producto, diríjase al asesoramiento de productos
Hama.
Línea directa: +49 9091 502-115 (Alemán/Inglés)
Encontrar más información de soporte aquí:
www.xavax.eu
12. Datos técnicos
La técnica de sensores de alta precisión permite
una elevada exactitud de pesaje y un exacto control
del peso
Peso máx, 150 kg
División de la
escala 100 g
Unidades kilogramos (kg),
libras (lb) o stones
(st:lb)
Indicación en caso de carga baja de las
pilas y en caso de sobrecarga
Desconexión automática
Teclas de función: UNIT (lado posterior)
Indicación de la hora
Marco para fotos integrado
Alimentación de
corriente 1 pila redonda del
tipo CR2032
00095306man_cs_de_el_en_es_fi_fr_hu_it_nl_pl_pt_ro_ru_sk_sv_tr.indd 13 21.10.13 10:43
00095306man_cs_de_el_en_es_fi_fr_hu_it_nl_pl_pt_ro_ru_sk_sv_tr.indd 14 21.10.13 10:43

15
4.Органы управления и индикации
• Кнопки на задней панели: Выбор единицы
измерения: килограммы, фунты, стоуны
• Часы
5. Ввод в эксплуатацию
5.1 Загрузка батарей:
• В устройстве применяется батарея PCS CR2032.
• На задней панели устройства откройте крышку
отсека батареи и вставьте батарею CR2032,
соблюдая полярность (плюс сверху). Закройте
отсек батареи.
Примечание
• Перед началом эксплуатации и при
изменении места эксплуатации весы
необходимо перезапустить. В противном
случае измерения могут производиться с
большими отклонениями.
6. Эксплуатация
• Поставьте весы на стабильную
горизонтальную поверхность.
• Убедитесь, что весы не шатаются.
Взвешивание:
• Встаньте на платформу. Весы при этом
включатся автоматически. Во время
считывания данных на дисплее мигает
предварительное значение результата
измерения.
• Дождитесь окончания измерения. Результат
измерения отображается на дисплее в течение
15 секунд.
• После этого весы автоматически отключаются.
Индикация сбоев
• Если весы перегружены, на дисплее
отображается „Err”.
• Если разряжена батарея, на дисплее
отображается „LO”. В этом случае замените
батарею.
Примечание
• Чтобы обеспечить точность измерения,
взвешивание рекомендуется производить
в одно и то же время, например, по утрам
до завтрака)
Примечание
• Если весы показывают нереалистичный
вес, проверьте надежность контакта
батареи. Если весы долго не
эксплуатировались, замените батарею и
попробуйте взвесить объект еще раз
7. Настройка часов
Чтобы настроить часы, на короткое время
удалите батарею из отсека батареи, затем снова
загрузите ее. После загрузки батареи на дисплее
мигает „12:00”. Установите текущее время с
помощью кнопки „kg/lb/st”, расположенной на
задней панели. Нажатием кнопки установите
значение часа. Затем нажмите и удерживайте
кнопку ок. 5 секунд, пока не начнет мигать
значение минут. Короткими нажатиями
установите значение минут. Чтобы подтвердить
настройку, нажмите и удерживайте кнопку ок. 5
секунд. Текущее время всегда отображается на
дисплее в ждущем режиме.
8. Рамка для фотографии
В платформу весов встроена рамка для
фотографии, рисунка и т.п.
Откройте пластиковую крышку на задней
панели, потянув за два язычка. Снимите крышку
и замените фотографию. Максимальные
размеры: 24,50 - 19,50 см
00095306man_cs_de_el_en_es_fi_fr_hu_it_nl_pl_pt_ro_ru_sk_sv_tr.indd 15 21.10.13 10:43

00095306man_cs_de_el_en_es_fi_fr_hu_it_nl_pl_pt_ro_ru_sk_sv_tr.indd 16 21.10.13 10:43

17
IIstruzioni per l‘uso
Indice
Spiegazione dei simboli di avvertimento e delle
indicazioni.........................................................17
Contenuto della confezione ...............................17
Indicazioni di sicurezza......................................17
Elementi di comando e indicazioni..................... 18
Messa in funzione.............................................. 18
Funzionamento..................................................18
Cura e manutenzione......................................... 18
Esclusione di garanzia .......................................19
Assistenza e supporto........................................ 19
Dati tecnici ........................................................19
Grazie per avere acquistato un prodotto Xavax!
Prima della messa in esercizio, leggete
attentamente le seguenti istruzioni e avvertenze.
quindi conservatele in un luogo sicuro per una
eventuale consultazione.
1. Spiegazione dei simboli di avvertimento e
delle indicazioni
Attenzione
• Viene utilizzato per contrassegnare le
indicazioni di sicurezza oppure per rivolgere
l‘attenzione verso particolari rischi e pericoli.
Avvertenza
• Viene utilizzato per contrassegnare
informazioni supplementari o indicazioni
importanti.
Pericolo dovuto a scossa elettrica
• Questo simbolo indica un pericolo dovuto al
contatto con parti non isolate del prodotto
che potrebbero provocare una tensione
pericolosa di entità tale da generare il
pericolo di una scossa elettrica.
2. Contenuto della confezione
• Pesa persone „Picta”
• 1 portafoto
• 1 pila a pastiglia CR2032
• Informazioni per lo smaltimento
• Queste istruzioni per l’uso
3. Indicazioni di sicurezza:
• Il prodotto è concepito per l’uso domestico
privato, non commerciale.
• Proteggere il prodotto da sporcizia, umidità e
surriscaldamento e utilizzarlo solo in locali asciutti
• Non fare cadere il prodotto e non sottoporlo a
forti scossoni!
• Non mettere in esercizio il prodotto al di fuori dei
suoi limiti di rendimento indicati nei dati tecnici.
• Non aprire il prodotto e non utilizzarlo più se
danneggiato.
• Ttenere l’imballo fuori dalla portata dei bambini,
pericolo di soffocamento!
• Smaltire immediatamente il materiale
d‘imballaggio attenendosi alle prescrizioni locali
vigenti
• Non apportare modifiche all’apparecchio per
evitare di perdere i diritti di garanzia
00095306man_cs_de_el_en_es_fi_fr_hu_it_nl_pl_pt_ro_ru_sk_sv_tr.indd 17 21.10.13 10:43
This manual suits for next models
1
Table of contents
Languages:
Other Xavax Scale manuals