Xavax Wanda User manual

00095309/12.16
Alllisted brands are trademarksof thecorrespondingcompanies.Errors andomissions excepted,
andsubjectto technical changes. Ourgeneraltermsof delivery andpaymentare applied.
Distributed by Hama GmbH & Co KG
86652 Monheim/Germany
+49 9091 502-0
www.xavax.eu

E
CZ
F
D
GB
I
P
NL
TR
GR
RO
H
FIN
PL
S
RUS
SK
Operating Instructions
Bedienungsanleitung
Mode d‘emploi
Instrucciones de uso
Руководство по эксплуатации
Istruzioni per l‘uso
Gebruiksaanwijzing
Οδηγίες χρήσης
Instrukcja obsługi
Használati útmutató
Návod k použití
Návod na použitie
Manual de instruções
Kullanma kılavuzu
Manual de utilizare
Bruksanvisning
Pistokelaturi
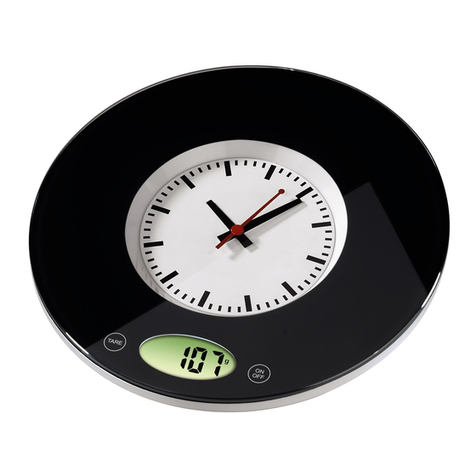
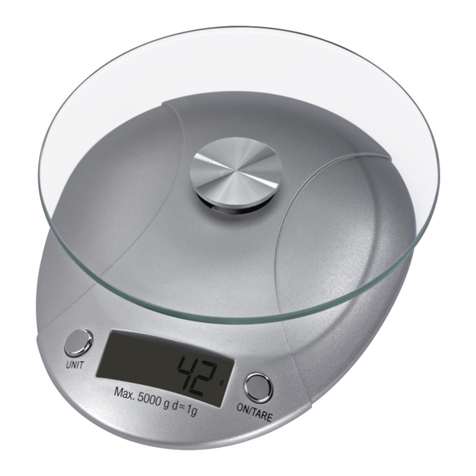
„Wanda”Küchenwaage
Kitchen Scales
00
095309


3
1
4
2

6
DBedienungsanleitung
Vielen Dank, dass Sie sich für ein Xavax Produkt
entschieden haben! Nehmen Sie sich Zeit und lesen
Sie die folgenden Anweisungen und Hinweise
zunächst ganz durch. Bewahren Sie diese
Bedienungsanleitung anschließend an einem
sicheren Ort auf, um bei Bedarf darin nachschlagen
zu können. Sollten Sie das Gerät veräußern, geben
Sie diese Bedienungsanleitung an den neuen
Eigentümer weiter.
1. Bedienungselemente und Anzeigen
• 1. SET-Taste
= Einstellungen/ Bestätigung des
Einstellungswertes
•2.TARE/q-Taste
=Tara-Funktion/ Verringerung des aktuellen
Einstellungswertes
•3.ON/OFF-Taste
= Ein-und Ausschalten der Wiegefunktion
•4.UNIT/p-Taste
= Auswahl der Gewichtseinheit:Kilogramm
(kg) und Gramm (g)/ Countdown-Einstellung/
Erhöhung des aktuellen Einstellungswertes
2. Erklärung von Warnsymbolen und Hinweisen
Warnung
•Wird verwendet, um Sicherheitshinweise zu
kennzeichnen oder um Aufmerksamkeit auf
besondere Gefahren und Risiken zu lenken.
Hinweis
•Wird verwendet, um zusätzlich Informationen
oder wichtige Hinweise zu kennzeichnen.
3. Packungsinhalt
•Küchenwaage
•3AAA Batterien
•Wiegeschüssel
•Wandbefestigung
•3Dübel mit zugehörigen Schrauben
•diese Bedienungsanleitung
4. Sicherheitshinweise
•Das Produkt ist für den privaten, nicht-
gewerblichen Haushaltsgebrauch vorgesehen.
•Schützen Sie das Produkt vor Schmutz,
Feuchtigkeit und Überhitzung und verwenden Sie
es nur in trockenen Räumen.
•Lassen Sie das Produkt nicht fallen und setzen Sie
es keinen heftigen Erschütterungen aus.
•Betreiben Sie das Produkt nicht außerhalb
seiner in den technischen Daten angegebenen
Leistungsgrenzen.
•Öffnen Sie das Produkt nicht und betreiben Sie es
bei Beschädigungen nicht weiter.
•Halten Sie Kinder unbedingt von dem
Verpackungsmaterial fern, es besteht
Erstickungsgefahr.
•Entsorgen Sie das Verpackungsmaterial
sofort gemäß den örtlich gültigen
Entsorgungsvorschriften.
•Nehmen Sie keine Veränderungen am
Gerät vor. Dadurch verlieren sie jegliche
Gewährleistungsansprüche.
Warnung – Batterien
•Beachten Sie unbedingt die korrekte
Polarität
(Beschriftung + und -) der Batterien
und legen
Sie diese entsprechend ein. Bei
Nichtbeachtung besteht die Gefahr des
Auslaufens oder einer Explosion der Batterien
• Schließen Sie die Batterien nicht kurz.
• Laden Sie Batterien nicht.
•Werfen Sie Batterien nicht ins Feuer.
• Bewahren Sie Batterien außerhalb der
Reichweite von Kindern auf.
• Gestatten Sie Kindern nicht ohne Aufsicht das
Wechseln von Batterien.
• Entfernen Sie Batterien aus Produkten, die
längere Zeit nicht benutzt werden

7
5. Montage
Warnung – Montagehinweis
Prüfen Sie vor Montage die Eignung der
vorgesehenen Wand für das anzubringende
Gewicht und vergewissern Sie sich, dass sich
an der Montagestelle in der Wand keine
elektrischen Leitungen, Wasser-, Gas- oder
sonstige Leitungen benden.
•Stellen Sie die Waage auf eine saubere
Tischäche oder befestigen Sie die Waage wie
folgend beschrieben an einer geraden Wand.
•Nehmen Sie den Packungsinhalt aus der
Verpackung und legen Sie alle Bestandteile vor
sich auf.
•Nehmen Sie die Wandbefestigung und halten
Sie diese an die gewünschte Stelle, an welcher
Sie die Waage montieren möchten. Zeichnen Sie
mit einem Bleistift eine kleine Markierung an die
Stelle, an der danach die Löcher gebohrt werden.
•Bohren Sie die Löcher an der gewünschten,
angezeichneten Stelle in die Wand. Dann stecken
Sie die 3 Dübel in die Löcher und schrauben
die Wandbefestigung mit den beiliegenden
Schrauben fest.
•Hängen Sie die Küchenwaage in die dafür
vorgesehenen Haken der Halterung ein. Achten
Sie dabei auf sicheren Halt der Waage. Sie
können die Waage jederzeit bei Bedarf aus der
Halterung nehmen.
6. Inbetriebnahme
•Verwenden Sie drei AAA Batterien
•Zum Einlegen oder Auswechseln der Batterien
an der Waage, nehmen Sie diese von der
Wandhalterung, öffnen die Batterieabdeckung
auf der Rückseite der Waage und legen drei
AAA-Batterien polrichtig in das Batteriefach
ein. Schließen Sie dann das Batteriefach
ordnungsgemäß
Hinweis
•Vor Erstgebrauch oder nach Standortwechsel,
muss die Waage neu gestartet werden.
Tarieren Sie hierfür durch Drücken der
TARE/q-Taste (2) die Waage. Ohne Neustart
können Messabweichungen auftreten.
6.1 Uhrzeit einstellen
•Sobald Sie die Batterien in die Waage einlegen,
blinkt die Minutenanzeige im Display.
•Wählen Sie durch Betätigung der TARE/q-Taste
(2) oder UNIT/p-Taste (4) zunächst die korrekte
Minutenzahl aus und bestätigen Sie die Auswahl
durch Drücken der SET-Taste (1).
•Die Stundenanzeige beginnt zu blinken. Durch
wiederholte Betätigung der TARE/q-Taste (2)
oder UNIT/p-Taste (4) wird hier die korrekte
Stundenzahl ausgewählt und durch erneute
Bedienung der SET-Taste (1) bestätigt.
•ImStandby wird im Display ständig die Uhrzeit
angezeigt.

8
7. Betrieb
7.1 Wiegen
•Vergewissern Sie sich, dass die Waage stabil
steht oder fest an der Wand montiert ist.
•Schalten Sie die Waage mit der Taste ON/OFF
ein. Zunächst erscheint der Willkommens-
Schriftzug. Nach einigen Sekunden wird
„0.000 kg“ auf dem Display angezeigt.
•Drücken Sie wiederholt die UNIT/p-Taste (4), um
zwischen den Gewichtseinheiten Kilogramm (kg)
und Gramm (g) zu wechseln.
•Sobald „0.000 kg/0 g“ angezeigt wird, legen Sie
den Gegenstand auf die Waage. Das Gewicht
wird nun auf dem Display angezeigt.
•Wenn sich ein Gegenstand auf der Waage
bendet, können Sie die Waage mit TARE/q-
Taste (2) auf Null stellen (tarieren). So löschen
Sie z. B. das Gewicht des Behälters, wenn Sie
Zutaten einwiegen wollen.
•Durch erneutes Nullstellen können Sie bei Bedarf
noch weitere Zutaten einwiegen.
•Sobald der Wiegevorgang abgeschlossen ist,
nehmen Sie den Behälter von der Waage. Das
Display zeigt nun mit negativem Vorzeichen an,
wie schwer der Gegenstand vor dem letzten
Nullstellen war.
•Sobald die Anzeige stabil bleibt, schaltet sich die
Waage nach ca. 30 Sekunden automatisch in die
Uhrzeitanzeige.
•Manuell können Sie auch kurz die ON/OFF-
Taste (3) drücken, um in die Uhrzeitanzeige zu
gelangen.
Hinweis
•Wenn Ihnen das ermittelte Gewicht ungenau
vorkommt, vergewissern Sie sich, dass
zwischen der Batterie und den Kontakten ein
einwandfreier Kontakt hergestellt ist. Wenn
Sie die Waage lange nicht benutzt haben,
wechseln Sie die Batterie aus und versuchen
Sie es erneut.
7.2 Countdown – Funktion:
•In die Countdown-Funktion gelangen Sie, indem
Sie die UNIT/p-Taste (4) drücken.
•Um nun die Zeit einzustellen, von welcher bis
0 abwärts gezählt werden soll, drücken Sie
zunächst die SET-Taste (1).
•Es blinkt die Sekundenanzeige. Mit der TARE/q-
Taste (2) oder UNIT/p-Taste (4) bestimmen
Sie die Sekundenzahl und bestätigen danach
erneut mit der SET-Taste (1). Dadurch gelangen
Sie zu der Minutenanzeige, die wiederum durch
Bedienen der TARE/q-Taste (2) oder UNIT/p-
Taste (4) eingestellt wird. Durch Bestätigung mit
der SET-Taste (1) startet der Countdown (max. 99
Minuten und 59 Sekunden programmierbar).
•Wenn der Countdown abgelaufen ist, ertönt ein
lauter Signalton. Dieser ertönt 25 Sekunden lang
und schaltet sich dann automatisch ab. Manuell
können Sie den Signalton mit der ON/OFF-Taste
(3) beenden.
Fehlermeldung:
•die Waage ist überlastet, wenn die
Fehlermeldung „Err“ anzeigt wird. Drücken Sie
die TARE/q-Taste (2), um die Waage neu zu
tarieren/ zu starten.
•wenn die Meldung „ “ angezeigt wird,
ist die Batterie leer. Wechseln Sie die Batterie so
schnell wie möglich aus.
8. Wartung und Pflege
•Reinigen Sie dieses Produkt nur mit einem
fusselfreien, leicht feuchten Tuch und verwenden
Sie keine aggressiven Reiniger. Achten sie darauf,
dass kein Wasser in die Waage eindringt.
9. Haftungsausschluss
Die Hama GmbH & Co. KG übernimmt keinerlei
Haftung oder Gewährleistung für Schäden, die
aus unsachgemäßer Installation, Montage und
unsachgemäßem Gebrauch des Produktes oder
einer Nichtbeachtung der Bedienungsanleitung
und/oder der Sicherheitshinweise resultieren.
9
10. Service and Support
Bitte wenden Sie sich bei Fragen zum Produkt
gerne an die Hama-Produktberatung.
Hotline: +49 9091 502-115 (Deu/Eng)
Weitere Supportinformationen nden sie hier:
www.xavax.eu
11. Technische Daten
Der hochpräzise Dehnungssensor und der
leistungsstarke Prozessor sorgen für hohe
Wiegegenauigkeit.
Max. Gewicht 3000 g
Skalenteilung 1 g
Einheit Gramm (g),
Kilogramm (kg)
Anzeige bei niedrigem Batteriestand
und Überlastung
Tarafunktion
Timerfunktion
Counterfunktion
Stromversorgung 3x AAA Batterien
(3x 1,5V)
12. Entsorgungshinweise
Hinweis zum Umweltschutz:
Ab dem Zeitpunkt der Umsetzung der
europäischen Richtlinien 2002/96/EG und
2006/66/EG in nationales Recht gilt
folgendes: Elektrische und elektronische
Geräte sowie Batterien dürfen nicht mit
dem Hausmüll entsorgt werden. Der Verbraucher ist
gesetzlich verpichtet, elektrische und elektronische
Geräte sowie Batterien am Ende ihrer Lebensdauer
an den dafür eingerichteten, öffentlichen
Sammelstellen oder an die Verkaufsstelle
zurückzugeben. Einzelheiten dazu regelt das
jeweilige Landesrecht. Das Symbol auf dem
Produkt, der Gebrauchsanleitung oder der
Verpackung weist auf diese Bestimmungen hin.
Mit der Wiederverwertung, der stoichen
Verwertung oder anderen Formen der Verwertung
von Altgeräten/Batterien leisten Sie einen wichtigen
Beitrag zum Schutz unserer Umwelt.

10
GOperating instruction
Thank you for choosing a Xavax product.
Take your time and read the following instructions
and information completely. Keep these operating
instructions in a safe place for future reference.
If you sell the device, please pass these operating
instructions on to the new owner.
1. Controls and Displays
•1. SET button
= settings/conrm the set value
•2. TARE/qbutton
= tare function/reduce the current set value
•3. ON/OFF button
= switch scale function on and off
•4. UNIT/pbutton
= select the unit of weight: kilograms (kg) and
grams (g)/countdown setting/increase the current
set value
2. Explanation of Warning Symbols and Notes
Warning
•This symbol is used to indicate safety
instructions or to draw your attention to
specific hazards and risks.
Note
•This symbol is used to indicate additional
information or important notes.
3. Package Contents
•Kitchen scales
•3AAA batteries
•Removable bowl
•Wall mounting
•3anchors with matching screws
•These operating instructions
4. Safety Notes
•This device is intended for private, non-
commercial use only.
•Protect the device from dirt, moisture and
overheating, and only use it in dry locations.
•Do not drop the device and do not expose it to
any major shocks.
•Do not operate the device outside of its operating
limits as dened in the technical specications.
•Do not open the device or continue to operate it
if it becomes damaged.
•K
eep the packaging material out of the reach of
children due to the risk of suffocation.
•Dispose of packaging material immediately
according to locally applicable regulations.
•Do not modify the device in any way. Doing so
voids the warranty
Warning - batteries
•When inserting batteries, note the correct
polarity (+ and - markings) and place
•the batteries accordingly. Failure to do so could
result in the batteries leaking or exploding.
• Do not short-circuit the batteries.
• Do not recharge the batteries.
• Do not throw the batteries in a re.
•Keep batteries out of the reach of children.
• Do not allow children to change batteries
without supervision.
• If the device is not used for a long period of
time, remove the batteries.

11
5. Mounting
Warning - Mounting material
Before mounting, check that the wall you have
chosen is suitable for the weight to be mounted
Also make sure that there are no electric, water,
gas or other lines running through the wall at
the mounting site
•Place the scale on a clean table surface or attach
it to a smooth, even wall as described below.
•Remove the contents from the packaging and
place all of the components in front of you.
•Take the wall bracket and hold it on the desired
location where you would like to mount the
scales. Use a pencil to mark the places on the
wall where you will drill the holes for the bracket.
•Drill the holes at the required positions that you
marked on the wall. Then place the 3 anchors
in the holes and screw the wall bracket securely
onto the wall using the included screws.
•Mount the kitchen scale onto the hooks on
the bracket. Ensure that the scale is securely
attached. You can remove the scale from the
bracket at any time, if needed.
6. Getting started
•Always use three AAA batteries.
•To insert or change the scales’ batteries, remove
the scales from the wall bracket, open the battery
cover on the back of the scales and insert three
AAA batteries with the correct polarity into the
battery compartment. Then close the battery
compartment fully.
Note
•Before using the scales for the rst time
or after moving the scales they must be
restarted. Press the TARE/qbutton (2) to
re-zero or restart the scale. Without restarting
them, the measurements could be incorrect.
6.1 Setting the time
•Once you have inserted the batteries in the scale,
the minutes ash on the display.
•First select the correct minutes value using the
TARE/qbutton (2) or the UNIT/pbutton (4)
and then conrm your selection with the SET
button (1).
•The hours display begins to ash. Continue
pressing the TARE/qbutton (2) or the UNIT/p
button (4) to set the correct hours value and then
press the SET button (1) again to conrm your
selection.
•The time is continuously displayed in standby
mode.

12
7. Operation
7.1 Weighing:
•Make sure that the scales are stable or are
securely mounted onto the wall.
•Switch the scale on using the ON/OFF button.
First the welcome message appears. “0.000 kg”
appears on the display after a few seconds.
•Press the UNIT/pbutton (4) to switch between
kilograms (kg) and grams (g) for the unit of
weight.
•Once “0.000 kg / 0 g” is displayed, lay the object
to be weighed on the scales. The weight is then
shown on the display.
•If there is an object on the scale, you can zero
(tare) the scale using the TARE/qbutton
(2). This allows you to subtract the weight
of a container, for example, if you want to
weigh ingredients. Once you have weighed
one ingredient, additional ingredients can be
weighed by setting the scale again to zero.
•As soon as you are nished weighing, remove the
container from the scales. The display will now
show how heavy the object was before the last
tare as a negative value.
•Once the display stops changing, the scales
automatically switch to displaying the time after
approximately 30 seconds.
•You can also press the ON/OFF button (3) briey
to manually switch to the time display mode.
Note
•When the weight displayed by the scales
seems to be incorrect, check that the contact
between battery and the contacts is in proper
working order. If you haven’t used the scales
in a long time, change the battery and try
again
7.2 Countdown function:
•Press the UNIT/pbutton (4) to access the
countdown function.
•Then press the SET button (1) to set the timer; the
scale will count down from this time to 0.
•The seconds display ashes. Using the TARE/q
button (2) or the UNIT/pbutton (4), set the
number of seconds and then conrm it by pressing
the SET button (1) again. This will take you to the
minutes display, which can also be set using the
TARE/q(2) or UNIT/p(4) button. Conrming
this entry with the SET button (1) starts the
countdown (max. 99 minutes and 59 seconds).
•Once the timer reaches zero the scale emits a
loud signal tone. This sounds for 25 seconds
and then switches off automatically. You can
stop the signal tone manually using the ON/OFF
button (3).
Error message:
•When the error message “Err” is shown, the scale
is overloaded. Press the TARE/qbutton (2) to
re-zero or restart the scale.
•When the error message “ “ is shown,
the battery is dead. Replace the battery as soon
as possible.
8. Care and Maintenance
•Only clean this product with a slightly damp,
lint-free cloth and do not use aggressive cleaning
agents. Make sure that water does not get into
the scales.
9. Warranty Disclaimer
Hama GmbH & Co. KG assumes no liability and
provides no warranty for damage resulting from
improper installation/mounting, improper use of
the product or from failure to observe the operating
instructions and/or safety notes.

13
10. Service and Support
Please contact Hama Product Consulting if you
have any questions about this product.
Hotline: +49 9091 502-115 (German/English)
Further support information can be found here:
www.xavax.eu
11. Technical Data
The high-precision strain gauge sensor and the
powerful processor ensure extremely precise
weighing.
Max. weight 3000 g
Scale division 1 g
UNITs of
measurement Grams (g),
Kilograms (kg)
Low battery and overload warning
Tare function
Timer function
Counter function
Power supply 3 AAA batteries
(3x 1,5V)
12. Recycling Information
Note on environmental protection:
After the implementation of the European
Directive 2002/96/EU and 2006/66/EU in
the national legal system, the following
applies: Electric and electronic devices as
well as batteries must not be disposed of
with household waste. Consumers are obliged by
law to return electrical and electronic devices as
well as batteries at the end of their service lives to
the public collecting points set up for this purpose
or point of sale. Details to this are dened by the
national law of the respective country. This symbol
on the product, the instruction manual or the
package indicates that a product is subject to these
regulations. By recycling, reusing the materials or
other forms of utilising old devices/Batteries, you
are making an important contribution to protecting
our environment.

14
FMode d‘emploi
Nous vous remercions d’avoir sélectionné un
produit de Xavax.
Veuillez prendre le temps de lire l‘ensemble
des remarques et consignes suivantes. Veuillez
conserver ce mode d‘emploi à portée de main
an de pouvoir le consulter en cas de besoin.
Transmettez-le au nouveau propriétaire avec
l’appareil le cas échéant.
1 Éléments de commande et d‘affichage
•1Touche SET
= réglages / conrmation de la valeur
sélectionnée
•2Touche TARE/q
= fonction de tare / diminution de la valeur en
cours de réglage
•3Touche ON/OFF
= mise en/hors service de la fonction de pesage
•4Touche UNIT/p
= sélection de l’unité de poids : kilogrammes
(kg) et grammes (g) / réglage compte à rebours /
augmentation de la valeur en cours de réglage
2. Explication des symboles d‘avertissement et
des remarques
Avertissement
•Ce symbole est utilisé pour indiquer des
consignes de sécurité ou pour attirer
votre attention sur des dangers et risques
particuliers.
Remarque
•Ce symbole est utilisé pour indiquer des
informations supplémentaires ou des
remarques importantes.
3. Contenu de l‘emballage
•Balance de cuisine
•3piles LR03/AAA
•Bol de pesée
•Fixation murale
•3chevilles avec vis
•Mode d‘emploi
4. Consignes de sécurité
•Ce produit est destiné à une installation
domestique non commerciale.
•Protégez-le de toute saleté, humidité, surchauffe
et utilisez-le uniquement dans des locaux secs.
•Protégez-le des secousses violentes et évitez tout
choc ou toute chute.
•N‘utilisez pas la balance au delà des indications
mentionnées dans les caractéristiques techniques
•N‘essayez pas d‘ouvrir l‘appareil et cessez de
l’utiliser en cas de détérioration.
•Tenez les emballages d‘appareils hors de portée
des enfants, risque d‘étouffement.
•Recyclez les matériaux d’emballage conformément
aux prescriptions locales en vigueur
•N’apportez aucune modication à l’appareil. Des
modications vous feraient perdre vos droits de
garantie
Avertissement concernant la pile
•Respectez impérativement la polarité de
la pile (marquage + et -) lors de l‘insertion
dans le boîtier ; risques d‘écoulement et
d‘explosion de la pile si tel n‘est pas le cas.
• Ne mettez pas la pile en court-circuit.
• Ne tentez pas de recharger la pile.
• Ne jetez pas de piles au feu.
• Conservez les piles hors de portée des enfants
• N‘autorisez pas à des enfants de remplacer
les piles d‘un appareil sans surveillance.
• Retirez la pile de l‘appareil si vous ne comptez
pas utiliser ce dernier pendant un certain temps

15
5. Installation
Avertissement - matériel de montage
•Avant l‘installation, vériez que le mur prévu
pour l‘installation dispose d‘une force portante
susante et qu‘aucune conduite d‘électricité,
d‘eau, de gaz ni aucune autre conduite ne
passe dans cette partie de la cloison.
•Placez la balance sur une table propre ou xez-la
à une paroi comme expliqué plus bas.
•Déballez les éléments et disposez-les devant
vous.
•Placez la xation murale à l‘endroit auquel vous
désirez installer la balance. Marquez, à l‘aide
d‘un crayon, l‘endroit auquel vous percerez les
trous.
•Percez les trous aux endroits que vous avez
marqués. Introduisez les trois chevilles dans les
trous, puis vissez la xation murale en utilisant
les vis fournies.
•Suspendez la balance de cuisine aux crochets
du support prévus à cet effet. Veuillez contrôler
la parfaite xation de la balance. Vous pourrez
retirer la balance hors de la xation à tout
moment.
6. Mise en service
•Utilisez trois piles LR03/AAA.
•Pour introduire ou remplacer les piles, retirez
la balance de la xation murale, ouvrez le
compartiment à piles situé sur la face arrière de
la balance, puis insérez trois piles de type LR03/
AAA dans le compartiment conformément aux
indications de polarité. Refermez le couvercle du
compartiment.
Remarque
•Il est nécessaire de redémarrer le pèse-personne
avant la première utilisation ou après un
changement d‘emplacement.
Appuyez sur la
touche TARE/q(2) an de tarer / démarrer
à nouveau la balance.
Des mesures inexactes
sont susceptibles de survenir si vous ne
redémarrez pas l‘appareil.
6.1 Réglage de l'heure
•L'achage des minutes clignote à l'écran après
avoir inséré les piles dans la balance.
•Utilisez la touche TARE/q(2) ou la touche
UNIT/p(4) an de sélectionner le bon réglage
des minutes, puis conrmez votre sélection en
appuyant sur la touche SET (1).
•Les chiffres de l’heure se mettent à clignoter.
Appuyez plusieurs fois sur la touche TARE/q
(2) ou la touche UNIT/p(4) an de sélectionner
le bon réglage des heures, puis conrmez votre
sélection en appuyant sur la touche SET (1).
•L’heure est achée en permanence à l’écran de
l’appareil lorsque celui-ci est en veille.

16
7. Fonctionnement
7.1 Pesée:
•Contrôlez la parfaite stabilité de la balance ou sa
bonne xation à la paroi.
•Mettez la balance sous tension à l‘aide de la
touche ON/OFF. Un message de bienvenue, puis
« 0,000 kg » apparaissent à l‘écran au bout de
quelques secondes.
•Appuyez plusieurs fois sur la touche UNIT/p
(4) an de sélectionner une unité de poids -
kilogrammes (kg) ou grammes (g).
•Vous pouvez placer la denrée que vous désirez
peser sur la balance dès que « 0,000 kg/0g »
apparaît. Le poids de la denrée apparaît à
l’écran.
•Vous pouvez mettre la balance à zéro (tarer la
balance) à l’aide de la touche TARE/q(2) après
avoir placé un objet sur le plateau. Vous pouvez
ainsi effacer le poids d‘un récipient lorsque
vous désirez calculer le poids d‘un ingrédient.
En appuyant à nouveau sur cette touche, vous
pourrez remettre la balance à zéro pour peser
d‘autres ingrédients.
•Retirez le récipient du plateau dès que vous avez
terminé la pesée. L‘achage indique le poids de
l‘objet (précédé du signe « - ») avant la dernière
remise à zéro.
•La balance commute automatiquement en mode
d‘achage de l‘heure au bout de 30 secondes
dès que l‘achage s‘est stabilisé.
•Vous pouvez aussi appuyez brièvement sur la
touche ON/OFF (3) an d’accéder à l’achage
de l’heure.
Remarque
•Si vous trouvez le résultat de la pesée inexact,
assurez-vous que la pile est correctement
insérée dans le logement et qu‘elle adhère
parfaitement aux contacts. Remplacez les
la pile et refaites un essai si vous n‘avez pas
utilisé la balance pendant un certain temps
7.2 Fonction compte à rebours
•Appuyez sur la touche UNIT/p(4) an d’accéder
à la fonction compte à rebours.
•Commencez par appuyer sur la touche SET (1)
an de dénir l’heure à partir de laquelle vous
désirez démarrer le compte à rebours.
•L’achage des secondes clignote à l’écran.
Utilisez la touche TARE/q(2) ou la touche
UNIT/p(4) an de dénir le chiffre des
secondes, puis conrmez votre sélection à
l’aide de la touche SET (1). Vous activerez ainsi
l’achage des minutes que vous pourrez régler à
l’aide de la touche TARE/q(2) ou de la touche
UNIT/p(4). Le compte à rebours démarre dès
que vous appuyez sur la touche SET (1) (vous
pouvez programmer un laps de temps maximal
de 99 minutes et 59 secondes).
•Un signal acoustique fort retentit à la n du
compte à rebours. Ce signal retentit pendant 25
secondes, puis s’éteint automatiquement. Vous
pouvez interrompre manuellement le signal à
l’aide de la touche ON/OFF (3).
Messages d‘erreur:
•Le message d‘erreur « Err » indique une surcharge
de la balance. Appuyez sur la touche TARE/q(2)
an de tarer / démarrer à nouveau la balance.
•Les piles de la balance sont usées lorsque
«» apparaît à l‘écran. Dans ce cas,
remplacez les piles au plus vite.
8. Soins et entretien
•Nettoyez la balance uniquement à l’aide d’un
chiffon non breux légèrement humide ; évitez
tout détergent agressif. Veillez à ce qu’aucun
liquide ne pénètre dans la balance.
9. Exclusion de garantie
La société Hama GmbH & Co. KG décline toute
responsabilité en cas de dommages provoqués par
une installation, un montage ou une utilisation non
conformes du produit ou encore provoqués par un
non respect des consignes du mode d‘emploi et/ou
des consignes de sécurité.

17
10. Service et assistance
En cas de question concernant le produit, veuillez
vous adresser au service de conseil produits de
Hama.
Ligne téléphonique directe : +49 9091 502-115
(allemand/anglais)
Vous trouverez ici de plus amples informations
concernant l‘assistance : www.xavax.eu
11. Caractéristiques techniques
Un capteur extensométrique de haute précision
ainsi qu'un processeur puissant garantissent la
précision de la pesée.
Poids maxi 3000 g
Graduation 1 g
Unité gramme (g)
kilogramme (kg)
Achage de pile faible et de surcharge
Fonction de tare
Fonction compte à rebours
Fonction compteur
Alimentation
électrique 3 piles LR03/AAA
(3x 1,5V)
12. Consignes de recyclage
Remarques concernant la protection de
l’environnement:
Conformément à la directive européenne
2002/96/CE et 2006/66/CE, et an
d‘atteindre un certain nombre d‘objectifs
en matière de protection de
l‘environnement, les règles suivantes
doivent être appliquées: Les appareils électriques et
électroniques ainsi que les batteries ne doivent pas
être éliminés avec les déchets ménagers. Le
pictogramme “picto” présent sur le produit, son
manuel d‘utilisation ou son emballage indique que le
produit est soumis à cette réglementation. Le
consommateur doit retourner le produit/la batterie
usager aux points de collecte prévus à cet effet. Il
peut aussi le remettre à un revendeur. En permettant
enn le recyclage des produits ainsi que les batteries,
le consommateur contribuera à la protection de notre
environnement. C‘est un acte écologique.

18
CNávod k použití
Děkujeme, že jste si zakoupili výrobek Xavax.
Před prvním použitím si pozorně přečtěte návod
k použití. Návod k použití si pečlivě uschovejte,
abyste jej v případě potřeby mohli použít. Pokud
výrobek prodáte, předejte tento text novému
majiteli.
1. Ovládací prvky a indikace
•1. Tlačítko SET
= nastavení / potvrzení hodnoty nastavení
•2. Tlačítko TARE/ q
= funkce Tara / snížení aktuální hodnoty
nastavení
•3. Tlačítko ON/OFF
= zapnutí a vypnutí funkce vážení
•4. Tlačítko UNIT/ p
= výběr jednotky hmotnosti: kilogram (kg) a gram
(g)/nastavení zbývajícího času /zvýšení aktuální
hodnoty nastavení
2. Vysvětlení výstražných symbolů a pokynů
Upozornění
•Tento symbol označuje bezpečnostní
upozornění, které poukazuje na určitá rizika
a nebezpečí.
Poznámka
•Tento symbol označuje dodatečné informace
nebo důležité poznámky.
3. Obsah balení
•kuchyňská váha
•3AAA baterie
•miska na vážení
•montážní destička
•3hmoždinky se šrouby
•návod na použití
4. Bezpečnostní pokyny
•Tento výrobek je určen pro domácí použití, ne pro
komerční účely.
•Chraňte zařízení před prachem, vlhkostí a
vysokými teplotami, zařízení používejte v suchých
místnostech.
•Dbejte na to, aby Vám zařízení nespadlo a
nevystavujte ho otřesům.
•Zařízení nepřetěžujte.
•Zařízení neotvírejte.
•Pokud je zařízení poškozené, dále ho
nepoužívejte.
•Obalový materiál uschovejte mimo dosah dětí,
hrozí nebezpečí udušení.
•Obalový materiál odstraňte podle platných
místních předpisů o likvidaci.
•Zařízení neopravujte sami, tím by mohl zaniknout
nárok na záruku
Upozornění – baterie
•Při vkládání baterií dbejte na správnou
polaritu (+ / -). Pokud baterie vložíte
nesprávné, hrozí nebezpečí vytečení baterií,
nebo exploze.
• Baterie nezkratujte.
• Baterie nenabíjejte.
• Neházejte baterie do ohně.
• Baterie odložte mimo dosah dětí.
• Nedovolte, aby děti měnily baterie bez dozoru
•Pokud delší dobu zařízení nepoužíváte,
vyjměte baterie

19
5. Montáž na stěnu
Figyelmeztetés – szerelési anyag
•Aszerelés előtt ellenőrizze a kiszemelt fal
alkalmasságát a felszerelendő súlyra és
bizonyosodjon meg róla, hogy a szerelési
helyen a falban nincs kábel, víz-, gáz- vagy
egyéb vezeték.
•Váhu umístěte na čistou plochu stolu nebo ji
upevněte dle níže uvedeného postupu na rovné zdi.
•Vybalte obsah balení a položte jej před sebe.
•Vezměte montážní destičku a přiložte ji na stěnu
do požadované výšky, kde chcete váhu umístit.
Tužkou si označte díry, kde budete vrtat díry.
•Vyvrtejte díry na označeném místě. Vložte
všechny 3 hmoždinky do vyvrtaných děr a
pevně přišroubujte montážní destičku pomocí
přiloženým šroubů.
•Kuchyňskou váhu zavěste do příslušných háčků
držáku. Dbejte na bezpečné upevnění váhy. V
případě potřeby můžete váhu kdykoliv z držáku
vyjmout.
6. Uvedení do provozu
•Použijte 3 baterie AAA.
•Chcete-li vložit nebo vyměnit baterie, váhu
sundejte z držáku. Otevřete kryt na baterie na
zadní straně zařízení a vložte tři AAA baterie.
Dbejte na správnou polaritu. Kryt opět uzavřete.
Poznámka
•Před prvním použitím nebo po změně
umístění se musí váha vždy restartovat.
Stiskněte tlačítko TARE/q(2) pro nové
vynulování / spuštění váhy. Pokud váhu
nerestartujete, může při následném vážení
dojít k odchylkám při vážení.
6.1 Nastavení času
•Jakmile do váhy vložíte baterie, bliká na displeji
zobrazení minut.
•Stisknutím tlačítka TARE/q(2) nebo tlačítka
UNIT/p(4) zvolte nejprve správný počet minut a
výběr potvrďte stisknutím tlačítka SET (1).
•Začne blikat zobrazení hodin. Opakovaným
stisknutím tlačítka TARE/q(2) nebo tlačítka
UNIT/p(4) se zvolí správný počet hodin a
potvrdí opětovným stisknutím tlačítka SET (1) .
•Vrežimu Standby se na displeji stále zobrazuje
hodinový čas.

20
7. Provoz
7.1 Vážení
•Ujistěte se, že je váha stabilní nebo pevně
upevněná na stěně.
•Pomocí tlačítka ON/OFF zapněte váhu. Nejprve
se zobrazí uvítací text. Po několika sekundách se
na displeji zobrazí „0.000 kg“.
•Opakovaně stiskněte tlačítko UNIT/p(4) pro
přepnutí jednotek hmotnosti kilogram (kg) a
gram (g).
•Hned jak se na displeji zobrazí „0.000 kg / 0g“,
položte na váhu předmět. Na displeji se zobrazí
hmotnost.
•Pokud se na váze nachází předmět, můžete
pomocí tlačítka TARE/q(2) váhu vynulovat
(tara). Tímto způsobem vymažete např. hmotnost
misky, pokud chcete odvážit suroviny. Pomocí
opětovného vynulování můžete podle potřeby
odvážit další suroviny.
•Pokud jste vážení ukončili, sundejte misku z váhy.
Na displeji se zobrazí záporná hodnota, která
zobrazuje hmotnost váženého předmětu před
posledním nulováním.
•Pokud se váha 30 sekund nepoužívá, automaticky
se přepne do režimu zobrazení času.
•Manuálně můžete také krátce stisknout
tlačítko ON/OFF (3), abyste přešli k zobrazení
hodinového času.
Poznámka
•Pokud budete mít dojem, že zobrazené
výsledky vážení nejsou přesné, zkontrolujte
kontakty mezi baterií a místy dotyku. Pokud
jste váhu delší dobu nepoužívali, vyměňte
baterie a opět opakujte postup.
7.2 Funkce zbývajícího času
•Kfunkci zbývajícího času přejdete tak, že stisknete
tlačítko UNIT/p(4).
•Nyní pro nastavení času, od kterého se bud
odpočítávat do 0, stiskněte nejprve tlačítko SET (1).
•Bliká zobrazení sekund. Tlačítkem TARE/q(2)
nebo UNIT/p(4) určíte počet sekund a poté
opětovně potvrdíte tlačítkem SET (1). Takto
přejdete k zobrazení minut, které se nastavují
stisknutím tlačítka TARE/q(2) nebo tlačítka
UNIT/p(4). Stisknutím tlačítka SET (1) se
spustí odpočítání zbývajícího času (možnost
naprogramování max. 99 minut a 59 sekund).
•Jakmile tento čas uběhl, zazní hlasitý signál. Tento
zazní po dobu 25 sekund a poté se automaticky
vypne. Manuálně můžete signál ukončit tlačítkem
ON/OFF (3).
Chybová hlášení:
•pokud se na displeji zobrazí chybové hlášení
„Err“, je váha přetížená. Stiskněte tlačítko
TARE/q(2) pro nové vynulování / spuštění váhy.
pokud se na displeji zobrazí chybové hlášení
„“, baterie jsou vybité. Ihned je vyměňte
za nové.
8. Údržba a čištění
Zařízení čistěte jemným navlhčeným hadříkem,
který nepouští žmolky. Při čištění nepoužívejte
agresivní čistící prostředky. Dbejte na to, aby se do
váhy nedostala voda.
9. Vyloučení záruky
Hama GmbH & Co. KG nepřebírá žádnou
odpovědnost nebo záruku za škody vzniklé
neodbornou instalací, montáží nebo neodborným
použitím výrobku nebo nedodržováním návodu k
použití a/nebo bezpečnostních pokynů.

21
10. Servis a podpora
Máte otázky k produktu ? Obraťte na na
poradenské oddělení Hama.
Horká linka: +49 9091 502-115 (německy/anglicky)
Další podpůrné informace naleznete na adrese:
www.xavax.eu
11. Technické údaje
Přesnost vážení zaručuje vysoce přesný
tenzometrický snímač a výkonný procesor.
Max. zatížení 3000 g
Měření po 1 g
Jednotka gram (g)
kilogram (kg)
Indikace slabých baterií a přetížení
Funkce vynulování
Funkce odpočítávání
Funkcia odpocítavania:
Napájení 3x AAA baterie
(3x 1,5V)
12. Pokyny k likvidaci
Ochrana životního prostředí:
Evropská směrnice 2002/96/EG a
2006/66/EU ustanovujete následující:
Elektrická a elektronická zařízení stejně
jako baterie nepatří do domovního
odpadu. Spotřebitel se zavazuje odevzdat
všechna zařízení a baterie po uplynutí jejich
životnosti do příslušných sběren. Podrobnosti
stanoví zákon příšlušné země. Symbol na produktu,
návod k obsluze nebo balení na toto poukazuje.
Recyklací a jinými způsoby zužitkování přispíváte k
ochraně životního prostředí.
This manual suits for next models
1
Table of contents
Languages:
Other Xavax Scale manuals