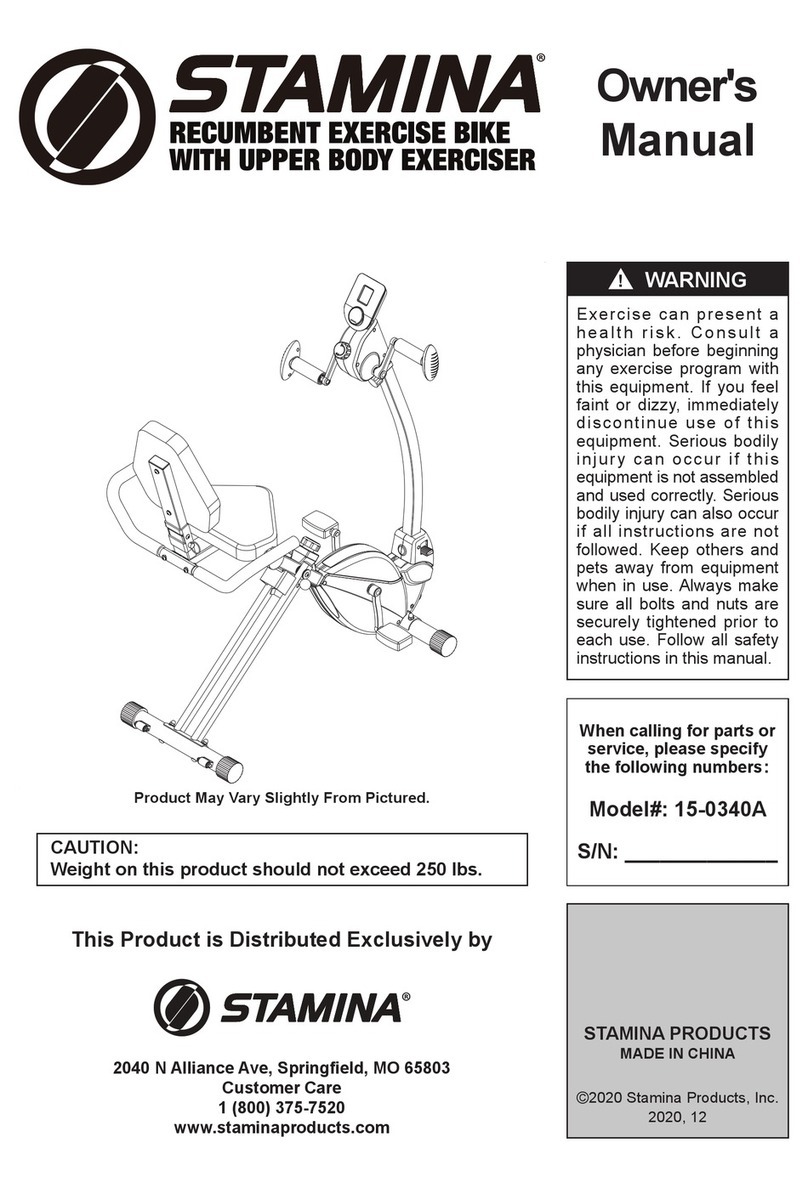
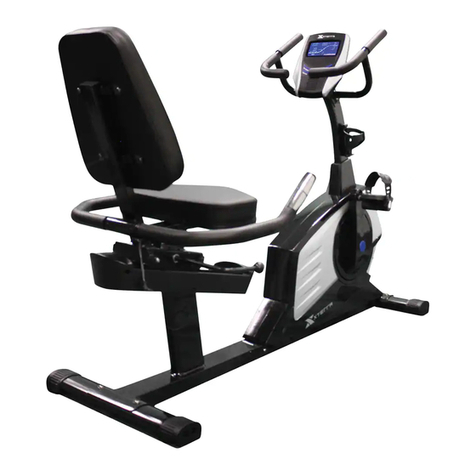
Xterra 16416852 User manual

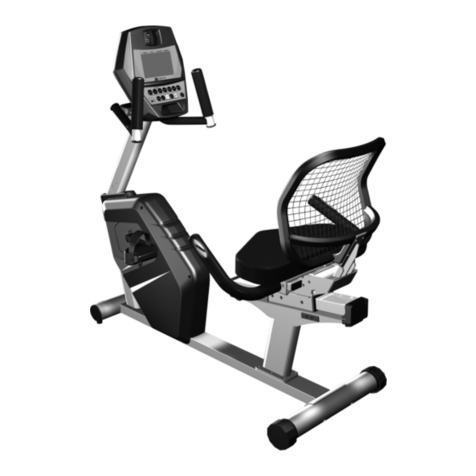
MAGNETIC RECUMBENTCYCLE
RETAINFORFUTUREREFERENCE
MAURICE PINCOFFS CANADAINC. 6050DONMURIE STREET,NIAGARA FALLS, ONTARIOL2E 6X8
OWNER S
MANUAL
ModelNo.
16416852
Recumbent
Cycle
•Assembly
•Operation
•Exercise
•Parts
•Warranty
CAUTION:
You mustread and
understand this
ownersmanual
before operating
unit.
PDFcreated withpdfFactorytrialversion www.softwarelabs.com

Customer Service1-888-707-1880
Email: customerservice@pincoffs.ca -1-MauricePincoffsCanadaInc. ©2010
Manufacture sOne-YearLimitedWarranty
Your Xterra RecumbentCycleiswarrantedforone yearfromthe dateofpurchaseagainst
defectsinmaterialwhenusedfor thepurposeintended,under normalconditionsand
provided itreceivesproper care.Anypartfounddefectiveor missingwillbesentatno
costwhen returnedinaccordancewiththe termsofthiswarranty.
Thiswarrantyisnottransferableandisextendedonlytothe originalowner.
The warrantyshallnotapplytoexerciseunitswhichare(1) used forcommercialor other
incomeproducingpurposes,or (2) subject tomisuse, neglect, accidentorunauthorized
repairand alterations.
Thiswarrantyprovidedhereinislieu ofallotherexpresswarranties,anyimplied
warranties,including anyimplied warrantiesof merchantabilityoffitness forparticular
purpose,are limitedinduration tothe first12monthsfromdateof purchase.Allother
obligationsorliabilities,including liabilityfor consequentialdamagesare herebyexcluded.
RepairPartsand Service
Allofthe partsfor thecycleshowninfigure can beorderedfromMauricePincoffsCanada
Inc.6050DONMURIE STREET,NIAGARAFALLS, ONTARIOL2E6X8. When ordering
parts, the partswillbe sent andbilled at thecurrentprices.Pricesmaybe subject to
changewithoutnotice. Checkormoneyorder mustaccompanyallorders.Standard
hardware itemsare availableat your localhardware store.
Toensure promptandcorrecthandlingofanyerrors,or toanswer anyquestions,please
callour TollFree number:1-888-707-1880,orlocalnumber 1-905-353-8955 or fax1-905-
353-8968oremail customerservice@pincoffs.caorvisitourwebsite: www.pincoffs.ca
Officehoursare from8:30AMto5:00 PMMondaytoFridayEastern Standard Time.
Alwaysincludethe followinginformationwhen orderingparts
lModelnumber
lNameof eachpart
lPartnumber ofeachpart
Tableof Contents
SAFETYPRECAUTIONS 1 EXPLODEDDIAGRAM14
PRE-ASSEMBLYCHECK LIST 2 PARTSLIST15-18
HARDWAREPACKINGLIST 3 TROUBLESHOOTING19
ASSEMBLYINSTRUCTION 4-9 TRAINNINGGUIDELINES 20-22
COMPUTERINSTRUCTION10-13 EXERCISEROUTINE 23-24
PDFcreated withpdfFactorytrialversion www.softwarelabs.com

Customer Service1-888-707-1880
Email: customerservice@pincoffs.ca -2-MauricePincoffsCanadaInc. ©2010
SAFETYPRECAUTIONS
Thankyou forpurchasing our product.Even thoughwego togreateffortstoensure the
qualityof eachproduct weproduce,occasionalerrorsand /oromissionsdooccur. Inany
eventshouldyou findthisproducttohaveeither adefectiveor amissingpart please
contact usforareplacement.
Thisproduct hasbeen designed forhomeuseonly. Product liabilityand guarantee
conditionswill not be applicabletoproductsbeing subjected toprofessionaluseor
productsbeingused inagymcenter.
Thisexerciseequipment wasdesigned andbuilt foroptimumsafety.However,certain
precautionsapplywhenever you operateapieceofexerciseequipment.Besure toread
the entire manualbefore assemblyand operation of thismachine.Also, pleasenotethe
following safetyprecautions:
1.Readthe OWNERSOPERATINGMANUALandallaccompanying literatureand
followitcarefullybefore using yourcycle.
2.If dizziness,nausea,chest pains,or anyother abnormalsymptomsare experienced
whileusing thisequipment, STOPthe workoutat once.CONSULTA PHYSICIAN
IMMEDIATELY.
3.Inspectyourexerciseequipmentpriortoexercisingtoensurethat allnutsandbolts
are fullytightened before eachuse.
4.The cyclemustberegularlycheckedforsignsofwear and damage. Anypartfound
defectivemust be replacedwithanewpartfromthe manufacturer.
5.Fitnessequipmentmustalwaysbe installedon aflatsurface.Itisrecommended to
useanequipment mattopreventtheunitfrommovingwhileitisbeing used,which
couldpossiblyscratchordamagethesurfaceofyour floor.
6.Nochangesmustbemadewhichmightcompromisethe safetyof theequipment.
7.It isrecommendedtohaveaminimumof2 safeclearancearoundthe exercise
equipmentwhileinuse.
8.Keepchildrenandpetsawayfromthisequipmentat alltimeswhileexercising.
9.Warmup 5to10minutesbeforeeachworkoutandcooldown5to10minutes
afterward.Thisallowsyour heartratetograduallyincreaseand decreaseand will
helppreventyoufromstraining muscles.
10.Neverholdyourbreathwhileexercising. Breathingshouldremainatanormalratein
conjunctionwiththe levelofexercisebeing performed.
11.Alwayswearsuitableclothing andfootwearwhileexercising. Donotwearloosefitting
clothing that couldbecomeentangledwiththe movingpartsofyourcycle.
12.Care mustbetaken when lifting ormovingtheequipment, soasnottoinjureyour
back.Alwaysuseproperliftingtechniques.
13.User weightshouldnot exceed 270lbs.
14.Tieall long hairback.
15.Removeallpersonaljewelrybefore exercising.
16.After eating,allow1-2 hoursbefore exercisingasthiswill helptoprevent muscle
strain.
17.Injuriesmayresult fromincorrector excessivetrainingand usingthe equipment
otherwisethan asdirectedor recommendedbyyour doctor.
WARNING:BEFORE BEGINNINGANY EXERCISE PROGRAMCONSULTYOUR
PHYSICIAN.THIS ISESPECIALLY IMPORTANTFORINDIVIDUALSOVERTHE AGE
OF35ORPERSONSWITHPRE-EXISTINGHEALTHPROBLEMS. READ ALL
INSTRUCTIONS BEFORE USINGANYFITNESS EQUIPMENT.WE ASSUME NO
RESPONSIBILITY FORPEROSNALINJURY ORPROPERTY DAMAGESUSTAINSBY
ORTHROUGHTHE USE OFTHISPRODUCT.
PDFcreated withpdfFactorytrialversion www.softwarelabs.com
Customer Service1-888-707-1880
Email: customerservice@pincoffs.ca -3-MauricePincoffsCanadaInc. ©2010
PRE-ASSEMBLYCHECKLIST
15
60
59
8
4
9
3
2
627
62
32
PARTSNO.DESCRIPTION QTY
1 Frontframe 1
5 Rearframe 1
8 Seatframe 1
3 Upright 1
60 Backcushion 1
4 FrontHandlebar 1
2 Frontstabilizer 1
59 Seat 1
9 RearHandlebar w/pulse1
6 Rearstabilizer 1
32 Uprightcover 1
27 Computer 1
62 Bottleholder 1
Inner box
PDFcreated withpdfFactorytrialversion www.softwarelabs.com
Customer Service1-888-707-1880
Email: customerservice@pincoffs.ca -4-MauricePincoffsCanadaInc. ©2010
HARDWAREPACKINGLIST
NO DESCRIPTIONQ TY DRAWINGS
85 SCREWM4X15MM 10
72 ALLENHEADBOLTM8X55MM 4
100 SPRINGWASHERM8 6
103 WASHERM8 4
74 ALLENHEADBOLTM10X20MM 4
75 ALLENHEADBOLTM10X53MM 3
101 SPRINGWASHERM10 9
76 ALLENHEADBOLTM10X200MM 2
99 CURVE WASHERM10 8
97 CAP NUTM10 2
71 ALLENHEADBOLTM8X45MM 2
98 CURVE WASHERM8 2
82 BOLTM6X38MM 8
78 BOLTM6X12MM 2
79 HEXHEADBOLTM8X15MM 6
70 ALLENHEADBOLTM8X40MM 1
67 CAP 4
53 CAP NUTM10 8
64 LEVELINGCAP 4
68 LEVELINGCAP 1
39L LEFTFOOTPEDAL 1
39R RIGHTFOOTPEDAL 1
40L LEFTFOOTPEDALSTRAP 1
40R RIGHTFOOTPEDALSTRAP 1
36L LEFTEND CAPWITHWHEEL1
36R RIGHTEND CAP WITHWHEEL1
63 STABILIZEREND CAP 2
104 ALLENWRENCH (5MM) 1
105 ALLENWRENCH (6MM) 1
42 WRENCH 1
PDFcreated withpdfFactorytrialversion www.softwarelabs.com
Customer Service1-888-707-1880
Email: customerservice@pincoffs.ca -5-MauricePincoffsCanadaInc. ©2010
ASSEMBLYINSTRUCTION
Thismanualisdesignedtohelpyou easilyassemble,adjust and usethismachine.Please
readthismanualcarefully.Forthe sakeoffamiliarizing yourself withthe partsidentified in
the instruction,first studythe overviewdrawing.Setallpartsinacleararea on the floor
and removethepacking material.Refer tothe partslist for helptoidentifytheparts. It will
taketwopeopletoassembleyour unit.
STEP 1
1.Attachtheleft andright end capwithwheels (36L/R) tothefrontstabilizer (2).
Secureusingfourscrews (85) and twolevelling caps (64)
2.Attachthefrontstabilizer (2) tothe bracketof thefrontframe (1).Secureusing two
carriagebolts (72),twospring washers (100), twoflatwashers (103) asshowninthe
diagram.
Wheel(34)
Wheel(34)
PDFcreated withpdfFactorytrialversion www.softwarelabs.com
Customer Service1-888-707-1880
Email: customerservice@pincoffs.ca -6-MauricePincoffsCanadaInc. ©2010
STEP 2
1.Attachtheendcaps (63) tothe rear stabilizer (6).Secure using four screws (85) and
twolevelling caps (64).
2.Attachtherear stabilizer (6) tothebracketofthe rearframe (5).Secureusingtwo
carriagebolts (72),twospring washers (100), twoflatwashers (103) asshowninthe
diagram.
3.Connectthe backhandpulsewire (43) fromtherearframe (5) tothecomputer wire
(25) fromthe front frame (1).
4.Insertthe front frame (1) intotherear frame (5).Secureonbothsidesoftheframe
using four allenhead bolts (74), fourspring washers (101) andfourcurvewashers
(99).
5.Tighten thebottomof therearframe (5) withthree allen headbolts (75).
6.Attachthelevellingcap (68) tothe frontframe (1).
NOTE: Ensurethat youfastenthe boltssecurelytoavoidshakingand discomfortwhen
cycling.
Onceyour cycleisassembled,usethe levellingcaps(64 / 68)tolevelyour cycle.
RearFrame(5),is
insideofRear
Covers(65,66)
PDFcreated withpdfFactorytrialversion www.softwarelabs.com

Customer Service1-888-707-1880
Email: customerservice@pincoffs.ca -7-MauricePincoffsCanadaInc. ©2010
STEP 3
1.Attachtheseatframe (8) tothe seatcarriage (7).Secure using twoallenhead bolts
(76), fourflatwashers (99),twospring washers (101) and twoacorn nuts (97).
2. Attachthehandrail (9) withhand pulse (56) tothe bottomside ofseatcarriage (7).
Secureusing twoallen headbolts (71), twospring washers (100) andtwocurve
washers (98).
3.Insertthe plug ofthehandpulsewire (55) intothesocketof theback handpulsewire
(43) locatedon theseatrail (45).
STEP 4
1.Attachtheseat (59) tothe seat frame (8).Secureusingfourround headbolts (82).
2.Attachtheseatcushion (60) tothe backof theseatframe (8).Secureusingfour
round headbolts (82).
3.Attachtheeightplasticcaps (53) on totheeightnylon nuts (95) thatwereassembled
on theseatcarriage (7).
SocketofPulse
ExtensionWire(43)
Use thissetofattachment
holes forassembly.
PDFcreated withpdfFactorytrialversion www.softwarelabs.com
Customer Service1-888-707-1880
Email: customerservice@pincoffs.ca -8-MauricePincoffsCanadaInc. ©2010
STEP 5
1.Slidethe upright cover (32) ontothe upright (3).
2.Connectthe upper computer extensionwire (26) tothe computer extension wire (25).
3.Insertthe upright (3) intothefront frame (1).Secure using sixallen headbolts (79).
NOTE: Ensurethatthewiresare safelytuckedinside thefrontframebefore inserting the
uprightsothatthe wiresdonotgetpinched wheninserting the uprightintothe
frontframe.
Donot tightenthe allen bolts (79) untilallboltshavebeen assembled on the front
frame.
4.Attachtherightand left pedalstraps(40R/L)totherightand left pedals(39R/L).
NOTE:Theendofthestrapwithfouradjustableholes must beset outwards.
5.Attachtherightand left pedals(39R/L) tothe right andleftcrankarm(35R/L).
NOTE: ThepedalsandcrankarmsaremarkedwithR& L.The rightpedalshouldbe
threadedonclockwiseand the left pedalshouldbethreaded on counter-clockwise.
PDFcreated withpdfFactorytrialversion www.softwarelabs.com
Customer Service1-888-707-1880
Email: customerservice@pincoffs.ca -9-MauricePincoffsCanadaInc. ©2010
STEP 6
1.Slidethe upper extensionwire (26) through theopeningofthehandlebar (4).
2.Attachthehandlebar (4) tothetop computer bracketof upright (3).Secureusingtwo
flat headscrews (78).
NOTE:Ensurethat thewiresaresafelytuckedinsidetheopening.
3.Connectthe upper computer wire (26) intothe wireson the back ofthemonitor (27).
4.Removefour pre-assembledround head screws (86) fromthe computer (27).
5.Attachthecomputer (27) totop computerbracketofhandlebar (4) and secure with
fourroundhead screws (86).
6.Attachthebottleholder (62) totheupright post (3) andsecure withtwoscrews (85).
ENSURETO FIRMLYTIGHTENALLNUTSANDBOLTS
YOURUNITISNOWFULLYASSEMBLED
Plugthe adaptor (83) intothe socketofthe powercable (28) located onthe frontofthe
bike.
PDFcreated withpdfFactorytrialversion www.softwarelabs.com

Customer Service1-888-707-1880
Email: customerservice@pincoffs.ca -10-MauricePincoffs CanadaInc. ©2010
COMPUTERINSTRUCTION
BUTTONS:
PROGRAMBUTTONS: The MagneticRecumbentBikehastwelve(12)preset workout
programs.
Select the desired programfromthe twelve(12) buttonsonthe
computer.
+/UP:Presstoincreasethevaluesof the setting mode.
Presstoincreasethelevelofthe workloadwhen running a
program.
-/DOWN: Presstodecreasethevaluesof thesettingmode.Pressto
decreasethe levelofthe workloadwhenrunning aprogram.
ENTER: Presstoselect thevaluesof thevarioussettings.
START/STOP:Presstostart theselected program.Pressthe START/STOP
button tostoptheprogram. PressandholdtheSTART/STOP
button downfor foursecondstoreset allofthefunctionvaluesto
zero.
PDFcreated withpdfFactorytrialversion www.softwarelabs.com

Customer Service1-888-707-1880
Email: customerservice@pincoffs.ca -11-MauricePincoffs CanadaInc. ©2010
LCD DISPLAY INSTRUCTIONS
PROGRAM:Displaystheselectedprogramduring exercise,fromP1-P12.
TIME: Displaysthetime.Countsupward fromonesecond to99:59minutes.
Countsdownfrompreset value.
SPEED:Displaysthecurrentspeed fromzeroto99.9milesperhour.
DISTANCE:Displaysthedistancefromzeroto999.9miles.
CALORIE: Displaysthecalorieconsumptionfromzeroto999.9Kcal.
NOTE: Thecaloriereadoutsare an estimateforan average user.It
shouldbe usedonlyasacomparisonbetweenworkoutsonthis
unit.
AGE/TARGETH.R.: When you selecttheHeartRateControlPrograms, P11 or P12,
youmustinputyourage.ThisvalueaffectsonlytheHeart Rate
ControlPrograms.PressENTERbuttonuntil the AGE/TARGET
H.R.displayisflashinganduse “+/-“buttonstoinput yourage.
When Heart RateControlPrograms,P11orP12, are selected,the
targetheartratevaluewillbeshownduringexercise.
HEARTRATE: Displaysheartrateinbeatsper minutefrom40 to240 beatsper
minute.Todisplaythe heartrate,you must graspthePulseSensors
onbothsidesofthehandrail, one ineachhand. The heartsymbol
”“willbeginflashing whenthe computer sensesyour heartrate.
Yourheart ratewill be displayed approximatelyfive(5)secondsafter
the heart icon isdisplayed.Ifyoudonotplaceyourhandscorrectly
and60 secondspasseswithoutaheart ratereading,thecomputer
willturnofftheheart ratecircuit.Ifthisoccurs,presstheENTER
button torestartthe heartratecircuit,placeyour handsback on the
PulseSensorscorrectly,and theheartratereadout willappear.
COMPUTERINSTRUCTIONS
PROGRAMDESCRIPTIONS
Thiscomputer containers12 differentprograms. You canpresetthe programtimeandthe
computer willdividethetimechoseninto10intervals.If you do not set theprogramtimein
advance, thecomputer willdefaulttoa30minuteworkouttime.
MANUALPROGRAM:P1isamanualprogram
allowing theuser tohavefullmanualcontrolof
the workload. Usethe “+”buttontoincreasethe
load. User “-“button todecreasethe load.
16
15
14
13
12
11
10
9
8
7
6
5
4
3
2
112345678910
MANUALPROGRAM
PDFcreated withpdfFactorytrialversion www.softwarelabs.com
Customer Service1-888-707-1880
Email: customerservice@pincoffs.ca -12-MauricePincoffs CanadaInc. ©2010
PRESETPROGRAMS: P2toP10 are presetautomaticprograms.Theprofilesareshown
onthefaceofthe computer.Usethe “+”buttontoincreasetheloadlevelof theprogram.
User the “-“buttontodecreasetheload levelofthe program.
Asyou exercise,the programwillmonitor your
Pulseandadjust the workloadautomaticallyto
keep youworkingwithinazonethatisplusor minus
5beatsper minuteofyour target heartrate.Your
age and the programyour selectedwilldetermine
your heartratezone.
Forexample, ifyourage is30,your maximumhear
rateis190.If you selected P11,your workoutwill
keep your withinatargetheartratezone thatisplus
orminus5beatsperminuteof60 of your maximum
heartrate:190x60%= 114 soyourheartratezone
is109to119.Theprogramwill monitoryourpulse
and adjust theworkload automaticallytokeep your
pulsewithinthe heartratezoneduringyour workout.
16
15
14
13
12
11
10
9
8
7
6
5
4
3
2
112345678910
ROLLINGPROGRAM
16
15
14
13
12
11
10
9
8
7
6
5
4
3
2
112345678910
FATBURNPROGRAM
16
15
14
13
12
11
10
9
8
7
6
5
4
3
2
112345678910
RAMPPROGRAM
16
15
14
13
12
11
10
9
8
7
6
5
4
3
2
112345678910
FITNESSPROGRAM
16
15
14
13
12
11
10
9
8
7
6
5
4
3
2
112345678910
RANDOMPROGRAM
16
15
14
13
12
11
10
9
8
7
6
5
4
3
2
112345678910
FLATPROGRAM
16
15
14
13
12
11
10
9
8
7
6
5
4
3
2
112345678910
INTERVALPROGRAM
16
15
14
13
12
11
10
9
8
7
6
5
4
3
2
112345678910
MOUNTAINPROGRAM
16
15
14
13
12
11
10
9
8
7
6
5
4
3
2
112345678910
60%RATE
16
15
14
13
12
11
10
9
8
7
6
5
4
3
2
112345678910
85%RATE
16
15
14
13
12
11
10
9
8
7
6
5
4
3
2
112345678910
VALLEY PROGRAM
11
PDFcreated withpdfFactorytrialversion www.softwarelabs.com
Customer Service1-888-707-1880
Email: customerservice@pincoffs.ca -13-MauricePincoffs CanadaInc. ©2010
COMPUTEROPERATION
STEP 1:POWERONEnsurethattheadaptorispluggedintothesocket foundat
thebottomofthefrontframe.Pedaling or press anybutton.
STEP 2:SELECTPROGRAM
Pressthe programbuttonsuntilthe desired programisdisplayed.
STEP 3:SETTHEPROGRAMTIME (ANDINPUTAGE FORHEARTRATECONTROL
PROGRAMS)
Pressthe ENTER button,the TIME function mode will appear withthedisplay
flashing “0:00”.
Pressthe ENTER buttonagaintopass settingthe programtime.Orusethe
programbuttonstosettheprogramtime,from5minutesupto99 minuteswith1
minuteincrements.
Pressthe ENTER buttontoconfirmthesetting. Pressthe START/STOP button
tostarttheprogram.
NOTE:
1.The programwillnotstartuntilyou pressthe START/STOPbutton.
2.If you dont set theprogramtime,the computerwillcountup fromonesecondupto
99:59 minutes, and usethedefaultworkouttime, 30 minutes,tocyclerun the
programprofile.
3.The computerwillcountdownfromtheprogramtimethat youset.When thetimer
countsdowntozero,the computerwill alert youwithanaudiblealarmthat your
workout iscomplete.Youcan pressanybuttontostopthe audiblealarm.
OPERATIONDESCRIPTION
1.Tostop arunning program,pressthe START/ STOP button.Inthismode,you can
pressthe START/ STOP button againtocontinuetorun thecurrentprogram.Or,
you canusethe programbuttonstoselectanewprogram. The function valuesof
DISTANCE and CALORIE willcontinue toaccumulate.
2.Whenyoucompleteaprogram, pressthe START/ STOP buttontostopthe
program. You canusethe Programbuttonstoselectanewprogram. The function
valuesof DISTANCE and CALORIE willcontinue toaccumulate.Thiswill allowyou
torunseveralprogramsandstillknowthetotal DISTANCE and CALORIE during
the workout.
3.Ifyouwanttorestart withanewprogram,press the START/STOP buttontoreset
all ofthe function valuestozero.Usethe programbuttonstoselectanewprogram.
4.The computerwill shutoff automaticallyafter4minutesofinactivity,and the
functionvalues, DISTANCE and CALORIE,willbekept.
PDFcreated withpdfFactorytrialversion www.softwarelabs.com
Customer Service1-888-707-1880
Email: customerservice@pincoffs.ca -14-MauricePincoffs CanadaInc. ©2010
DIAGRAM
PDFcreated withpdfFactorytrialversion www.softwarelabs.com
Customer Service1-888-707-1880
Email: customerservice@pincoffs.ca -15-MauricePincoffs CanadaInc. ©2010
PARTSLIST
KEY NO. PARTNO. DESCRIPTION/SPECIFICATION Q'TY
1 85201 Frontframe 1
2 85202 Frontstabilizer 1
3 85203 Upright 1
4 85204 Handlebar 1
5 85205 Rear frame 1
6 85206 Rear stabilizer 1
7 85207 Handrailbracket 1
8 85208 SeatFrame 1
9 85209 Handrail 1
10 85210 Beltpulley 1
11 85211 Bearing (6003Z) 2
12 85212 Bearing Washer 2
13 85213 CRing(17mm) 2
14 85214 Drivebelt 1
15 85215 Idlewheelbracket 1
16 85216 Idlewheel 1
17 85217 Spacer 1
18 85218 Spring 1
19 85219 Mag.flywheelsystemwithpivot shaft
1
20 85220 Washer 2
21 85221 Nut 1
22 85222 Nut 3
23 85223 Resistant cable 1
24 85224 Motorw/extensionmotorcable 1
25 85225 Middlesection systemcable 1
26 85226 Uppersection systemcable 1
27 85227 Computer 1
28 85228 Power cable 1
29 85229 Nut 1
PDFcreated withpdfFactorytrialversion www.softwarelabs.com

Customer Service1-888-707-1880
Email: customerservice@pincoffs.ca -16-MauricePincoffs CanadaInc. ©2010
KEY NO. PARTNO. DESCRIPTION/SPECIFICATION Q'TY
30 85230 Sensorw/wire 1
31 85231 Magnet 1
32 85232 Uprightsleeve 1
33 85233 Screw M6X75mm 2
34 85234 Wheel 2
35R 85235R CrankarmRight 1
35L 85236L CrankarmLeft 1
36R 85236R Transportation wheelcapRight 1
36L 85236L Transportation wheelcapLeft 1
37 85237 FlangeBolt M8X1.25X20mm 2
38 85238 Crankplug 2
39R 85239R Foot pedalRight 1
39L 85239L Foot pedalLeft 1
40R 85240R Foot pedalstrap Right 1
40L 85240L Foot pedalstrap Left 1
41 85241 Roundplug(25.4mm 2
42 85242 Wrench 1
43 85243 Rear section systemcable 1
44 85244 Wire plug 1
45 85245 Seat rail 1
46 85246 Railcap 2
47 85247 Stopper 4
48 85248 Sleeve 1
49 85249 Quickrelease 1
50 85250 Roller 8
51 85251 Rollersupport 4
52 85252 Cring(10mm) 8
53 85253 Nutcap 8
54 85254 Wire plug 1
55 85255 Handpulsewire 1
PDFcreated withpdfFactorytrialversion www.softwarelabs.com
Customer Service1-888-707-1880
Email: customerservice@pincoffs.ca -17-MauricePincoffs CanadaInc. ©2010
KEY NO. PARTNO. DESCRIPTION/SPECIFICATION Q'TY
56 85256 Handpulsesensor plate 2
57 85257 Handgrip 2
58 85258 Cap 2
59 85259 Seat 1
60 85260 Back cushion 1
61 85261 Formgrip 2
62 85262 Bottleholder 1
63 85263 Footcap 2
64 85264 Levelingcap 4
65R 85265R Rear chainguardRight 1
65L 85265L Rear chainguardLeft 1
66R 85266R Frontchainguard Right 1
66L 85266L Frontchainguard Left 1
67 85267 Plug 4
68 85268 Levelingcap 1
69 85269 Machinescrew M4X50mm 1
70 85270 Allenhead bolt M8X40mm 1
71 85271 Allenhead bolt M8X45mm 2
72 85272 Allenhead bolt M8X55mm 4
73 85273 Allenhead bolt M10X15mm 7
74 85274 Allenhead bolt M10X20mm 4
75 85275 Allenhead bolt M10X53mm 3
76 85276 Allenhead bolt M10X200mm 2
77 85277 HexheadboltM8X70mm 2
78 85278 Flathead screw M6X12mm 2
79 85279 Flathead boltM8X15mm 6
80 85280 Flathead boltM8X20mm 1
81 85281 Flathead boltM8X35mm 1
82 85282 Screw M6X38mm 8
83 85283 Adaptor 1
16
PDFcreated withpdfFactorytrialversion www.softwarelabs.com
Customer Service1-888-707-1880
Email: customerservice@pincoffs.ca -18-MauricePincoffs CanadaInc. ©2010
KEY NO. PARTNO. DESCRIPTION/SPECIFICATION Q'TY
84 85284 Flathead screw M5X20mm 3
85 85285 Machinescrew M4X15mm 10
86 85286 Machinescrew M5X15mm 4
87 85287 Machinescrew M4X15mm 12
88 85288 Machinescrew M4X25mm 11
89 85289 Screw M5X10mm 4
90 85290 Machinescrew M5X15mm 1
91 85291 NutM8 2
92 85292 Nylock nutM5 3
93 85293 Nylock nutM6 2
94 85294 Nylock nutM8 1
95 85295 Nylock nutM10X7mm 9
96 85296 WasherM10 8
97 85297 Acron nut M10 2
98 85298 CurvewasherM8 2
99 85299 CurvewasherM10 8
100 852100 SpringwasherM8 6
101 852101 SpringwasherM10 16
102 852102 Washer32x16x0.5mm 1
103 852103 Flatwasher M8 4
104 852104 Allenwrench5mm 1
105 852105 Allenwrench6mm 1
PDFcreated withpdfFactorytrialversion www.softwarelabs.com
Customer Service1-888-707-1880
Email: customerservice@pincoffs.ca -19-MauricePincoffs CanadaInc. ©2010
TROUBLESHOOTING
Problem Cause Correction
MonitordoesnotdisplayAdaptor notplugged Plug adaptor in
Nospeedordistance
displaysonthemonitor Sending unitnotconnected Securelyplug sendingunit
intoextensionwire and the
backofthe computer
Sending unitnotworking
properly Replacesending unit
Computernotworking
properly Replacecomputer
Notension Motor cableor resistant
cablenotconnected
Securelyconnectthemotor
cableintothe extension
motor cableand the
resistantcable
Magneticwheelnotworking
properly Replacemagneticwheel
Heartratenotdisplaying
Pulsewire notconnected
not connected Securelyplug wirestogether
Hand pulsedefective Replacehandpulse
Computernotworking
properly Replacecomputer
GrindingCrankbearingdefective Replacecrankbearings
Idlepulleydefective Replaceidlepulley
Mag.flywheeldefective Replacemag.flywheel
Squealing PolyV-beltslipping Adjustpolyv-belt
PDFcreated withpdfFactorytrialversion www.softwarelabs.com
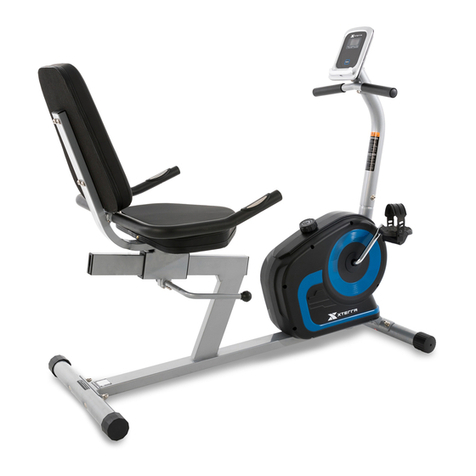
Table of contents
Other Xterra Exercise Bike manuals

Xterra
Xterra SB500 User manual

Xterra
Xterra 16204791500 User manual

Xterra
Xterra SB4500 User manual

Xterra
Xterra MB880 User manual

Xterra
Xterra MBX2500 User manual

Xterra
Xterra EU100 User manual

Xterra
Xterra 16416880-1 User manual

Xterra
Xterra MB500 User manual

Xterra
Xterra SB540r User manual

Xterra
Xterra R15 User manual

Xterra
Xterra FB160 User manual

Xterra
Xterra MB8.5 User manual

Xterra
Xterra FB360 User manual

Xterra
Xterra 16467450US User manual

Xterra
Xterra 16467200US User manual

Xterra
Xterra SB440r User manual

Xterra
Xterra UB2.5 User manual

Xterra
Xterra SB2.5 User manual

Xterra
Xterra SB250 User manual

Xterra
Xterra 16204770480 User manual