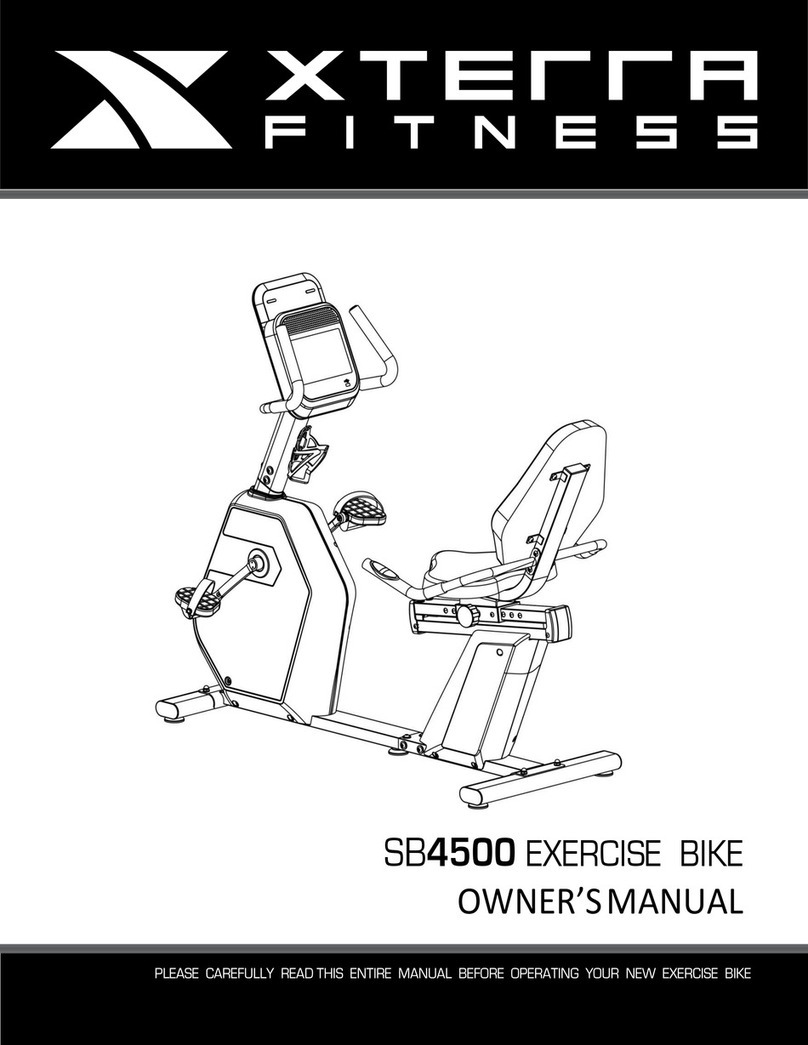
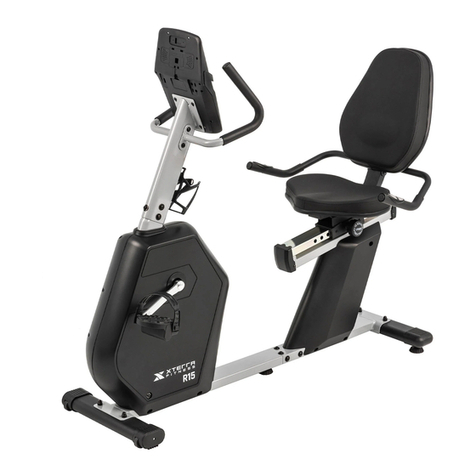
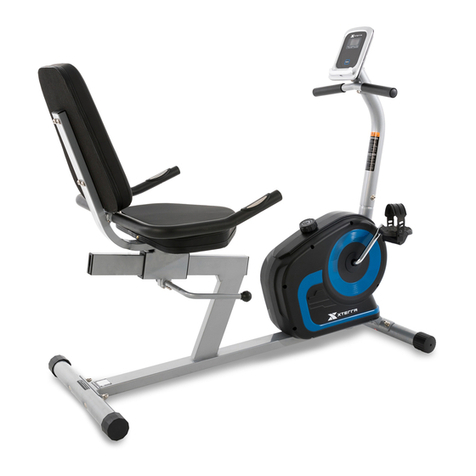
Xterra 16416540 User manual

RETAIL FOR FUTURE REFERENCE
MAURICE PINCOFFS CANADA INC. 6050 DON MURIE STREET, NIAGARA FALLS, ONTARIO, L2E 6X8
OWNER’S MANUAL
MODEL NO.
16416540
•Warranty
•Assembly
•Parts
•Operation
•Exercise
CAUTION:
You must read and
understand this
owner’s manual
before operating unit.

CUSTOMER SERVICE 1-888-707-1880 MAURICE PINCOFFS CANADA INC.
©2010
1
Manufacture’s One-Year Limited Warranty
Your Xterra deluxe training cycle is warranted for one year from the date of purchase against
defects in material and workmanship, when used for the purpose intended, under normal conditions,
and provided it receives proper care. Any part found defective will be sent at no cost when returned
in accordance with the terms of this warranty.
This warranty is not transferable and is extended only to the original owner.
The warranty shall not apply to deluxe training cycle which are (1) used for commercial or other
income producing purposes, or (2) subject to misuse, neglect, accident or unauthorized repairs and
alterations.
This warranty provided herein is in lieu of all other express warranties. Any implied warranties,
including any implied warranties of merchantability or fitness for particular purpose, are limited in
duration to the first 12 months from the date of purchase. All other obligations or liabilities, including
liability for consequential damages, are hereby excluded.
Repair Parts and Service
All of the parts for the cycle, shown in figure can be ordered from: MAURICE PINCOFFS
CANADA INC., 6050 Don Murie Street, Niagara Falls, Ontario L2E 6X8. When ordering parts, the
parts will be sent and billed at the current prices. Prices may be subject to change without notice.
Cheque or money order must accompany all orders. Standard hardware items are available at your
local hardware store.
To ensure prompt and correct handling of any errors, or to answer any questions, please call our
Toll Free number, 1-888-707-1880, or local number 1-905-353-8955 or fax 1-905-353-8968 or email
Eastern Standard time. Visit is at www.pincoffs.ca.
Always include the following information when ordering parts:
•Model number
•Name of each part
•Part number of each part
Table of Contents
WARRANTY 1
MONITOR INSTRUCTION 13-19
SAFETY PRECAUTIONS 2
PARTS LIST& DIAGRAM 20-23
HARDWARE PACKING LIST 3-5
TROUBLE SHOOTING 24
ASSEMBLY INSTRUCTION 6-10
TRAINING GUIDELINES 25-27
DRINK BOTTLE HOLDER ASSEMBLING 11
STRETCHING 28-29
FEATURES 12

CUSTOMER SERVICE 1-888-707-1880 MAURICE PINCOFFS CANADA INC.
©2010
2
SAFETY PRECAUTIONS
Thank you for purchasing our product. Even though we go to great efforts to ensure the quality of
each product we produce, occasional errors and /or omissions do occur. In any event should you
find this product to have either a defective or a missing part please contact us for a replacement.
This product has been designed for home use only. Product liability and guarantee conditions will
not be applicable to products being subjected to professional use or products being used in a gym
center.
This exercise equipment was designed and built for optimum safety. However, certain precautions
apply whenever you operate a piece of exercise equipment. Be sure to read the entire manual
before assembly and operation of this machine. Also, please note the following safety precautions:
1. Read the OWNER’S OPERATING MANUAL and all accompanying literature and follow it
carefully before using your upright cycle.
2. If dizziness, nausea, chest pains, or any other abnormal symptoms are experienced while
using this equipment, STOP the workout at once. CONSULT A PHYSICIAN MMEDIATELY.
3. Inspect your exercise equipment prior to exercising to ensure that all nuts and bolts are fully
tightened before each use.
4. The upright cycle must be regularly checked for signs of wear and damage. Any part
found defective must be replaced with a new part from the manufacturer.
5. Fitness equipment must always be installed on a flat surface, It is recommended to use an
equipment mat to prevent the unit from moving while it is being used, which could possibly
scratch or damage the surface of your floor.
6. No changes must be made which might compromise the safety of the equipment.
7. It is recommended to have a minimum of 2’ safe clearance around the exercise equipment
while in use.
8. Keep children and pets away from this equipment at all times while exercising.
9. Warm up 5 to 10 minutes before each workout and cool down 5 to 10 minutes afterward.
This allows your heart rate to gradually increase and decrease and will help prevent you
from straining muscles.
10. Never hold your breath while exercising. Breathing should remain at a normal rate in
conjunction with the level of exercise being performed.
11. Always wear suitable clothing and footwear while exercising. Do not wear loose fitting
clothing that could become entangled with the moving parts of your upright cycle.
12. Care must be taken when lifting or moving the equipment, so as not to injure your back.
Always use proper lifting techniques.
13. User weight should not exceed 300 lbs.
14. Tie all long hair back. Remove all personal jewelry before exercising.
15. After eating, allow 1-2 hours before exercising as this will help to prevent muscle strain.
16. Injuries may result from incorrect or excessive training and using the equipment otherwise
than as directed or recommended by your doctor.
WARNING:
BEFORE BEGINNING ANY EXERCISE PROGRAM CONSULT YOUR PHYSICIAN. THIS IS
ESPECIALLY IMPORTANT FOR INDIVIDUALS OVER THE AGE OF 35 OR PERSONS WITH
PRE-EXISTING HEALTH PROBLEMS. READ ALL INSTRUCTIONS BEFORE USING ANY
FITNESS EQUIPMENT. WE ASSUME NO RESPONSIBILITY FOR PEROSNAL INJURY OR
PROPERTY DAMAGE SUSTAINS BY OR THROUGH THE USE OF THIS PRODUCT.
CUSTOMER SERVICE 1-888-707-1880 MAURICE PINCOFFS CANADA INC.
©2010
3
#95 - 5/16"
×
3/4"
Button Head Socket Bolt (6pcs)
#96 - 3/8" × 3-1/2" Carriage Bolt (2pcs)
#70 - 5/16" × 18mm
Flat Washer (6pcs)
#97 - 3/8" × 23mm
Curved Washer (2pcs)
Step 2
#80. 3/8"
Nyloc Nut (4pcs)
ASSEMBLY PACK CHECK LIST
Step 1
#100 - 3/8"× 3" Hex Head Bolt (4pcs)
#99 - M6 × 15mm
Phillips Head Screw (4pcs)
#98 - 3/8"
Cap Nut (2pcs)
#71 - 3/8" × 19mm
Flat Washer (4pcs)
#73 - 5/16"
Split Washer (6pcs)
#90 - 5/16"
×
1
-
1/4"
Hex Head Bolt (4pcs)
#81 - M5
×
12mm
Phillips Head Screw (4pcs)

CUSTOMER SERVICE 1-888-707-1880 MAURICE PINCOFFS CANADA INC.
©2010
4
Step 4
ASSEMBLY PACK CHECK LIST
Step 3
#101 - 3/8" × 3/4"
Self Tapping Screw (6pcs)
#71 - 3/8" × 19mm
Flat Washer (6pcs)
#81 - M5 × 12mm
Phillips Head Screw (4pcs)
#70 - 5/16"
×
18
mm
Flat Washer (4pcs)
#95 - 5/16" × 3/4"
Button Head Socket Bolt (6pcs)
#102 - 5/16" × 19mm
Curved Washer (2pcs)
#70 - 5/16" × 18mm
Flat Washer (2pcs)
#95 - 5/16" × 3/4"
Button Head Socket Bolt (2pcs)
#73 - 5/16”
Split Washer (2pcs)

CUSTOMER SERVICE 1-888-707-1880 MAURICE PINCOFFS CANADA INC.
©2010
5
#105 - Phillips Screw Driver (1pc)
#104 - 14/15mm Wrench (1pc)
#103 - 12/14mm Wrench (1pc)
Tools
#106 - M5 Allen Wrench (1pc)

CUSTOMER SERVICE 1-888-707-1880 MAURICE PINCOFFS CANADA INC.
©2010
6
Before assembling the seat carriage to the bike, in Step 1 of the assembly instructions, you
need to slide the seat carriage forward on the chrome tube so it is a few inches away from
the end of the tube.
Seat carriage position as shipped.
Push handle down, Shipping position
Slide seat carriage forward
Seat carriage position for assembly.
Seat carriage position for assembly, a few inches from tube end
Assembly InstructionsInformation

CUSTOMER SERVICE 1-888-707-1880 MAURICE PINCOFFS CANADA INC.
©2010
7
STEP 1: SEAT ASSEMBLY & REAR STABILIZER
•Install the rear stabilizer tube(18) to the main frame (1). Secure with two 3/8" × 3-1/2"
carriage bolts (96), two 3/8" × 23mm curved washers (97) and two 3/8" cap nuts (98).
•Sitting next to the unit, with the seat post (11) in your lap, connect the two wires together
(109 & 110). Secure the seat post to the main frame – be careful to not pinch the wires –
with the six 5/16" × 3/4" button head socket bolts (95), six 5/16" split washers (73) and
six 5/16" × 18mm flat washers (70).
•Lay the seat cushion (52) on the floor, cushion side down, and then lay the seat carriage
assembly (4 &14) on top of the seat cushion. Align the holes and secure the seat cushion
with four M6 x 15mm phillips head screws (99). Make sure seat cushion is facing the
right direction.
•Secure the seat carriage assembly (4 &14) to the seat post with four 5/16" × 1-1/4" hex
head bolts (90). Make sure these bolts are very tight. Assemble the two plastic end caps
(42) to the seat carriage with four M5 × 12mm phillips head screws (81).

CUSTOMER SERVICE 1-888-707-1880 MAURICE PINCOFFS CANADA INC.
©2010
8
STEP 2: Rear Handle Bars
•Install the left and right handlebars (6 & 7) to the seat carriage. Secure with four 3/8" ×
3" hex head bolts (100), four 3/8" flat washers (71) and four 3/8" nyloc nuts (80). Be
careful that the wires do not get pinched while assembling the handlebars. The wires for
the pulse sensors (111 & 112) will be connected in step 4; just leave them hanging for
now.

CUSTOMER SERVICE 1-888-707-1880 MAURICE PINCOFFS CANADA INC.
©2010
9
STEP 3: Console Mast & Seat Back
•Secure the seat back assembly (5) to the seat carriage with six 3/8" × 3/4" self tapping
screws (101) and six 3/8" × 19mm flat washers (71). Make sure these bolts are very
tight.
•Run the two wires (107 & 109) through the bottom of the console mast and out the
hole at the top. Slide the console mast into the mating tube; pull slightly on the two wires
while you install the console mast so they do not get pinched. Secure the mast with six
5/16" × 3/4" button head socket bolts (95), four 5/16" × 18mm flat washers (70) on the
side bolts and two 5/16" × 19mm curved washers (102) on the two front bolts. Make
sure to start all six bolts first before tightening all the way.

CUSTOMER SERVICE 1-888-707-1880 MAURICE PINCOFFS CANADA INC.
©2010
10
STEP 4: Console, Handle Bars and Pedals
•Install the front handlebar (3) and secure with two 5/16" x 3/4" button head socket bolts
(95), two 5/16" split washers (73) and two
5/16" × 18mm flat washers (70).
•Connect the two wires (107 & 109) to the mating connectors on the back of the console
(94) and secure the console with four M5 x 12mm phillips head screws (81). Be careful
not to pinch the wires between the console and mounting plate.
•Install the right and left pedals (36 / 35) to the right and left crank arms (45R / 45L). The
left pedal (35) is a reverse thread so as you turn the pedal bolt into the crank arm turn it
counter-clockwise as if you are loosening it. The right side pedal (36) is a normal thread
so tighten it clockwise. Make sure the pedals are as tight as you can possibly get them. It
may be necessary to re-tighten them again after a few hours of use.

CUSTOMER SERVICE 1-888-707-1880 MAURICE PINCOFFS CANADA INC.
©2010
11
Drink Bottle Holder Assembling

CUSTOMER SERVICE 1-888-707-1880 MAURICE PINCOFFS CANADA INC.
©2010
12
Foot pedals
Through research performed with a leading sports scientist and physical rehabilitation expert the
engineers at Xterra have developed a breakthrough in pedal design. Typical stationary exercise
bikes are wider than a normal road bike to allow for the braking mechanism, pulleys, drive
components and beauty covers. Since the bike is wider, so is the distance between the pedals; this
width between the pedals is called the Q factor.
Xterra has designed our pedal system so the Q factor is the smallest in the industry, but we did not
stop there. We have also custom designed and tooled a new pedal that provides a two degree
inward tilt to compensate for the Q factor not being perfect. Having a small Q factor in addition to
the two degree inward tilt of the pedals puts the user into a biomechanical neutral alignment. This
means that your feet, ankles, knees and hips are lined up properly so you can workout more
comfortably for a longer time.
Transportation
The bike is equipped with two transport wheels, which are engaged when rear of the Bike is lifted.
POWER CONNECTOR LOCATED ON
FRONT, RIGHT HAND SIDE OF UNIT.
Features

CUSTOMER SERVICE 1-888-707-1880 MAURICE PINCOFFS CANADA INC.
©2010
13
Power up
The Elliptical is supplied with an external power supply. When power is connected to the Elliptical,
the console will automatically power up. If there is no input to the console for 20 minutes the
console will go to stand-by mode to save energy. To turn the console on press any key.
When initially powered on the console will perform an internal self-test. During this time all the lights
will turn on. When the lights go off the dot matrix display will show a software version (i.e.: VER 1.0)
and the time and distance windows will display an odometer reading. The odometer reading
displays how many hours the elliptical has been used and how many virtual miles the elliptical has
gone. The odometer will remain displayed for only a few seconds then the console will go to the
start up display. The dot matrix display will be scrolling through the different workout profiles of the
programs and the message window will be scrolling an instructional message. You may now begin
to use the console.
Operation of Your Bike Console

CUSTOMER SERVICE 1-888-707-1880 MAURICE PINCOFFS CANADA INC.
©2010
14
Console Operation
Quick Start mode
This is the quickest way to start a workout. After the console powers up you just press the Start key
to begin. In Quick Start the Time will count up from zero and the workload may be adjusted
manually by pressing the Up or Down keys. The dot matrix display will show a work profile with a ¼
mile track around it and a lap counter to the left. Pressing the Enter key will switch the display from
track to a hill type profile. To the right of the dot matrix is a number that indicates your work level.
Basic information and functions:
The Data displays:
•Pulse indicates your heart rate if you are grasping the hand pulse sensors.
•Time shows elapsed time unless you set the timer to count down.
•Distance displays accumulated mileage.
•Calories show an accumulation of calories burned (Kcal). The number shown is just an
estimate; your actual calorie burn most likely will be different. The only way to get an
accurate calorie reading is in a laboratory setting connected to a host of machines.
Message Window: Instructions are displayed to assist in programming the console and during a
workout the message window will display workout data as described below.
•Speed shows your speed in miles per hour if there is an ‘M’ displayed to the left of the
track/profile window, and kilometers per hour if ‘Km’ is displayed. Press the Enter key to
switch the display to see your Speed in RPM.
•Level Pressing the enter key again will switch the display to show your current work level.
The Elliptical has a built in heart rate monitoring system. Simply grasping the hand pulse sensors
on the stationary handle bars will start the heart Icon blinking (this may take a few seconds). The
Pulse Display Window will display your heart rate in beats per minute.
The Stop/Reset button performs several functions. Pressing the Stop/Reset key once during a
program will Pause the program for 5 minutes. If you need to get a drink, answer the phone or any
of the many things that could interrupt your workout, this is a great feature. To resume your workout
during Pause just press the Start key. If the Stop/Reset button is pressed twice during a workout the
program will end and a summary of your workout is displayed. If the Stop/Reset key is held down
for 3 seconds the console will perform a complete Reset. Pressing the stop key while you are
setting up a program will take you back one step to the previous screen.
There is an Audio Input Jack on the front of the console and built-in speakers. You may plug any
low-level audio source signal into this port. Audio sources include MP3, Ipod, portable radio, CD
player or even a TV or computer audio signal.
Programming the console
Each of the programs can be customized with your personal information and changed to suit your
needs. Some of the information asked for during programming is necessary to ensure the readouts
are correct. You will be asked for your Age and Weight. Entering your Age is necessary during the
Heart Rate control program to ensure the correct settings are entered in the program. Entering your
Weight aides in calculating a more correct Calorie reading; although we cannot provide an exact
calorie count we do want to be as close as possible.

CUSTOMER SERVICE 1-888-707-1880 MAURICE PINCOFFS CANADA INC.
©2010
15
A message about Calories: Calorie readings on every piece of exercise equipment, whether it is
in a gym or at home, are not accurate and tend to vary widely. They are meant only as a guide to
monitor your progress from workout to workout. The only way to measure your calorie burn
accurately is in a clinical setting connected to a host of machines. This is because every person is
different and burns calories at a different rate.
Entering a program/Changing Settings
Press the program keys to scroll through the program selections. The profile for each program will
be displayed in the dot matrix window. Press the enter key to select a program and begin
customizing the settings. If you want to workout without entering new settings then just press the
Start key. This will bypass the programming of data and take you directly to the start of your
workout. If you want to change the personal settings then just follow the instructions in the
message window. If you start a program without changing the settings, the default settings will be
used.
NOTE: Age and Weight default settings will change when you enter a new number. So the last Age
and Weight entered will be saved as the new default settings. If you enter an age and weight the
first time you use the Elliptical you will not have to enter it every time you work out unless either
your age or weight changes or someone else enters a different age and weight.
Programming:
Manual
The Manual program works as the name implies, manually. This means that you control the
workload yourself and not the computer.
1. Press the Manual program button then press the Enter key.
2. The message window will ask you to enter your Weight. You may adjust the weight setting
using the Up and Down keys, then press enter to continue.
3. The message window will ask you to enter your Age. You may adjust the age setting using
the Up and Down keys, then press the Enter key to accept the new number and proceed on
to the next screen.
4. Next is the Time. You may adjust the Time and press enter to continue.
5. Now you are finished editing the settings and can begin your workout by pressing the Start
key.
6. Once the program starts the elliptical will be set to level one. This is the easiest level and it is
a good idea to stay at level one for a while to warm up. If you want to increase the work load
at any time press the Up key; the Down key will decrease the workload.
7. When the program ends the message window will show a summary of your workout. The
summary will be displayed for a short time then the console will return to the start-up display.

CUSTOMER SERVICE 1-888-707-1880 MAURICE PINCOFFS CANADA INC.
©2010
16
Preset Programs
The Elliptical has seven different programs that have been designed for a variety of workouts.
These seven programs have factory preset profiles for achieving different goals.
P-1 Sunrise
The Sunrise program simulates going up and down a gentle hill. The resistance in the pedals will steadily
increase and then decrease during the program.
P-2 Journey
The Journey program is designed to maximize the burning of fat, a lifelong journey for some of us. There are
many schools of thought on the best way to burn fat, but most experts agree that a lower exertion level that
stays at a steady workload is the best. The absolute best way to burn fat is to keep your heart rate at around
60% to 70% of its maximum potential. This program does not use heart rate but simulates a lower, steady
exertion workout.
P-3 Wild Ride
The Wild Ride program is designed to increase your cardio vascular function; this is exercise for your heart
and lungs. It will build up your heart muscle and increase blood flow and lung capacity. This is achieved by
incorporating a higher level of exertion with slight fluctuations in work….a real Wild Ride!
P-4 Xtreme
The Xtreme program is designed to increase muscular strength in your lower body with extreme resistance.
This program will steadily increase in resistance to a high level and then keeps you there. This is designed
to strengthen and tone your legs and glutes.

CUSTOMER SERVICE 1-888-707-1880 MAURICE PINCOFFS CANADA INC.
©2010
17
P-5 Canyons
The Canyons program takes you through high levels of intensity followed by periods of low intensity.
This program increases your endurance by depleting your oxygen level followed by periods of
recovery to replenish oxygen. Your cardio vascular system gets programmed to use oxygen more
efficiently this way.
P-6 Thrill Hill
The Thrill Hill program combines a few types of workout in one, with variations of cardio and
strength portions to give you a thrill.
P-7 X-Country
The X-Country program simulates a cross country run across uneven terrain.
Programming Preset Programs:
1. Select the desired program then press the Enter key.
2. The message window will ask you to enter your Weight. You may adjust the weight setting, using the
Up and Down keys, then press the Enter key to accept the new number and proceed on to the next
screen.
3. You are now asked to enter your Age. You may adjust the age number using the Up and Down keys,
then press enter to continue.
4. Next is Time. You may adjust the Time and press enter to continue.
5. Now you are asked to adjust the Max Level. This is the peak exertion level you will experience during
the program (work level at the top of the hill). Adjust the level and then press enter.
6. Now you are finished editing the settings and can begin your workout by pressing the Start key.
7. If you want to increase or decrease the workload at any time during the program press the Up or Down
key. This will change only the work level during the current segment.
8. During the program you will be able to switch between a quarter mile track or profile display in the dot
matrix window.
9. When the program ends the message window will show a summary of your workout. The summary will
be displayed for a short time then the console will return to the start-up display.

CUSTOMER SERVICE 1-888-707-1880 MAURICE PINCOFFS CANADA INC.
©2010
18
Custom User Defined Programs
The customizable User programs allow you to build and save your own workout. You can build your
own custom program by following the instructions below.
1. Select the User program (U1 or U2) then press enter.
2. When you press enter, the message window will show “Welcome….press start…” if there is no
name saved. If the name “David” had been previously saved the message window will show
“Welcome David….” and the D will be blinking. If there is a name saved you can change it or
you may press the Stop key to keep the name and continue to the next step. If you want to
enter a new name press enter. Then use the Up and/or the Down key to change the first letter
and press Enter to save the first letter and continue to the next letter. When you have finished
entering the name press the Stop key to save the name and continue to the next step.
3. The message window will ask you to enter your Weight. You may enter your weight using the
Up and Down keys, then press the Enter key to accept the new number and proceed on to the
next screen.
4. You are now asked to enter your Age. You may adjust the age number using the Up and Down
keys, then press enter to continue.
5. Next is Time. You may adjust the total program time and press enter to continue.
6. Now the message window will ask you to adjust the first segment level; use the up & down
keys to adjust. When you finish adjusting the first segment, or if you don’t want to change it,
then press enter to continue to the next segment.
7. The next segment will show the same level as the previously adjusted segment. Repeat the
same process as the last segment then press enter. Continue this process until all twenty
segments have been set.
8. The message window will ask you to press start, which will start the program and also save the
program in memory.
9. If you want to increase or decrease the workload at any time during the program press the Up
or Down key. This will only affect the workload for the present position in the profile. When the
profile changes to the next column it will return to the preset work level.
10.When the program ends the message window will show a summary of your workout. The
summary will be displayed for a short time then the console will return to the start-up display.
Heart Rate Control Program operation
To start the HRC program follow the instructions below or just select the HRC program then the
Enter button and follow the directions in the message window.
1. Select the HRC program then press the Enter key.
2. The message window will ask you to enter your Weight. You may enter your weight using the
Up and Down keys then press the Enter key to accept the new number and proceed.
3. You are now asked to enter your Age. You may adjust the age number using the Up and Down
keys then press enter to continue.
4. You are now asked to select the target heart rate (THR) level. This is the heart rate level you will
experience during the program. Adjust the level and then press enter.
5. Next is Time. You may adjust the Time and press enter to continue.
6. Now you are finished editing the settings and can begin your workout by pressing the Start key.
7. If you want to change the THR at any time during the program press the Up or Down key.
When the program ends the message window will show a summary of your workout. The summary
will be displayed for a short time then the console will return to the start-up display.

CUSTOMER SERVICE 1-888-707-1880 MAURICE PINCOFFS CANADA INC.
©2010
19
Maintenance:
1. Wipe down all areas in the sweat path with a damp cloth after each workout.
2. If a thump, clicking or wobbly feeling develops the main cause is usually the pedals and/or
crank arms being loose.
Maintenance Menu in console software:
The console has built in maintenance/diagnostic software. The software will allow you to change
the console settings from English to Metric and turn off the beeping of the speaker when a key is
pressed for example. To enter the Maintenance menu (may be called Engineering mode,
depending on version) press and hold down the Start, Stop and Enter keys. Keep holding the keys
down for about 5 seconds and the message window will display “Engineering mode”. Press the
enter button to access the menu below. Press the up and down keys to navigate the menu.
a. Display test (tests all the display functions, press enter to perform test)
b. Key test (will allow you to test all the keys to make sure they are functioning)
c. Functions (Press enter to access settings, use up/dn keys to scroll)
i. ODOMETER reset (reset the odometer)
ii. Units (Set to English or Metric display readings)
iii. Bike or Elliptical (changes settings so the console can be used on an
Xterra bike or elliptical)
iv. Sleep mode Turns on/off sleep mode.
v. Motor test (continually runs the tensioning gear motor)
vi. Manual (Allows stepping of the gear motor)
vii. Key tone (Turn on or off the beep when a key is pressed)
d. Security (Allows you to lock the keypad so no unauthorized use is allowed) When
the child lock is enabled, the console will not allow the keypad to operate unless
you press and hold the Start and Enter buttons for 3 seconds to unlock the
console.
e. Clear EEPROM for engineering use only
Table of contents
Other Xterra Exercise Bike manuals

Xterra
Xterra 16204791500 User manual

Xterra
Xterra 16467200US User manual

Xterra
Xterra SB4.5r User manual

Xterra
Xterra SB2.5 User manual

Xterra
Xterra 16468451US User manual

Xterra
Xterra FB160 User manual

Xterra
Xterra UP150 User manual

Xterra
Xterra UB120 User manual

Xterra
Xterra 16416880-1 User manual

Xterra
Xterra SU139-43 User manual

Xterra
Xterra UB1.5 User manual

Xterra
Xterra 16467450US User manual

Xterra
Xterra MB880 User manual

Xterra
Xterra SB440r User manual

Xterra
Xterra SB150 User manual

Xterra
Xterra SB500 User manual

Xterra
Xterra U15 User manual

Xterra
Xterra UB2.5 User manual

Xterra
Xterra FB150 User manual

Xterra
Xterra 16416525 User manual