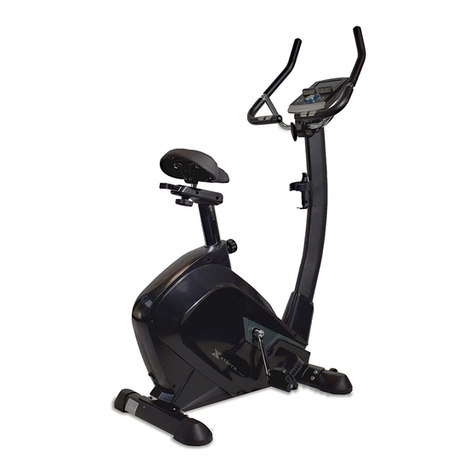
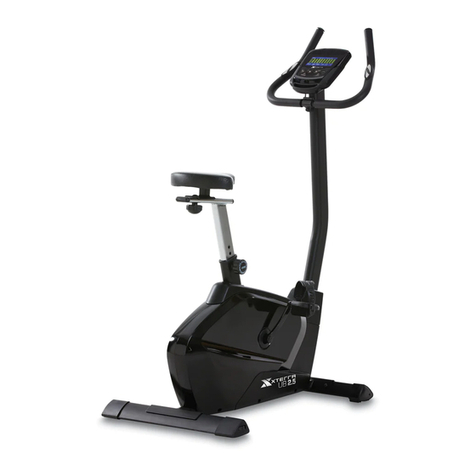
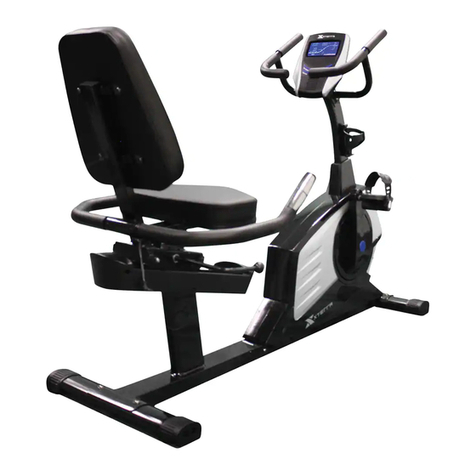
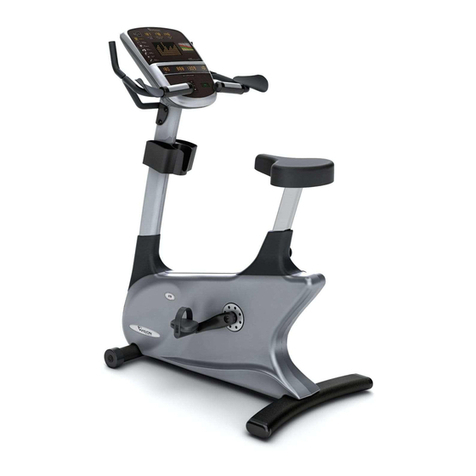
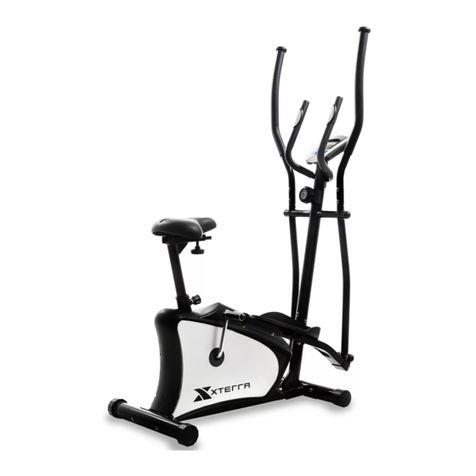
Xterra U15 User manual

U15
EXERCISE BIKE
OWNER’SMANUAL
PLEASE CAREFULLY READ THIS ENTIRE MANUAL BEFORE OPERATING YOUR NEW EXERCISE BIKE

Table Of Contents
Important Safety Instructions ..................................................................2
Important Electrical Instructions..............................................................3
Important Operation Instructions.............................................................3
U15 Assembly Instructions......................................................................5
Operation of Your Console......................................................................9
Program Introduction & Operation.........................................................12
LCD Workout Graphics.........................................................................16
Hand Pulse Grips..................................................................................19
Exploded View Diagram........................................................................20
Parts List...............................................................................................21
SU141-HB003_2109(XL)B

2
Important Safety Instructions
When using an electrical appliance, basic precautions should always be followed, including the following: Read
all instructions before using thisappliance.
DANGER- Toreduce the risk of electric shock:
1. Always unplug this appliance from the electrical outlet immediately after using and beforecleaning.
WARNING- Toreduce the risk of burns, fire electric shock, or injury to persons:
1.
An appliance should never be left unattended when plugged in. Unplug from outlet when not in use, and
before putting on or taking off parts.
2.
Do not operate under blanket or pillow. Excessive heating can occur and cause fire, electric shock, or injury
to persons.
3.
This exercise equipment is not intended for use by persons with reduced physical, sensory or mental capa-
bilities, or lack of experience and knowledge.
4.
Use this appliance only for its intended use as described in this manual. Do not use attachments not
recommended by the manufacturer.
5.
Never operate this appliance if it has a damaged cord or plug, if it is not working properly, if it hasbeen
dropped or damaged, or dropped into water. Return the appliance to a service center for examination and
repair.
6.
Do not carry this appliance by supply cord or use cord as a handle.
7.
Keep the cord away from heated surfaces.
8.
Never operate the appliance with the air openings blocked. Keep the air openings free of lint, hair, and the
like.
9.
Never drop or insert any object into any opening.
10.
Do not use outdoors.
11.
Do not operate where aerosol (spray) products are being use or where oxygen is beingadministered.
12.
Connect this appliance to a properly grounded outlet only.
13.
The appliance is intended for household use.
Fitness Equipment Safety Instructions
•Todisconnect, turn all controls to the off position, then remove the plug from the outlet.
•Do not operate equipment on deeply padded, plush or shag carpet. Damage to both carpet and equipment
may result.
•Before beginning this or any exercise program, consult a physician. This is especially important for persons
over the age of 35 or persons with pre-existing health conditions.
•Keep hands away from all moving parts.
•The pulse sensors are not medical devices. Various factors, including the user’s movement, may affect the
accuracy of heart rate readings. The pulse sensors are intended only as exercise aids in determining heart
rate trends in general.
•Do not attempt to use your equipment for any purpose other than for the purpose it isintended.
•Wear proper shoes. High heels, dress shoes, sandals or bare feet are not suitable for use onyour
equipment. Quality athletic shoes are recommended to avoid leg fatigue.
Failure to follow all guidelines may compromise the effectiveness of the exercise experience, expose
yourself (and possibly others) to injury, and reduce the longevity of theequipment.
SAVE THESE INSTRUCTIONS - THINK SAFETY!
CAUTION!! Please be careful when unpacking thecarton.
3
Important Electrical Instructions
WARNING!
•NEVER remove any cover without first disconnecting AC power supply.
•If A.C. voltage varies by ten percent (10%) or more, the performance of your exercise
bike may be affected. Such conditions are not covered under your warranty. If you
suspectthe voltage is low, contact your local power company or a licensed electrician for
proper testing.
•NEVER expose this exercise bike to rain or moisture. This product is NOT designed for
use outdoors, near a pool or spa, or in any other high humidity environment.Maximum
environmental ratings are 40-120 degrees Fahrenheit, 95% humidity non-condensing(no
water droplets forming on surfaces).
Important Operation Instructions
•NEVER operate this exercise bike without reading and completely understanding the
results
of any operational change you request from thecomputer.
•Understand that changes in resistance do not occur immediately. Set your desired level on
the computer console and release the adjustment key. The computer will obey the
command gradually.
•NEVER use your exercise bike during an electrical storm. Surges may occur in
your household power supply that could damage exercise bike components.
•Use caution while participating in other activities while using your exercise bike such
as watching television, reading, etc. These distractions may cause you to lose
balance, resulting in serious injury.

4
U15
Assembly
PackChecklist
28#、Carriage Bolt
M8*72MM (4pcs)
27#、Carriage Bolt
M10*35MM (1pc)
40#、Flat Washer
φ8*16*1.5t (4pcs)
37#、Flat Washer
φ10*30*3t (1pc)
17#、Seat Adj. Knob
(1pc)
32#、Phillips Head Screw
M5*12MM (6pcs)
49#、Cap Nut M8
(4pcs)
50#、L Allen Wrench 5mm
(1pc)
16#、Handlebar Adj. Knob
(1pc)
51#、Philips Head Screwdriver &
Wrench 13 14 15 (1pc)
44#、Block
φ8*13*6mm (1pc)
31#、Button Head
Socket Screw
M8*15MM (6pcs)
41#、Flat Washer
φ8*21*2t (4pcs)
42#、Cup Washer
φ8*21*2t (2pcs)

5
#28 Carriage Bolt M8*72mm (2 pcs)
#40 Flat Washer φ8*16*1.5t (2 pcs)
#49 Cap Nut M8 (2 pcs)
#28 Carriage Bolt M8*72mm (2 pcs)
#40 Flat Washer φ8*16*1.5t (2 pcs)
#49 Cap Nut M8 (2 pcs)
R
e
ar
S
t
abili
z
er
U15
Assembly Instructions
1
1. Install the Front Stabilizer Tube
(No. 5) onto the Main Frame and
secure using 2 Carriage Bolts (No.
28), 2 Flat Washers (No. 40), and 2
Cup Nuts (No. 49).
2
1. Install the Rear Stabilizer Tube (No.
6) onto the Main Frame and secure
using 2 Carriage Bolts (No. 28), 2
Flat Washers (No. 40), and 2 Cap
Nuts (No. 49).
Hardware
Step 1
Fr
ont
S
t
abili
z
er
Hardware
Step 2

6
#31. Button Head Socket Screw
M8*15mm (6 pcs)
#41
.
Flat Washer φ8*21*2t (4 pcs)
#42
.
Cup Washer φ8*21*2t (2 pcs)
#16. Handlebar Adj. Knob (1pc)
#32
.
Phillips Head Screw M5*12mm (2 pcs)
#44
.
Block φ8*13*6mm (1 pc)
3
1.
Put the O-Ring (No.20) onto the
Console Mast Cover (No. 24).
2.
Run the lower Computer Cable
(No. 63) through the Console
Mast Cover (No. 24) and the O-
Ring (No.20). Connect the
Computer Cables (No. 63 & No.
64) together.
3.
Secure the Console Mast (No. 2) to
the Main Frame using 6 Button
Head Socket Screw (No.31), 4 Flat
Washers (No. 41), and 2 Cup
Washer (No. 42).
4
1. Secure the Drink Bottle Holder (No.
57) to the Console Mast (No.2)
using 2 Philips Head Screws (No.
32).
2. Secure the Handle Bar (No.9) using
the Handlebar Adj. Knob (No.16)
and 1 Block (No.44).
Console
Mast
Hardware
Step 3
Handlebar
Hardware
Step 4

7
#51
.
Philips Head Screwdriver &
Wrench 13 14 15 (1 pc)
Pedals
C
onsole
#32
.
Phillips Head Screw M5*12mm
(4 pcs)
5
1.
Pull the Handpulse wires
(No. 68) through the
Grommet (No. 21) and then
through the hole of the
Console mast (No. 2), finally
plug the Grommet (No. 21)
into the Console mast (No.
2)
2.
Connect the upper Computer
Cable (No. 63) with the
Handpulse wires (No. 68) to
the Console (No. 59) and
install console onto the Mast
(No. 2) with using 4 Philips
Head Screws (No. 32)
Note: Pay attention on avoiding scratching and pinching the cables.
6
1.
Secure the Pedal - L (No. 54)
and Pedal - R (No. 55) using
the Philips Head Screwdriver
& Wrench (No. 51). The Left
Pedal (No. 54) should be
tightened counter-clockwise
and the Right Pedal (No. 55)
clockwise.
Console
Hardware
Step 5
Hardware
Step 6

8
#17
.
Seat Adj. Knob (1 pc)
#27
.
Carriage Bolt M10*35mm (1 pc)
#37
.
Flat Washer φ10*30*3t (1 pc)
#56-1
.
Cap Nut M8*8mm (3 pcs)
#56-2
.
Flat Washer φ8*φ19*2.0t (3
pcs)
7
1.
Secure the Seat Cushion (No.
56) to the Sliding Seat Mount
(No. 4) using 3 Cap Nut
(No.56-1) and 3 Flat Washer
(No.56-2).
8
1. Secure the Sliding Seat
Mount (No. 4) using the Seat
Adj. Knob (No.17), 1
Carriage Bolt (No.27) and 1
Flat Washer (No.37).
2. Make sure all screws are
secured fasten.
S
e
a
t
Cushion
S
e
a
t
Hardware
Step 7
Hardware
Step 8

9
Operation Of Your Console
U15
console
The things you should know before exercise
A. Program select and setting value
1. Use the UP or DOWN keys to select program mode and then press ENTER to confirm your
exercise mode.
2. At the Manual mode, the computer will use the UP or DOWN keys to set up your exercise TIME,
DISTANCE, CALORIES, PULSE.
3. Press the START/STOP key to start exercise.
4. When you reach the target, the computer will produce beep sounds and then stop.
5. If you set up more than one target and you would like to reach next target, press START/STOP
key to keep on exercise.
B. Wake-Up Function
The monitor will entry SLEEP mode (LCD off) when there is no signal input and no key be pressed
after 4 minutes. Please press any key to start the monitor.

10
Functions And Features
1. TIME:
Shows your elapsed workout time in minutes and seconds. Your computer will automatically count
up from 0:00 to 99:59 in one second intervals. You can also program your computer to count down
from a set value by using the UP and DOWN keys. If you continue exercising once the time has
reached 0:00, the computer will begin beeping, and reset itself to the original time set, letting you
know your workout is done.
2. DISTANCE:
Displays the accumulative distance traveled during each workout up to a maximum of 99.9KM/MILE.
3. RPM:
Your pedal cadence.
4. SPEED:
Displays your workout speed value in KM/MILE per hour.
5. CALORIES:
Your computer will estimate the cumulative calories burned at any given time during your workout.
6. PULSE:
Your computer displays your pulse rate in beats per minute during your workout.
7. AGE:
Your computer is age-programmable from 10 to 99 years. If you do not set an age, this function will
always default to age 35.
8. TARGET HEART RATE (TARGET PULSE):
The heart rate you should maintain is called your Target Hear Rate in beats per minute.
9. PULSE RECOVERY:
During the START stage, leave the hands holding on grips or leave the chest transmitter attached
and then press “PULSE RECOVERY” key, time starts counting from 01:00 - 00:59 - - to 00:00. As
soon as 00:00 is reached, the computer will show your heart rate recovery status with the grade
F1.0 to F6.0.
1.0 means OUTSTANDING
1.0<F<2.0 means EXCELLENT
2.0≦F≦2.9 means GOOD
3.0≦F≦3.9 means FAIR
4.0≦F≦5.9 means BELOW AVERAGE
6.0 means POOR
Note: If no pulse signal input then the computer will show “P” on the PULSE window. If the
computer shows “ERR” on the message window, please re-press the PULSE RECOVERY key and
please make sure your hands are keeping well on the grips or the chest transmitter is attached well.
10.DISTANCE BAR:
Every bar indicates 100 meter or 0.1 mile.

11
Key function
There are 6 button keys and the function description as follows:
1. START/STOP KEY:
➢Quick Start function: Allows you to start the computer without selecting a program.
Manual workout only. Time automatically begins to count up from zero
➢During the exercise mode, press the key to STOP exercise.
➢During the stop mode, press the key to START exercise.
2. UP KEY:
➢Press the key to increase the resistance during exercise mode.
➢During the setting mode, press the key to increase the value of Time, Distance,
Calories, Age and select Gender and Program.
3. DOWN KEY:
➢Press the key to decrease the resistance during exercise mode.
➢During the setting mode, press the key to decrease the value of Time, Distance,
Calories, Age and select Gender and Program.
4. ENTER KEY:
➢During the setting mode, press the key to accept the current data entry.
➢At the stop mode, by holding this key for over two seconds the user can reset all
values to zero or default value.
➢During setting the Clock, press this key can accept the setting hour and setting minute.
5. BODY FAT KEY:
Press the key to input your HEIGHT, WEKGHT, GENDER and AGE then to measure
your body fat ratio
6. PULSE RECOVERY KEY:
Press the key to activate heart rate recovery function.

12
Program Introduction & Operation
Manual Program: Manual
P1 is a manual program. User can start exercise by pressing START/STOP key. The default
resistance level is 5. Users may exercise in any desirous of resistance level (Adjusting by
UP/DOWN keys during the workout) with a period of time or a number of calories or a certain
distance.
Operations:
1. Use UP/DOWN keys to select the MANUAL (P1) program.
2. Press the ENTER key to enter MANUAL program.
3. The TIME will flash and you can press UP or DOWN keys to set your exercise TIME.
Press ENTER key to confirm your desired TIME.
4. The DISTANCE will flash and you can press UP or DOWN keys to set your target
DISTANCE. Press ENTER key to confirm your desired DISTANCE.
5. The CALORIES will flash and you can press UP or DOWN keys to set your exercise
CALORIES. Press ENTER key to confirm your desired CALORIES.
6. The PULSE will flash and then you can press UP or DOWN keys to set your exercise
PULSE. Press ENTER key to confirm your desired Pulse.
7. Press the START/STOP key to begin exercise.
Preset Program: Steps, Hill, Rolling, Valley, Fat Burn, Ramp, Mountain,Intervals,
Random, Plateau, Fartlek, Precipice Program
PROGRAM 2 to PROGRAM 13 is the preset programs. Users can exercise with different level
of loading in different intervals as
the profiles show. Users may exercise in any desirous of resistance level (Adjusting by
UP/DOWN keys during the workout) with a period of time or a number of calories or a certain
distance.
Operations:
1. Use UP/DOWN keys to select one of the above programs from P2 to P13.
2. Press the ENTER key to enter your workout program.
3. The TIME will flash and you can press UP or DOWN keys to setting your exercise
TIME. Press ENTER key to confirm your desired TIME.
4. The DISTANCE will flash and you can press UP or DOWN keys to setting your target
DISTANCE. Press ENTER key to confirm your desired DISTANCE.
5. The CALORIES will flash and you can press UP or DOWN keys to setting your
exercise CALORIES. Press ENTER key to confirm your desired CALORIES.
6. The PULSE will flash and then you can press UP or DOWN keys to set your exercise
PULSE. Press ENTER key to confirm your desired Pulse.
7. Press the START/STOP key to begin exercise.
User Setting Program: User 1, User 2, User 3, User 4
Program 14 to 17 is the user setting program. Users are free to create the values in the order of
TIME, DISTANCE, CALORIES and the resistance level in 10 columns. The values and profiles
will be stored in the memory after setup. Users may also change the ongoing loading in each

13
column by UP/DOWN keys, and they will not change the resistance level stored in the memory.
Operations:
1. Use UP/DOWN keys to select the USER program from P14 to P17.
2. Press the ENTER key to enter your workout program.
3. The column 1 will flash, and then use the UP/DOWN keys to create your personal
exercise profile. Press ENTER to confirm your first column of exercise profile. The
default level is load 1.
4. The column 2 will flash, and then use the UP/DOWN keys to create your personal
exercise profile. Press ENTER to confirm your second column of exercise profile.
5. Follow the above description 5 and 6 to finish your personal exercise profiles. Press
ENTER to confirm your desired exercise profile.
6. The TIME will flash and you can press UP or DOWN keys to setting your exercise
TIME.Press ENTER key to confirm your desired TIME.
7. The DISTANCE will flash and you can press UP or DOWN keys to setting your target
DISTANCE. Press ENTER key to confirm your desired DISTANCE.
8. The CALORIES will flash and you can press UP or DOWN keys to setting your
exercise CALORIES. Press ENTER key to confirm your desired CALORIES.
9. The PULSE will flash and then you can press UP or DOWN keys to set your exercise
PULSE. Press ENTER key to confirm your desired Pulse.
10. Press the START/STOP key to begin exercise.
Heart Rate Control Program: 55% H.R.C., 65% H.R.C., 75% H.R.C., 85% H.R.C.,
Target H.R.C.
Program 18 to Program 22 is the Heart Rate Control Programs and Program 22 is the Target
Heart Rate Control program.
Program 18 is the 55% Max H.R.C. - - Target H.R. = (220 –AGE) x 55%
Program 19 is the 65% Max H.R.C. - - Target H.R. = (220 –AGE) x 65%
Program 20 is the 75% Max H.R.C. - - Target H.R. = (220 –AGE) x 75%
Program 21 is the 85% Max H.R.C. - - Target H.R. = (220 –AGE) x 85%
Program 22 is the Target H.R.C. - - Workout by your target heart rate value.
Users can exercise according to your desired Heart Rate program by setting your AGE, TIME,
DISTANCE, CALORIES or TARGET PULSE. In these programs, the computer will adjust the
resistance level according to the heart rate detected. For example, the resistance level may
increase every 20 seconds while the heart rate detected is lower than the TARGET H.R.C. Also
the resistance level may decrease every 20 seconds while the heart rate detected is higher than
the TARGET H.R.C.
Operations:
1. Use UP/DOWN keys to select one of the heart rate control program from P18 to P22.
2. Press the ENTER key to enter your workout program
3. The AGE will flash at P18 to P21 programs and you can press UP or DOWN keys to
set your AGE. The default age is 35.
4. At program 22, the TARGET PULSE will flash and you can press UP or DOWN keys
to set your TARGET PULSE between 80 to 180. The default TARGET PULSE is 120.
5. The TIME will flash and you can press UP or DOWN keys to set your exercise TIME.
Press ENTER key to confirm your desired TIME.

14
6. The DISTANCE will flash and you can press UP or DOWN keys to set your target
DISTANCE. Press ENTER key to confirm your desired DISTANCE.
7. The CALORIES will flash and you can press UP or DOWN keys to set your exercise
CALORIES. Press ENTER key to confirm your desired CALORIES.
8. Press the START/STOP key to begin exercise
Body Fat Program: Body Fat
Program 23 is a special program design to calculate users’ body fat ratio and to offer a specific
loading profile for users. There are 3 body types divided according to the FAT% calculated.
Type1: BODY FAT% > 27
Type2: 27 ≧BODY FAT% ≧20
Type3: BODY FAT % < 20
The computer will show the test results of FAT PERCENT
Operations:
1. Use UP/DOWN keys to select the BODY FAT (P23) program.
2. Press the ENTER key to enter your workout program.
3. The HEIGHT will flash and you can press UP or DOWN keys to set your HEIGHT.
Press ENTER key to confirm your HEIGHT. The default HEIGHT is 170cm or 5’07”
(5feet 7 inches).
4. The WEIGHT will flash and you can press UP or DOWN keys to set your WEIGHT.
Press ENTER key to confirm your WEIGHT. The default WEIGHT is 70kgs or 155lbs.
5. The GENDER will flash and you can press UP or DOWN keys to select your sex.
Number 1 means man and number 0 means female. Press ENTER key to confirm
your Gender. The default sex is 1 (MAN).
6. The AGE will flash and you can press UP or DOWN keys to set your AGE. Press
ENTER key to confirm your AGE. The default AGE is 35.
7. Press the START/STOP key to begin body fat measurement. If the window show E on
the window, please make sure your hands are attached well on the grips or the chest
belt is touch well on your body. Then press the START/STOP key again to begin body
fat measurement.
8. After finished your measurement, the computer will show the values of FAT PERCENT
on the LCD display.
9. Press START/STOP key to begin exercise..

15
Error Message
E1 (ERROR 1):
Normal state: During workout, when the monitor did not get the count signal from the gear
motor more than 4 seconds and check under successive 3 times then the LCD
will show E1.
Power on state: The gear motor will return to zero automatically, when the signal of motor
cannot be detected for more than 4 seconds then the gear motor’s driver will be
cut off immediately and show the E1 on the LCD display. All the other digital
and function mark are blank, and the output signals are cut off also.
E2 (ERROR 2):
When the monitor read the memory data, if the I.D. code is not correct or the memory IC
damages then the monitor will show E2 immediately at power on.
E3 (ERROR 3):
After 4 seconds by start mode, the computer detects the faulty motor did not leave the zero
point then the LCD bar displays “E3”.
Technical data of the current adapter
1. Output: DC 6~9V/0.5~1A

16
LCD Workout Graphics
➢
PRESET PROGRAM PROFILES
PROGRAM 1 PROGRAM 2 PROGRAM 3
MANUAL STEPS HILL
PROGRAM 4 PROGRAM 5 PROGRAM 6
ROLLING VALLEY FAT BURN
PROGRAM 7 PROGRAM 8 PROGRAM 9
RAMP MOUNTAIN INTERVALS
PROGRAM 10 PROGRAM 11 PROGRAM 12
RANDOM PLATEAU FARTLEK
PROGRAM 13
PRECIPICE
➢
USER SETTING PROGRAM
PROGRAM 14
USER 1

17
PROGRAM 15
USER 2
PROGRAM 16
USER 3
PROGRAM 17
USER 4
➢
HEART RATE PROGRAM PROFILES:
PROGRAM 18
55% H.R.C.
PROGRAM 19
65% H.R.C.
PROGRAM 20
75% H.R.C.

18
PROGRAM 21
85% H.R.C.
PROGRAM 22
TARGET H.R.C.
➢
BODY FAT TEST PROGRAMS:
BODY FAT
(STOP MODE) (START MODE)
PROGRAM 23
One of the Following Six Profiles Will Display Automatically after Measuring Your BODY FAT:
Workout Time: 40 minutes Workout Time: 40 minutes Workout time: 20 minutes

19
Hand Pulse Grips
Your U15 Exercise bike has built-in hand pulse grips located on the handles next toeither
side of the seat. Tomonitor your heart rate, simply grasp both hand pulse gripsensuring
steady contact is made between your hands and the metal contact pads for at least10
seconds. Once the machine has detected your pulse, the heart rate will be display inthe
“Pulse” section on your screen.
Note: There are significant individual differences in the heart rate of normal adults at rest, with
an average of about 75 beats/min (between 60-100 beats/min). Factors like age, gender, and
other physiological conditions will affect heart rate. The resting heart rate of newborn babies
is fast, reaching more than 130 beats per minute. Among adults, the heart rate ofwomen
is generally slightly faster than that of men. Heart rate will slow down during quiet orsleep
and speed up during exercise or emotional excitement. Under the influence of certain drugs
or neurohumoral factors, the heart rate will increase ordecrease.
People who do physical labor or physical exercise daily oftenhave
a slower heart rate.
Wearing A Chest Strap
(Sold Separately)
1.
Attach the transmitter to the elastic strap using the interlocking button.
2.
Adjust the strap as tightly as possible as long as the strap is not too tight toremain
comfortable.
3.
Position the transmitter with the logo centered in the middle of your
torso facing away from your chest (some people must position the
transmitter slightly left of center). Attach the final end of the elastic
strap by inserting the round end and, using the locking parts,secure
the transmitter and strap around your chest.
4.
Position the transmitter directly below the pectoral muscles.
5.
Sweat is the best conductor to measure very minute heart beat electrical signals.
However, plain water can also be used to pre-wet the electrodes (2 ribbed oval areas
on the reverse side of the belt and both sides of the transmitter). It’s also recommended
that you wear the transmitter strap a few minutes before your
work out. Some users, because of body chemistry, have a more difficult time in
achieving a strong, steady signal at the beginning. After “warming up”, thisproblem
lessens.
6.
Your workout must be within range - distance between transmitter/receiver –to achieve
a strong steady signal. The length of range may vary somewhat but generally stayclose
enough to the console to
maintain good, strong, reliable readings. Wearing the transmitter directly on bare skin
assures you of proper operation. If you wish, you may wear the transmitter over ashirt.
Todo so, wet the areas of the shirt that the electrodes will rest upon.
Note: The transmitter is automatically activated when it detects activity from the user’s heart. Additionally, it au-
tomatically deactivates when it does not receive any activity. Although the transmitter is water resistant,moisture
can have the effect of creating false signals, so you should take precautions to completely dry the transmitter.
Table of contents
Other Xterra Exercise Bike manuals

Xterra
Xterra XB 78 User manual

Xterra
Xterra 16467200US User manual

Xterra
Xterra UB1.7 User manual

Xterra
Xterra EU100 User manual

Xterra
Xterra 16467450US User manual

Xterra
Xterra 16468451US User manual

Xterra
Xterra 16416525 User manual

Xterra
Xterra MB8.5 User manual

Xterra
Xterra SB4500 User manual

Xterra
Xterra FB160 User manual

Xterra
Xterra FB360 User manual

Xterra
Xterra SB4.5r User manual

Xterra
Xterra UB1.5 User manual

Xterra
Xterra MB880 User manual

Xterra
Xterra 16416852 User manual

Xterra
Xterra SU139-43 User manual

Xterra
Xterra SB250 User manual

Xterra
Xterra SB500 User manual

Xterra
Xterra 16416880-1 User manual

Xterra
Xterra MB880 User manual